There used to be a little bakery tucked away on the corner of Elm and 3rd in my hometown that made the most incredible cake dip. They called it “Holiday Frost,” and it was this fluffy, festive concoction served with graham crackers and strawberries. When they closed their doors two years ago—just up and vanished one November—I felt a genuine pang of loss. I mean, it sounds silly to mourn a dip, but this was *the* dip. The one that made you close your eyes and forget about the freezing rain outside.
After twelve tries—and let me tell you, some of those attempts were downright tragic—I finally cracked it. This Cozy Copycat Christmas Tree Cake Dip is my victory lap. It wasn’t about copying a recipe; it was about chasing a specific, creamy, nostalgic bite. That first successful spoonful? Honestly, I almost cried. It tasted like a Christmas morning memory I didn’t know I had.
Maybe you’ve been there—chasing a flavor from a place that no longer exists. This dip is for that feeling. It’s for the nights when you want something sweet, familiar, and ridiculously easy. It’s the kind of recipe that feels like a hug from an old friend, no baking required.
Why You’ll Love This Recipe
This isn’t just another dessert dip. Over the years, I’ve tested countless versions of cake dips, and this one stands out because of its texture and that unmistakable “Christmas tree cake” flavor. It’s a crowd-pleaser that comes together in under ten minutes, which honestly feels like a Christmas miracle when you’re juggling a dozen other holiday tasks.
- Quick & Easy: No oven, no mixer required. Just a bowl, a spoon, and five minutes of your time. It’s perfect for those last-minute holiday cravings or an unexpected guest.
- Simple Ingredients: You probably have most of these in your pantry right now. No fancy extracts or hard-to-find items—just classic, comforting staples.
- Perfect for the Holidays: This dip is the star of any Christmas party, cookie exchange, or cozy night in watching cheesy holiday movies. It’s festive without the fuss.
- Crowd-Pleaser: I’ve brought this to three different gatherings now, and it disappears every single time. Kids love it, adults love it—it’s a universal winner.
- Unbelievably Delicious: The texture is light, fluffy, and almost mousse-like. The flavor is pure nostalgia, hitting that sweet, creamy, slightly fruity note of a classic Christmas tree cake.
What makes this different from other cake dips is the technique. I discovered that letting the cream cheese soften completely—not just for ten minutes, but a full half-hour—makes a world of difference. It creates an ultra-smooth base that blends effortlessly with the frosting and cake mix, avoiding those dreaded lumps. This is comfort food at its finest: fast, forgiving, and guaranteed to make you smile.
What Ingredients You Will Need
This recipe uses simple, wholesome ingredients to deliver that nostalgic holiday flavor without any complicated steps. Everything here is a pantry staple or an easy grocery find, making this a true last-minute lifesaver.
- 8 oz cream cheese, softened: This is the backbone of the dip. I always recommend using full-fat cream cheese for the richest, creamiest texture. (I personally prefer Philadelphia for its consistent quality.) Let it sit out for at least 30 minutes before starting—trust me on this.
- 1/2 cup unsalted butter, softened: Adds richness and helps the dip hold its shape. If you only have salted butter, just reduce the added salt by a pinch.
- 1 cup powdered sugar: This sweetens the dip without making it grainy. Sift it if you have the patience—it prevents any tiny clumps from forming.
- 1 teaspoon vanilla extract: Pure vanilla makes a difference here. The imitation stuff works in a pinch, but the flavor won’t be as warm and round.
- 1/2 cup white cake mix (dry): This is the secret ingredient! It gives the dip that signature “boxed cake” flavor that we all secretly love. Just make sure it’s the classic white variety. (I use Duncan Hines, but any brand works.)
- 1/4 cup Christmas tree cake crumbles: You’ll need about 2-3 Little Debbie Christmas Tree Cakes, finely crumbled. This adds that iconic flavor and little specks of frosting throughout.
- Green gel food coloring: For that festive holiday look. A few drops go a long way. Liquid food coloring works too, but gel gives a more vibrant color without thinning the dip.
- Red and green sprinkles: For garnish. The more sprinkles, the merrier, honestly.
- For serving: Graham crackers, vanilla wafers, pretzels, apple slices, or strawberries. Anything dippable works!
Substitution Tips: For a dairy-free version, use vegan cream cheese and vegan butter—just make sure they are softened. The texture will be slightly different but still delicious. If you can’t find Christmas tree cakes, you can substitute with any white-frosted snack cake, like a vanilla cupcake or a Twinkie, though the flavor won’t be quite as spot-on.
Equipment Needed
You don’t need a fancy kitchen for this one. Here’s what you’ll need:
- Large mixing bowl: Any bowl works, but a wider one makes mixing easier.
- Hand mixer or stand mixer: A hand mixer is perfect for this. I’ve made it with a whisk before, and my arm was not happy. A mixer saves time and ensures a fluffier texture.
- Rubber spatula: For scraping down the sides and folding in the crumbles.
- Serving bowl: A shallow, wide bowl looks best for dipping.
- Measuring cups and spoons: Standard set—nothing fancy.
Budget-Friendly Tip: If you don’t have a hand mixer, you can absolutely do this by hand. Just make sure your cream cheese and butter are very soft. A sturdy whisk and some elbow grease will get the job done, though the texture won’t be quite as airy.
Preparation Method
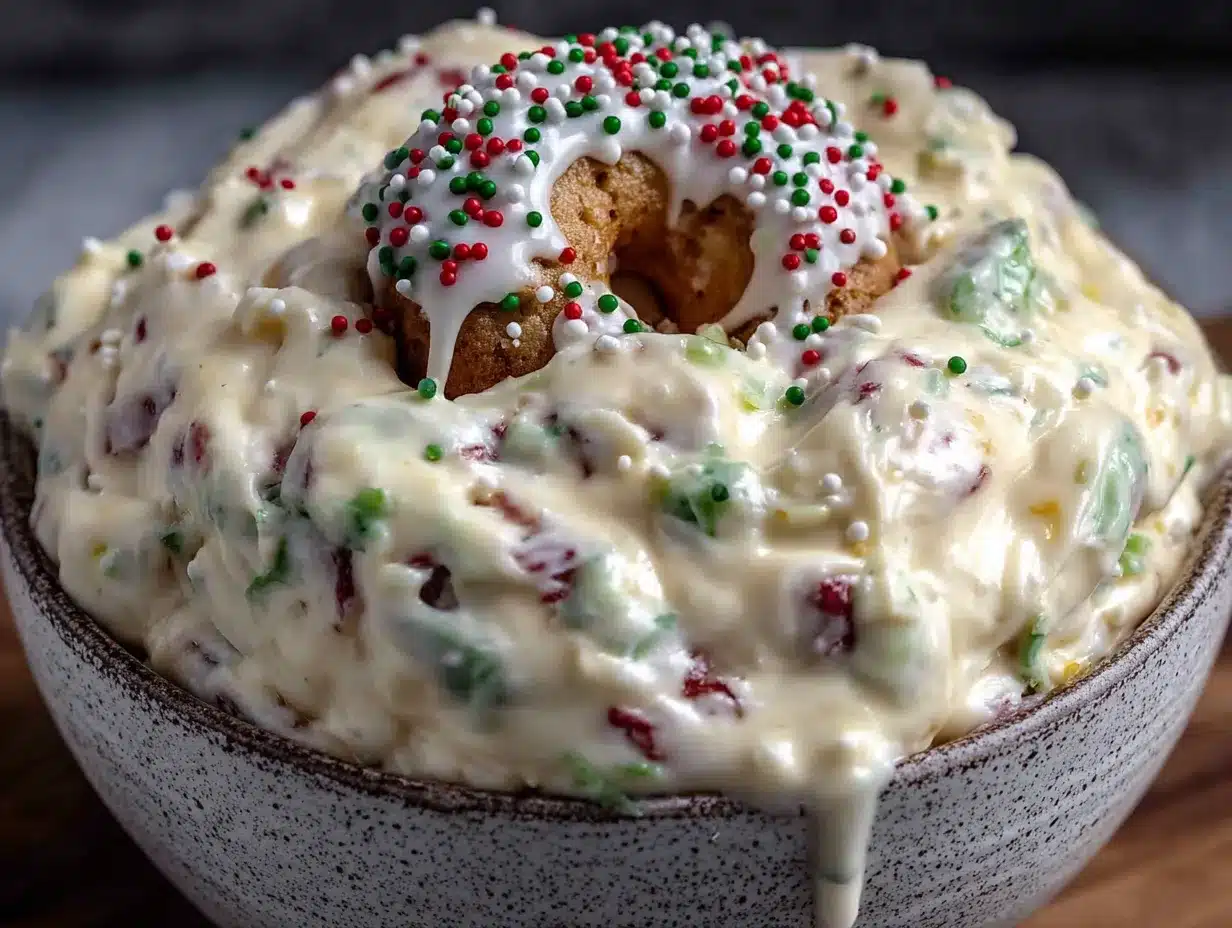
Let’s make this dip! It’s so simple, you’ll be snacking in no time.
- Soften the cream cheese and butter: This is the most important step. Take your cream cheese and butter out of the fridge at least 30 minutes before you start. They should be soft to the touch—if you press a finger into them, it should leave a clear indent. Cold ingredients will give you a lumpy dip, and nobody wants that.
- Cream the base: In a large mixing bowl, combine the softened cream cheese and butter. Beat them together with your hand mixer on medium speed until they are completely smooth and well combined—about 2 minutes. Scrape down the sides of the bowl with your spatula halfway through. You’re looking for a pale, fluffy mixture with no streaks of butter.
- Add the sugar and vanilla: Add the powdered sugar and vanilla extract to the bowl. Start mixing on low speed to avoid a sugar cloud (trust me on this—I learned the hard way). Once the sugar is incorporated, increase the speed to medium and beat for another 2-3 minutes until the mixture is light and airy. It should look like a thick, creamy frosting.
- Mix in the dry cake mix: Add the dry white cake mix to the bowl. Mix on low speed until it’s fully incorporated. The mixture will thicken up noticeably. You might need to scrape the bowl again to make sure everything is even. This is where that classic cake flavor starts to come through.
- Add the color: Add 4-5 drops of green gel food coloring. Mix on low speed until the color is evenly distributed. If you want a deeper green, add a drop or two more. I like mine a soft, pastel green—like a retro Christmas tree.
- Fold in the crumbles: Crumble your Christmas tree cakes into small pieces—you want little bits of cake and frosting throughout. Gently fold them into the dip with your spatula. Don’t overmix; you want some chunks to remain for texture.
- Chill (optional but recommended): For the best texture, cover the bowl and pop it in the fridge for 20-30 minutes. This allows the flavors to meld and the dip to firm up slightly. It’s totally delicious right away, but the chill time makes it even better.
- Serve and garnish: Transfer the dip to your serving bowl. Top with a generous sprinkle of red and green sprinkles and a few extra Christmas tree cake crumbles for looks. Serve with your favorite dippers and watch it disappear.
Sensory Cue: At step 3, the mixture should smell sweet and buttery, like a vanilla cloud. When you fold in the crumbles at step 6, you’ll see little green and white specks throughout—that’s the magic happening.
Cooking Tips & Techniques
I’ve made this dip more times than I care to admit, and I’ve learned a few things the hard way.
Room temperature is non-negotiable. I once tried to rush the process and used cold cream cheese. The dip came out lumpy and sad. Seriously, let those ingredients sit out. It makes all the difference between a silky dip and a bumpy mess.
Don’t overmix the cake crumbles. When you fold them in, do it gently. If you mix too aggressively, the crumbles will break down into dust, and you’ll lose that lovely texture. You want little pockets of cake in every bite.
Gel food coloring is your friend. Liquid food coloring can thin out the dip, making it runny. Gel gives you a vibrant color without affecting the consistency. I use Americolor brand, but any gel works.
Make it ahead of time. This dip actually gets better after a few hours in the fridge. The flavors meld together, and the texture becomes even more luscious. Just take it out 15 minutes before serving to soften slightly.
One mistake I made: I once added the entire box of cake mix thinking “more is better.” It was a disaster—dry, crumbly, and way too sweet. Stick to the half cup. Trust the recipe, not your impulse.
Variations & Adaptations
This dip is wonderfully flexible. Here are a few ways to make it your own:
- Peppermint Twist: Add 1/2 teaspoon of peppermint extract along with the vanilla. Crush up some candy canes and sprinkle them on top instead of the red and green sprinkles. It’s like a holiday candy explosion.
- Chocolate Lover’s Version: Swap the white cake mix for chocolate cake mix. Use Christmas tree cakes that have chocolate frosting, or just use regular chocolate sandwich cookies crumbled in. The green color looks surprisingly good with chocolate.
- Dairy-Free Delight: Use vegan cream cheese and vegan butter. The texture will be a bit softer, so you might need to chill it for an extra 15 minutes. I tested this with Kite Hill brand cream cheese, and it worked beautifully.
- Lighter Option: Use low-fat cream cheese and a sugar substitute like Swerve in place of the powdered sugar. The texture won’t be as rich, but it’s still a satisfying treat. I’ve made this for a friend who was watching her sugar, and she didn’t complain once.
- Funfetti Style: Add 2 tablespoons of rainbow sprinkles to the dip along with the cake mix. It turns into a birthday party dip—perfect for any celebration, not just Christmas.
I personally love the peppermint twist version. It feels extra festive and reminds me of the peppermint bark I used to get at that same bakery. Each variation brings its own charm.
Serving & Storage Suggestions
This dip is best served chilled, straight from the fridge. Take it out about 10-15 minutes before serving to let it soften to a dippable consistency. It should be thick but scoopable, like a creamy frosting.
Perfect Pairings: Graham crackers are the classic choice—they have that slight sweetness and sturdy crunch. Vanilla wafers, pretzel sticks, apple slices, and strawberries are also fantastic. For a truly indulgent experience, try it with those small, soft gingerbread cookies. The spice and the sweet are a match made in heaven.
Storage: Store any leftovers in an airtight container in the refrigerator for up to 5 days. The dip will firm up as it chills, so just let it sit at room temperature for a few minutes before serving again. I don’t recommend freezing this dip—the texture becomes watery and grainy after thawing.
Flavor Development: Honestly, this dip tastes even better on day two. The cake crumbles soften slightly and meld into the cream cheese base, creating a more uniform flavor. It’s a great make-ahead option for holiday parties.
Reheating: Don’t even think about microwaving this. It will turn into a soupy mess. Just let it come to room temperature naturally.
Nutritional Information & Benefits
Let’s be real—this is a treat, not a health food. But here’s the estimated breakdown per serving (about 2 tablespoons):
- Calories: 180
- Fat: 12g
- Carbohydrates: 18g
- Protein: 2g
- Sugar: 15g
Health Highlights: The cream cheese provides a small amount of calcium and protein. The butter adds vitamin A. The cake mix… well, it adds joy. And honestly, that counts for something.
Dietary Considerations: This recipe contains dairy, gluten, and eggs (from the cake mix). It’s not vegan or gluten-free as written, but the substitutions above can help accommodate those needs. Always check your cake mix label for potential allergens.
I believe in balance. This dip is for the moments when you want to indulge—a holiday party, a cozy night in, a rough Tuesday. It’s okay to enjoy something sweet without guilt. One serving won’t derail your wellness goals, but it might just lift your spirits.
Conclusion
This Cozy Copycat Christmas Tree Cake Dip is more than just a recipe—it’s a little piece of holiday magic that you can whip up in minutes. It brings back that bakery memory every single time I make it, and now it’s become a tradition in my own kitchen. The best part? You don’t have to chase a closed-down bakery to get that taste. It’s right here, in your bowl, waiting for you.
I’d love to see your version! Did you add peppermint? Go the chocolate route? Leave a comment below and tell me how it turned out—or tag me in your photos on social media. Your feedback and creative twists are what make this community so special.
Go ahead, grab a graham cracker, and dig in. You deserve this little moment of sweetness. Happy holidays, friend.
Frequently Asked Questions
Can I make this dip without a mixer?
Absolutely! Just make sure your cream cheese and butter are very soft. A sturdy whisk and some patience will work, but the dip won’t be quite as fluffy. It’ll still taste amazing.
How far in advance can I make this dip?
You can make it up to 2 days ahead. Store it in an airtight container in the fridge, and let it sit at room temperature for 15 minutes before serving. The flavor actually improves overnight.
Can I use a different flavor of cake mix?
Yes! Vanilla, funfetti, or even strawberry cake mix would work. Just keep in mind that the flavor will change. Chocolate cake mix with green food coloring might look a little strange, but it tastes great.
What if I can’t find Christmas tree cakes?
No problem! You can substitute with any vanilla-frosted snack cake, like a Twinkie or a cupcake. The flavor won’t be exactly the same, but it will still be delicious. You could also just skip the crumbles entirely for a smooth dip.
Is this dip safe for kids?
Yes, it’s perfectly safe! Just be mindful of the food coloring if you’re using gel—some brands contain ingredients that might not be suitable for very young children. Otherwise, it’s a fun, festive treat that kids absolutely love.
Pin This Recipe!
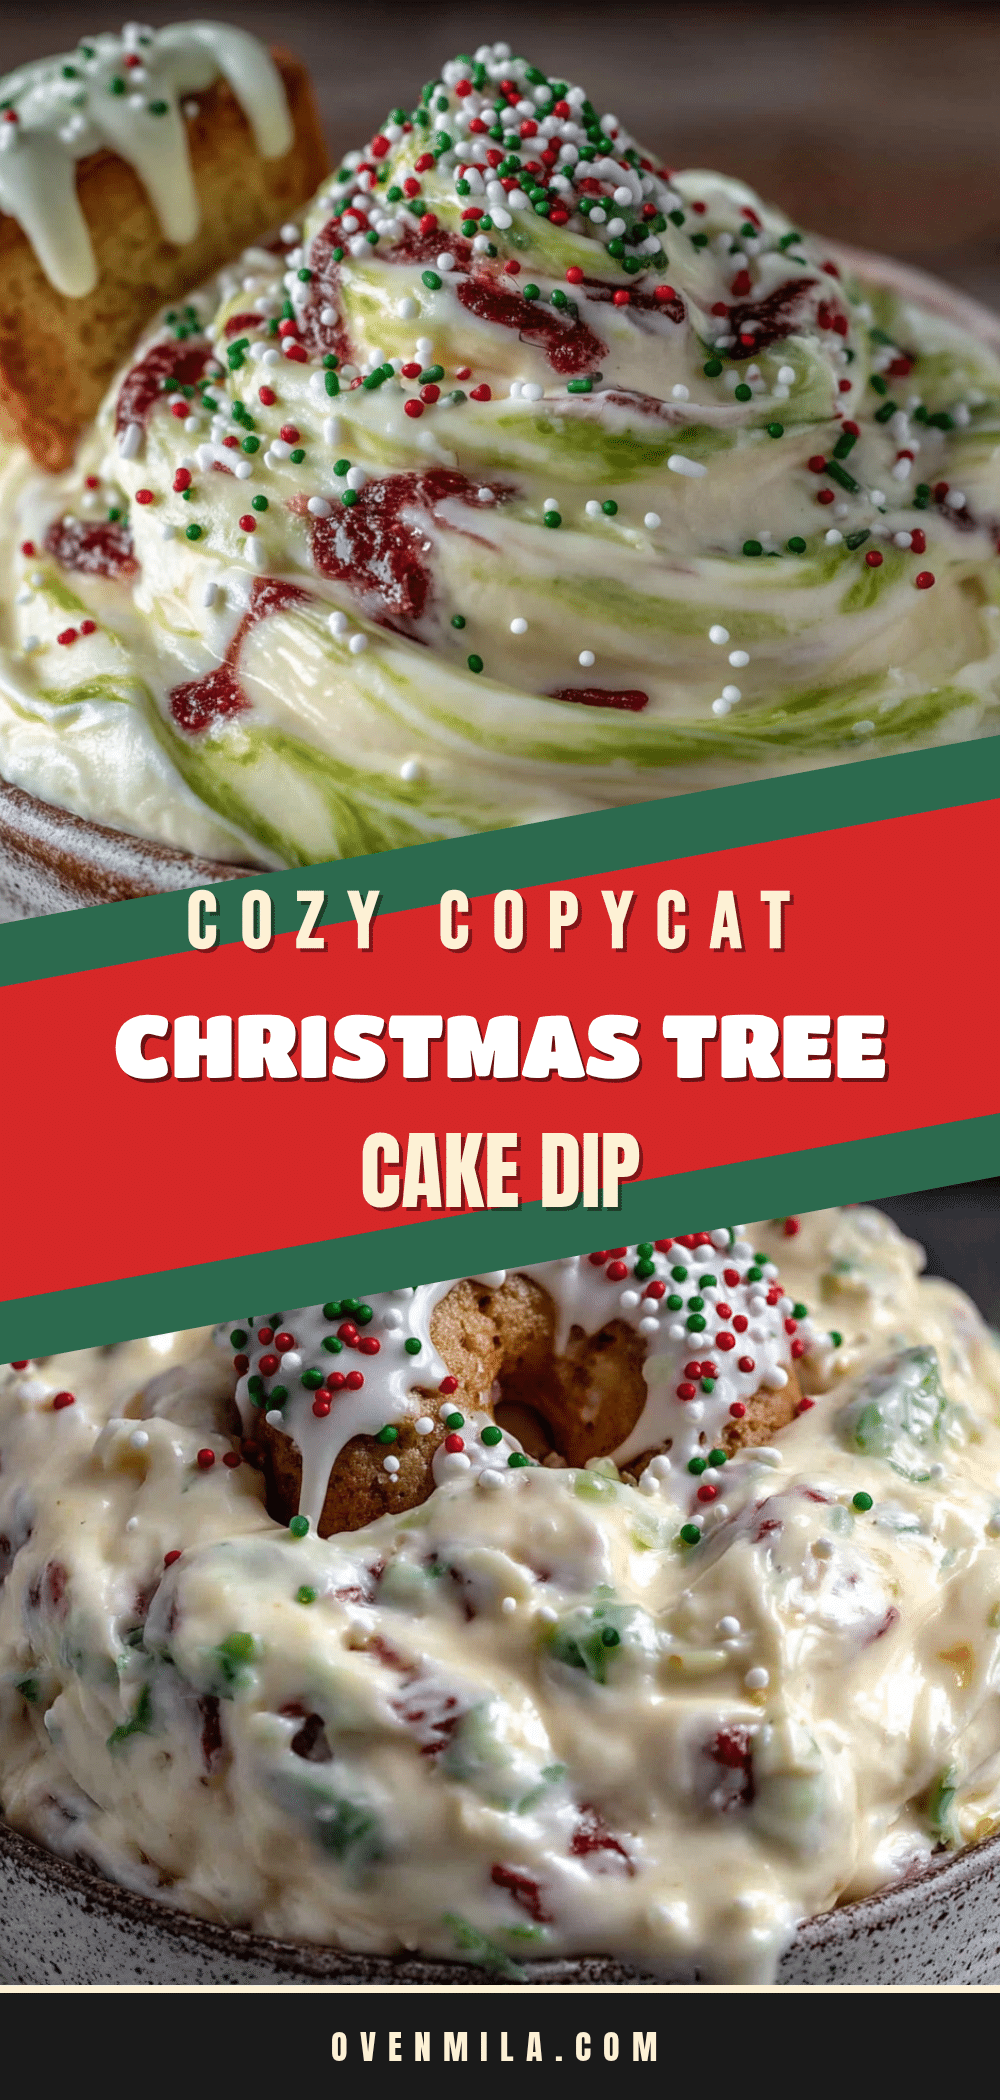
Easy Cozy Copycat Christmas Tree Cake Dip
This Cozy Copycat Christmas Tree Cake Dip is a fluffy, festive dessert dip that tastes like a Christmas morning memory. It comes together in under ten minutes with simple ingredients, perfect for holiday parties or cozy nights in.
- Prep Time: 10 minutes
- Cook Time: 0 minutes
- Total Time: 10 minutes (plus optional 20-30 minutes chilling)
- Yield: 8 servings 1x
- Category: Dessert
- Cuisine: American
Ingredients
- 8 oz cream cheese, softened
- 1/2 cup unsalted butter, softened
- 1 cup powdered sugar
- 1 teaspoon vanilla extract
- 1/2 cup white cake mix (dry)
- 1/4 cup Christmas tree cake crumbles (about 2–3 Little Debbie Christmas Tree Cakes)
- Green gel food coloring
- Red and green sprinkles (for garnish)
- Graham crackers, vanilla wafers, pretzels, apple slices, or strawberries (for serving)
Instructions
- Soften the cream cheese and butter: Take cream cheese and butter out of the fridge at least 30 minutes before starting. They should be soft to the touch, leaving a clear indent when pressed.
- Cream the base: In a large mixing bowl, combine softened cream cheese and butter. Beat with a hand mixer on medium speed until completely smooth and well combined, about 2 minutes. Scrape down sides of bowl halfway through.
- Add the sugar and vanilla: Add powdered sugar and vanilla extract. Mix on low speed to avoid a sugar cloud, then increase to medium and beat for 2-3 minutes until light and airy, like thick creamy frosting.
- Mix in the dry cake mix: Add dry white cake mix and mix on low speed until fully incorporated. The mixture will thicken noticeably. Scrape bowl to ensure even mixing.
- Add the color: Add 4-5 drops of green gel food coloring. Mix on low speed until evenly distributed. Add more drops for a deeper green if desired.
- Fold in the crumbles: Crumble Christmas tree cakes into small pieces. Gently fold them into the dip with a rubber spatula, leaving some chunks for texture.
- Chill (optional but recommended): Cover bowl and refrigerate for 20-30 minutes to allow flavors to meld and dip to firm up slightly.
- Serve and garnish: Transfer dip to a serving bowl. Top with red and green sprinkles and extra Christmas tree cake crumbles. Serve with desired dippers.
Notes
Let cream cheese and butter soften for at least 30 minutes for smoothest texture. Don’t overmix cake crumbles to maintain texture. Gel food coloring is preferred over liquid to avoid thinning the dip. Dip can be made up to 2 days ahead and stored in the refrigerator. Flavor improves overnight. Do not freeze or microwave.
Nutrition
- Serving Size: 2 tablespoons
- Calories: 180
- Sugar: 15
- Sodium: 120
- Fat: 12
- Saturated Fat: 7
- Carbohydrates: 18
- Protein: 2
Keywords: Christmas tree cake dip, copycat recipe, holiday dessert dip, easy dessert, no-bake dessert, festive dip, cream cheese dip


