There used to be a tiny sports bar off exit 14 on the interstate called The Rusty Anchor that made the best buffalo chicken dip I have ever tasted. When they closed in 2019—a victim of a rent hike and a broken HVAC system—I genuinely mourned. I’m not joking. I stood in the parking lot staring at the locked door like a fool. That dip was the reason my friends and I drove forty minutes out of our way on game days. It was creamy, spicy, with these perfect ribbons of melted cheese that stretched from the chip to your mouth. The kicker? They never gave out the recipe.
After seventeen attempts—seventeen, let me tell you—I finally cracked it. The first few tries were disasters. One batch came out greasy. Another was so spicy it sent my brother-in-law running for milk. But batch number eight? That was close. Batch number twelve was almost there. And batch seventeen? That was the one where my husband looked up from the couch, chip halfway to his mouth, and said, “Wait. This is the Anchor dip.” I nearly cried. Honestly, I did.
So this is it. The recipe I spent two years chasing. The one that makes people stand around the kitchen island, dipping in silence, just nodding at each other. You know that feeling when a dish brings back a whole memory? That’s what this dip does. It brings back loud Sundays, cold beers, and the one place that got it exactly right. Now you can get it right in your own kitchen. Maybe you’ve been searching for that one perfect game day dip too. Trust me, this is it.
Why You’ll Love This Recipe
Let’s be real—there are a thousand buffalo chicken dip recipes out there. But this one? It’s different. It’s the one I tested and retested until it matched a memory. And now it’s the one I bring to every game day gathering, every potluck, every time I need to show up with something that disappears in twenty minutes.
- Game Day Perfection: This dip was designed for crowds. It feeds 10-12 people easily, and you can double it without any issues. It stays hot in a slow cooker for hours, so you’re not stuck in the kitchen when the big play happens.
- Simple Ingredients: No fancy grocery store runs. Cream cheese, shredded chicken, hot sauce, ranch dressing, and cheese. That’s it. You probably have half of these in your fridge right now.
- Make-Ahead Friendly: This is a host’s secret weapon. Assemble it the night before, pop it in the fridge, and bake it right before guests arrive. Your future self will thank you.
- Always a Crowd-Pleaser: I’ve brought this to parties where people claimed they “didn’t like spicy food” and watched them go back for thirds. The cream cheese tames the heat just enough.
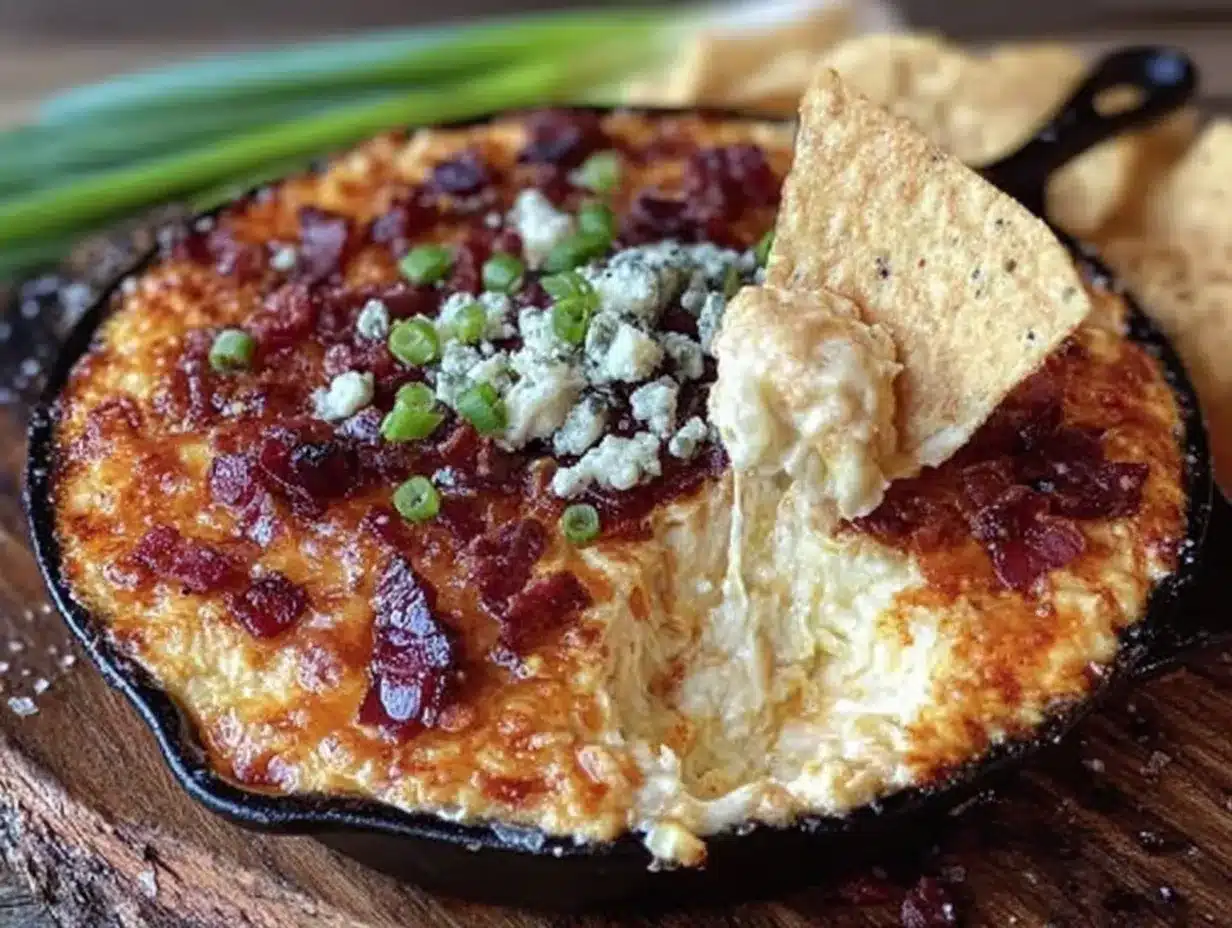
- Unbelievably Addictive: The texture is what gets you. It’s creamy, it’s cheesy, it has those little bits of shredded chicken in every bite, and the top gets this golden, slightly crispy layer that is just pure magic.
This isn’t just another dip recipe. It’s the one that gets requested every single time. It’s the one people ask for the recipe card. It’s the one that makes you look like you spent hours in the kitchen when really, it took you fifteen minutes of prep. That’s the kind of recipe every host needs in their back pocket.
What Ingredients You Will Need
This recipe uses simple, pantry-friendly ingredients to deliver that bold, spicy, creamy flavor everyone craves on game day. Nothing fancy here—just smart choices that work together perfectly.
- 8 ounces cream cheese, softened (Use full-fat for the creamiest texture. Low-fat works but the dip will be slightly thinner. I prefer Philadelphia brand for consistency.)
- 1/2 cup ranch dressing (I recommend Hidden Valley for that classic flavor. You can use blue cheese dressing instead if you’re a blue cheese person—just know it changes the flavor profile completely.)
- 1/2 cup Frank’s RedHot Original Cayenne Pepper Sauce (This is non-negotiable for me. Frank’s has that vinegary kick that makes buffalo sauce what it is. Other brands just don’t hit the same.)
- 2 cups cooked, shredded chicken (About 2 large chicken breasts or 1 rotisserie chicken. Rotisserie chicken is my shortcut—it adds flavor and saves time. Shred it while it’s still warm for easier handling.)
- 1 cup shredded sharp cheddar cheese (Sharp cheddar gives you more flavor. Shred it yourself from a block—pre-shredded cheese has anti-caking agents that prevent smooth melting.)
- 1 cup shredded mozzarella cheese (Mozzarella adds that stretchy, gooey texture. Low-moisture part-skim works best here.)
- 2 green onions, thinly sliced (For garnish and a fresh pop of color. You can also add a tablespoon of fresh chives if you have them.)
- Optional: 1/4 teaspoon garlic powder (Adds a subtle savory depth. Not necessary, but I always include it.)
- Optional: 1/4 teaspoon onion powder (Same idea—just rounds out the flavors nicely.)
For serving: Tortilla chips, celery sticks, carrot sticks, or crusty bread. I personally love scooping this with thick, restaurant-style tortilla chips. They hold up to the weight of the dip without breaking.
Substitution notes: For a lighter version, use Neufchatel cheese (it has less fat than cream cheese) and Greek yogurt instead of ranch dressing. For a dairy-free option, use dairy-free cream cheese and shredded dairy-free cheese—just know the texture will be slightly different. If you want extra heat, add a teaspoon of cayenne pepper or use Frank’s Extra Hot sauce.
Equipment Needed
You don’t need a professional kitchen for this one. Here’s what you’ll need:
- 9×13-inch baking dish (A 2-quart casserole dish works too. Glass or ceramic both work great. I use a Pyrex dish and it cleans up easily.)
- Large mixing bowl (Any medium-to-large bowl works. You just need room to stir everything together without making a mess.)
- Electric hand mixer or sturdy spoon (The hand mixer makes blending the cream cheese smooth and easy. A wooden spoon works—it just takes a little more elbow grease.)
- Measuring cups and spoons (For accuracy. I’ve eyeballed it before and regretted it.)
- Spatula (For scraping every last bit of dip into the dish. Waste not, want not.)
- Cutting board and knife (For slicing the green onions and shredding the chicken if you’re using whole breasts.)
- Slow cooker (optional) (If you want to keep the dip warm for hours, transfer it to a slow cooker after baking. Set it to “warm” and it stays perfect for up to 4 hours.)
Budget-friendly tip: You don’t need a fancy baking dish. A disposable aluminum pan from the grocery store works perfectly for potlucks—no cleanup required. I’ve done it many times.
Preparation Method
Preheat your oven to 350°F (175°C). Get everything ready before you start—it makes the process so much smoother, especially if you’re prepping while guests are on their way.
- Soften the cream cheese: Take the cream cheese out of the fridge 30 minutes before you start. If you forgot (I forget all the time), microwave it in 10-second bursts until it’s soft but not melted. You want it pliable, not hot.
- Shred the chicken: If you’re using fresh chicken breasts, place them in a pot, cover with water, bring to a boil, then reduce to a simmer for 12-15 minutes until cooked through. Let them cool slightly, then shred with two forks. If you’re using a rotisserie chicken, just pull the meat off the bones and shred it. You should have about 2 cups.
- Mix the base: In your large mixing bowl, combine the softened cream cheese, ranch dressing, and Frank’s RedHot sauce. Use your hand mixer on low speed until it’s completely smooth and well combined. Scrape down the sides with your spatula. The mixture should be a uniform orange-pink color.
- Add the chicken and cheese: Fold in the shredded chicken, 3/4 cup of the sharp cheddar, and 3/4 cup of the mozzarella. Reserve the remaining 1/4 cup of each cheese for the top. Stir until everything is evenly distributed. The mixture will be thick and chunky at this point—that’s exactly what you want.
- Season it: Add the garlic powder and onion powder if using. Give it one more stir. Taste a tiny bit (careful, it’s hot!) and adjust the seasoning. If you want more heat, add another tablespoon of hot sauce. If you want it creamier, add an extra splash of ranch.
- Transfer to baking dish: Spread the mixture evenly into your 9×13-inch baking dish. Use your spatula to smooth the top. It should be fairly even so it bakes uniformly.
- Top with cheese: Sprinkle the reserved cheddar and mozzarella over the top. Don’t pile it all in the middle—spread it out to the edges. That crispy cheese edge is the best part.
- Bake: Place the dish in the preheated oven and bake for 20-25 minutes. You’ll know it’s done when the edges are bubbly and the top is golden brown. The center should be hot and slightly jiggly—it will set as it cools.
- Garnish and serve: Remove from the oven and let it rest for 5 minutes. This is important—it needs that time to set up so it doesn’t slide off your chips. Sprinkle the sliced green onions on top. Serve warm with tortilla chips, celery sticks, and carrot sticks.
Sensory cues: When it’s done, you should see the cheese bubbling around the edges. The top will be slightly browned in spots. The smell? It’s incredible—spicy, cheesy, and a little bit tangy. Your whole kitchen will smell like game day.
Cooking Tips & Techniques
I learned most of these the hard way—through batches that didn’t turn out right. Save yourself the trouble and use these tips.
Don’t overbake it. I made this mistake with batch number three. The dip came out dry and grainy because I left it in too long. You want it bubbly, not browned all over. Keep an eye on it after the 20-minute mark.
Shred your own cheese. I know it’s tempting to buy the bagged shredded cheese. I’ve done it. But it doesn’t melt the same way. The anti-caking powder they add prevents that smooth, creamy texture. Spend the extra two minutes shredding a block of cheese. Your dip will thank you.
Let the cream cheese really soften. Cold cream cheese creates lumps that never fully smooth out. If you’re in a rush, cut it into small cubes before microwaving. It softens faster and more evenly.
Use room temperature ingredients. Cold chicken straight from the fridge will cool down your mixture. Let the shredded chicken sit out for 10 minutes while you prep everything else. Small detail, big difference.
Make it ahead for better flavor. Honestly, this dip tastes even better the next day. The flavors have time to meld together. Assemble it the night before, cover it with foil, and refrigerate. When you’re ready, just add 5-10 minutes to the baking time since it’s starting from cold.
Keep it warm for parties. Once it’s baked, transfer it to a small slow cooker set to “warm.” It stays perfect for hours. I do this every single time I host. It frees up the oven and keeps the dip at the ideal temperature.
Variations & Adaptations
This recipe is forgiving. Here are some ways to make it your own.
Spicy Buffalo Version: Add 1/2 teaspoon of cayenne pepper to the cream cheese mixture and use Frank’s Extra Hot sauce. Top with sliced jalapeños before baking. This one is for the heat seekers in your crowd.
Smoky Buffalo Version: Substitute half the cheddar with smoked gouda and add 1/2 teaspoon of smoked paprika. The smoky flavor pairs beautifully with the spicy buffalo sauce. I tried this for a tailgate last fall and it was gone in fifteen minutes.
Blue Cheese Buffalo Version: Replace the ranch dressing with blue cheese dressing and crumble 1/4 cup of blue cheese over the top before baking. This is a polarizing one—blue cheese lovers go crazy for it. If you’re not sure about your crowd, stick with ranch.
Healthier Version: Use Neufchatel cheese (it has 1/3 less fat than cream cheese), Greek yogurt instead of ranch, and reduced-fat shredded cheese. The texture is slightly less creamy but still delicious. I’ve made this for friends who are watching their calories and they didn’t even notice the difference.
Meatless Version: Substitute the chicken with 2 cups of canned or frozen black beans (rinsed and drained) or 2 cups of cooked cauliflower florets, finely chopped. The cauliflower version is surprisingly good—it soaks up all the buffalo flavor.
Serving & Storage Suggestions
This dip is best served warm, straight from the oven or slow cooker. Set it out with a variety of dippers to keep everyone happy.
Best dippers: Thick tortilla chips (I use Tostitos Scoops—they hold the most dip), celery sticks, carrot sticks, cucumber rounds, bell pepper strips, or crusty bread cubes. For a low-carb option, use pork rinds or endive leaves.
What to serve alongside: This dip pairs beautifully with other game day favorites. I usually set it out next to a bowl of guacamole, some salsa, and maybe a tray of sliders. It also goes great with cold beer—an IPA or a light lager cuts through the richness perfectly.
Storage: Leftover dip keeps in an airtight container in the refrigerator for up to 4 days. The flavors actually get better overnight as they meld together.
Reheating: The best way to reheat is in the oven at 350°F (175°C) for 10-15 minutes, or until bubbly. You can also microwave it in 30-second bursts, stirring between each, but the texture won’t be quite as good. If you’re reheating for a party, put it in a small slow cooker on low for an hour.
Freezing: You can freeze this dip before or after baking. Assemble it in a freezer-safe dish, cover tightly with foil and plastic wrap, and freeze for up to 3 months. Thaw overnight in the refrigerator before baking. Add 10 minutes to the baking time if baking from thawed.
Flavor development: I’ve noticed this dip is even better on day two. The heat from the buffalo sauce mellows out a bit and the flavors become more rounded. If you’re planning ahead, make it a day early—your guests will never know.
Nutritional Information & Benefits
Let’s be honest—this is a game day indulgence. But here’s what you’re working with per serving (based on 12 servings):
- Calories: Approximately 280
- Protein: 18 grams
- Fat: 20 grams
- Carbohydrates: 4 grams
- Fiber: 0 grams
- Sugar: 2 grams
Health benefits: The chicken provides a solid dose of lean protein, which helps keep you full and satisfied. The cream cheese and cheddar add calcium for bone health. And the hot sauce? It contains capsaicin, which has been linked to boosting metabolism and reducing inflammation. So there’s that.
Dietary considerations: This recipe is naturally low-carb and keto-friendly (just skip the tortilla chips and use celery sticks). It’s also gluten-free as written. It contains dairy, so it’s not suitable for those with dairy allergies or on a vegan diet. If you’re watching your sodium, use low-sodium hot sauce and reduce the added salt.
My perspective: I don’t pretend this is health food. It’s comfort food, plain and simple. But I feel better about serving it knowing it has real ingredients—no processed cheese products, no mystery additives. Just honest food that tastes incredible.
Conclusion
This is the dip that made my friends stop asking me to bring anything else to game day. It’s the one that got me a text from my sister-in-law saying, “I dream about your dip.” It’s the recipe I was genuinely proud to finally get right after all those failed attempts. And now it’s yours.
What I love most about this recipe is how it brings people together. There’s something about a warm, cheesy, spicy dip that makes everyone gather around the table. Strangers become friends. Friends become family. And the game? Well, the game is just background noise at that point.
I want you to make this your own. Add more hot sauce if you like it spicy. Throw in some bacon crumbles. Use blue cheese instead of ranch. The base is solid—you can build on it however you want. And when you do, come back and tell me about it. Leave a comment below and let me know how it turned out. Did your guests love it? Did you change something that made it even better? I read every single comment, and honestly, hearing your stories makes my day.
So grab your chips, preheat that oven, and get ready to be the hero of game day. You’ve got this.
Frequently Asked Questions
Can I make this buffalo chicken dip in a slow cooker?
Absolutely! Combine all the ingredients in a slow cooker (no need to soften the cream cheese first—the slow cooker will take care of that). Cook on low for 2-3 hours, stirring occasionally, until everything is melted and hot. Then switch to “warm” for serving. The texture will be slightly softer than the baked version, but it’s just as delicious.
How do I keep the dip from getting oily or greasy?
This usually happens when the cream cheese breaks down from too much heat. Bake at 350°F (175°C) and don’t leave it in the oven longer than 25 minutes. Also, using full-fat cream cheese and freshly shredded cheese helps prevent separation. If it does get greasy, stir it well before serving—it usually comes back together.
Can I use canned chicken instead of fresh?
You can, but I don’t recommend it. Canned chicken has a different texture—it’s softer and sometimes a bit mushy. The flavor is also less pronounced. If you’re in a pinch, drain the canned chicken well and pat it dry with paper towels before adding it to the mixture. But honestly, a rotisserie chicken from the grocery store is faster and tastes so much better.
How spicy is this dip? Can I make it milder?
This version is moderately spicy—it has a nice kick but won’t make you reach for water. To make it milder, use only 1/4 cup of hot sauce and add an extra tablespoon of ranch dressing. You can also use a mild hot sauce or a buffalo sauce labeled “mild.” For a completely non-spicy version, omit the hot sauce entirely and use a teaspoon of smoked paprika for flavor.
Can I double this recipe for a big party?
Yes! This recipe doubles beautifully. Use a 9×13-inch dish for a single batch or a larger 11×15-inch dish for a double batch. You may need to add 5-10 minutes to the baking time since there’s more volume. You can also make two separate dishes and bake them at the same time—just rotate them halfway through for even baking.
Pin This Recipe!

Best Baked Buffalo Chicken Dip: Easy Game Day Crowd-Pleaser

This creamy, spicy buffalo chicken dip is the ultimate game day crowd-pleaser. Made with simple ingredients like cream cheese, shredded chicken, hot sauce, and cheese, it’s easy to prepare and always disappears fast.
- Prep Time: 15 minutes
- Cook Time: 25 minutes
- Total Time: 40 minutes
- Yield: 12 servings 1x
- Category: Appetizer
- Cuisine: American
Ingredients
- 8 ounces cream cheese, softened
- 1/2 cup ranch dressing
- 1/2 cup Frank’s RedHot Original Cayenne Pepper Sauce
- 2 cups cooked, shredded chicken (about 2 large chicken breasts or 1 rotisserie chicken)
- 1 cup shredded sharp cheddar cheese
- 1 cup shredded mozzarella cheese
- 2 green onions, thinly sliced
- 1/4 teaspoon garlic powder (optional)
- 1/4 teaspoon onion powder (optional)
Instructions
- Preheat your oven to 350°F (175°C).
- Soften the cream cheese: Take the cream cheese out of the fridge 30 minutes before you start. If you forgot, microwave it in 10-second bursts until it’s soft but not melted.
- Shred the chicken: If using fresh chicken breasts, place them in a pot, cover with water, bring to a boil, then reduce to a simmer for 12-15 minutes until cooked through. Let cool slightly, then shred with two forks. If using a rotisserie chicken, pull the meat off the bones and shred it. You should have about 2 cups.
- Mix the base: In a large mixing bowl, combine the softened cream cheese, ranch dressing, and Frank’s RedHot sauce. Use a hand mixer on low speed until completely smooth and well combined. Scrape down the sides with a spatula.
- Add the chicken and cheese: Fold in the shredded chicken, 3/4 cup of the sharp cheddar, and 3/4 cup of the mozzarella. Reserve the remaining 1/4 cup of each cheese for the top. Stir until everything is evenly distributed.
- Season it: Add the garlic powder and onion powder if using. Give it one more stir. Taste a tiny bit and adjust the seasoning if desired.
- Transfer to baking dish: Spread the mixture evenly into a 9×13-inch baking dish. Use a spatula to smooth the top.
- Top with cheese: Sprinkle the reserved cheddar and mozzarella over the top, spreading it out to the edges.
- Bake: Place the dish in the preheated oven and bake for 20-25 minutes, until the edges are bubbly and the top is golden brown.
- Garnish and serve: Remove from the oven and let it rest for 5 minutes. Sprinkle the sliced green onions on top. Serve warm with tortilla chips, celery sticks, and carrot sticks.
Notes
For best results, shred your own cheese from a block to avoid anti-caking agents. Let the cream cheese fully soften to prevent lumps. This dip can be assembled the night before and refrigerated; add 5-10 minutes to baking time if starting from cold. For parties, transfer to a slow cooker set to ‘warm’ after baking to keep it hot for hours.
Nutrition
- Serving Size: 1 serving (based on
- Calories: 280
- Sugar: 2
- Fat: 20
- Carbohydrates: 4
- Protein: 18
Keywords: buffalo chicken dip, game day dip, buffalo dip, chicken dip, easy appetizer, party dip, spicy dip


