The neighborhood Halloween block party was in six hours and I’d completely forgotten. Everyone else would be bringing those elaborate themed desserts you see on cooking shows—you know, the ones that look like they took three days and a pastry degree. I had a box of black cocoa powder I’d bought on a whim, a block of cream cheese that was about to expire, and honestly, a growing sense of panic. I mean, I couldn’t show up with store-bought cookies. Not to this crowd.
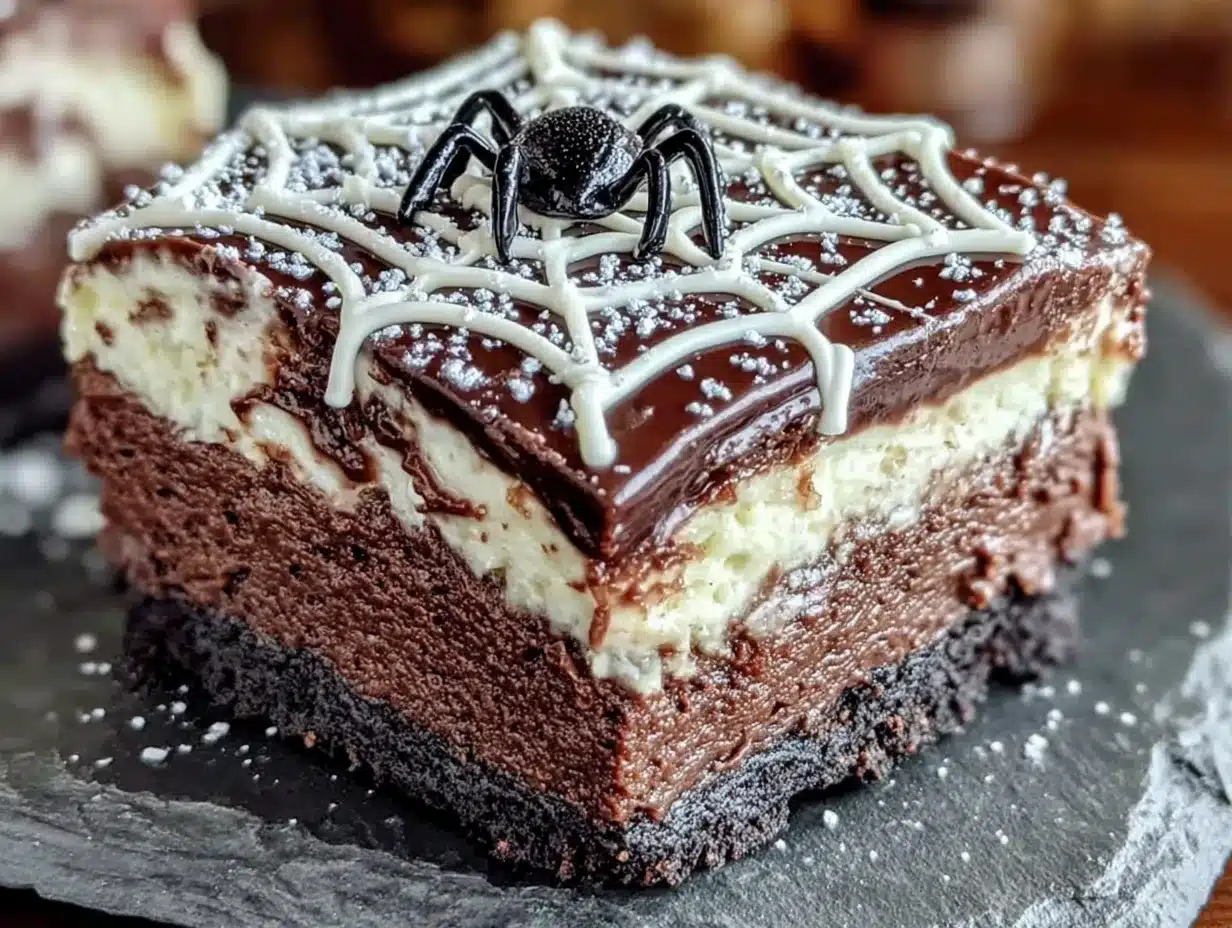
So I did what any reasonable person would do when backed into a corner. I threw together a cheesecake bar recipe using what I had, hoping it would at least look festive. The black cocoa gave the crust this gorgeous dark color—almost velvety, like something out of a gothic bakery dream. And then, purely by accident, I swirled the cheesecake topping too slowly and created this accidental spiderweb pattern. Let me tell you, I almost dropped the pan when I saw it.
That night, my “panic recipe” disappeared faster than the professionally decorated cupcakes. People kept asking where I bought them. I just smiled and said nothing. But honestly, that’s when I knew this recipe was special. It’s not fancy. It’s not complicated. But it looks like you tried so hard—and that’s the best kind of recipe to have in your back pocket, especially when you’re hosting. Maybe you’ve been there, scrambling at the last minute, praying for a kitchen miracle. Well, this is that miracle.
Why You’ll Love This Recipe
Let’s be real for a second. Hosting is stressful enough without worrying about a complicated dessert that might flop. These Black Velvet Spiderweb Cheesecake Bars are the answer to that problem. I’ve tested this recipe at four different gatherings now, and it never fails to get that “wait, you made these?” reaction. Here’s why you’re going to love them:
- Looks Impressive, Takes Minimal Effort : The spiderweb swirl looks like advanced piping technique, but it’s literally just a toothpick and a steady hand. Your guests will think you spent hours on it.
- Perfect for Halloween Gatherings : Whether it’s a spooky dinner party, a potluck, or a festive get-together, these bars fit right in. The black velvet color is dramatic without being over-the-top.
- Make-Ahead Friendly : You can prep these the night before your event. They actually taste better after chilling overnight—the flavors meld together beautifully.
- No Fancy Equipment Needed : You don’t need a stand mixer or a springform pan. Just a basic 9×13 baking dish and some elbow grease.
- Crowd-Pleasing Texture : The contrast between the dark, slightly crunchy crust and the creamy, tangy cheesecake layer is honestly addictive. Every bite has that perfect balance.
What makes this recipe different from the dozens of other cheesecake bar recipes out there? It’s the black cocoa powder. That’s the secret weapon. It gives the crust this deep, almost mysterious flavor—like a really good chocolate cookie but darker and more sophisticated. Plus, the spiderweb design isn’t just for show; the sour cream swirl adds a subtle tang that cuts through the richness. This isn’t just another version of cheesecake bars. It’s the one that’ll have people asking for the recipe before the party’s over.
And here’s the emotional part—this recipe is for the host who wants to impress without the stress. It’s for the person who wants to enjoy their own party instead of sweating in the kitchen. When you pull these bars out of the fridge and see that beautiful spiderweb pattern, you’ll feel a little burst of pride. And honestly? You deserve that.
What Ingredients You Will Need
This recipe uses simple, everyday ingredients to create something that looks and tastes far more complex than it actually is. Most of these are probably already in your pantry or fridge, which is exactly what you want when you’re hosting and time is tight. Let’s break down what you’ll need and why each ingredient matters.
For the Black Velvet Crust
- 1 ½ cups chocolate wafer crumbs (about 25 wafers, crushed—I prefer Nabisco Famous Chocolate Wafers for their deep flavor)
- ¼ cup black cocoa powder (this is the star of the show—I use King Arthur Flour’s Black Cocoa for that dramatic dark color)
- ¼ cup granulated sugar (just enough to balance the bitterness of the cocoa)
- 6 tablespoons unsalted butter, melted (use salted butter if that’s what you have, just reduce the added salt elsewhere)
- Pinch of salt (enhances the chocolate flavor—don’t skip it)
For the Cheesecake Layer
- 16 ounces cream cheese, softened to room temperature (Philadelphia is my go-to for consistent results—let it sit out for at least an hour)
- ¾ cup granulated sugar (adds sweetness without overpowering the tang)
- 2 large eggs, room temperature (cold eggs can make the batter lumpy—trust me on this one)
- 1 teaspoon vanilla extract (pure vanilla, not imitation—it makes a difference)
- ¼ cup sour cream (adds moisture and a subtle tang that balances the richness)
- 1 tablespoon all-purpose flour (helps stabilize the cheesecake and prevents cracking)
For the Spiderweb Topping
- ¼ cup sour cream (for the white swirl—use full-fat for the best texture)
- 1 tablespoon granulated sugar (just a touch to sweeten the swirl)
- 1 tablespoon black cocoa powder (for the dark accent swirls—sift it first to avoid lumps)
- 1-2 tablespoons milk (to thin the black cocoa paste to the right consistency)
Ingredient Tips from My Kitchen: When I first made these, I used regular cocoa powder for the crust, and honestly, it just looked brown. Not spooky at all. The black cocoa powder is non-negotiable if you want that dramatic black velvet effect. You can find it online or at specialty baking stores—it’s worth the investment if you bake for Halloween gatherings regularly. Also, make sure your cream cheese is genuinely room temperature. I once rushed this step and ended up with lumpy cheesecake batter. Not the end of the world, but not as smooth as it should be.
Substitution Guidance: If you can’t find chocolate wafer crumbs, Oreo crumbs (cream removed) work beautifully. For a gluten-free version, use gluten-free chocolate cookies. And if you’re dairy-free, there are good plant-based cream cheese options now—just make sure they’re the block style, not the spreadable kind.
Equipment Needed
One of the best things about this recipe is that it doesn’t require any specialized equipment. Here’s what you’ll need:
- 9×13-inch baking pan (metal or glass both work—I prefer metal for even baking)
- Parchment paper (for easy removal—trust me, this saves so much cleanup)
- Mixing bowls (one medium for the crust, one large for the cheesecake filling)
- Electric hand mixer or stand mixer (you can do this by hand with a whisk, but a mixer makes it much easier to get that smooth, lump-free texture)
- Spatula (for scraping down the bowl—don’t waste that precious cheesecake batter)
- Toothpick or skewer (for creating the spiderweb design—a simple wooden skewer works perfectly)
- Rolling pin or food processor (for crushing the cookies—I use a rolling pin and a zip-top bag because I hate washing extra dishes)
- Measuring cups and spoons (accurate measurements matter in baking)
Budget-Friendly Options: Don’t have a food processor for crushing cookies? No problem. Place the wafers in a zip-top bag and go at them with a rolling pin. It’s slightly more work, but honestly, it’s kind of therapeutic. And if you don’t have a hand mixer, a whisk and some elbow grease will work—just make sure your cream cheese is really soft.
Preparation Method
Alright, let’s get to the good part. Here’s how to make these crowd-pleasing Black Velvet Spiderweb Cheesecake Bars, step by step. I’ve included all the little details that’ll help you nail it on your first try.
Step 1: Prepare the Pan and Preheat
Preheat your oven to 325°F (160°C). Line your 9×13-inch baking pan with parchment paper, leaving some overhang on two opposite sides. This creates “handles” that make it super easy to lift the bars out later. Lightly spray the parchment with non-stick cooking spray for extra insurance.
Step 2: Make the Black Velvet Crust
In a medium bowl, combine the chocolate wafer crumbs, black cocoa powder, granulated sugar, and salt. Stir with a fork until everything is evenly distributed—you don’t want pockets of white sugar in your dark crust. Pour in the melted butter and stir until the mixture looks like wet sand and holds together when you squeeze it.
Press this mixture firmly into the bottom of your prepared pan. I use the bottom of a measuring cup to really pack it down—this prevents the crust from crumbling when you cut the bars later. Bake for 10 minutes, then set aside to cool slightly while you make the filling. The crust will firm up as it cools.
Step 3: Make the Cheesecake Filling
In a large bowl, beat the softened cream cheese with an electric mixer on medium speed until smooth and creamy—about 2 minutes. Scrape down the sides and bottom of the bowl with a spatula. Add the sugar and beat for another minute until well combined and fluffy.
Add the eggs one at a time, beating on low speed after each addition just until incorporated. Overmixing at this stage can incorporate too much air, which leads to cracks in the finished cheesecake. Add the vanilla extract, sour cream, and flour, then mix on low until just combined. The batter should be smooth and silky—if you see lumps, your cream cheese wasn’t soft enough.
Step 4: Assemble the Bars
Pour the cheesecake filling over the pre-baked crust and spread it evenly with a spatula. Give the pan a gentle tap on the counter to release any air bubbles.
Step 5: Create the Spiderweb Design
This is where the magic happens. In a small bowl, mix the ¼ cup sour cream with 1 tablespoon sugar until smooth. In another small bowl, combine the black cocoa powder with enough milk (1-2 tablespoons) to create a smooth, drizzle-able paste.
Drop spoonfuls of the white sour cream mixture in a random pattern across the top of the cheesecake batter. Then drop smaller spoonfuls of the black cocoa paste in between the white spots. Using a toothpick or skewer, drag through the spots in a continuous circular motion, starting from the center and working outward. Wipe the toothpick clean between swirls for the cleanest web effect. Don’t over-swirl—about 4-5 rotations is plenty.
Step 6: Bake and Cool
Bake at 325°F (160°C) for 35-40 minutes. The edges should be set and slightly puffed, but the center should still have a slight jiggle when you gently shake the pan—like jello, not like liquid. This is the sweet spot for creamy cheesecake.
Turn off the oven, crack the door open, and let the cheesecake bars cool inside for 30 minutes. This gradual cooling helps prevent cracks. Then transfer to a wire rack to cool completely to room temperature, about 1 hour.
Step 7: Chill and Serve
Cover the pan with plastic wrap and refrigerate for at least 4 hours, but overnight is better. This is crucial—the cheesecake needs time to set properly. When you’re ready to serve, use the parchment handles to lift the entire block out of the pan. Use a sharp knife (wiped clean between cuts) to slice into bars. For the cleanest cuts, dip your knife in hot water and dry it before each slice.
Cooking Tips & Techniques
After making these bars more times than I care to count (and messing up a few batches along the way), here are my best tips for guaranteed success:
Don’t Overmix the Batter. I learned this the hard way. Overmixing incorporates too much air, which causes the cheesecake to puff up dramatically in the oven and then collapse, creating cracks. Mix just until everything is combined—no more.
The Toothpick Trick for Clean Webs. Here’s something I figured out after my first disastrous attempt: wipe the toothpick clean between each swirl. If you don’t, the colors start to muddy together, and you lose that crisp spiderweb effect. Keep a paper towel handy and wipe between each pass.
Room Temperature Ingredients Are Non-Negotiable. I know, I know, it’s annoying to wait. But cold cream cheese creates lumpy batter, and cold eggs can cause the batter to curdle. Set everything out on the counter at least an hour before you start baking. Set a timer if you’re forgetful like me.
The Jiggle Test. Don’t rely solely on baking time—ovens vary. The best way to know your cheesecake is done is the jiggle test. The center should wobble slightly when you shake the pan. If it’s completely firm, it’s overbaked and will likely crack. If it’s still liquidy, give it more time.
Patience with Chilling. I get it—you want to serve these immediately. But cutting into warm cheesecake is a recipe for a mess. The bars need that full 4 hours (or overnight) to set properly. Trust the process. Your guests will thank you.
Variations & Adaptations
One of the things I love about this recipe is how flexible it is. Here are some variations I’ve tried and loved:
Pumpkin Spice Version: Add ½ cup pumpkin puree and 1 teaspoon pumpkin pie spice to the cheesecake batter. Reduce the sour cream to 2 tablespoons. The pumpkin flavor pairs beautifully with the dark chocolate crust. I made this for a fall potluck and it was gone in 15 minutes.
Peppermint Holiday Twist: Swap the vanilla extract for peppermint extract (use just ½ teaspoon—it’s potent). Crush some candy canes and sprinkle them over the top before serving. The red and white against the black crust is stunning for Christmas parties.
Gluten-Free Adaptation: Use gluten-free chocolate sandwich cookies for the crust. Everything else in the recipe is naturally gluten-free. I’ve tested this with several brands, and it works perfectly every time.
Mini Cheesecake Bites: Press the crust mixture into a mini muffin tin lined with paper liners. Fill with cheesecake batter and bake for 12-15 minutes. These are perfect for parties where people want to graze—no slicing required.
White Chocolate Drizzle: After the bars have chilled and been sliced, melt some white chocolate and drizzle it over the top. The white against the black velvet creates an even more dramatic presentation. I did this for a friend’s Halloween wedding shower, and people went nuts.
Serving & Storage Suggestions
Serving Temperature: These bars are best served cold, straight from the refrigerator. The cheesecake layer is firm and creamy at this temperature, and the crust holds together beautifully. If you prefer a softer texture, let them sit at room temperature for 10-15 minutes before serving.
Presentation Tips for Hosting: Arrange the bars on a dark platter or black cake stand for maximum visual impact. The spiderweb pattern really pops against a dark background. Garnish with a few edible glitter stars or tiny plastic spiders for a fun Halloween touch. I like to dust the edges with a little extra black cocoa powder just before serving—it looks dramatic and professional.
What to Serve Alongside: These bars pair wonderfully with a cup of hot coffee or a glass of cold milk. For a full Halloween dessert table, serve them alongside pumpkin cupcakes, caramel apples, or a bowl of fresh fruit to balance the richness.
Storage Instructions: Store leftover bars in an airtight container in the refrigerator for up to 5 days. The flavor actually improves after a day or two as the ingredients meld together. To freeze, wrap individual bars tightly in plastic wrap, then place them in a freezer-safe bag. They’ll keep for up to 3 months. Thaw in the refrigerator overnight before serving.
Reheating Note: These bars are meant to be served cold, so no reheating is needed. If you’ve frozen them, just give them a few hours in the fridge to thaw completely.
Nutritional Information & Benefits
While these bars are definitely a treat (and I’m not here to pretend otherwise), here’s the nutritional breakdown for one serving, based on 16 bars:
- Calories: 285
- Total Fat: 19g
- Saturated Fat: 11g
- Cholesterol: 75mg
- Sodium: 210mg
- Total Carbohydrates: 26g
- Dietary Fiber: 1g
- Sugars: 19g
- Protein: 5g
Health Benefits of Key Ingredients: The black cocoa powder in this recipe is rich in antioxidants called flavonoids, which can help reduce inflammation and support heart health. Cream cheese provides calcium for strong bones, and eggs offer high-quality protein. The sour cream adds probiotics that support digestive health.
Dietary Considerations: This recipe contains dairy, eggs, and gluten. For a dairy-free version, use plant-based cream cheese and butter alternatives—just note that the texture may be slightly different. The bars are naturally low in sodium compared to many store-bought desserts.
My Personal Perspective: Look, I’m not a nutritionist. I’m a home cook who believes in balance. These bars are a celebration food—something you make for special occasions when you want to treat yourself and your guests. Enjoy them mindfully, savor every bite, and don’t stress about the numbers. Life’s too short for guilt-ridden dessert.
Conclusion
These Black Velvet Spiderweb Cheesecake Bars have become my secret weapon for Halloween hosting. They look like something from a fancy bakery, but they’re secretly one of the easiest desserts I’ve ever made. The dramatic black crust, the creamy cheesecake filling, and that stunning spiderweb design—it all comes together to create something that feels special without requiring hours of work.
What I love most about this recipe is how adaptable it is. You can dress it up for a formal dinner party or keep it casual for a neighborhood potluck. It’s the kind of recipe that makes you look like a hero, even when you’re running on limited time and a prayer. And honestly? That’s the best kind of recipe to have in your collection.
I’d love to hear how these turn out for you. Did you try any of the variations? Did your guests guess the secret ingredient? Drop a comment below and let me know—I read every single one. And if you’re looking for another crowd-pleasing dessert for your next gathering, check out my spooky white chocolate pumpkin bars for a different take on Halloween baking. Happy hosting, friends!
Frequently Asked Questions
Can I make these Black Velvet Spiderweb Cheesecake Bars ahead of time?
Absolutely! In fact, I recommend it. These bars need at least 4 hours to chill, but making them a day ahead is even better. The flavors meld together overnight, and the texture becomes perfectly creamy. Just keep them covered in the refrigerator until you’re ready to serve.
Can I use regular cocoa powder instead of black cocoa powder?
You can, but the color won’t be as dramatic. Regular cocoa powder will give you a brown crust instead of that deep black velvet effect. If you’re making these for a Halloween party, I strongly recommend tracking down black cocoa powder—it’s available online and at specialty baking stores.
Why did my cheesecake crack on top?
Cracks usually happen for one of two reasons: overmixing the batter (which incorporates too much air) or overbaking. Make sure you mix just until combined, and pull the cheesecake out of the oven when the center still has a slight jiggle. The gradual cooling process in the oven also helps prevent cracks.
Can I freeze these cheesecake bars?
Yes! Wrap individual bars tightly in plastic wrap, then place them in a freezer-safe bag or container. They’ll keep for up to 3 months. When you’re ready to enjoy them, thaw in the refrigerator overnight. The texture remains creamy and delicious.
How do I get clean cuts when slicing the bars?
Use a sharp knife and wipe it clean between each cut. For the cleanest slices, dip your knife in hot water, dry it off, then make your cut. The heat helps the knife glide through the cheesecake without dragging the filling. Repeat this process for each slice.
Pin This Recipe!
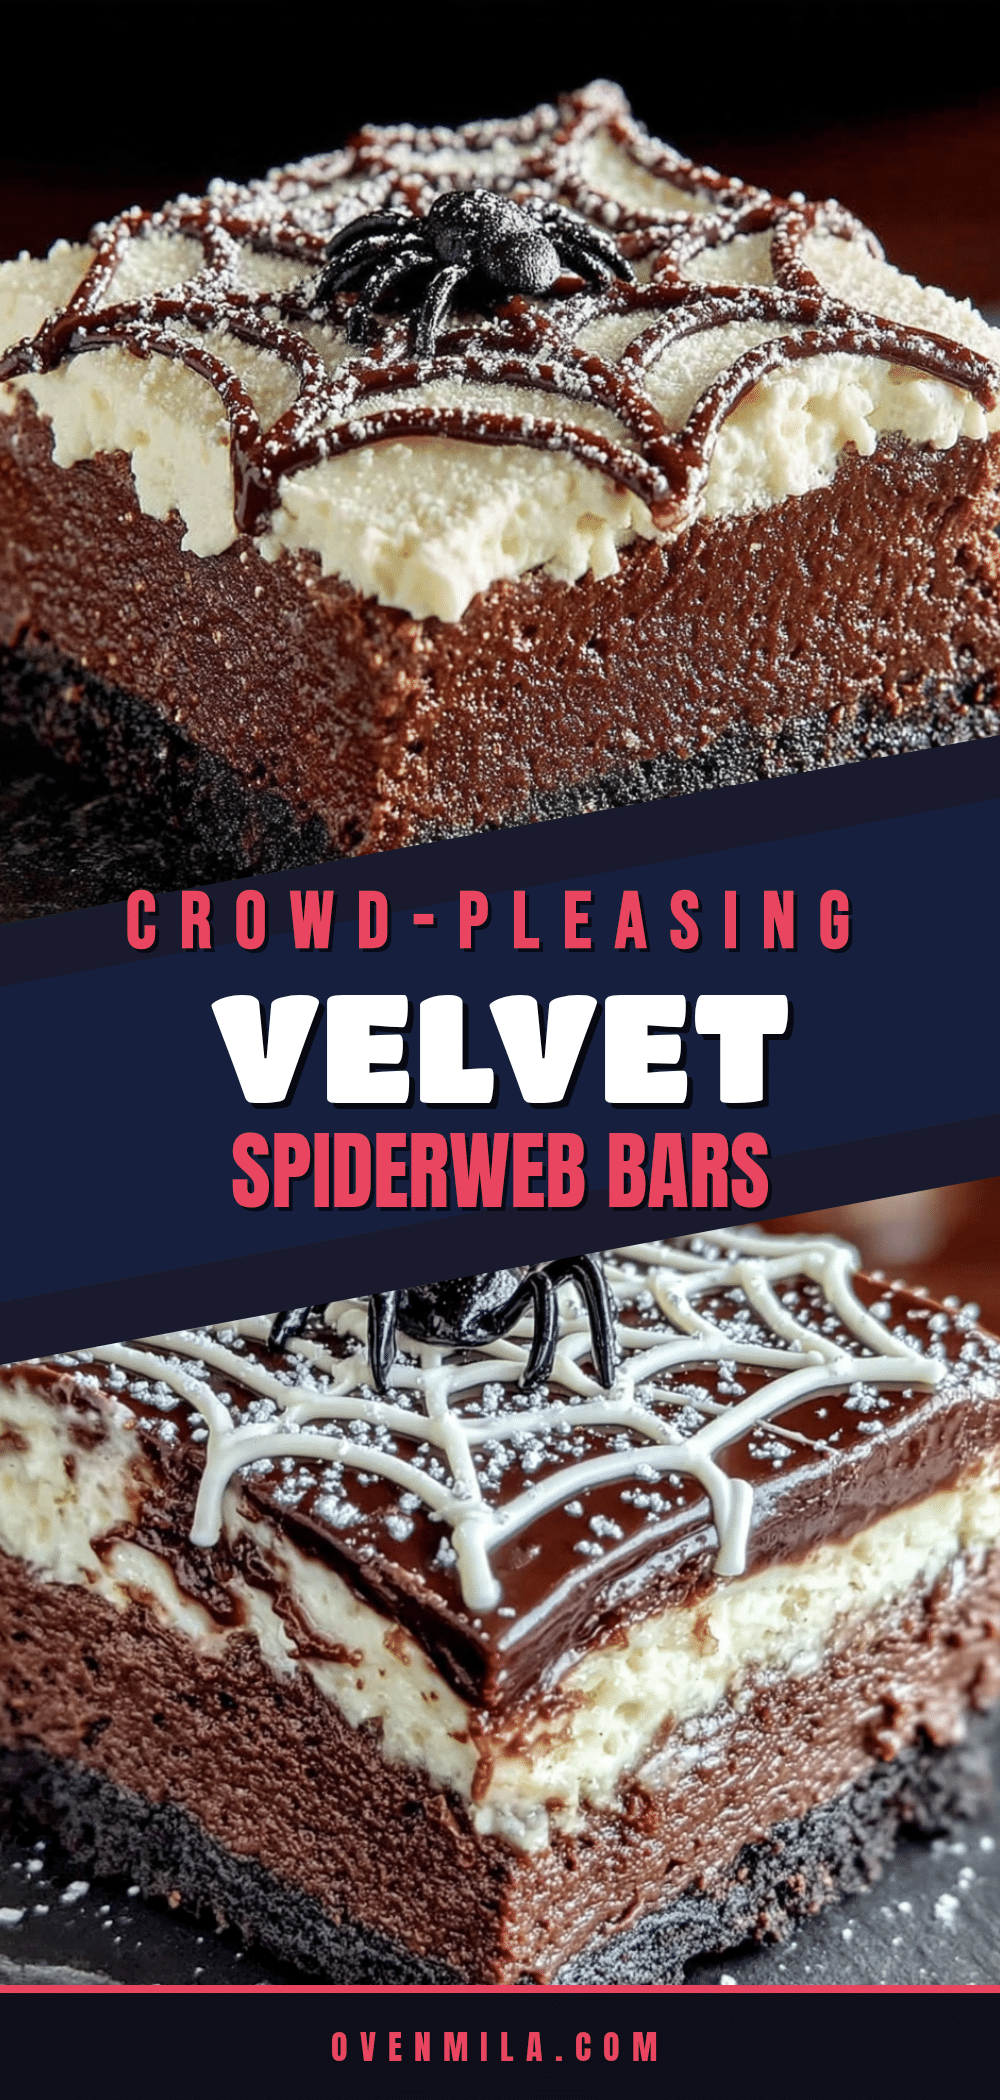
Easy Black Velvet Spiderweb Cheesecake Bars Recipe
These Black Velvet Spiderweb Cheesecake Bars are a show-stopping Halloween dessert that looks like it took hours but comes together with minimal effort. A dark, velvety chocolate crust is topped with a creamy cheesecake filling and finished with a stunning spiderweb design that will impress your guests.
- Prep Time: 20 minutes
- Cook Time: 40 minutes
- Total Time: 5 hours (includes chilling time)
- Yield: 16 servings 1x
- Category: Dessert
- Cuisine: American
Ingredients
- 1 ½ cups chocolate wafer crumbs (about 25 wafers, crushed)
- ¼ cup black cocoa powder
- ¼ cup granulated sugar
- 6 tablespoons unsalted butter, melted
- Pinch of salt
- 16 ounces cream cheese, softened to room temperature
- ¾ cup granulated sugar
- 2 large eggs, room temperature
- 1 teaspoon vanilla extract
- ¼ cup sour cream
- 1 tablespoon all-purpose flour
- ¼ cup sour cream (for topping)
- 1 tablespoon granulated sugar (for topping)
- 1 tablespoon black cocoa powder (for topping)
- 1–2 tablespoons milk (for topping)
Instructions
- Preheat your oven to 325°F (160°C). Line a 9×13-inch baking pan with parchment paper, leaving overhang on two opposite sides. Lightly spray with non-stick cooking spray.
- In a medium bowl, combine chocolate wafer crumbs, black cocoa powder, ¼ cup granulated sugar, and a pinch of salt. Stir until evenly distributed. Pour in melted butter and stir until the mixture looks like wet sand and holds together when squeezed.
- Press the crust mixture firmly into the bottom of the prepared pan using the bottom of a measuring cup. Bake for 10 minutes, then set aside to cool slightly.
- In a large bowl, beat softened cream cheese with an electric mixer on medium speed until smooth and creamy, about 2 minutes. Scrape down the sides and bottom of the bowl.
- Add ¾ cup granulated sugar and beat for another minute until well combined and fluffy.
- Add eggs one at a time, beating on low speed after each addition just until incorporated. Add vanilla extract, ¼ cup sour cream, and flour, then mix on low until just combined and smooth.
- Pour the cheesecake filling over the pre-baked crust and spread evenly with a spatula. Gently tap the pan on the counter to release air bubbles.
- In a small bowl, mix ¼ cup sour cream with 1 tablespoon sugar until smooth. In another small bowl, combine 1 tablespoon black cocoa powder with enough milk (1-2 tablespoons) to create a smooth, drizzle-able paste.
- Drop spoonfuls of the white sour cream mixture in a random pattern across the top of the cheesecake batter. Then drop smaller spoonfuls of the black cocoa paste in between the white spots. Using a toothpick or skewer, drag through the spots in a continuous circular motion, starting from the center and working outward. Wipe the toothpick clean between swirls for the cleanest web effect. Do about 4-5 rotations.
- Bake at 325°F (160°C) for 35-40 minutes. The edges should be set and slightly puffed, but the center should still have a slight jiggle when gently shaken.
- Turn off the oven, crack the door open, and let the cheesecake bars cool inside for 30 minutes. Then transfer to a wire rack to cool completely to room temperature, about 1 hour.
- Cover the pan with plastic wrap and refrigerate for at least 4 hours, preferably overnight. When ready to serve, use the parchment handles to lift the entire block out of the pan. Use a sharp knife (wiped clean between cuts) to slice into bars.
Notes
Black cocoa powder is essential for the dramatic dark color. Make sure cream cheese is at room temperature to avoid lumps. For clean cuts, dip your knife in hot water and dry it before each slice. The bars taste even better after chilling overnight.
Nutrition
- Serving Size: 1 bar
- Calories: 285
- Sugar: 19
- Sodium: 210
- Fat: 19
- Saturated Fat: 11
- Carbohydrates: 26
- Fiber: 1
- Protein: 5
Keywords: Halloween dessert, cheesecake bars, spiderweb, black velvet, chocolate cheesecake, easy dessert, party dessert


