I had claimed to hate pumpkin for years. A solid decade, at least. Every autumn when the pumpkin spice brigade marched out in full force, I’d just roll my eyes and mutter something about cinnamon and nutmeg covering up blandness. My neighbor Carol, who bakes for every single block party and holiday gathering, took this as a personal challenge. Every October, she’d leave a loaf of something pumpkin-based on my doorstep with a sticky note that just said “Try it.” And every year, I’d politely thank her and quietly pass it off to my brother-in-law Mark who’d eat anything.
Then last November, I was hosting a small Friendsgiving dinner and had specifically asked everyone not to bring pumpkin desserts. I’d made a chocolate tart, a lemon meringue pie, and a pear crisp—none of which contained a single gram of pumpkin puree. Carol showed up with a basket of these mini loaves, each one topped with this crumbly, buttery streusel that looked like it had been sprinkled on by angels. “Just set them out for people to take home,” she said, winking. I set them on the counter by the door, completely out of the main dessert spread. And then I caught my brother-in-law—the same Mark who eats anything—standing by the door, halfway through his second mini loaf, with this look on his face like he’d just discovered fire. “You have got to try these,” he said, crumbs falling down his shirt. “They’re not even pumpkin-y.”
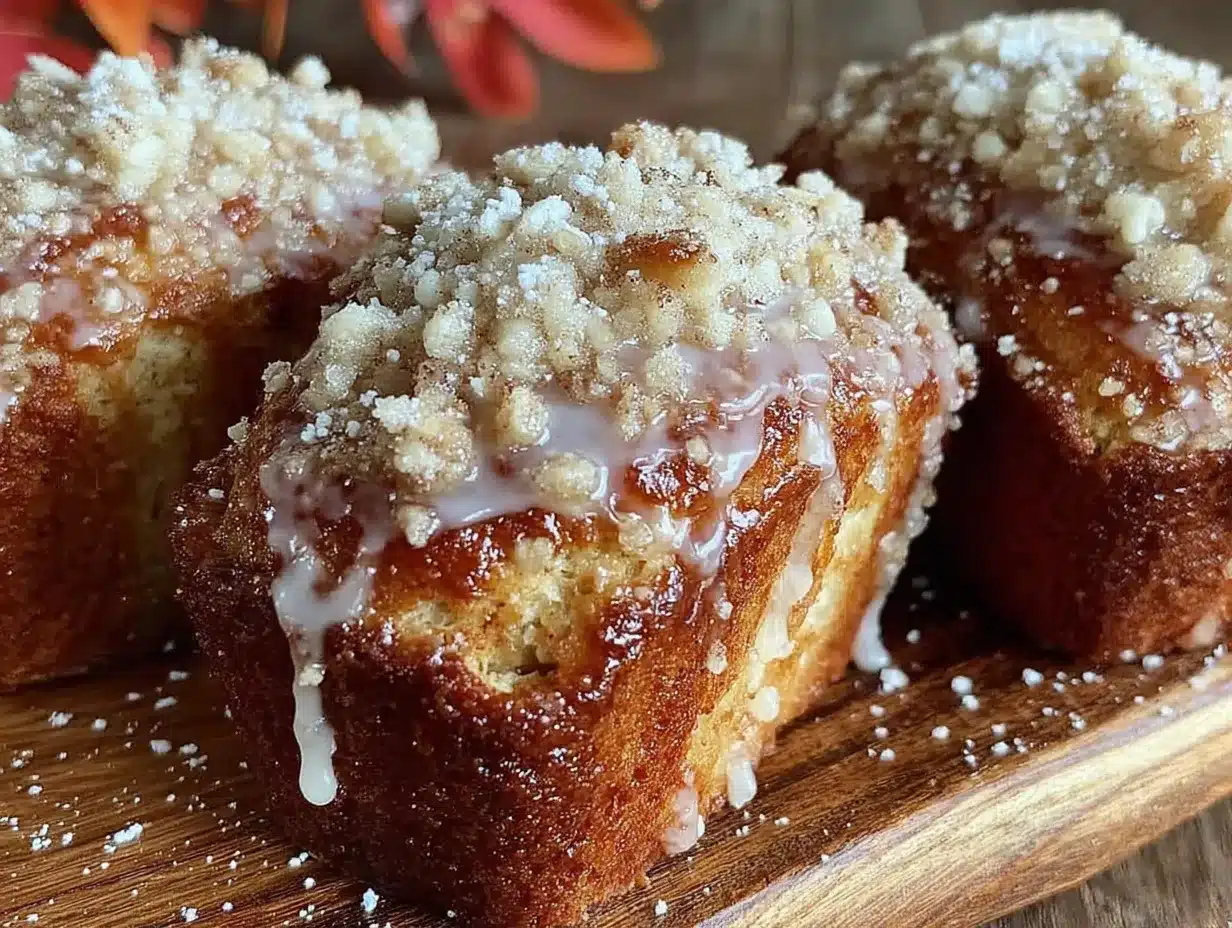
I took a bite. And that was it. The texture was impossibly moist, almost velvety, and the pumpkin flavor was subtle—more of a background warmth than an in-your-face squash situation. The streusel on top was crunchy and sweet, with little pockets of cinnamon that made you close your eyes without meaning to. I ended up eating three that night, standing in my kitchen at midnight, telling myself I was just “testing the quality.” Carol never said a word. She just smiled the next time she saw me and asked if I wanted her recipe. I said yes before I could stop myself. Now I make these mini loaves every fall, for every gathering, and I think about how I almost missed out on something truly special because I was too stubborn to admit I might be wrong.
Why You’ll Love This Recipe
Let me tell you why these mini loaves have become my official hostess gift, my go-to potluck contribution, and the thing I make when I want to feel like I’ve got my act together even when I absolutely don’t. These little guys deliver big on flavor without taking up your whole afternoon.
- Quick & Easy: From mixing bowl to oven in about 15 minutes. The batter comes together with a whisk and a spatula—no stand mixer required, which means less cleanup and more time for the important stuff (like figuring out what you’re wearing to that dinner party).
- Simple Ingredients: You probably have most of these in your pantry right now. Canned pumpkin puree, flour, sugar, eggs, butter, and cinnamon. No weird specialty items that you’ll use once and then forget about until they expire.
- Perfect for Hosting: These mini loaves are made for gatherings. They look impressive on a dessert table, they’re easy to grab and eat without plates or forks, and they make people feel special—like they got their own personal loaf. Plus, they freeze beautifully, so you can make them days ahead.
- Crowd-Pleaser: I’ve served these to pumpkin lovers and pumpkin skeptics (like my former self), and everyone goes back for seconds. The streusel topping is the great equalizer—it’s hard to argue with butter, sugar, and cinnamon.
- Unbelievably Delicious: The texture is what gets people. It’s not dense or heavy like some pumpkin breads. It’s light, tender, and stays moist for days. The streusel adds this satisfying crunch that contrasts perfectly with the soft crumb.
What makes this recipe different from all the other pumpkin breads out there? It’s the ratio of pumpkin to fat, honestly. I’ve tested this with different amounts of oil, butter, and pumpkin puree, and this version hits that sweet spot where the bread is moist without being greasy, and the pumpkin flavor is present but not overwhelming. The streusel isn’t an afterthought either—it’s a generous layer that bakes into this golden, crunchy crust that makes every bite interesting.
This is the kind of recipe that makes you look like a hero at a gathering without breaking a sweat. You can make a batch of these mini loaves, arrange them on a nice board or platter, and suddenly you’re the person who brought the thing everyone’s talking about. And honestly, as a host, that’s the best feeling—watching your guests hover around the dessert table, reaching for just one more slice.
What Ingredients You Will Need
This recipe uses simple, pantry-friendly ingredients to create something that tastes far more complicated than it is. I’ve tested these ingredients in various combinations, and this lineup gives you the best texture and flavor without any fuss.
For the Pumpkin Bread
- 1 ¾ cups (220g) all-purpose flour – Spoon and level your flour for the best results. Scooping directly from the bag packs in too much flour and makes the bread dense.
- 1 teaspoon baking soda – Make sure it’s fresh. If your baking soda has been sitting in the back of the cabinet for two years, it might not give you the rise you’re looking for.
- ½ teaspoon baking powder – Adds a little extra lift to keep these loaves light.
- 1 teaspoon ground cinnamon – This is the backbone of the spice profile. I prefer Saigon cinnamon for its stronger, warmer flavor.
- ½ teaspoon ground nutmeg – Freshly grated if you have it, but ground works perfectly fine.
- ½ teaspoon ground ginger – Adds a little warmth without being spicy.
- ¼ teaspoon ground cloves – Just a pinch. Cloves are potent, so a little goes a long way.
- ½ teaspoon salt – Don’t skip this. Salt balances the sweetness and makes all the other flavors pop.
- 1 cup (200g) granulated sugar – Regular white sugar works best here. You could use coconut sugar, but the texture will be slightly denser.
- ½ cup (120ml) vegetable oil – Canola oil or any neutral-flavored oil works. I’ve also used melted coconut oil, and it’s lovely, just make sure it’s cooled slightly before mixing.
- 2 large eggs, room temperature – Cold eggs can make the batter seize up. Leave them on the counter for 30 minutes, or place them in a bowl of warm water for 5 minutes.
- 1 cup (245g) canned pumpkin puree – Not pumpkin pie filling. Look for 100% pure pumpkin. I prefer Libby’s, but any brand works.
- 1 teaspoon vanilla extract – Pure vanilla extract, not imitation. It makes a difference in the depth of flavor.
For the Cinnamon Streusel
- ½ cup (65g) all-purpose flour
- ½ cup (100g) packed light brown sugar – Dark brown sugar works too, but light gives a more delicate caramel flavor.
- 1 teaspoon ground cinnamon
- ¼ teaspoon salt
- ¼ cup (55g) unsalted butter, cold and cut into small cubes – Cold butter is key for that crumbly texture. If the butter is too soft, your streusel will turn into a paste.
Ingredient Tips from My Kitchen
I’ve learned a few things the hard way over the years. First, always buy canned pumpkin in the fall when stores stock the good brands. I’ve been caught in April with only off-brand pumpkin that was watery and bland. Second, if you’re using a glass loaf pan, reduce the oven temperature by 25 degrees—glass retains heat differently and can burn the edges before the center is done. And third, for the streusel, use your fingers to work the butter into the flour mixture until it looks like coarse sand with some pea-sized clumps. Those clumps are what create those beautiful crunchy pockets on top of the bread.
Equipment Needed
You don’t need a professional bakery setup for these mini loaves. Here’s what I use and what you can swap in if you’re working with a more modest kitchen.
- Mini loaf pans (6-cavity pan or individual pans) – I use a 6-cavity non-stick mini loaf pan that I picked up at Target for about $12. If you don’t have one, you can use a standard 9×5-inch loaf pan and bake for 50-60 minutes instead.
- Mixing bowls – One large bowl for the dry ingredients and one medium bowl for the wet. Nothing fancy needed.
- Whisk and rubber spatula – A whisk for the dry ingredients and a spatula for folding the wet into the dry. A wooden spoon works too.
- Measuring cups and spoons – I prefer metal measuring cups for dry ingredients and glass for liquids. The accuracy matters more than you’d think.
- Parchment paper or baking spray – Parchment paper makes removal a breeze. I cut strips that hang over the edges of each cavity so I can lift the loaves out cleanly.
- Cooling rack – Essential for even cooling. If you don’t have one, you can use the oven rack (turned off and cool) or a cutting board propped up on two cans.
- Pastry blender or fork – For cutting the butter into the streusel. If you don’t have a pastry blender, two knives work, or you can use your fingers—just work quickly so the butter doesn’t warm up.
I’ve made these loaves with a cheap mini loaf pan that I’ve had for years, and they still come out perfect every time. The non-stick coating has worn off in spots, so I just make sure to grease it well or use parchment. Don’t feel like you need to invest in expensive equipment—a well-seasoned pan and a little patience go a long way.
Preparation Method
Let’s get these mini loaves in the oven. I’ve broken everything down into clear steps so you can follow along without any surprises.
- Preheat your oven to 350°F (175°C). Place the rack in the center position. While the oven is heating, spray your mini loaf pan with non-stick baking spray or line each cavity with parchment paper strips. If you’re using parchment, cut strips about 6 inches long and 2 inches wide, and lay them crosswise in each cavity so the ends hang over the sides.
- Make the streusel first. In a small bowl, whisk together ½ cup flour, ½ cup packed brown sugar, 1 teaspoon cinnamon, and ¼ teaspoon salt. Add the cold butter cubes and use a pastry blender or your fingertips to work the butter into the dry ingredients until the mixture looks like coarse sand with some pea-sized clumps. Don’t overwork it—you want those clumps. Set the streusel in the refrigerator while you make the batter. This keeps the butter cold and ensures a crumbly texture.
- Whisk the dry ingredients. In a large bowl, whisk together 1¾ cups flour, 1 teaspoon baking soda, ½ teaspoon baking powder, 1 teaspoon cinnamon, ½ teaspoon nutmeg, ½ teaspoon ginger, ¼ teaspoon cloves, and ½ teaspoon salt. Whisk for about 20 seconds to distribute everything evenly. This step aerates the flour and prevents clumps of baking soda from ending up in your bread.
- Mix the wet ingredients. In a separate medium bowl, whisk together 1 cup sugar, ½ cup vegetable oil, 2 eggs, 1 cup pumpkin puree, and 1 teaspoon vanilla extract. Whisk until smooth and well combined. The mixture should be a uniform orange color with no streaks of egg white.
- Combine wet and dry. Pour the wet ingredients into the bowl with the dry ingredients. Use a rubber spatula to fold everything together gently. Stir just until you no longer see streaks of flour—about 15 to 20 strokes. A few small lumps are fine. Overmixing will develop the gluten and make your bread tough, so resist the urge to keep stirring.
- Fill the loaf cavities. Divide the batter evenly among the 6 mini loaf cavities. I use a ¼-cup measuring cup and fill each cavity about ¾ full. The batter will be thick—that’s normal. Use the back of a spoon or a small offset spatula to spread it to the edges.
- Add the streusel topping. Remove the streusel from the refrigerator. Sprinkle it generously over each loaf, pressing it gently into the batter so it sticks. Don’t be shy—pile it on. The streusel will spread as the bread rises and bakes. Use all of it. I usually get about 2 to 3 tablespoons per mini loaf.
- Bake. Place the pan in the preheated oven and bake for 22 to 28 minutes. Start checking at 22 minutes by inserting a toothpick into the center of a loaf—if it comes out clean or with just a few moist crumbs, they’re done. The tops should be golden brown and the streusel should look crunchy and set.
- Cool in the pan. Place the pan on a cooling rack and let the loaves cool in the pan for 10 minutes. This allows them to finish setting up and makes them easier to remove without falling apart.
- Remove and cool completely. After 10 minutes, use the parchment strips or a small offset spatula to lift the loaves out of the pan. Transfer them to the cooling rack to cool completely before serving. If you try to slice them while they’re warm, they’ll crumble. I know from experience—I’ve definitely eaten a warm, crumbly loaf over the sink, and while it was delicious, it wasn’t pretty.
Cooking Tips & Techniques
I’ve made these mini loaves probably two dozen times now, and I’ve collected a few tricks that make the process smoother and the results more consistent.
Don’t skip the streusel refrigeration step. I learned this the hard way when I made streusel with room-temperature butter and ended up with a paste that baked into a solid, hard crust instead of those lovely crumbly bits. Cold butter is non-negotiable for streusel. If you forget to cube it ahead of time, pop the butter in the freezer for 10 minutes before cutting it into the flour mixture.
Use a cookie scoop for even batter distribution. I use a ¼-cup cookie scoop to portion the batter into each cavity. This gives me exactly the same amount in every loaf, which means they all bake at the same rate. If you’re eyeballing it, the smaller loaves will overbake while the bigger ones are still raw in the middle.
Rotate the pan halfway through baking. Ovens have hot spots—I’ve burned the back row of mini loaves more than once because I forgot to rotate the pan. At the 12-minute mark, quickly pull the pan out, rotate it 180 degrees, and slide it back in. This ensures even browning across all six loaves.
Let them cool completely before wrapping. If you’re making these ahead of time for a gathering, resist the urge to wrap them while they’re still warm. The steam will condense inside the wrap and make the streusel soggy. Cool them completely on a rack, then wrap each loaf individually in plastic wrap and store in an airtight container. They’ll stay fresh for up to 3 days at room temperature.
Test for doneness with a toothpick, not your eyes. The streusel topping browns quickly and can make the loaves look done when they’re actually still raw in the center. Always use a toothpick inserted into the middle of a loaf—not the edge. If it comes out with wet batter, give them another 3 to 5 minutes and check again.
One more thing—if you’re like me and you tend to get distracted mid-recipe, set a timer for the streusel. I once forgot I had streusel sitting in the fridge and ended up baking the loaves without it. They were fine, honestly, just plain. But the streusel is really what makes these loaves special, so don’t skip it.
Variations & Adaptations
One of the things I love about this recipe is how adaptable it is. Here are some variations I’ve tried and loved.
Dairy-Free Version: Swap the butter in the streusel with a plant-based butter that’s solid when cold. I’ve used Earth Balance sticks with great results. The rest of the recipe is already dairy-free since we’re using oil instead of butter in the batter.
Gluten-Free Version: Substitute the all-purpose flour with a 1:1 gluten-free baking flour blend. I’ve tested this with Bob’s Red Mill 1:1 Baking Flour, and the texture was slightly more tender but still delicious. Add 1 teaspoon of xanthan gum if your blend doesn’t already include it.
Add-In Variations: Fold in ½ cup of chocolate chips, dried cranberries, or chopped pecans after combining the wet and dry ingredients. I made a batch with dark chocolate chips and dried cherries last Christmas, and they disappeared in minutes. For a savory-sweet twist, try adding ¼ cup of chopped crystallized ginger—it adds a spicy kick that pairs beautifully with the pumpkin.
Spice It Up: If you want a more intense spice profile, add ¼ teaspoon of cardamom or allspice to the flour mixture. I’ve also made a chai-spiced version by swapping the cinnamon, nutmeg, ginger, and cloves for 2 teaspoons of chai spice blend. It’s subtle but noticeable.
Maple Glaze Option: For a sweeter, more decadent version, skip the streusel and drizzle the cooled loaves with a maple glaze. Mix ½ cup powdered sugar with 2 tablespoons maple syrup and 1 tablespoon milk or cream. Drizzle over the loaves and let set for 10 minutes before serving.
I personally love the chocolate chip version for fall gatherings because it feels a little unexpected. People see pumpkin bread and expect cinnamon and nutmeg, but when they bite into a pocket of melted chocolate, their faces light up. It’s a small twist that makes a big impression.
Serving & Storage Suggestions
These mini loaves are versatile when it comes to serving. Here’s how I handle them for gatherings.
Serving Temperature: These are best at room temperature. If you’ve made them ahead, take them out of the fridge about 30 minutes before serving. The texture is softer and the spices are more pronounced when they’re not cold. For a warm treat, pop a loaf in the microwave for 10 to 15 seconds—just enough to take the chill off without melting the streusel.
Presentation Ideas: For a dinner party, arrange the mini loaves on a wooden board or cake stand. I like to dust them with a little powdered sugar right before serving—it makes them look extra special. You can also slice each mini loaf into 4 to 6 pieces and arrange them on a platter for easy grabbing. Add a small bowl of softened butter or honey butter on the side for spreading.
What to Serve Alongside: These loaves pair beautifully with a hot cup of coffee, chai tea, or apple cider. For a dessert spread, serve them alongside vanilla ice cream or a dollop of whipped cream. They also work well on a brunch table with eggs, bacon, and fresh fruit.
Storage Instructions: Store the cooled loaves in an airtight container at room temperature for up to 3 days. If you need to keep them longer, wrap each loaf individually in plastic wrap, then place them in a freezer-safe bag or container. They freeze beautifully for up to 3 months. To thaw, leave them on the counter for about 2 hours, or unwrap and microwave for 20 to 30 seconds.
How Flavors Develop: Honestly, these loaves taste even better the day after baking. The spices meld together, and the texture becomes even more moist and tender. If you’re making them for a gathering, bake them a day ahead and store them wrapped tightly at room temperature. Your future self will thank you.
One tip for hosts: if you’re serving these at a party, slice each mini loaf in half horizontally and toast the cut sides in a dry skillet for about 2 minutes. The streusel gets extra crunchy, and the interior stays soft. It’s a small step that makes a huge difference in texture.
Nutritional Information & Benefits
Here’s a rough estimate of the nutritional content per mini loaf (based on 6 servings per batch). Keep in mind that these are approximate values and can vary based on specific brands and ingredient substitutions.
| Nutrient | Amount per Mini Loaf |
|---|---|
| Calories | 320 |
| Total Fat | 16g |
| Saturated Fat | 4g |
| Cholesterol | 55mg |
| Sodium | 310mg |
| Total Carbohydrates | 42g |
| Dietary Fiber | 2g |
| Sugars | 24g |
| Protein | 4g |
| Vitamin A | 190% DV |
| Vitamin C | 4% DV |
| Calcium | 4% DV |
| Iron | 10% DV |
Health Benefits: Pumpkin is packed with vitamin A, which supports eye health and immune function. It’s also a good source of fiber, which helps with digestion and keeps you feeling full. The cinnamon in these loaves has anti-inflammatory properties and may help regulate blood sugar levels. While these mini loaves are certainly a treat, they do offer some nutritional perks compared to other desserts.
Dietary Considerations: This recipe is nut-free (as written) and can be made dairy-free with a simple swap. It contains gluten, eggs, and wheat, so it’s not suitable for those with celiac disease or wheat allergies without substitution. The sugar content is moderate, but you can reduce it by ¼ cup if you prefer a less sweet bread.
I personally appreciate that these loaves feel indulgent without being over-the-top. They’re satisfying enough to feel like a real dessert, but they’re not so heavy that you feel guilty about having a second slice. For me, that’s the sweet spot.
Conclusion
These mini pumpkin bread loaves with cinnamon streusel have become my fall baking staple, and I think they deserve a spot in your kitchen too. They’re simple enough for a weekday baking project but impressive enough to bring to a dinner party or holiday gathering. The texture is tender and moist, the streusel adds that perfect crunch, and the pumpkin flavor is warm and comforting without being overwhelming.
What I love most about this recipe is how forgiving it is. You can swap ingredients, adjust the spices, add mix-ins, and it still turns out beautifully. It’s the kind of recipe that makes you feel like a confident baker even if you’re just starting out. And honestly, watching your guests reach for a second mini loaf is one of the most satisfying feelings in the world.
I’d love to hear how these turn out for you. Leave a comment below and let me know if you tried any variations—I’m always looking for new ideas. And if you’re bringing these to a gathering, take a photo and tag me. There’s nothing better than seeing someone else fall in love with a recipe that started as a stubborn refusal to like pumpkin.
Happy baking, friends. You’ve got this.
Frequently Asked Questions
Can I use fresh pumpkin instead of canned?
Yes, you can. Roast a small sugar pumpkin until tender, scoop out the flesh, and puree it in a food processor. Just be aware that fresh pumpkin puree has a higher water content than canned, so you may need to drain it in a cheesecloth-lined sieve for about 30 minutes before using. The flavor will be slightly milder, but it works beautifully.
How do I know when the mini loaves are done baking?
Insert a toothpick into the center of one of the loaves. If it comes out clean or with just a few moist crumbs attached, they’re done. If the toothpick has wet batter on it, give them another 3 to 5 minutes. Also, the edges should be pulling away slightly from the sides of the pan, and the tops should be golden brown.
Can I make this recipe in a standard loaf pan instead of mini pans?
Absolutely. Grease a 9×5-inch loaf pan and pour all the batter into it. Spread the streusel evenly on top. Bake at 350°F for 50 to 60 minutes, or until a toothpick inserted in the center comes out clean. You may need to tent the loaf with foil after 30 minutes if the streusel is browning too quickly.
How do I prevent the streusel from sinking into the batter?
Make sure your batter is thick enough—it should be scoopable, not runny. Also, gently press the streusel into the top of the batter rather than dropping it on from a height. If your batter is too thin, the streusel will sink. Chilling the streusel before adding it also helps it stay on top during baking.
Can I freeze these mini loaves?
Yes, and they freeze beautifully. Let the loaves cool completely, then wrap each one individually in plastic wrap, followed by a layer of aluminum foil or a freezer-safe bag. They’ll keep for up to 3 months. To thaw, leave them on the counter for about 2 hours, or unwrap and microwave for 20 to 30 seconds. The streusel will soften slightly, but the flavor will still be fantastic.
Pin This Recipe!
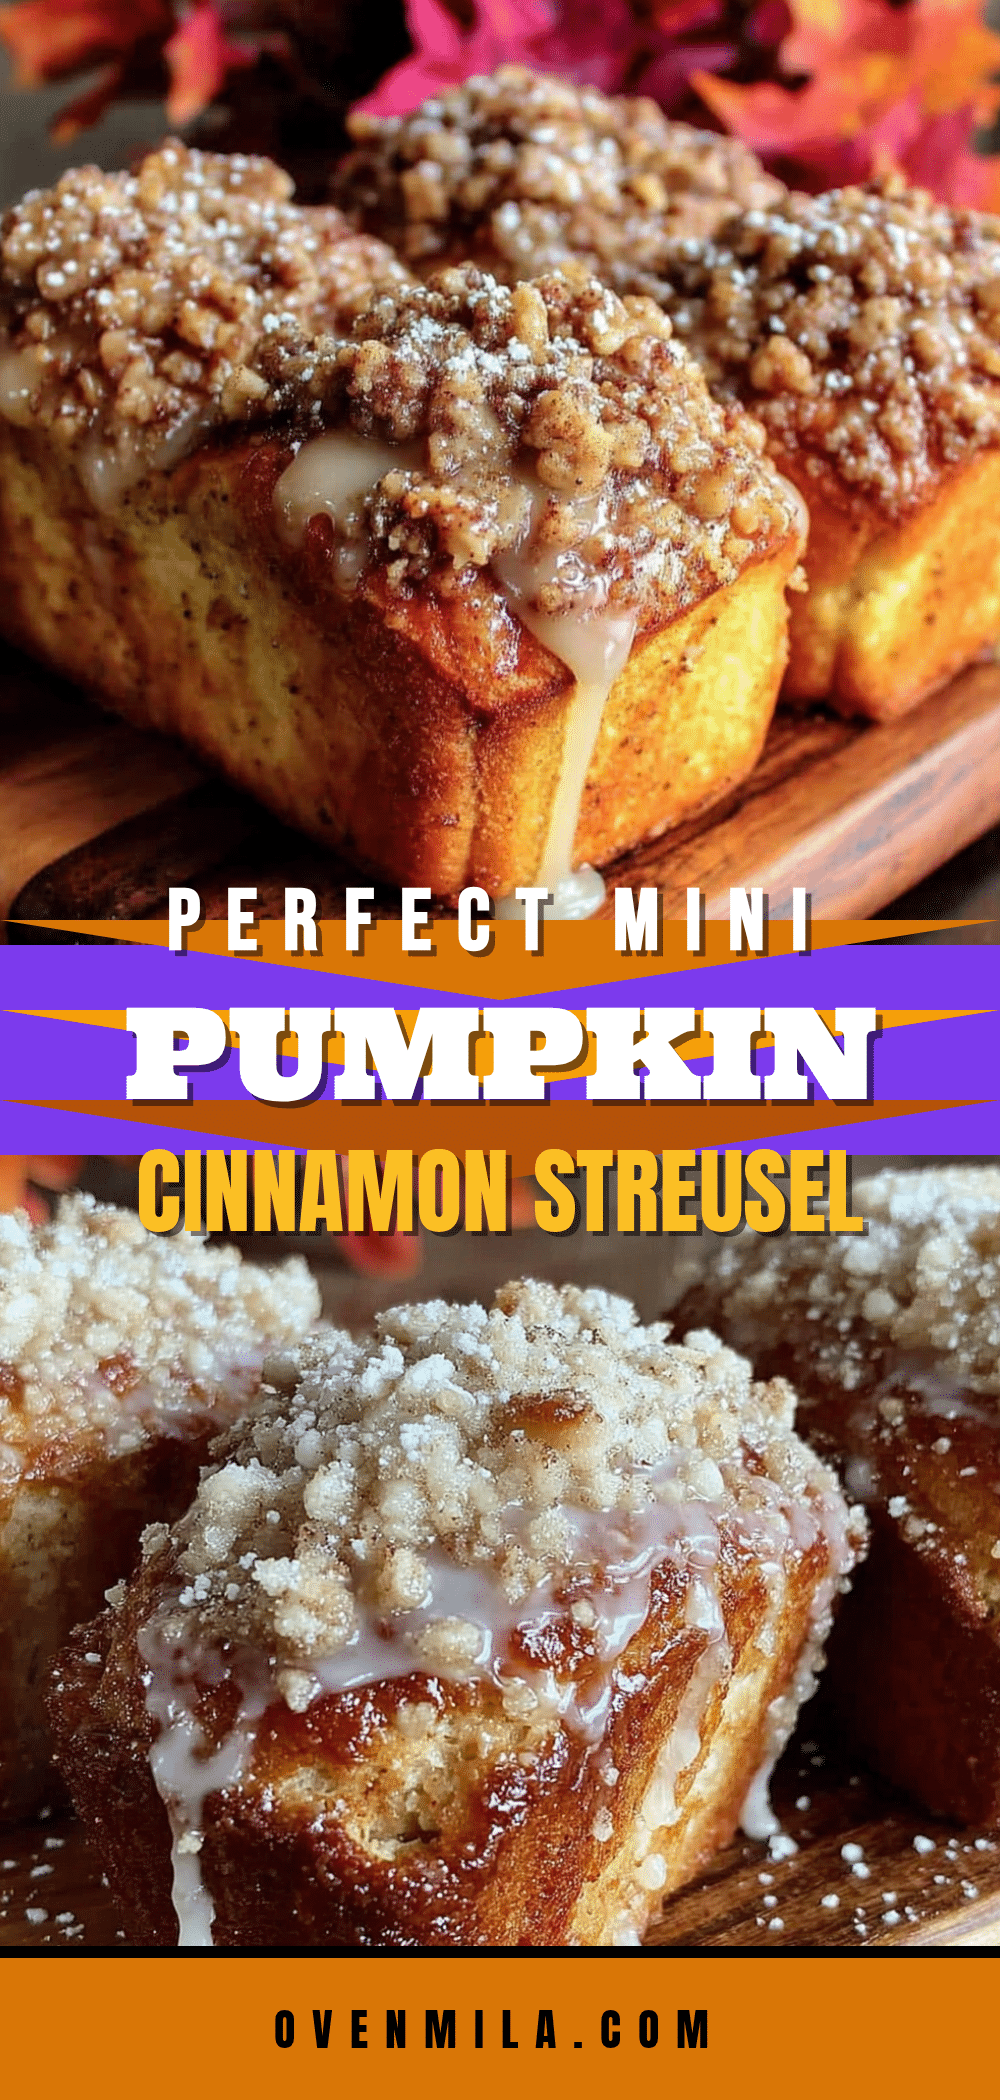
Perfect Mini Pumpkin Bread Loaves with Easy Cinnamon Streusel
These moist, tender mini pumpkin bread loaves are topped with a crunchy cinnamon streusel and are perfect for fall gatherings. They’re quick to make, use simple ingredients, and are a crowd-pleaser even for pumpkin skeptics.
- Prep Time: 15 minutes
- Cook Time: 25 minutes
- Total Time: 40 minutes
- Yield: 6 mini loaves 1x
- Category: Dessert
- Cuisine: American
Ingredients
- 1 ¾ cups (220g) all-purpose flour
- 1 teaspoon baking soda
- ½ teaspoon baking powder
- 1 teaspoon ground cinnamon
- ½ teaspoon ground nutmeg
- ½ teaspoon ground ginger
- ¼ teaspoon ground cloves
- ½ teaspoon salt
- 1 cup (200g) granulated sugar
- ½ cup (120ml) vegetable oil
- 2 large eggs, room temperature
- 1 cup (245g) canned pumpkin puree
- 1 teaspoon vanilla extract
- ½ cup (65g) all-purpose flour (for streusel)
- ½ cup (100g) packed light brown sugar (for streusel)
- 1 teaspoon ground cinnamon (for streusel)
- ¼ teaspoon salt (for streusel)
- ¼ cup (55g) unsalted butter, cold and cut into small cubes (for streusel)
Instructions
- Preheat your oven to 350°F (175°C). Spray a 6-cavity mini loaf pan with non-stick spray or line each cavity with parchment paper strips.
- Make the streusel: In a small bowl, whisk together ½ cup flour, ½ cup packed brown sugar, 1 teaspoon cinnamon, and ¼ teaspoon salt. Add cold butter cubes and use a pastry blender or fingertips to work the butter into the dry ingredients until the mixture looks like coarse sand with some pea-sized clumps. Refrigerate while making the batter.
- Whisk dry ingredients: In a large bowl, whisk together 1¾ cups flour, 1 teaspoon baking soda, ½ teaspoon baking powder, 1 teaspoon cinnamon, ½ teaspoon nutmeg, ½ teaspoon ginger, ¼ teaspoon cloves, and ½ teaspoon salt.
- Mix wet ingredients: In a separate medium bowl, whisk together 1 cup sugar, ½ cup vegetable oil, 2 eggs, 1 cup pumpkin puree, and 1 teaspoon vanilla extract until smooth.
- Combine wet and dry: Pour the wet ingredients into the dry ingredients. Fold gently with a rubber spatula until just combined (about 15-20 strokes). Do not overmix.
- Fill the loaf cavities: Divide the batter evenly among the 6 mini loaf cavities, filling each about ¾ full.
- Add streusel: Remove streusel from the refrigerator. Sprinkle generously over each loaf, pressing gently into the batter.
- Bake for 22 to 28 minutes, until a toothpick inserted into the center comes out clean or with a few moist crumbs.
- Cool in the pan for 10 minutes, then use parchment strips to lift loaves out and transfer to a cooling rack to cool completely.
- Serve at room temperature or warm slightly before serving.
Notes
For best results, use cold butter for the streusel and refrigerate it before adding to the batter. Rotate the pan halfway through baking for even browning. Cool completely before wrapping to keep streusel crunchy. These loaves taste even better the next day.
Nutrition
- Serving Size: 1 mini loaf
- Calories: 320
- Sugar: 24
- Sodium: 310
- Fat: 16
- Saturated Fat: 4
- Carbohydrates: 42
- Fiber: 2
- Protein: 4
Keywords: mini pumpkin bread, pumpkin loaf, cinnamon streusel, fall baking, pumpkin dessert, easy pumpkin bread


