My neighbor, an older woman named Rose, watched me wrestling with a towering stack of holiday baking magazines at the library last November. I was determined to find a dessert that was impressive but wouldn’t require me to camp out in the kitchen for two days. She didn’t say anything at first. Then, she just slid a worn, grease-stained index card across the table. “Peppermint mocha cheesecake bars,” she said with a wink. “No oven required. You can thank me later.” I honestly thought she was joking. No-bake cheesecake bars that taste like a fancy coffee shop drink? It sounded too good to be true. But I was desperate, and the promise of a stress-free holiday dessert was too tempting to ignore. So, I took the card home, and let me tell you—it was love at first bite. That first creamy, minty, chocolatey forkful was a total game-changer. I’ve made a few tweaks over the years, like swapping in a darker cocoa powder and adding a splash of real peppermint extract, but the heart of Rose’s recipe is still there. It’s the dessert I bring to every holiday party now, and it never fails to disappear. Maybe you’ve been there—staring down a holiday to-do list, wondering how you’ll find time to bake. This recipe is the answer. It’s the kind of thing you can whip up while the kids are watching a movie, and it looks like you spent all day on it. Honestly, that’s the best kind of holiday magic, isn’t it?
Why You’ll Love This Recipe
I’ve tested this recipe more times than I can count, and it’s become my absolute go-to for the holidays. It’s not just another dessert; it’s a showstopper that saves you from the kitchen chaos. Here’s why this one’s a keeper:
- Quick & Easy: It comes together in under 30 minutes of active prep time. The hardest part is waiting for it to chill in the fridge!
- Simple Ingredients: You don’t need any fancy or hard-to-find items. Most of these are probably already in your pantry.
- Perfect for Holiday Gatherings: Whether it’s for Christmas Eve, a cookie swap, or a cozy New Year’s Eve party, these bars fit right in.
- Crowd-Pleaser: I’ve served these to kids, adults, and even picky in-laws. Every single person asks for the recipe.
- Unbelievably Delicious: The combination of a crunchy Oreo crust, a velvety mocha cheesecake filling, and a cool peppermint layer is pure bliss. It’s like drinking a peppermint mocha, but better—because it’s dessert.
What makes this recipe different from the rest is the technique. Instead of a complicated stovetop custard, we use a simple cream cheese base that sets perfectly in the fridge. The secret is blending the cream cheese until it’s *ultra* smooth—no lumps allowed. And the peppermint layer? It’s not just a drizzle; it’s a whole separate, creamy layer that adds a refreshing pop of flavor. This isn’t just another version of a cheesecake bar; it’s my best version, perfected after a few happy accidents. I once forgot to add the sugar to the mocha layer and had to start over—lesson learned! But that slip-up taught me to taste as I go, which is a tip I’ll share later. This recipe is the kind that makes you close your eyes after the first bite. It’s comfort food reimagined—faster, easier, but with the same soul-soothing satisfaction. Perfect for impressing guests without stress, or turning a simple holiday meal into something truly memorable.
What Ingredients You Will Need
This recipe uses simple, wholesome ingredients to deliver bold flavor and satisfying texture without the fuss. Most are pantry staples, but a few are seasonal stars that make these bars so special.
- For the Crust:
- 24 chocolate sandwich cookies (like Oreos) – You can use regular or double-stuff. The filling helps bind the crust.
- 5 tablespoons unsalted butter, melted – (adds richness and helps the crust hold together)
- 1/4 teaspoon peppermint extract – (optional, but gives the crust a subtle minty hint)
- For the Mocha Cheesecake Layer:
- 16 ounces cream cheese, softened to room temperature – (I recommend full-fat for the creamiest texture. Philadelphia is my go-to brand.)
- 1/2 cup granulated sugar
- 1/4 cup unsweetened cocoa powder – (Use a high-quality brand like Ghirardelli for a richer chocolate flavor.)
- 2 tablespoons instant espresso powder – (This intensifies the coffee flavor without making it watery. Decaf works too!)
- 1 teaspoon vanilla extract
- 1 cup heavy whipping cream, cold – (You’ll whip this into soft peaks for a light, airy filling.)
- For the Peppermint Layer:
- 2 cups powdered sugar, sifted
- 4 tablespoons unsalted butter, softened
- 2 tablespoons milk (or heavy cream for extra richness)
- 1 teaspoon peppermint extract – (Look for pure peppermint extract, not mint, for a cleaner taste.)
- 1-2 drops red food coloring (optional, for a festive pink hue)
- For the Topping:
- 1 cup semi-sweet chocolate chips – (I prefer Ghirardelli for a smooth melt.)
- 1/2 cup heavy whipping cream
- 1/2 cup crushed candy canes or peppermint candies – (For that satisfying crunch and festive look.)
Substitution Tips: For a gluten-free option, use gluten-free chocolate sandwich cookies. If you don’t have espresso powder, you can substitute 1/4 cup of strong brewed coffee, but reduce the heavy cream by 2 tablespoons to keep the texture right. For a dairy-free version, use vegan cream cheese, butter, and coconut cream instead of heavy cream—though the texture will be slightly less firm.
Equipment Needed
You don’t need a fancy bakery setup for these bars. Here’s what you’ll need:
- 9×9-inch baking pan – An 8×8 works too, but the bars will be slightly thicker.
- Parchment paper – For easy lifting and clean removal.
- Food processor or zip-top bag – For crushing the cookies. A rolling pin works in a pinch!
- Electric hand mixer or stand mixer – Essential for getting that cream cheese super smooth.
- Medium mixing bowls – At least three for the different layers.
- Rubber spatula – For scraping every last bit of filling.
- Measuring cups and spoons – Precision matters in no-bake recipes.
Personal Tip: I’ve tried making the crust with just my hands, and it’s a sticky mess. A food processor is your best friend here. If you don’t have one, put the cookies in a zip-top bag and crush them with a rolling pin—it’s a great stress reliever!
Preparation Method
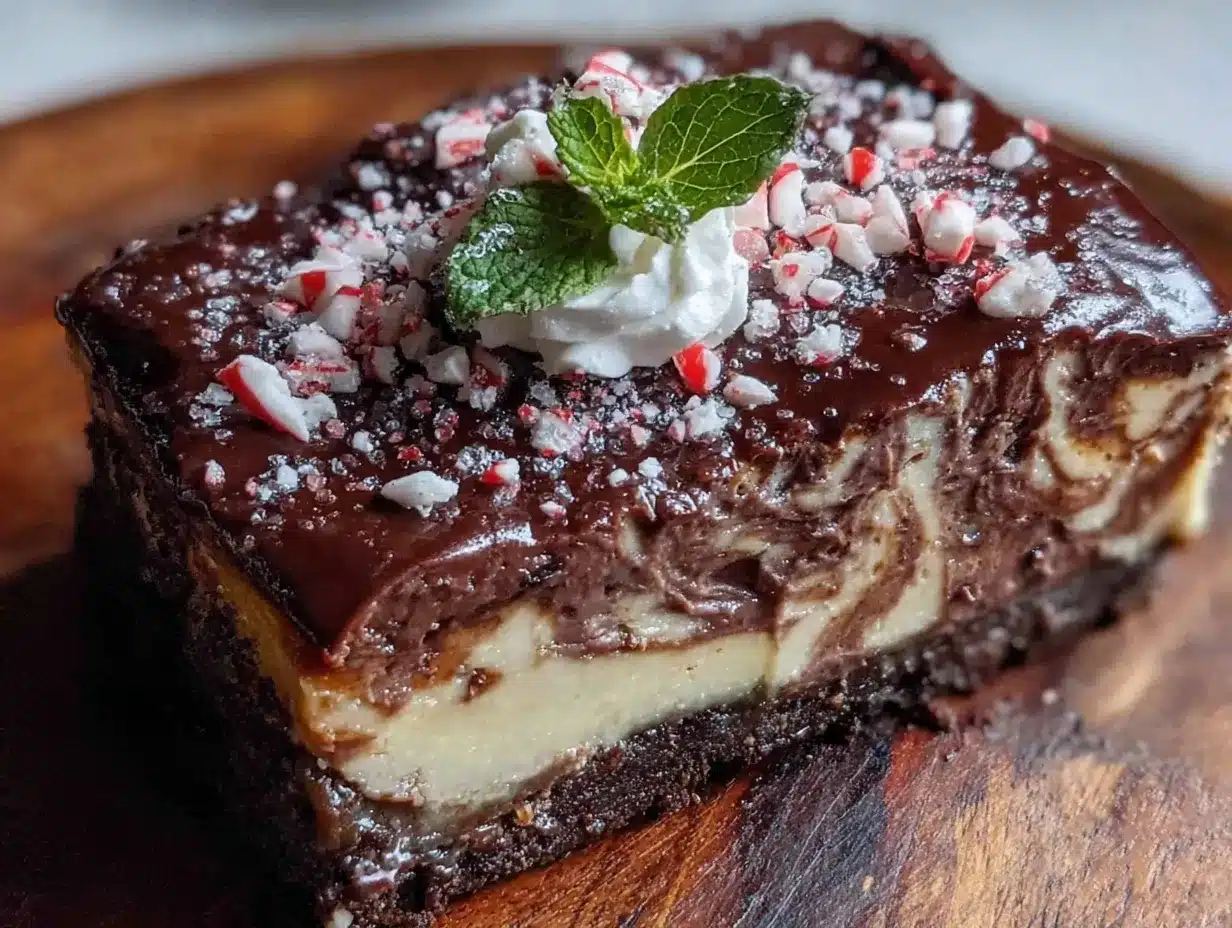
- Prepare the Pan: Line your 9×9-inch baking pan with parchment paper, leaving an overhang on two sides. This will be your “handle” to lift the bars out later. Set aside.
- Make the Crust: In a food processor, pulse the 24 chocolate sandwich cookies until they turn into fine crumbs. You should have about 2 cups of crumbs. Drizzle in the 5 tablespoons of melted butter and 1/4 teaspoon of peppermint extract (if using). Pulse again until the mixture looks like wet sand and holds together when pinched. Press this mixture firmly into the bottom of the prepared pan. Use the bottom of a measuring cup to pack it down evenly. Pop it in the fridge to set while you make the filling.
- Whip the Cream: In a large mixing bowl, pour in 1 cup of cold heavy whipping cream. Using an electric hand mixer, beat on medium-high speed until soft peaks form. This takes about 2-3 minutes. Be careful not to over-whip—you don’t want butter! Set the whipped cream aside in the fridge for now.
- Make the Mocha Filling: In another large bowl, beat the 16 ounces of softened cream cheese with an electric mixer until it’s completely smooth and fluffy—about 2 minutes. Scrape down the sides of the bowl with a rubber spatula. Add 1/2 cup of granulated sugar, 1/4 cup of unsweetened cocoa powder, 2 tablespoons of instant espresso powder, and 1 teaspoon of vanilla extract. Beat on medium speed until everything is well combined and smooth. The mixture will be thick and glossy.
- Fold in the Whipped Cream: Take the whipped cream out of the fridge. Gently fold it into the mocha cream cheese mixture using a rubber spatula. Do this in two additions, folding just until no white streaks remain. Be gentle—you want to keep the filling light and airy. Spread this filling evenly over the chilled crust. Smooth the top with the spatula. Return to the fridge while you make the peppermint layer.
- Make the Peppermint Layer: In a medium bowl, beat 4 tablespoons of softened unsalted butter until creamy. Gradually add 2 cups of sifted powdered sugar, beating on low speed to start. Add 2 tablespoons of milk (or heavy cream) and 1 teaspoon of peppermint extract. Beat on medium-high until the mixture is smooth and fluffy. If you want a pink color, add 1-2 drops of red food coloring and beat until evenly distributed. Spread this peppermint layer over the mocha cheesecake layer. Use an offset spatula for a smooth, even finish. Place the pan back in the fridge.
- Make the Ganache Topping: In a small microwave-safe bowl, combine 1 cup of semi-sweet chocolate chips and 1/2 cup of heavy whipping cream. Microwave in 30-second intervals, stirring after each, until the chocolate is completely melted and the mixture is smooth. Let it cool for 5 minutes. Pour the ganache over the peppermint layer, spreading it gently to the edges. Sprinkle the top with 1/2 cup of crushed candy canes. Refrigerate for at least 4 hours, or overnight for the best results.
- Slice and Serve: Once fully set, use the parchment paper overhang to lift the entire block out of the pan. Place it on a cutting board. Use a sharp knife to slice into 16 bars. For clean cuts, wipe the knife clean between slices.
Cooking Tips & Techniques
Here are a few things I’ve learned the hard way so you don’t have to:
- Room Temperature Cream Cheese is Crucial: I once tried to rush this and used cold cream cheese. It was a lumpy disaster. Let it sit on the counter for at least 30 minutes before you start. It blends so much smoother.
- Don’t Over-Whip the Cream: Soft peaks are your goal. If you whip it too much, it will turn into butter and your filling will be grainy. Stop when the cream holds a soft, droopy peak when you lift the beaters.
- Patience with the Chill Time: I know it’s tempting to cut into them after an hour, but trust me—wait the full 4 hours. Overnight is even better. The layers need time to set properly, or your bars will be a gooey mess.
- Crush Candy Canes Strategically: Put the candy canes in a zip-top bag and crush them with a rolling pin. Don’t pulverize them into dust—you want some small chunks for texture. And do this right before you sprinkle them on top, or they’ll get sticky.
- Use a Sharp Knife for Slicing: A dull knife will drag through the layers and ruin the pretty stripes. Run the knife under hot water, wipe it dry, then slice. Clean the blade between each cut.
My Biggest Failure: I once forgot to add the sugar to the mocha layer. The result? A bitter, sad cheesecake that no one would eat. Now, I always taste the filling before folding in the whipped cream. It’s a simple step that saves you from a total do-over.
Variations & Adaptations
This recipe is a great base for experimentation. Here are a few ways I’ve played with it:
- Gluten-Free Version: Swap the Oreos for gluten-free chocolate sandwich cookies. The rest of the recipe is naturally gluten-free, so you’re good to go!
- Vegan Adaptation: Use vegan cream cheese, butter, and coconut cream (the thick part from a can of full-fat coconut milk) instead of heavy cream. The texture will be a bit softer, but the flavor is still amazing. I’ve made this for my vegan cousin, and she loved it.
- Extra Chocolatey: Add a layer of melted dark chocolate between the peppermint and ganache layers. Just spread a thin layer of melted chocolate and let it set in the fridge before adding the ganache. It’s over-the-top in the best way.
- Mint Chocolate Chip Twist: Fold 1/2 cup of mini chocolate chips into the peppermint layer before spreading it. It adds a lovely crunch and extra chocolate in every bite.
- Peppermint White Chocolate: Swap the semi-sweet chocolate chips in the ganache for white chocolate chips. The white chocolate pairs beautifully with the peppermint and gives the bars a festive, snowy look.
Serving & Storage Suggestions
These bars are best served cold, straight from the fridge. The layers are firm but creamy, and the peppermint layer has a cool, refreshing finish. For a pretty presentation, I like to dust the top with a little extra cocoa powder or crushed candy canes right before serving. They pair wonderfully with a hot cup of coffee, a glass of cold milk, or even a scoop of vanilla ice cream for a truly indulgent treat.
Storage: Store any leftover bars in an airtight container in the refrigerator. They will keep well for up to 5 days. The flavors actually meld together over time, so they might taste even better on day two!
Freezing: These bars freeze beautifully. Place the sliced bars on a baking sheet and freeze until solid (about 2 hours). Then, transfer them to a freezer-safe container or zip-top bag, separating layers with parchment paper. They will keep for up to 3 months. To thaw, simply place a bar in the fridge overnight. The texture remains perfect—no sogginess here.
Reheating: You don’t need to reheat these bars. If you prefer a slightly softer texture, let them sit at room temperature for 10 minutes before serving. For a warm ganache topping, you can microwave a single bar for 10-15 seconds.
Nutritional Information & Benefits
Let’s be real—this is a decadent holiday dessert, not a health food. But knowing what’s in it can help you enjoy it mindfully. Per bar (based on 16 servings), here are the estimated values:
| Nutrient | Amount |
|---|---|
| Calories | 380 |
| Fat | 24g |
| Carbohydrates | 38g |
| Protein | 5g |
| Sugar | 28g |
Health Highlights: The cocoa powder is rich in antioxidants, and the peppermint can aid digestion. The cream cheese provides a small amount of calcium. For a lighter version, you can use reduced-fat cream cheese and skip the ganache topping—but honestly, the full-fat version is worth the splurge for a special occasion. This recipe is not gluten-free or vegan as written, but the substitutions above work well. It contains dairy and gluten (from the cookies).
Conclusion
These Holiday Peppermint Mocha Cheesecake Bars are everything I want in a dessert: impressive, delicious, and surprisingly easy. They’ve become a staple in my holiday baking rotation, and I hope they become one in yours too. The best part is that you can customize them to your heart’s content—add more peppermint, swap the chocolate, or even make them vegan. The recipe is just a starting point. I’d love to hear how yours turn out! Drop a comment below and tell me about your favorite holiday dessert memory. Or, if you make a fun variation, share it with the community. Don’t forget to pin this recipe for later and share it with a friend who needs a stress-free holiday win. Happy baking—and happy holidays!
Frequently Asked Questions
Can I use a different type of cookie for the crust?
Absolutely! Graham crackers, shortbread cookies, or even gluten-free vanilla wafers work well. Just adjust the butter amount slightly—you want the mixture to feel like wet sand. For a peppermint twist, try using chocolate mint cookies.
How long do these bars need to chill?
At least 4 hours is non-negotiable for clean slices. Overnight is ideal. If you’re in a rush, you can speed things up by placing the pan in the freezer for 2 hours, but the texture won’t be as creamy. Patience is key here!
Can I make these bars ahead of time?
Yes, and I actually recommend it! They taste even better after a day or two in the fridge. You can make them up to 3 days in advance. Just keep them covered in the fridge and add the crushed candy canes right before serving to keep them crunchy.
Why did my peppermint layer turn out too soft?
This usually happens if the butter was too soft or if you added too much milk. The peppermint layer should be firm but spreadable. If it’s too runny, pop it in the fridge for 15 minutes to firm up before spreading. Next time, start with less milk and add more if needed.
Can I skip the espresso powder?
Yes, but you’ll lose that rich coffee flavor that makes it a “mocha.” If you don’t have espresso powder, you can use 1/4 cup of strong brewed coffee instead, but reduce the heavy cream by 2 tablespoons to keep the filling from becoming too thin. Or, just leave it out for a plain chocolate cheesecake bar—it will still be delicious!
Pin This Recipe!
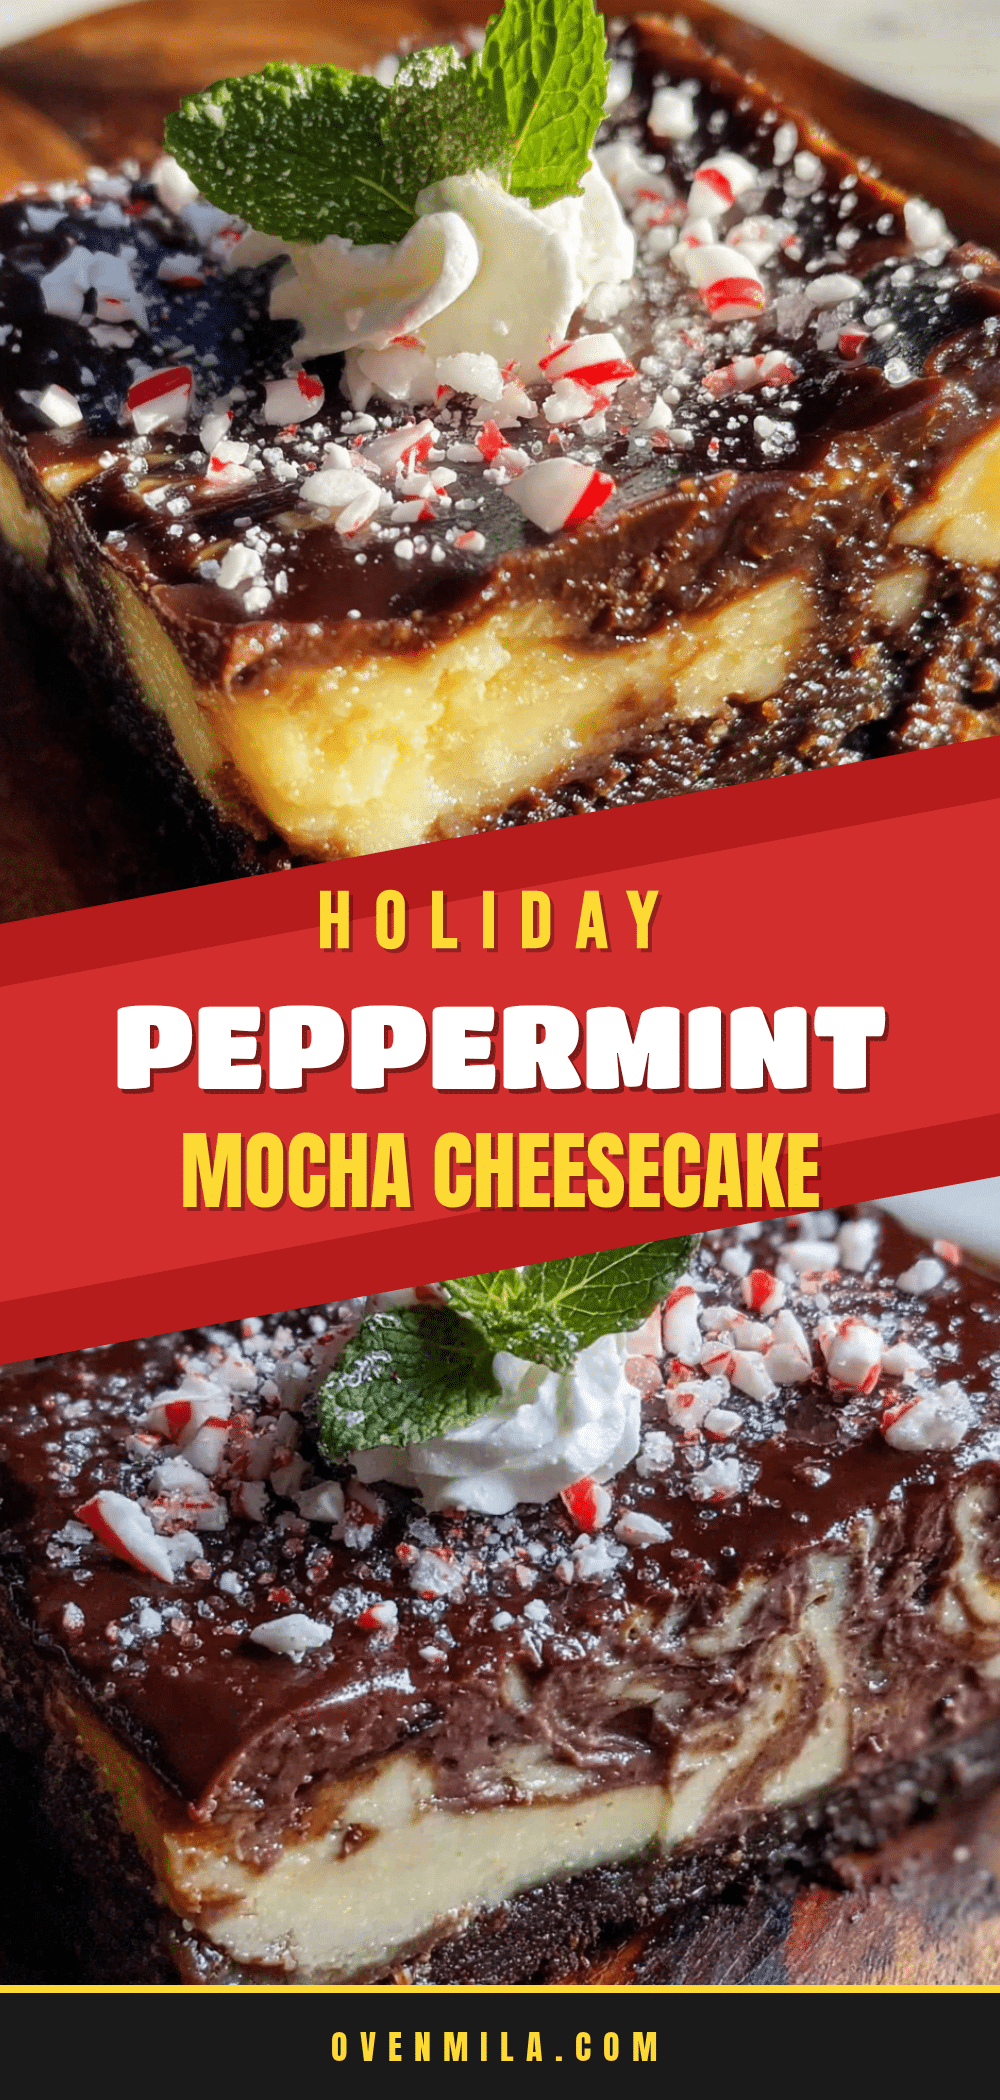
Holiday Peppermint Mocha Cheesecake Bars: Easy No-Bake Recipe
These no-bake peppermint mocha cheesecake bars feature a crunchy Oreo crust, a velvety mocha cheesecake filling, a cool peppermint layer, and a rich chocolate ganache topping. They are quick to prepare and perfect for holiday gatherings.
- Prep Time: 30 minutes
- Cook Time: 0 minutes
- Total Time: 4 hours 30 minutes (includes chilling)
- Yield: 16 servings 1x
- Category: Dessert
- Cuisine: American
Ingredients
- 24 chocolate sandwich cookies (like Oreos)
- 5 tablespoons unsalted butter, melted
- 1/4 teaspoon peppermint extract (optional)
- 16 ounces cream cheese, softened to room temperature
- 1/2 cup granulated sugar
- 1/4 cup unsweetened cocoa powder
- 2 tablespoons instant espresso powder
- 1 teaspoon vanilla extract
- 1 cup heavy whipping cream, cold
- 2 cups powdered sugar, sifted
- 4 tablespoons unsalted butter, softened
- 2 tablespoons milk (or heavy cream)
- 1 teaspoon peppermint extract
- 1–2 drops red food coloring (optional)
- 1 cup semi-sweet chocolate chips
- 1/2 cup heavy whipping cream
- 1/2 cup crushed candy canes or peppermint candies
Instructions
- Line a 9×9-inch baking pan with parchment paper, leaving an overhang on two sides.
- In a food processor, pulse the 24 chocolate sandwich cookies into fine crumbs. Drizzle in the 5 tablespoons melted butter and 1/4 teaspoon peppermint extract (if using). Pulse until the mixture looks like wet sand. Press firmly into the bottom of the prepared pan. Refrigerate while making the filling.
- In a large bowl, beat 1 cup cold heavy whipping cream with an electric mixer on medium-high speed until soft peaks form, about 2-3 minutes. Set aside in the fridge.
- In another large bowl, beat 16 ounces softened cream cheese until smooth and fluffy, about 2 minutes. Add 1/2 cup granulated sugar, 1/4 cup unsweetened cocoa powder, 2 tablespoons instant espresso powder, and 1 teaspoon vanilla extract. Beat until well combined and smooth.
- Gently fold the whipped cream into the mocha cream cheese mixture in two additions, until no white streaks remain. Spread evenly over the chilled crust. Return to the fridge.
- In a medium bowl, beat 4 tablespoons softened unsalted butter until creamy. Gradually add 2 cups sifted powdered sugar, then 2 tablespoons milk and 1 teaspoon peppermint extract. Beat until smooth and fluffy. Add 1-2 drops red food coloring if desired. Spread over the mocha layer. Return to the fridge.
- In a small microwave-safe bowl, combine 1 cup semi-sweet chocolate chips and 1/2 cup heavy whipping cream. Microwave in 30-second intervals, stirring after each, until smooth. Let cool for 5 minutes. Pour over the peppermint layer and spread gently. Sprinkle with 1/2 cup crushed candy canes. Refrigerate for at least 4 hours or overnight.
- Use the parchment overhang to lift the bars out of the pan. Slice into 16 bars with a sharp knife, wiping the blade clean between cuts.
Notes
Room temperature cream cheese is crucial for a smooth filling. Do not over-whip the cream; stop at soft peaks. Chill for at least 4 hours, preferably overnight, for clean slices. Crush candy canes just before using to prevent stickiness. Use a sharp knife for slicing, wiping clean between cuts.
Nutrition
- Serving Size: 1 bar
- Calories: 380
- Sugar: 28
- Fat: 24
- Carbohydrates: 38
- Protein: 5
Keywords: peppermint mocha, cheesecake bars, no-bake, holiday dessert, Christmas dessert, easy dessert


