This was supposed to be a simple tray of fudgy brownies for a cookie swap. I had my recipe memorized, my butter softening on the counter, and a brand new bag of dark chocolate chips ready to go. But somewhere between answering the door for a delivery and trying to untangle my fairy lights, I grabbed the wrong bottle from the spice rack. Instead of vanilla extract, I poured in a generous glug of peppermint extract. I realized my mistake the second the minty smell hit my nose—sharp, cool, and completely wrong for a classic brownie. My heart sank. I was already running late, the kitchen was a mess, and I had no backup plan. Honestly, I almost just dumped the whole bowl in the trash and started over.
But here’s the thing about baking when you’re stressed—you get stubborn. I figured, what’s the worst that could happen? I’d end up with weird minty brownies that nobody would touch. So I stirred in the peppermint, added a handful of crushed candy canes I found in the back of my pantry from last Christmas, and poured the batter into the pan. The whole time, I was muttering to myself about how this was going to be a disaster. Maybe you’ve been there—that moment when you’re convinced you’ve ruined something and you’re already planning your apology speech for your guests.
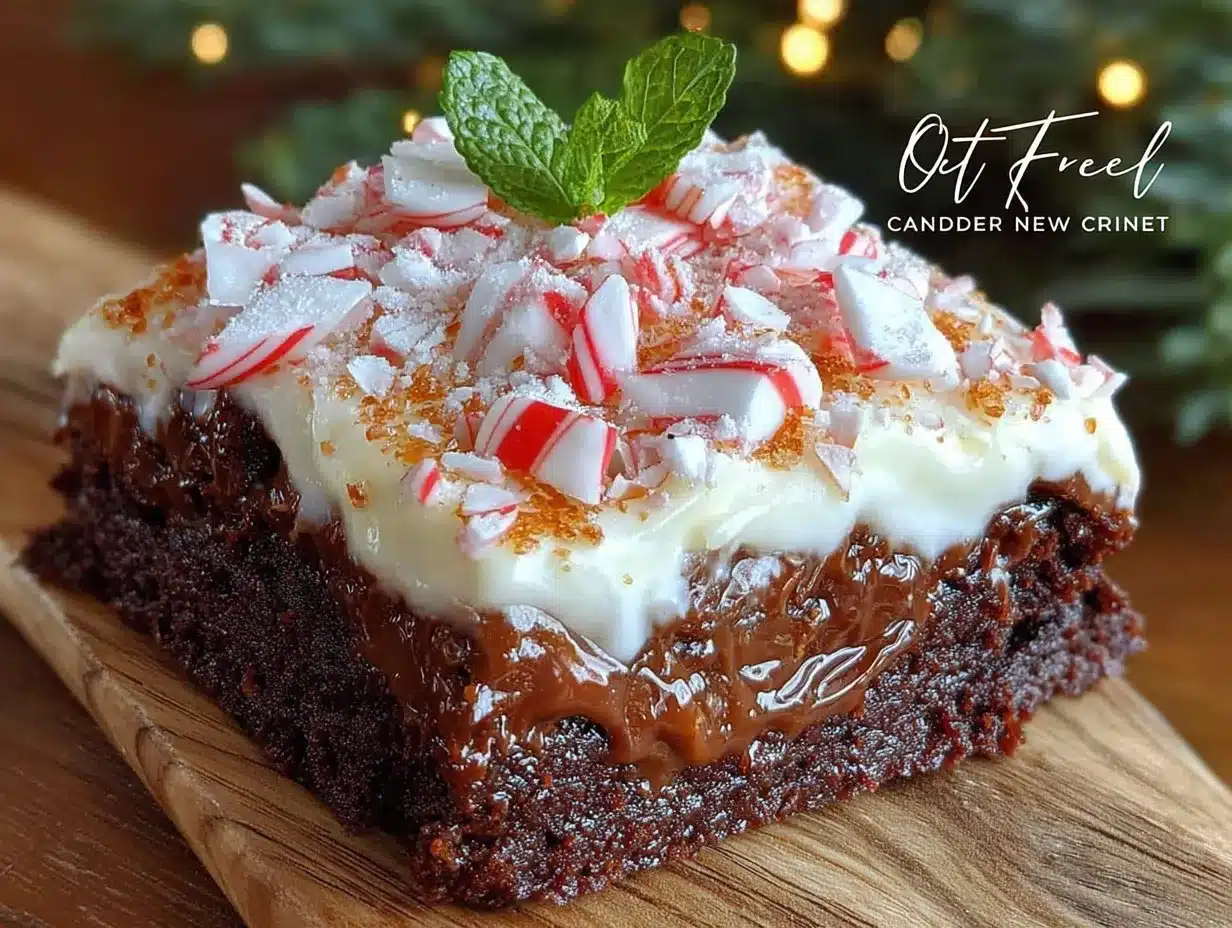
I pulled those brownies out of the oven, and they looked… fine. Normal, even. But when I cut into them the next morning, the smell was incredible—rich chocolate with this cool, festive peppermint kick. I brought them to the swap, expecting polite smiles and maybe one or two bites before they got abandoned. Instead, people went quiet after the first bite. Then came the questions: “What’s in these?” “Can I get the recipe?” “Did you use a special kind of chocolate?” By the end of the night, the tray was empty, and three people had asked me to make them for their Christmas parties. That happy accident taught me something I’ve never forgotten: sometimes the best recipes come from the moments you think you’ve failed. And that’s exactly how these Perfect Christmas Peppermint Brownies became the guest-favorite dessert I make every single year.
Why You’ll Love This Recipe
These aren’t just brownies. They’re the kind of dessert that makes people close their eyes after the first bite. And when you’re hosting a holiday gathering, that’s exactly the reaction you want from your guests. Here’s why this recipe works so well for entertaining:
- Foolproof for Hosting: This recipe comes together in under 45 minutes, with only 10 minutes of active prep. You can make them a day ahead—they actually taste better the next day as the flavors meld together.
- Simple Ingredients: No trips to a specialty baking store. You likely have most of these in your pantry right now. The peppermint extract and candy canes are the only “special” additions, and they’re easy to find at any grocery store during the holidays.
- Perfect for Christmas Gatherings: Whether it’s a cookie swap, a family dinner, or a casual potluck, these brownies fit right in. They’re festive without being fussy, and they travel well if you’re bringing them somewhere.
- Crowd-Pleaser: I’ve served these to kids, grandparents, and everyone in between. The combination of rich chocolate and cool peppermint is universally loved. Plus, the crushed candy cane topping adds a satisfying crunch that people can’t resist.
- Unbelievably Delicious: The texture is everything—fudgy, dense, and slightly gooey in the center, with a crackly top and a peppermint finish that lingers just long enough. It’s next-level comfort food with a holiday twist.
What makes this recipe different from every other brownie recipe out there? It’s the balance. Most peppermint brownies either taste like toothpaste or have barely any mint flavor at all. I spent a whole winter testing ratios—too much extract and you ruin the chocolate, too little and what’s the point? This version hits that sweet spot where the peppermint enhances the cocoa without overpowering it. And the crushed candy canes on top aren’t just for decoration—they add texture and a slow-release mint flavor that keeps people coming back for “just one more bite.”
This is the recipe that makes you look like a hero at any holiday gathering. It’s impressive enough to serve at a dinner party but simple enough to whip up on a Tuesday night when you’re craving something festive. Trust me—after you make these once, they’ll become your go-to Christmas dessert too.
What Ingredients You Will Need
This recipe uses simple, pantry-friendly ingredients to deliver that perfect balance of rich chocolate and refreshing peppermint. Each component plays a specific role in creating the texture and flavor that makes these brownies so special.
For the Brownie Base
- 1 cup (226g) unsalted butter – Use good quality butter here since it’s the foundation of the flavor. I prefer Kerrygold for its richness, but any unsalted butter works. Make sure it’s softened to room temperature for easier mixing.
- 2 cups (400g) granulated sugar – White sugar gives these brownies their crackly top. Don’t substitute with brown sugar here—it changes the texture too much.
- 4 large eggs – Room temperature eggs incorporate more air into the batter, giving you that perfect fudgy-but-not-dense texture. Take them out of the fridge 30 minutes before baking.
- 1 cup (120g) all-purpose flour – Spoon and level your flour for accuracy. Scooping directly from the bag packs in too much flour and makes dry brownies.
- ¾ cup (65g) unsweetened cocoa powder – I use Dutch-process cocoa for a deeper, more mellow chocolate flavor. Natural cocoa works too but gives a slightly sharper taste.
- ½ teaspoon salt – Don’t skip this. Salt enhances the chocolate and balances the sweetness.
- 1 teaspoon baking powder – Just enough to give these brownies a slight lift without making them cakey.
For the Peppermint Layer
- 1½ teaspoons peppermint extract – This is where quality matters. I use Nielsen-Massey peppermint extract because it’s pure and potent. Avoid imitation peppermint flavoring—it tastes artificial and medicinal.
- ½ cup (85g) white chocolate chips (optional) – These add little pockets of sweetness that complement the peppermint beautifully. You can leave them out, but I think they make the brownies extra special.
For the Topping
- ½ cup (60g) crushed candy canes – About 4-5 regular-sized candy canes. Crush them in a sealed ziplock bag with a rolling pin. Don’t pulverize them into powder—you want some small chunks for texture.
- Flaky sea salt (optional) – A small sprinkle right before serving takes these over the top. The salt cuts through the sweetness and makes the chocolate pop.
Ingredient Selection Tips: When buying candy canes for crushing, avoid the mini ones—they’re harder to crush evenly. Full-sized candy canes give you better control over the texture. And if you’re making these for a party where kids might be around, look for candy canes that are certified gluten-free if that’s a concern for your guests.
Substitution Guidance: Need a gluten-free version? Swap the all-purpose flour with a 1:1 gluten-free baking flour blend. I’ve tested this with Bob’s Red Mill and it works perfectly. For a dairy-free option, use vegan butter sticks (not the spreadable kind) and dairy-free white chocolate chips. The texture stays remarkably similar.
Equipment Needed
You don’t need a professional bakery setup to make these brownies. Most of these tools are standard kitchen staples:
- 9×13-inch baking pan – This is the ideal size for getting thick, fudgy brownies. A metal pan works best for even heat distribution. Glass pans tend to overbake the edges before the center is done.
- Parchment paper – Line your pan with parchment, leaving overhang on two sides. This creates “handles” that let you lift the entire block of brownies out cleanly for cutting.
- Large mixing bowl – You need enough room to whisk everything without splashing. I use a stainless steel bowl because it doesn’t retain heat from my hands.
- Whisk and rubber spatula – A whisk for incorporating eggs and sugar, and a spatula for folding in the flour and chocolate chips without overmixing.
- Rolling pin and ziplock bag – For crushing candy canes. A meat mallet works too if you have one. Just be careful not to puncture the bag.
- Cooling rack – Letting brownies cool completely in the pan on a rack prevents the bottoms from getting soggy from trapped steam.
Budget-Friendly Alternatives: Don’t have a 9×13 pan? Use two 8×8 square pans and reduce the baking time by about 5 minutes. No parchment paper? Grease the pan thoroughly with butter and dust with cocoa powder instead of flour to avoid white residue on your brownies.
Preparation Method
Let me walk you through this step by step. I’ve made these brownies more times than I can count, and these are the exact techniques that give you perfect results every time.
Step 1: Preheat and Prep (5 minutes)
Preheat your oven to 350°F (175°C). Line your 9×13-inch baking pan with parchment paper, leaving about 2 inches of overhang on the long sides. This little trick makes lifting the brownies out so much easier—no more struggling to get that first piece out cleanly.
Step 2: Melt the Butter (3 minutes)
In a large microwave-safe bowl, melt the butter in 30-second intervals, stirring between each, until just melted. Don’t let it boil or get too hot—you want it melted, not sizzling. If you prefer the stovetop, use a small saucepan over low heat. Let the melted butter cool for 2-3 minutes while you measure your other ingredients.
Step 3: Mix Sugar and Eggs (5 minutes)
Add the granulated sugar to the warm melted butter and whisk until combined. The mixture will look grainy—that’s normal. Now add the eggs one at a time, whisking vigorously after each addition. Here’s the key: whisk for a full 2 minutes after adding the last egg. This incorporates air into the batter, which gives you that beautiful crackly top. The mixture should look thick, glossy, and slightly lighter in color. I usually set a timer on my phone for this step because I always underestimate how long two minutes actually is.
Step 4: Add Dry Ingredients (3 minutes)
In a separate bowl, whisk together the flour, cocoa powder, salt, and baking powder. Make sure there are no lumps—cocoa powder loves to clump. Add the dry ingredients to the wet mixture and fold gently with a rubber spatula. Stop as soon as you no longer see streaks of flour. Overmixing at this stage develops gluten and makes tough brownies. You want to see a few small floury patches—they’ll disappear as you fold in the next ingredients.
Step 5: Add Peppermint and White Chocolate (2 minutes)
Pour in the peppermint extract and fold until just combined. Then fold in the white chocolate chips if you’re using them. The batter will be thick and fudgy—almost like a very dense cake batter. Take a moment to smell it here. That combination of chocolate and peppermint is pure holiday magic.
Step 6: Bake (25-30 minutes)
Pour the batter into your prepared pan and spread it evenly with the spatula. Bake for 25-30 minutes, or until a toothpick inserted into the center comes out with a few moist crumbs attached. If it comes out clean, you’ve overbaked them. The edges should look set and slightly pulled away from the pan, but the center should still look a little soft. Remember: brownies continue cooking from residual heat after you take them out of the oven.
Step 7: Cool Completely (1-2 hours)
Place the pan on a cooling rack and let the brownies cool completely in the pan. This is the hardest part—I know you want to cut into them immediately. But trust me, warm brownies are too soft to cut cleanly, and the peppermint flavor needs time to settle. If you cut them too early, you’ll end up with a crumbly mess. I learned this the hard way when I served “brownie rubble” to my book club last December.
Step 8: Add Topping and Serve (5 minutes)
Once completely cool, use the parchment handles to lift the entire block of brownies out of the pan. Sprinkle the crushed candy canes evenly over the top, pressing them in gently so they stick. If you’re using flaky sea salt, sprinkle that on now. Cut into 24 squares using a sharp knife—wipe the blade clean between cuts for neat edges.
Cooking Tips & Techniques
After making these brownies for countless holiday gatherings, I’ve picked up a few tricks that make a real difference:
Room Temperature Eggs Matter. I cannot stress this enough. Cold eggs seize the melted butter and create a dense, greasy brownie. If you forgot to take your eggs out ahead of time, place them in a bowl of warm water for 5 minutes before using. It’s a simple fix that saves your texture.
Don’t Overbake. This is the number one mistake I see home bakers make. Brownies should look slightly underdone when you pull them out of the oven. The toothpick test should show moist crumbs, not wet batter. If you wait until the toothpick comes out clean, your brownies will be dry and crumbly by the next day. When you’re hosting, you want brownies that stay fudgy for days.
Crush Candy Canes Strategically. I learned this after my first batch turned into a sticky mess. Crush the candy canes just before you’re ready to top the brownies. If you crush them too early, they absorb moisture from the air and become gummy. Also, leave some larger pieces—they look prettier and provide a satisfying crunch against the soft brownie.
Timing for Hosting. These brownies are perfect for make-ahead entertaining. Bake them the day before your party, cool them completely, and store them in an airtight container at room temperature. Add the crushed candy cane topping right before serving—otherwise, the candy canes will dissolve into the brownie surface and lose their crunch. This strategy means you have one less thing to worry about on party day.
Cutting Clean Slices. For those picture-perfect squares, use a plastic knife instead of a metal one. The plastic glides through the brownies without dragging the top layer. If you only have metal knives, run the blade under hot water and dry it between each cut. This gives you clean edges every time.
Variations & Adaptations
One of the best things about this recipe is how easily it adapts to different tastes and dietary needs. Here are some variations I’ve tried and loved:
Dark Chocolate Peppermint Brownies
Swap the white chocolate chips for dark chocolate chunks (60-70% cocoa). The bitterness of the dark chocolate pairs beautifully with the cool peppermint and creates a more sophisticated flavor profile. This version is always a hit at adult dinner parties.
Gluten-Free Version
Replace the all-purpose flour with a high-quality 1:1 gluten-free baking blend. I’ve tested this with both Bob’s Red Mill and King Arthur Measure for Measure, and both work perfectly. Add an extra tablespoon of the gluten-free flour blend to compensate for the lack of gluten structure. Nobody at your party will know the difference.
Mint Chocolate Chip Twist
Fold in ½ cup of mini chocolate chips along with the white chocolate chips. The double chocolate with the peppermint creates a brownie that tastes like a thin mint cookie in bar form. My nephew requests this version every Christmas, and I’ve started making a separate batch just for him.
Vegan Adaptation
Use flax eggs (1 tablespoon ground flaxseed mixed with 3 tablespoons water per egg, let sit for 5 minutes) and vegan butter sticks. The texture is slightly more cake-like but still delicious. I served these at a potluck last year and didn’t tell anyone they were vegan until after they’d finished their first piece—everyone was shocked.
Extra Peppermint Kick
For the true peppermint lovers, add ¼ teaspoon of peppermint extract to the crushed candy canes before sprinkling them on top. Toss them gently so the extract coats the candy pieces. This intensifies the mint flavor without making the brownies themselves too strong.
Serving & Storage Suggestions
These brownies are versatile enough for any holiday occasion. Here’s how to serve and store them for the best experience:
Serving Temperature: Serve these brownies at room temperature for the best texture and flavor. If you’ve stored them in the fridge, let them sit out for 20-30 minutes before serving. Cold brownies taste less chocolatey and the texture becomes dense. For an extra special presentation, warm individual brownies in the microwave for 10 seconds and top with a scoop of vanilla ice cream. The warm brownie with cold ice cream and crunchy candy cane pieces is absolutely irresistible.
Presentation Tips for Hosting: Arrange the brownies on a festive platter or cake stand. Dust with a light sprinkle of powdered sugar and a few extra crushed candy canes for visual appeal. If you’re bringing them to a party, stack them in a decorative tin with parchment paper between layers to prevent sticking.
Storage Instructions: Store leftover brownies in an airtight container at room temperature for up to 4 days. If you live in a humid climate, add a piece of bread to the container—it absorbs excess moisture and keeps the brownies from getting sticky. For longer storage, freeze the brownies (without the candy cane topping) for up to 3 months. Wrap each brownie individually in plastic wrap, then place them in a freezer-safe bag. Thaw at room temperature for about an hour before adding fresh crushed candy canes and serving.
Flavor Development: Here’s a secret these brownies actually taste better on day two. The peppermint flavor mellows and blends with the chocolate, creating a more harmonious taste. If you’re planning a party, I recommend baking these a day ahead. Your future self will thank you.
Nutritional Information & Benefits
While these brownies are definitely a treat, they do offer some surprising nutritional perks. Here’s the estimated breakdown per serving (1 brownie, based on 24 servings):
- Calories: 195
- Total Fat: 11g
- Saturated Fat: 7g
- Carbohydrates: 24g
- Fiber: 1g
- Sugar: 18g
- Protein: 3g
- Sodium: 95mg
Health Benefits of Key Ingredients: Dark cocoa powder is rich in antioxidants called flavonoids, which support heart health and reduce inflammation. Peppermint extract has natural digestive properties—it can help soothe an upset stomach after a heavy holiday meal. And while candy canes are mostly sugar, they do provide a small amount of iron and calcium. Plus, the act of crushing them yourself means you’re getting a more natural product without the artificial additives found in some store-bought toppings.
Dietary Considerations: This recipe contains dairy, eggs, and gluten. For those with allergies, the vegan and gluten-free variations work beautifully. The brownies are nut-free as written, making them safe for school parties and gatherings where nut allergies are a concern.
Conclusion
These Perfect Christmas Peppermint Brownies started as a mistake—a moment of panic in a messy kitchen that somehow turned into my most requested holiday recipe. Every time I make them, I remember that feeling of almost giving up, and I’m grateful I didn’t. Because honestly, these brownies have become more than just a dessert. They’re the thing I bring to cookie swaps that empties the tray first. They’re what my neighbors secretly hope I’ll drop off on their doorstep. They’re the recipe my sister-in-law texts me about every December, asking if I’m “making those mint brownies again.”
What I love most about this recipe is how forgiving it is. You don’t need to be a professional baker to get perfect results. You just need good ingredients, a little patience while they cool, and the willingness to embrace happy accidents. Whether you’re hosting a big Christmas dinner or just want something special to share with your family, these brownies deliver every single time.
I’d love to hear how yours turn out! Drop a comment below and let me know if you tried any of the variations, or if you came up with your own twist. And if you snap a photo, tag me—I always love seeing your holiday baking. Here’s to making mistakes that turn into magic, and to desserts that bring people together around the table.
Frequently Asked Questions
Can I use natural cocoa powder instead of Dutch-process?
Yes, you can. Natural cocoa powder will work, but the flavor will be slightly sharper and more acidic. If you’re using natural cocoa, consider adding an extra tablespoon of sugar to balance the taste. The texture will be similar, though the brownies might be slightly less fudgy.
How do I prevent my brownies from sticking to the pan?
Line your pan with parchment paper, leaving overhang on two sides. This creates handles that let you lift the entire block out cleanly. If you don’t have parchment, grease the pan thoroughly with butter and dust with cocoa powder instead of flour. Cocoa powder prevents white residue on your brownies.
Can I make these brownies without peppermint extract?
Absolutely. If you don’t have peppermint extract on hand, you can crush 10-12 regular peppermint candies into a fine powder and mix them into the sugar before adding the eggs. The flavor will be more subtle and the texture slightly different, but it still works beautifully.
Why did my brownies turn out cakey instead of fudgy?
You likely overmixed the batter after adding the flour or overbaked them. For fudgy brownies, fold the dry ingredients in gently and stop as soon as the flour disappears. And remember, brownies are done when a toothpick comes out with moist crumbs, not clean. Take them out a few minutes early if you’re unsure.
How far in advance can I make these for a party?
You can bake the brownies up to 3 days ahead of time. Store them in an airtight container at room temperature. Add the crushed candy cane topping no more than 2 hours before serving to keep the candy canes crunchy. If you want to prep even further ahead, freeze the baked brownies (without topping) for up to 3 months.
Pin This Recipe!

Perfect Christmas Peppermint Brownies – Easy Holiday Dessert Recipe

These fudgy brownies with a cool peppermint kick and crunchy candy cane topping are a festive holiday dessert that started as a happy accident. They’re easy to make, perfect for cookie swaps, and taste even better the next day.
- Prep Time: 10 minutes
- Cook Time: 30 minutes
- Total Time: 45 minutes
- Yield: 24 servings 1x
- Category: Dessert
- Cuisine: American
Ingredients
- 1 cup (226g) unsalted butter, softened
- 2 cups (400g) granulated sugar
- 4 large eggs, room temperature
- 1 cup (120g) all-purpose flour
- 3/4 cup (65g) unsweetened cocoa powder (Dutch-process preferred)
- 1/2 teaspoon salt
- 1 teaspoon baking powder
- 1 1/2 teaspoons peppermint extract
- 1/2 cup (85g) white chocolate chips (optional)
- 1/2 cup (60g) crushed candy canes (about 4–5 regular-sized)
- Flaky sea salt (optional, for topping)
Instructions
- Preheat oven to 350°F (175°C). Line a 9×13-inch baking pan with parchment paper, leaving about 2 inches of overhang on the long sides.
- In a large microwave-safe bowl, melt the butter in 30-second intervals until just melted. Let cool for 2-3 minutes.
- Add the granulated sugar to the warm melted butter and whisk until combined. Add eggs one at a time, whisking vigorously after each addition. Whisk for a full 2 minutes after adding the last egg until the mixture is thick, glossy, and slightly lighter in color.
- In a separate bowl, whisk together the flour, cocoa powder, salt, and baking powder until no lumps remain. Add the dry ingredients to the wet mixture and fold gently with a rubber spatula until just combined (a few small floury patches are okay).
- Pour in the peppermint extract and fold until just combined. Fold in the white chocolate chips if using. The batter will be thick and fudgy.
- Pour the batter into the prepared pan and spread evenly. Bake for 25-30 minutes, or until a toothpick inserted into the center comes out with a few moist crumbs attached (not clean).
- Place the pan on a cooling rack and let the brownies cool completely in the pan, about 1-2 hours.
- Once completely cool, use the parchment handles to lift the entire block of brownies out of the pan. Sprinkle the crushed candy canes evenly over the top, pressing them in gently. If using, sprinkle with flaky sea salt. Cut into 24 squares using a sharp knife, wiping the blade clean between cuts.
Notes
For best results, use room temperature eggs and don’t overbake. Brownies taste even better on day two. Add crushed candy cane topping just before serving to keep them crunchy. For gluten-free, use a 1:1 gluten-free baking flour blend. For dairy-free, use vegan butter sticks and dairy-free white chocolate chips.
Nutrition
- Serving Size: 1 brownie
- Calories: 195
- Sugar: 18
- Sodium: 95
- Fat: 11
- Saturated Fat: 7
- Carbohydrates: 24
- Fiber: 1
- Protein: 3
Keywords: peppermint brownies, Christmas brownies, holiday dessert, fudgy brownies, candy cane brownies, easy brownie recipe


