I was standing in the baking aisle last Tuesday, staring at a row of chocolate chips, when the smell hit me. Not the smell of the store, but a memory-smell — sweet, peanut buttery, with that unmistakable hint of white chocolate and crispy rice. And suddenly I was seven years old, standing on a step stool in my Aunt Margie’s tiny kitchen, watching her drop spoonfuls of what she called “haystacks” onto wax paper. She passed away three years ago, and I haven’t thought about those afternoons in forever. But there I was, in the middle of a grocery run, practically tasting that first bite — the crunch, the melt, the way the peanut butter stuck to the roof of my mouth.
I grabbed a box of crispy rice cereal, a bag of white chocolate chips, and some peanut butter without even thinking. My cart was already full of the usual stuff — milk, bread, those snack packs my youngest won’t eat but I keep buying anyway — but these cookies? They were coming home with me. Let me tell you, I nearly burned my dinner that night because I couldn’t stop sneaking spoonfuls of the mixture before it set. Maybe you’ve been there — that moment when a recipe grabs you by the collar and refuses to let go.
These no-bake avalanche cookies are the kind of thing you make when you need a win. No oven, no fancy equipment, no tempering chocolate like some kind of pastry chef. Just five ingredients, ten minutes of stirring, and a little patience while they firm up. They’re budget-friendly, which matters when you’re feeding a family on a sensible budget, and they’ve got that perfect combo of crunchy, creamy, and sweet that makes everyone happy. I’ve made three batches in the past week, and I’m not sorry about it.
Why You’ll Love This Recipe
Look, I’ve tested a lot of cookie recipes over the years. Some turn out great, others end up in the trash (RIP, those vegan oatmeal disasters from last spring). But these no-bake avalanche cookies? They’re a consistent winner. Here’s why they’ve earned a permanent spot in my rotation:
- Budget-Friendly: You probably have most of these ingredients in your pantry right now. No expensive extracts, no specialty flours, no gadgets you’ll use once and forget about. This recipe respects your grocery budget.
- Kid-Approved: My kids fought over the last one yesterday. And the day before that. And the day before that. They’re sweet without being overwhelming, and that crispy texture is basically kid crack.
- No-Bake Magic: It’s August as I’m writing this. My kitchen is already a sauna. Turning on the oven is not happening. These cookies come together on the stovetop in about five minutes, then chill in the fridge. No sweat — literally.
- Simple Ingredients: White chocolate chips, creamy peanut butter, crispy rice cereal, and a tiny bit of butter. That’s it. No weird stuff you have to hunt down at three different stores.
- Quick & Easy: From start to finish, you’re looking at about 15 minutes of active work. The hardest part is waiting for them to set in the fridge.
What makes these different from every other no-bake cookie recipe out there? It’s the ratio. I’ve messed around with the amounts until I found that sweet spot where the cookies hold their shape without being rock-hard, and the peanut butter flavor comes through without overpowering everything else. These aren’t those sad, crumbly haystacks that fall apart when you look at them. These are sturdy, satisfying cookies that actually taste like something.
Honestly, this is the kind of recipe that makes you feel like a hero. Your kids will think you spent hours in the kitchen, but you’ll know the truth — you just melted some stuff and stirred it together. And that’s okay. We all need wins like that.
What Ingredients You Will Need
This recipe uses simple, pantry-friendly ingredients to deliver that classic avalanche cookie flavor and texture. Nothing fancy here — just good, honest ingredients that work together beautifully.
- White chocolate chips (12 oz / 340 g): I’ve tried a few brands, and I keep coming back to Ghirardelli for the smoothest melt. But honestly, store brand works fine too. Just make sure you’re using real white chocolate, not white baking chips that have artificial flavors. The real stuff melts creamier. (Pro tip: if you see “white morsels” on the label, check the ingredients — you want cocoa butter listed.)
- Creamy peanut butter (1/2 cup / 130 g): Go with the regular processed stuff here, not natural peanut butter that separates. The stabilizers in brands like Jif or Skippy help the cookies hold together better. Natural peanut butter can make them greasy and crumbly. I learned that the hard way.
- Butter (2 tablespoons / 28 g): Unsalted is best so you control the salt level. But if all you have is salted butter, just skip the pinch of salt I mention later. No big deal.
- Crispy rice cereal (3 cups / 90 g): Rice Krispies are the classic choice, but any generic crispy rice cereal works. Just don’t use the puffed rice that comes in the hot cereal section — that stuff disintegrates when you stir it. Ask me how I know.
- Powdered sugar (1 cup / 120 g): This adds sweetness and helps bind everything together. No need to sift it unless it’s super clumpy. A quick whisk with a fork usually does the trick.
- Vanilla extract (1 teaspoon / 5 ml): Pure vanilla is nice, but imitation works perfectly fine in this recipe. The flavor is subtle anyway.
- Salt (a pinch): Just a tiny bit to balance the sweetness. If you’re using salted butter or salted peanut butter, you can skip this.
That’s it. Seven ingredients, most of which are probably in your kitchen right now. I love recipes like this — no special trip to the store, no expensive ingredients that sit in your pantry forever. Just straightforward stuff that comes together into something genuinely delicious.
Equipment Needed
You don’t need much for these no-bake avalanche cookies, which is part of why I love them. Here’s what you’ll need:
- Medium saucepan: Any saucepan works. I use my trusty 3-quart one that’s seen better days but still gets the job done.
- Large mixing bowl: You’ll dump the crispy rice cereal and powdered sugar in here before adding the melted mixture.
- Wooden spoon or silicone spatula: For stirring. A metal spoon can scratch your pan, so stick with wood or silicone.
- Baking sheet or large plate: To hold the cookies while they set. Line it with parchment paper or wax paper for easy removal.
- Cookie scoop or two spoons: For portioning. A #40 cookie scoop (about 1.5 tablespoons) is perfect. If you don’t have one, just use two spoons to scoop and scrape.
- Refrigerator space: You need about 30 minutes of chill time. Clear a shelf beforehand so you’re not playing fridge Tetris.
If you don’t have parchment paper, wax paper works great. In a pinch, you can even use aluminum foil lightly sprayed with cooking spray. The cookies won’t stick as long as the mixture has set properly.
Preparation Method
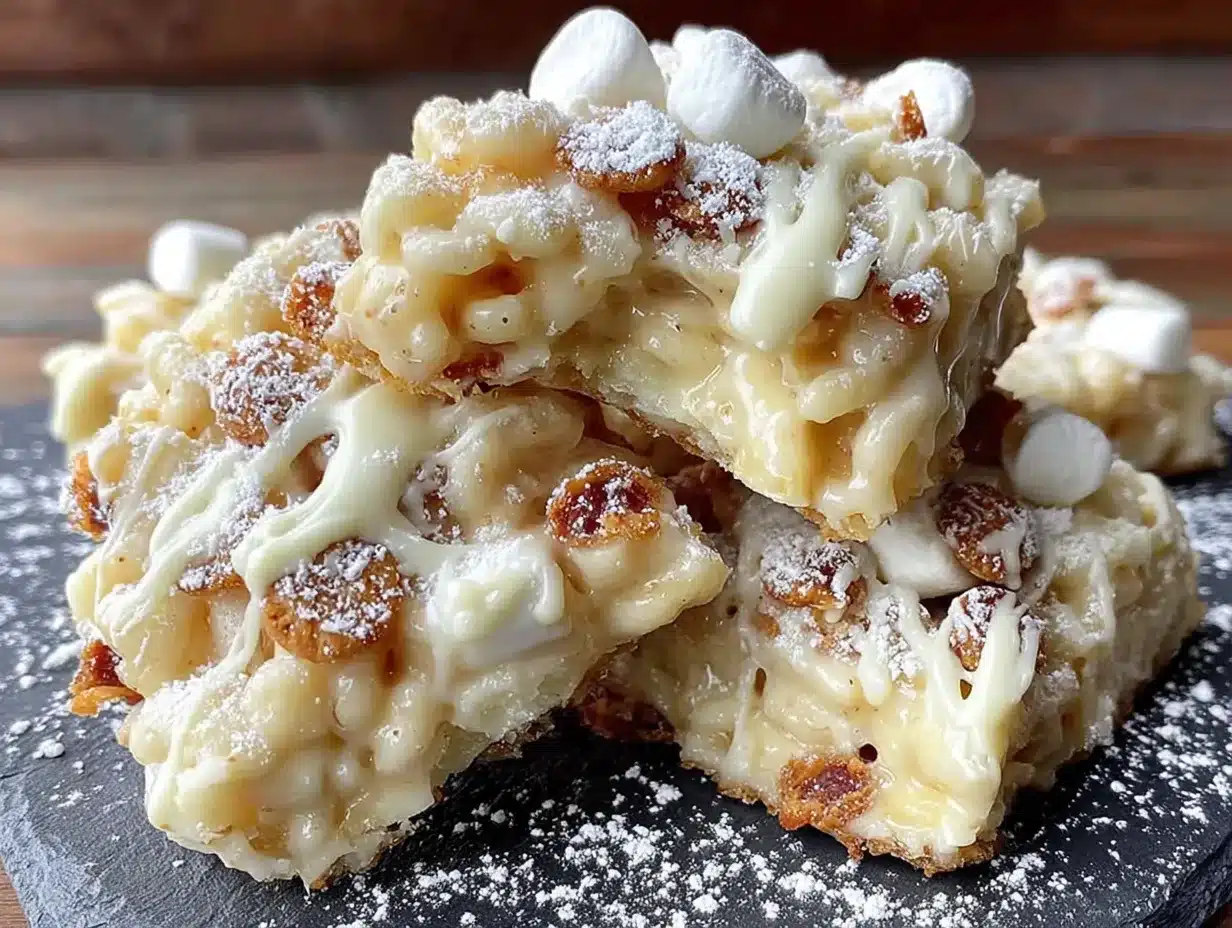
Alright, let’s make these cookies. I’ll walk you through it step by step, with all the little details I wish someone had told me the first time.
Step 1: Prep your workspace. Line a baking sheet with parchment paper or wax paper. Set it aside where it won’t get bumped. Clear a spot in your fridge for later. Trust me, you don’t want to be juggling a hot pan while clearing shelf space.
Step 2: Combine dry ingredients. In your large mixing bowl, add 3 cups (90 g) of crispy rice cereal and 1 cup (120 g) of powdered sugar. Give it a quick stir with your spoon to distribute the sugar. It doesn’t have to be perfect — just get them acquainted.
Step 3: Melt the base. In your medium saucepan over low heat, combine 12 oz (340 g) of white chocolate chips, 1/2 cup (130 g) of creamy peanut butter, and 2 tablespoons (28 g) of butter. Stir constantly. I cannot stress this enough — low heat and constant stirring. White chocolate burns easily and gets grainy when overheated. You want it just barely melted, not bubbling. This takes about 3-4 minutes. The mixture will look lumpy at first, then smooth out as everything melts together. When it’s glossy and smooth, remove it from the heat immediately.
Step 4: Add vanilla and salt. Stir in 1 teaspoon (5 ml) of vanilla extract and a pinch of salt. The mixture will seize up slightly and look a little weird for a second. Keep stirring. It’ll smooth back out. This is normal — don’t panic.
Step 5: Combine everything. Pour the warm peanut butter mixture over the cereal mixture. Stir gently but thoroughly. You want every piece of cereal coated. The powdered sugar will make the mixture look a bit dusty at first, but keep stirring. It’ll come together. This takes about 2 minutes of steady stirring. Your arm might get a little tired. That’s okay — consider it your workout for the day.
Step 6: Scoop and shape. Working quickly (the mixture sets as it cools), scoop rounded tablespoons onto your prepared baking sheet. A cookie scoop makes this so much easier. If you’re using two spoons, scoop a heaping spoonful, then use the second spoon to push it onto the sheet. Don’t worry about making them perfect — rustic is part of the charm. You should get about 24 cookies, depending on size.
Step 7: Chill. Pop the baking sheet into the fridge for at least 30 minutes. The cookies need this time to firm up. If you try to eat one too early, it’ll fall apart in your hands. I know this from experience — I have the sticky fingers to prove it.
Step 8: Enjoy. Once set, the cookies should peel easily off the parchment. If they stick, give them another 10 minutes in the fridge. Store in an airtight container in the fridge for up to a week. Good luck making them last that long.
Cooking Tips & Techniques
I’ve made these no-bake avalanche cookies more times than I can count, and I’ve picked up a few tricks along the way. Here’s what I wish I’d known from the start:
Low heat is your friend. White chocolate is temperamental. High heat makes it seize up into a grainy, clumpy mess. Keep your burner on low and stir constantly. If you see steam rising from the pan, you’re too hot. Pull it off the heat and keep stirring — the residual heat will finish the job.
Work fast once the mixture is combined. The cookies start setting the moment the warm mixture hits the cereal. If you dither, you’ll end up with a solid block in your bowl instead of individual cookies. Scoop quickly, and if the mixture gets too stiff to work with, pop the bowl in the microwave for 10 seconds to soften it up.
Don’t over-stir the cereal. You want the cereal to stay mostly intact for that satisfying crunch. Stir just until everything is coated. Over-stirring crushes the cereal and gives you dense, sad cookies. Nobody wants that.
Use a cookie scoop for consistent size. This isn’t just about aesthetics — uniform cookies set at the same rate. If some are big and some are small, the little ones will be rock-hard while the big ones are still soft. A #40 scoop (1.5 tablespoons) is perfect.
Let them fully set before storing. I know it’s tempting to stack them in a container right away, but if they’re not completely firm, they’ll stick together and turn into one giant cookie blob. Give them the full 30 minutes in the fridge, minimum.
I once tried to rush the process by sticking the pan in the freezer for 10 minutes instead of the fridge. The edges froze while the centers stayed soft, and I ended up with weirdly textured cookies. Learn from my mistakes — the fridge is the way to go.
Variations & Adaptations
One of the best things about this recipe is how easy it is to customize. Here are some variations I’ve tried and loved:
Chocolate Avalanche Cookies: Swap the white chocolate chips for milk chocolate or semi-sweet chocolate chips. The peanut butter and chocolate combo is a classic for a reason. If you go this route, reduce the powdered sugar to 3/4 cup — chocolate is already sweet enough.
Crunchy Peanut Butter Version: Use crunchy peanut butter instead of creamy for extra texture. The little peanut pieces add a nice surprise in every bite. Just note that the cookies might be slightly more crumbly since crunchy peanut butter has a different consistency.
Add-In Bonanza: Fold in 1/2 cup of mini chocolate chips, dried cranberries, or chopped nuts after combining the cereal mixture. My kids love the version with mini M&Ms mixed in — it makes the cookies look festive and fun.
Gluten-Free Option: Most crispy rice cereals are naturally gluten-free, but check the label to be sure. Rice Krispies are made with malt flavoring that contains gluten, so look for a certified gluten-free brand like Nature’s Path or One Degree. Everything else in the recipe is gluten-free, so this is an easy swap.
Vegan Adaptation: Use vegan white chocolate chips (Enjoy Life makes a good one), vegan butter, and a plant-based peanut butter that doesn’t contain honey. The texture will be slightly different — vegan white chocolate doesn’t set quite as firmly — but the taste is still great.
I tried a version with almond butter once, thinking it would be a fun twist. It was okay, but the flavor was a little too subtle. Stick with peanut butter for the best results. Some things are classics for a reason.
Serving & Storage Suggestions
These no-bake avalanche cookies are best served cold, straight from the fridge. The texture is perfect — firm enough to hold together, but soft enough to melt in your mouth. If you leave them out at room temperature for too long, they’ll get soft and sticky. Not the end of the world, but not ideal either.
For a pretty presentation, arrange the cookies on a plate and dust them lightly with powdered sugar. It makes them look fancy with zero extra effort. I’ve brought these to potlucks and birthday parties, and they always disappear fast. People love them.
They pair beautifully with a cold glass of milk (obviously), a hot cup of coffee, or even a scoop of vanilla ice cream for an indulgent dessert. Crush a couple over ice cream for a quick sundae topping — it’s dangerously good.
Storage: Keep the cookies in an airtight container in the refrigerator for up to a week. Layer them between sheets of wax paper or parchment to prevent sticking. If you’re stacking them, don’t go more than two layers deep, or the bottom cookies might get squished.
Freezer: These cookies freeze beautifully. Place them in a single layer on a baking sheet and freeze until solid (about an hour), then transfer to a freezer-safe bag or container. They’ll keep for up to 3 months. Thaw in the fridge for about 30 minutes before serving, or eat them frozen — they’re like little ice cream bites.
The flavors actually get better after a day or two in the fridge. Something about the peanut butter and white chocolate melding together. If you can resist eating them all on day one, you’ll be rewarded on day two.
Nutritional Information & Benefits
Let’s be real — these are cookies, not health food. But here’s the nutritional breakdown for one cookie (based on 24 cookies):
| Nutrient | Amount per cookie |
|---|---|
| Calories | 145 |
| Total Fat | 8g |
| Saturated Fat | 4g |
| Carbohydrates | 17g |
| Sugar | 13g |
| Protein | 3g |
| Sodium | 65mg |
The peanut butter does bring some protein and healthy fats to the table, so these are slightly more substantial than your average cookie. They also don’t contain eggs or dairy in large amounts (the butter is minimal), which makes them a good option for people with certain dietary restrictions.
Allergen note: These cookies contain peanuts, dairy (butter and white chocolate), and may contain gluten depending on the cereal you use. If you’re serving these at a gathering, make sure to label them clearly.
Are they a daily snack? Probably not. But as an occasional treat that doesn’t require turning on the oven? Absolutely worth it. Sometimes you need a little sweetness in your life, and these cookies deliver without any guilt.
Conclusion
These no-bake avalanche cookies have become a staple in my kitchen for good reason. They’re easy, budget-friendly, and absolutely delicious. Every time I make them, I think about Aunt Margie and those afternoons in her kitchen, and I smile. Food has a way of doing that — connecting us to people and moments we thought we’d forgotten.
I hope you give these cookies a try. Maybe you’ll make them exactly as written, or maybe you’ll add your own twist. That’s the beauty of recipes like this — they’re forgiving and flexible. Don’t stress about perfection. Just stir, scoop, and enjoy.
If you do make them, I’d love to hear how they turned out. Drop a comment below, tag me in your photos, or share your own variations. The best part of cooking is sharing it with others, and I can’t wait to see what you create. Happy baking — or, I guess, happy no-baking!
Frequently Asked Questions
Can I use natural peanut butter?
You can, but the cookies might be greasier and more crumbly. Natural peanut butter lacks the stabilizers that help the cookies hold together. If you only have natural peanut butter, refrigerate the cookies for an extra 15-20 minutes to help them firm up.
Why did my white chocolate seize up?
White chocolate is sensitive to heat and moisture. If it got too hot or if even a drop of water got into the pan, it can seize into a grainy, clumpy mess. Always use low heat, stir constantly, and make sure your pan and utensils are completely dry.
Can I make these without a microwave?
Absolutely. The recipe uses a stovetop saucepan for melting. No microwave required. That’s actually my preferred method — it gives you more control over the heat.
How long do these cookies last?
Stored in an airtight container in the fridge, they’ll stay fresh for up to a week. In the freezer, they’ll keep for up to 3 months. Just make sure they’re fully set before you store them, or they’ll stick together.
Can I double this recipe?
Yes, but make it in two batches. Doubling the mixture in one pan makes it harder to stir evenly, and the mixture might cool too quickly before you can scoop all the cookies. It’s easier to make two separate batches.
Pin This Recipe!

Easy No-Bake Avalanche Cookies: Kid-Approved Budget Dessert

These no-bake avalanche cookies are a quick, budget-friendly dessert made with white chocolate, peanut butter, and crispy rice cereal. They come together in minutes with no oven required and are perfect for satisfying sweet cravings.
- Prep Time: 15 minutes
- Cook Time: 5 minutes
- Total Time: 50 minutes
- Yield: 24 cookies 1x
- Category: Dessert
- Cuisine: American
Ingredients
- 12 oz (340 g) white chocolate chips
- 1/2 cup (130 g) creamy peanut butter
- 2 tablespoons (28 g) unsalted butter
- 3 cups (90 g) crispy rice cereal
- 1 cup (120 g) powdered sugar
- 1 teaspoon (5 ml) vanilla extract
- A pinch of salt
Instructions
- Line a baking sheet with parchment paper or wax paper. Clear a spot in your fridge for later.
- In a large mixing bowl, combine 3 cups (90 g) of crispy rice cereal and 1 cup (120 g) of powdered sugar. Stir to distribute the sugar.
- In a medium saucepan over low heat, combine 12 oz (340 g) of white chocolate chips, 1/2 cup (130 g) of creamy peanut butter, and 2 tablespoons (28 g) of butter. Stir constantly until melted and smooth, about 3-4 minutes. Remove from heat immediately.
- Stir in 1 teaspoon (5 ml) of vanilla extract and a pinch of salt. The mixture may seize slightly; keep stirring until smooth.
- Pour the warm peanut butter mixture over the cereal mixture. Stir gently but thoroughly until every piece of cereal is coated, about 2 minutes.
- Working quickly, scoop rounded tablespoons (about 1.5 tablespoons each) onto the prepared baking sheet. You should get about 24 cookies.
- Refrigerate for at least 30 minutes until firm. Once set, peel cookies off the parchment and store in an airtight container in the fridge for up to a week.
Notes
Use low heat and stir constantly when melting white chocolate to prevent seizing. Work quickly once the mixture is combined as it sets fast. For best texture, refrigerate cookies fully before storing. If using natural peanut butter, the cookies may be greasier and more crumbly; refrigerate an extra 15-20 minutes.
Nutrition
- Serving Size: 1 cookie
- Calories: 145
- Sugar: 13
- Sodium: 65
- Fat: 8
- Saturated Fat: 4
- Carbohydrates: 17
- Protein: 3
Keywords: no-bake cookies, avalanche cookies, peanut butter cookies, white chocolate cookies, crispy rice cereal cookies, budget dessert, kid-friendly


