My dad had a standing rule about fudge. For thirty-seven years, he claimed to hate it. “Too sweet,” he’d say, waving away the bakery boxes at Christmas. “Grainy. Sticks to your teeth.” He’d tell this to anyone who offered him a piece, with the kind of stubborn certainty that only a man who’s never actually tried the right version can have. Then last December, I caught him standing at the counter, eating straight from the pan I’d set out to cool. He had a spoon. He wasn’t apologizing.
The thing is, I get it now. Most fudge is a letdown, honestly. You spend all that time messing with a candy thermometer, watching the sugar syrup like a hawk, and half the time it seizes up on you or turns into a gritty mess. I’d pretty much given up on homemade fudge myself. Then a friend—okay, it was my neighbor Carol, the one who brings over casseroles when you sneeze twice—dropped off a pan of this stuff. She called it “that marshmallow fluff fudge,” like it was no big deal. One bite and I was texting her for the recipe before I’d even swallowed.
So here’s the honest truth: this Creamy Classic Fantasy Fudge changed my mind, and apparently it changed my dad’s too. It’s not just another holiday candy recipe. It’s the one that makes people who “don’t like fudge” suddenly become people who hide the pan. Maybe you’ve been there, watching someone you love turn up their nose at something you know could be incredible. Let me tell you, this is the recipe that fixes that. I mean it.
Why You’ll Love This Recipe
This isn’t your grandmother’s finicky fudge recipe—though she might approve once she tries it. What makes this Creamy Classic Fantasy Fudge stand out is how it delivers that perfect, melt-in-your-mouth texture without the stress of a candy thermometer. I’ve tested this version more times than I care to count (someone had to eat all those test batches, right?), and it works every single time.
- Ready in 5 Minutes of Active Time : From saucepan to pan in about five minutes of hands-on work. No stirring for ages, no waiting for the perfect soft-ball stage.
- Foolproof Every Time : The marshmallow fluff stabilizes the sugar mixture, so you don’t have to worry about crystallization or grainy fudge. It’s practically impossible to mess up.
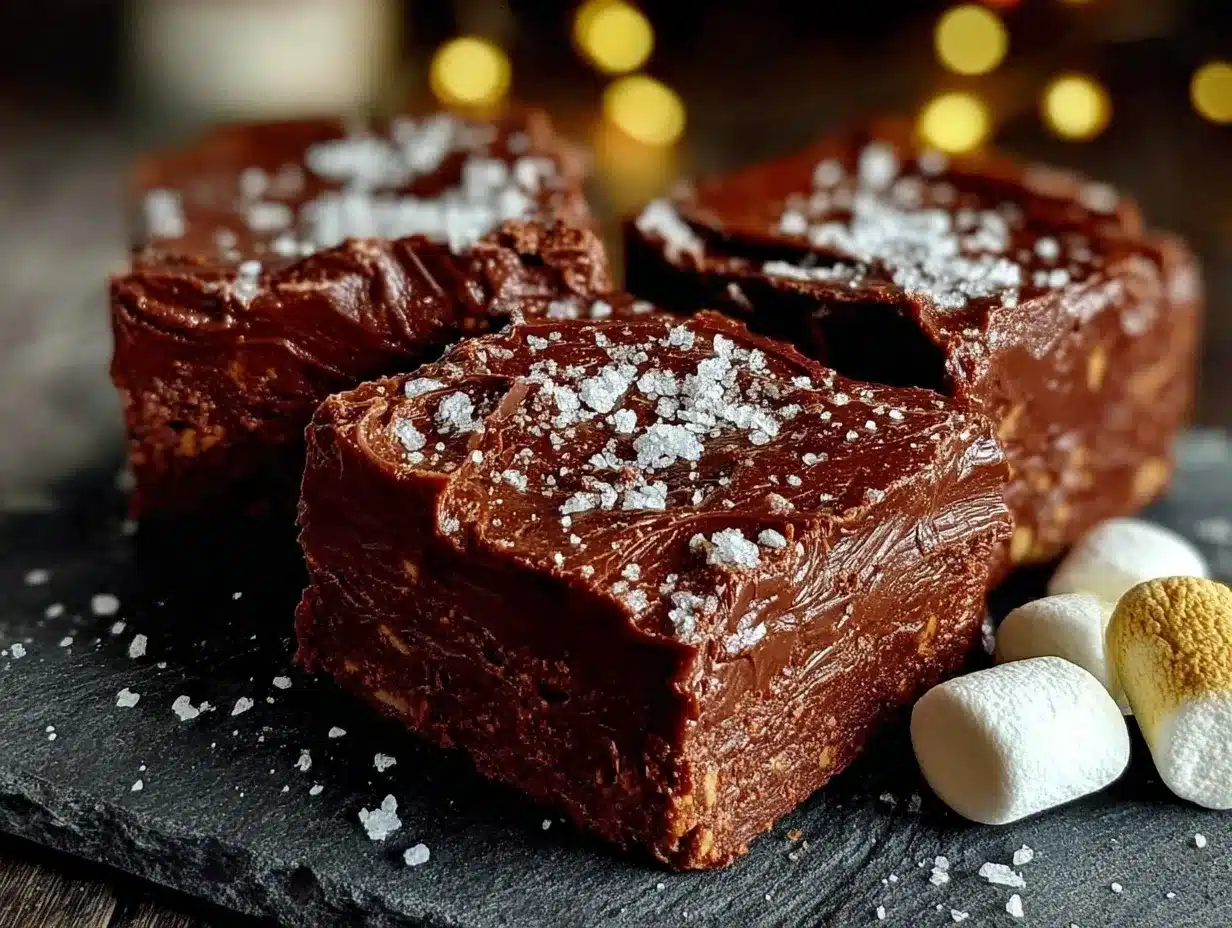
- Perfectly Creamy Texture : That classic fantasy fudge texture—smooth, dense, and creamy without being greasy or sticky. It cuts cleanly and melts on your tongue.
- Simple Pantry Ingredients : Sugar, butter, evaporated milk, chocolate chips, marshmallow fluff, and vanilla. That’s it. No weird specialty items.
- Crowd-Pleaser for the Holidays : This makes the perfect giftable fudge for Christmas, Thanksgiving, or any gathering. It disappears fast.
What really sets this recipe apart is the texture. The marshmallow fluff does something magical here—it creates a fudge that’s creamy and smooth, not too dense, with just the right amount of chew. I’ve tried versions with marshmallows, with condensed milk, with all sorts of shortcuts. Nothing compares to this original marshmallow fluff method. It’s the kind of fudge that makes you close your eyes after the first bite, the kind you keep sneaking back to the kitchen for. Honestly, it’s comfort food reimagined—faster, simpler, but with the same soul-soothing satisfaction as the complicated versions.
What Ingredients You Will Need
This recipe uses simple, wholesome ingredients to deliver that classic creamy fudge texture without any fuss. Most of these are pantry staples you might already have on hand, especially during the holiday baking season.
- Granulated Sugar (3 cups) – White sugar is essential here. Don’t substitute with brown sugar or alternative sweeteners, as they’ll change the texture and the way the fudge sets.
- Unsalted Butter (3/4 cup, or 1 1/2 sticks) – I prefer using unsalted butter so I can control the salt level. If you only have salted butter, just skip adding any extra salt. Cut it into pieces so it melts evenly.
- Evaporated Milk (2/3 cup) – Not to be confused with sweetened condensed milk! Evaporated milk adds richness without the extra sweetness. I recommend Carnation brand for consistent results.
- Semi-Sweet Chocolate Chips (12 ounces, or about 2 cups) – Use good-quality chocolate chips for the best flavor. Ghirardelli or Guittard work beautifully. You can also chop up a semi-sweet chocolate bar if that’s what you have.
- Marshmallow Fluff (1 jar, 7 ounces) – This is the secret ingredient! The original recipe calls for Marshmallow Fluff brand, and I stick with it. Don’t use mini marshmallows as a substitute—the texture won’t be the same.
- Vanilla Extract (1 teaspoon) – Pure vanilla extract adds warmth and depth. Imitation vanilla works in a pinch, but pure is better.
- Chopped Nuts (Optional) (1 cup) – Walnuts or pecans are classic additions. Toast them lightly first for extra flavor. I usually add them to half the batch because my kids prefer plain fudge.
Substitution Guidance: If you need a dairy-free version, you can try using vegan butter and a dairy-free chocolate chip brand like Enjoy Life. The texture will be slightly different, but it still works. For a nut-free version, simply omit the nuts or add dried cranberries or crushed peppermint candies instead.
Equipment Needed
You don’t need a lot of fancy equipment for this Creamy Classic Fantasy Fudge, which is part of its charm. Here’s what you’ll need:
- Medium Heavy-Bottomed Saucepan (3-quart size) – A heavy-bottomed pan distributes heat evenly and prevents the sugar mixture from scorching. I use my trusty Calphalon saucepan, but any sturdy pan works.
- Wooden Spoon or Silicone Spatula – You’ll be stirring constantly, so use something heat-resistant. A wooden spoon is traditional and works great.
- Candy Thermometer (Optional but Helpful) – While this recipe doesn’t strictly require one, if you’re nervous about the soft-ball stage, a thermometer gives you confidence. You’re aiming for 234°F to 240°F.
- 8×8-Inch Baking Pan – This is the perfect size for this fudge recipe. Line it with parchment paper or aluminum foil, leaving some overhang for easy lifting.
- Measuring Cups and Spoons – Accurate measurements matter here, especially for the sugar and evaporated milk.
- Sharp Knife – For cutting the fudge once it’s set. A chef’s knife works better than a butter knife for clean cuts.
If you don’t have a candy thermometer, don’t stress. I’ve made this fudge dozens of times without one. The “soft-ball stage” is easy to test by dropping a small amount of the hot mixture into a glass of cold water—if it forms a soft, pliable ball, you’re there.
Preparation Method
- Prepare your pan. Line an 8×8-inch baking pan with parchment paper or aluminum foil, leaving about 2 inches of overhang on two opposite sides. This will make it easy to lift the fudge out later. Lightly grease the liner with butter or nonstick spray.
- Combine the base ingredients. In your medium heavy-bottomed saucepan, combine 3 cups granulated sugar, 3/4 cup unsalted butter (cut into pieces), and 2/3 cup evaporated milk. Place the pan over medium heat and stir constantly with your wooden spoon or silicone spatula. You want the butter to melt completely and the sugar to dissolve.
- Bring to a boil. Continue stirring as the mixture heats up. Once it comes to a full, rolling boil, stop stirring. Let it boil for exactly 4 minutes. This is important—set a timer. The mixture will bubble up, so make sure your pan is big enough to handle it. It should look thick and slightly darker in color.
- Test for the soft-ball stage (optional). If you’re using a candy thermometer, you’re looking for 234°F to 240°F. If you’re testing by hand, drop a small spoonful of the hot mixture into a glass of cold water. It should form a soft, pliable ball that holds its shape when you pick it up. If it’s still runny, let it boil another 30 seconds and test again.
- Remove from heat and add chocolate. Take the pan off the heat immediately. Add 12 ounces of semi-sweet chocolate chips and stir gently until they’re completely melted and smooth. The residual heat from the mixture will do the work—just keep stirring.
- Add the marshmallow fluff and vanilla. Spoon in the entire 7-ounce jar of marshmallow fluff and 1 teaspoon of vanilla extract. Stir vigorously until everything is well combined and the mixture looks glossy and smooth. This might take a minute or two of stirring. Don’t rush it.
- Fold in nuts (if using). If you’re adding chopped walnuts or pecans, fold them in now. Stir just until they’re evenly distributed.
- Pour into the prepared pan. Scrape the fudge mixture into your lined pan and spread it evenly with your spatula. It will be thick, so take your time. Try to get it as even as possible so it sets uniformly.
- Let it set. Allow the fudge to cool at room temperature for at least 2 to 3 hours, or until it’s firm to the touch. For quicker results, you can refrigerate it for about 1 hour. Don’t rush this step—warm fudge won’t cut cleanly.
- Cut and serve. Once the fudge is completely set, lift it out of the pan using the parchment overhang. Place it on a cutting board and use a sharp knife to cut it into 1-inch squares. Wipe the knife clean between cuts for neat edges.
Pro tip: If your fudge seems too soft after the cooling time, it might need a bit more boiling time next batch. Make sure you’re letting it boil for the full 4 minutes, and that the mixture is at a true rolling boil—not just simmering.
Cooking Tips & Techniques
I’ve made this Creamy Classic Fantasy Fudge more times than I can count, and I’ve definitely learned a few things the hard way. Let me save you some trouble.
The biggest mistake people make is not letting the mixture come to a proper boil before starting the timer. That “rolling boil” needs to be vigorous—little bubbles around the edge don’t count. You want big, lazy bubbles breaking across the entire surface. If you start the timer too early, your fudge won’t set properly and you’ll end up with fudge sauce instead of fudge. Trust me, I’ve been there.
Humidity is your enemy when making fudge. If it’s a rainy or humid day, the sugar can absorb moisture from the air, and your fudge might not set as firmly. Try to make this on a dry day if possible. If you can’t avoid humid weather, let the fudge boil for an extra 30 seconds to compensate.
Don’t skip the constant stirring during the initial heating phase. Sugar can scorch easily, and once it burns, there’s no saving it. I ruined my first batch because I got distracted by a phone call. The smell of burnt sugar is not a pleasant kitchen memory.
When you add the chocolate chips, make sure the mixture is still hot enough to melt them completely. If you let it cool too much, you’ll end up with lumpy fudge. If that happens, you can return the pan to very low heat for a few seconds, stirring constantly, to help the chips melt.
For the smoothest, creamiest texture, use a high-quality vanilla extract. I know it seems like a small detail, but it makes a difference. And always, always line your pan with parchment paper. Trying to scrape fudge out of an unlined pan is a nightmare you don’t need in your life.
Variations & Adaptations
This Creamy Classic Fantasy Fudge recipe is wonderfully adaptable. Here are some of my favorite variations:
Chocolate Peanut Butter Swirl Fudge: After pouring the fudge into the pan, drop spoonfuls of creamy peanut butter on top. Use a knife to swirl it through the fudge for a marbled effect. It’s absolutely divine and tastes like a peanut butter cup.
Mint Chocolate Chip Fudge: Add 1/2 teaspoon of peppermint extract along with the vanilla. Fold in 1/2 cup of mini chocolate chips or crushed peppermint candies right before pouring into the pan. This is a holiday favorite in my house.
White Chocolate Cranberry Fudge: Substitute white chocolate chips for the semi-sweet chips. Fold in 1/2 cup of dried cranberries and 1/2 cup of chopped pistachios. The tartness of the cranberries balances the sweetness beautifully.
Vegan-Friendly Version: Use vegan butter, dairy-free chocolate chips, and a vegan marshmallow fluff (available at specialty stores). The texture will be slightly softer, but the flavor is still fantastic.
Spiced Holiday Fudge: Add 1 teaspoon of cinnamon, 1/2 teaspoon of nutmeg, and a pinch of cloves along with the vanilla. This gives the fudge a warm, cozy flavor that’s perfect for Christmas cookie exchanges.
I once made a batch with bourbon vanilla and added a splash of bourbon whiskey (about 2 tablespoons) right at the end. It was for a grown-up gathering and it was a huge hit. Just know that alcohol can affect the setting, so you might need to refrigerate it a bit longer.
Serving & Storage Suggestions
This fudge is best served at room temperature. The texture is at its creamiest when it’s not straight out of the fridge. If you’ve refrigerated it, let it sit on the counter for about 20 minutes before serving.
For presentation, I love arranging the fudge squares on a festive platter or in a decorative tin lined with parchment paper. It makes a wonderful homemade gift for neighbors, teachers, or coworkers. You can also stack the squares in a clear cellophane bag tied with a ribbon for a simple, elegant gift.
Storage: Store your Creamy Classic Fantasy Fudge in an airtight container at room temperature for up to 2 weeks. Yes, it keeps that long—if you can resist eating it all. Layer the squares between sheets of wax paper or parchment to prevent them from sticking together.
Freezing: This fudge freezes beautifully. Wrap the entire slab or individual squares tightly in plastic wrap, then place them in a freezer-safe bag or container. It will keep for up to 3 months. Thaw at room temperature for about an hour before serving.
One thing I’ve noticed: the fudge actually gets better after a day or two. The flavors meld together and the texture becomes even creamier. So if you can wait, make it a day ahead of when you plan to serve it. The flavor develops beautifully over time.
Nutritional Information & Benefits
Let’s be real—fudge is a treat, not a health food. But here’s the nutritional breakdown for one square (based on 64 squares from an 8×8 pan):
Per Serving (approximate): Calories: 120 | Fat: 6g | Carbohydrates: 17g | Sugar: 15g | Protein: 1g | Sodium: 20mg
The semi-sweet chocolate chips do offer some antioxidants, and the butter provides a small amount of vitamin A. The nuts, if you add them, contribute healthy fats, fiber, and protein. But honestly, this is a recipe for indulgence, and that’s okay. Sometimes you need a little sweetness in your life, and this fudge delivers it in the most satisfying way possible.
For those with dietary restrictions, this recipe contains dairy and gluten (though the fudge itself is gluten-free, always check your chocolate chip labels). It’s not suitable for vegans unless you make the substitutions mentioned above. The marshmallow fluff contains egg whites, so it’s not vegan-friendly as written.
Conclusion
This Creamy Classic Fantasy Fudge is more than just a recipe—it’s the one that converts skeptics, wins over crowds, and makes you look like a kitchen hero with almost no effort. It’s the fudge I bring to every holiday party, the one my dad now requests by name, the one that disappears fastest from the cookie platter.
I love that it’s forgiving enough for beginners but impressive enough for experienced bakers. I love that it uses ingredients I usually have on hand. And I really love that I can make a batch in under 10 minutes of active time and still get that perfect, creamy texture that everyone raves about.
So go ahead—make a batch for yourself, or for someone who claims they don’t like fudge. Trust me, they’ll come around. When you do, I’d love to hear about it! Leave a comment below and tell me how it turned out, or share your own variation. Did you add nuts? Try a different chocolate? I’m always looking for new ideas. Happy fudge making, friends!
Frequently Asked Questions
Can I use regular marshmallows instead of marshmallow fluff?
I don’t recommend it. Marshmallow fluff has a different consistency and stabilizes the fudge differently than whole marshmallows. If you’re in a pinch, you can melt mini marshmallows, but the texture won’t be as smooth and creamy.
Why did my fudge turn out grainy?
Grainy fudge usually means the sugar crystallized. This can happen if you stirred the mixture while it was boiling, or if a grain of sugar from the spoon or pan got into the mixture. To avoid this, don’t stir once it starts boiling, and make sure your utensils are clean.
Can I double this recipe?
Absolutely! Double all ingredients and use a 9×13-inch pan. You’ll need to boil the mixture for about 5 to 6 minutes instead of 4, since there’s more volume. Keep an eye on the soft-ball stage to be safe.
How do I know when the fudge is done boiling?
After it reaches a rolling boil, let it boil for exactly 4 minutes. If you’re using a candy thermometer, look for 234°F to 240°F. For the cold water test, drop a bit into cold water—it should form a soft ball that holds its shape.
My fudge is too soft—what went wrong?
This usually means the mixture didn’t boil long enough, or it didn’t reach a true rolling boil before you started timing. Next time, make sure you’re at a full, vigorous boil before setting the timer. You can also try refrigerating the fudge longer to help it set.
Pin This Recipe!

Creamy Classic Fantasy Fudge: Easy 5-Minute Homemade Recipe
This foolproof fudge recipe delivers a perfectly creamy, melt-in-your-mouth texture without the stress of a candy thermometer. Made with simple pantry ingredients, it’s ready in just 5 minutes of active time and is guaranteed to convert even the most stubborn fudge skeptics.
- Prep Time: 5 minutes
- Cook Time: 4 minutes
- Total Time: 2 hours 9 minutes (includes cooling)
- Yield: 64 servings 1x
- Category: Dessert
- Cuisine: American
Ingredients
- 3 cups granulated sugar
- 3/4 cup unsalted butter (1 1/2 sticks), cut into pieces
- 2/3 cup evaporated milk
- 12 ounces semi-sweet chocolate chips (about 2 cups)
- 1 jar (7 ounces) marshmallow fluff
- 1 teaspoon vanilla extract
- 1 cup chopped walnuts or pecans (optional)
Instructions
- Line an 8×8-inch baking pan with parchment paper or aluminum foil, leaving about 2 inches of overhang on two opposite sides. Lightly grease the liner with butter or nonstick spray.
- In a medium heavy-bottomed saucepan, combine 3 cups granulated sugar, 3/4 cup unsalted butter (cut into pieces), and 2/3 cup evaporated milk. Place over medium heat and stir constantly until butter is melted and sugar is dissolved.
- Bring the mixture to a full, rolling boil. Once boiling, stop stirring and let it boil for exactly 4 minutes. The mixture should be thick and slightly darker in color.
- Optional: Test for soft-ball stage by dropping a small spoonful into a glass of cold water. It should form a soft, pliable ball that holds its shape. If using a candy thermometer, aim for 234°F to 240°F.
- Remove the pan from heat immediately. Add 12 ounces semi-sweet chocolate chips and stir gently until completely melted and smooth.
- Add the entire 7-ounce jar of marshmallow fluff and 1 teaspoon vanilla extract. Stir vigorously until glossy and well combined, about 1-2 minutes.
- If using, fold in 1 cup chopped nuts until evenly distributed.
- Pour the fudge mixture into the prepared pan and spread evenly with a spatula.
- Let the fudge cool at room temperature for 2-3 hours, or until firm to the touch. For quicker results, refrigerate for about 1 hour.
- Once set, lift the fudge out of the pan using the parchment overhang. Place on a cutting board and cut into 1-inch squares with a sharp knife, wiping the knife clean between cuts.
Notes
For best results, make on a dry day as humidity can affect setting. If fudge is too soft, it may need longer boiling time next batch. The fudge actually improves after a day or two as flavors meld. Store in an airtight container at room temperature for up to 2 weeks, or freeze for up to 3 months.
Nutrition
- Serving Size: 1 square (1-inch)
- Calories: 120
- Sugar: 15
- Sodium: 20
- Fat: 6
- Saturated Fat: 3.5
- Carbohydrates: 17
- Fiber: 0.5
- Protein: 1
Keywords: fudge, creamy fudge, fantasy fudge, marshmallow fluff fudge, easy fudge, homemade fudge, holiday fudge, chocolate fudge, 5-minute fudge, no thermometer fudge


