I still remember the first time I saw them. It was a few Halloweens ago, and my neighbor, an older woman named Clara who keeps to herself mostly, saw me struggling with a batch of store-bought cupcakes that looked more sad than scary. She didn’t say anything at first. Then, the next day, she knocked on my door with a simple white platter covered in plastic wrap. Underneath were the most perfect little deviled eggs I had ever seen, each one topped with a black olive that had been sliced to look just like a spider. I honestly just stood there staring. She shrugged and said, “It’s just eggs and olives, dear. But it’s the look on people’s faces that makes it worth it.” That moment, standing in my doorway on a crisp October afternoon, changed how I think about Halloween food forever.
See, I used to think Halloween snacks had to be complicated or sugary. You know, the kind of thing that takes three trips to the craft store and a degree in pastry arts. Clara’s spooky spider deviled eggs were the opposite of all that. They were simple, savory, and honestly, a little bit genius. The black olive “spiders” sitting on top of the creamy, golden filling looked creepy in the best way possible. I mean, who knew an olive could look so much like a tiny eight-legged creature? I made a mess of my kitchen trying to perfect the spider legs that first time—some of them looked more like squiggly worms—but Clara’s lesson stuck with me. It wasn’t about perfection. It was about the fun of the thing.
So, let me tell you, if you are looking for a Halloween appetizer that disappears before the candy bowl even gets touched, this is it. These spooky spider deviled eggs are the perfect mix of nostalgic and new. They are the kind of thing that makes adults smile and kids giggle (or shriek, depending on the kid). And honestly, they are so easy to put together that you will wonder why you haven’t been making them for every Halloween party. Maybe you have been there, staring at a Pinterest board full of elaborate desserts, feeling a little overwhelmed. I get it. This recipe is your shortcut to being the hit of the party without any stress. Let’s get into it.
Why You’ll Love This Recipe
I have tested this recipe at three different parties now, and each time, the platter comes back empty. There is something about the combination of the creamy, tangy yolk filling and the briny pop of the black olive spiders that people just cannot resist. Plus, they are genuinely fun to make. I am not a professional chef by any means, but I have learned a few tricks along the way that make these turn out perfectly every single time.
- Quick & Easy: You can have these ready in under 30 minutes. Seriously. Hard-boil the eggs, mix the filling, and assemble the spiders. That is it.
- Simple Ingredients: No fancy grocery trips needed. You likely already have eggs, mayonnaise, mustard, and a can of black olives in your pantry.
- Perfect for Halloween: These are the star of any spooky spread. Great for parties, potlucks, or even a fun family dinner before trick-or-treating.
- Crowd-Pleaser: I have seen picky eaters, adults, and even my uncle who “doesn’t do eggs” go back for seconds. They are just that good.
- Unbelievably Delicious: The texture of the creamy yolk filling combined with the smooth, salty olive is a match made in Halloween heaven. It is comfort food with a creepy twist.
What makes this recipe different from the rest? It is the balance. I have tried versions where the spiders look more like blobs, or the filling is too dry. My version uses a little bit of pickle juice (trust me on this) to give the filling a tangy kick that cuts through the richness. It is a small trick, but it makes a huge difference. This isn’t just another deviled egg recipe—it is your new go-to for every Halloween gathering.
What Ingredients You Will Need
This recipe uses simple, everyday ingredients to deliver a big impact. The key is using good quality eggs and making sure your olives are firm for easy slicing. Here is what you will need:
- 12 large eggs (room temperature works best for even cooking)
- 1/3 cup mayonnaise (I prefer Hellmann’s or Duke’s for a creamier texture)
- 1 tablespoon yellow mustard (adds a nice tang and color)
- 1 teaspoon white vinegar or pickle juice (pickle juice is my secret weapon for extra flavor)
- 1/4 teaspoon salt (or to taste)
- 1/8 teaspoon black pepper
- 1 can (6 ounces) large pitted black olives (you need the large ones for the spider bodies)
- Paprika or smoked paprika (for garnish, optional but pretty)
For the spider legs, you will also need a sharp paring knife. The olives are the star of the show here. I recommend buying the jumbo or colossal pitted black olives. They are easier to slice into spider shapes. If you can only find regular-sized olives, they will still work, but the spiders will be smaller and a little trickier to handle. Look for olives that are firm, not mushy. I have made the mistake of using soft olives before, and they just fall apart when you try to cut the legs.
If you want to add a little extra color, you can sprinkle some finely chopped chives or parsley on top of the filling before adding the spiders. It gives a nice pop of green against the yellow and black. But honestly, the classic black and white look is what makes them so spooky.
Equipment Needed
You do not need any fancy equipment for this recipe. Here is what I use every time:
- Medium saucepan (for boiling the eggs)
- Large bowl of ice water (for shocking the eggs after boiling)
- Sharp paring knife (essential for slicing the olives into spider shapes)
- Cutting board
- Mixing bowl (for the filling)
- Fork or potato masher (for mashing the yolks)
- Piping bag or zip-top bag (for filling the egg whites neatly)
- Serving platter
If you do not have a piping bag, do not worry. A simple zip-top bag with the corner snipped off works perfectly. I have used this method for years, and it is actually easier to control than a fancy piping bag. Just make sure the hole is big enough to let the filling through without getting clogged. You can also just use a small spoon to fill the eggs, but piping gives a much cleaner, more professional look.
Preparation Method
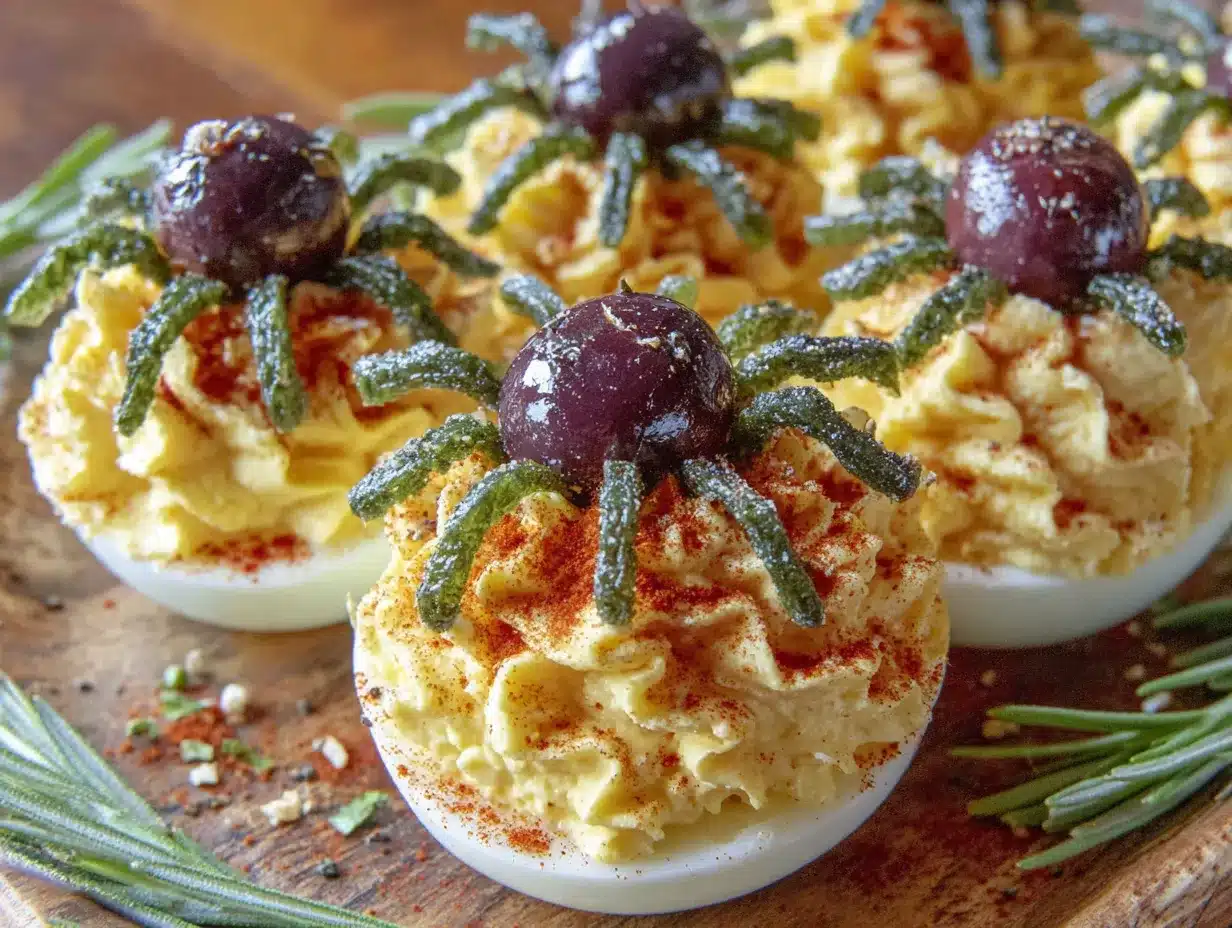
Making these spooky spider deviled eggs is easier than you think. Follow these steps carefully, and you will have a platter of creepy-crawly goodness in no time.
- Hard-Boil the Eggs: Place the 12 large eggs in a single layer in your saucepan. Cover them with cold water by about an inch. Bring the water to a rolling boil over high heat. Once it is boiling, turn off the heat, cover the pot, and let it sit for exactly 12 minutes. This is the sweet spot for perfectly cooked yolks—no green rings!
- Ice Bath: While the eggs are sitting, prepare a large bowl of ice water. When the 12 minutes are up, use a slotted spoon to transfer the eggs to the ice bath. Let them sit for at least 10 minutes. This stops the cooking process and makes them much easier to peel. I have learned the hard way that skipping this step leads to eggs that look like they have been through a war.
- Peel the Eggs: Gently tap each egg on the counter to crack the shell, then roll it between your palms to loosen the shell. Start peeling from the wider end where the air pocket is. Rinse the peeled eggs under cold water to remove any tiny shell fragments. Pat them dry with a paper towel.
- Slice the Eggs: Using a sharp knife, slice each egg in half lengthwise. Gently pop out the yolks into a mixing bowl. Arrange the egg white halves on a serving platter, cut side up. You should have 24 white halves.
- Make the Filling: Add the 1/3 cup mayonnaise, 1 tablespoon yellow mustard, 1 teaspoon white vinegar or pickle juice, 1/4 teaspoon salt, and 1/8 teaspoon black pepper to the bowl with the yolks. Use a fork to mash everything together until it is smooth and creamy. Taste it and adjust the seasoning if needed. I usually add a little more pickle juice because I love the tang.
- Pipe the Filling: Spoon the yolk mixture into a piping bag or a zip-top bag. Snip off a small corner of the bag. Pipe the filling into each egg white half, swirling it slightly at the top for a nice presentation. You can also use a small spoon if you prefer.
- Prepare the Spider Olives: Drain the can of large pitted black olives and pat them dry with a paper towel. This is the fun part. Take one olive and slice it in half crosswise (not lengthwise). One half will be the spider’s body. For the legs, take the other half and carefully cut it into thin strips, about 4-6 strips per spider. You want them to look like little spider legs. Repeat this process for as many spiders as you need. I usually make one spider per egg half, so you will need 24 olive halves for bodies and 24 halves for legs.
- Assemble the Spiders: Place one olive half (the body) on top of the filling in the center of each egg. Then, take the thin olive strips (the legs) and arrange them around the body. I like to place 4 legs on each side, slightly curved, to look like a real spider. It takes a little patience, but it is so worth it.
- Garnish and Serve: Lightly sprinkle the deviled eggs with paprika if desired. This adds a little color and a smoky flavor. Serve immediately or refrigerate for up to 2 hours before serving.
Cooking Tips & Techniques
I have made these spooky spider deviled eggs about a dozen times now, and I have definitely learned a few things along the way. Here are my best tips to make sure yours turn out perfect:
Perfect Hard-Boiled Eggs Every Time: The 12-minute method I mentioned above is foolproof. But here is the thing—do not skip the ice bath. I once forgot to put the eggs in ice water because I got distracted by a phone call. The yolks had that ugly green ring, and the eggs were a nightmare to peel. The ice bath is non-negotiable.
Making the Spiders: The olives can be tricky. I have had plenty of spider legs break off or look more like squiggly lines than legs. The trick is to use a very sharp knife and slice the olive strips as thin as you can. If the olive is too soft, it will crumble. If that happens, try chilling the olives in the fridge for 10 minutes before slicing. It firms them up nicely.
Timing and Multitasking: You can make the filling and slice the olives while the eggs are boiling and cooling. This saves a ton of time. I usually set up my piping bag and get the platter ready while the eggs are in the ice bath. It makes the whole process feel effortless.
Consistency is Key: If your filling is too thick, add a tiny splash of pickle juice or milk. If it is too thin, add a little more mayonnaise. You want it to be creamy but firm enough to hold its shape when piped. I have had a batch that was too runny, and the spiders just sank into the filling. Not a good look.
Variations & Adaptations
One of the best things about this recipe is how easy it is to adapt. Here are some variations I have tried and loved:
- Spicy Spider Eggs: Add a dash of hot sauce or a pinch of cayenne pepper to the yolk mixture. It gives the eggs a nice little kick that pairs perfectly with the salty olives.
- Avocado Deviled Spiders: Swap half the mayonnaise for mashed avocado. This makes the filling greener and adds a creamy, healthy twist. Just be aware that the filling will brown faster, so serve them soon after making.
- Bacon Spider Legs: For a meatier version, replace the olive legs with thin strips of crispy bacon. It is not as spider-like, but it is delicious. I tried this for a Halloween party once, and they were gone in minutes.
- Gluten-Free & Low-Carb: This recipe is naturally gluten-free and low-carb, so it is perfect for guests with dietary restrictions. Just double-check your mayonnaise label to make sure it is gluten-free.
- Vegan Option: You can make a vegan version using silken tofu or vegan mayonnaise for the filling. For the “eggs,” use small round pieces of tofu or potato rounds. The olives work the same way.
Serving & Storage Suggestions
These spooky spider deviled eggs are best served chilled or at room temperature. I like to arrange them on a black or dark-colored platter to make the spiders really pop. A little bit of fresh dill or parsley around the edges of the platter can look like grass or cobwebs, adding to the spooky vibe.
For storage, place the deviled eggs in an airtight container and refrigerate them. They will keep for up to 2 days, but the texture is best within the first 24 hours. The olives might release a little moisture over time, so I recommend adding the spiders right before serving if you are making them ahead of time. You can prep the filling and the egg whites separately, then assemble everything an hour or two before your party.
When it comes to reheating, do not do it. Deviled eggs are meant to be served cold. If they have been in the fridge for a while, let them sit at room temperature for about 10 minutes before serving to take the chill off.
Nutritional Information & Benefits
These spooky spider deviled eggs are surprisingly nutritious. Here is a rough estimate per serving (2 egg halves):
| Nutrient | Amount |
|---|---|
| Calories | ~180 |
| Protein | 12g |
| Fat | 14g |
| Carbohydrates | 2g |
| Fiber | 0g |
| Sugar | 1g |
Eggs are a great source of high-quality protein and healthy fats. They also contain important vitamins like B12, D, and choline, which is great for brain health. Olives are rich in healthy monounsaturated fats and antioxidants. This recipe is naturally gluten-free, low-carb, and keto-friendly. The only potential allergen is eggs, so be sure to let your guests know if you are serving these at a party.
Conclusion
Honestly, these spooky spider deviled eggs are the kind of recipe that makes me excited for Halloween every year. They are simple enough for a weeknight snack but impressive enough for a party. I love how they bring a little bit of creepy fun to the table without any of the stress. And every time I make them, I think of Clara standing at my door with that platter, proving that the best recipes come from the most unexpected moments.
I really hope you give these a try. Customize them however you like—add some spice, swap the olives for bacon, or just keep them classic. The beauty is in the simplicity. Let me know how they turn out! Leave a comment below with your own twist, or share a photo of your spooky spider eggs. I would love to see them. And if you enjoyed this recipe, consider sharing it with a friend who loves Halloween as much as you do. Happy cooking, and have a wonderfully spooky Halloween!
Frequently Asked Questions
How do I keep the olive spiders from falling apart?
Use a very sharp knife and slice the olives slowly. If the olives are too soft, chill them in the fridge for 10 minutes before cutting. This firms them up and makes them easier to handle.
Can I make these deviled eggs a day ahead?
Yes! You can prepare the egg whites and the filling up to 24 hours in advance. Store them separately in the fridge. Assemble the spiders and fill the eggs a few hours before serving for the best texture and appearance.
What if I don’t have a piping bag?
No problem at all. Use a zip-top bag with a small corner snipped off. It works just as well. You can also use a small spoon to fill the eggs, though the look will be a little more rustic.
Can I use large eggs instead of jumbo?
Absolutely. Large eggs work perfectly fine. Just be aware that the spider olives might look a bit large on smaller egg halves. You can use smaller olives or just cut the spiders to fit.
Are these deviled eggs safe for kids?
Yes, they are perfectly safe for kids. The olive spiders might look a little spooky, but they are just olives. Most kids think they are fun and delicious. Just be mindful of any egg allergies in the group.
Pin This Recipe!
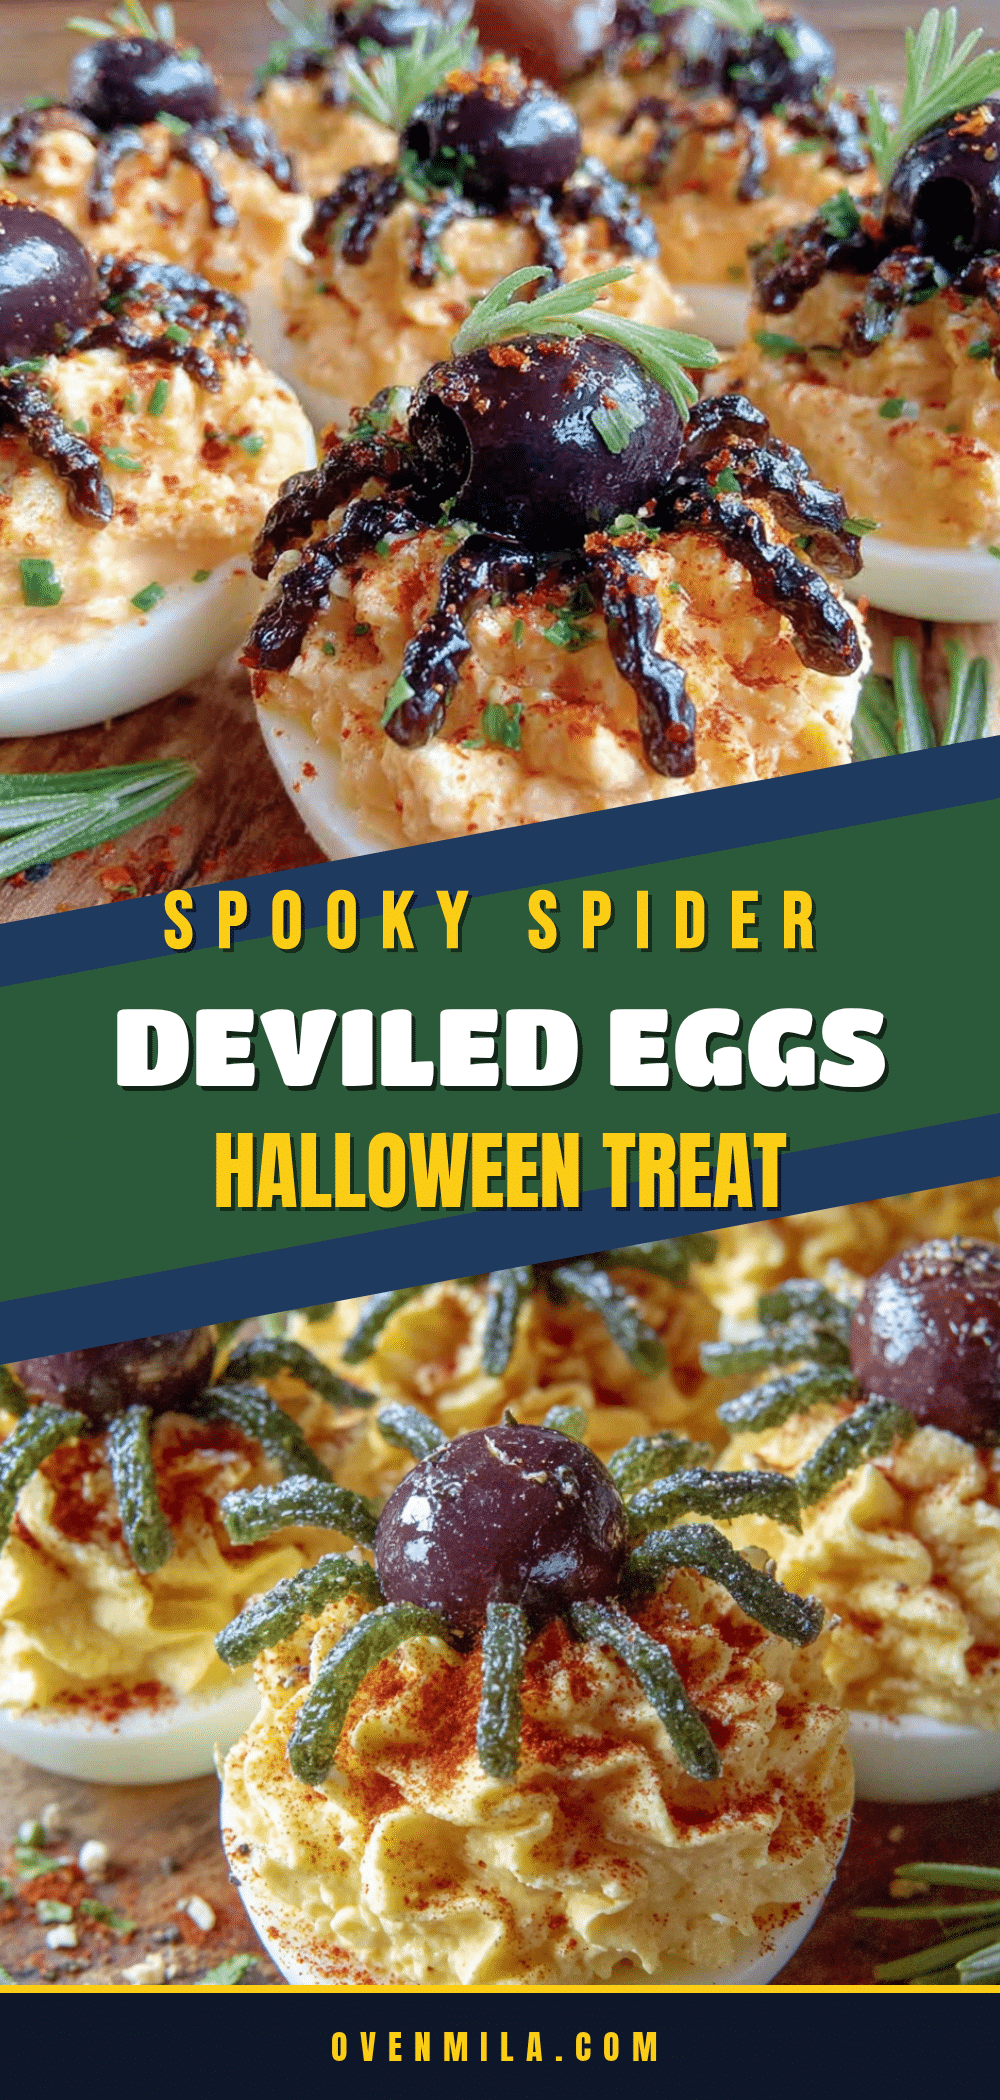
Best Spooky Spider Deviled Eggs – Easy Halloween Appetizer
These spooky spider deviled eggs are the perfect Halloween appetizer—creamy, tangy, and topped with black olive spiders that look creepy in the best way. Quick to make with simple ingredients, they’re a crowd-pleaser for parties and potlucks.
- Prep Time: 15 minutes
- Cook Time: 12 minutes
- Total Time: 27 minutes
- Yield: 24 deviled eggs (12 servings of 2 eggs each) 1x
- Category: Appetizer
- Cuisine: American
Ingredients
- 12 large eggs (room temperature)
- 1/3 cup mayonnaise (Hellmann’s or Duke’s recommended)
- 1 tablespoon yellow mustard
- 1 teaspoon white vinegar or pickle juice
- 1/4 teaspoon salt
- 1/8 teaspoon black pepper
- 1 can (6 ounces) large pitted black olives (jumbo or colossal preferred)
- Paprika or smoked paprika (for garnish, optional)
Instructions
- Hard-boil the eggs: Place eggs in a single layer in a saucepan, cover with cold water by 1 inch. Bring to a rolling boil over high heat, then turn off heat, cover, and let sit for exactly 12 minutes.
- Prepare an ice bath: While eggs sit, fill a large bowl with ice water. Transfer eggs to ice bath using a slotted spoon and let cool for at least 10 minutes.
- Peel the eggs: Gently tap each egg to crack the shell, roll between palms, and peel starting from the wider end. Rinse under cold water and pat dry.
- Slice the eggs: Cut each egg in half lengthwise. Remove yolks to a mixing bowl. Arrange egg white halves on a serving platter, cut side up.
- Make the filling: Add mayonnaise, mustard, vinegar or pickle juice, salt, and pepper to the yolks. Mash with a fork until smooth and creamy. Adjust seasoning to taste.
- Pipe the filling: Transfer yolk mixture to a piping bag or zip-top bag with a small corner snipped off. Pipe filling into each egg white half, swirling slightly at the top.
- Prepare the spider olives: Drain olives and pat dry. Slice each olive in half crosswise. Use one half as the spider body. Cut the other half into thin strips (4-6 per spider) for legs.
- Assemble the spiders: Place one olive half (body) on top of the filling in the center of each egg. Arrange olive strips (legs) around the body, 4 on each side, slightly curved.
- Garnish and serve: Lightly sprinkle with paprika if desired. Serve immediately or refrigerate for up to 2 hours before serving.
Notes
For best results, use jumbo or colossal pitted black olives for easier slicing. Chill olives in the fridge for 10 minutes before cutting if they are too soft. The pickle juice adds a tangy kick—adjust to taste. Deviled eggs can be made up to 24 hours ahead; store filling and whites separately and assemble before serving. Do not reheat; serve cold or at room temperature.
Nutrition
- Serving Size: 2 deviled eggs
- Calories: 180
- Sugar: 1
- Sodium: 320
- Fat: 14
- Saturated Fat: 3.5
- Carbohydrates: 2
- Protein: 12
Keywords: Halloween deviled eggs, spider deviled eggs, spooky appetizer, easy Halloween recipe, black olive spiders, party appetizer


