It was 10:47 PM on a random Wednesday in mid-October, and I was staring at a bag of baby carrots like it held the secrets to the universe. The Halloween party was the next day—the one I’d volunteered to bring “something fun” for, because apparently I forget every single year that I am not a crafty person. I didn’t have a themed platter, or cookie cutters shaped like ghosts, or any of those cute little food picks they sell at the fancy grocery store. But I had a bag of carrots, some cream cheese that was about to expire, and an idea that felt a little unhinged at that hour. What if I just… made the veggies look like a skeleton? Not a cute skeleton. A slightly terrifying, very hungry skeleton that had crawled out of the snack drawer. Honestly, it was the kind of idea that only makes sense when you’re tired, the kitchen lights are too bright, and you’ve already committed to not going to the store again. I grabbed a serrated knife and started carving. Maybe you’ve been there—staring down a party platter deadline with nothing but determination and a vague sense of panic. Let me tell you, that weird late-night impulse turned into a tradition that my kids now demand every single October. This Easy Halloween Skull & Bones Veggie Tray is proof that you don’t need fancy tools or a Pinterest-worthy kitchen to make something that absolutely steals the show.
Why You’ll Love This Recipe
This isn’t just another veggie platter. This is the one that gets photographed before anyone even takes a bite, and then gets completely devoured because, surprise, it’s actually delicious. I’ve tested this with my own crew of picky eaters and at three different school Halloween parties, and it’s never come home with leftovers.
- Budget-Friendly: You’re using basic veggies and pantry staples. No weird ingredients, no expensive specialty items. This whole tray costs less than a fast-food run.
- Quick to Assemble: Once you get the hang of the skull shape, you can put this together in under 20 minutes. The actual carving is maybe 10 minutes. I timed it.
- Kid-Approved: My kids fought over who got to eat the “brain” (the cauliflower). They forget they’re eating vegetables when they look like a skeleton.
- Customizable for Picky Eaters: Don’t like broccoli? Swap it out. Someone hates ranch? Use hummus. This tray adapts to whatever your family will actually eat.
- Makes You Look Like a Hero: Honestly, people will think you spent hours on this. You can smile and nod. I won’t tell.
What makes this different from every other veggie tray out there is the presentation. It’s not just arranged nicely—it’s a full-on edible skeleton that sits right in the middle of the table and becomes the conversation piece. And because it’s built on a base of cream cheese dip, every single veggie has something tasty to grab onto. It’s the kind of snack that makes you close your eyes after the first bite because you’re so relieved it actually worked. It’s Halloween fun, reimagined for real families with real kitchens and real budgets.
What Ingredients You Will Need
This recipe uses simple, everyday vegetables and a couple of dip ingredients to create something that looks far more complicated than it is. Most of these are probably already in your fridge or crisper drawer right now.
For the Skeleton Base & Dip
- 8 ounces cream cheese, softened (I use Philadelphia—it gives the smoothest base for the dip)
- 1/2 cup sour cream (adds tanginess and helps the dip spread easily)
- 1 packet ranch dressing mix (the dry powder kind, like Hidden Valley)
- 1/4 cup milk (to thin the dip to the perfect dipping consistency)
For the Skull & Bones
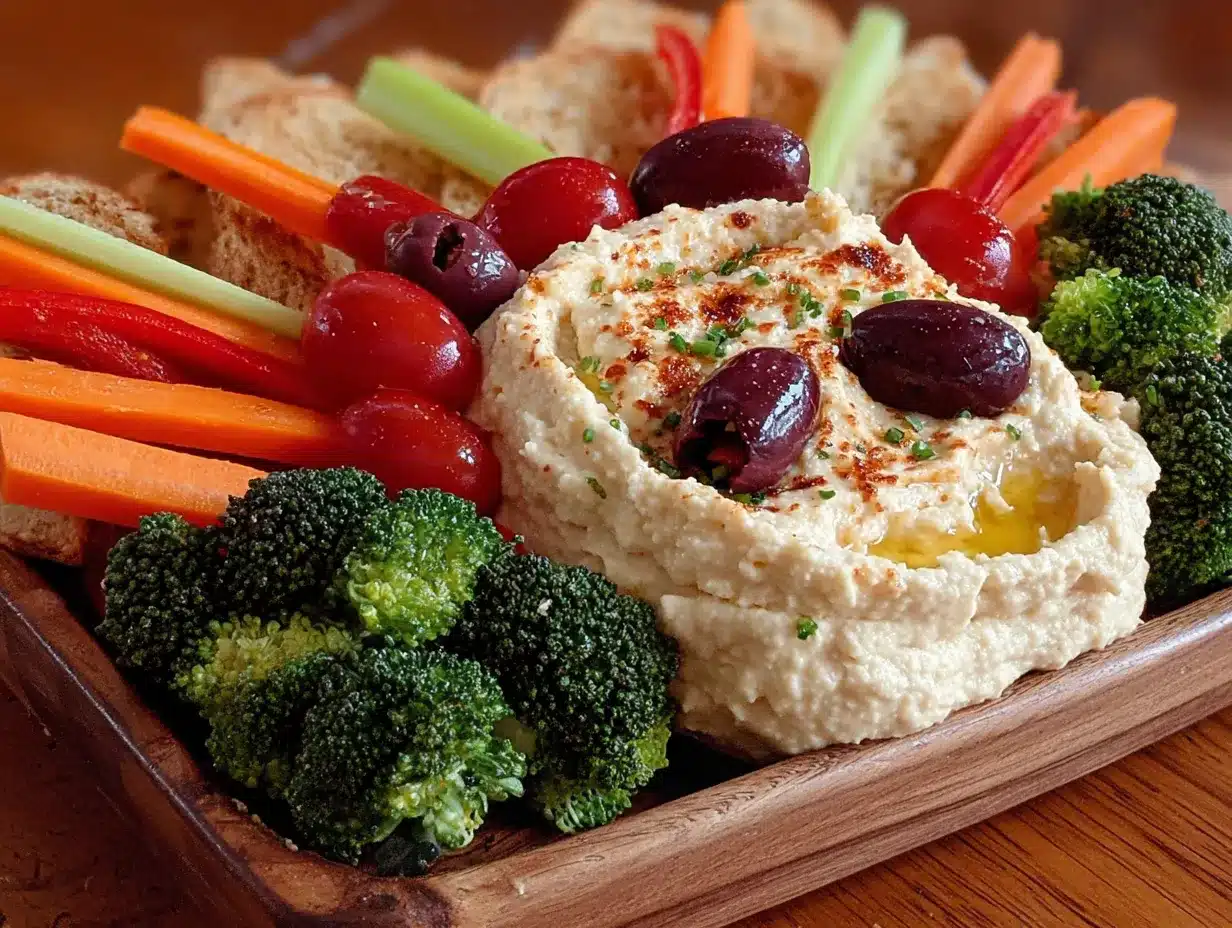
- 1 large head of cauliflower (this will be the skull—look for one that’s round and fairly smooth on top)
- 1 large cucumber, cut into thin rounds (these form the eye sockets and nasal cavity)
- 2-3 black olives, sliced (for the pupils—adds that slightly creepy skeleton stare)
- 1 bag baby carrots (about 10 ounces—these will be the “bones” radiating out from the skull)
- 1 bunch celery, cut into 3-inch sticks (more bones, but with a different texture)
- 1 red bell pepper, cut into strips (adds color and a sweet crunch)
- 1 cup broccoli florets (optional, but great for filling space and adding green)
- 1 cup cherry tomatoes (optional, but kids love popping them in their mouths)
Ingredient Tips: I’ve found that using full-fat cream cheese makes the dip significantly creamier and more stable for sitting out at a party. If you’re dairy-free, you can use a plant-based cream cheese and dairy-free sour cream—just be aware the texture might be slightly thinner. For the cauliflower, try to pick one that’s not too lumpy on top. The smoother the dome, the more skull-like it will look. And honestly, if you can’t find a good cauliflower, a large round zucchini works in a pinch—just carve it a bit deeper.
Equipment Needed
You don’t need a lot of fancy tools for this, which is honestly my favorite part. Here’s what I use every time:
- Large serving platter or cutting board (at least 12 inches wide—you need room for the bones to spread out)
- Small paring knife (for carving the face into the cauliflower)
- Mixing bowl (for the dip)
- Spatula (for spreading the dip on the platter)
- Cutting board and sharp knife (for prepping the veggies)
- Small round cookie cutter or a shot glass (optional, but makes perfect eye sockets in the dip)
If you don’t have a paring knife, a small serrated steak knife works surprisingly well for carving the cauliflower. I’ve also used a melon baller to scoop out the eye sockets, which gave a really clean look. For the platter, a basic white one from the dollar store works great because the white dip and cauliflower really pop against it. Just make sure it’s big enough—I learned the hard way that a small plate makes the skeleton look cramped and sad.
Preparation Method
Let’s build this skeleton. I promise it’s easier than it sounds, and the first time you do it, you’ll be amazed at how quickly it comes together.
- Make the dip first. In a mixing bowl, combine the softened cream cheese, sour cream, ranch packet, and milk. Whisk or stir until completely smooth and creamy. You want it to be thick but spreadable—like a very soft buttercream. If it’s too thick, add another tablespoon of milk. Set this aside while you prep the veggies.
- Prep the cauliflower skull. Rinse the cauliflower and pat it dry. Place it on your cutting board with the stem side down. You’re going to carve a face into the rounded top. Start by cutting two deep eye sockets about 1 inch wide and 1/2 inch deep. I use the tip of my paring knife to score the shape first, then scoop out the flesh. For the nose, cut a small upside-down triangle or two small holes. For the mouth, cut a jagged line about 2 inches wide—think of a skeleton’s grin. Don’t worry if it’s not perfect. Imperfect skulls look more authentic anyway.
- Assemble the skull. Place a cucumber slice into each eye socket. Top each with a slice of black olive for the pupil. Place a smaller cucumber slice or a piece of olive in the nose cavity. For the mouth, you can leave it empty or line it with small carrot sticks to look like teeth. I usually leave it dark—it looks creepier.
- Prepare the platter. Take your large serving platter and spread the cream cheese dip in a rough oval shape in the center. This is going to be the “body” of the skeleton. Use a spatula to smooth it out evenly, about 1/4 inch thick. The dip should be about 6-8 inches wide and 10-12 inches long.
- Place the skull. Gently set the cauliflower skull at the top of the dip oval. Press it down slightly so it stays in place. The stem should be resting on the platter, with the carved face looking out at your guests.
- Create the skeleton body. Use the baby carrots to form the ribs. Starting just below the skull, place carrot sticks diagonally across the dip, angling them inward toward the center. I use about 6-8 carrots on each side to create a ribcage effect. Then use the celery sticks to form the arms and legs. Place two celery sticks extending outward from the top of the dip for arms, and two longer ones at the bottom for legs. You can bend the celery slightly at the “elbows” and “knees” by making a small cut halfway through the stalk.
- Fill in the rest. Arrange the red bell pepper strips, broccoli florets, and cherry tomatoes around the skeleton to fill the empty spaces on the platter. This adds color and gives people more to grab. I like to place the tomatoes near the “hands” of the skeleton, like it’s holding them.
- Final check. Step back and look at your creation. Does it look like a skeleton? If the ribs look too sparse, add more carrots. If the skull looks too plain, you can add a small piece of bell pepper as a tongue. Adjust until you’re happy—this is your skeleton, after all.
Cooking Tips & Techniques
I’ve made this tray probably a dozen times now, and I’ve learned a few things the hard way. Here’s what I wish someone had told me before my first attempt.
Don’t overthink the carving. The first time I made this, I spent 20 minutes trying to make the cauliflower look like a perfect human skull. It looked weird and stressed me out. Now I just cut two circles for eyes, a triangle for the nose, and a jagged line for the mouth. That’s it. Kids don’t care about anatomical accuracy—they care that it looks like a spooky skeleton.
Keep the dip thick. If your dip is too thin, it will run off the platter and make a mess. I learned this when I added too much milk and ended up with a ranch puddle on my counter. The dip should be thick enough that it holds its shape when you spread it. If you make it ahead of time, it will thicken up in the fridge, so you can always add a splash of milk right before serving to loosen it up.
Prep everything before you start assembling. Cut all your veggies, make the dip, and carve the cauliflower before you even touch the platter. Once you start arranging, you don’t want to stop to wash a knife or find the olives. Trust me on this—I’ve had a half-assembled skeleton sitting on my counter while I dug through the fridge for more carrots. It’s not a good look.
Use the veggies as structural elements. The carrots and celery aren’t just decoration—they actually help hold the dip in place. If you press them gently into the dip, they’ll stay put even if someone bumps the platter. I arrange the ribs first, then use the arm and leg bones to create a frame around the dip oval.
One more thing—if you’re making this for a party, assemble it on the platter you’re serving it on. Trying to transfer it later is a disaster. I speak from experience. A spatula and a lot of swearing were involved.
Variations & Adaptations
This skeleton is forgiving. Here are some ways I’ve changed it up depending on what’s in season or who’s coming over.
The Dip Swap. Not a fan of ranch? Use hummus instead. I’ve made this with roasted red pepper hummus and it looked incredible—the orange color actually made the skeleton look more “Halloween-y.” You can also use spinach artichoke dip for a warmer, more indulgent version. Just make sure whatever dip you use is thick enough to hold the veggies in place.
The Veggie Swap. My kids hate broccoli, so sometimes I use snap peas or zucchini sticks instead. The key is to keep the colors contrasting—green against the white dip, orange carrots popping out. I’ve also used jicama sticks for a crunchier, milder option that picky eaters seem to love. And if you can’t find a good cauliflower, a large round head of cabbage works—just peel off the outer leaves and carve the same way.
The Spooky Upgrade. For a truly terrifying version, use a small pumpkin or butternut squash for the skull. You’ll need to hollow it out first, but the orange color against the white dip is genuinely creepy. I did this for a Halloween party once and someone actually screamed. It was my proudest moment.
The Dietary Adaptation. To make this dairy-free, use a plant-based cream cheese and dairy-free sour cream for the dip. Most ranch seasoning packets are naturally gluten-free, but double-check the label. For a lower-carb version, skip the carrots and use more celery, cucumber, and bell pepper. The skeleton will look a little different, but it still works.
Serving & Storage Suggestions
This tray is best served cold, right after assembly. The dip is creamy, the veggies are crisp, and the skeleton looks its spookiest when everything is fresh. I usually put it out about 20 minutes before guests arrive, so it has time to come to a slightly less fridge-cold temperature, but not so long that the veggies start to wilt.
What to serve with it: This tray is usually the star of the show, but I’ve paired it with other Halloween snacks like spider web pizza bites and mummy hot dogs for a full spooky spread. It also goes great with a bowl of popcorn or a plate of pumpkin-shaped cheese ball for a balanced snack table.
Storage: If you have leftovers (unlikely, but possible), remove the cauliflower skull and store it separately in an airtight container. The dip and veggies can be stored together, but the dip will absorb moisture from the veggies overnight, so it won’t be as thick the next day. I usually just toss the leftover dip and keep the veggies for lunchboxes.
Reheating: You don’t reheat this—it’s a cold dish. But if the dip has thickened up in the fridge, you can let it sit at room temperature for 15 minutes and stir it before serving again. The veggies might be a little softer, but they’re still good.
Flavor development: Honestly, this is best eaten the day you make it. The dip stays fresh, but the veggies start to lose their crunch after about 24 hours. If you’re prepping for a party, I recommend making the dip and cutting the veggies the night before, then assembling the skeleton no more than 2 hours before serving.
Nutritional Information & Benefits
This is one of those rare Halloween treats that’s actually good for you. Here’s a rough breakdown for a serving of about 1 cup of veggies with 2 tablespoons of dip:
- Calories: Approximately 120-150 per serving
- Protein: 3-4 grams (from the dairy and veggies)
- Carbohydrates: 10-12 grams (mostly from the vegetables)
- Fiber: 3-4 grams (hello, cauliflower and carrots)
- Fat: 8-10 grams (from the cream cheese and sour cream)
Health Benefits: Cauliflower is packed with vitamin C and antioxidants. Carrots are famous for their beta-carotene (great for eye health). Celery is mostly water and fiber, making it hydrating and filling. The cream cheese dip adds calcium and protein, which helps balance out the sugar spikes from all the Halloween candy your kids will inevitably eat later. This is a smart way to get some actual nutrition into them before the sugar rush begins.
Dietary Considerations: This recipe is naturally vegetarian and can be made gluten-free by checking your ranch seasoning label. It’s low in added sugar and can be made dairy-free with simple substitutions. The main allergens are dairy (cream cheese, sour cream) and possibly gluten in the ranch mix.
Conclusion
This Easy Halloween Skull & Bones Veggie Tray has become my go-to for every Halloween party, school event, and spooky movie night. It’s the kind of recipe that looks like you spent hours on it, but really came together in a late-night moment of desperation and creativity. My kids now expect it every October, and honestly, I love making it. There’s something deeply satisfying about watching people’s faces light up when they realize the skeleton is made of vegetables. It’s fun, it’s frugal, and it actually gets kids to eat their veggies without a single complaint.
I’d love to hear how yours turns out. Did you add your own twist? Did your kids help carve the skull? Drop a comment below and let me know—I read every single one, and I love seeing your spooky creations. If you found this helpful, share it with a friend who’s stressing about their Halloween party menu. Trust me, this skeleton will save the day.
Frequently Asked Questions
Can I make this tray ahead of time?
You can prep the dip and cut the veggies up to 24 hours in advance, but I recommend assembling the skeleton no more than 2 hours before serving. The veggies start to lose their crunch and the dip can get watery if it sits too long.
What if I can’t find a good cauliflower for the skull?
No worries! A large round zucchini, a head of cabbage, or even a small pumpkin works great. Just carve the face into whatever vegetable you have. The shape doesn’t have to be perfect—imperfect skulls look more authentic anyway.
How do I get my kids to help with this recipe?
Let them carve the face into the cauliflower (with a butter knife for safety) and arrange the veggies on the platter. Kids love being in charge of the “bones.” My youngest always insists on placing the olive pupils herself.
Can I use a different dip?
Absolutely! Hummus, spinach dip, or even guacamole work great. Just make sure the dip is thick enough to hold the veggies in place. If it’s too runny, it will slide off the platter and make a mess.
How long will this last at a party?
It’s fine at room temperature for about 2 hours, which is standard for any dairy-based dip. If your party runs longer, just put the platter back in the fridge for 15 minutes to chill it down again. The veggies will stay crisp for the whole party if you keep them cold.
Pin This Recipe!
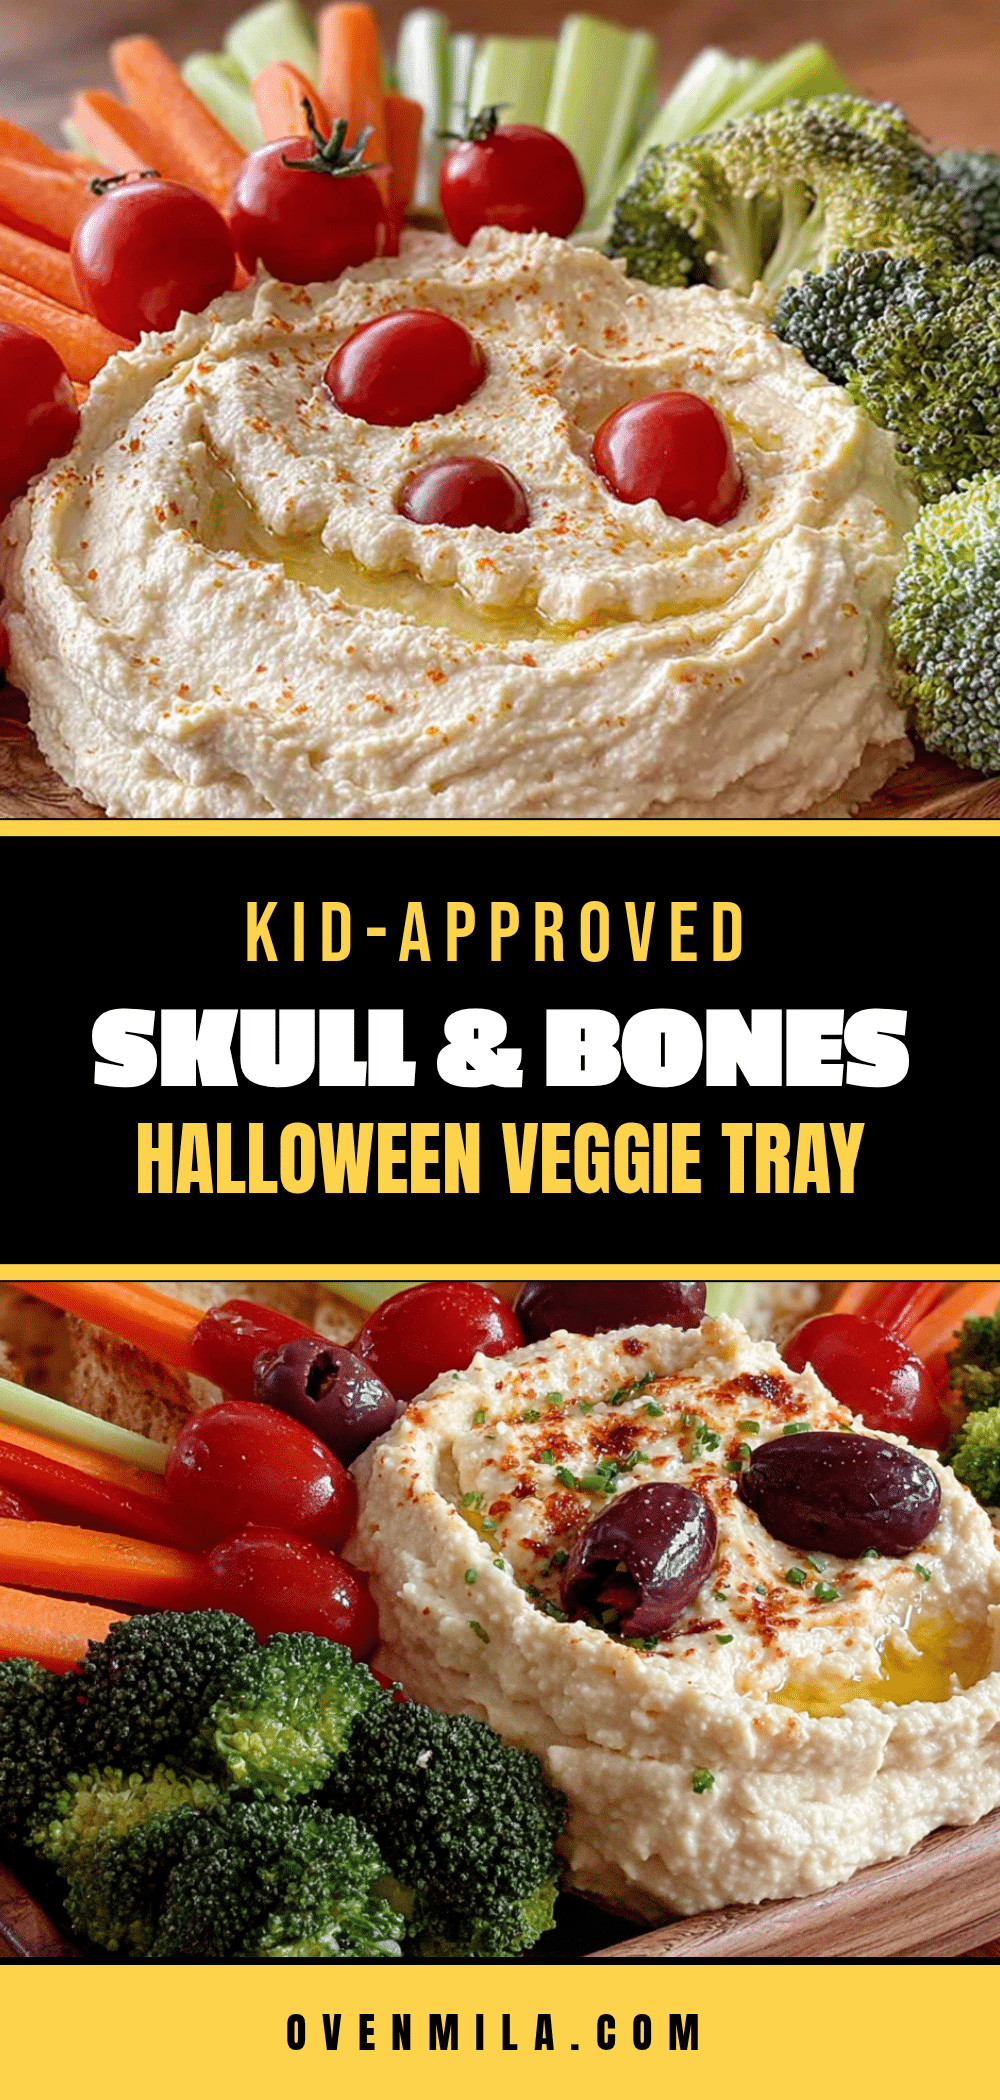
Easy Halloween Skull & Bones Veggie Tray
A spooky and fun Halloween veggie tray shaped like a skeleton, made with a creamy ranch dip, cauliflower skull, and colorful vegetables. It’s a budget-friendly, kid-approved appetizer that looks impressive but comes together in under 20 minutes.
- Prep Time: 20 minutes
- Cook Time: 0 minutes
- Total Time: 20 minutes
- Yield: 8 servings 1x
- Category: Appetizer
- Cuisine: American
Ingredients
- 8 ounces cream cheese, softened
- 1/2 cup sour cream
- 1 packet ranch dressing mix
- 1/4 cup milk
- 1 large head of cauliflower
- 1 large cucumber, cut into thin rounds
- 2–3 black olives, sliced
- 1 bag baby carrots (about 10 ounces)
- 1 bunch celery, cut into 3-inch sticks
- 1 red bell pepper, cut into strips
- 1 cup broccoli florets (optional)
- 1 cup cherry tomatoes (optional)
Instructions
- Make the dip first. In a mixing bowl, combine the softened cream cheese, sour cream, ranch packet, and milk. Whisk or stir until completely smooth and creamy. Set aside.
- Prep the cauliflower skull. Rinse the cauliflower and pat it dry. Place it on your cutting board with the stem side down. Carve a face into the rounded top: cut two deep eye sockets about 1 inch wide and 1/2 inch deep, a small upside-down triangle for the nose, and a jagged line about 2 inches wide for the mouth.
- Assemble the skull. Place a cucumber slice into each eye socket. Top each with a slice of black olive for the pupil. Place a smaller cucumber slice or a piece of olive in the nose cavity. Leave the mouth empty or line it with small carrot sticks.
- Prepare the platter. Take your large serving platter and spread the cream cheese dip in a rough oval shape in the center, about 1/4 inch thick and 6-8 inches wide by 10-12 inches long.
- Place the skull. Gently set the cauliflower skull at the top of the dip oval. Press it down slightly so it stays in place.
- Create the skeleton body. Use the baby carrots to form the ribs by placing them diagonally across the dip, angling inward toward the center. Use about 6-8 carrots on each side. Then use the celery sticks to form the arms and legs: two extending outward from the top for arms, and two longer ones at the bottom for legs.
- Fill in the rest. Arrange the red bell pepper strips, broccoli florets, and cherry tomatoes around the skeleton to fill empty spaces on the platter.
- Final check. Step back and adjust as needed. Add more carrots if ribs look sparse, or add a small piece of bell pepper as a tongue.
Notes
Don’t overthink the carving—imperfect skulls look more authentic. Keep the dip thick to prevent running. Prep all ingredients before assembling. Use veggies as structural elements by pressing them gently into the dip. Assemble on the serving platter to avoid transferring later.
Nutrition
- Serving Size: 1 cup of veggies wit
- Calories: 120150
- Sugar: 45
- Sodium: 300400
- Fat: 810
- Saturated Fat: 56
- Carbohydrates: 1012
- Fiber: 34
- Protein: 34
Keywords: Halloween, veggie tray, skeleton, spooky, appetizer, party food, healthy snack, kid-friendly


