My neighbor, a retired art teacher named Mrs. Gable, watched me fumbling with a block of cream cheese one October afternoon. I was trying to shape it into a perfect pumpkin for a Halloween party, and honestly, it was looking more like a lumpy potato. She didn’t say anything at first. Then she just walked over to her garden, picked a few sprigs of rosemary, and handed them to me. “Forget the pumpkin,” she said with a wink. “Make something that looks like it’s having fun.” That conversation—her gentle nudge to stop overcomplicating things—stuck with me way more than any recipe ever could. And it’s exactly why I started making this Crowd-Pleasing Mummy Wrapped Cheese Ball with Crackers. It’s not about perfection; it’s about the joy of sharing something that makes people smile before they even take a bite.
Let me tell you, the first time I brought this to a Halloween potluck, I was a little nervous. I mean, a cheese ball wrapped to look like a mummy? It felt a bit silly. But the moment I set it down on the table, surrounded by dips and chips, it became the center of attention. People didn’t just grab a cracker and move on—they stopped, laughed, and asked how I did it. And that’s the thing about this recipe. It’s not just a snack; it’s a conversation starter. You know that feeling when you bring a dish to a party and it disappears in ten minutes? That’s this cheese ball. It’s creamy, savory, and wrapped in a blanket of buttery crescent dough that looks exactly like mummy bandages. Two tiny olive eyes peek out, and suddenly, everyone at the party is a kid again.
I’ve tweaked Mrs. Gable’s advice over the years, swapping the rosemary for crescent rolls and adding a blend of cheeses that makes it impossible to stop eating. Honestly, it’s become my go-to for any gathering where I want to impress without stress. Whether it’s a Halloween bash, a Thanksgiving appetizer spread, or just a random Friday night with friends, this mummy cheese ball delivers. It’s the kind of recipe that makes you look like a kitchen wizard, even if you spent most of the prep time laughing at how goofy it looks. And that’s why I keep making it—because every time I do, I remember that cooking is supposed to be fun, not fussy.
Why You’ll Love This Recipe
This isn’t just another cheese ball recipe. After testing this dozens of times for family gatherings and neighborhood parties, I can tell you it’s the one that gets the most “wow” reactions. Here’s why this Crowd-Pleasing Mummy Wrapped Cheese Ball with Crackers deserves a spot in your hosting rotation:
- Quick & Easy: Comes together in under 30 minutes, with just 15 minutes of active prep. Perfect for those last-minute party invites or when you realize you forgot to plan the appetizer.
- Simple Ingredients: No fancy grocery trips needed. Cream cheese, shredded cheddar, crescent rolls, and a few pantry staples are all you need. You likely have everything in your kitchen right now.
- Perfect for Halloween & Beyond: While it’s a showstopper at Halloween parties, this cheese ball works for any gathering where you want a fun, themed dish. Game day, birthday parties, or just a cozy night in with friends.
- Crowd-Pleaser: Creamy, cheesy, and wrapped in flaky, buttery dough—this is the kind of appetizer that disappears before you can grab a second serving. Kids and adults alike go crazy for it.
- Unbelievably Delicious: The combination of tangy cream cheese, sharp cheddar, and savory seasonings, all wrapped in golden crescent dough, is next-level comfort food. It’s rich, satisfying, and utterly addictive.
What makes this recipe different from the rest? It’s the texture. Most cheese balls are just a soft blob on a plate, but this one has a crispy, flaky exterior that contrasts perfectly with the creamy, cold center. The crescent dough bakes into a golden, buttery crust that mimics mummy bandages, and the two olive eyes add that playful touch. It’s not just another version—it’s my best version, tested and perfected over years of Halloween parties.
This recipe isn’t just good—it’s the kind that makes you close your eyes after the first bite. It’s comfort food reimagined: fun, festive, and incredibly easy. Perfect for impressing guests without stress, or turning a simple snack into something memorable. Trust me, once you make this, you’ll be asked to bring it to every party.
What Ingredients You Will Need
This recipe uses simple, wholesome ingredients to deliver bold flavor and satisfying texture without the fuss. Everything is easy to find at your local grocery store, and most are likely already in your fridge or pantry.
For the Cheese Ball
- 16 oz cream cheese, softened to room temperature (I recommend Philadelphia for the creamiest texture)
- 2 cups shredded sharp cheddar cheese (use freshly shredded for better melting; pre-shredded has anti-caking agents)
- 1/4 cup sour cream (adds tanginess and helps bind the mixture)
- 1 tsp garlic powder
- 1/2 tsp onion powder
- 1/2 tsp smoked paprika (adds a subtle smokiness)
- 1/4 tsp black pepper
- 1/4 tsp salt
- 2 tbsp fresh chives, finely chopped (optional, but adds a nice freshness)
For the Mummy Wrap
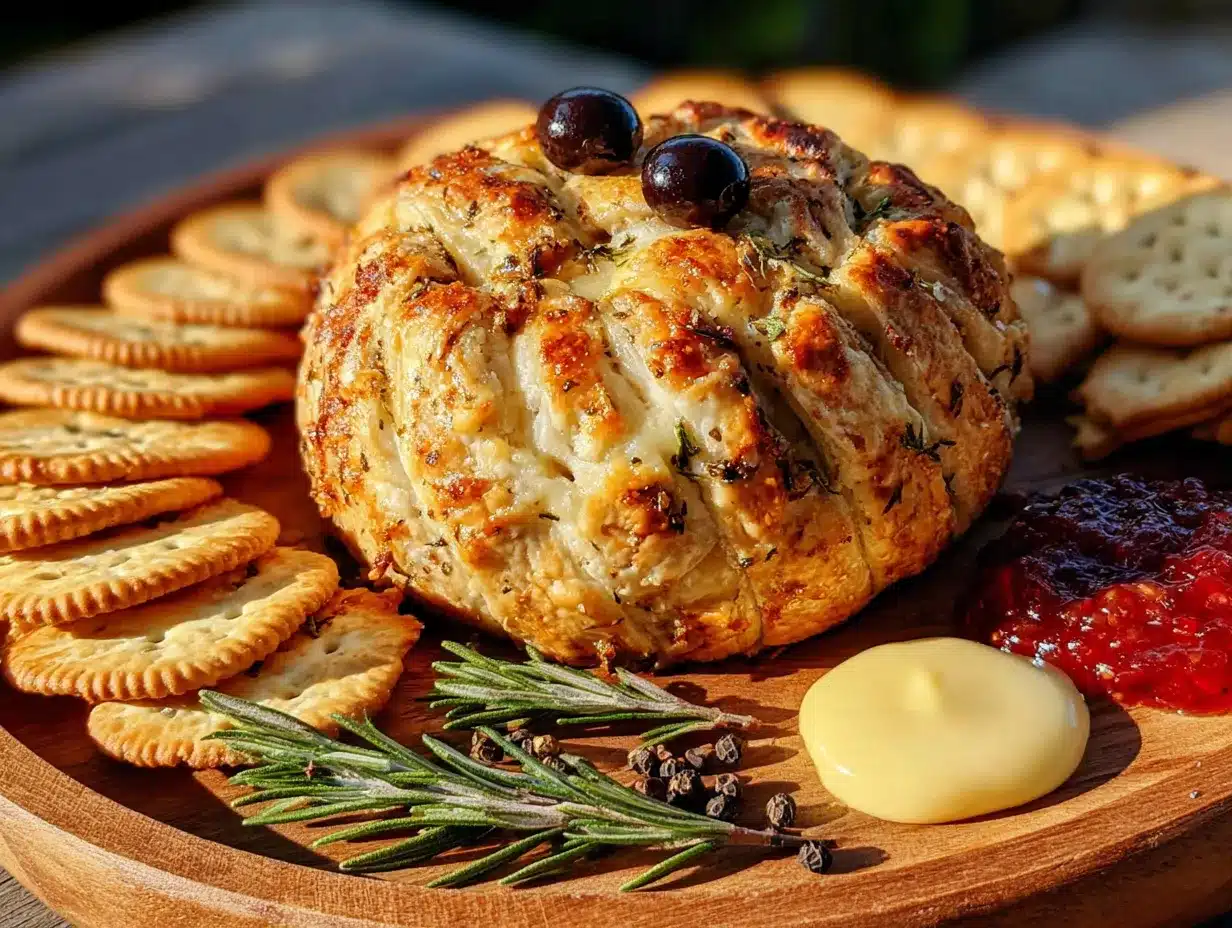
- 1 can (8 oz) refrigerated crescent roll dough (I use Pillsbury; it’s the most reliable for even baking)
- 1 large egg, beaten (for egg wash, gives the dough a golden shine)
- 2 black olives, pitted and sliced into rounds (for the eyes; use a sharp knife for clean cuts)
For Serving
- Assorted crackers (butter crackers, Ritz, or wheat crackers work great)
- Fresh vegetable sticks (carrot, celery, bell pepper—for a low-carb option)
Ingredient Selection Tips: For the best texture, make sure your cream cheese is truly softened—leave it out on the counter for at least 30 minutes. If you’re in a hurry, you can microwave it in 10-second bursts, but be careful not to melt it. For the shredded cheddar, I recommend buying a block and shredding it yourself. It melts more smoothly and has a better flavor. If you want a milder taste, use Monterey Jack or mozzarella instead.
Substitution Guidance: Need a dairy-free option? Use dairy-free cream cheese and shredded vegan cheddar. The texture will be slightly different, but it still works. For a gluten-free version, use gluten-free crescent roll dough or simply skip the wrap and serve the cheese ball plain with gluten-free crackers. You can also swap the sour cream for Greek yogurt if you want a bit more protein.
Equipment Needed
You don’t need fancy kitchen gadgets to make this Crowd-Pleasing Mummy Wrapped Cheese Ball with Crackers. Here’s what you’ll need:
- Large mixing bowl: For combining the cheese ball ingredients. A glass or stainless steel bowl works best.
- Hand mixer or stand mixer: Makes creaming the cream cheese much easier, but you can also do it by hand with a sturdy spoon—just expect a bit of arm workout.
- Spatula: For scraping the bowl and shaping the cheese ball.
- Plastic wrap: Essential for shaping and chilling the cheese ball without it sticking to your hands.
- Baking sheet: Lined with parchment paper or a silicone baking mat for easy cleanup.
- Sharp knife: For cutting the crescent dough into strips and slicing the olives.
- Pastry brush: For applying the egg wash. If you don’t have one, use a clean paper towel.
- Small bowl: For beating the egg.
Budget-Friendly Options: If you don’t have a hand mixer, a whisk and some elbow grease will do the job. No pastry brush? Just dab the egg wash on with your fingers—it’s not fancy, but it works. I’ve done it plenty of times when my brush was in the dishwasher.
Preparation Method
Follow these steps carefully, and you’ll have a mummy cheese ball that looks like it came from a bakery. I’ve included time estimates and sensory cues so you know exactly what to look for.
Step 1: Make the Cheese Mixture (10 minutes)
In a large mixing bowl, combine the softened cream cheese, shredded cheddar cheese, sour cream, garlic powder, onion powder, smoked paprika, black pepper, and salt. Using a hand mixer on medium speed, beat the mixture until it’s smooth and well-combined. Scrape down the sides of the bowl with a spatula to ensure everything is incorporated. The mixture should be thick, creamy, and slightly fluffy—like a very dense cheesecake batter. If you’re using fresh chives, fold them in now with the spatula.
Step 2: Shape and Chill the Cheese Ball (15 minutes + 1 hour chill)
Scoop the cheese mixture onto a large piece of plastic wrap. Use your hands to shape it into a round ball—don’t worry about perfection, just get it roughly spherical. Wrap the plastic wrap tightly around the cheese ball, twisting the ends to secure it. Place it in the refrigerator for at least 1 hour, or up to overnight. This step is crucial: the cheese ball needs to be firm enough to hold its shape when you wrap it with dough. If it’s too soft, the dough will sink into it and lose the mummy effect.
Step 3: Preheat and Prep (5 minutes)
About 15 minutes before you’re ready to bake, preheat your oven to 375°F (190°C). Line a baking sheet with parchment paper or a silicone mat. Remove the chilled cheese ball from the fridge and unwrap it. Place it in the center of the prepared baking sheet.
Step 4: Wrap the Mummy (10 minutes)
Open the can of crescent roll dough and separate the triangles along the perforations. Using a sharp knife, cut each triangle lengthwise into 3 or 4 thin strips—they should be about 1/2-inch wide. You want them to look like bandages. Starting from the bottom of the cheese ball, lay the strips across the ball, overlapping them slightly. Leave a small gap at the top for the “face.” Don’t cover the entire cheese ball; you want some of the creamy filling to peek through. Press the ends of the strips gently against the bottom of the cheese ball so they stay in place. It’s okay if they look a bit messy—mummies aren’t supposed to be perfect!
Step 5: Add the Eyes (2 minutes)
Take two olive slices and place them in the gap you left at the top of the cheese ball. Press them gently into the cheese so they stay put. These are the mummy’s eyes, so position them slightly apart for a cute, goofy expression.
Step 6: Apply Egg Wash (2 minutes)
In a small bowl, beat the egg with a fork until it’s frothy. Using a pastry brush, gently brush the egg wash over the crescent dough strips. Be careful not to get egg on the olives—it will make them look dull. The egg wash gives the dough a beautiful golden-brown color as it bakes.
Step 7: Bake (15-18 minutes)
Place the baking sheet in the preheated oven and bake for 15 to 18 minutes, or until the crescent dough is puffed and golden brown. The cheese ball should be warm in the center but not melted—if you see cheese oozing out, it’s been in too long. The dough should be crispy and flaky when you tap it. Let it cool on the baking sheet for 5 minutes before transferring to a serving platter.
Step 8: Serve (2 minutes)
Surround the mummy cheese ball with an assortment of crackers and vegetable sticks. Serve immediately while the dough is still warm and the cheese is creamy. If you’re serving it later, let it cool completely, then wrap it loosely in foil and reheat in a 350°F oven for 5 minutes.
Troubleshooting Tip: If the dough starts to brown too quickly, tent the cheese ball loosely with aluminum foil for the last 5 minutes of baking. This prevents the bandages from burning while the center warms through.
Cooking Tips & Techniques
After making this recipe more times than I can count, I’ve picked up a few tricks that make all the difference. Here’s what I’ve learned—sometimes the hard way.
Don’t Skip the Chill Time. I know it’s tempting to rush, but if you try to wrap a soft cheese ball, the dough will sink into it and you’ll end up with a cheesy mess. Trust me, I learned this the hard way when I was running late for a party. The cheese ball needs to be firm enough to hold its shape. An hour in the fridge is the minimum—overnight is even better.
Cut the Dough Evenly. When you’re slicing the crescent dough into strips, try to keep them uniform in width. This ensures they bake evenly. If some strips are too thick, they’ll be doughy in the center; if they’re too thin, they’ll burn. I use a ruler sometimes—yes, I’m that person.
Don’t Overlap Too Much. You want the cheese ball to look wrapped, not buried. Leave some gaps between the strips so the creamy filling peeks through. This also helps the dough bake faster and prevents a soggy bottom.
Use a Sharp Knife for the Olives. Olives are slippery little things. Use a very sharp knife to slice them cleanly, and pat them dry with a paper towel before placing them on the cheese ball. This helps them stick better and prevents them from sliding off during baking.
Multitask Like a Pro. While the cheese ball is chilling, you can prep the crackers and vegetables. Wash and cut the veggies, arrange them on a platter, and cover with plastic wrap. This way, when the mummy comes out of the oven, you’re ready to serve in minutes.
One Mistake I Keep Making. I always forget to set out the cream cheese ahead of time. If you’re in a rush, you can soften it in the microwave, but be careful—10 seconds at a time, and stop as soon as it’s soft. Melted cream cheese will make the mixture too loose, and you’ll have a hard time shaping it.
Variations & Adaptations
This recipe is incredibly versatile. Here are some of my favorite variations, all tested and approved by my family and friends.
Spicy Mummy
Add 1/4 cup of finely chopped pickled jalapeños or 1 teaspoon of cayenne pepper to the cheese mixture. The heat cuts through the richness beautifully. I made this for a game day party, and it was gone before the first quarter ended.
Herb & Garlic Mummy
Skip the smoked paprika and add 2 tablespoons of fresh chopped parsley, 1 tablespoon of fresh dill, and an extra teaspoon of garlic powder. This version is lighter and more refreshing—perfect for spring gatherings.
Bacon Cheddar Mummy
Cook 4 slices of bacon until crispy, then crumble them into the cheese mixture. Use extra-sharp cheddar for a bolder flavor. The smoky, salty bacon pairs perfectly with the creamy cheese. My brother-in-law requests this version every Thanksgiving.
Vegetarian & Gluten-Free Option
Use gluten-free crescent roll dough (available at most health food stores) or skip the wrap entirely. For a vegetarian version, simply omit the bacon and add more vegetables, like finely chopped roasted red peppers or sun-dried tomatoes.
Dairy-Free Adaptation
Substitute the cream cheese with a dairy-free alternative, use vegan shredded cheddar, and replace the sour cream with coconut yogurt. The texture will be slightly different—a bit softer—but the flavor is still delicious. I’ve made this for a friend with lactose intolerance, and she couldn’t stop eating it.
Mini Mummy Bites
Instead of one large cheese ball, shape the mixture into 12 small balls. Wrap each one with a single strip of crescent dough, add a tiny olive slice for an eye, and bake for 10-12 minutes. These are perfect for parties where guests want individual servings.
Serving & Storage Suggestions
This mummy cheese ball is best served warm, straight from the oven. The contrast between the crispy, golden dough and the cold, creamy center is what makes it so addictive. Here’s how to serve and store it like a pro.
Serving Temperature: Let the cheese ball cool for 5 minutes after baking, then serve immediately. If you’re making it ahead, reheat it in a 350°F oven for 5-7 minutes before serving. Don’t microwave it—the dough will become soggy.
Presentation Tips: Place the mummy cheese ball on a large wooden board or a festive platter. Surround it with an assortment of crackers—butter crackers, Ritz, and wheat crackers are my favorites. Add some fresh vegetable sticks like carrot, celery, and bell pepper for color and crunch. For a Halloween party, I like to add some candy corn or pumpkin-shaped crackers around the board for extra festivity.
Complementary Dishes: This cheese ball pairs beautifully with a crisp green salad or a bowl of soup. For a party spread, serve it alongside other finger foods like stuffed mushrooms, spinach dip, or a charcuterie board. A light white wine, like Sauvignon Blanc, complements the creamy cheese perfectly.
Storage Instructions: If you have leftovers (unlikely, but possible), wrap the cheese ball tightly in plastic wrap and store it in the refrigerator for up to 3 days. The dough will soften, but the flavor will still be great. To reheat, place it on a baking sheet in a 350°F oven for 5-7 minutes. Don’t freeze this dish—the cream cheese will become grainy when thawed.
Flavor Development: The cheese mixture actually tastes better after it’s been in the fridge for a few hours. The flavors meld together, making it even more delicious. If you’re making this for a party, prep the cheese ball the night before, then wrap and bake it just before serving.
Nutritional Information & Benefits
While this is definitely a treat, it’s not without some redeeming qualities. Here’s a breakdown of what you’re getting in each serving (based on 8 servings).
| Nutrient | Amount Per Serving |
|---|---|
| Calories | 320 |
| Total Fat | 24g |
| Saturated Fat | 14g |
| Cholesterol | 75mg |
| Sodium | 520mg |
| Total Carbohydrates | 16g |
| Dietary Fiber | 1g |
| Sugars | 4g |
| Protein | 12g |
| Calcium | 200mg |
Health Benefits: Cream cheese and cheddar are good sources of calcium, which supports bone health. The protein content (12g per serving) helps keep you full and satisfied. If you use the vegetable sticks for dipping, you’ll add fiber, vitamins, and antioxidants to your snack. I personally love that this recipe feels indulgent but still has some nutritional value—it’s not just empty calories.
Dietary Considerations: This recipe is vegetarian-friendly. For a lower-carb option, skip the crackers and serve with vegetable sticks only. It’s also naturally gluten-free if you use gluten-free crescent dough. The main allergens are dairy (cream cheese, cheddar, sour cream) and gluten (crescent dough).
My Personal Wellness Perspective: I believe in balance. This mummy cheese ball is a celebration food—it’s meant to be enjoyed at parties and gatherings. I don’t stress about the calories; instead, I focus on the joy of sharing it with people I love. One serving is perfectly satisfying, and it’s worth every bite.
Conclusion
This Crowd-Pleasing Mummy Wrapped Cheese Ball with Crackers is more than just an appetizer—it’s a memory in the making. It’s the dish that makes people stop, smile, and ask for the recipe. It’s the centerpiece of your Halloween spread, the surprise hit at your potluck, and the thing your friends will request year after year.
I love this recipe because it’s proof that cooking doesn’t have to be complicated to be impressive. With just a few simple ingredients and a little bit of creativity, you can create something that looks like it took hours of effort. And honestly, the best part is watching people’s faces when they see it for the first time. That moment of delight is why I keep making it.
So go ahead—make this mummy cheese ball for your next gathering. Customize it with your favorite cheeses, add some spice, or make it mini. Whatever you do, don’t forget to have fun with it. And when your guests ask how you did it, just smile and say, “It’s a secret.” Then send them my way for the full story.
I’d love to hear how yours turns out! Drop a comment below, share a photo of your mummy creation, or tag me on social media. Happy hosting, and happy eating!
FAQs
Can I make this mummy cheese ball ahead of time?
Absolutely! You can prepare the cheese mixture and shape it into a ball up to 24 hours in advance. Keep it wrapped tightly in plastic wrap in the refrigerator. When you’re ready to serve, simply wrap it with the crescent dough, add the olives, and bake. This makes it perfect for party prep.
Can I use a different type of cheese?
Yes, you can experiment with different cheeses. Monterey Jack, mozzarella, or a smoked gouda would all work well. Just make sure to use a cheese that melts smoothly and has a good flavor. Avoid very dry cheeses like Parmesan, as they won’t blend as well with the cream cheese.
How do I prevent the crescent dough from getting soggy?
The key is to make sure the cheese ball is well-chilled before wrapping it. A firm cheese ball won’t release as much moisture during baking. Also, don’t overload the dough with egg wash—a thin, even layer is all you need. If the dough still seems soggy, try baking it for an extra 2-3 minutes.
Can I freeze the mummy cheese ball?
I don’t recommend freezing this dish. The cream cheese will become grainy and watery when thawed, and the crescent dough will lose its flaky texture. It’s best to make it fresh or prep it the night before and bake it just before serving.
What can I use instead of crescent roll dough?
If you can’t find crescent roll dough, you can use puff pastry sheets cut into strips. The texture will be flakier and more buttery. For a gluten-free option, use gluten-free pizza dough rolled thin and cut into strips. You can also skip the wrap entirely and serve the cheese ball plain with crackers—it’s still delicious!
Pin This Recipe!
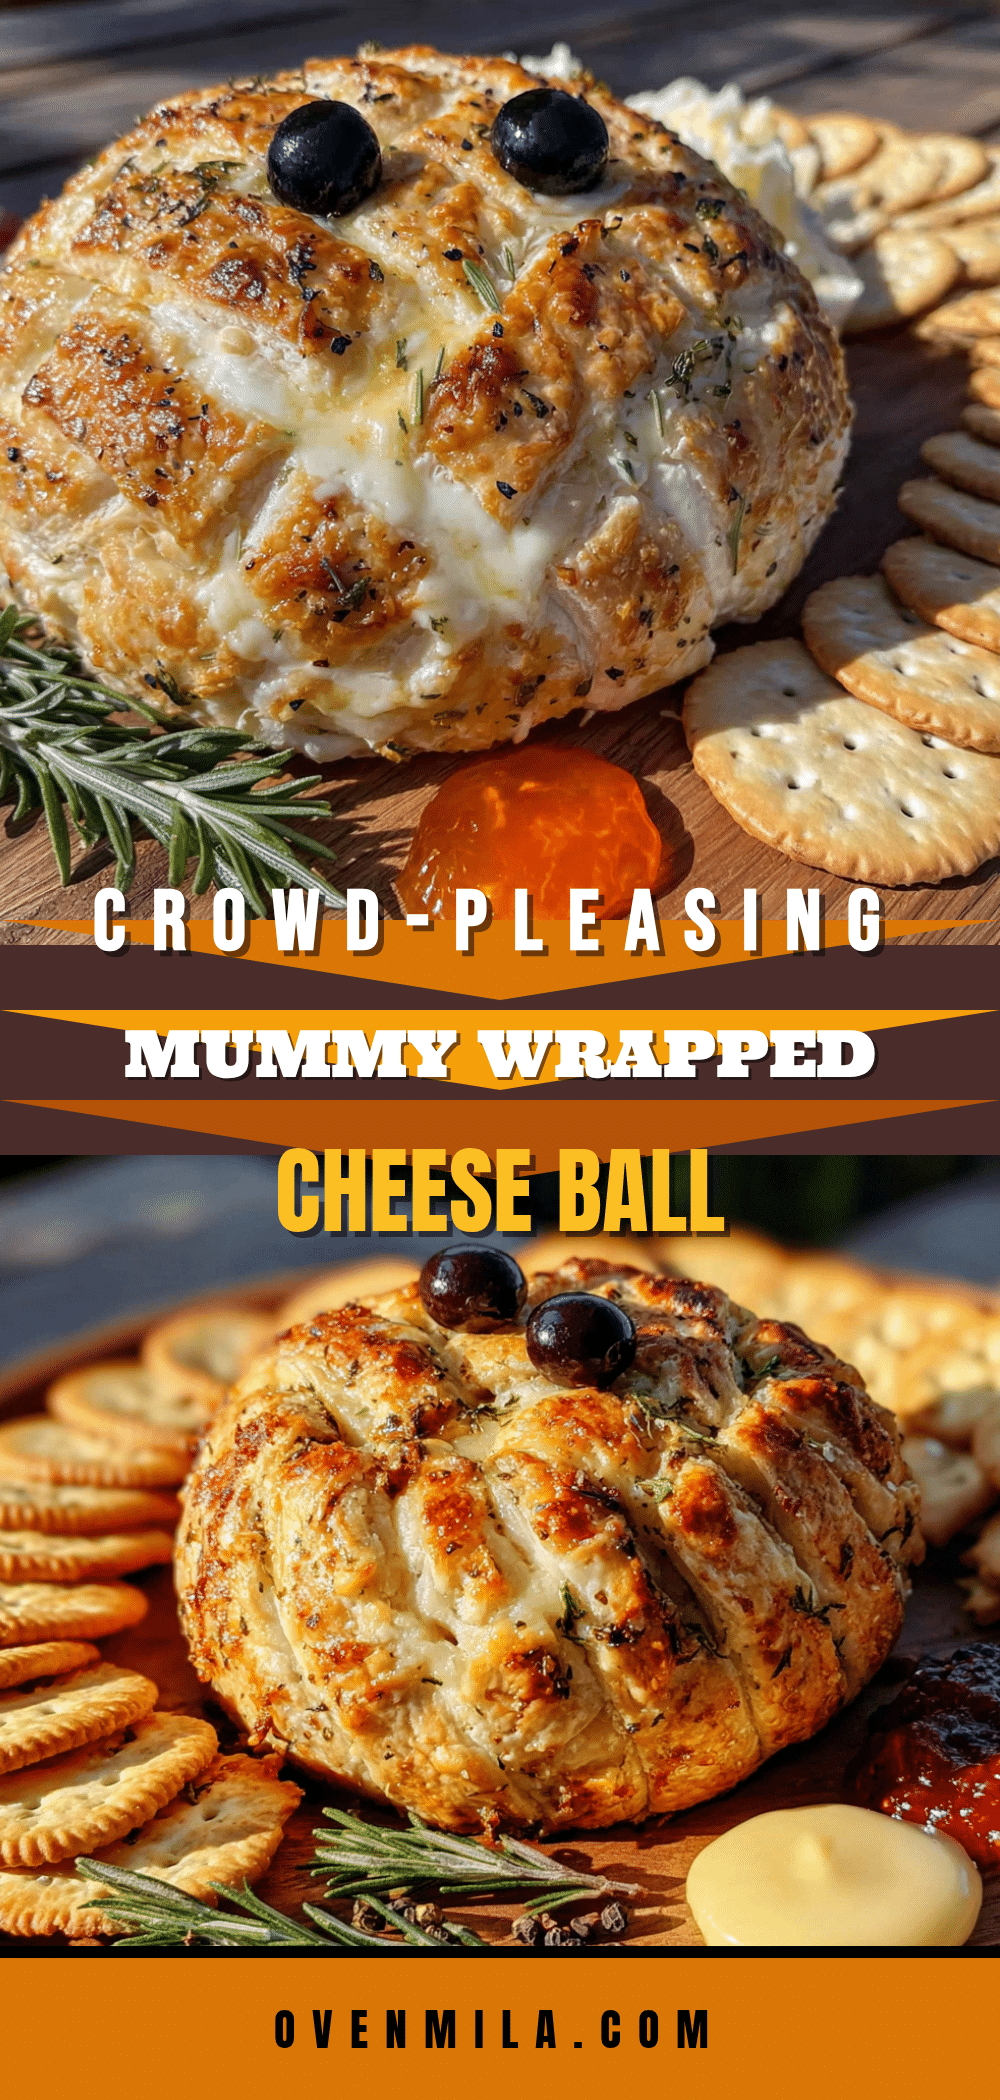
Easy Mummy Wrapped Cheese Ball Recipe: Best Perfect Crowd Pleaser

A creamy, savory cheese ball wrapped in buttery crescent dough to look like a mummy, with olive eyes. It’s a fun, festive appetizer that’s a conversation starter and a crowd-pleaser for Halloween parties and beyond.
- Prep Time: 15 minutes
- Cook Time: 18 minutes
- Total Time: 1 hour 33 minutes (includes 1 hour chill time)
- Yield: 8 servings 1x
- Category: Appetizer
- Cuisine: American
Ingredients
- 16 oz cream cheese, softened to room temperature
- 2 cups shredded sharp cheddar cheese
- 1/4 cup sour cream
- 1 tsp garlic powder
- 1/2 tsp onion powder
- 1/2 tsp smoked paprika
- 1/4 tsp black pepper
- 1/4 tsp salt
- 2 tbsp fresh chives, finely chopped (optional)
- 1 can (8 oz) refrigerated crescent roll dough
- 1 large egg, beaten
- 2 black olives, pitted and sliced into rounds
- Assorted crackers for serving
- Fresh vegetable sticks for serving (optional)
Instructions
- In a large mixing bowl, combine softened cream cheese, shredded cheddar, sour cream, garlic powder, onion powder, smoked paprika, black pepper, and salt. Beat with a hand mixer on medium speed until smooth and well-combined. Fold in fresh chives if using.
- Scoop the cheese mixture onto a large piece of plastic wrap. Shape into a round ball, wrap tightly, and refrigerate for at least 1 hour or up to overnight.
- Preheat oven to 375°F (190°C). Line a baking sheet with parchment paper. Unwrap the chilled cheese ball and place it in the center of the prepared baking sheet.
- Open the can of crescent roll dough and separate the triangles. Cut each triangle lengthwise into 3-4 thin strips (about 1/2-inch wide).
- Starting from the bottom, lay the strips across the cheese ball, overlapping slightly. Leave a small gap at the top for the face. Press the ends gently against the bottom to secure.
- Place two olive slices in the gap at the top for the mummy’s eyes, pressing them gently into the cheese.
- Brush the beaten egg over the crescent dough strips, avoiding the olives.
- Bake for 15-18 minutes, until the dough is puffed and golden brown. Let cool on the baking sheet for 5 minutes.
- Transfer to a serving platter and surround with crackers and vegetable sticks. Serve warm.
Notes
Don’t skip the chill time—the cheese ball must be firm to hold its shape. Cut crescent dough strips evenly for even baking. Leave gaps between strips so the filling peeks through. Use a sharp knife for clean olive slices. If dough browns too quickly, tent with foil for the last 5 minutes.
Nutrition
- Serving Size: 1 serving (based on
- Calories: 320
- Sugar: 4
- Sodium: 520
- Fat: 24
- Saturated Fat: 14
- Carbohydrates: 16
- Fiber: 1
- Protein: 12
Keywords: mummy cheese ball, Halloween appetizer, cheese ball recipe, crescent roll cheese ball, easy appetizer, crowd-pleaser, party snack


