There used to be a tiny, dimly lit diner called The Rusty Skillet on the edge of town that made the most incredible deviled eggs. When they closed down three years ago—literally boarded up overnight with a handwritten sign that just said “Retired”—I was genuinely heartbroken. I mean, I’d been going there since college, and their deviled eggs had this perfect balance of creamy, tangy, and just a little bit smoky that I could never quite replicate at home. After eight tries—eight batches of eggs that were either too watery, too salty, or just plain boring—I finally got it. And then Halloween rolled around, and my friend Maria showed up to a party with black olives cut into spider shapes on top of deviled eggs, and honestly, it was like a lightbulb went off in my head. The combination of that perfect diner-style filling with the fun, creepy-crawly presentation? Pure magic. Let me tell you, when you bring these to a Halloween gathering, people lose their minds. Maybe you’ve been there—staring at a Pinterest board full of complicated party snacks thinking, “There’s no way I’m pulling that off.” Well, this is the one that actually works.
Why You’ll Love This Recipe
These Halloween Deviled Egg Spiders are the ultimate crowd-pleaser for a reason. I’ve tested this recipe at four different parties now, and every single time, the plate comes back empty within twenty minutes. Here’s what makes them stand out:
- Quick & Easy: Comes together in under 30 minutes, which is a lifesaver when you’re juggling costumes, decorations, and last-minute party prep.
- Simple Ingredients: No fancy grocery trips needed. Eggs, mayo, mustard, paprika, and black olives—that’s it. You probably have everything already.
- Perfect for Halloween Parties: These little guys look genuinely creepy but are completely approachable. Kids love them, adults can’t stop grabbing them, and they’re the perfect finger food for mingling.
- Crowd-Pleaser: I’ve watched self-proclaimed “deviled egg skeptics” take one bite and reach for a second. The smoky paprika and tangy mustard combo is basically irresistible.
- Unbelievably Delicious: The filling is silky smooth with just the right amount of bite. Plus, the olive “spiders” add a salty, briny pop that takes the whole thing to another level.
What makes this recipe different from every other deviled egg out there? It’s the technique. I spent years perfecting the filling consistency—too many watery disasters, let me tell you—and I’ve finally cracked the code. The secret is letting the egg yolks sit out for a few minutes after boiling so they dry out slightly, which gives you that ultra-creamy, not-grainy texture. And the black olive spiders? They’re not just decoration. The olive oil from the olives actually seeps into the filling just a little bit, adding this subtle richness that makes people go, “What did you put in these?”
This is the recipe that makes you close your eyes after the first bite. It’s comfort food reimagined for Halloween—fun, festive, and utterly satisfying. Perfect for impressing guests without stress, or turning a simple appetizer into something memorable.
What Ingredients You Will Need
This recipe uses simple, everyday ingredients to deliver bold flavor and satisfying texture without any fuss. Most of these are pantry staples, which makes this the kind of recipe you can throw together on a whim—even if Halloween snuck up on you.
For the Deviled Eggs
- 12 large eggs (room temperature works best for even cooking)
- 1/3 cup mayonnaise (I prefer Hellmann’s or Duke’s for the creamiest texture—Duke’s has a tangier kick that I love)
- 1 tablespoon yellow mustard (adds that classic deviled egg tang)
- 1 teaspoon Dijon mustard (for a little extra depth—this is my secret weapon)
- 1/2 teaspoon smoked paprika (plus more for garnish—smoked is non-negotiable here, it adds that subtle campfire flavor)
- 1/4 teaspoon garlic powder (optional but highly recommended)
- Salt and black pepper (to taste—go easy on the salt since the olives add brine)
- 1 teaspoon white vinegar (helps the filling stay smooth and bright)
For the Spider Decorations
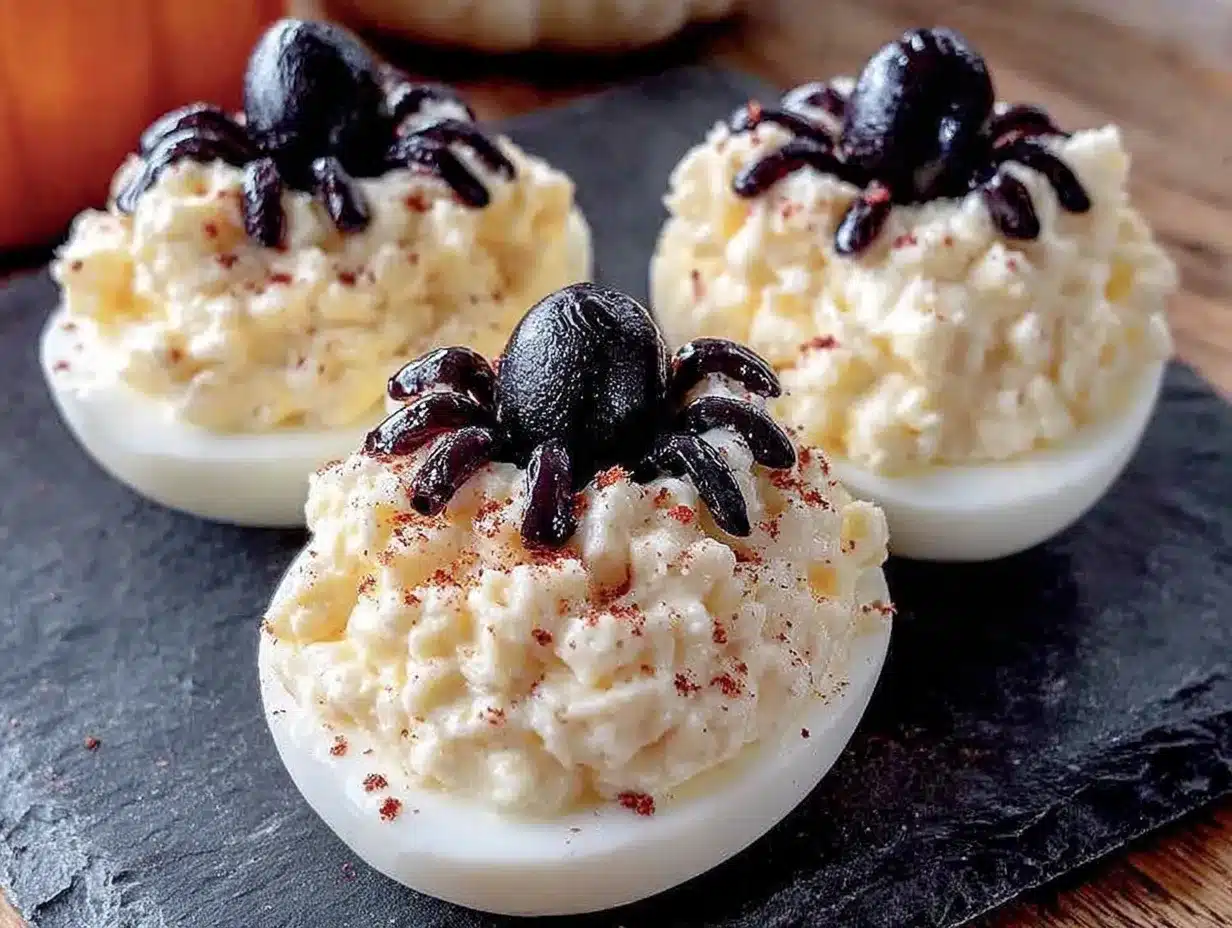
- 1 can (6 ounces) large black olives (pitted—you’ll need whole olives for the bodies and sliced olives for the legs)
- 1 can (6 ounces) sliced black olives (for easier leg assembly—or just slice whole ones yourself)
Ingredient Selection Tips: Look for eggs that are at least a week old—fresh eggs are actually harder to peel after boiling. I learned this the hard way after a particularly frustrating batch where half the whites came off with the shell. Also, go for large black olives, not the jumbo ones, because they fit perfectly on top of the egg halves without looking ridiculous.
Substitution Guidance: If you’re dairy-free, most mayonnaise is naturally dairy-free, but double-check the label. For a lighter version, swap half the mayo with plain Greek yogurt—it adds protein and a nice tang. You can also use avocado oil mayo for a healthier fat profile. If you don’t have smoked paprika, regular paprika works, but honestly, the smoky flavor is what makes these so addictive.
Equipment Needed
You don’t need any fancy gadgets for this recipe, which is part of why I love it. Here’s what you’ll need:
- Large pot (for boiling the eggs—make sure it’s big enough that the eggs aren’t crowded)
- Medium mixing bowl (for the filling)
- Fork or potato masher (for mashing the yolks—I actually prefer a fork because it gives me more control)
- Piping bag or zip-top bag (for filling the eggs—a zip-top bag works perfectly if you don’t have a piping bag)
- Sharp knife and cutting board (for slicing olives and halving eggs)
- Serving platter (something with a little edge so the eggs don’t slide around)
Budget-Friendly Options: If you don’t have a piping bag, just snip a small corner off a zip-top bag—it works like a charm. I’ve been doing this for years and honestly, it’s easier to clean up anyway. For the olive legs, a paring knife gives you more precision, but any sharp knife will do.
Personal Experience: I used to use a pastry bag with a star tip for the filling, but honestly, it makes the eggs look too fancy for Halloween. A simple round cut on the piping bag gives them a more rustic, homemade look that fits the spooky theme better. Plus, it’s one less thing to wash.
Preparation Method
Alright, let’s get into the step-by-step. I’ve made these so many times that I’ve got the process down to a science. Follow along, and you’ll have a platter of creepy-crawly goodness in no time.
Step 1: Boil the Eggs
Place your 12 eggs in a large pot and cover them with cold water by about an inch. Bring the water to a rolling boil over high heat—you’ll see big, vigorous bubbles. Once it’s boiling, cover the pot, turn off the heat, and let it sit for exactly 12 minutes. This gives you hard-boiled eggs with fully set yolks but no green ring around the outside. While the eggs are sitting, prepare a bowl of ice water. After 12 minutes, transfer the eggs to the ice water bath and let them cool for at least 10 minutes. This shock stops the cooking and makes peeling infinitely easier.
Step 2: Peel and Halve the Eggs
Once the eggs are cool enough to handle, gently tap each one on the counter to crack the shell all over, then peel under running cold water. The water helps get under the membrane and the shell comes off in bigger pieces. Pat the peeled eggs dry with a paper towel. Using a sharp knife, slice each egg in half lengthwise. Carefully pop out the yolks into your medium mixing bowl. Arrange the egg white halves on your serving platter, cut-side up.
Step 3: Make the Filling
Let the yolks sit in the bowl for about 2-3 minutes to dry out slightly—this is the secret to a non-grainy filling. Then, using a fork, mash the yolks until they’re a fine crumb. Add the mayonnaise, yellow mustard, Dijon mustard, smoked paprika, garlic powder, white vinegar, and a pinch of salt and pepper. Mix everything together until it’s completely smooth and creamy. Taste it—this is important. Adjust the seasoning if needed. I usually add a little more paprika because I love that smoky flavor.
Step 4: Fill the Egg Whites
Spoon your filling into a piping bag or a zip-top bag with a small corner snipped off. Pipe the filling into each egg white half, mounding it slightly. You want a nice, generous amount—these are supposed to be indulgent. If you don’t have a piping bag, you can carefully spoon the filling in, but piping gives you that nice, fluffy look.
Step 5: Create the Spider Decorations
Now for the fun part. Take your whole black olives and slice each one in half lengthwise—these will be the spider bodies. For the legs, you have two options: use sliced black olives (each slice becomes two legs), or slice whole olives into thin rounds and then cut each round in half. You’ll need 8 leg pieces per spider. Place one olive half (cut-side down) on top of each filled egg. Then, arrange 4 leg pieces on each side of the olive body, pressing them gently into the filling so they stay in place. The legs should curve slightly outward, like a real spider’s legs.
Step 6: Garnish and Serve
Lightly dust the finished deviled egg spiders with a little extra smoked paprika—this adds color and a subtle smoky kick. You can also add tiny dots of mustard or paprika on the olive “head” for eyes, but I usually skip this because it can look messy. Serve immediately or refrigerate until you’re ready to serve.
Cooking Tips & Techniques
I’ve made enough mistakes with deviled eggs to fill a cookbook, so let me save you some trouble. Here are the tips that make the difference between good deviled eggs and unforgettable ones.
The Perfect Boil: That 12-minute sit time after boiling? Non-negotiable. I once got distracted and left the eggs on the heat for 15 minutes, and the yolks had that unappetizing green-gray ring. The texture was off, too—crumbly instead of creamy. Set a timer. Trust me.
Peeling Without Tears: If you’re struggling with peeling, try adding a teaspoon of baking soda to the boiling water. It raises the pH and helps the shells slide off more easily. I was skeptical at first, but it honestly works. Also, older eggs peel better than fresh ones, so plan ahead.
Filling Consistency: The biggest mistake people make is adding too much mayo. Start with 1/3 cup and add more only if the mixture looks too dry. You want it creamy but not runny—it should hold its shape when piped. If you accidentally make it too wet, add a little more mashed yolk or even a teaspoon of breadcrumbs to absorb the excess moisture.
Olive Assembly Hack: To make the spider legs look more realistic, use kitchen shears to cut the olive slices into thin strips instead of using a knife. It’s faster and gives you more uniform legs. Plus, it’s oddly satisfying—like arts and crafts, but edible.
Timing Strategy: You can boil and peel the eggs up to two days ahead. Store them in the refrigerator in a covered container with a damp paper towel to keep them from drying out. The filling can also be made a day ahead and stored in a piping bag in the fridge. Assemble the spiders no more than 4 hours before serving, though, or the olives can make the filling a little watery.
Variations & Adaptations
One of the best things about this recipe is how customizable it is. Here are some variations I’ve tried and loved.
Spicy Spider: Add 1/2 teaspoon of cayenne pepper or a few dashes of hot sauce to the filling. The heat pairs beautifully with the cool, creamy texture. I made this version for a Halloween party with a “spicy food” theme, and it was the first thing to disappear.
Bacon-Wrapped Bodies: Cook 6 strips of bacon until crispy, then crumble them. Mix half the bacon into the filling and sprinkle the rest on top of the olive bodies. The smoky, salty crunch is incredible. Just be aware that these won’t keep as long—bacon gets soggy after a few hours.
Guacamole Spider: For a completely different take, swap the mayo-based filling for a simple guacamole—mashed avocado, lime juice, salt, and a little diced onion. The green color is actually perfect for Halloween, and the creamy avocado pairs surprisingly well with the briny olives. This version is dairy-free and paleo-friendly.
Vegan Version: Use silken tofu or mashed chickpeas as the base for the filling, and vegan mayonnaise. The texture won’t be exactly the same, but it’s surprisingly close. I made these for a friend with egg allergies, and she was thrilled to be included in the Halloween fun.
Mini Spider Bites: For a bite-sized version, use quail eggs instead of chicken eggs. You’ll need about 24 quail eggs, and the cooking time drops to 4 minutes. These are adorable and perfect for kids’ parties.
Serving & Storage Suggestions
These deviled egg spiders are best served chilled, right out of the refrigerator. The cold filling is firmer and holds its shape better, plus the olives stay crisp. Arrange them on a black or orange platter for maximum Halloween effect—I found a great spiderweb-patterned plate at a thrift store that I use every year.
What to Serve Alongside: These pair beautifully with other finger foods. I usually serve them with veggie sticks, a cheese board, and maybe some mini sliders. For drinks, a crisp white wine or a light beer works well. If you’re going for a spooky vibe, try a blood-red punch or a dark ale.
Storage Instructions: Store any leftovers in an airtight container in the refrigerator for up to 2 days. The filling may soften slightly from the olive moisture, but they’re still delicious. Do not freeze deviled eggs—the texture becomes watery and grainy when thawed.
Reheating: These are served cold, so no reheating needed. If you’ve stored them, just let them sit at room temperature for 10 minutes before serving to take the chill off.
Flavor Development: Honestly, these taste even better after a few hours in the fridge. The flavors meld together, and the paprika really infuses into the filling. If you can, make them the morning of your party and refrigerate until serving time.
Nutritional Information & Benefits
Here’s the estimated nutritional breakdown per spider (one deviled egg half with olive decoration):
- Calories: 85
- Protein: 6g
- Fat: 6g
- Carbohydrates: 1g
- Fiber: 0g
- Sugar: 0g
Health Benefits: Eggs are a fantastic source of high-quality protein and contain all nine essential amino acids. They’re also rich in choline, which supports brain health, and lutein and zeaxanthin, which are good for your eyes. The olives provide healthy monounsaturated fats and antioxidants. This is a relatively low-carb, high-protein snack that fits into most dietary patterns.
Dietary Considerations: This recipe is naturally gluten-free, low-carb, and keto-friendly. For a lower-fat version, use light mayonnaise or substitute half with Greek yogurt. If you’re watching sodium, use low-sodium olives or rinse them before using.
Potential Allergens: Eggs and olives are the main allergens here. The mayonnaise may contain soybean oil, so check labels if you have soy sensitivities.
Personal Wellness Perspective: I love that these are indulgent enough to feel like a treat but still packed with protein. They keep me full during parties without weighing me down, which means I have more energy for dancing and socializing. Plus, they’re way healthier than most Halloween candy!
Conclusion
These Halloween Deviled Egg Spiders are the kind of recipe that makes you the hero of the party. They’re creepy, they’re cute, and they’re absolutely delicious. After that diner closed down, I never thought I’d find a deviled egg that brought me that same joy—but honestly, these might be even better. The smoky paprika, the creamy filling, the salty pop of the olive spiders—it’s a combination that works on every level.
Don’t be afraid to make these your own. Add extra spice, throw in some bacon, or experiment with different olive shapes. The best part about cooking is making a recipe fit your personality. I’d love to hear how yours turn out—drop a comment below and let me know if your guests were properly spooked (and satisfied). And if you’re looking for more Halloween inspiration, be sure to check out my spooky pumpkin dip and mummy pigs in a blanket for a full spread that’ll have everyone talking. Happy Halloween, and happy cooking!
Frequently Asked Questions
Can I make these deviled egg spiders a day ahead?
Yes, but with one caveat. You can boil, peel, and halve the eggs up to two days ahead, and you can make the filling a day ahead. However, I recommend assembling the spiders no more than 4 hours before serving. The olives can release moisture into the filling over time, making it a bit watery. If you need to assemble them the night before, pat the olive pieces dry with a paper towel before placing them on the eggs to minimize moisture transfer.
How do I prevent the egg yolks from turning green?
That green ring around the yolk is caused by overcooking—specifically, a reaction between sulfur in the whites and iron in the yolks. The fix is simple: after bringing the water to a boil, turn off the heat and let the eggs sit for exactly 12 minutes. Then immediately transfer them to an ice bath. This stops the cooking process and prevents that unappealing discoloration. I learned this trick from a chef friend, and I haven’t had a green yolk since.
Can I use a different type of olive for the spiders?
Absolutely. While black olives are traditional because they look like spider bodies, you can use green olives for a different look. Stuffed olives (with pimento or garlic) add an extra flavor pop. Kalamata olives give a more intense, briny flavor but are softer and harder to cut cleanly. Just keep in mind that lighter-colored olives won’t look as much like spiders—they might look more like alien creatures, which could be fun for a sci-fi themed party!
What’s the best way to transport these to a party?
I’ve learned this one the hard way. Use a large, flat platter with a rim or edge to prevent sliding. Cover the platter with plastic wrap, making sure it doesn’t touch the spider legs (they’ll stick and pull off). If you’re stacking multiple platters, place a layer of paper towels between them to absorb any condensation. For extra security, you can place a few toothpicks in the eggs to hold the plastic wrap above the spiders. And drive carefully—no sudden stops!
How many spiders does this recipe make, and can I scale it up?
This recipe makes 24 spider deviled eggs (from 12 eggs halved). For a party of 10-12 people, this is usually perfect. To scale up, simply multiply the ingredients. For 24 eggs (48 spiders), double everything. Just be aware that you’ll need a larger pot for boiling and a bigger platter for serving. I’ve made 48 spiders for a big Halloween bash, and it took about 45 minutes total. The assembly is the most time-consuming part, so enlist a helper if you’re scaling up significantly.
Pin This Recipe!
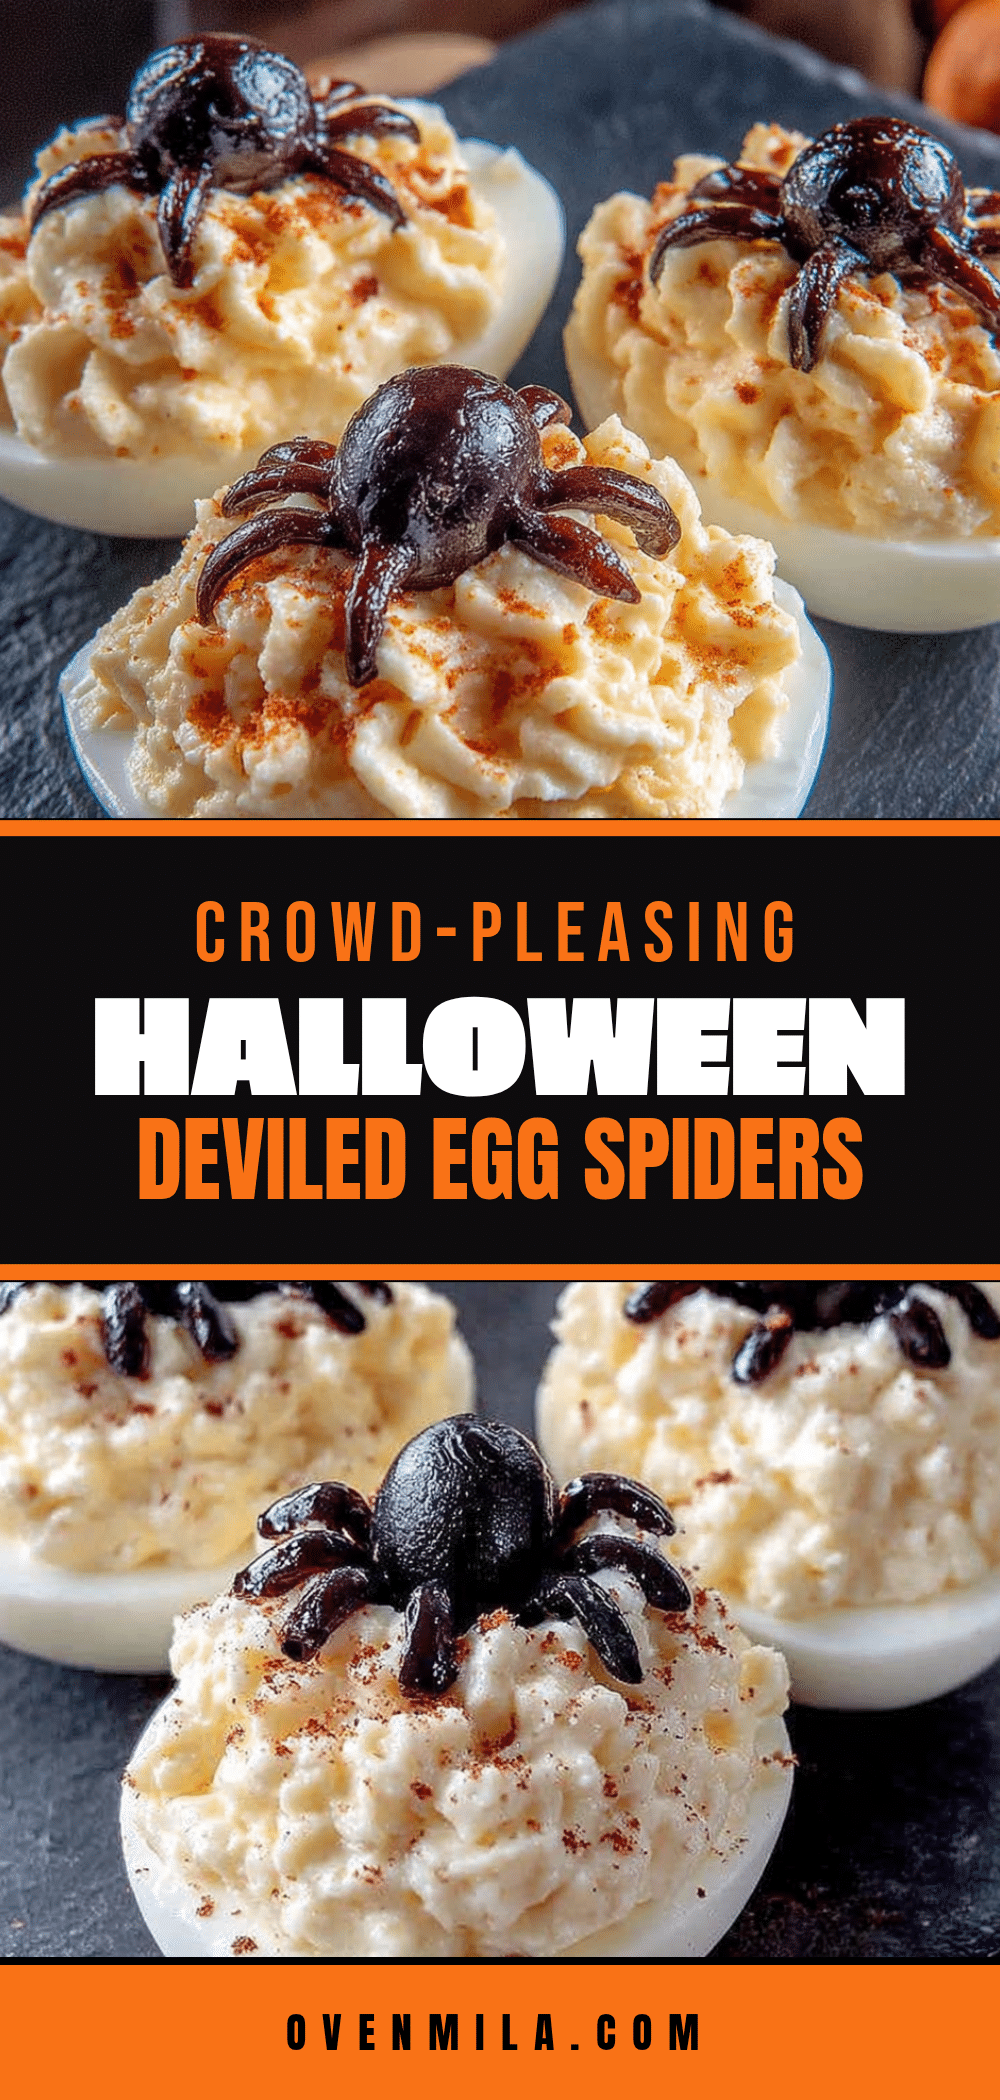
Best Halloween Deviled Egg Spiders Easy Crowd-Pleasing Recipe
These Halloween Deviled Egg Spiders are the ultimate crowd-pleaser—creamy, tangy deviled eggs topped with black olive spiders that look creepy but taste amazing. Perfect for Halloween parties, they come together in under 30 minutes with simple ingredients.
- Prep Time: 15 minutes
- Cook Time: 12 minutes
- Total Time: 27 minutes
- Yield: 24 spiders (12 eggs halved) 1x
- Category: Appetizer
- Cuisine: American
Ingredients
- 12 large eggs (room temperature)
- 1/3 cup mayonnaise (Hellmann’s or Duke’s recommended)
- 1 tablespoon yellow mustard
- 1 teaspoon Dijon mustard
- 1/2 teaspoon smoked paprika (plus more for garnish)
- 1/4 teaspoon garlic powder (optional)
- Salt and black pepper to taste
- 1 teaspoon white vinegar
- 1 can (6 ounces) large black olives (pitted)
- 1 can (6 ounces) sliced black olives
Instructions
- Place 12 eggs in a large pot and cover with cold water by about an inch. Bring to a rolling boil over high heat, then cover, turn off heat, and let sit for exactly 12 minutes.
- Prepare a bowl of ice water. Transfer eggs to ice bath and cool for at least 10 minutes.
- Peel eggs under running cold water, pat dry, and slice each in half lengthwise. Pop out yolks into a medium bowl. Arrange egg white halves on a serving platter, cut-side up.
- Let yolks sit for 2-3 minutes to dry slightly. Mash with a fork until fine crumb. Add mayonnaise, yellow mustard, Dijon mustard, smoked paprika, garlic powder, white vinegar, salt, and pepper. Mix until smooth and creamy. Adjust seasoning to taste.
- Spoon filling into a piping bag or zip-top bag with a small corner snipped off. Pipe filling into each egg white half, mounding slightly.
- For spider decorations: Slice whole black olives in half lengthwise for bodies. For legs, use sliced olives or slice whole olives into thin rounds and cut each round in half. Place one olive half (cut-side down) on each filled egg. Arrange 4 leg pieces on each side of the olive body, pressing gently into filling.
- Lightly dust with extra smoked paprika. Serve immediately or refrigerate until ready to serve.
Notes
For best results, use eggs that are at least a week old for easier peeling. Let yolks dry out slightly after boiling for a non-grainy filling. Assemble spiders no more than 4 hours before serving to prevent olives from making filling watery. Can boil and peel eggs up to 2 days ahead; filling can be made 1 day ahead.
Nutrition
- Serving Size: 1 spider (1 deviled
- Calories: 85
- Sodium: 180
- Fat: 6
- Saturated Fat: 1.5
- Carbohydrates: 1
- Protein: 6
Keywords: Halloween deviled eggs, spider deviled eggs, Halloween appetizer, deviled egg spiders, easy Halloween recipe, crowd-pleasing appetizer


