I was folding laundry last October — a Tuesday, I think — when the smell of cinnamon and nutmeg hit me from nowhere. Not from my kitchen, not from a candle. Just this phantom scent that hung in the air for half a second, and suddenly I was seven years old at my Aunt Carla’s kitchen table, pressing crushed Oreos into a buttered pie plate with my thumbs while she hummed along to the radio. She passed away five years ago, and I haven’t had her no-bake Thanksgiving cookie cake since. But that random Tuesday, with a basket of mismatched socks beside me, I knew I had to figure it out. I had to make that thing she always called “the lazy person’s pie” — this messy, glorious, Oreo-crusted cookie cake that showed up every single Thanksgiving without fail. Honestly, I didn’t even have all the ingredients that night. I used regular cream cheese instead of the block kind (spoiler: it worked, barely), and I forgot to chill the crust long enough. But you know that feeling when you take the first bite and everything just clicks? That was it. Not perfect, not pretty — but it tasted exactly like her kitchen. Like Thanksgiving without the stress. Like something you can throw together while the turkey’s in the oven and still get compliments for hours. This no-bake Thanksgiving cookie cake with Oreo crust is that recipe for me now, and maybe it’ll become that for you too.
Why You’ll Love This No-Bake Thanksgiving Cookie Cake
Let me tell you why this recipe has become my go-to for every fall gathering. I’ve tested it about six times now — tweaking the cream cheese ratio, trying different cookie fillings, even attempting a gluten-free version with mixed results. And every single time, someone asks for the recipe before they’ve finished their slice.
- No Oven Required: Your oven is already working overtime with the turkey and sides. This no-bake Thanksgiving cookie cake with Oreo crust frees up precious space and keeps your kitchen cool.
- Simple Ingredients: You probably have most of this in your pantry right now. Oreos, cream cheese, butter, powdered sugar — nothing fancy, nothing stressful.
- Perfect for Thanksgiving: It’s the dessert that doesn’t compete with the pies. It sits alongside them, doing its own thing, and somehow everyone ends up grabbing a slice of both.
- Crowd-Pleaser: Kids love the Oreo crust. Adults love the creamy, not-too-sweet filling. Leftovers? Never happened in my house.
- Make-Ahead Friendly: You can assemble this the day before and just pull it out when dessert time rolls around. Less stress, more enjoying.
What makes this different from other no-bake desserts? It’s the texture. The Oreo crust stays slightly crunchy even after chilling, and the filling has this almost cheesecake-like density without being heavy. I added a pinch of cinnamon to the filling for warmth, and honestly, that little tweak makes it taste like Thanksgiving in every single bite. This isn’t just another dessert — it’s the one that makes you close your eyes after that first forkful and think, yeah, this is what the holidays should taste like.
What Ingredients You Will Need
This no-bake Thanksgiving cookie cake with Oreo crust uses simple, wholesome ingredients that come together for something truly special. Most of these are pantry staples, which is exactly what you want when you’re already juggling a full holiday menu.
For the Oreo Crust
- 24 Oreo cookies (regular, not double-stuffed — trust me on this)
- 5 tablespoons unsalted butter, melted (I use Kerrygold for the richness)
- Pinch of salt (optional, but it balances the sweetness)
For the Cookie Cake Filling
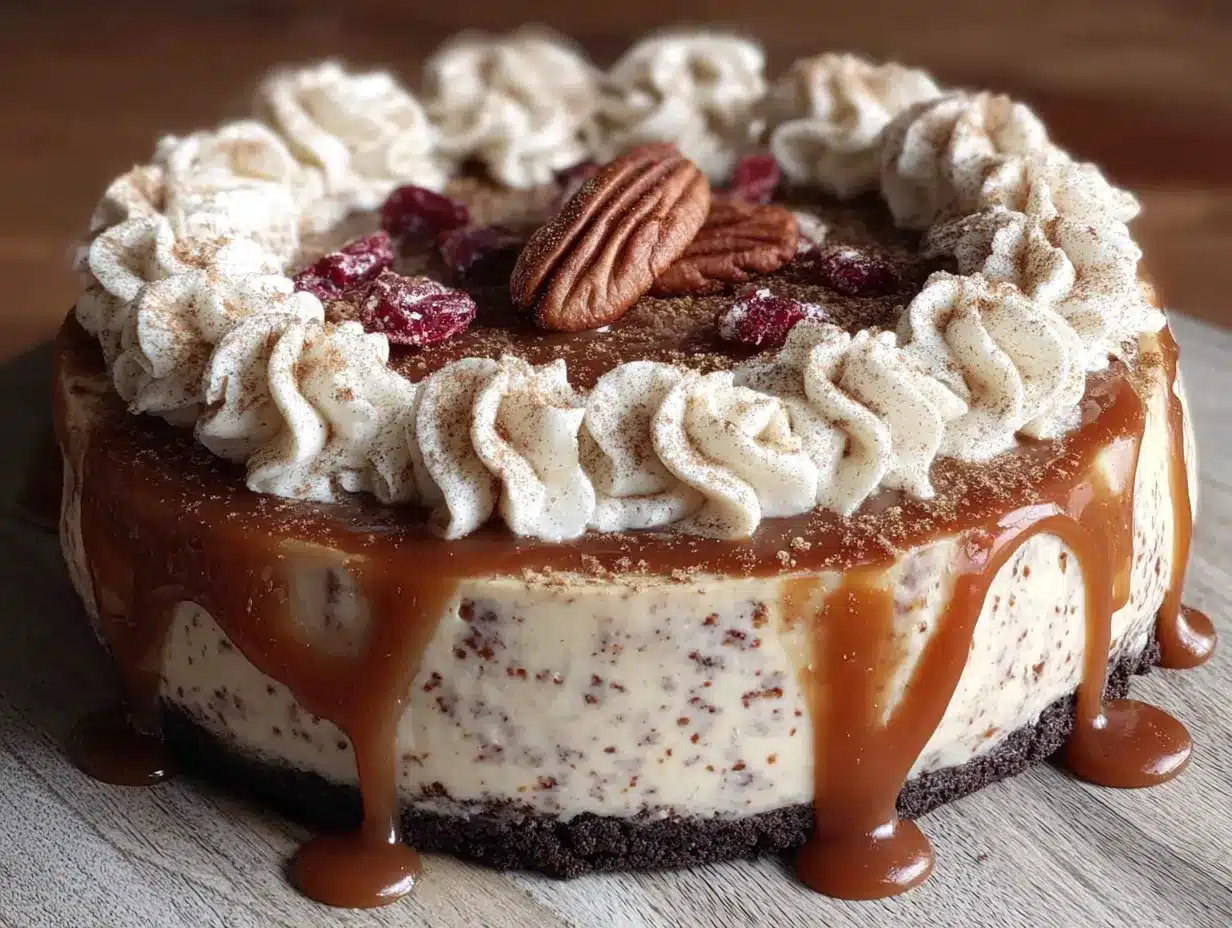
- 16 ounces cream cheese, softened to room temperature (the block kind, not the spreadable tub — Philadelphia is my go-to)
- 1/2 cup granulated sugar
- 1 teaspoon vanilla extract
- 1/2 teaspoon ground cinnamon (adds that cozy Thanksgiving warmth)
- 1 cup crushed shortbread or sugar cookies (about 8-10 cookies, crushed fine)
- 1/2 cup semi-sweet chocolate chips, melted and slightly cooled
- 1 cup heavy whipping cream, cold
- 1/4 cup powdered sugar
For the Topping (Optional but Recommended)
- 1/2 cup crushed Oreos (about 4-5 cookies)
- 1/4 cup caramel sauce, for drizzling
- Flaky sea salt, for sprinkling
I’ve tested this with different cookies for the crust, and honestly, Oreos are non-negotiable here. The dark chocolate flavor pairs perfectly with the creamy, spiced filling. If you’re dairy-free, you can use vegan cream cheese and coconut cream instead of heavy cream — just make sure everything is well-chilled before whipping. For a nut-free version, skip the flaky salt or use a plain sea salt instead.
Equipment Needed
- 9-inch springform pan (or a deep-dish pie plate in a pinch)
- Food processor or zip-top bag and rolling pin for crushing cookies
- Electric hand mixer or stand mixer
- Medium mixing bowl
- Small microwave-safe bowl for melting chocolate
- Rubber spatula
- Plastic wrap
I’ve made this with just a pie plate and a potato masher when I couldn’t find my food processor — it works, but the crust won’t be as even. A springform pan is ideal because you can remove the sides for a clean, impressive presentation. If you don’t have one, line your pie plate with parchment paper for easier lifting.
Preparation Method
- Make the Oreo crust. Place 24 Oreos in your food processor and pulse until you get fine crumbs. If you don’t have a processor, put them in a zip-top bag and go to town with a rolling pin — it’s a great stress reliever after a long day. Transfer the crumbs to a medium bowl, pour in 5 tablespoons of melted butter, and stir until every crumb is coated. Press the mixture firmly into the bottom and about 1 inch up the sides of your 9-inch springform pan. Use the bottom of a measuring cup to really pack it down. Pop it in the fridge for at least 30 minutes while you make the filling.
- Whip the cream. In a large bowl, pour 1 cup of cold heavy whipping cream and 1/4 cup of powdered sugar. Beat with an electric mixer on medium-high speed until stiff peaks form — about 3-4 minutes. You’ll know it’s ready when you lift the beaters and the cream stands up in peaks without drooping. Set this aside in the fridge while you work on the rest.
- Make the filling base. In another large bowl, beat 16 ounces of softened cream cheese with 1/2 cup of granulated sugar until smooth and fluffy — about 2 minutes. Scrape down the sides of the bowl halfway through. Add 1 teaspoon of vanilla extract and 1/2 teaspoon of ground cinnamon, and beat just until combined. Don’t overmix here, or the filling can get too loose.
- Add the crushed cookies. Gently fold in 1 cup of crushed shortbread or sugar cookies using a rubber spatula. You want them evenly distributed but not completely dissolved into the filling — little pockets of cookie texture are what make this special.
- Fold in the melted chocolate. Melt 1/2 cup of semi-sweet chocolate chips in a small microwave-safe bowl in 20-second bursts, stirring between each, until smooth. Let it cool for about 2 minutes, then drizzle it into the cream cheese mixture while folding gently. Don’t overmix — you want a few streaks of chocolate visible for that marbled effect.
- Fold in the whipped cream. Take your chilled whipped cream and add it to the cream cheese mixture in three additions, folding gently after each. Be patient here — you want to keep as much air in the whipped cream as possible for a light, mousse-like texture.
- Assemble and chill. Spoon the filling into your chilled Oreo crust and spread it evenly with a spatula. Tap the pan gently on the counter to release any air bubbles. Cover with plastic wrap and refrigerate for at least 6 hours, but overnight is best. The filling needs time to set properly, and the flavors meld together beautifully overnight.
- Add the topping. Before serving, sprinkle the top with 1/2 cup of crushed Oreos, drizzle with caramel sauce, and finish with a pinch of flaky sea salt. Run a knife around the edge of the pan before releasing the springform sides.
Cooking Tips & Techniques
I’ve made plenty of mistakes with this no-bake Thanksgiving cookie cake with Oreo crust so you don’t have to. Here’s what I’ve learned the hard way:
Don’t rush the chilling time. I once served this after only 3 hours in the fridge, and it was a soupy mess. The filling needs at least 6 hours to set properly — overnight is non-negotiable if you want clean slices.
Room temperature cream cheese is crucial. Cold cream cheese will leave you with lumpy filling. Let it sit on the counter for about an hour before you start. If you’re short on time, cut it into small cubes and microwave for 10 seconds — but watch it carefully.
Use cold heavy cream. This seems obvious, but I’ve forgotten to chill the bowl and beaters before whipping cream. Cold cream, cold bowl, cold beaters — that’s the secret to perfect whipped cream every time.
Press the crust firmly. A loose crust will crumble when you try to slice the cake. Use the bottom of a measuring cup or a flat glass to really pack those Oreo crumbs down. I press for about 2 minutes straight — it makes a difference.
Timing strategy: Make the crust and filling the night before, then just add the toppings before serving. This frees up your Thanksgiving morning for turkey prep and last-minute panic.
Variations & Adaptations
Gluten-Free Version
Use gluten-free chocolate sandwich cookies for the crust and gluten-free shortbread cookies for the filling. The texture will be slightly different, but it still tastes amazing. I’ve tested this with a brand called Glutino, and it worked great.
Pumpkin Spice Twist
Add 1/2 cup of pumpkin puree and an extra teaspoon of pumpkin pie spice to the filling. Reduce the heavy cream by 2 tablespoons to compensate for the extra moisture. This version tastes like fall in a slice — perfect for the Thanksgiving table.
Peppermint Holiday Variation
Swap the cinnamon for 1/2 teaspoon of peppermint extract, and top with crushed candy canes instead of Oreos. This works beautifully for Christmas, but honestly, I’ve made it in November too because why limit yourself?
Vegan Adaptation
Use vegan cream cheese, coconut cream (chilled and whipped), and dairy-free chocolate. The texture will be slightly denser, but the flavor is still incredible. Just make sure your Oreos are vegan — the classic ones are!
Serving & Storage Suggestions
This no-bake Thanksgiving cookie cake with Oreo crust is best served cold, straight from the fridge. Let it sit at room temperature for about 5 minutes before slicing — just enough to soften the edges without losing the structure.
For presentation, I like to run a thin knife under hot water, wipe it dry, and then slice. Clean the knife between cuts for picture-perfect slices. Serve with a dollop of whipped cream and an extra drizzle of caramel sauce if you’re feeling fancy.
Storage: Cover tightly with plastic wrap or transfer to an airtight container. It keeps in the refrigerator for up to 5 days, though the crust will soften slightly over time. The flavors actually get better on day two — the cinnamon and chocolate meld together beautifully.
Freezing: You can freeze the assembled cake (without toppings) for up to 2 months. Wrap it well in plastic wrap and then foil. Thaw in the refrigerator overnight, add the toppings, and serve. I’ve done this for unexpected guests, and nobody guessed it wasn’t fresh.
Reheating: Don’t. This is a cold dessert, and reheating will turn the filling into a puddle. If you want a warm element, heat the caramel sauce separately and drizzle it over the cold slices.
Nutritional Information & Benefits
Let’s be real — this is a dessert, not a health food. But here’s what you’re working with per slice (based on 12 servings): approximately 380 calories, 24g fat, 38g carbs, 5g protein, and 22g sugar. The cream cheese provides calcium and protein, while the dark chocolate offers antioxidants. The cinnamon has anti-inflammatory properties, so that’s something, right?
For dietary considerations: This recipe contains dairy, gluten, and eggs (in the Oreos). It’s not suitable for vegans unless you make the adaptations above. The sugar content is moderate for a dessert, but you can reduce the granulated sugar to 1/3 cup if you prefer a less sweet filling.
My personal take? I don’t make this for the nutrition. I make it because it reminds me of Aunt Carla and because it makes people happy. Sometimes that’s enough.
Conclusion
This no-bake Thanksgiving cookie cake with Oreo crust is everything I want in a holiday dessert — easy, make-ahead, and absolutely delicious. It doesn’t compete with the pies; it complements them. It’s the dessert that says, “Hey, I put thought into this, but I also want to enjoy the party.”
I’d love for you to try this and make it your own. Maybe add extra cinnamon, or swap the caramel for chocolate sauce, or leave off the topping entirely. The beauty of this recipe is how forgiving it is. Drop a comment below and tell me how it turned out — or better yet, share a photo of your creation. Tag me so I can see your version of Aunt Carla’s lazy person’s pie.
Happy Thanksgiving, friend. May your slices be clean, your crust stay crunchy, and your heart feel full.
Frequently Asked Questions
Can I use regular chocolate cookies instead of Oreos?
Absolutely. Any chocolate sandwich cookie will work for the crust. Just avoid the double-stuffed ones — the extra filling makes the crust too greasy and it won’t hold together as well.
How far in advance can I make this no-bake Thanksgiving cookie cake?
You can make it up to 2 days ahead without the toppings. Add the crushed Oreos, caramel, and flaky salt just before serving to keep everything fresh and crunchy. The filling actually tastes better after a day in the fridge.
Can I skip the whipped cream in the filling?
You can, but the texture will be much denser — more like a cheesecake than a mousse. If you skip the whipped cream, reduce the cream cheese to 12 ounces and add 1/4 cup of milk to keep the filling from being too thick.
My crust keeps falling apart. What did I do wrong?
Two common mistakes: not enough butter, or not pressing firmly enough. Make sure your Oreo crumbs are fully coated in butter, and use the bottom of a measuring cup to really pack them down. Chilling for at least 30 minutes before adding the filling is essential too.
Can I make this in a different pan?
Yes! A 9-inch deep-dish pie plate works perfectly. You can also use an 8×8 square pan for bar-style servings — just adjust the chilling time to 4 hours minimum. If using a smaller pan, the crust and filling layers will be thicker, so you might need a few extra Oreos for the crust.
Pin This Recipe!
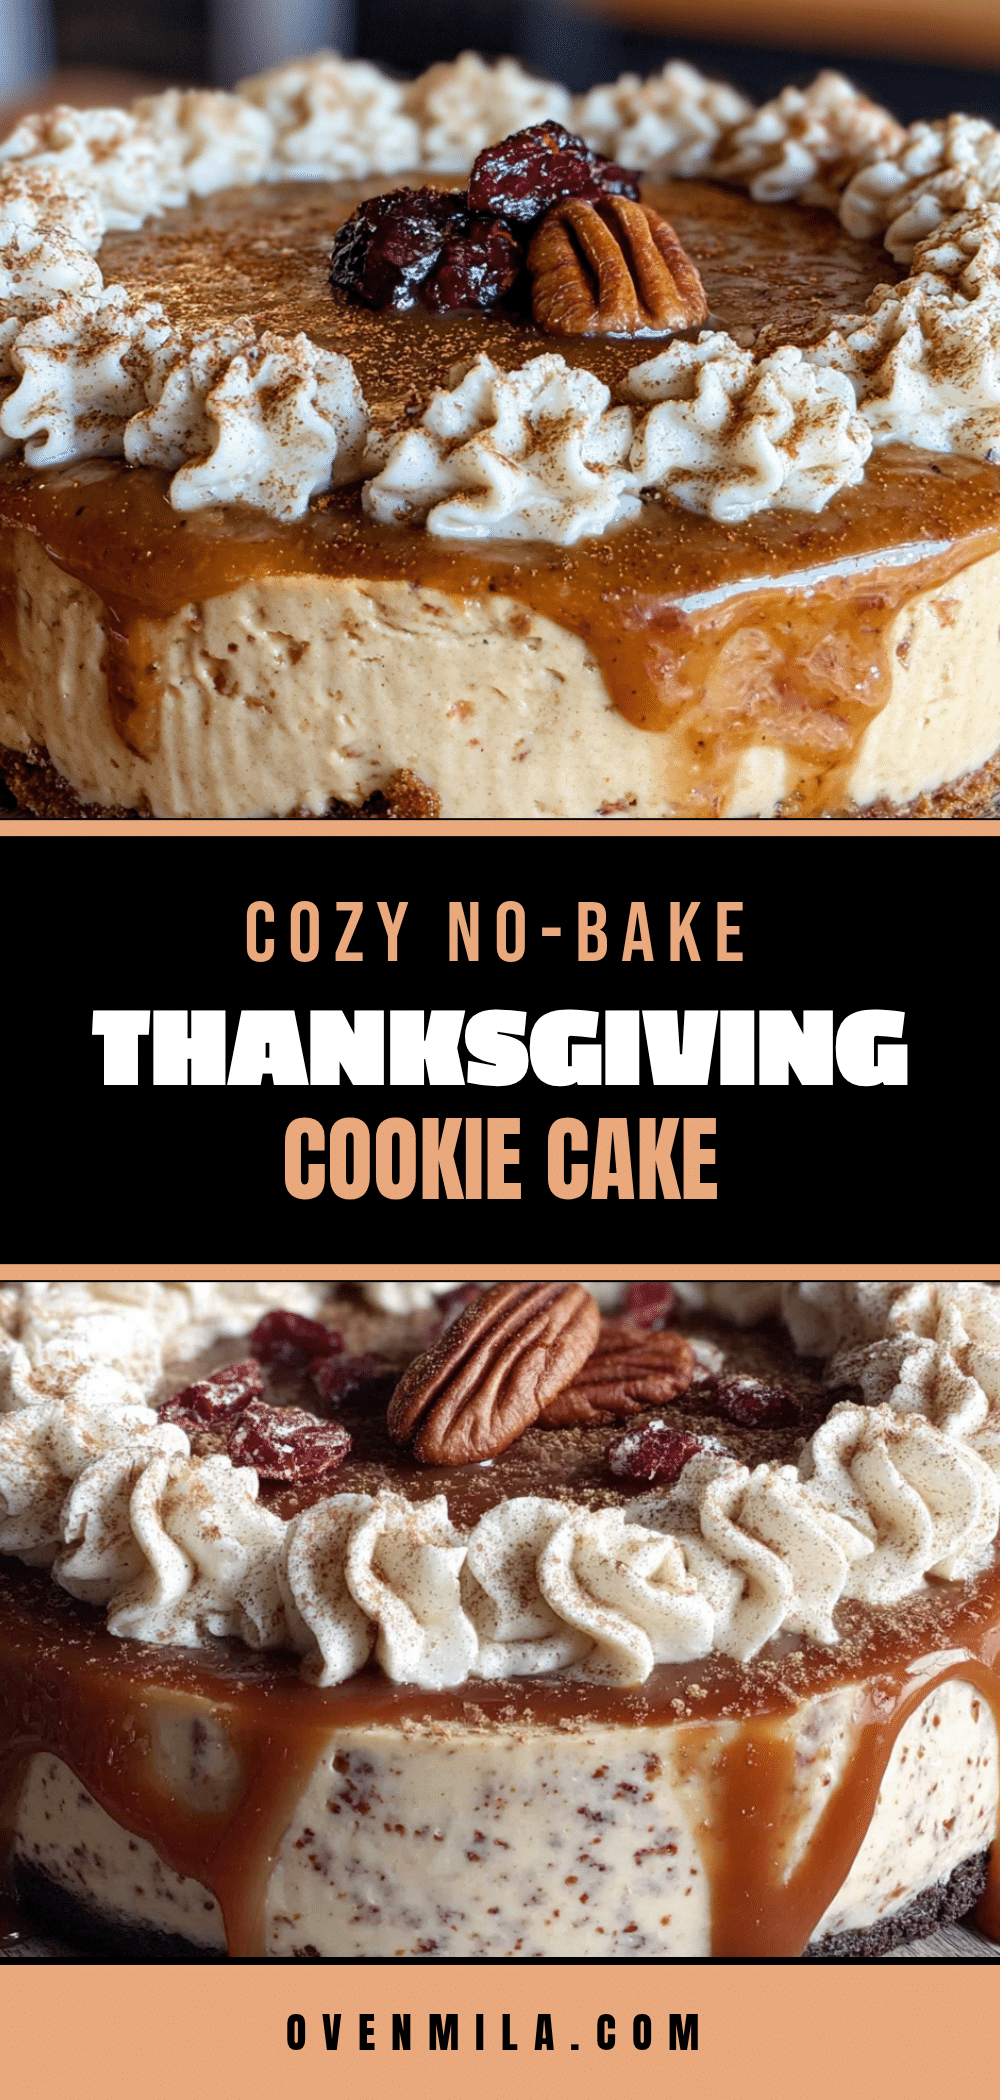
No-Bake Thanksgiving Cookie Cake with Oreo Crust
A no-bake dessert featuring an Oreo crust and a creamy, spiced cookie cake filling, perfect for Thanksgiving when the oven is busy.
- Prep Time: 30 minutes
- Cook Time: 0 minutes
- Total Time: 6 hours 30 minutes (includes chilling)
- Yield: 12 servings 1x
- Category: Dessert
- Cuisine: American
Ingredients
- 24 Oreo cookies (regular, not double-stuffed)
- 5 tablespoons unsalted butter, melted
- Pinch of salt (optional)
- 16 ounces cream cheese, softened to room temperature
- 1/2 cup granulated sugar
- 1 teaspoon vanilla extract
- 1/2 teaspoon ground cinnamon
- 1 cup crushed shortbread or sugar cookies (about 8–10 cookies)
- 1/2 cup semi-sweet chocolate chips, melted and slightly cooled
- 1 cup heavy whipping cream, cold
- 1/4 cup powdered sugar
- 1/2 cup crushed Oreos (for topping)
- 1/4 cup caramel sauce (for drizzling)
- Flaky sea salt (for sprinkling)
Instructions
- Make the Oreo crust: Place 24 Oreos in a food processor and pulse until fine crumbs. Transfer to a bowl, add melted butter and salt, and stir until coated. Press firmly into the bottom and 1 inch up the sides of a 9-inch springform pan. Refrigerate for at least 30 minutes.
- Whip the cream: In a large bowl, beat cold heavy cream and powdered sugar with an electric mixer on medium-high until stiff peaks form, about 3-4 minutes. Refrigerate until needed.
- Make the filling base: In another large bowl, beat cream cheese and granulated sugar until smooth and fluffy, about 2 minutes. Add vanilla and cinnamon, and beat just until combined.
- Add the crushed cookies: Gently fold in the crushed shortbread or sugar cookies with a rubber spatula until evenly distributed.
- Fold in the melted chocolate: Drizzle the cooled melted chocolate into the cream cheese mixture and fold gently, leaving a few streaks for a marbled effect.
- Fold in the whipped cream: Add the chilled whipped cream in three additions, folding gently after each to keep the mixture light and airy.
- Assemble and chill: Spoon the filling into the chilled crust and spread evenly. Tap the pan gently to release air bubbles. Cover with plastic wrap and refrigerate for at least 6 hours, preferably overnight.
- Add the topping: Before serving, sprinkle with crushed Oreos, drizzle with caramel sauce, and finish with flaky sea salt. Run a knife around the edge before releasing the springform sides.
Notes
Don’t rush the chilling time; at least 6 hours is essential for clean slices. Use room temperature cream cheese to avoid lumps. Press the crust firmly to prevent crumbling. Make ahead up to 2 days without toppings.
Nutrition
- Serving Size: 1 slice
- Calories: 380
- Sugar: 22
- Sodium: 280
- Fat: 24
- Saturated Fat: 14
- Carbohydrates: 38
- Fiber: 1
- Protein: 5
Keywords: no-bake, Thanksgiving, cookie cake, Oreo crust, dessert, holiday


