I was elbow-deep in wrapping paper last December, the kind of tangled mess that makes you question your life choices, when the smell hit me. Not pine, not cinnamon—but the unmistakable, almost powdery sweetness of crushed Oreos mixing with cream cheese. It came from my neighbor’s apartment, drifting through the thin walls, and suddenly I was eight years old again, standing on a step stool in my Aunt Lou’s tiny kitchen. She was laughing, flour dusting her gray curls, pressing a sticky, dark ball of something into my palm. “Taste this,” she’d said, “and tell me if it’s Christmas yet.” I didn’t know then that she was making truffles, or that she’d learned the trick from a friend who’d learned it from a magazine. I just knew the chocolate and the cool, sweet filling felt like a secret I was being let in on. She’s been gone six years now, and I still can’t find her exact recipe anywhere. But last week, standing in my own kitchen with a block of cream cheese and a family-size pack of cookies, I finally got close. Maybe you’ve been there—chasing a taste you can almost remember, like a song you can’t quite hum. These Easy No-Bake Christmas Oreo Truffle Balls are that song. They’re the reason I keep making truffles every single December, even when I swear I’ll try something new. Honestly, I don’t think I ever will.
Why You’ll Love This Recipe
Let me tell you—these truffles have saved my sanity more than once during the holiday season. When you’re hosting a dinner party or a festive get-together, the last thing you need is a complicated dessert that requires a candy thermometer and a prayer. These Easy No-Bake Christmas Oreo Truffle Balls are the opposite of that. They’re the kind of recipe that makes you look like a rockstar with almost zero effort.
- Only 3 Ingredients: Oreos, cream cheese, and melting chocolate. That’s it. No trips to a specialty store, no hunting down obscure extracts.
- No Baking Required: Seriously, the oven stays off. This is a game-changer when your oven is already full of casseroles and cookies.
- Perfect for Hosting: These little bites are the ultimate crowd-pleaser. They’re elegant enough for a holiday party but simple enough for a casual potluck. Plus, they’re easy to scale—double the batch for a big gathering without any extra stress.
- Make-Ahead Magic: You can prep these days in advance. That means less chaos on the day of your event. Just pull them out of the fridge, arrange them on a platter, and watch them disappear.
- Unbelievably Delicious: The texture is what gets everyone. That creamy, almost cheesecake-like center against the crunchy chocolate shell? It’s pure comfort food, but fancy enough to impress.
What makes these different from every other truffle recipe out there? It’s the ratio. I’ve tested this a dozen times—too much cream cheese and they’re soggy, too little and they’re dry. This version is just right. It’s the kind of treat that makes you close your eyes after the first bite, and honestly, that’s the best compliment a recipe can get.
What Ingredients You Will Need
This recipe relies on simple, pantry-friendly ingredients that come together to create something surprisingly luxurious. Here’s what you’ll need and why each one matters.
- 1 (14.3-ounce) package of Oreo cookies (about 36 cookies): You want the classic Oreos here, not the double-stuf or the thin ones. The filling-to-cookie ratio is key for the right texture. I’ve tried this with store-brand sandwich cookies, and honestly, they just don’t crush the same way. Stick with the real deal for the best results. For a festive twist, you can use the holiday-themed Oreos with red filling—they add a fun pop of color inside.
- 1 (8-ounce) block of cream cheese, softened to room temperature: This is non-negotiable. The cream cheese is what binds the crushed Oreos into a fudge-like dough. Make sure it’s truly softened—if it’s too cold, you’ll end up with lumpy truffles. I usually take it out of the fridge about an hour before I start. Full-fat cream cheese works best here; low-fat versions can make the mixture too wet and hard to roll.
- 12 ounces of melting chocolate or candy melts (white, dark, or milk chocolate): This is for the coating. I prefer Ghirardelli melting wafers for their smooth texture and clean snap, but any brand of candy melts works fine. If you’re using regular chocolate chips, add a teaspoon of coconut oil to help them melt smoothly. For a Christmas look, I love using white chocolate and then drizzling with red and green candy melts.
Optional but recommended:
- Festive sprinkles, crushed candy canes, or edible glitter: These are for decorating. Sprinkles are the easiest way to make these truffles look like they belong on a holiday dessert table.
- 1/2 teaspoon of peppermint extract (if using white chocolate): This adds a subtle minty kick that pairs beautifully with the chocolate Oreo base. Just don’t overdo it—a little goes a long way.
Substitution guidance: If you’re dairy-free, you can use a vegan cream cheese alternative and dairy-free chocolate. The texture will be slightly softer, so plan to keep them chilled until serving. For a gluten-free version, use gluten-free sandwich cookies—just make sure they have a similar cream filling.
Equipment Needed
You don’t need a fancy kitchen to make these truffles, which is part of their charm. Here’s what you’ll need:
- Food processor or high-speed blender: This is for crushing the Oreos into fine crumbs. You can also do it the old-fashioned way—place the cookies in a zip-top bag and smash them with a rolling pin. It’s a great stress reliever, but it takes a bit more elbow grease.
- Large mixing bowl: For combining the Oreo crumbs and cream cheese.
- Rubber spatula or wooden spoon: For mixing. A spatula makes it easier to scrape the sides of the bowl.
- Small cookie scoop or tablespoon: For portioning the truffle mixture into even balls. A cookie scoop ensures they’re all the same size, which makes dipping easier.
- Baking sheet lined with parchment paper or a silicone baking mat: For holding the truffles as they chill and set.
- Microwave-safe bowl or double boiler: For melting the chocolate. I prefer the microwave for speed—just use short bursts and stir frequently.
- Fork or dipping tool: For coating the truffles in chocolate. A regular dinner fork works perfectly; just tap off the excess.
If you don’t have a food processor, don’t sweat it. I’ve made these using a zip-top bag and a heavy skillet, and they turned out just as good. The key is getting the Oreos to a fine, sand-like consistency.
Preparation Method
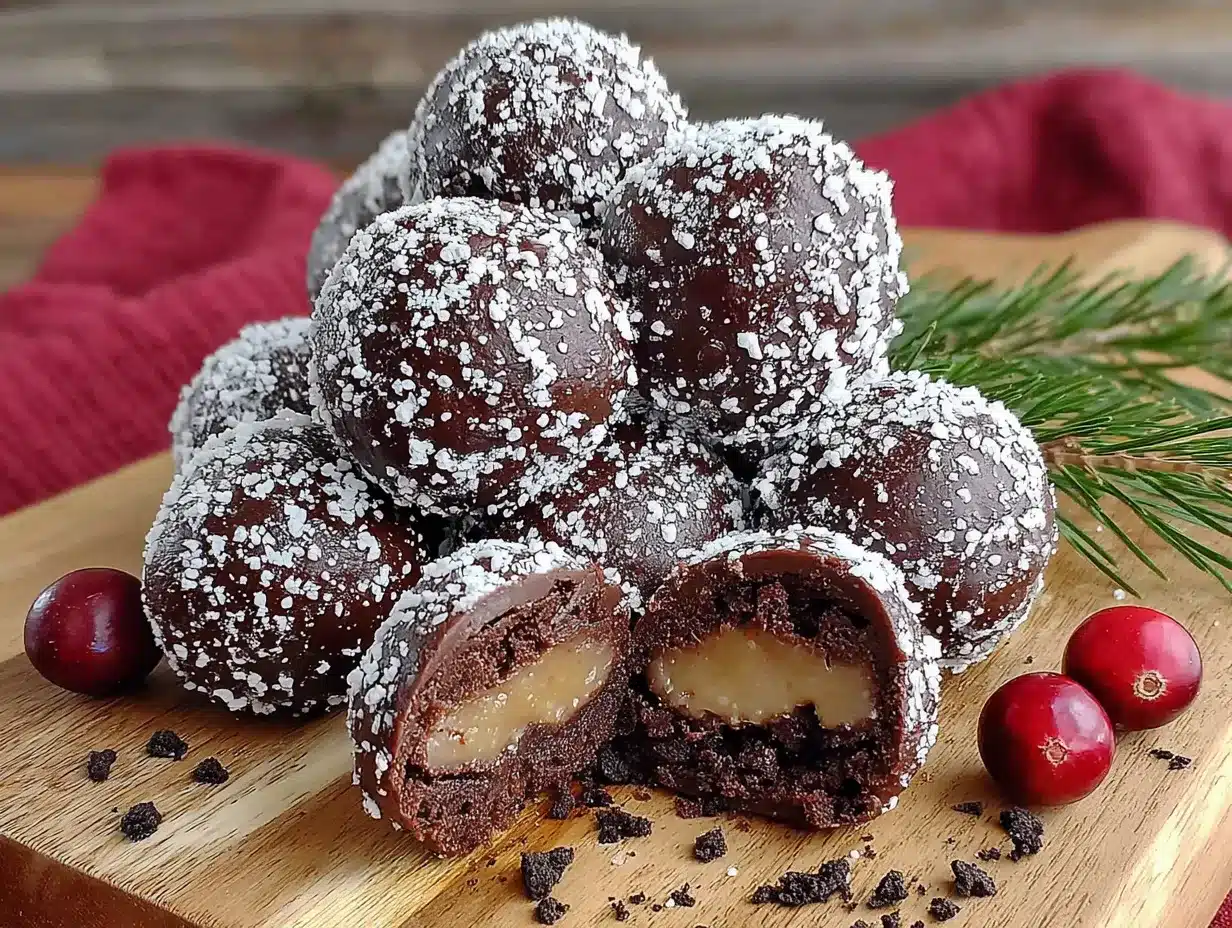
This is where the magic happens. Follow these steps carefully, and you’ll have a batch of beautiful truffles in no time.
- Crush the Oreos (5 minutes): Place the entire package of Oreos—filling and all—into your food processor. Pulse until you have fine, uniform crumbs. You want them to look like dark sand. If you’re using the bag-and-rolling-pin method, make sure there are no large chunks left. A few tiny bits are okay, but big pieces will make the truffles crumbly.
- Mix the dough (3 minutes): In a large mixing bowl, combine the Oreo crumbs with the softened cream cheese. Use your spatula to mix until everything is fully incorporated. At first, it will look like a mess—dry crumbs everywhere. Keep pressing and folding. After about a minute, it will come together into a thick, fudge-like dough. Don’t overmix, or the cream cheese can get too warm and make the mixture sticky.
- Chill the mixture (30 minutes): Cover the bowl with plastic wrap and pop it in the fridge. This step is crucial. Chilling the dough makes it firm enough to roll into balls without sticking to your hands. If you skip this, you’ll end up with a gooey mess. Trust me, I learned this the hard way during a frantic Christmas Eve prep session.
- Roll into balls (15 minutes): Once the mixture is chilled, use your cookie scoop or a tablespoon to portion out even amounts. Roll each portion between your palms to form smooth, round balls. Place them on the parchment-lined baking sheet. If the mixture starts to get too soft, pop it back in the fridge for 10 minutes. You should get about 24 to 28 truffles, depending on size.
- Chill again (15-20 minutes): Place the baking sheet with the rolled truffles in the fridge. This second chill helps them hold their shape when you dip them in the warm chocolate.
- Melt the chocolate (5 minutes): While the truffles are chilling, melt your chocolate according to the package directions. If using the microwave, heat in 30-second bursts, stirring between each, until smooth. Be careful not to overheat—chocolate can seize up and turn grainy. If that happens, stir in a teaspoon of vegetable oil to bring it back.
- Dip the truffles (20 minutes): Remove the truffles from the fridge. Working one at a time, drop a truffle into the melted chocolate. Use a fork to gently roll it around until fully coated. Lift it out with the fork, tapping the handle on the edge of the bowl to let the excess chocolate drip off. Gently slide the truffle off the fork and back onto the parchment paper. If you’re adding sprinkles, do it immediately—the chocolate sets fast.
- Set the truffles (30 minutes): Let the truffles sit at room temperature until the chocolate is completely set. If you’re in a hurry, you can pop them in the fridge for 15 minutes. Just be careful not to leave them in too long, or condensation can form on the surface.
Sensory cues: When you’re mixing the dough, it should feel like a stiff, slightly greasy playdough. When you roll the balls, they should be smooth and hold their shape without cracking. The melted chocolate should be glossy and runny, like thick syrup.
Cooking Tips & Techniques
Over the years, I’ve made more batches of these truffles than I can count, and I’ve picked up a few tricks along the way. Here’s what I wish someone had told me the first time.
- Work in small batches: Don’t take all the truffle balls out of the fridge at once. They warm up quickly, and warm truffles are harder to dip. Keep them chilled until the moment you’re ready to coat them.
- Thin your chocolate if needed: If your melted chocolate is too thick for smooth dipping, stir in a teaspoon of coconut oil or vegetable shortening. This makes the coating thinner and easier to work with, plus it gives a shinier finish.
- Use a toothpick for tricky spots: If a truffle isn’t fully coated after dipping, use a toothpick to dab chocolate onto the bare spots. It’s a small trick that makes a big difference in appearance.
- Don’t overfill your bowl: When melting chocolate, use a bowl that’s deep enough to submerge the truffles but narrow enough that the chocolate stays deep. A shallow bowl makes dipping a nightmare.
- My biggest failure: I once tried to speed things up by using cold cream cheese straight from the fridge. The mixture was lumpy and dry, and the truffles fell apart when I tried to roll them. I had to start over. Lesson learned: room temperature cream cheese is your friend.
For hosting, here’s a pro tip: Make the truffle balls and keep them undipped in the fridge up to three days before your party. On the day of, just melt the chocolate and dip them. It breaks up the work and keeps you from feeling rushed.
Variations & Adaptations
These truffles are endlessly customizable, which is part of the fun. Here are a few ways to switch things up.
- Peppermint Bark Truffles: Add 1/2 teaspoon of peppermint extract to the Oreo mixture. Dip the truffles in white chocolate and sprinkle crushed candy canes on top. This is my personal favorite for Christmas—it tastes just like a peppermint bark, but in bite-sized form.
- Dark Chocolate Lovers: Use dark chocolate melting wafers for the coating. The slight bitterness of the dark chocolate balances the sweetness of the Oreo filling beautifully. I’ve also added a pinch of sea salt on top for a salted chocolate vibe.
- Vegan-Friendly Version: Swap the cream cheese for a vegan cream cheese alternative (like Kite Hill or Tofutti) and use dairy-free chocolate. The texture will be a bit softer, so keep them chilled until serving. I’ve made these for a vegan friend’s holiday party, and they were a hit.
- Funfetti Truffles: Use golden Oreos instead of classic ones, and mix in 2 tablespoons of rainbow sprinkles before rolling. Dip in white chocolate and add more sprinkles on top. These are perfect for a kid-friendly gathering or a non-holiday event.
- Spiced Holiday Twist: Add 1/2 teaspoon of cinnamon and a pinch of nutmeg to the Oreo mixture. The warm spices make the truffles taste even more festive. I tried this on a whim last year, and now it’s my go-to for winter potlucks.
Serving & Storage Suggestions
These truffles are best served chilled, straight from the fridge. The cold temperature keeps the chocolate snappy and the center creamy. Arrange them on a festive platter or a cake stand for a beautiful presentation. For a dinner party, I like to place them in mini paper cupcake liners—it makes them look like little gifts and keeps the chocolate from smudging.
What to serve alongside: These truffles pair beautifully with a cup of hot cocoa or a strong coffee. They’re also great on a dessert table next to other no-bake treats like Christmas pudding cups or a plate of gingerbread biscotti. If you’re hosting a holiday brunch, try them alongside a stack of creamy eggnog pancakes for a sweet start to the day.
Storage instructions: Store the truffles in an airtight container in the refrigerator for up to 2 weeks. They also freeze beautifully—place them in a single layer in a freezer-safe container, with parchment paper between layers, and freeze for up to 3 months. When you’re ready to serve, thaw them in the fridge overnight. Don’t thaw them at room temperature, or condensation can form and make the chocolate sticky.
Flavor development: Honestly, these truffles taste even better the next day. The flavors meld together as they sit, and the texture becomes even more fudge-like. So don’t be afraid to make them a day or two ahead of your event.
Nutritional Information & Benefits
Let’s be real—these are a treat, not a health food. But here’s the estimated nutritional breakdown per truffle (based on 24 truffles):
| Nutrient | Amount per Truffle |
|---|---|
| Calories | 145 |
| Total Fat | 9g |
| Saturated Fat | 5g |
| Carbohydrates | 16g |
| Sugar | 11g |
| Protein | 2g |
That said, there are a few surprising benefits. The cream cheese adds a small amount of calcium and protein, and if you use dark chocolate for the coating, you’ll get a dose of antioxidants. Plus, because these are so rich, a single truffle is usually enough to satisfy a sweet craving—which means you’re less likely to overindulge. For those with dietary restrictions, this recipe can easily be adapted to be gluten-free or vegan, as noted in the variations section.
As with any holiday treat, moderation is key. I like to think of these as a special-occasion indulgence, not an everyday snack. And honestly, that makes them taste even better.
Conclusion
These Easy No-Bake Christmas Oreo Truffle Balls are everything I want in a holiday dessert: simple, stunning, and utterly delicious. They’re the recipe I turn to when I need to impress guests without spending hours in the kitchen, and they never fail to get compliments. Whether you’re hosting a big dinner party or just bringing a plate to a neighbor’s potluck, these truffles will make you look like a pro. And the best part? You can customize them to your heart’s content—peppermint, dark chocolate, funfetti, you name it. I’d love to hear how you make them your own. Drop a comment below and tell me your favorite variation, or share a photo of your truffles on social media. Don’t forget to tag me so I can see your beautiful creations. Happy holidays, and happy truffle-making!
Frequently Asked Questions
Can I use Double Stuf Oreos for this recipe?
I don’t recommend it. Double Stuf Oreos have more cream filling, which can make the truffle mixture too soft and sticky. Stick with classic Oreos for the best texture.
How do I keep the chocolate from cracking when I cut into the truffles?
Make sure your truffles are fully chilled before dipping, and let the chocolate set at room temperature rather than in the fridge. Rapid temperature changes can cause the chocolate to crack.
Can I make these truffles without a food processor?
Absolutely! Place the Oreos in a zip-top bag and crush them with a rolling pin or the bottom of a heavy skillet. It takes a bit more effort, but it works just as well.
How far in advance can I make these truffles?
You can make the undipped truffle balls up to 3 days ahead and keep them in the fridge. Once dipped, they’ll stay fresh for up to 2 weeks in the refrigerator or 3 months in the freezer.
Why did my truffle mixture turn out too dry?
This usually happens if the cream cheese wasn’t softened enough or if you used reduced-fat cream cheese. Make sure your cream cheese is at room temperature and use full-fat for the best results.
Pin This Recipe!
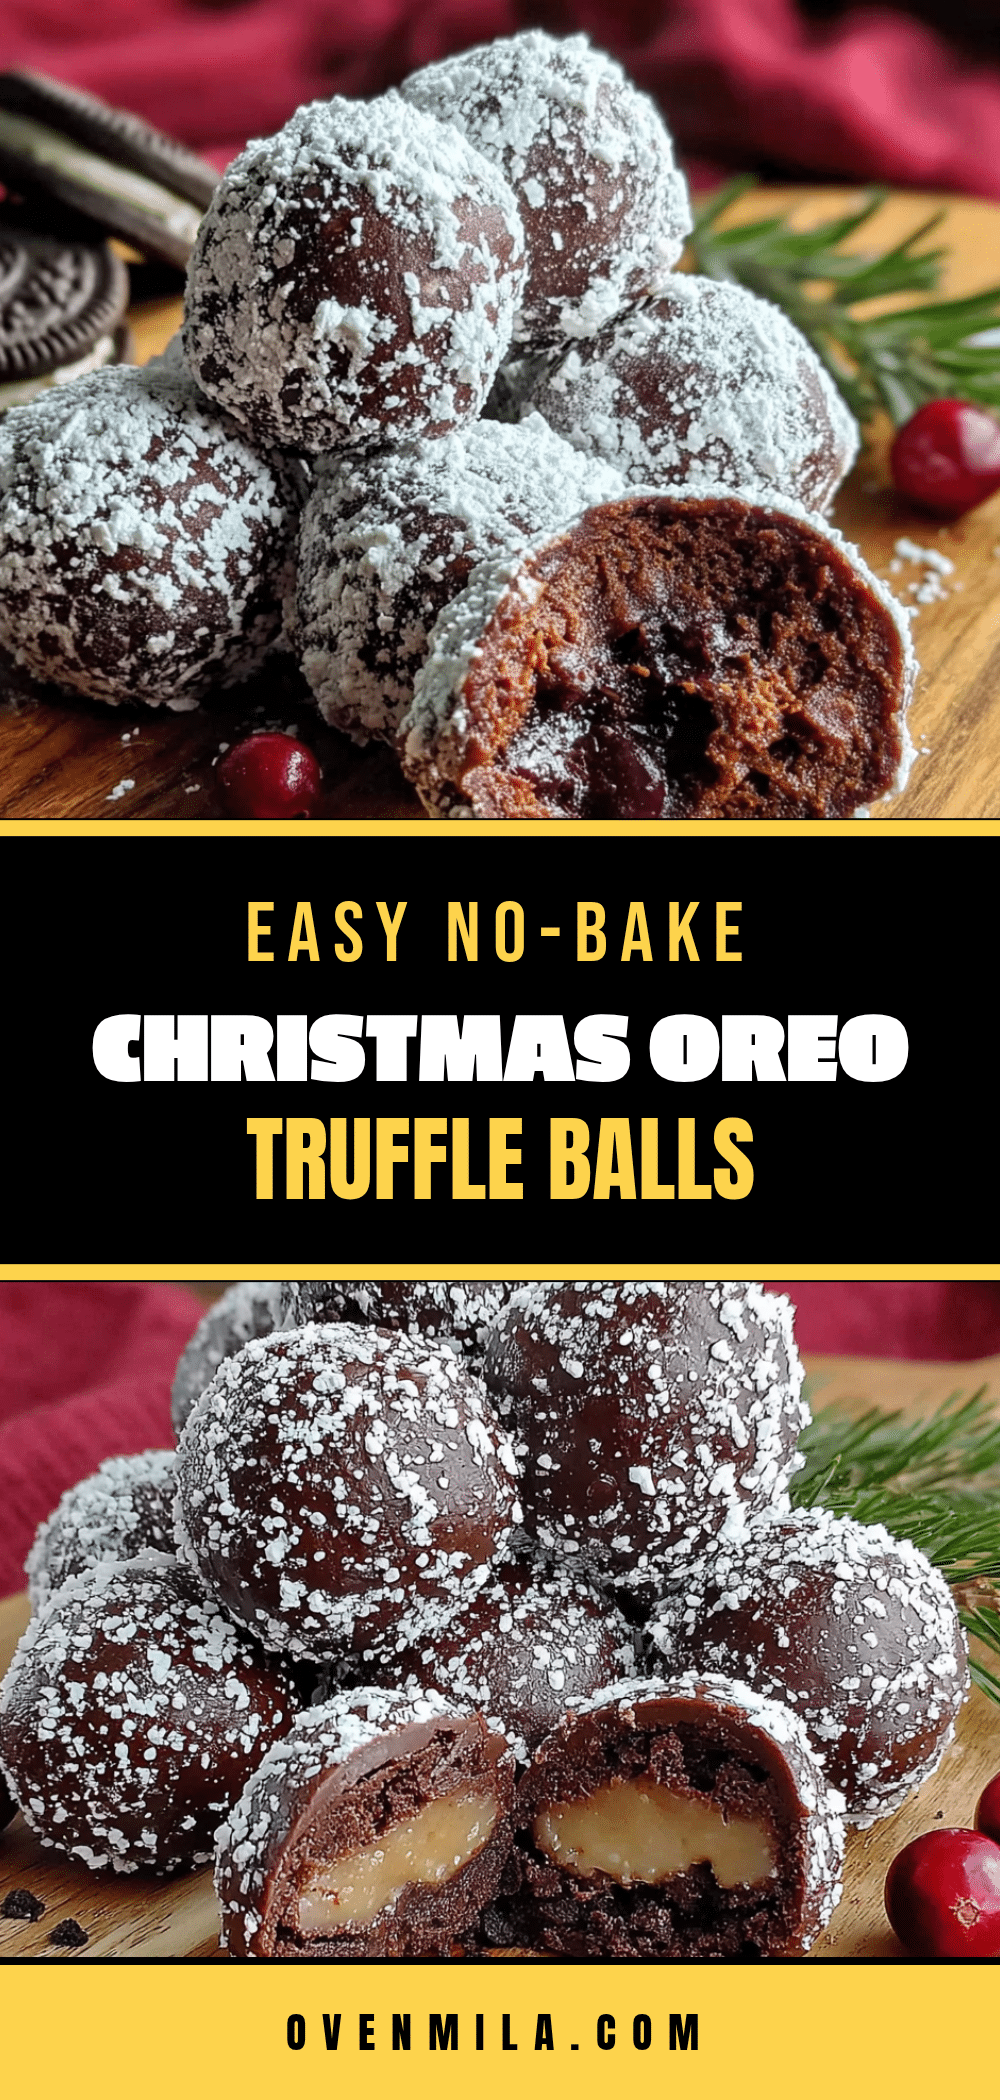
Easy No-Bake Christmas Oreo Truffle Balls: 3-Ingredient Treat

These Easy No-Bake Christmas Oreo Truffle Balls are a simple, 3-ingredient dessert that’s perfect for holiday hosting. With a creamy Oreo and cream cheese center dipped in chocolate, they’re a crowd-pleasing treat that requires no baking and can be made ahead.
- Prep Time: 20 minutes
- Cook Time: 0 minutes
- Total Time: 1 hour 30 minutes (includes chilling and setting time)
- Yield: 24-28 truffles 1x
- Category: Dessert
- Cuisine: American
Ingredients
- 1 (14.3-ounce) package of Oreo cookies (about 36 cookies)
- 1 (8-ounce) block of cream cheese, softened to room temperature
- 12 ounces of melting chocolate or candy melts (white, dark, or milk chocolate)
- Festive sprinkles, crushed candy canes, or edible glitter (optional, for decorating)
- 1/2 teaspoon of peppermint extract (optional, if using white chocolate)
Instructions
- Crush the Oreos: Place the entire package of Oreos (filling and all) into a food processor. Pulse until you have fine, uniform crumbs (like dark sand). Alternatively, place cookies in a zip-top bag and crush with a rolling pin.
- Mix the dough: In a large mixing bowl, combine the Oreo crumbs with the softened cream cheese. Use a rubber spatula to mix until fully incorporated into a thick, fudge-like dough.
- Chill the mixture: Cover the bowl with plastic wrap and refrigerate for 30 minutes until firm.
- Roll into balls: Using a small cookie scoop or tablespoon, portion out even amounts and roll between your palms into smooth, round balls. Place on a parchment-lined baking sheet. You should get about 24 to 28 truffles.
- Chill again: Place the baking sheet with the rolled truffles in the fridge for 15-20 minutes to firm up.
- Melt the chocolate: While truffles chill, melt the chocolate according to package directions (microwave in 30-second bursts, stirring between each, until smooth). If using regular chocolate chips, add 1 teaspoon of coconut oil to help melt smoothly.
- Dip the truffles: Remove truffles from fridge. Working one at a time, drop a truffle into the melted chocolate. Use a fork to roll it around until fully coated. Lift out, tap off excess chocolate, and slide back onto the parchment paper. Add sprinkles immediately if desired.
- Set the truffles: Let truffles sit at room temperature until chocolate is completely set (about 30 minutes). For faster setting, refrigerate for 15 minutes.
Notes
Make sure cream cheese is truly softened to room temperature for a smooth mixture. If the mixture gets too soft while rolling, pop it back in the fridge for 10 minutes. For a shiny chocolate coating, add a teaspoon of coconut oil or vegetable shortening to the melted chocolate. These truffles taste even better the next day as flavors meld.
Nutrition
- Serving Size: 1 truffle
- Calories: 145
- Sugar: 11
- Fat: 9
- Saturated Fat: 5
- Carbohydrates: 16
- Protein: 2
Keywords: no-bake truffles, Oreo truffles, Christmas dessert, 3-ingredient dessert, holiday treats, easy truffles


