The Friendsgiving potluck was in four hours and I’d completely forgotten. I mean, completely. I’d RSVP’d yes, promised to bring a side dish, and then let life get in the way. Everyone else would be bringing their grandmother’s legendary green bean casserole or some elaborate, multi-day mac and cheese. I had a pound of ground turkey, a half-used loaf of sourdough, and a fridge drawer full of celery and onions. Panic doesn’t even begin to cover it.
I remember standing there, staring into the open fridge like an answer was going to magically appear. My friend Sarah, who was hosting, sent a text that said, “See you at 6! Can’t wait for your dish!” I almost dropped my phone. So I did what any reasonable person would do under pressure—I started pulling things out and hoping for the best. The sausage and sage stuffing balls I threw together that afternoon were a Hail Mary, pure and simple. I didn’t have time to fuss, so I kept it simple and made it lighter, swapping in turkey sausage and loading up on fresh herbs.
Honestly, I was ready to apologize when I walked in. But then people started eating them. And then they went back for more. And then Sarah asked me for the recipe before I’d even put my coat back on. I just stood there, a little sheepish, thinking about the messy counter I’d left at home. These lighter sausage and sage stuffing balls saved me that day, and they’ve been a regular in my kitchen ever since. Maybe you’ve been there too—scrambling at the last minute, convinced you’ve failed before you even start. Let me tell you, this recipe is your backup plan, your secret weapon, and honestly, it might just become your new favorite.
Why You’ll Love This Recipe
These lighter sausage and sage stuffing balls have earned a permanent spot in my meal rotation, and I think they’ll earn one in yours too. I’ve tested this recipe more times than I can count—tweaking the moisture level, playing with the herb ratios, and even trying different binders to make sure it works every single time. Here’s what makes them stand out:
- Quick & Easy : From start to finish, you’re looking at about 35 minutes. That’s fast enough for a weeknight dinner but impressive enough for a holiday table.
- Simple Ingredients : You probably have most of these in your pantry right now. No trips to a specialty store required.
- Perfect for Gatherings : Whether it’s Thanksgiving, a potluck, or just a cozy Sunday dinner, these little bites fit right in.
- Crowd-Pleaser : I’ve served them to picky kids and foodie adults, and they disappear every time.
- Unbelievably Delicious : The outside gets perfectly golden and crisp, while the inside stays tender and packed with savory flavor.
What makes these different from every other stuffing ball out there? It’s the balance. I use lean turkey sausage instead of pork, which cuts the fat without cutting the flavor. And instead of drowning everything in butter, I use a light splash of broth to keep things moist. The result is a stuffing ball that tastes indulgent but doesn’t leave you feeling heavy. It’s comfort food reimagined—healthier, faster, but with the same soul-soothing satisfaction. Perfect for impressing guests without stress, or turning a simple meal into something memorable.
What Ingredients You Will Need
This recipe uses simple, wholesome ingredients to deliver bold flavor and satisfying texture without the fuss. Most of these are pantry staples, which makes this dish perfect for last-minute cravings or planned gatherings alike.
- Ground turkey sausage (1 lb) – I prefer using lean turkey sausage (around 93% lean) for a lighter base. If you can’t find it pre-seasoned, plain ground turkey works too—just add an extra pinch of sage and fennel seeds.
- Day-old sourdough bread (4 cups, cubed) – The slight tang of sourdough pairs beautifully with the sage. Stale bread works best because it absorbs the liquid without turning mushy. If your bread is fresh, toast the cubes in a 300°F oven for 10 minutes first.
- Fresh sage leaves (2 tablespoons, finely chopped) – Fresh sage is non-negotiable here. It has a warmth and earthiness that dried sage just can’t match. I grow a small plant on my windowsill specifically for this recipe.
- Yellow onion (1 medium, finely diced) – Adds sweetness and depth. I recommend [brand] Vidalia onions when they’re in season for an extra mild flavor.
- Celery stalks (2 large, finely diced) – That classic stuffing crunch. Make sure to dice them small so they blend into the balls without creating weird texture pockets.
- Low-sodium chicken broth (½ cup) – Keeps everything moist without adding too much salt. You can use vegetable broth to make this vegetarian-friendly.
- Egg (1 large, beaten) – The binder that holds everything together. For an egg-free version, try a flax egg (1 tablespoon ground flaxseed mixed with 3 tablespoons water).
- Garlic cloves (3, minced) – Because what savory dish doesn’t benefit from garlic?
- Olive oil (2 tablespoons) – For sautéing the aromatics and brushing the baking sheet. I use extra virgin for flavor, but light olive oil works too.
- Salt and black pepper (to taste) – Go easy on the salt since the sausage and broth already have some. Freshly cracked pepper makes a difference here.
- Optional: Dried cranberries (¼ cup, chopped) – A sweet pop that plays nicely with the sage. I add these when I’m feeling festive or serving them alongside roasted turkey.
For ingredient selection, look for firm, small-curd bread for the best texture. If you’re using gluten-free bread, choose a sturdy variety like a crusty gluten-free sourdough to avoid crumbling.
Equipment Needed
You don’t need a fancy kitchen to make these lighter sausage and sage stuffing balls. Here’s what I use:
- Large mixing bowl – Any big bowl will do. I’ve used a salad bowl in a pinch, and it worked fine.
- Sharp chef’s knife and cutting board – For dicing the veggies and herbs. A dull knife makes this step way harder than it needs to be.
- Large skillet – For cooking the sausage and aromatics. A non-stick skillet makes cleanup easier, but stainless steel works too.
- Baking sheet – Line it with parchment paper for easy cleanup. I’ve forgotten the parchment before, and let’s just say scrubbing is not my favorite activity.
- Cookie scoop or spoon – A 1.5-inch cookie scoop gives you uniform balls that cook evenly. If you don’t have one, just use two spoons to shape them.
- Cooling rack – Placing the cooked balls on a rack keeps them from getting soggy on the bottom. A paper towel-lined plate works in a pinch.
Budget-friendly tip: You don’t need a fancy baking sheet. A basic one from the grocery store works just as well as a pricey brand. I’ve had mine for years, and it’s still going strong.
Preparation Method

- Preheat your oven to 400°F (200°C). Line a baking sheet with parchment paper and set it aside. Getting the oven hot before you start mixing ensures even cooking.
- Heat 1 tablespoon of olive oil in a large skillet over medium heat. Add the ground turkey sausage and cook for 6-8 minutes, breaking it up with a wooden spoon as it browns. You want it cooked through but not dry—small crumbles are ideal. If you’re using plain ground turkey, add 1 teaspoon of dried sage and ½ teaspoon of fennel seeds at this stage.
- Add the diced onion, celery, and minced garlic to the skillet. Cook for another 4-5 minutes, stirring occasionally, until the vegetables are softened and translucent. The smell at this point is incredible—earthy, savory, and deeply comforting. If the pan looks dry, add a splash of broth to loosen things up.
- Transfer the sausage and vegetable mixture to a large mixing bowl. Let it cool for 5 minutes. This step is important—if you add the egg while the mixture is too hot, it will scramble. Trust me, I learned that the hard way.
- Add the cubed sourdough bread, chopped fresh sage, and beaten egg to the bowl. Pour in ½ cup of low-sodium chicken broth. If you’re using dried cranberries, add them now. Use your hands or a spatula to gently mix everything together until the bread is evenly coated and the ingredients are well combined. Don’t overmix, or the balls will turn dense.
- Let the mixture sit for 5-10 minutes. This allows the bread to absorb the liquid, which helps the balls hold their shape. If the mixture seems too dry, add another tablespoon of broth. If it’s too wet, add a handful of extra breadcrumbs.
- Shape the mixture into 1.5-inch balls. A cookie scoop makes this step fast and consistent. If you’re using your hands, lightly wet them with water to prevent sticking. You should get about 20-24 balls, depending on size.
- Place the balls on the prepared baking sheet, spacing them about 1 inch apart. Brush the tops lightly with the remaining olive oil for a golden, crispy exterior.
- Bake for 18-22 minutes, or until the balls are golden brown and firm to the touch. Halfway through, rotate the baking sheet for even browning. The kitchen will smell like Thanksgiving morning—it’s honestly the best part.
- Remove from the oven and let them cool on the baking sheet for 2 minutes. Then transfer them to a cooling rack to keep the bottoms crisp. Serve warm or at room temperature.
Cooking Tips & Techniques
Over the years, I’ve made these lighter sausage and sage stuffing balls more times than I can count, and I’ve definitely learned a few things along the way. Here are my best tips for getting them right every time:
Don’t skip the cooling step. I once added the egg right after cooking the sausage, and the result was a scrambled mess inside the mixture. Letting the meat and veggies cool for at least 5 minutes prevents this and keeps the texture smooth.
Use your hands to mix. A spatula works, but your hands give you a better feel for the texture. You can tell instantly if the mixture is too dry or too wet and adjust accordingly. Plus, it’s oddly satisfying.
Toast the bread if it’s fresh. Fresh bread soaks up liquid too quickly and turns into paste. If your sourdough is soft, cube it and toast it in a 300°F oven for 10 minutes. This dries it out just enough to hold its shape.
Make them ahead of time. You can shape the balls up to 24 hours in advance and keep them covered in the fridge. When you’re ready to bake, just add 5 minutes to the cooking time. This is a lifesaver during the holidays.
Watch the moisture level. Different breads absorb liquid differently. If your mixture seems dry after the resting period, add broth one tablespoon at a time. If it’s too wet, stir in a tablespoon of breadcrumbs or panko.
One mistake I’ve made more than once is crowding the baking sheet. When the balls are too close together, they steam instead of roasting, and you lose that beautiful golden crust. Give them breathing room, and you’ll be rewarded with crispy edges.
Variations & Adaptations
One of the best things about this recipe is how flexible it is. I’ve tried quite a few variations over the years, and here are my favorites:
Vegetarian Version : Swap the turkey sausage for a plant-based sausage crumble or finely chopped mushrooms. Sauté the mushrooms until they release their liquid and start browning, then proceed as usual. The umami flavor is surprisingly close to the original.
Gluten-Free Adaptation : Use a sturdy gluten-free bread, like a crusty gluten-free sourdough or a multigrain loaf. Add an extra tablespoon of broth since gluten-free bread tends to be drier. I’ve tested this with several brands, and it works beautifully.
Seasonal Twist : In the fall, I add ¼ cup of finely chopped apple (Honeycrisp or Granny Smith) to the mixture. The sweetness plays off the sage and adds a lovely tender bite. In the spring, I swap the sage for fresh thyme and add a handful of chopped parsley.
Spicy Kick : If you like heat, use hot Italian turkey sausage instead of mild, or add ½ teaspoon of red pepper flakes along with the garlic. The warmth builds slowly and keeps things interesting.
Cheesy Indulgence : Stir in ½ cup of grated Parmesan or sharp cheddar cheese before shaping the balls. It adds a salty, savory depth that’s hard to resist. I do this when I want a more decadent version.
Each variation brings something new to the table, but the original remains my go-to. It’s simple, balanced, and reliably delicious.
Serving & Storage Suggestions
These lighter sausage and sage stuffing balls are best served warm, straight from the oven, when the exterior is at its crispiest. But honestly, they’re pretty fantastic at room temperature too—I’ve been known to sneak a few while packing leftovers.
Serving Ideas : Arrange them on a platter with a small bowl of warm gravy for dipping. They pair beautifully with roasted turkey, creamy mashed potatoes, or a simple green salad with a tangy vinaigrette. For a holiday spread, I like to serve them alongside my cranberry orange relish for a bright, acidic contrast.
Storage : Let any leftovers cool completely, then store them in an airtight container in the refrigerator for up to 4 days. The flavors actually deepen overnight, so they might taste even better the next day.
Freezing : These freeze like a dream. Arrange the baked and cooled balls in a single layer on a baking sheet and freeze for 2 hours, then transfer them to a freezer-safe bag or container. They’ll keep for up to 3 months. To reheat, bake from frozen at 375°F for 12-15 minutes, or until warmed through.
Reheating : For the crispiest results, reheat them in the oven or an air fryer at 350°F for 5-7 minutes. The microwave works in a pinch, but the texture will be softer. I usually pop them in the toaster oven while I’m making coffee—it’s quick and easy.
One thing I love about this recipe is how the flavors develop. Day-old stuffing balls are almost better than fresh, with the sage and garlic mellowing into a cozy, savory harmony.
Nutritional Information & Benefits
Here’s an estimated breakdown for one serving (about 4-5 stuffing balls):
| Nutrient | Amount |
|---|---|
| Calories | 245 |
| Protein | 18g |
| Carbohydrates | 22g |
| Fat | 9g |
| Saturated Fat | 2g |
| Fiber | 2g |
| Sodium | 480mg |
Using lean turkey sausage instead of traditional pork sausage cuts the saturated fat by nearly half, making this a lighter option that doesn’t skimp on flavor. Fresh sage is rich in antioxidants and has anti-inflammatory properties, while the celery and onion add a boost of fiber and vitamins. This recipe is also lower in calories than traditional stuffing balls, which often rely on heavy butter and cream.
Dietary considerations: This recipe can be made gluten-free and dairy-free with simple swaps. It contains eggs, but a flax egg works as a substitute. The sodium content is moderate, so feel free to use no-salt-added broth if you’re watching your intake.
From a wellness perspective, I love that this dish lets me enjoy a classic comfort food without the post-meal heaviness. It’s satisfying, flavorful, and fits into a balanced eating plan without feeling restrictive.
Conclusion
These lighter sausage and sage stuffing balls have become a staple in my kitchen for good reason. They’re quick enough for a busy weeknight, impressive enough for a holiday table, and versatile enough to adapt to whatever you have on hand. Whether you’re scrambling to bring something to a potluck or just craving a cozy, savory bite, this recipe delivers every single time.
I love how forgiving this recipe is—you can tweak the herbs, swap the protein, or add your favorite mix-ins, and it still turns out delicious. That’s the kind of recipe I want in my back pocket, and I hope it becomes that for you too.
Have you tried making these? I’d love to hear how they turned out! Drop a comment below with your favorite variation, or tag me in your photos—I’m always inspired by how you make recipes your own. Happy cooking, friend!
Frequently Asked Questions
Can I make these stuffing balls ahead of time?
Yes! You can shape the balls up to 24 hours in advance and keep them covered in the fridge. When you’re ready to bake, add 5 minutes to the cooking time. They also freeze beautifully after baking.
Can I use dried sage instead of fresh?
You can, but fresh sage really makes a difference here. If you’re in a pinch, use 2 teaspoons of dried sage and add it with the garlic. The flavor will be more muted, so consider adding a pinch of thyme to boost the herbal notes.
How do I prevent the stuffing balls from falling apart?
Make sure the mixture rests for 5-10 minutes before shaping, so the bread absorbs the liquid. If the mixture still seems crumbly, add an extra tablespoon of broth or another beaten egg. Also, don’t skip the egg—it’s the main binder.
Can I make this recipe dairy-free?
Absolutely. The recipe as written is naturally dairy-free, since it uses olive oil instead of butter. Just double-check your bread to make sure it doesn’t contain milk or butter.
What’s the best way to reheat leftovers?
For the crispiest results, reheat them in the oven or an air fryer at 350°F for 5-7 minutes. The microwave works, but the texture will be softer. I usually use the toaster oven for a quick, even reheat.
Pin This Recipe!
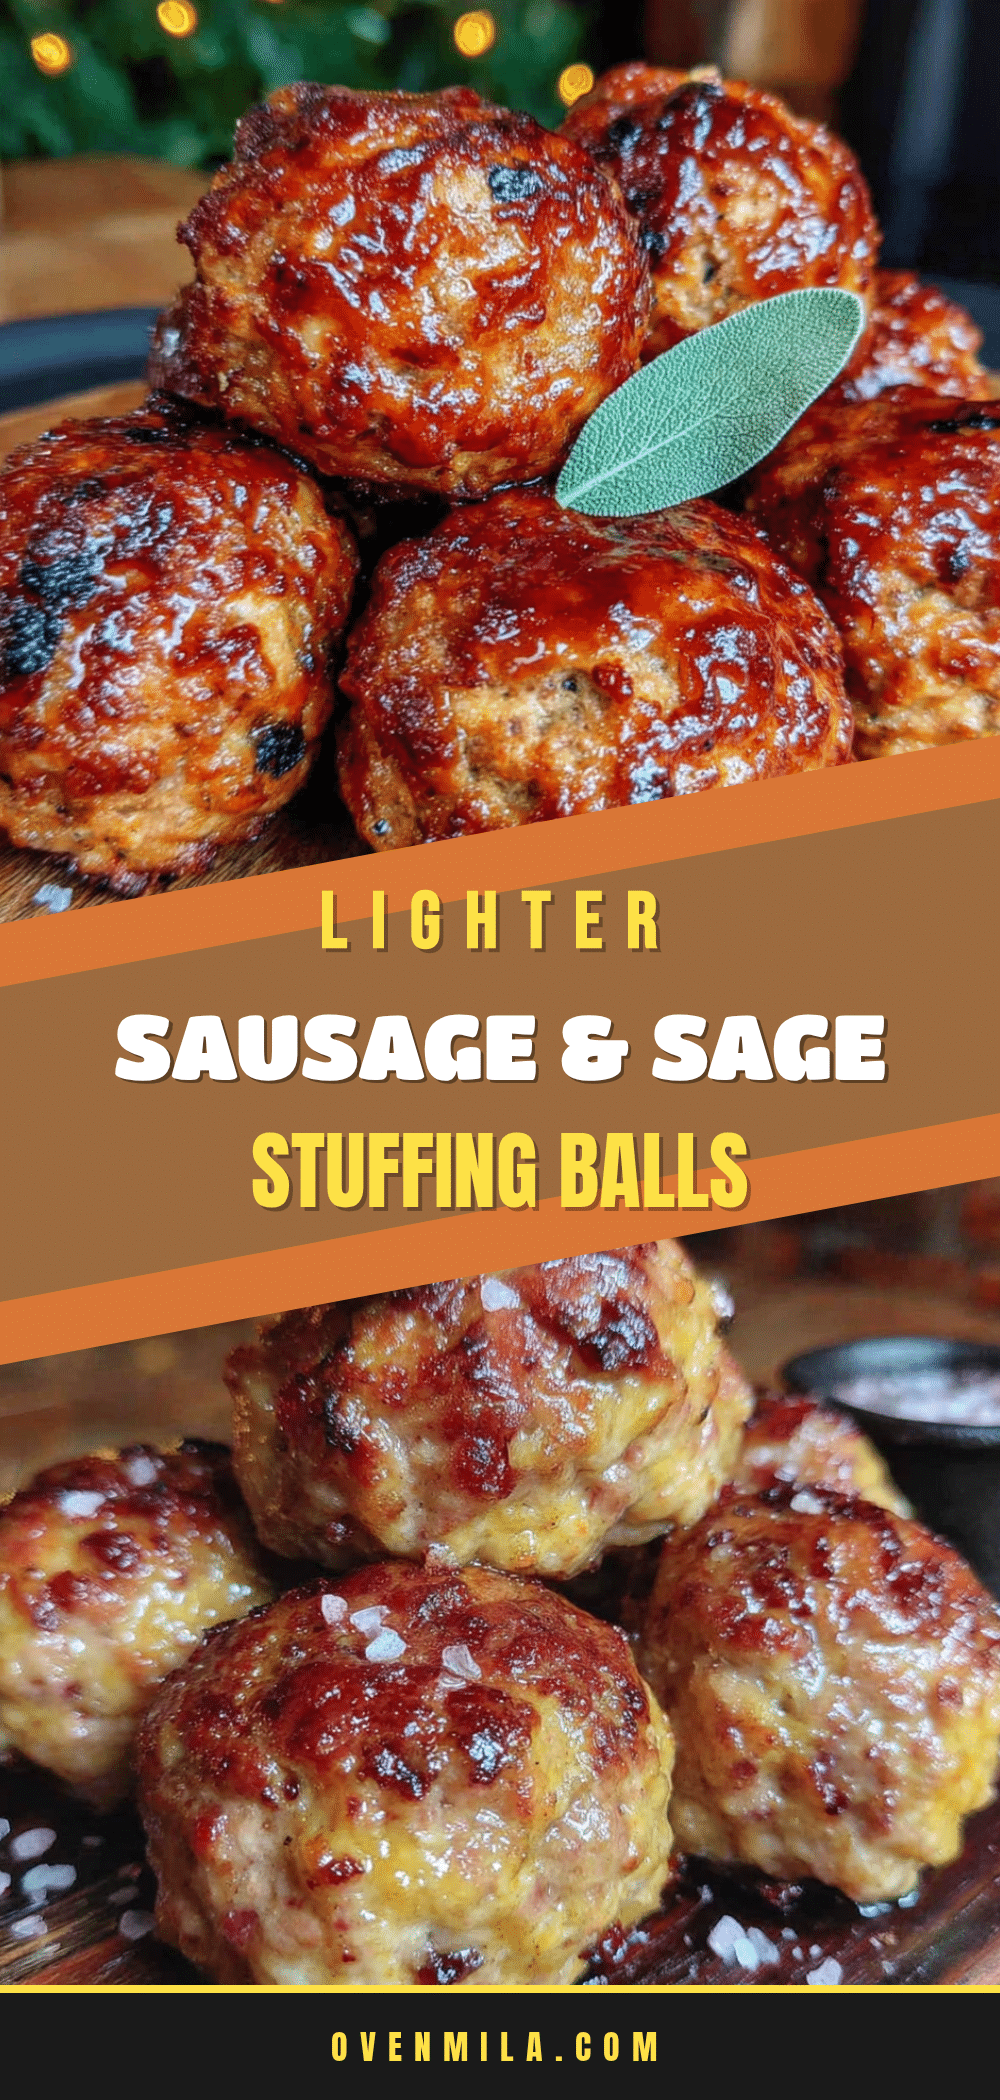
Lighter Sausage and Sage Stuffing Balls

These lighter sausage and sage stuffing balls are quick, easy, and perfect for gatherings. Made with lean turkey sausage and fresh sage, they’re a healthier twist on a classic comfort food that’s ready in about 35 minutes.
- Prep Time: 15 minutes
- Cook Time: 20 minutes
- Total Time: 35 minutes
- Yield: 4 servings 1x
- Category: Side Dish
- Cuisine: American
Ingredients
- 1 lb ground turkey sausage (93% lean)
- 4 cups day-old sourdough bread, cubed
- 2 tablespoons fresh sage leaves, finely chopped
- 1 medium yellow onion, finely diced
- 2 large celery stalks, finely diced
- ½ cup low-sodium chicken broth
- 1 large egg, beaten
- 3 garlic cloves, minced
- 2 tablespoons olive oil
- Salt and black pepper to taste
- ¼ cup dried cranberries, chopped (optional)
Instructions
- Preheat your oven to 400°F (200°C). Line a baking sheet with parchment paper and set aside.
- Heat 1 tablespoon of olive oil in a large skillet over medium heat. Add the ground turkey sausage and cook for 6-8 minutes, breaking it up with a wooden spoon as it browns, until cooked through.
- Add the diced onion, celery, and minced garlic to the skillet. Cook for another 4-5 minutes, stirring occasionally, until the vegetables are softened and translucent.
- Transfer the sausage and vegetable mixture to a large mixing bowl. Let it cool for 5 minutes.
- Add the cubed sourdough bread, chopped fresh sage, and beaten egg to the bowl. Pour in ½ cup of low-sodium chicken broth. If using dried cranberries, add them now. Gently mix everything together until the bread is evenly coated and the ingredients are well combined. Do not overmix.
- Let the mixture sit for 5-10 minutes to allow the bread to absorb the liquid. If the mixture seems too dry, add another tablespoon of broth. If it’s too wet, add a handful of extra breadcrumbs.
- Shape the mixture into 1.5-inch balls. A cookie scoop makes this step fast and consistent. You should get about 20-24 balls.
- Place the balls on the prepared baking sheet, spacing them about 1 inch apart. Brush the tops lightly with the remaining olive oil.
- Bake for 18-22 minutes, or until the balls are golden brown and firm to the touch. Halfway through, rotate the baking sheet for even browning.
- Remove from the oven and let them cool on the baking sheet for 2 minutes. Then transfer them to a cooling rack to keep the bottoms crisp. Serve warm or at room temperature.
Notes
Let the mixture cool before adding the egg to prevent scrambling. Use your hands to mix for better texture control. Toast fresh bread before using to prevent mushiness. Balls can be shaped up to 24 hours in advance and refrigerated. For freezing, bake first, cool, then freeze for up to 3 months.
Nutrition
- Serving Size: 4-5 stuffing balls
- Calories: 245
- Sugar: 4
- Sodium: 480
- Fat: 9
- Saturated Fat: 2
- Carbohydrates: 22
- Fiber: 2
- Protein: 18
Keywords: stuffing balls, sausage stuffing, turkey sausage, sage, Thanksgiving side, easy stuffing recipe, lighter stuffing, holiday side dish


