I burned the garlic in my first three attempts at making homemade pickles before I finally understood what was going wrong. Honestly, I never thought refrigerator pickles could taste good without that slow, all-day brine magic. But it turns out, if you get the garlic just right and keep the crunch in mind, you can have crisp, flavorful dill pickles in just 24 hours—no long wait, no soggy mess. The first time I tried this recipe, I was skeptical. I didn’t expect the cucumbers to stay crunchy or the garlic to sing without overpowering the jar. But that first bite was a quiet shock—bright, garlicky, and perfectly tangy with a satisfying snap. It’s funny because I usually shy away from pickles that taste too sour or mushy, and for years I made versions I barely ate. This one stuck. It’s the kind of recipe that slowly settles into your routine, the one you keep reaching for when you want that quick, satisfying crunch alongside everything from sandwiches to grilled cheese.
There’s something about how the fresh dill and garlic mingle overnight in the fridge—it’s subtle but unmistakable. You don’t have to be a pickle pro to make it happen, and honestly, it feels like a little kitchen victory every time I pull that jar from the fridge. If you’re the type who’s always wanted to try pickling but thought it was too much fuss or time, this recipe might just change your mind. Plus, it’s a great way to use up those cucumbers that sometimes sit forgotten in the crisper drawer. Not to mention, it pairs beautifully with simple dishes like the fresh avocado and smoked salmon crostini or adds a crunchy, tangy pop to a quick salad.
In the end, the reason this recipe stuck with me is simple: it works. It’s fast enough for last-minute cravings but doesn’t sacrifice that classic pickle crunch or garlicky punch. That’s why I’m sharing it with you—because sometimes the best recipes aren’t complicated; they’re just honest and dependable, like this crisp, garlicky dill pickle jar waiting in your fridge.
Why You’ll Love This Recipe
This recipe for crispy garlic dill refrigerator pickles isn’t just another pickle recipe. It’s one I’ve tested multiple times to get the balance just right. Here’s why you’ll find yourself reaching for this recipe again and again:
- Quick & Easy: Ready in just 24 hours—no weeks of waiting required. Perfect when you want crunchy pickles without planning days ahead.
- Simple Ingredients: Uses pantry staples and fresh cucumbers. No weird additives or complicated spices—just what you likely have on hand.
- Perfect for Any Occasion: Great for casual snacks, sandwich toppings, or even a tangy addition to your next potluck spread.
- Crowd-Pleaser: The crisp texture and balanced garlic-dill flavor always get compliments, whether it’s a family dinner or an impromptu picnic.
- Unbelievably Delicious: The way the garlic mellows and the cucumbers stay crunchy is pretty special. Honestly, it’s a texture and flavor combo that’s hard to beat.
- What Makes This Recipe Different: The secret is in the garlic preparation and the quick refrigerator method that keeps the cucumbers snappy. Unlike traditional canned pickles, these don’t need boiling or canning equipment, and the dill is fresh, not dried, which makes a huge difference.
Plus, this recipe fits right in with other fresh, vibrant dishes like the fresh quinoa salad with pomegranate drizzle, making it a versatile addition to your kitchen repertoire.
What Ingredients You Will Need
This recipe uses simple, wholesome ingredients to deliver bold flavor and a satisfying crunch without any fuss. Most of these are pantry staples, and the fresh dill and garlic give it that unmistakable homemade touch.
- Fresh cucumbers: About 4-5 medium Kirby or Persian cucumbers, sliced into spears or rounds (Kirby cucumbers are best for crunch).
- Garlic cloves: 4-5 large cloves, peeled and lightly crushed (to release flavor without overpowering).
- Fresh dill: 3-4 sprigs, with stems (look for bright green, fragrant dill—avoid wilted ones).
- White vinegar: 1 cup (240 ml), preferably distilled or white wine vinegar for clean acidity.
- Water: 1 cup (240 ml), filtered or bottled if your tap water is heavily chlorinated.
- Salt: 1 tablespoon kosher salt or pickling salt (avoid iodized table salt—it can cloud the brine).
- Sugar: 1 teaspoon granulated sugar (balances vinegar sharpness, optional but recommended).
- Black peppercorns: 1 teaspoon whole peppercorns (adds gentle spice).
- Optional spices: A pinch of red pepper flakes or mustard seeds for a slight kick (if you like).
I usually go with the kosher salt from Diamond Crystal for the best dissolve and taste. If fresh dill isn’t available, frozen dill can work but won’t be quite as fragrant. In summer, sometimes I swap sliced cucumbers with the fresh cucumbers used in my cucumber and basil sparkling water recipe for a double dose of freshness.
Equipment Needed
- Mason jars or any glass jars with airtight lids: 1 quart (1 liter) size is ideal for this recipe. I’ve used standard Ball jars and also repurposed jam jars when in a pinch.
- Measuring cups and spoons: For precise vinegar, water, salt, and sugar ratios.
- Mixing bowl: To soak cucumbers briefly, if preferred.
- Knife and cutting board: For slicing cucumbers uniformly.
- Small saucepan: To warm the brine slightly, which helps dissolve salt and sugar faster.
If you don’t have mason jars, any clean, heatproof jar with a tight lid works fine—just make sure it seals well in the fridge. Personally, I keep a set of glass jars with metal lids specifically for quick pickling; they’re easy to clean and reuse. And here’s a tip: avoid metal lids that can rust over time—plastic-lined lids are better for salty brines and fridge use.
Preparation Method

- Wash and slice the cucumbers: Rinse 4-5 medium Kirby cucumbers well. Cut off the blossom ends (they can cause softening). Slice into spears about 3-4 inches long or into ¼-inch rounds depending on your preference. Uniform size helps ensure even pickling. (Prep time: 10 minutes)
- Prepare the garlic and dill: Peel 4-5 garlic cloves and gently crush them with the flat side of a knife to release flavor. Rinse 3-4 fresh dill sprigs and pat dry. If you want a stronger dill flavor, add extra sprigs. (Prep time: 5 minutes)
- Make the brine: In a small saucepan, combine 1 cup (240 ml) white vinegar, 1 cup (240 ml) water, 1 tablespoon kosher salt, and 1 teaspoon sugar. Warm over medium heat just enough to dissolve salt and sugar completely—don’t boil. Let it cool slightly. (Prep time: 5 minutes)
- Pack the jar: Place the cucumber slices into a clean quart-sized mason jar. Tuck in the crushed garlic cloves, dill sprigs, 1 teaspoon whole black peppercorns, and optional pinch of red pepper flakes or mustard seeds. Pack tightly but don’t crush the cucumbers. (Prep time: 5 minutes)
- Pour the brine: Pour the warm brine over the cucumbers in the jar, covering them fully but leaving about ½ inch of headspace. Tap the jar gently to release trapped air bubbles. Seal tightly with the lid. (Prep time: 2 minutes)
- Refrigerate: Place the jar in the fridge and let it sit for at least 24 hours before eating. The cucumbers will soak up the garlic dill flavor and stay crisp in the cold. Best flavor develops after 48 hours but 24 hours is plenty for that satisfying crunch and tang. (Wait time: 24 hours+)
- Check before serving: When you open the jar, the garlic aroma should be fragrant but not burnt, and the cucumbers should snap when bitten. If they feel soft or mushy, it likely means the cucumbers were overripe or the salt ratio was off—try fresh cucumbers next time!
Pro tip: If you want extra crisp pickles, soak your sliced cucumbers in ice water for 30 minutes before packing. This tightens their texture. Also, removing the blossom end prevents softening enzymes from ruining the crunch.
Cooking Tips & Techniques
Getting pickles perfectly crispy can be tricky, but a few tricks make all the difference. First, never skip the step of removing cucumber blossom ends—they contain enzymes that break down the flesh quickly. I learned this the hard way when my first batch turned out mushy despite everything else seeming right.
Secondly, the brine ratio must be spot on. Too little salt, and the cucumbers get limp; too much, and the flavor becomes harsh. I recommend sticking to kosher or pickling salt to avoid cloudiness and off-flavors. Dissolving the salt and sugar in warm vinegar and water helps them blend smoothly.
Don’t rush the refrigeration time. While it’s tempting to taste earlier, the pickles need at least 24 hours to absorb the flavors fully and develop that satisfying tang. I usually make mine a day ahead of serving.
Another tip: use fresh dill, not dried. Fresh dill adds a bright, herbal note that dried just can’t match. If you’re craving a little heat, adding red pepper flakes is a simple upgrade that works beautifully with the garlic-dill combo.
If you ever want to scale this recipe up, just maintain the liquid-to-cucumber ratio and brine proportions. And for those who enjoy multitasking in the kitchen, these pickles pair wonderfully with quick dishes like the maple bourbon pulled jackfruit sliders, offering a crunchy contrast to rich flavors.
Variations & Adaptations
This recipe is flexible, so you can tweak it based on what you have or how you like your pickles:
- Low-Sodium Version: Reduce salt by half, but expect a slight drop in crunch. Consider adding a pinch of calcium chloride (pickling crisp) for texture preservation.
- Spiced-Up Pickles: Add mustard seeds, coriander seeds, or a few sliced jalapeños for heat and complexity.
- Vegan-Friendly Sweet Pickles: Swap sugar with maple syrup or agave nectar for a natural sweetness twist.
- Quick Refrigerator Bread and Butter Pickles: Add thinly sliced onions and increase sugar to 2 tablespoons for a sweeter, tangier version.
- Herb Variations: Try swapping dill for fresh thyme or tarragon for a different herbal note.
Personally, once I tried a batch with lemon zest and it was surprisingly refreshing—bright enough to pair well with the smoky fish in my miso-glazed cod recipe. It’s fun to experiment and find what clicks with your palate!
Serving & Storage Suggestions
These pickles are best served cold straight from the fridge. The crunch and tang make them an ideal side for sandwiches, burgers, or even as a snack on their own. I often serve them alongside creamy dishes, where their acidity cuts through richness wonderfully.
Store pickles in the fridge for up to 3 weeks. The flavor actually deepens over the first few days, so if you can wait, it’s worth it. Keep the jar sealed tightly to maintain crispness and prevent other fridge odors from creeping in.
Reheat? Nah, these are meant to be cold. But if you want to bring out the flavor, let the jar sit at room temperature for 10-15 minutes before serving. This softens the brine’s sharpness just a touch without losing crunch.
For an easy snack idea, try pairing your pickles with a fresh, light cheese plate or alongside the fresh quinoa salad with roasted edamame and pomegranate drizzle for a meal that’s bright and balanced.
Nutritional Information & Benefits
These crispy garlic dill refrigerator pickles are low in calories (about 10-15 calories per serving), fat-free, and packed with flavor. The vinegar and garlic have antimicrobial properties, and cucumbers provide hydration plus small amounts of vitamins K and C.
This recipe is naturally gluten-free, vegan, and low-carb, making it suitable for most dietary needs. Just watch the sodium content if you’re on a low-salt diet, and consider adjusting salt levels accordingly.
From my wellness perspective, it’s a great way to add probiotics if you let the pickles ferment slightly (beyond 24 hours), but even quick fridge pickles offer a boost of flavor with minimal fuss and no artificial preservatives.
Conclusion
This crispy garlic dill refrigerator pickles recipe is a keeper because it combines speed, simplicity, and that unmistakable homemade crunch. You don’t need fancy equipment or days of waiting, just fresh ingredients and a little patience for the magic to happen in your fridge.
Feel free to customize the garlic, dill, and spice levels to fit your taste buds. I love how this recipe turned something I used to burn into a staple I rely on—proof that cooking is all about learning and adjusting. If you try it, I’d love to hear how you make it your own or what dishes you enjoy it with. Happy pickling!
FAQs About Crispy Garlic Dill Refrigerator Pickles
How long do refrigerator pickles last?
When stored properly in the fridge, these pickles stay fresh and crunchy for up to 3 weeks. After that, they may start to soften or lose flavor.
Can I use regular cucumbers instead of Kirby cucumbers?
Kirby cucumbers are preferred for their firmness and thin skin, which helps the pickles stay crisp. Regular cucumbers can work but may yield softer pickles.
Is it necessary to crush the garlic?
Lightly crushing the garlic releases more flavor into the brine without overwhelming the pickles. Whole cloves can be used but might impart a milder garlic taste.
Can I make these pickles spicy?
Absolutely! Adding red pepper flakes or sliced jalapeños during packing gives a nice spicy kick that complements the dill and garlic.
Why do my pickles turn out soggy?
Common reasons include using overripe cucumbers, not removing blossom ends, insufficient salt, or storing at too warm a temperature. Try fresh Kirby cucumbers and follow the salt ratio carefully.
Pin This Recipe!
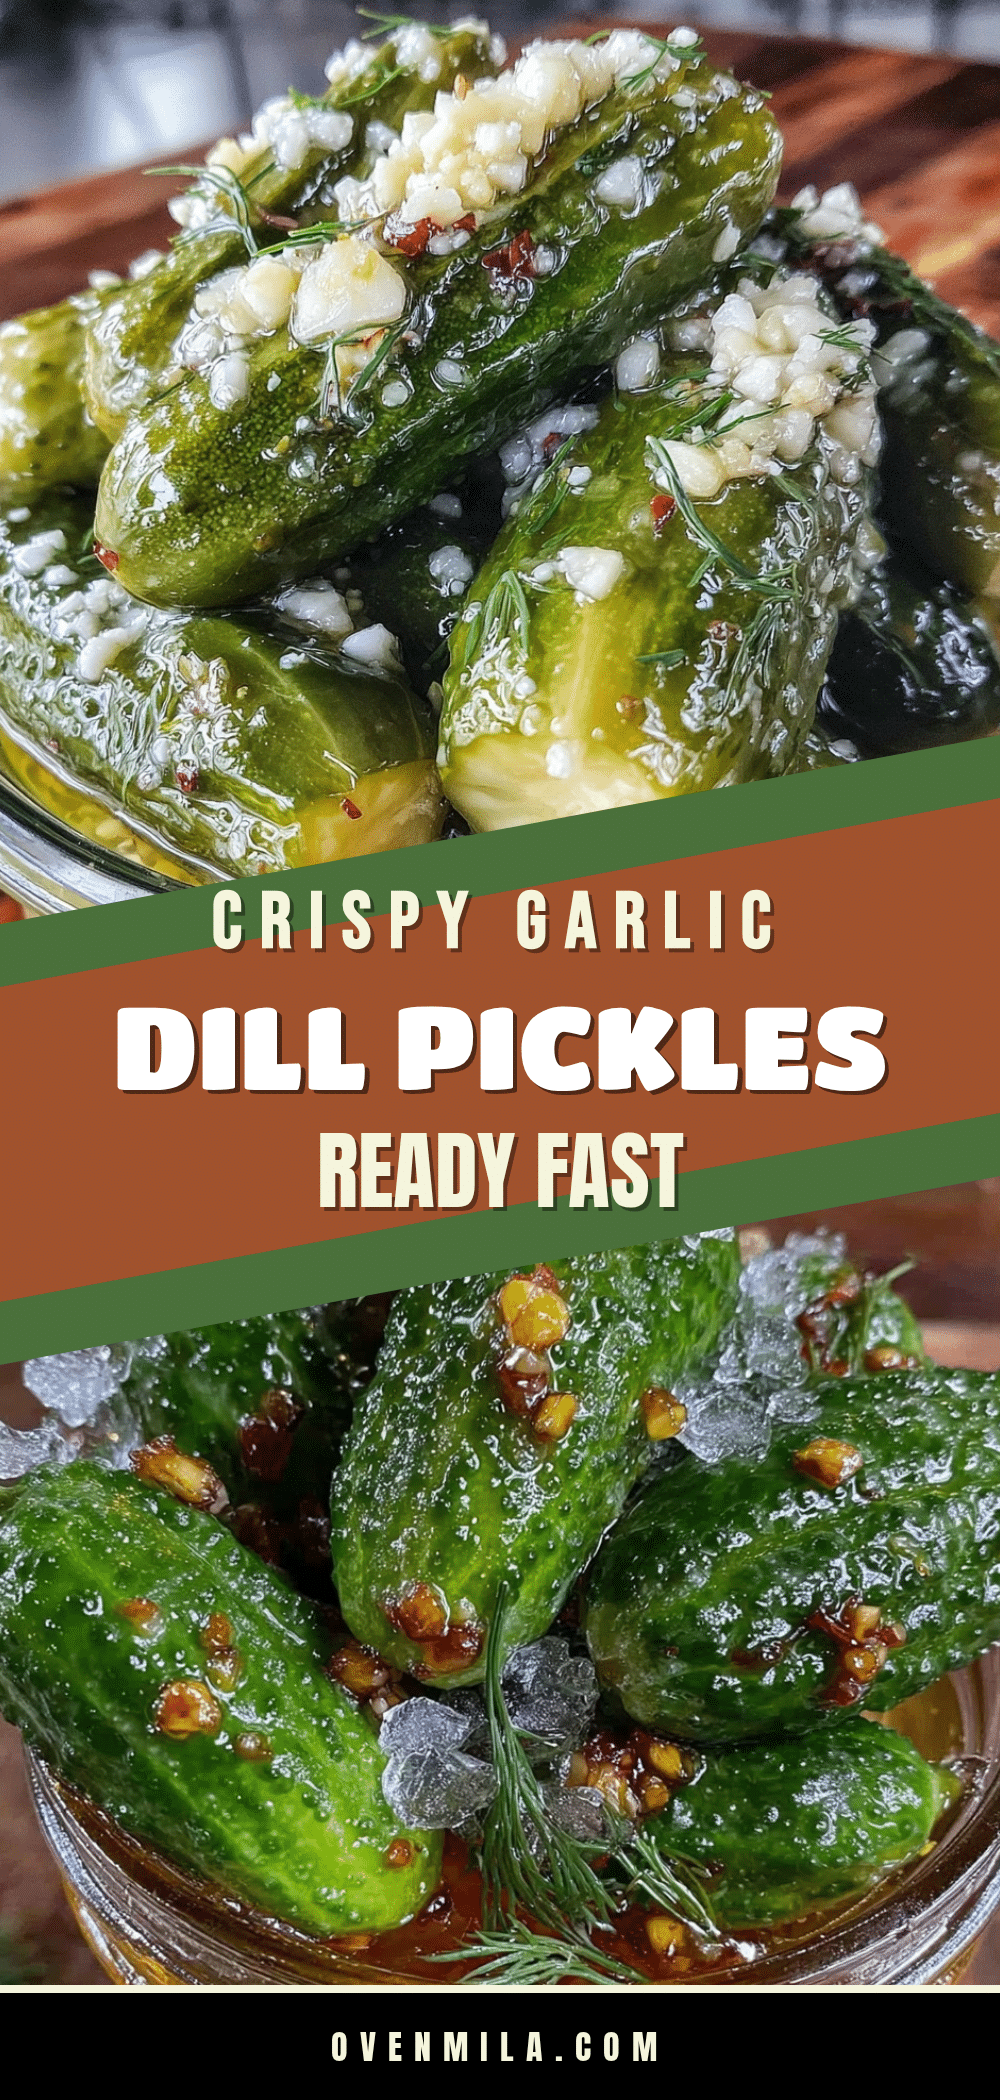
Crispy Garlic Dill Refrigerator Pickles
A quick and easy recipe for crisp, flavorful dill pickles ready in just 24 hours without the need for canning. Perfectly tangy with a satisfying crunch and a balanced garlic-dill flavor.
- Prep Time: 25 minutes
- Cook Time: 0 minutes
- Total Time: 24 hours 25 minutes
- Yield: 1 quart jar (about 4-5 servings) 1x
- Category: Condiment
- Cuisine: American
Ingredients
- 4–5 medium Kirby or Persian cucumbers, sliced into spears or rounds
- 4–5 large garlic cloves, peeled and lightly crushed
- 3–4 sprigs fresh dill, with stems
- 1 cup (240 ml) white vinegar (distilled or white wine vinegar preferred)
- 1 cup (240 ml) water (filtered or bottled if tap water is chlorinated)
- 1 tablespoon kosher salt or pickling salt
- 1 teaspoon granulated sugar (optional but recommended)
- 1 teaspoon whole black peppercorns
- Optional: pinch of red pepper flakes or mustard seeds
Instructions
- Wash and slice the cucumbers: Rinse 4-5 medium Kirby cucumbers well. Cut off the blossom ends. Slice into spears about 3-4 inches long or into ¼-inch rounds depending on preference.
- Prepare the garlic and dill: Peel 4-5 garlic cloves and gently crush them with the flat side of a knife. Rinse 3-4 fresh dill sprigs and pat dry.
- Make the brine: In a small saucepan, combine 1 cup white vinegar, 1 cup water, 1 tablespoon kosher salt, and 1 teaspoon sugar. Warm over medium heat just enough to dissolve salt and sugar completely—do not boil. Let cool slightly.
- Pack the jar: Place cucumber slices into a clean quart-sized mason jar. Add crushed garlic cloves, dill sprigs, black peppercorns, and optional red pepper flakes or mustard seeds. Pack tightly without crushing cucumbers.
- Pour the brine: Pour the warm brine over the cucumbers, covering them fully but leaving about ½ inch of headspace. Tap the jar gently to release trapped air bubbles. Seal tightly with the lid.
- Refrigerate: Place the jar in the fridge and let it sit for at least 24 hours before eating. Best flavor develops after 48 hours.
- Check before serving: The garlic aroma should be fragrant but not burnt, and cucumbers should snap when bitten. If soft or mushy, cucumbers may have been overripe or salt ratio off.
Notes
For extra crisp pickles, soak sliced cucumbers in ice water for 30 minutes before packing. Always remove cucumber blossom ends to prevent softening. Use kosher or pickling salt to avoid cloudy brine. Do not boil brine; just warm to dissolve salt and sugar. Refrigerate at least 24 hours before eating; flavor improves after 48 hours. Store pickles in fridge up to 3 weeks. Avoid metal lids that can rust; plastic-lined lids are better for fridge use.
Nutrition
- Serving Size: About 1/4 cup (1-2 s
- Calories: 15
- Sugar: 1
- Sodium: 800
- Carbohydrates: 3
- Fiber: 0.5
Keywords: refrigerator pickles, garlic dill pickles, quick pickles, crispy pickles, easy pickles, homemade pickles, dill pickles, no canning pickles


