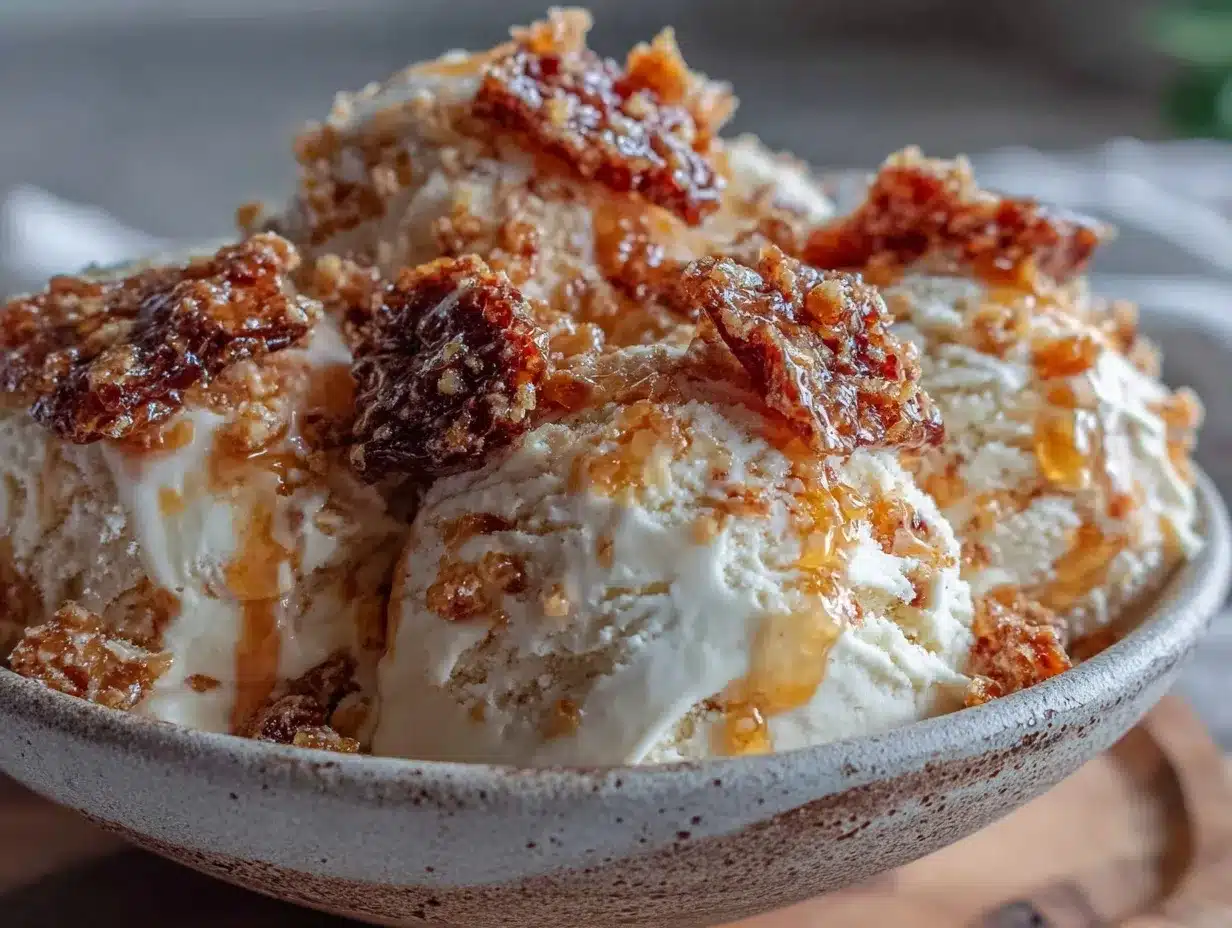
Crunchy, airy shards scattered across a silken, creamy canvas — that’s what I crave most about this brown butter honeycomb crunch no-churn ice cream. The way the honeycomb snaps gently between your teeth, a brittle contrast to the soft, luscious ice cream, is what made me chase this recipe for months. Honestly, it’s the texture that hooked me before the taste even had a chance. The buttery richness feels almost like velvet melting on your tongue, while the honeycomb’s light crackle keeps your fingers sticky and your senses alert.
It all started on a humid afternoon when I was experimenting with a batch of browned butter. The scent was intoxicating, nutty and warm, filling the kitchen with a cozy aroma that begged for something sweet. I had leftover honeycomb candy from a previous baking adventure, and the idea hit me — why not combine that buttery depth with the delicate crunch of honeycomb in a no-churn ice cream? No fancy ice cream maker, just simple ingredients and a bit of patience.
What surprised me most was how the honeycomb stayed crisp after freezing, nestled inside that creamy brown butter base. You know, it’s tricky to get candy to hold up in ice cream; usually, it sogs or dissolves, but this crunch holds its own. The brown butter gives the ice cream a mellow, almost caramelized undertone that makes every bite feel like a cozy, indulgent hug in a bowl.
That sticky, crackly contrast is what I made this for — everything else is secondary. It’s a quiet joy, the kind you don’t rush through but savor slowly, finger-licking sweet and quietly proud you made it yourself. This recipe stuck with me because it’s not just dessert; it’s a texture experience, a personal little moment of crunchy, creamy delight that always feels special without fuss.
Why You’ll Love This Recipe
Having tinkered with ice creams and sweets for years, I can tell you this brown butter honeycomb crunch no-churn ice cream is special in several ways. Here’s why it’s become a go-to for me and many who’ve tried it:
- Quick & Easy: No ice cream maker needed, and it comes together in under 20 minutes prep time. Perfect for last-minute dessert cravings.
- Simple Ingredients: You probably already have salted butter, honey, cream, and sugar in your pantry — no obscure items here.
- Perfect for Summer Treats: Whether it’s a backyard barbecue or a quiet night in, this ice cream cools you down with style.
- Crowd-Pleaser: The crunchy honeycomb surprises kids and adults alike, and the brown butter flavor adds a grown-up twist.
- Unbelievably Delicious: The creamy base is rich but not heavy, and the honeycomb crunch adds that addictive texture factor.
What sets this recipe apart? It’s the way the brown butter is cooked just right — nutty and fragrant, not burnt — folded carefully into whipped cream and sweetened condensed milk, which creates that ultra-smooth, creamy texture. Then, folding in homemade honeycomb candy adds a satisfying crunch that lingers. It’s the kind of treat that makes you close your eyes after the first bite, savoring that perfect balance of sweet, buttery, and crunchy.
And honestly, it’s comforting without feeling heavy or overdone. If you’ve ever tried a no-churn ice cream that tasted icy or artificial, this one changes the game. It’s like comfort food, but chilled and vibrant — perfect for impressing guests or just treating yourself on a quiet weekend.
What Ingredients You Will Need
This recipe uses simple, wholesome ingredients to deliver bold flavor and satisfying texture without the fuss. Most are pantry staples, and the honeycomb candy is surprisingly easy to make at home or find pre-made in specialty shops.
- Unsalted Butter: 6 tablespoons (85g), browned — this adds deep, nutty flavor to the ice cream base.
- Granulated Sugar: 1 cup (200g) — for the honeycomb and added sweetness.
- Honey: 2 tablespoons (40g), preferably a mild variety like clover or acacia (adds natural sweetness and a floral note).
- Baking Soda: 1 teaspoon (5g) — essential for creating the airy honeycomb texture.
- Sweetened Condensed Milk: 1 can (14 oz / 396g) — provides sweetness and creamy consistency without needing an ice cream maker.
- Heavy Cream: 2 cups (480ml), cold — whipped to soft peaks for smoothness.
- Vanilla Extract: 1 teaspoon (5ml) — rounds out the flavor.
- Sea Salt: A pinch, optional — enhances the brown butter’s flavor and balances the sweetness.
Ingredient tips: For best results, I recommend using a high-quality unsalted butter like Kerrygold for that golden brown butter flavor. If you want a dairy-free option, substitute condensed coconut milk and coconut cream, but the texture will be slightly different.
If you prefer to buy honeycomb candy instead of making it, look for firm, fresh pieces to maintain that perfect crunch. In summer, I sometimes swap the honey with a drizzle of maple syrup to add a cozy twist similar to my pumpkin cream cheese swirl brownies.
Equipment Needed
- Heavy-bottomed saucepan: For browning the butter and making the honeycomb candy. A thick base helps prevent burning.
- Mixing bowls: One large for whipping cream and folding ingredients, plus a small one for mixing baking soda into the honeycomb.
- Electric mixer or stand mixer: Essential for whipping the heavy cream to soft peaks quickly and efficiently.
- Baking sheet lined with parchment paper or silicone mat: To spread out the honeycomb and allow it to set crisp.
- Spatula: For gentle folding, so you don’t deflate the whipped cream.
- Freezer-safe container: For freezing the ice cream — a loaf pan works perfectly.
If you don’t have a stand mixer, an electric hand mixer works just fine. I’ve tried whipping cream by hand before, but honestly, it’s a workout and you might not get the same fluffiness. And about the saucepan — I learned the hard way that a thin pan scorches the butter and candy too fast.
Preparation Method
- Brown the Butter: In a heavy-bottomed saucepan over medium heat, melt 6 tablespoons (85g) of unsalted butter. Swirl constantly until it turns a deep golden brown with nutty aroma, about 5-7 minutes. Watch closely — it can go from browned to burnt quickly. Remove from heat and let cool slightly.
- Make the Honeycomb Candy: In the same saucepan, combine 1 cup (200g) granulated sugar and 2 tablespoons (40g) honey over medium heat. Stir gently until sugar dissolves, then stop stirring and let it boil until it turns a deep amber color (around 300°F or 150°C on a candy thermometer), about 6-8 minutes. Remove from heat immediately.
- Add Baking Soda: Quickly whisk in 1 teaspoon (5g) baking soda. The mixture will foam aggressively — stir gently to combine, then pour onto a parchment-lined baking sheet. Let it cool completely and harden, about 30 minutes.
- Whip the Cream: Using an electric mixer, whip 2 cups (480ml) heavy cream with 1 teaspoon (5ml) vanilla extract until soft peaks form. Don’t overwhip — you want it light and fluffy.
- Combine Base: In a large bowl, mix the browned butter (cooled but still liquid) with 1 can (14 oz / 396g) sweetened condensed milk and a pinch of sea salt if using. Stir well until smooth.
- Fold Ingredients: Gently fold the whipped cream into the brown butter and condensed milk mixture. Aim to keep it airy and light — fold slowly with a spatula.
- Break Honeycomb: Once set, break the honeycomb candy into bite-sized pieces. Fold about two-thirds of the honeycomb into the ice cream base, reserving some for topping.
- Freeze: Pour the mixture into a freezer-safe container or loaf pan. Sprinkle the remaining honeycomb pieces on top for a pretty crunch layer. Cover tightly and freeze for at least 6 hours, preferably overnight.
- Serve: Let the ice cream sit at room temperature for 5 minutes before scooping for the perfect creamy texture.
Pro tip: If your honeycomb candy softens too much during folding, try folding it in right before serving for maximum crunch. Also, when browning butter, I like to swirl the pan rather than stir, so it cooks evenly without bits burning.
Cooking Tips & Techniques
Brown butter can be tricky — it goes from perfectly nutty to burnt in seconds, so keep your eyes glued to the saucepan. I learned that patience is key; swirl the pan and smell for that toasty aroma rather than relying on color alone.
When making honeycomb, timing is everything. Use a candy thermometer if you have one to hit the right amber stage. If you miss it, the candy might be too soft or bitter. Also, add baking soda off the heat and stir quickly — the foam sets the airy texture.
Whipping cream to soft peaks is another small skill. Stop whipping as soon as stiff peaks form to avoid turning it into butter. Folding is all about gentle movements — I use a wide spatula and fold in thirds to keep the air in.
Multitasking helps: while the honeycomb sets, whip your cream and brown your butter. That way, the whole process feels smooth, not rushed.
Lastly, freezing no-churn ice cream isn’t as fast as churned, so plan ahead. But once frozen, it holds its texture nicely and doesn’t get icy like some quick-freeze recipes.
Variations & Adaptations
- Chocolate Brown Butter Honeycomb: Fold in ½ cup (90g) mini chocolate chips or drizzle melted dark chocolate on top before freezing for a double treat.
- Vegan Version: Swap heavy cream for full-fat coconut cream and sweetened condensed milk for coconut condensed milk. Use vegan butter for browning. Honeycomb can be made with golden syrup instead of honey.
- Spiced Honeycomb: Add a pinch of cinnamon or cardamom to the sugar before cooking honeycomb for a warm, aromatic twist.
- Nutty Crunch: Toss in some toasted chopped pecans or almonds with the honeycomb for extra texture and flavor.
- Fruit Swirl: Swirl in homemade berry jam or caramel sauce before freezing to contrast with the brown butter richness — similar to how I love layering flavors in my fresh peach no-churn ice cream.
One variation I tried recently was adding a pinch of smoked sea salt on top, which made the sweet notes pop even more. Totally unexpected but fantastic!
Serving & Storage Suggestions
This ice cream is best served straight from the freezer with a few minutes at room temperature to soften. Scoop it into small bowls or cones to showcase the lovely honeycomb crunch on top.
Pair it with warm desserts like a simple apple crisp or alongside a slice of nutty cake for a contrast of temperatures and textures. It’s also fantastic with a cup of strong coffee or a lightly sweetened iced tea on a hot day.
Store leftovers in an airtight container in the freezer. It keeps well for up to 2 weeks, but the honeycomb crunch is at its best within the first few days. To re-crisp honeycomb pieces that soften, pop them in a 300°F (150°C) oven for 3-4 minutes before folding in or topping.
The flavors also mellow and marry beautifully after a day or two in the freezer, so if you’re patient, the ice cream develops a more rounded, deeper brown butter flavor.
Nutritional Information & Benefits
This creamy brown butter honeycomb crunch no-churn ice cream is a treat best enjoyed in moderation. Per serving (about ½ cup / 125ml), it contains roughly 250-300 calories, 18g fat, 25g carbohydrates, and 3g protein.
Brown butter adds a dose of healthy fats, and honey provides natural sweetness with trace antioxidants. Using real ingredients like heavy cream and natural honey means no artificial additives or stabilizers typical in store-bought ice creams.
This recipe isn’t low-calorie or sugar-free, but it’s a wholesome homemade dessert alternative that lets you control the quality of ingredients. For dairy-free or vegan adaptations, coconut cream and plant-based sweeteners offer a lighter option with beneficial medium-chain triglycerides.
Conclusion
If you’re looking for a no-fuss, no-churn ice cream that delivers creamy richness with a delightful honeycomb crunch, this recipe is an easy winner. The brown butter base brings a comforting warmth, while the honeycomb adds that textural snap you didn’t know you needed.
Feel free to tweak the crunch or swirl in your favorite flavors — that’s the beauty of homemade ice cream. I love this recipe because it turns simple ingredients into something unexpectedly special, a little celebration of texture and taste in every scoop.
Give it a try, and if you enjoy it as much as I do, share your own twists or favorite ways to serve it. There’s nothing better than a homemade ice cream that feels like a personal creation, rich in flavor and texture.
FAQs about Creamy Brown Butter Honeycomb Crunch No-Churn Ice Cream
Can I make the honeycomb candy ahead of time?
Yes, you can make honeycomb candy up to a week in advance. Store it in an airtight container at room temperature to keep it crisp before folding it into the ice cream.
What if I don’t have a candy thermometer?
Watch the sugar mixture carefully; it should turn a deep amber color before removing from heat. The mixture should be bubbling vigorously but not burnt. Adding baking soda off the heat is important to get the honeycomb texture.
How long does the no-churn ice cream need to freeze?
Freeze for at least 6 hours or overnight for best texture. Let it soften a bit at room temperature before serving to make scooping easier.
Can I use salted butter instead of unsalted?
Unsalted butter is best so you can control the salt level, but if using salted butter, omit adding extra salt to the recipe.
Is this recipe suitable for vegans?
The base recipe isn’t vegan, but you can substitute coconut cream, vegan condensed milk alternatives, and plant-based butter to make a vegan-friendly version.
Pin This Recipe!
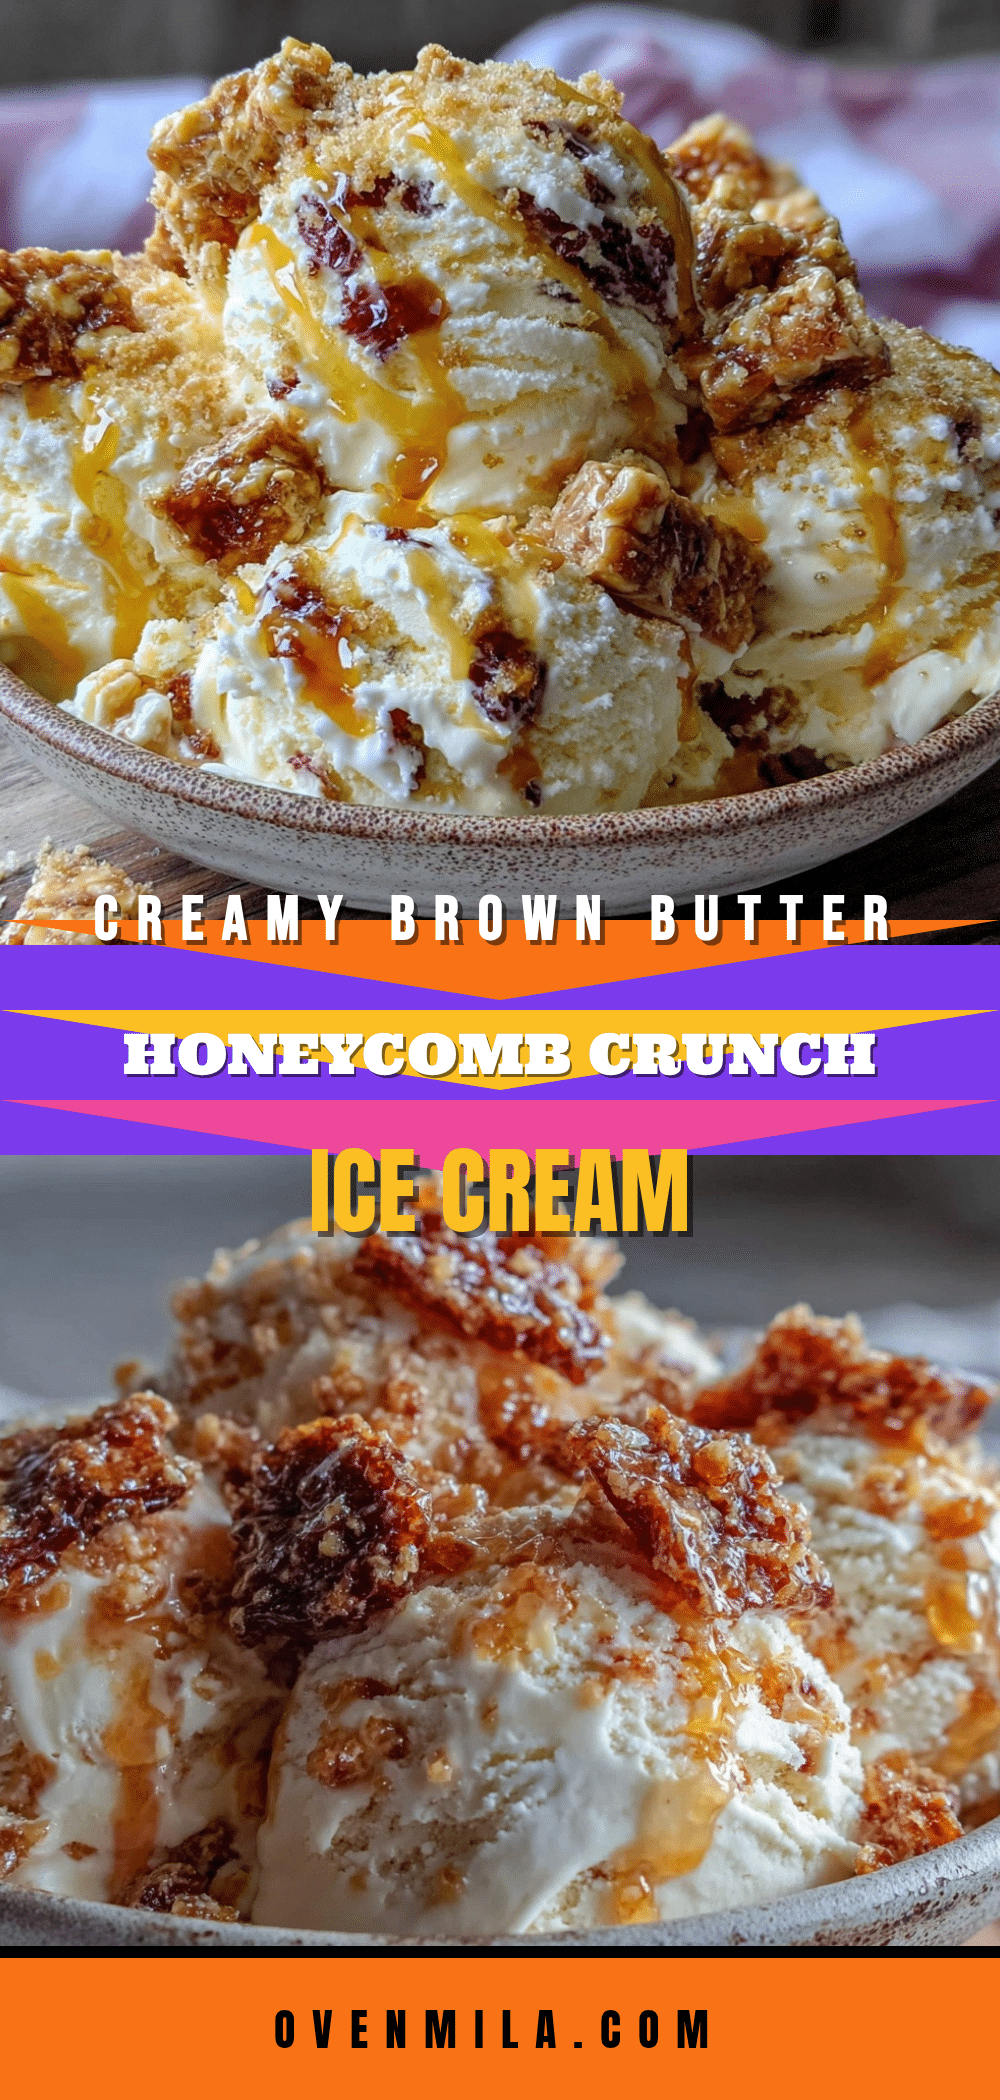
Creamy Brown Butter Honeycomb Crunch No-Churn Ice Cream

A rich and creamy no-churn ice cream featuring nutty brown butter and crunchy honeycomb candy for a delightful texture contrast. Easy to make without an ice cream maker and perfect for summer treats.
- Prep Time: 15 minutes
- Cook Time: 15 minutes
- Total Time: 6 hours 30 minutes
- Yield: 8 servings 1x
- Category: Dessert
- Cuisine: American
Ingredients
- 6 tablespoons (85g) unsalted butter, browned
- 1 cup (200g) granulated sugar
- 2 tablespoons (40g) honey, preferably mild variety like clover or acacia
- 1 teaspoon (5g) baking soda
- 1 can (14 oz / 396g) sweetened condensed milk
- 2 cups (480ml) heavy cream, cold
- 1 teaspoon (5ml) vanilla extract
- Pinch of sea salt (optional)
Instructions
- Brown the Butter: In a heavy-bottomed saucepan over medium heat, melt 6 tablespoons (85g) of unsalted butter. Swirl constantly until it turns a deep golden brown with nutty aroma, about 5-7 minutes. Remove from heat and let cool slightly.
- Make the Honeycomb Candy: In the same saucepan, combine 1 cup (200g) granulated sugar and 2 tablespoons (40g) honey over medium heat. Stir gently until sugar dissolves, then stop stirring and let it boil until it turns a deep amber color (around 300°F or 150°C), about 6-8 minutes. Remove from heat immediately.
- Add Baking Soda: Quickly whisk in 1 teaspoon (5g) baking soda. The mixture will foam aggressively — stir gently to combine, then pour onto a parchment-lined baking sheet. Let it cool completely and harden, about 30 minutes.
- Whip the Cream: Using an electric mixer, whip 2 cups (480ml) heavy cream with 1 teaspoon (5ml) vanilla extract until soft peaks form. Don’t overwhip.
- Combine Base: In a large bowl, mix the browned butter (cooled but still liquid) with 1 can (14 oz / 396g) sweetened condensed milk and a pinch of sea salt if using. Stir well until smooth.
- Fold Ingredients: Gently fold the whipped cream into the brown butter and condensed milk mixture, keeping it airy and light.
- Break Honeycomb: Once set, break the honeycomb candy into bite-sized pieces. Fold about two-thirds of the honeycomb into the ice cream base, reserving some for topping.
- Freeze: Pour the mixture into a freezer-safe container or loaf pan. Sprinkle the remaining honeycomb pieces on top. Cover tightly and freeze for at least 6 hours or overnight.
- Serve: Let the ice cream sit at room temperature for 5 minutes before scooping.
Notes
Use a heavy-bottomed pan to prevent burning the butter and sugar. Fold whipped cream gently to keep the mixture airy. If honeycomb softens during folding, add it just before serving for maximum crunch. Store honeycomb candy in an airtight container at room temperature to keep crisp. For vegan version, substitute coconut cream, vegan condensed milk, and vegan butter.
Nutrition
- Serving Size: About 1/2 cup (125ml
- Calories: 275
- Sugar: 22
- Sodium: 70
- Fat: 18
- Saturated Fat: 11
- Carbohydrates: 25
- Protein: 3
Keywords: brown butter, honeycomb, no-churn ice cream, easy ice cream, homemade ice cream, crunchy ice cream, summer dessert


