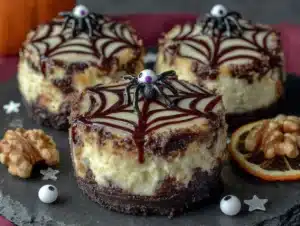
I need a Halloween dessert that doesn’t require turning on the oven. That’s the thought that starts this whole thing. Not because I’m lazy—okay, maybe a little—but because the kitchen is already going to be a disaster zone with the main course cooking. And honestly, these Easy No-Bake Halloween Spider Web Cheesecake Bites are the kind of treat that looks like you spent hours on them. You haven’t. That’s the secret.
The idea came to me while staring at a bag of Oreos and a block of cream cheese. Two things that have no business being this good together. I wanted something that would make my kids’ friends gasp at the Halloween party and something I could actually pull off while simultaneously managing a toddler covered in fake spiderwebs. The spider web design? Pure accident. I was playing around with melted white chocolate and a piping bag, and suddenly it looked like something out of a haunted bakery. I knew I was onto something.
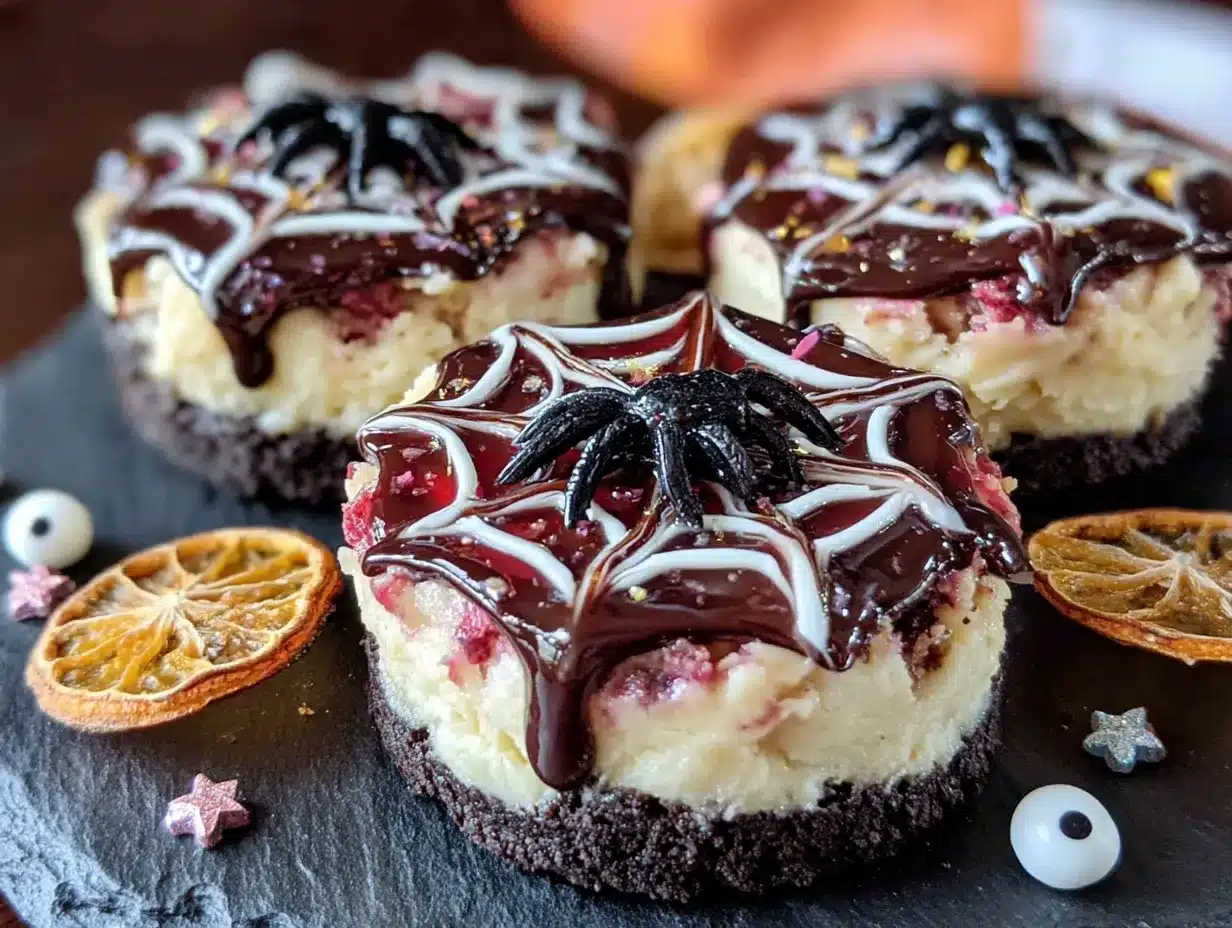
These little bites are basically a no-bake cheesecake filling nestled inside a chocolate cookie crust, all topped with a delicate white chocolate spider web. They’re bite-sized, which means you can eat three without feeling guilty. Or four. I’m not counting. The best part? No water baths, no springform pans, no waiting hours for them to set. A quick chill in the fridge and you’re done. Perfect for those last-minute Halloween cravings or when you want to show up to the school party with something that screams “I have my life together.” Spoiler: you don’t need to have your life together. You just need this recipe.
Why You’ll Love This Recipe
Let me tell you why these cheesecake bites have become my go-to Halloween dessert. I’ve tested this recipe at three different parties now, and every single time, people ask for the recipe. That’s not bragging—that’s just me being honest about how good these are.
- No Oven Required: Your oven is free for the main dish, or better yet, you can keep it off entirely. Perfect for warm Halloween nights or when you just don’t want to deal with the heat.
- Kid-Friendly to Make: My seven-year-old helped pipe the spider webs last year. Were they perfect? No. Were they adorable? Absolutely. This is a great recipe to get little hands involved without the danger of a hot oven.
- Make-Ahead Magic: You can prep these a day or two in advance. The flavor actually gets better after a night in the fridge. One less thing to stress about on party day.
- Naturally Portion Controlled: Bite-sized means you can grab one (or five) without committing to a full slice of cheesecake. Perfect for grazing at parties.
- Customizable Decorations: The spider web design is just the beginning. Add candy spiders, edible glitter, or orange sprinkles. Make them as spooky or as cute as you want.
- Simple Ingredients: Cream cheese, Oreos, butter, sugar, vanilla, and white chocolate. That’s it. Nothing weird or hard to find at the grocery store.
What makes these different from every other cheesecake bite recipe out there? It’s the texture. The filling is light and creamy without being too dense—I use a trick with heavy cream that gives it that airy mousse-like quality. And the spider web design isn’t just for show. That thin layer of white chocolate adds a satisfying snap when you bite into them. It’s texture contrast at its finest.
These are the kind of dessert that makes people close their eyes after the first bite. I’ve seen it happen. There’s something about the combination of crunchy chocolate cookie, silky cheesecake, and delicate white chocolate that hits all the right notes. Plus, they’re just plain fun to look at. Halloween desserts should be fun, right?
What Ingredients You Will Need
This recipe uses simple, everyday ingredients to create something that looks way more complicated than it is. Here’s what you’ll need to gather:
For the Crust
- 24 Oreo cookies (regular or double stuff—both work fine)
- 4 tablespoons unsalted butter, melted (salted butter works too, just skip the extra salt)
- Pinch of salt (optional, but I like it to balance the sweetness)
For the Cheesecake Filling
- 16 ounces cream cheese, softened to room temperature (I use Philadelphia—it’s consistent and reliable)
- 1/2 cup granulated sugar
- 1 teaspoon vanilla extract
- 1/2 cup heavy cream, cold (this is my secret for the light texture)
For the Spider Web Topping
- 1/2 cup white chocolate chips (I prefer Ghirardelli for smooth melting)
- 1 teaspoon coconut oil or vegetable shortening (helps thin the chocolate for piping)
- Optional decorations: candy spiders, orange sprinkles, black sanding sugar
Ingredient Tips & Sourcing Notes
For the cream cheese, make sure it’s truly softened. Cold cream cheese will give you lumpy filling. Leave it on the counter for at least an hour before starting. If you’re in a rush, microwave it in 10-second bursts, but be careful not to melt it.
The heavy cream needs to be cold—straight from the fridge. This is crucial for whipping it properly. I’ve made the mistake of using room temperature cream, and it just won’t whip up. Trust me on this one.
For the white chocolate, avoid white chocolate chips that contain “compound coating” or “white morsels” that don’t melt smoothly. Real white chocolate has cocoa butter listed in the ingredients. If you can find a white chocolate bar and chop it yourself, that’s even better.
Substitution Guidance
- Use gluten-free chocolate sandwich cookies for a gluten-free version
- Swap the heavy cream with full-fat coconut cream for a dairy-free option (chill the can and scoop the solid part)
- Use dairy-free cream cheese alternative—just note the texture might be slightly softer
- Dark chocolate works beautifully for the drizzle if you’re not a white chocolate fan
Equipment Needed
You don’t need a fancy kitchen to pull these off. Here’s what I use every time:
- Food processor or blender (for crushing Oreos into fine crumbs—you can also use a ziplock bag and rolling pin, but the food processor is faster)
- Medium mixing bowl (for the crust mixture)
- Large mixing bowl (for the cheesecake filling)
- Electric hand mixer or stand mixer (you can whisk by hand, but your arm will get tired)
- Mini muffin pan (24-count—I got mine at Target for $8 and it works great)
- Piping bag or small ziplock bag (for the spider web design)
- Small microwave-safe bowl (for melting white chocolate)
- Spatula (for scraping every last bit of filling)
- Measuring cups and spoons
If you don’t have a mini muffin pan, you can use a regular muffin pan with liners—just make the portions slightly bigger and adjust the chilling time. I’ve also made these in a small loaf pan as a cheesecake bar, then cut them into squares. Whatever works!
For the piping bag, I just use a small ziplock bag with the tiniest corner snipped off. No need to buy fancy piping tips. The hole should be about the size of a pinprick—smaller than you think you need. You can always make it bigger, but you can’t make it smaller.
Preparation Method
Let me walk you through this step by step. I’ve made these so many times that I’ve got the process down to a science.
Step 1: Make the Crust
Place the Oreos (filling and all) in your food processor. Pulse until you get fine crumbs—think sand texture. This takes about 30 seconds. Pour the crumbs into a medium bowl, add the melted butter and salt, and stir with a fork until everything looks like wet sand. Every crumb should be coated.
Press about one tablespoon of the mixture into each mini muffin cup. Use the bottom of a shot glass or a small measuring cup to really pack it down. This is important—if the crust is loose, your bites will fall apart when you try to remove them. I learned this the hard way when my first batch crumbled everywhere. Pack it tight, like you’re making a tiny sandcastle.
Pop the pan in the freezer for 10 minutes while you make the filling. This helps the crust set up firm.
Step 2: Make the Cheesecake Filling
In a large bowl, beat the softened cream cheese with an electric mixer until it’s smooth and fluffy—about 2 minutes. No lumps allowed. Add the sugar and vanilla, and beat for another minute until everything is combined and silky.
In a separate small bowl, whip the cold heavy cream until stiff peaks form. This takes about 3-4 minutes with a hand mixer. You’ll know it’s ready when you lift the beaters and the cream stands up in peaks that don’t flop over. Don’t over-whip, or you’ll end up with butter.
Fold the whipped cream into the cream cheese mixture. Use a spatula and a gentle hand—fold, don’t stir. You want to keep all that air you whipped in. The mixture should be light, fluffy, and completely uniform. Taste it. Yes, I know you shouldn’t eat raw cheesecake filling, but honestly, one little taste won’t hurt. It’s for quality control.
Step 3: Fill the Cups
Remove the crusts from the freezer. Spoon or pipe the cheesecake filling into each cup, filling them almost to the top. I use a piping bag for this—it’s faster and less messy. If you don’t have one, use two spoons: one to scoop, one to scrape the filling into the cup.
Smooth the tops with the back of a spoon or an offset spatula. You want a flat surface for the spider web design. Place the pan in the refrigerator for at least 4 hours, or overnight. The longer they chill, the cleaner they’ll cut. I usually make them the night before and let them set while I sleep.
Step 4: Make the Spider Webs
When the cheesecake bites are fully set, it’s time for the fun part. Remove them from the pan by gently running a thin knife around the edges. They should pop right out if you packed the crust well enough.
Place the white chocolate chips and coconut oil in a small microwave-safe bowl. Microwave in 20-second intervals, stirring between each, until the chocolate is smooth and fully melted. This usually takes about 60-90 seconds total. Don’t overheat, or the chocolate will seize up.
Transfer the melted chocolate to your piping bag or ziplock bag. Snip off the tiniest corner—seriously, start small. Practice on a piece of parchment paper first if you’re nervous.
Step 5: Pipe the Spider Web Design
Hold the piping bag about an inch above each cheesecake bite. Pipe a small dot in the center. Then pipe a spiral outward, starting from the center and working your way to the edge. It doesn’t have to be perfect—actually, imperfect spirals look more organic and spider-web-like.
Here’s the trick: use a toothpick to drag lines from the center outward through the spiral. Start at the center and drag outward, like you’re drawing spokes on a wheel. Do this in 6-8 places around the circle. The toothpick will pull the white chocolate, creating that classic web pattern. It’s almost magical to watch.
Work quickly—the white chocolate sets fast. If it starts getting too thick, pop the bowl back in the microwave for 10 seconds. I usually pipe 4-5 webs at a time before the chocolate needs reheating.
Step 6: Decorate and Chill
While the white chocolate is still wet, add your decorations. A candy spider in the center of each web is adorable. Orange sprinkles add a pop of color. Black sanding sugar makes them look extra spooky. Get creative—I’ve used mini candy eyeballs before, and they were hilarious.
Return the cheesecake bites to the refrigerator for another 30 minutes to let the white chocolate fully set. Then they’re ready to serve!
Cooking Tips & Techniques
After making these about a dozen times (for parties, school events, and just because), I’ve collected some hard-won wisdom. Let me share the mistakes I made so you don’t have to.
Temperature is everything. The cream cheese needs to be soft. The heavy cream needs to be cold. The white chocolate needs to be warm but not hot. If your filling is lumpy, it’s because the cream cheese wasn’t soft enough. If your white chocolate seizes up, it’s because you overheated it or got water in it. Work at room temperature, and you’ll be fine.
Don’t skip the chilling time. I know, waiting is hard. But if you try to remove these from the pan too early, they’ll fall apart. Four hours minimum. Overnight is better. The filling needs time to firm up so the bites hold their shape.
Pack the crust tightly. This is the most common mistake I see people make. Loose crust = crumbly bites. Use the bottom of a shot glass or a small measuring cup to really press that crust down. You want it compact and firm.
Work in batches for the spider webs. Don’t try to pipe all 24 at once. The white chocolate will start to set, and your last few will look messy. Pipe 4-5, do the toothpick drag, add decorations, then move on. Reheat the chocolate as needed.
Use a mini offset spatula for smooth tops. If you want perfectly flat cheesecake bites (which makes the spider web design look cleaner), use a mini offset spatula to smooth the tops before chilling. I bought one for $3 and it’s become my favorite kitchen tool.
Keep them cold until serving. These are no-bake cheesecake bites, so they need to stay chilled. If you’re serving them at a party, keep them on a platter set over ice or pop them back in the fridge between rounds. They’ll hold up for about 30 minutes at room temperature before they start getting soft.
Variations & Adaptations
One of the best things about this recipe is how easy it is to customize. Here are some variations I’ve tried and loved:
Pumpkin Spice Version
Add 1/4 cup pumpkin puree and 1 teaspoon pumpkin pie spice to the cheesecake filling. Reduce the heavy cream to 1/3 cup. The pumpkin adds moisture, so you need less cream. Top with a drizzle of caramel instead of white chocolate for a fall twist. I made these for Thanksgiving last year, and they disappeared before the pie.
Chocolate Lover’s Version
Use chocolate wafer cookies instead of Oreos for the crust. Add 2 tablespoons cocoa powder to the cheesecake filling. Use dark chocolate for the spider web design instead of white chocolate. Top with chocolate shavings. This version is dangerously rich—in the best way possible.
Vegan Version
Use vegan cream cheese (I like Miyoko’s or Kite Hill), coconut cream instead of heavy cream, and vegan butter. Use vegan chocolate sandwich cookies for the crust. The texture will be slightly softer, but the flavor is still amazing. Chill them for an extra hour to help them set up.
Peanut Butter Spider Webs
Swirl 1/4 cup creamy peanut butter into the cheesecake filling before filling the cups. Use melted milk chocolate for the spider web design instead of white chocolate. The peanut butter-chocolate combination is always a winner. My husband’s obsessed with this version.
Mini Cheesecake Bites on a Stick
Insert a lollipop stick into each cheesecake bite before the final chill. Once set, dip the entire bite in melted chocolate or white chocolate. These are perfect for party favors or Halloween treat bags. Just make sure they’re fully chilled before you try to dip them.
Serving & Storage Suggestions
Serving Temperature: Serve these straight from the fridge. They’re best cold—the filling is firm and creamy, the crust is crunchy, and the white chocolate web has a satisfying snap. If they sit out too long, they’ll get soft and lose their structure.
Presentation Ideas: Arrange the cheesecake bites on a black platter or a dark-colored cake stand for maximum spooky effect. Add some fake spiderwebs around the edges (the craft store kind, not the edible kind). Scatter a few candy spiders on the platter. For a Halloween party, I like to serve them on a wooden board with some orange and black sprinkles scattered around.
Complementary Dishes: These pair beautifully with a hot cup of coffee or a glass of cold milk. For a Halloween dessert spread, serve them alongside my Black Velvet Halloween Cupcakes with Orange Cream Cheese Swirl and some spooky punch. They also work great as a lighter alternative to heavy Halloween desserts like pumpkin pie.
Storage Instructions: Store the cheesecake bites in an airtight container in the refrigerator for up to 5 days. Place them in a single layer with parchment paper between layers if stacking. They’ll stay fresh and delicious.
Freezing Instructions: These freeze beautifully! Place the fully assembled cheesecake bites on a baking sheet and freeze until solid (about 2 hours). Transfer to a freezer-safe container with parchment paper between layers. They’ll keep for up to 3 months. Thaw in the refrigerator overnight before serving. The texture is slightly softer after freezing, but still delicious.
Reheating: Don’t. These are no-bake cheesecake bites—they’re meant to be served cold. If you want to enjoy them at room temperature, let them sit out for 10-15 minutes before serving. Any longer, and they’ll start to lose their shape.
How Flavors Develop: The flavor actually improves after a day in the fridge. The crust softens slightly (in a good way), and the filling becomes more cohesive. If you can plan ahead, make these a day before you need them. Your future self will thank you.
Nutritional Information & Benefits
I’m not a nutritionist, but I can give you the estimated numbers based on standard ingredients. Each cheesecake bite (based on 24 servings) contains approximately:
- Calories: 185
- Fat: 12g
- Carbohydrates: 18g
- Protein: 3g
- Sugar: 13g
- Sodium: 150mg
Health Benefits: Look, these are a treat, not a health food. But the cream cheese does provide some calcium and protein. The heavy cream adds a bit of vitamin A. And honestly, there’s something to be said for the mental health benefits of enjoying a delicious, fun dessert. Life’s too short to skip dessert.
Dietary Considerations: These are vegetarian. For gluten-free, use gluten-free chocolate sandwich cookies. For dairy-free, use the substitutions I mentioned earlier. They’re not vegan in their standard form, but the vegan version works great. Always check your ingredient labels if you’re cooking for someone with allergies.
Potential Allergens: This recipe contains dairy (cream cheese, heavy cream, butter, white chocolate) and gluten (Oreos). It may also contain traces of soy and nuts depending on the brands you use. Always read labels carefully.
I like to think of these as a “sometimes food” in the best sense. They’re perfect for celebrations, parties, and those moments when you just need something special. Balance is key—enjoy them in moderation, and savor every bite.
Conclusion
These Easy No-Bake Halloween Spider Web Cheesecake Bites have become my secret weapon for Halloween entertaining. They’re simple enough to make on a busy weeknight but impressive enough to steal the show at any party. The no-bake aspect means you can focus on the fun parts—the decorating, the serving, the eating—without stressing over oven temperatures or baking times.
What I love most about this recipe is how it brings people together. My kids fight over who gets to pipe the spider webs. My husband sneaks them from the fridge when he thinks I’m not looking. And every time I bring them to a gathering, someone asks for the recipe. That’s the highest compliment a home cook can get.
I encourage you to make these your own. Play with the decorations. Try different flavor variations. Use them as a canvas for your creativity. And most importantly, have fun with them. Halloween is supposed to be a little spooky and a lot of fun—these cheesecake bites capture that perfectly.
If you loved this recipe, I’d love to hear about it! Leave a comment below and let me know how your spider webs turned out. Did you try a fun variation? Did your kids help with the decorating? Share your photos and tag me—I love seeing your creations. And if you’re looking for more easy Halloween treats, check out my Cozy Pumpkin Sourdough Bread with Cinnamon Honey Butter for a breakfast-friendly option.
Happy Halloween, and happy baking (or rather, happy no-baking)!
Frequently Asked Questions
Can I use low-fat cream cheese?
You can, but the texture won’t be as rich and creamy. Low-fat cream cheese has a higher water content, which can make the filling softer and less stable. If you use it, reduce the heavy cream slightly and chill the bites for an extra hour. Full-fat cream cheese really does give the best results.
How do I get the cheesecake bites out of the pan cleanly?
Run a thin knife around the edge of each cup before lifting them out. If they’re still sticking, try placing the pan on a warm towel for 30 seconds to loosen the butter in the crust. Make sure they’ve chilled for at least 4 hours—this makes removal much easier.
Can I make these without a mini muffin pan?
Absolutely! You can use a regular muffin pan with liners—just make the portions bigger (about 2 tablespoons of crust and 3 tablespoons of filling per cup). You’ll get about 12 larger bites instead of 24 mini ones. Adjust the chilling time to at least 6 hours for the bigger size.
My white chocolate seized up and became lumpy. What went wrong?
White chocolate is sensitive to heat and moisture. You likely overheated it or got a drop of water in the bowl. Always microwave in short bursts (20 seconds) and stir well between each. If it seizes, you can try adding a teaspoon of coconut oil and stirring vigorously, but sometimes it’s better to start fresh.
How far in advance can I make these?
You can make the cheesecake bites (without the spider web design) up to 3 days in advance. Store them in an airtight container in the refrigerator. Add the white chocolate spider webs the day you plan to serve them—the webs stay prettier when they’re fresh. The fully assembled bites will keep for up to 5 days in the fridge.
Pin This Recipe!
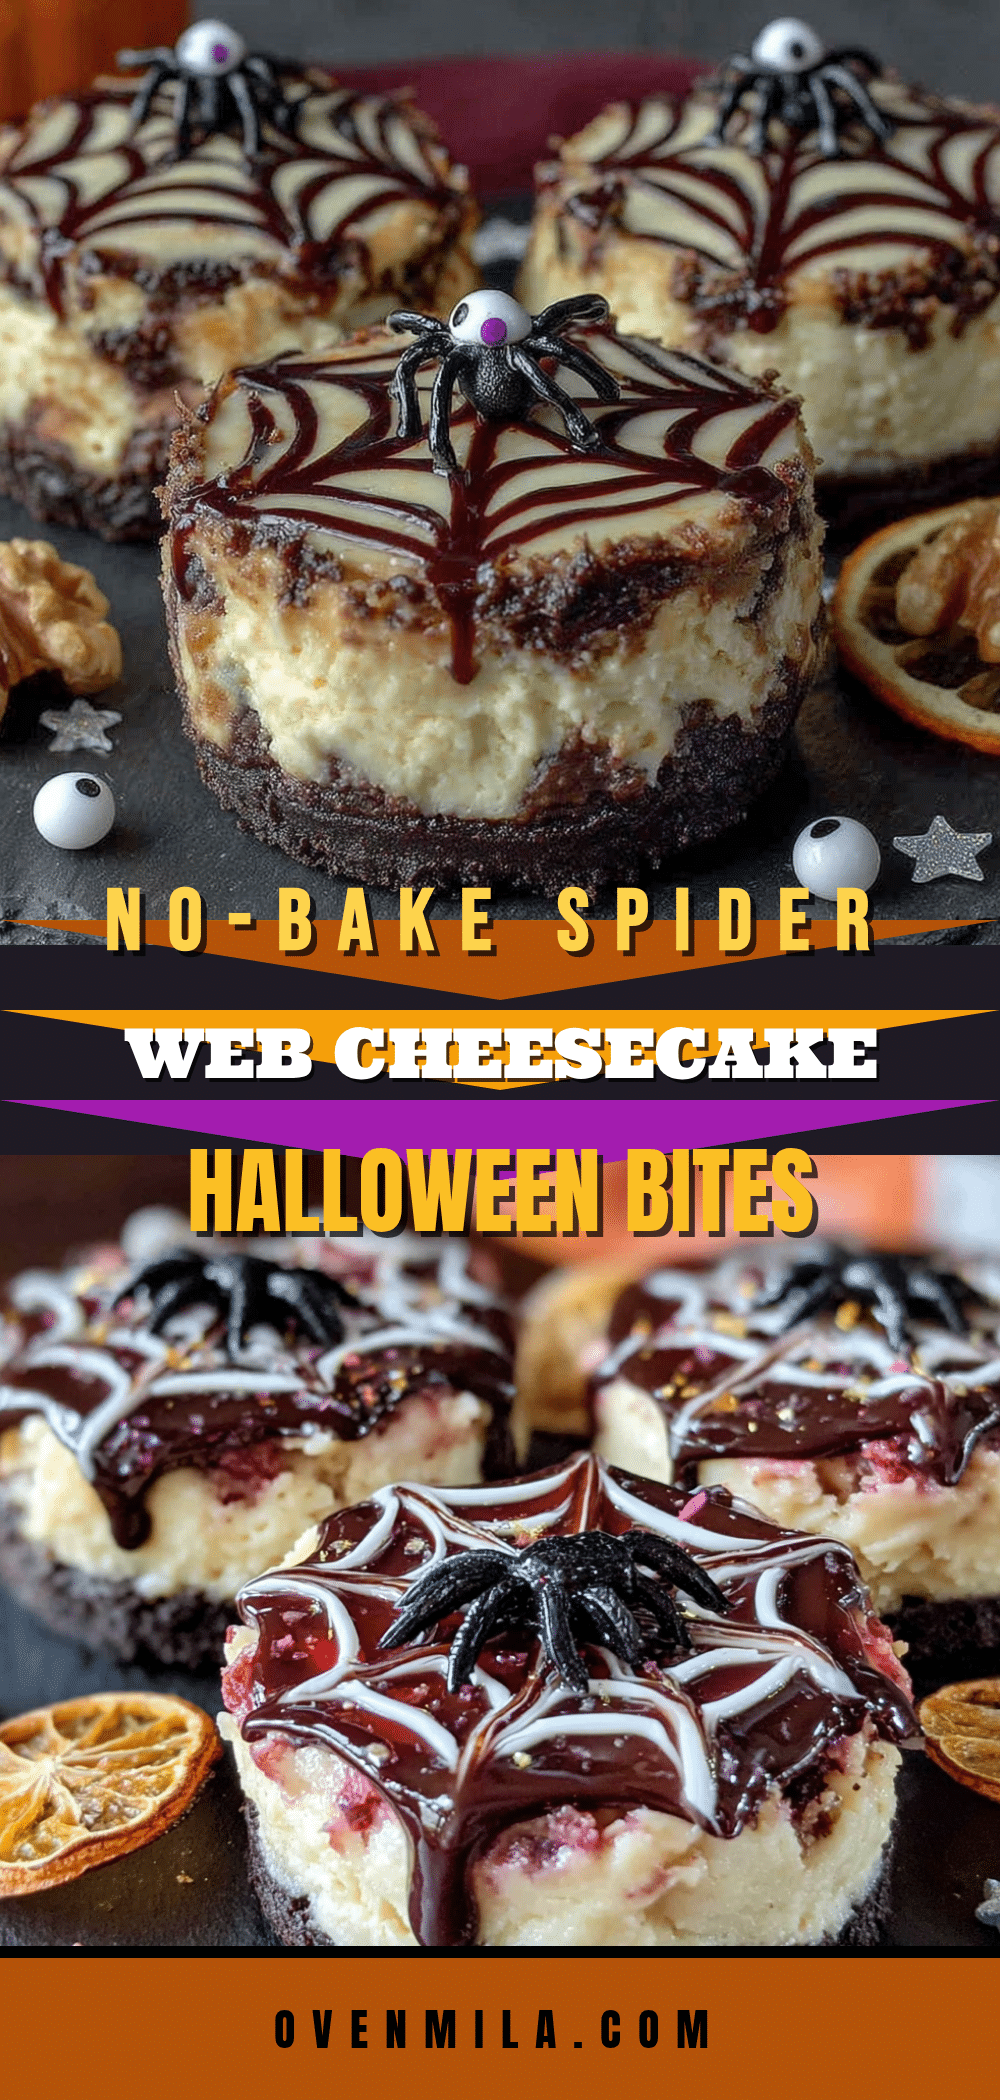
Easy No-Bake Spider Web Cheesecake Bites
These no-bake cheesecake bites feature a creamy cheesecake filling nestled inside a chocolate cookie crust, topped with a delicate white chocolate spider web. They’re bite-sized, easy to make, and perfect for Halloween parties.
- Prep Time: 30 minutes
- Cook Time: 0 minutes
- Total Time: 4 hours 30 minutes (includes chilling time)
- Yield: 24 servings 1x
- Category: Dessert
- Cuisine: American
Ingredients
- 24 Oreo cookies (regular or double stuff)
- 4 tablespoons unsalted butter, melted
- Pinch of salt (optional)
- 16 ounces cream cheese, softened to room temperature
- 1/2 cup granulated sugar
- 1 teaspoon vanilla extract
- 1/2 cup heavy cream, cold
- 1/2 cup white chocolate chips
- 1 teaspoon coconut oil or vegetable shortening
- Optional decorations: candy spiders, orange sprinkles, black sanding sugar
Instructions
- Make the crust: Place Oreos in a food processor and pulse until fine crumbs form. Pour into a medium bowl, add melted butter and salt, and stir until mixture resembles wet sand. Press about 1 tablespoon of the mixture into each mini muffin cup, packing tightly. Freeze for 10 minutes.
- Make the cheesecake filling: In a large bowl, beat softened cream cheese with an electric mixer until smooth and fluffy, about 2 minutes. Add sugar and vanilla, beat for another minute. In a separate bowl, whip cold heavy cream until stiff peaks form, about 3-4 minutes. Fold whipped cream into cream cheese mixture gently until combined.
- Fill the cups: Remove crusts from freezer. Spoon or pipe cheesecake filling into each cup, filling almost to the top. Smooth tops with a spoon or offset spatula. Refrigerate for at least 4 hours or overnight.
- Make the spider webs: Remove cheesecake bites from pan by running a thin knife around edges. Place white chocolate chips and coconut oil in a microwave-safe bowl. Microwave in 20-second intervals, stirring between each, until smooth and melted. Transfer to a piping bag or ziplock bag and snip off a tiny corner.
- Pipe the spider web design: Hold piping bag about an inch above each cheesecake bite. Pipe a small dot in the center, then pipe a spiral outward. Use a toothpick to drag lines from the center outward through the spiral, creating a web pattern. Work in batches of 4-5 at a time.
- Decorate and chill: While white chocolate is still wet, add decorations like candy spiders or sprinkles. Return to refrigerator for 30 minutes to let white chocolate fully set before serving.
Notes
Temperature is key: cream cheese must be softened, heavy cream must be cold, white chocolate should be warm but not hot. Pack crust tightly to prevent crumbling. Chill for at least 4 hours, preferably overnight. Work in batches when piping spider webs as white chocolate sets quickly. Keep bites refrigerated until serving.
Nutrition
- Serving Size: 1 cheesecake bite
- Calories: 185
- Sugar: 13
- Sodium: 150
- Fat: 12
- Carbohydrates: 18
- Protein: 3
Keywords: no-bake cheesecake, spider web, Halloween dessert, Oreo crust, white chocolate, bite-sized, easy dessert, party treat