I ruined three batches of cream cheese in a single afternoon before I figured out how to make these cheese ghosts work. The first batch melted into a sad, greasy puddle on my cutting board. The second batch cracked right down the middle when I tried to cut out the ghost shapes. I sat there on my kitchen floor, surrounded by ruined blocks of dairy, wondering why something so simple-looking was kicking my butt. But that fourth batch? That one worked. And when I placed those little cheese ghosts on a board full of dark cookies, pretzel sticks, and blood-red pepper strips, my kids actually gasped. That moment made every single failed block worth it.
This Easy Halloween Charcuterie Board with Adorable Cheese Ghosts has become our family’s official October tradition. It sits on our coffee table every Halloween night while we watch Hocus Pocus for the millionth time. The best part? You don’t need any special equipment or artistic talent. If you can cut a circle and poke two holes, you can make these ghosts. The rest of the board comes together in about fifteen minutes flat.
I know what you’re thinking — another Halloween snack board that looks cute but takes forever to assemble. That’s not this recipe. This one actually delivers on the cute factor without making you hate your life. The cheese ghosts are genuinely adorable (my neighbor texted me a photo of hers and I laughed out loud), and the whole thing feels festive without being fussy. Let me show you how it works.
Why You’ll Love This Easy Halloween Charcuterie Board
This board hits that sweet spot between impressive and doable. I’ve tested it at three different parties now, and it disappears every single time. Here is why it works so well:
- No Cooking Required : This is a true no-bake, no-stove situation. You just arrange things on a board. That’s it.
- Comes Together in 20 Minutes : Once you know the trick for the cheese ghosts, the whole board takes less time than ordering pizza.
- Kid-Friendly and Adult-Approved : My kids fight over the cheese ghosts, and the adults fight over the spicy salami roses. Everyone wins.
- Customizable for Any Diet : Swap in dairy-free cheese for the ghosts, use gluten-free crackers, load up on veggies — it adapts easily.
- Perfect for Parties and Movie Nights : This board sits out beautifully for hours, making it ideal for Halloween gatherings or spooky movie marathons.
What makes this board different from other Halloween snacks is the cheese ghost trick. Most recipes use cookie cutters or complicated molding techniques. I figured out a simpler method using just a round cutter and a chopstick. The ghosts come out perfectly every time, with no special tools required. Plus, the flavor combination works — the creamy, tangy cheese ghosts balance perfectly against salty crackers, sweet dried fruit, and savory meats.
Honestly, this board makes me feel like a Halloween hero without actually doing much work. I put it together while my kids are getting their costumes on, and they act like I performed magic. That feeling never gets old.
What Ingredients You Will Need
This recipe uses simple, grocery-store ingredients to create something that looks way more impressive than it actually is. Here is everything you need:
For the Cheese Ghosts
- 8 ounces block-style cream cheese, cold (I prefer Philadelphia brand for consistency — it holds its shape better than store brands)
- 1-2 tablespoons black sesame seeds (for the ghost eyes and mouth)
- Small round cookie cutter, about 1.5 to 2 inches wide (a shot glass works in a pinch)
For the Charcuterie Board
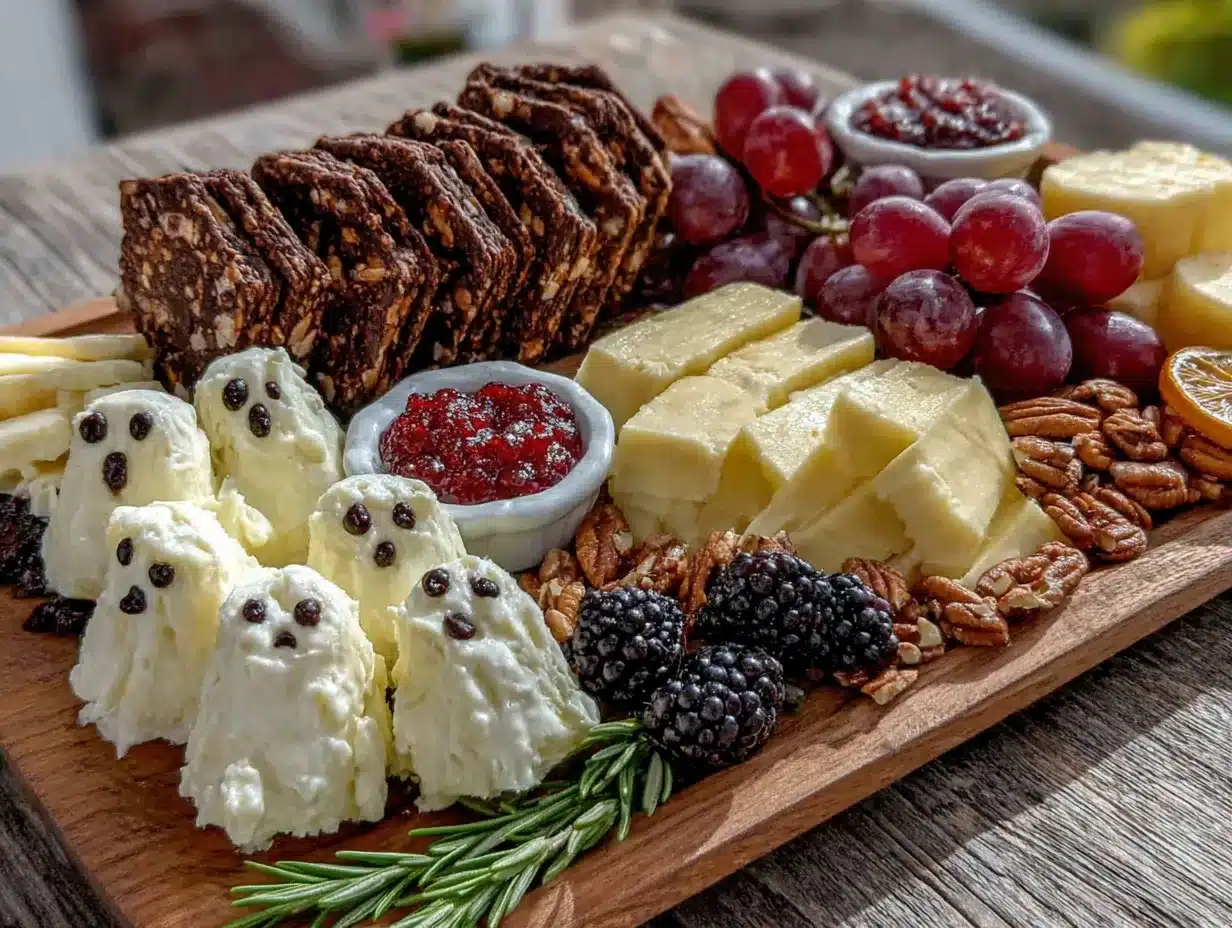
- 8 ounces salami or prosciutto, thinly sliced (I use genoa salami for the classic Halloween color)
- 6 ounces sharp cheddar cheese, cubed (the orange color fits the Halloween theme perfectly)
- 4 ounces gouda or brie, sliced (adds creamy contrast)
- 1 cup assorted crackers (I like a mix of buttery rounds and whole wheat squares)
- 1/2 cup black olives, pitted (they look spooky and add briny flavor)
- 1/2 cup dried cranberries or cherries (for sweet pop-ins)
- 1/4 cup pumpkin seeds or pepitas (toasted, for crunch and fall vibes)
- Fresh rosemary sprigs (optional, for garnish — they look like little spooky trees)
Optional Add-Ins
- Red bell pepper strips (look like bloody fingers — my kids love this detail)
- Pretzel sticks (arrange them like witch fingers or broomsticks)
- Dark chocolate-covered almonds (adds a sweet, spooky element)
- Grape tomatoes (look like little pumpkins when arranged together)
For the cheese ghosts, cold cream cheese is non-negotiable. If your cream cheese is room temperature, it will smush and stick to the cutter. I pop mine in the freezer for ten minutes before cutting — it makes a huge difference. Also, look for block-style cream cheese, not the spreadable kind in a tub. The block has a firmer texture that holds its shape better.
If you want to make this board dairy-free, use a firm vegan cream cheese block and dairy-free cheese cubes. The ghosts won’t be quite as sturdy, but they still look adorable. I tested this with Kite Hill brand and it worked well enough for a party setting.
Equipment Needed
- Large wooden cutting board or serving platter (at least 12×16 inches for a full spread)
- Small round cookie cutter, 1.5 to 2 inches (a shot glass or small jar lid works fine)
- Chopstick or skewer (for making ghost eyes and mouth holes)
- Small offset spatula or butter knife (for transferring cheese ghosts)
- Cheese knife or slicing knife (for cutting cheddar and gouda)
- Small bowls or ramekins (for olives, cranberries, and loose items)
I use a bamboo cutting board I found at a thrift store for five dollars. You don’t need anything fancy. A large dinner plate or even a baking sheet works perfectly. For the cookie cutter, I actually use the lid of a spice jar that happens to be the perfect size. Improvise with what you have — the ghosts don’t care about perfection.
One tip: run your cookie cutter under hot water and dry it before cutting the cream cheese. The warmth helps the cutter slide through cleanly without sticking. I learned this after my first batch turned into a sticky mess.
Preparation Method
Step 1: Make the Cheese Ghosts
Take your cold cream cheese block out of the refrigerator. Unwrap it and place it on a clean cutting board. Using your small round cookie cutter, press straight down firmly into the cream cheese. Do not twist — just press straight down and lift straight up. You should have a clean round disc of cream cheese. Repeat to make as many ghosts as you want (I usually get 6-8 from one block).
Place each cream cheese round on a small plate or parchment paper. Now comes the fun part. Take your chopstick or skewer and poke two small holes for eyes. Make them about a quarter-inch apart, positioned slightly above the center. Then poke a slightly larger hole below for the mouth. You can make the mouth round or oval-shaped — I prefer a small oval that looks like a surprised “O.”
Here is the trick: after poking the holes, gently press a black sesame seed into each eye hole. The seed should sit snugly inside the hole, not on top. If your holes are too shallow, the seeds will fall out. If they’re too deep, the seeds will disappear inside. Aim for about one-eighth inch deep. For the mouth, you can leave it as a hole or add a tiny piece of black sesame seed if you want a filled-in smile.
Transfer each finished ghost to your serving board using a small offset spatula. They are delicate, so handle them gently. If a ghost cracks, just press it back together with your fingers — nobody will notice once it’s on the board.
Step 2: Prepare the Meats and Cheeses
Roll your salami slices into loose roses. Take one slice, fold it in half, then roll it from one end to create a rose shape. Secure with a toothpick if needed. Place these in clusters on your board. For prosciutto, just drape it in loose, wavy folds — it looks more natural that way.
Cut your cheddar cheese into half-inch cubes. I leave the rind on for color contrast. Slice your gouda or brie into thin wedges or triangles. Arrange these in small groups around the board, leaving space for the ghosts and other items.
Step 3: Arrange the Accompaniments
Pour your olives, dried cranberries, and pumpkin seeds into small bowls. Place these bowls on the board in different spots. This creates visual anchors and makes the board feel full and intentional.
Arrange your crackers in small stacks or overlapping lines. I like to create little “paths” of crackers leading from one cheese group to another. It makes the board look cohesive and encourages people to mix and match.
Step 4: Position the Cheese Ghosts
Now for the star of the show. Place your cheese ghosts in a cluster near the center of the board, or scatter them among the other items. I like to arrange three or four ghosts together in a little “ghost party” scene. You can angle them slightly so they look like they’re floating or gathering.
Add fresh rosemary sprigs around the board for a spooky, forest-like feel. The rosemary looks like tiny pine trees and adds a nice green contrast to all the orange and black. Plus, it smells amazing.
Step 5: Final Touches
Step back and look at your board. Fill any empty spaces with extra crackers, nuts, or fruit. The goal is to make the board look abundant but not crowded. You should see the ghosts clearly — they are the main attraction, after all.
If you’re using red bell pepper strips or pretzel sticks, arrange them near the edges of the board like spooky decorations. My kids love when I place a few pepper strips near the ghosts, pretending they are bloody fingers reaching for them.
Cooking Tips & Techniques
I learned most of these tips the hard way, so you don’t have to. Here is what I wish someone had told me before my first attempt:
Keep everything cold. The cream cheese must be cold straight from the fridge. If it warms up, it gets sticky and impossible to work with. I keep my cream cheese in the fridge until the moment I’m ready to cut. If your kitchen is warm, pop the cut ghosts back in the fridge for five minutes before arranging them on the board.
Use a sharp cutter. A dull cookie cutter will squish the cream cheese instead of cutting it. If your cutter is dull, run it under hot water and dry it before each cut. The heat helps it slide through cleanly.
Don’t overthink the faces. The ghosts look cutest when they’re slightly imperfect. A crooked eye or a lopsided mouth adds character. My first batch had perfectly symmetrical faces and they looked weird — like factory-made toys. The wonky ones are way more charming.
Prep the board components first. Arrange everything except the ghosts before you start making them. That way, you can place the ghosts directly onto the completed board without moving them around. Moving them once they’re placed risks smudging the sesame seeds.
Make extra ghosts. Trust me on this one. Kids will eat them immediately, and you’ll want backups for the board. I always make two batches — one for the board and one for snacking during setup.
Variations & Adaptations
Spooky Spider Web Board
Instead of ghosts, use the same cream cheese technique to make spider shapes. Cut the cream cheese into small rounds, then use black olive slices for the body and pretzel sticks for the legs. Arrange them crawling across the board. My son requested this version last year and it was a huge hit.
Monster Mash Board
Use different colored cheeses to make monster faces. Cut cheddar into triangles for monster teeth, use gouda rounds for eyes, and add olive slices for pupils. Arrange them like little monsters peeking out from behind crackers. This version works great for younger kids who might find ghosts a little scary.
Sweet Halloween Board
Skip the savory components entirely and make a dessert board. Use the same cream cheese ghosts but pair them with chocolate-covered pretzels, candy corn, pumpkin-shaped cookies, and fresh fruit. The creamy cheese ghosts balance the sweetness beautifully. I made this for a Halloween brunch and it was gone in ten minutes.
Vegan Halloween Board
Use a firm vegan cream cheese block for the ghosts (I like Kite Hill or Violife). Pair with vegan cheeses, plant-based meats, and plenty of fresh vegetables. The ghosts won’t be quite as sturdy, but they still look adorable. Just handle them gently when transferring to the board.
Mini Ghost Cups
Instead of a full board, make individual ghost cups for parties. Place a cheese ghost in the bottom of a small cup, then fill the cup with crackers, nuts, and dried fruit. Guests get their own personal Halloween snack. This version is perfect for classroom parties or potlucks where you don’t want a shared board.
Serving & Storage Suggestions
Serve this board at room temperature for the best flavor. Take it out of the fridge about 20 minutes before serving. The cheeses will soften slightly and the flavors will bloom. The cream cheese ghosts hold their shape well at room temperature for about an hour.
For presentation, I like to place the board in the center of the table with small plates and napkins nearby. Add a few spooky cocktail napkins if you have them — it’s a small touch that makes the board feel festive. If you’re serving drinks, this board pairs beautifully with a crisp apple cider or a dry sparkling wine.
Leftovers store well in the refrigerator for up to three days. Wrap the cheese ghosts separately in plastic wrap so they don’t dry out. The crackers will get soft if stored with the cheeses, so keep them in a separate airtight container. The meats and other cheeses can be stored together in a sealed container.
To revive the board the next day, just rearrange the components on a fresh board. The ghosts might lose a few sesame seeds, but they still look cute. Honestly, the board tastes even better the next day because the flavors have melded together.
If you’re making this for a party, you can prep everything a day ahead. Make the ghosts, cut the cheeses, and arrange the non-perishable items. Store everything separately in the fridge. On party day, just pull everything out and assemble the board. It takes about five minutes.
Nutritional Information & Benefits
This board is as balanced as a snack board can be. The cream cheese ghosts provide protein and calcium, while the nuts and seeds add healthy fats and fiber. The dried fruit offers natural sweetness and antioxidants. The meats contribute protein and iron. It’s a snack that actually keeps you full, unlike a bowl of candy.
Here are approximate values per serving (based on 8 servings):
- Calories: 380-420 per serving
- Protein: 14-16 grams
- Fat: 28-32 grams
- Carbohydrates: 18-22 grams
- Fiber: 3-4 grams
- Sugar: 8-10 grams (mostly from dried fruit)
This board is naturally gluten-free if you use gluten-free crackers. It’s also low-carb friendly if you skip the crackers and focus on the meats, cheeses, and nuts. The main allergens are dairy (from the cheeses) and tree nuts (from the almonds and pumpkin seeds). If you’re serving a crowd with allergies, label the board clearly or offer alternatives.
I love that this board feels indulgent but actually has some nutritional value. My kids eat more protein on Halloween night because of this board than they do on regular nights. It’s a sneaky win for parents.
Conclusion
This Easy Halloween Charcuterie Board with Adorable Cheese Ghosts has become my secret weapon for October hosting. It looks like I spent hours on it, but the whole thing comes together in twenty minutes flat. The cheese ghosts are genuinely the cutest thing I’ve ever made, and they always steal the show at parties.
I love that this board brings people together. There is something about sharing food that feels festive and fun — especially when it involves tiny ghost-shaped cream cheese. My kids remember the Halloween boards more than they remember the candy they collected. That tells me this tradition is worth keeping.
I encourage you to make this board your own. Swap in your favorite cheeses, add your go-to crackers, arrange the ghosts however makes you happy. The beauty of a charcuterie board is that there are no rules. Just have fun with it.
If you make this board, I would love to hear about it. Drop a comment below and tell me how your cheese ghosts turned out. Share a photo if you’re feeling brave — I promise I won’t judge your sesame seed placement. And if you are looking for more easy entertaining ideas, check out my creamy pumpkin chocolate chip cheesecake bars or these black velvet Halloween cupcakes for a full spooky spread. Happy Halloween, friends.
Frequently Asked Questions
Can I make the cheese ghosts ahead of time?
Yes! Make them up to two days in advance. Store them in an airtight container in the refrigerator, separated by wax paper so they don’t stick together. Add the sesame seed eyes just before serving so they stay in place.
What if I don’t have a round cookie cutter?
No problem. Use a shot glass, a small jar lid, or even the rim of a drinking glass. Just make sure it’s clean and dry. You can also cut the cream cheese into squares with a knife and round the edges with your fingers. The ghosts will look a little different but just as cute.
Can I use flavored cream cheese for the ghosts?
You can, but plain works best. Flavored cream cheeses (like strawberry or chive) have a softer texture that doesn’t hold shape as well. Plus, plain cream cheese pairs better with the savory and sweet components on the board.
How many people does this board serve?
This board serves 6-8 people as a snack or appetizer. If it’s the main food at a party, plan for 4-6 people. I always make extra because people go back for seconds (and thirds) of the cheese ghosts.
What can I use instead of black sesame seeds for the ghost eyes?
Small pieces of black olive, tiny dots of black food coloring, or even mini chocolate chips work well. Just make sure whatever you use is small enough to fit in the holes without falling out. I’ve used poppy seeds in a pinch and they looked adorable.
Pin This Recipe!
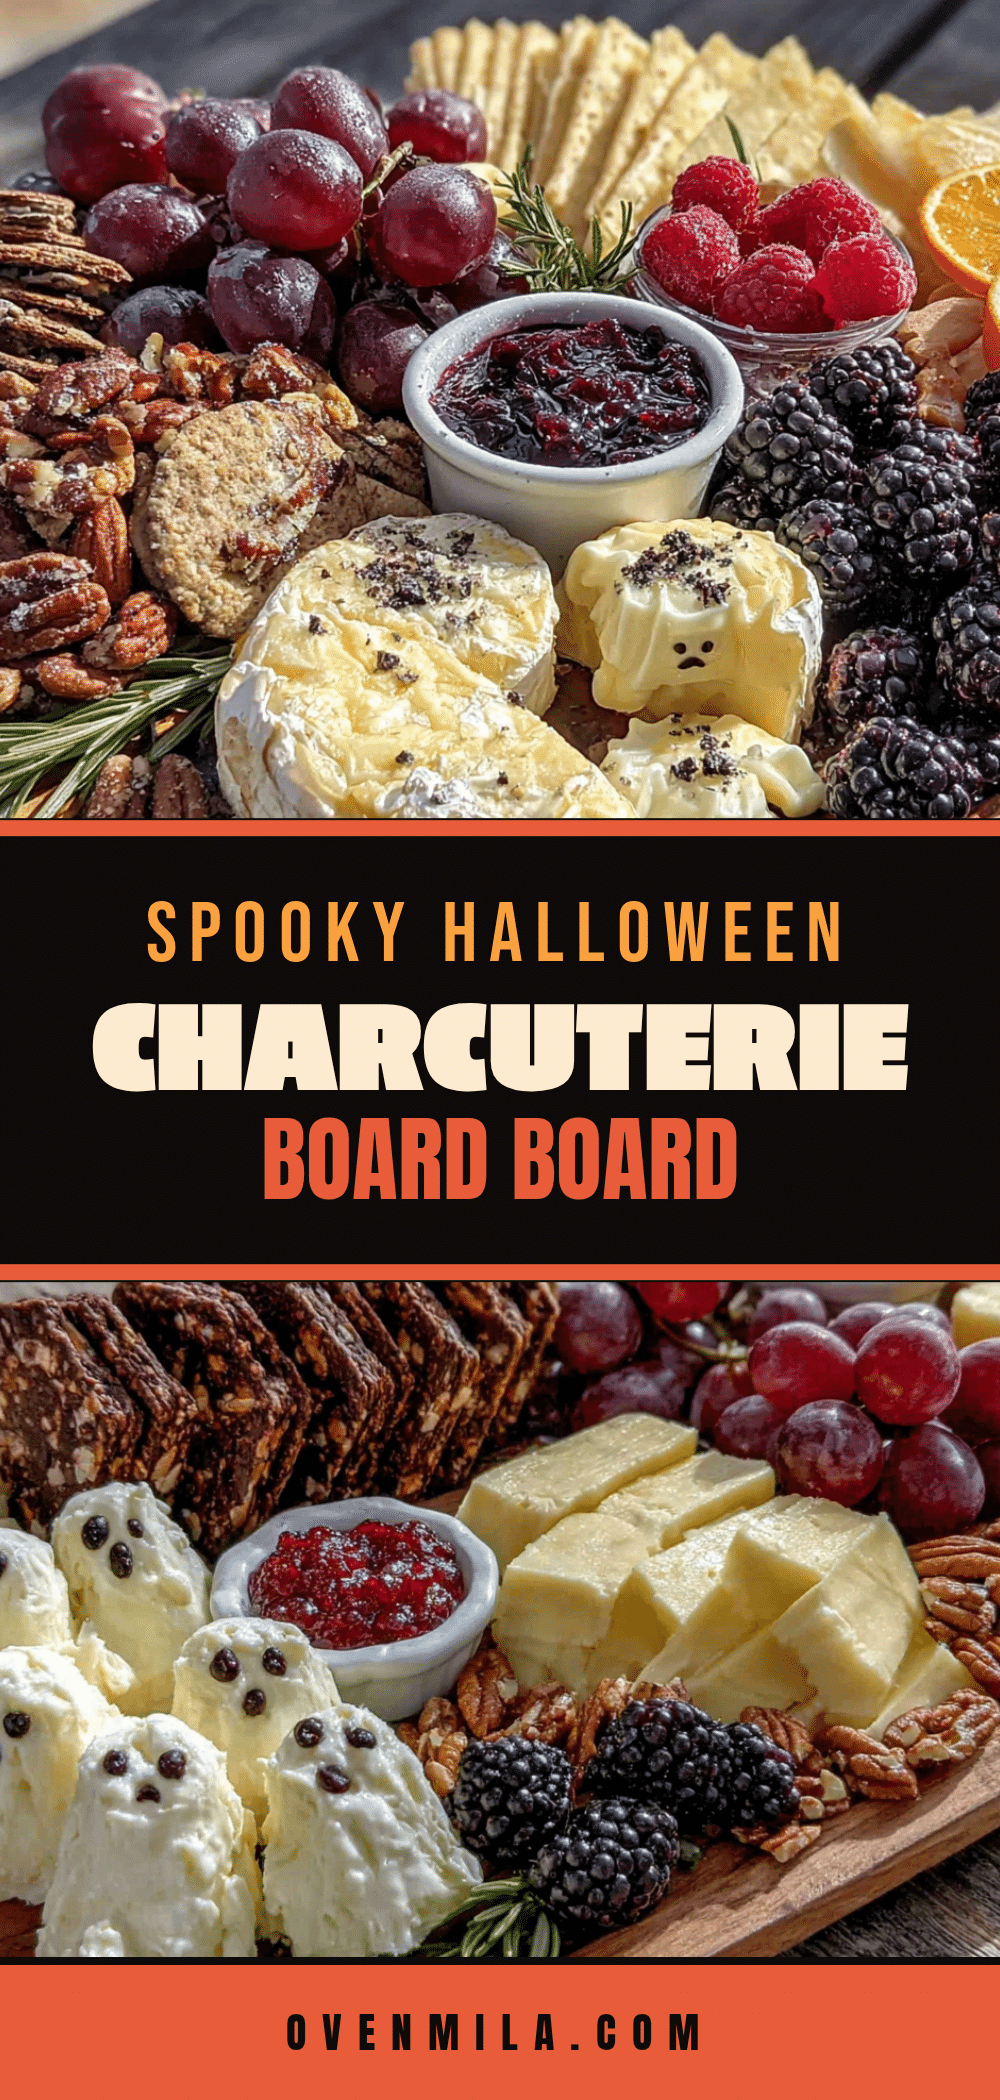
Best Easy Halloween Charcuterie Board with Adorable Cheese Ghosts
This Easy Halloween Charcuterie Board with Adorable Cheese Ghosts has become our family’s official October tradition. It sits on our coffee table every Halloween night while we watch Hocus Pocus for the millionth time, and the best part is you don’t need any special equipment or artistic talent.
- Prep Time: 20 minutes
- Cook Time: 0 minutes
- Total Time: 20 minutes
- Yield: 6-8 servings 1x
- Category: Appetizer
- Cuisine: American
Ingredients
- 8 ounces block-style cream cheese, cold
- 1–2 tablespoons black sesame seeds
- 8 ounces salami or prosciutto, thinly sliced
- 6 ounces sharp cheddar cheese, cubed
- 4 ounces gouda or brie, sliced
- 1 cup assorted crackers
- 1/2 cup black olives, pitted
- 1/2 cup dried cranberries or cherries
- 1/4 cup pumpkin seeds or pepitas, toasted
- Fresh rosemary sprigs (optional, for garnish)
- Red bell pepper strips (optional)
- Pretzel sticks (optional)
- Dark chocolate-covered almonds (optional)
- Grape tomatoes (optional)
Instructions
- Make the Cheese Ghosts: Take cold cream cheese block out of the refrigerator. Unwrap and place on a clean cutting board. Using a small round cookie cutter (about 1.5 to 2 inches wide), press straight down firmly into the cream cheese without twisting. Lift straight up to get a clean round disc. Repeat to make 6-8 ghosts from one block.
- Place each cream cheese round on a small plate or parchment paper. Using a chopstick or skewer, poke two small holes for eyes about a quarter-inch apart, slightly above center. Then poke a slightly larger hole below for the mouth (round or oval-shaped).
- Gently press a black sesame seed into each eye hole so it sits snugly inside. For the mouth, leave as a hole or add a tiny piece of black sesame seed for a filled-in smile. Transfer each finished ghost to the serving board using a small offset spatula.
- Prepare the Meats and Cheeses: Roll salami slices into loose roses by folding one slice in half and rolling from one end. Secure with a toothpick if needed. Place in clusters on the board. For prosciutto, drape in loose, wavy folds.
- Cut cheddar cheese into half-inch cubes. Slice gouda or brie into thin wedges or triangles. Arrange in small groups around the board, leaving space for ghosts and other items.
- Arrange the Accompaniments: Pour olives, dried cranberries, and pumpkin seeds into small bowls. Place bowls on the board in different spots. Arrange crackers in small stacks or overlapping lines, creating little ‘paths’ between cheese groups.
- Position the Cheese Ghosts: Place cheese ghosts in a cluster near the center of the board or scatter among other items. Arrange 3-4 ghosts together in a little ‘ghost party’ scene, angling them slightly.
- Add fresh rosemary sprigs around the board for a spooky, forest-like feel. Fill any empty spaces with extra crackers, nuts, or fruit. If using red bell pepper strips or pretzel sticks, arrange them near the edges of the board.
Notes
Keep cream cheese cold until ready to cut. If it warms up, it gets sticky. Run cookie cutter under hot water and dry before each cut for clean results. Make extra ghosts as kids will eat them immediately. The board can be prepped a day ahead – make ghosts, cut cheeses, and store separately in fridge. Assemble in 5 minutes on party day.
Nutrition
- Serving Size: 1 serving (based on
- Calories: 380420
- Sugar: 810
- Sodium: 600800
- Fat: 2832
- Saturated Fat: 1215
- Carbohydrates: 1822
- Fiber: 34
- Protein: 1416
Keywords: Halloween charcuterie board, cheese ghosts, easy Halloween snack, no-bake appetizer, spooky party food, cream cheese ghosts, Halloween party board


