That first cold snap in October. The one that turns the air sharp and makes you dig out your favorite wool socks. For me, it’s always paired with the scent of pumpkin and cinnamon, but not from a pie. No, it’s the memory of a tiny, perfect cheesecake, no-bake and impossibly creamy, sitting on a plate next to a cup of hot apple cider. I was at a friend’s Halloween party, years ago, and she served these little things. They weren’t scary, just adorable. And they were the most popular thing on the dessert table—even more than the candy corn (which, let’s be honest, is always a disappointment).
I begged her for the recipe, and she laughed. “It’s not really a recipe,” she said. “It’s more of a… feeling.” That’s not very helpful when you’re trying to recreate something at home, is it? So I spent the next few Halloweens tinkering. I wanted that same creamy, dreamy texture. I wanted that perfect pumpkin pie spice flavor, but without turning on the oven. Because who wants to heat up the whole house when you’re already wearing a cozy sweater? I wanted a no-fuss dessert that looked like you spent hours on it.
These Best Mini No-Bake Halloween Pumpkin Cheesecakes are the result of all that tinkering. They’re the little black dress of fall desserts—simple, elegant, and perfect for any occasion. They’ve become my go-to for Halloween parties, Thanksgiving dinners, and even just a random Tuesday when I need a little pumpkin pick-me-up. Honestly, I think they’re the best version of a no-bake pumpkin cheesecake you’ll ever try. They’re that good.
Why You’ll Love This Recipe
Let’s be real for a second. You’re probably busy, and the last thing you need is a complicated dessert that requires a culinary degree and a stand mixer that costs more than your first car. That’s where these little guys come in. They are the ultimate shortcut to a stunning fall dessert, and here’s why you’re going to absolutely adore them:
- No-Bake & Stress-Free: No oven required! This is a huge win, especially if you’re making a big holiday meal and your oven is already packed with a turkey or a cozy sourdough discard pumpkin bread. It frees up space and keeps your kitchen cool.
- Super Simple Ingredients: You don’t need to go on a wild goose chase for weird ingredients. Cream cheese, pumpkin puree, a little sugar, and some spices—that’s it. You probably have most of it in your pantry right now.
- Perfect for Halloween Parties: They are the perfect single-serving size, which means no slicing, no mess, and no fighting over the corner piece (you know the one). Plus, they look incredibly cute on a dessert table next to some spooky decorations.
- Seriously Crowd-Pleasing: Kids love them because they’re mini and fun. Adults love them because they taste like a luxurious, creamy pumpkin pie without all the work. I’ve never, ever had a complaint.
- Unbelievably Creamy & Delicious: The texture is what gets me every time. It’s so smooth and velvety, it almost melts on your tongue. And the flavor? It’s perfectly spiced, not too sweet, and has that deep, comforting pumpkin taste that makes fall feel like a hug.
What makes these different from other recipes? It’s the technique. I use a little trick with the cream cheese to make sure it’s absolutely lump-free, and I let the cheesecakes set in the fridge for a full four hours (or overnight) so they get that perfect, sliceable firmness. It’s the little things, you know? This isn’t just another pumpkin cheesecake recipe—it’s the one you’ll bookmark and make year after year. It’s the kind of dessert that makes you close your eyes after the first bite and just… sigh.
What Ingredients You Will Need
For this recipe, we’re using simple, wholesome ingredients that come together to create something truly magical. The beauty of a no-bake cheesecake is that the ingredients do all the heavy lifting, so quality really matters here. Let’s break it down:
For the Crust:
- 1 ½ cups (150g) graham cracker crumbs: You can buy them pre-crushed, or just throw a few whole graham crackers in a zip-top bag and go to town with a rolling pin. It’s a great way to get out some aggression! (I prefer the classic honey flavor.)
- ¼ cup (50g) granulated sugar: Just a little sweetness to balance the buttery, salty crust.
- 6 tablespoons (85g) unsalted butter, melted: This binds the crumbs together and gives the crust that rich, shortbread-like texture. Use real butter, not margarine—it makes a difference.
For the Pumpkin Cheesecake Filling:
- 16 ounces (450g) full-fat cream cheese, softened to room temperature: This is non-negotiable. The cream cheese needs to be super soft so you can beat it into a silky smooth mixture. If it’s cold, you’ll get lumps. I like to use Philadelphia brand for the most consistent results.
- 1 cup (200g) granulated sugar: Adds the perfect amount of sweetness to balance the tangy cream cheese and earthy pumpkin.
- 1 cup (245g) pure pumpkin puree: Not pumpkin pie filling! Make sure you grab the 100% pure pumpkin. It has a much better, less sweet flavor. Libby’s is my go-to brand.
- 1 teaspoon vanilla extract: It enhances all the other flavors and makes everything taste a little more “bakery-quality.”
- 1 teaspoon pumpkin pie spice: This is your secret weapon. It’s a blend of cinnamon, nutmeg, ginger, and allspice. If you don’t have it, you can use ½ teaspoon cinnamon, ¼ teaspoon nutmeg, ¼ teaspoon ginger, and a pinch of allspice.
- ½ teaspoon ground cinnamon: Because you can never have too much cinnamon in a pumpkin dessert. It adds warmth and depth.
- ¼ teaspoon salt: Don’t skip this! It cuts through the sweetness and makes all the flavors pop.
- 1 ½ cups (360ml) heavy whipping cream, cold: This is what gives the cheesecake its light, airy, mousse-like texture. Whip it to stiff peaks before folding it in.
For the Topping (Optional, but highly recommended):
- Whipped cream: For piping on top. You can use store-bought, but homemade is so much better.
- Caramel sauce: A drizzle of salted caramel takes these over the top.
- Halloween sprinkles or candy eyes: For that fun, spooky touch.
Ingredient Selection Tips: For the best texture, make sure your cream cheese is at room temperature. I take it out of the fridge about an hour before I start. Also, for a dairy-free option, you can use a plant-based cream cheese and coconut cream (the solid part from a can of full-fat coconut milk) instead of heavy cream. It works surprisingly well!
Equipment Needed
You don’t need a fancy kitchen to make these. Here’s what you’ll need:
- Muffin tin (standard 12-cup): This is what we’ll use to mold the cheesecakes. You could also use a mini cheesecake pan with removable bottoms, but a muffin tin works perfectly.
- Muffin liners (paper or foil): These make it so easy to lift the cheesecakes out of the tin. I like to use festive Halloween-themed ones for extra fun.
- Large mixing bowls: You’ll need one for the crust and one for the filling.
- Electric hand mixer or stand mixer: You need something to whip the cream and beat the cream cheese. A whisk and some elbow grease could work, but you’ll be tired.
- Measuring cups and spoons: For accuracy.
- Rubber spatula: For scraping down the bowl and folding in the whipped cream.
- Small glass or flat-bottomed cup: This is my secret tool! Use it to press the crust mixture down firmly into the muffin liners. It’s way easier than using your fingers.
Budget-Friendly Tip: If you don’t have a muffin tin, you can use small ramekins or even disposable plastic cups (like the ones for Jell-O shots). Just make sure they’re sturdy enough to hold the cheesecake.
Preparation Method
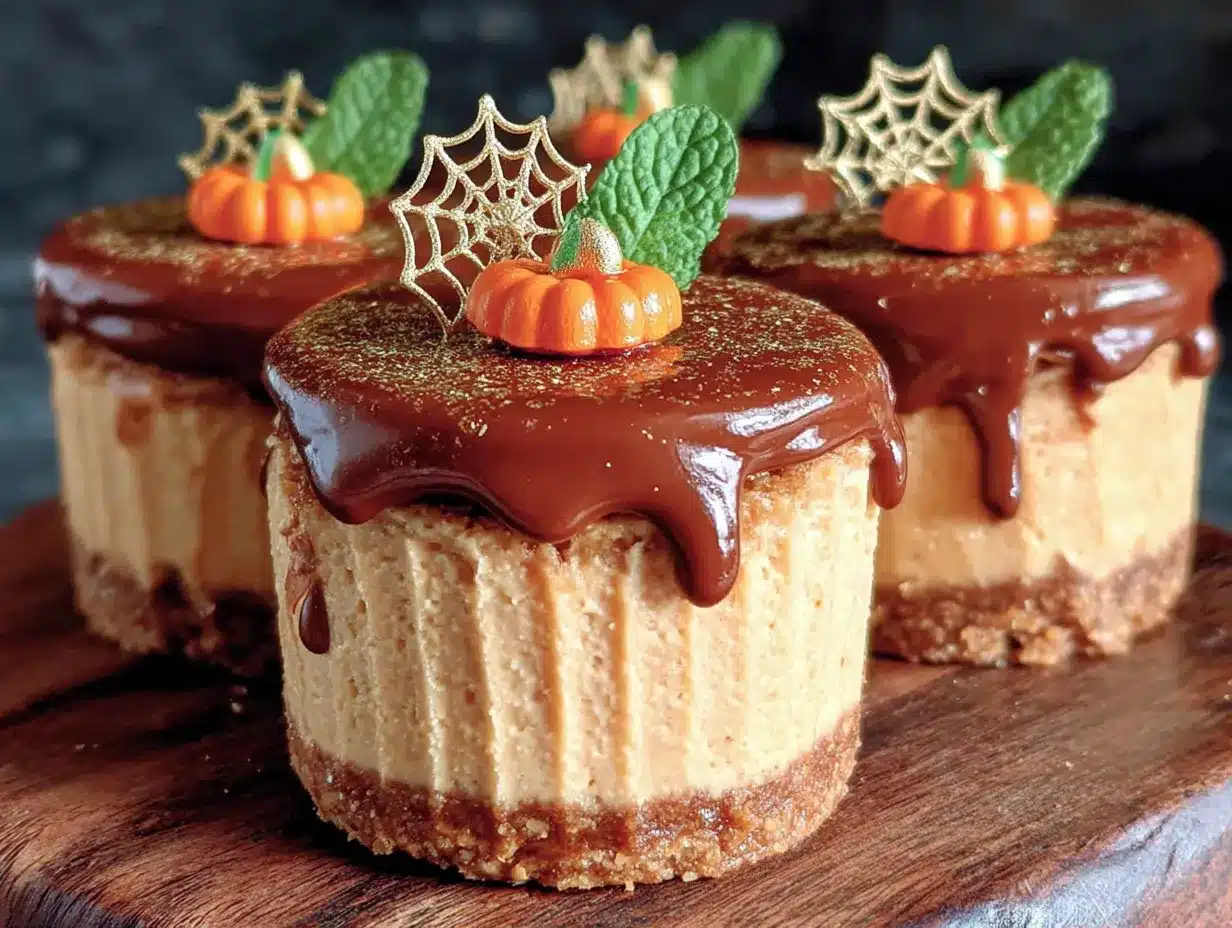
Alright, let’s get to the fun part! This recipe is broken down into simple, foolproof steps. Trust the process, and you’ll have perfect little cheesecakes in no time.
- Make the Crust: In a medium bowl, combine the graham cracker crumbs and sugar. Pour in the melted butter and stir with a fork until everything is evenly moistened. It should look like wet sand.
- Press the Crust: Line your muffin tin with 12 paper liners. Divide the crust mixture evenly among the liners (about 2 tablespoons each). Use the bottom of a small glass or a shot glass to press the crumbs down firmly and evenly. This is important—a compact crust won’t fall apart when you eat it. Pop the tin in the fridge while you make the filling.
- Whip the Cream: In a large, clean bowl, pour in the cold heavy whipping cream. Using an electric hand mixer or a stand mixer with the whisk attachment, whip the cream on high speed until stiff peaks form. This means when you lift the beaters, the cream stands up in a peak that doesn’t flop over. Don’t over-whip it, or you’ll end up with butter! Set this bowl aside.
- Beat the Cream Cheese: In another large bowl, beat the softened cream cheese and sugar together until smooth and creamy. This takes about 2-3 minutes. Scrape down the sides and bottom of the bowl with a rubber spatula to make sure there are no lumps.
- Add the Pumpkin & Spices: Add the pumpkin puree, vanilla extract, pumpkin pie spice, cinnamon, and salt to the cream cheese mixture. Beat on medium speed until everything is well combined and the mixture is a beautiful, uniform orange color. It will look a little loose, and that’s perfect.
- Fold in the Whipped Cream: This is the most important step. Take about ⅓ of the whipped cream and stir it into the pumpkin mixture to lighten it up. Then, gently fold in the remaining whipped cream using a rubber spatula. Fold until just combined—you don’t want to deflate all that air you whipped in. The final mixture should be light, fluffy, and incredibly mousse-like.
- Fill the Liners: Spoon or pipe the cheesecake filling into the prepared crusts, filling them almost to the top. You can use a piping bag or just a zip-top bag with the corner snipped off for a cleaner look. Smooth the tops with the back of a spoon.
- Chill: This is the hardest part! Place the muffin tin in the refrigerator for at least 4 hours, but overnight is best. The cheesecakes need this time to firm up and set. If you try to eat them too soon, they’ll be more like a mousse (still delicious, but not a sliceable cheesecake).
- Serve: Once set, carefully lift the cheesecakes out of the muffin tin using the paper liners. Peel off the liners, or serve them right in the liners for a cute, portable treat. Top with whipped cream, a drizzle of caramel sauce, and some fun Halloween sprinkles.
Cooking Tips & Techniques
I’ve made these cheesecakes more times than I can count, and I’ve learned a few things along the way. Here are my best tips to make sure yours turn out perfect every single time.
- The Soft Cream Cheese Rule: I cannot stress this enough. If your cream cheese is cold, you will have lumps. And those lumps will not go away, no matter how long you beat them. Let it sit on the counter for at least an hour. If you’re in a hurry, you can cut it into cubes and microwave it in 10-second bursts until it’s soft, but be careful not to melt it.
- Don’t Over-Whip the Cream: This was a mistake I made in my early days. You want stiff peaks, but if you keep going, the cream will separate and become grainy. As soon as the peaks hold their shape, stop.
- Patience is a Virtue: The 4-hour minimum chill time is not a suggestion. It’s a requirement. The filling needs to set up so it holds its shape. If you’re in a rush, you can pop them in the freezer for about 2 hours, but be careful not to freeze them solid.
- Make-Ahead Magic: These cheesecakes are the perfect make-ahead dessert. You can prepare them completely, cover the tin with plastic wrap, and keep them in the fridge for up to 2 days before serving. Just add the toppings right before you serve them so the whipped cream doesn’t get soggy.
- Easy Clean-Up: Use a piping bag (or a zip-top bag) to fill the liners. It’s so much cleaner and faster than trying to spoon the filling in. Plus, you won’t get filling all over the edges of the liners.
Variations & Adaptations
One of the best things about this recipe is how flexible it is. Don’t be afraid to make it your own! Here are a few of my favorite twists.
- Gluten-Free Option: Simply swap the graham cracker crumbs for gluten-free graham crackers or use crushed gluten-free ginger snaps. The ginger snap crust is actually amazing with the pumpkin flavor.
- Vegan & Dairy-Free: Use a high-quality vegan cream cheese (like Kite Hill or Violife) and coconut cream instead of heavy whipping cream. The coconut cream will give it a slightly different, but still delicious, texture. Make sure your graham crackers are also vegan.
- Chocolate Lover’s Twist: Add ¼ cup of melted, slightly cooled dark chocolate to the filling after you add the pumpkin. Or, use a chocolate wafer cookie crust instead of graham crackers. It’s a rich, decadent combination that pairs perfectly with the pumpkin.
- Spooky Spiderweb Design: After you pipe the whipped cream on top, drizzle a spiral of caramel sauce over it. Then, use a toothpick to drag lines from the center outwards to create a spiderweb effect. It looks incredibly impressive and is so easy to do.
- Pumpkin Spice Latte Version: Add 1 tablespoon of instant espresso powder dissolved in 1 tablespoon of hot water to the filling. It gives it that classic coffee-shop flavor. If you love that combo, you might also enjoy my Better Than Starbucks Homemade Pumpkin Spice Latte.
Serving & Storage Suggestions
These mini cheesecakes are best served cold, straight from the fridge. The texture is perfect when they’re nice and chilled.
- Serving Temperature: Serve them cold. They will be too soft if you let them sit out for too long. I usually take them out of the fridge about 10 minutes before serving to take the chill off.
- Presentation: Arrange them on a beautiful platter or cake stand. For a Halloween party, I like to place them on a black platter with some fake spiderwebs and plastic spiders scattered around. It makes for a great photo!
- Complementary Dishes: These cheesecakes are fantastic on their own, but they pair beautifully with a warm beverage. Try them with a Cozy Caramel Apple Cider Sangria for a grown-up treat, or a simple cup of hot coffee. For an even more indulgent dessert table, serve them alongside my Cozy Brown Butter Pumpkin Snickerdoodle Cookies.
- Storage: Store any leftover cheesecakes in an airtight container in the refrigerator. They will keep well for up to 4 days. The flavor actually gets even better as it melds together!
- Freezing: These freeze beautifully! Place the set, un-topped cheesecakes on a baking sheet and freeze them for 1 hour. Then, transfer them to a freezer-safe bag or container. They will keep for up to 3 months. Thaw them in the refrigerator overnight before serving and adding toppings.
Nutritional Information & Benefits
While these are a treat, they do have some surprising benefits! Please note that this is an estimate and will vary based on the specific ingredients you use.
- Estimated Nutritional Value (Per Cheesecake): Approximately 350-400 calories, 25g fat, 35g carbohydrates, 5g protein.
- Health Benefits: Pumpkin is packed with Vitamin A, which is great for your eyes and immune system. It’s also a good source of fiber. The cream cheese provides calcium and protein. So, you’re getting a little bit of goodness with your sugar rush!
- Dietary Considerations: This recipe can easily be made gluten-free, vegetarian, and with a few swaps, vegan and dairy-free. It is not low-carb or keto-friendly in its current form, but you could try a sugar substitute and a nut-based crust for a lower-carb version.
- Potential Allergens: This recipe contains dairy (cream cheese, butter, heavy cream) and gluten (graham crackers). Please check your specific ingredient labels if you have allergies.
- My Personal Take: Look, I’m not going to tell you this is a health food. It’s a dessert! But I feel good about making it because I know exactly what’s in it. It’s made with real ingredients, and it’s a far cry from the processed, preservative-laden stuff you buy at the store. Plus, the portion control of a mini cheesecake is a nice bonus!
Conclusion
So there you have it. My absolute favorite recipe for the Best Mini No-Bake Halloween Pumpkin Cheesecakes. They are everything I want in a fall dessert: easy, impressive, and absolutely delicious. No oven required, no complicated steps, just pure, creamy, pumpkin-spiced bliss in a tiny package. Whether you’re throwing a spooky Halloween bash, hosting a cozy Friendsgiving, or just want to treat yourself on a crisp autumn evening, these little cheesecakes are the answer.
I really hope you give them a try. Don’t be afraid to make them your own—play with the toppings, try a different crust, or add a splash of bourbon to the caramel sauce. The best recipes are the ones you make your own.
I’d love to hear how they turn out for you! Drop a comment below and let me know if you tried any fun variations. And if you loved them, please share this post with a friend who needs a little more pumpkin in their life. Happy Halloween, and happy baking (or, you know, no-baking)!
Frequently Asked Questions
Can I use a different type of cookie for the crust?
Absolutely! Ginger snaps, shortbread cookies, or even vanilla wafers all make fantastic crusts. Just crush them up and use the same amount as the graham crackers. Ginger snaps add a lovely spicy kick that pairs perfectly with the pumpkin.
My cream cheese is lumpy. What did I do wrong?
It most likely wasn’t soft enough. Cream cheese needs to be at room temperature (about 70°F) to beat smoothly. If you’re in a hurry, you can microwave it in short bursts, but it’s best to just let it sit out for an hour. If you still have lumps, try beating it for a longer time on high speed.
Can I make these without a muffin tin?
Yes! You can use small ramekins, mini glass jars, or even sturdy disposable cups. Just make sure whatever you use is freezer-safe if you plan to freeze them. The serving size will just be a bit different.
How do I know when the cheesecakes are fully set?
They should be firm to the touch and no longer jiggly in the center. When you gently shake the pan, the tops should not wiggle. This usually takes at least 4 hours in the refrigerator, but overnight is the safest bet for the perfect texture.
Can I use pumpkin pie filling instead of pure pumpkin puree?
I wouldn’t recommend it. Pumpkin pie filling is already sweetened and spiced, which would throw off the balance of the recipe and make it much too sweet. Stick with 100% pure pumpkin puree for the best, most authentic flavor.
Pin This Recipe!
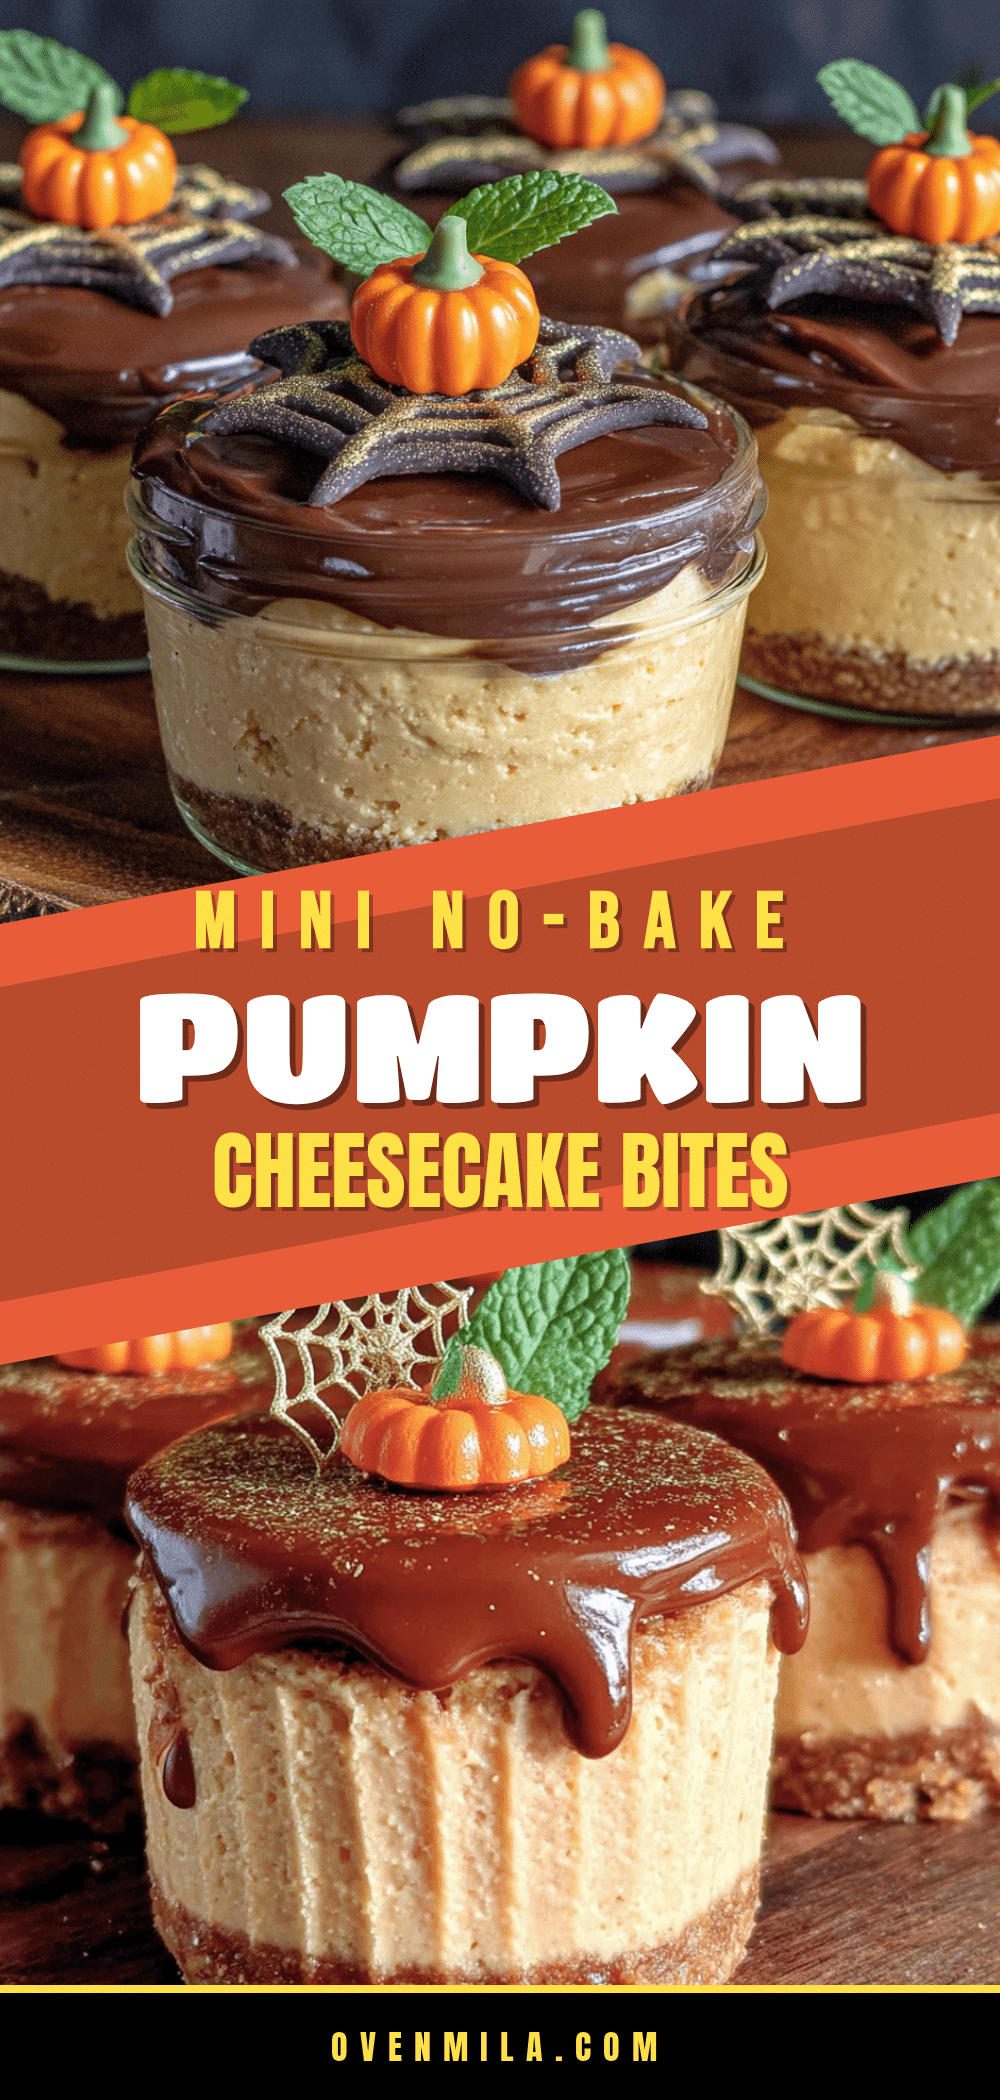
Best Mini No-Bake Halloween Pumpkin Cheesecakes
These mini no-bake pumpkin cheesecakes are incredibly creamy, perfectly spiced, and require no oven. They are the perfect single-serving dessert for Halloween parties or any fall gathering.
- Prep Time: 20 minutes
- Cook Time: 0 minutes
- Total Time: 4 hours 20 minutes (includes chilling)
- Yield: 12 servings 1x
- Category: Dessert
- Cuisine: American
Ingredients
- 1 ½ cups (150g) graham cracker crumbs
- ¼ cup (50g) granulated sugar
- 6 tablespoons (85g) unsalted butter, melted
- 16 ounces (450g) full-fat cream cheese, softened to room temperature
- 1 cup (200g) granulated sugar
- 1 cup (245g) pure pumpkin puree
- 1 teaspoon vanilla extract
- 1 teaspoon pumpkin pie spice
- ½ teaspoon ground cinnamon
- ¼ teaspoon salt
- 1 ½ cups (360ml) heavy whipping cream, cold
- Whipped cream (for topping, optional)
- Caramel sauce (for topping, optional)
- Halloween sprinkles or candy eyes (for topping, optional)
Instructions
- Make the Crust: In a medium bowl, combine the graham cracker crumbs and sugar. Pour in the melted butter and stir with a fork until everything is evenly moistened. It should look like wet sand.
- Press the Crust: Line your muffin tin with 12 paper liners. Divide the crust mixture evenly among the liners (about 2 tablespoons each). Use the bottom of a small glass or a shot glass to press the crumbs down firmly and evenly. Pop the tin in the fridge while you make the filling.
- Whip the Cream: In a large, clean bowl, pour in the cold heavy whipping cream. Using an electric hand mixer or a stand mixer with the whisk attachment, whip the cream on high speed until stiff peaks form. Set this bowl aside.
- Beat the Cream Cheese: In another large bowl, beat the softened cream cheese and sugar together until smooth and creamy, about 2-3 minutes. Scrape down the sides and bottom of the bowl with a rubber spatula.
- Add the Pumpkin & Spices: Add the pumpkin puree, vanilla extract, pumpkin pie spice, cinnamon, and salt to the cream cheese mixture. Beat on medium speed until everything is well combined and the mixture is a beautiful, uniform orange color.
- Fold in the Whipped Cream: Take about ⅓ of the whipped cream and stir it into the pumpkin mixture to lighten it up. Then, gently fold in the remaining whipped cream using a rubber spatula until just combined.
- Fill the Liners: Spoon or pipe the cheesecake filling into the prepared crusts, filling them almost to the top. Smooth the tops with the back of a spoon.
- Chill: Place the muffin tin in the refrigerator for at least 4 hours, but overnight is best.
- Serve: Once set, carefully lift the cheesecakes out of the muffin tin using the paper liners. Peel off the liners, or serve them right in the liners. Top with whipped cream, a drizzle of caramel sauce, and some fun Halloween sprinkles.
Notes
Make sure cream cheese is at room temperature to avoid lumps. Do not over-whip the cream. Chill for at least 4 hours, preferably overnight. These can be made ahead and stored in the fridge for up to 2 days before serving. Freeze un-topped cheesecakes for up to 3 months.
Nutrition
- Serving Size: 1 mini cheesecake
- Calories: 375
- Sugar: 25
- Sodium: 250
- Fat: 25
- Saturated Fat: 15
- Carbohydrates: 35
- Fiber: 1
- Protein: 5
Keywords: mini cheesecake, no-bake cheesecake, pumpkin cheesecake, Halloween dessert, fall dessert, pumpkin spice, easy dessert


