My friend Jess showed up at my door with a giant pumpkin she’d grown in her backyard. It was beautiful, honestly—like, Instagram-worthy orange perfection. But after we’d carved it into a lopsided jack-o’-lantern and roasted the flesh for soup, I was left staring at a massive bowl of slimy, stringy seeds. My first instinct was to toss them. But then I remembered my grandma’s old trick: never waste the seeds. So I rinsed them, spread them on a towel, and stood in my kitchen feeling a little lost. Plain salted seeds are fine, but I wanted something different.
I started pulling things from my spice cabinet. Cinnamon, obviously. Brown sugar. A pinch of cayenne because I can’t leave well enough alone. And salt—good flaky stuff, not the table kind. The first batch came out okay, but not great. Too sweet, not enough crunch. The second batch? I let them dry overnight and roasted them a little longer at a lower temp. That was the one. The sugar caramelized into these tiny, crispy shells around each seed, and the cinnamon gave them this warm, cozy smell that filled my whole apartment.
These crispy cinnamon sugar roasted pumpkin seeds turned into my official fall snack. I bring them to football watch parties, pack them in my lunch, and honestly, I’ve eaten them for breakfast more times than I’d like to admit. There’s just something about that sweet-savory combo that hits different. It’s not a complicated recipe—it’s actually embarrassingly simple once you get the method down. But it’s the kind of snack that makes people pause mid-bite and go, “Wait, what’s in these?” And that’s my favorite kind of recipe to share.
Why You’ll Love This Recipe
Let me tell you why these crispy cinnamon sugar roasted pumpkin seeds are about to become your new favorite snack. I’ve tested this recipe about six times—burned a batch, undercooked another, and finally nailed the perfect crunch. So you’re getting the results of my mistakes, not just a theory.
- Quick & Easy: From seed to snack in about 45 minutes, most of which is hands-off oven time. Perfect for when you’re already roasting something else or just need a fast snack fix.
- Simple Ingredients: You probably have everything in your pantry right now. No special trips to the store for fancy ingredients—just pumpkin seeds, sugar, cinnamon, butter, and salt.
- Perfect for Fall Gatherings: These are amazing for Halloween parties, Thanksgiving appetizers, or just munching while you watch a movie. I brought a big bowl to our last family game night and they disappeared before the chips.
- Crowd-Pleaser: Kids love the sweet side, adults appreciate the savory kick. It’s that rare snack that pleases everyone without trying too hard.
- Unbelievably Delicious: The texture is what gets me—crispy on the outside, slightly tender inside, with that caramelized sugar coating that shatters when you bite down. It’s next-level comfort snacking.
What makes this recipe different from every other roasted pumpkin seed recipe out there? It’s the double-roast method. I pre-bake the seeds to dry them out, then toss them in the cinnamon sugar mixture and roast again. That extra step makes all the difference between okay seeds and dangerously addictive ones. It’s not just another version—it’s the version I’d serve to people I want to impress.
Honestly, this recipe is the kind that makes you close your eyes after the first bite. It’s comfort food reimagined—healthier than chips, faster than baking a pie, but with the same soul-soothing satisfaction. Perfect for impressing guests without stress, or turning a simple snack into something memorable.
What Ingredients You Will Need
This recipe uses simple, wholesome ingredients to deliver bold flavor and satisfying crunch without the fuss. Most of these are pantry staples, especially if you’ve done any fall baking recently.
- Fresh pumpkin seeds – About 1 ½ cups, straight from your pumpkin. Rinse them well and pat dry. If you’re using store-bought raw pumpkin seeds (pepitas), that works too—just skip the initial drying step.
- Unsalted butter – 3 tablespoons, melted. I like using unsalted so I can control the salt level. Salted butter works if that’s all you have, just reduce the added salt slightly.
- Light brown sugar – 2 tablespoons, packed. This gives the seeds that deep, caramel-like sweetness. Dark brown sugar would work too, but it’ll be a little more molasses-forward.
- Granulated sugar – 1 tablespoon. The combination of brown and white sugar gives you both flavor and that crispy, crystallized coating.
- Ground cinnamon – 1 ½ teaspoons. I recommend McCormick or Simply Organic for the best flavor. Fresh cinnamon makes a noticeable difference here.
- Kosher salt – ½ teaspoon, plus more for finishing. I use Diamond Crystal—it’s less salty by volume, so if you’re using table salt, cut it back to ¼ teaspoon.
- Cayenne pepper – ⅛ teaspoon (optional, but highly recommended). This doesn’t make the seeds spicy—it just rounds out the sweetness and adds a tiny warmth at the end. Trust me on this one.
- Vanilla extract – ½ teaspoon. Pure vanilla, not imitation. It adds a subtle depth that plays beautifully with the cinnamon.
For the seeds themselves, try to get them from a sugar pumpkin or pie pumpkin—they’re smaller and tend to be more tender than the giant carving pumpkins. But honestly, any pumpkin seeds work. I’ve even used seeds from butternut squash in a pinch, and they turned out great.
If you want a dairy-free version, swap the butter for coconut oil or a plant-based butter. The flavor will change slightly, but the texture stays just as crispy. And if you’re watching your sugar intake, you can reduce the sugar by half—just know the coating won’t be quite as crunchy.
Equipment Needed
You don’t need much for this recipe, which is part of why I love it. Here’s what you’ll need:
- Baking sheet – A rimmed baking sheet works best. I use a half-sheet pan (about 18×13 inches). The rim keeps the seeds from rolling off when you toss them.
- Parchment paper or silicone baking mat – This prevents sticking and makes cleanup a breeze. I’ve forgotten it before and regretted every minute of scrubbing.
- Large bowl – For mixing the seeds with the butter and sugar mixture. Any medium-to-large mixing bowl works.
- Colander – For rinsing the seeds. A fine-mesh strainer works even better if you have one.
- Kitchen towel or paper towels – For drying the seeds thoroughly. This step is more important than you think.
- Small saucepan or microwave-safe bowl – For melting the butter. I usually just use the microwave because I’m impatient.
- Spatula or wooden spoon – For stirring the seeds on the baking sheet halfway through roasting.
If you don’t have parchment paper, you can grease the baking sheet lightly with butter or cooking spray. Just keep an eye on the seeds—they might stick a little more. And if you have a Silpat mat, that’s actually my favorite option. The seeds slide right off.
Preparation Method
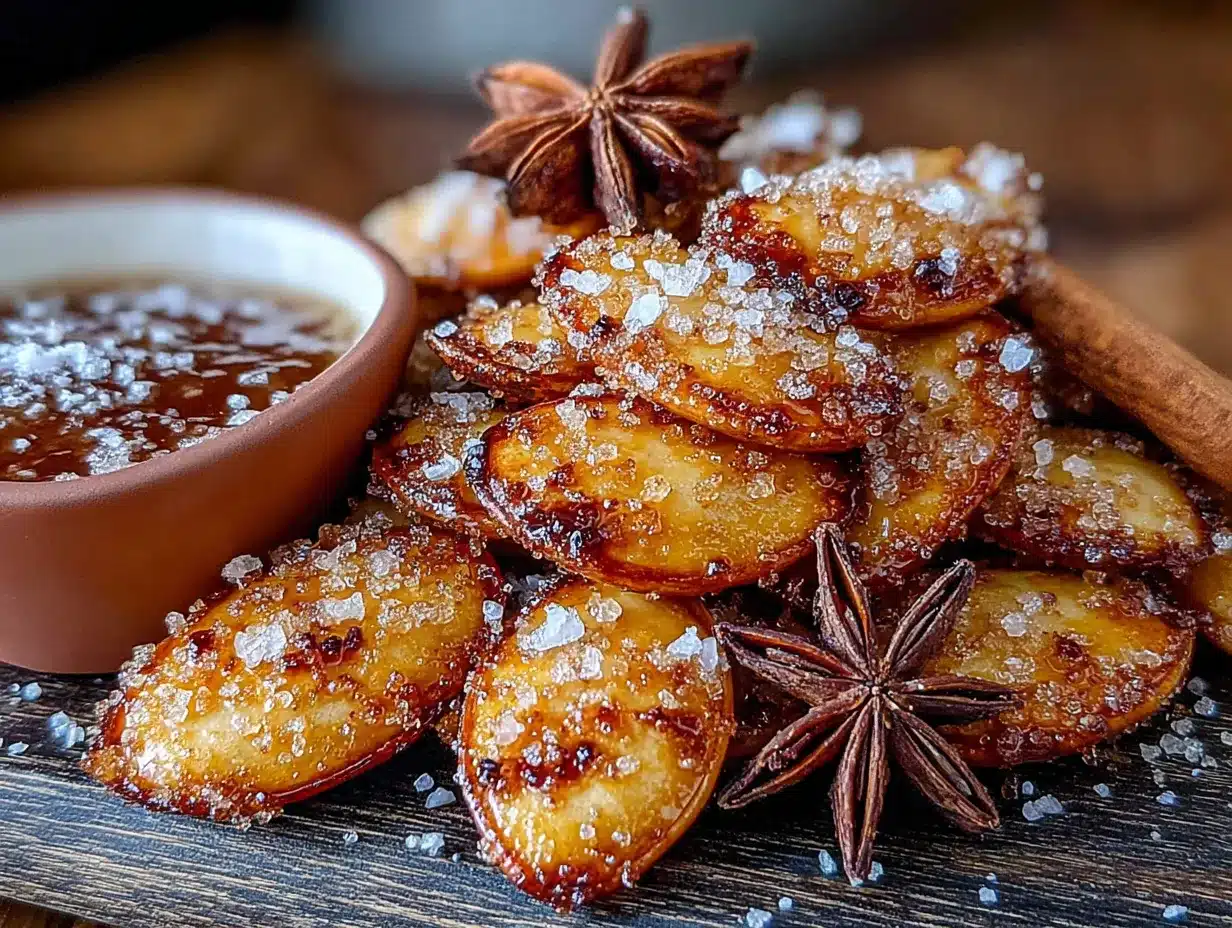
Alright, let’s get cooking. I’m going to walk you through this step by step, including all the little tricks I learned the hard way.
- Preheat your oven to 300°F (150°C). Yes, 300°F, not 350°F. Lower temperature means the seeds dry out evenly without burning the sugar later. I learned this after my first batch came out looking like charcoal briquettes.
- Rinse the pumpkin seeds thoroughly. Put them in a colander and run cold water over them while rubbing them between your fingers. You want to remove all the orange stringy pumpkin guts. This takes about 2-3 minutes. Don’t skip this—leftover pumpkin flesh will make your seeds soggy and weird.
- Dry the seeds completely. Spread them on a clean kitchen towel or paper towels and pat them dry. Then let them sit for about 10 minutes. Any moisture at this stage will steam the seeds instead of roasting them. I usually press another paper towel on top to absorb as much water as possible.
- First roast (the drying phase). Spread the seeds in a single layer on your parchment-lined baking sheet. Roast them for 15 minutes at 300°F. This step dries them out from the inside. They’ll look slightly pale and feel dry to the touch when they come out.
- Make the cinnamon sugar coating. While the seeds are roasting, melt your butter in a small bowl. In a separate bowl, whisk together the brown sugar, granulated sugar, cinnamon, kosher salt, cayenne (if using), and vanilla extract. Stir the melted butter into the sugar mixture until it forms a paste. It should look like wet sand.
- Toss the seeds in the coating. Take the seeds out of the oven and transfer them to a large bowl while they’re still warm. Pour the cinnamon sugar butter mixture over them and toss with a spatula until every seed is coated. Don’t worry if it looks clumpy—that’s exactly what you want.
- Spread them back on the baking sheet. Use your spatula to spread the coated seeds in a single layer. Try to break up any big clumps, but leave some small clusters—those are the best part. They get extra crispy and caramelized.
- Second roast (the caramelization phase). Return the baking sheet to the oven and roast for another 20-25 minutes, stirring halfway through. At the 10-minute mark, use your spatula to flip and stir the seeds. They should be golden brown and smell amazing at this point. Keep an eye on them during the last 5 minutes—sugar can go from golden to burned really fast.
- Cool completely. This is the hardest part. Let the seeds cool on the baking sheet for at least 15 minutes without touching them. The sugar coating hardens as it cools, giving you that signature crispy crunch. If you eat them warm, they’ll be soft and chewy—still tasty, but not the same texture.
- Break apart and season. Once completely cool, break apart any large clusters with your hands. Sprinkle with a tiny pinch of flaky sea salt on top. This final salt touch makes the sweet-savory thing really sing.
Your kitchen is going to smell like a fall candle factory. Honestly, that alone is worth the effort.
Cooking Tips & Techniques
I’ve made this recipe enough times to know exactly where things can go wrong. Let me save you the trouble.
The biggest mistake people make is not drying the seeds enough. I did this my first time and ended up with chewy, sad seeds that never got crispy. Water is the enemy of crunch. After rinsing, let them air-dry on a towel for at least 10 minutes, then blot them again before the first roast. If you’re in a humid climate (hello, Midwest fall), consider letting them dry overnight in the fridge.
Don’t skip the first roast. I know it seems like an extra step, but that 15-minute pre-roast is what makes the inside of the seed tender while the outside gets crispy. If you go straight to the sugar coating, the moisture inside the seed will steam the coating and you’ll lose that crackly texture.
Watch your oven temperature. Every oven runs a little differently. My old apartment oven ran hot by about 25 degrees, so I had to drop the temperature to 275°F. If your seeds are browning too fast, lower the temp and extend the cooking time. Burnt sugar tastes bitter and sad.
Stir halfway through the second roast. This ensures even coating and prevents the sugar from burning on the bottom. I use a thin metal spatula to scrape and flip. The seeds on the edges of the pan tend to cook faster, so give them extra attention.
Let them cool completely before storing. I know you’ll want to eat them immediately (and you should eat a few warm—they’re delicious), but for the best texture, let the majority cool fully. The sugar continues to harden as it cools, and that’s when the magic happens.
One more thing—if you’re making a double batch, use two baking sheets and rotate them halfway through. Don’t overcrowd a single sheet, or the seeds will steam instead of roast. They need room to breathe.
Variations & Adaptations
Once you’ve mastered the basic recipe, here are some fun ways to switch it up:
- Maple Pecan Version: Replace the brown sugar with 2 tablespoons of maple syrup and add ¼ cup of chopped pecans during the last 5 minutes of roasting. The maple flavor pairs beautifully with the cinnamon. This is my go-to for holiday gift bags.
- Spicy Chipotle Twist: Skip the cinnamon and cayenne, and instead use 1 teaspoon of chipotle powder and ½ teaspoon of smoked paprika. Add an extra tablespoon of brown sugar to balance the heat. These are incredible on salads or just eaten straight with cold beer.
- Vegan Option: Substitute the butter with melted coconut oil or vegan butter. Use maple syrup instead of brown sugar for a refined-sugar-free version. The texture will be slightly different—a little less crunchy, but still delicious.
- Pumpkin Pie Spice Blend: Replace the cinnamon with 2 teaspoons of pumpkin pie spice. Add a tablespoon of maple syrup to the sugar mixture. It tastes exactly like pumpkin pie filling, minus the pie. I made these for Thanksgiving last year and they were gone before dinner.
- Everything Bagel Style: For a savory version, skip the sugar and cinnamon entirely. Toss the dried seeds with melted butter, then sprinkle with everything bagel seasoning (sesame seeds, poppy seeds, garlic flakes, onion flakes, salt). Roast at 300°F for 25-30 minutes. These are amazing on soups or just as a salty snack.
I’ve tried all of these variations, and honestly, the maple pecan version is my personal favorite. But the original cinnamon sugar recipe is what I make most often because it’s the one my family requests. You do you.
Serving & Storage Suggestions
These crispy cinnamon sugar roasted pumpkin seeds are best served at room temperature. I like to put them in a nice bowl and let people grab handfuls. They’re perfect for snacking while watching a game, or you can sprinkle them over yogurt, oatmeal, or even a simple green salad for extra crunch.
They pair beautifully with a warm mug of homemade pumpkin spice latte or a glass of cold apple cider. If you’re serving them at a party, set them out alongside a bowl of loaded nacho football dip for a sweet-and-savory snack spread that covers all bases.
For storage, let the seeds cool completely first. Then transfer them to an airtight container. They’ll stay crispy at room temperature for up to 2 weeks. I’ve tested this—they were still crunchy on day 12, though honestly, they never last that long in my house.
If you live in a humid climate, add a silica gel packet (the kind you find in shoe boxes) to the container. It sounds weird, but it really helps keep them crispy. Or just store them in the fridge—that works too.
You can also freeze them. Spread the cooled seeds on a baking sheet and freeze for 1 hour, then transfer to a freezer-safe bag. They’ll keep for up to 3 months. Thaw at room temperature for about 10 minutes before serving. The texture holds up surprisingly well.
One thing to note: the flavors actually develop and deepen after a day or two. So if you can resist eating them all immediately, they’ll taste even better tomorrow. The cinnamon mellows out and the sweetness becomes more balanced.
Nutritional Information & Benefits
These seeds aren’t just delicious—they’re actually pretty good for you. Pumpkin seeds are packed with magnesium, zinc, and healthy fats. And since we’re using butter and sugar in moderation, this is still a snack you can feel good about.
Here’s the estimated nutrition per serving (about ¼ cup, or 30g):
| Nutrient | Amount |
|---|---|
| Calories | 175 |
| Total Fat | 12g |
| Saturated Fat | 4g |
| Carbohydrates | 12g |
| Fiber | 2g |
| Sugar | 8g |
| Protein | 7g |
| Sodium | 180mg |
| Magnesium | 150mg (36% DV) |
| Zinc | 2mg (18% DV) |
The magnesium in pumpkin seeds is great for muscle function and sleep quality. I’ve noticed that when I snack on these in the evening, I sleep better. The zinc supports immune health—perfect for cold and flu season. And the healthy fats keep you full and satisfied between meals.
If you’re watching your sugar intake, you can reduce the sugar by half without sacrificing too much crunch. The seeds will still be delicious, just less candy-like. And if you’re gluten-free, these are naturally gluten-free, so no worries there.
One note: pumpkin seeds are high in oxalates, so if you’re prone to kidney stones, you might want to enjoy these in moderation. Otherwise, snack away!
Conclusion
These crispy cinnamon sugar roasted pumpkin seeds are proof that the best snacks come from the simplest ingredients. They’re sweet, savory, crunchy, and completely addictive—everything you want in a fall snack. Plus, they turn something you’d normally throw away into something you’ll actually look forward to eating.
I love that this recipe is flexible. You can make it exactly as written, or you can play around with the spices and sugars to make it your own. Add more cayenne if you like heat. Swap in maple syrup for a different sweetness. Throw in some chopped nuts for extra texture. The base method stays the same, and it works every time.
If you make these (and I really hope you do), let me know how they turn out. Tag me in your photos, leave a comment below, or tell me about your favorite variation. I’m always looking for new ideas, and this community has the best suggestions. Honestly, some of my favorite recipe tweaks have come from readers just like you.
So grab that pumpkin, save those seeds, and get roasting. Your kitchen is about to smell incredible, and your snack game is about to level up. Happy snacking, friends!
Frequently Asked Questions
Can I use store-bought raw pumpkin seeds instead of fresh ones?
Absolutely! Raw pepitas (hulled pumpkin seeds) work great. Just skip the initial rinsing and drying steps, and start with the first roast at 300°F for 10 minutes instead of 15, since they’re already dry.
Why are my roasted pumpkin seeds chewy instead of crispy?
This usually happens when the seeds weren’t dried thoroughly before roasting, or when they weren’t roasted long enough. Make sure to pat them completely dry after rinsing, and don’t rush the roasting time. If they’re still chewy after cooling, pop them back in the oven at 275°F for another 5-10 minutes.
Can I make these in an air fryer?
Yes! Air fry at 280°F for 10 minutes for the first dry roast, then toss with the coating and air fry at 300°F for another 8-10 minutes, shaking halfway through. Keep a close eye on them since air fryers run hot and sugar burns fast.
How do I prevent the sugar coating from burning?
Use a lower oven temperature (300°F max) and stir the seeds halfway through roasting. If you notice the sugar browning too quickly, reduce the temperature by 25 degrees and extend the cooking time slightly. Also, make sure your seeds are in a single layer—overcrowding can cause uneven cooking.
Can I double this recipe for a party?
Definitely! Just use two baking sheets and rotate them halfway through the roasting time. Don’t overcrowd a single sheet, or the seeds will steam instead of roast. Store any leftovers in an airtight container—if there are any leftovers, that is!
Pin This Recipe!
Crispy Cinnamon Sugar Roasted Pumpkin Seeds

These crispy cinnamon sugar roasted pumpkin seeds are the perfect sweet and savory fall snack. With a caramelized coating and warm cinnamon flavor, they’re quick, easy, and made with simple pantry ingredients.
- Prep Time: 15 minutes
- Cook Time: 40 minutes
- Total Time: 55 minutes
- Yield: 4 servings 1x
- Category: Snack
- Cuisine: American
Ingredients
- 1 ½ cups fresh pumpkin seeds (or raw pepitas)
- 3 tablespoons unsalted butter, melted
- 2 tablespoons light brown sugar, packed
- 1 tablespoon granulated sugar
- 1 ½ teaspoons ground cinnamon
- ½ teaspoon kosher salt (plus more for finishing)
- ⅛ teaspoon cayenne pepper (optional)
- ½ teaspoon vanilla extract
- Flaky sea salt for finishing
Instructions
- Preheat your oven to 300°F (150°C).
- Rinse the pumpkin seeds thoroughly in a colander under cold water, rubbing them to remove any pumpkin guts. Drain well.
- Dry the seeds completely by spreading them on a clean kitchen towel or paper towels. Pat dry and let sit for about 10 minutes.
- Spread the seeds in a single layer on a parchment-lined baking sheet. Roast for 15 minutes at 300°F to dry them out.
- While the seeds roast, melt the butter in a small bowl. In a separate bowl, whisk together the brown sugar, granulated sugar, cinnamon, kosher salt, cayenne (if using), and vanilla extract. Stir the melted butter into the sugar mixture to form a paste.
- Remove the seeds from the oven and transfer them to a large bowl while still warm. Pour the cinnamon sugar butter mixture over them and toss until every seed is coated.
- Spread the coated seeds back on the baking sheet in a single layer, breaking up any large clumps but leaving some small clusters.
- Return to the oven and roast for another 20-25 minutes, stirring halfway through. Watch carefully during the last 5 minutes to prevent burning.
- Let the seeds cool completely on the baking sheet for at least 15 minutes without touching them. The sugar coating will harden as it cools.
- Once cool, break apart any large clusters with your hands. Sprinkle with a tiny pinch of flaky sea salt on top.
Notes
For best results, dry the seeds thoroughly before roasting to ensure crispiness. The double-roast method (first to dry, then to caramelize) is key. Store in an airtight container at room temperature for up to 2 weeks. For a dairy-free version, substitute butter with coconut oil or vegan butter. For a vegan version, use maple syrup instead of brown sugar.
Nutrition
- Serving Size: ¼ cup (30g)
- Calories: 175
- Sugar: 8
- Sodium: 180
- Fat: 12
- Saturated Fat: 4
- Carbohydrates: 12
- Fiber: 2
- Protein: 7
Keywords: pumpkin seeds, roasted pumpkin seeds, cinnamon sugar, fall snack, Halloween snack, Thanksgiving snack, sweet and savory


