I wasn’t expecting cooking advice from my accountant, but there I was, sitting in his cramped office during tax season, watching him peel a clementine while he described exactly how to make the most incredible no-bake pumpkin cheesecake bars I’d ever heard of. Honestly, I’d gone in expecting to discuss deductions and write-offs, not to leave with the blueprint for my new favorite fall dessert. He saw me eyeing the stack of pumpkin recipes I had bookmarked on my phone—I was desperately looking for something easy to bring to a Friendsgiving—and he just laughed. “Forget all that,” he said, tossing a clementine peel onto his desk. “You want my wife’s no-bake pumpkin cheesecake bars. They’re the only thing I’m allowed to bring to parties, and they disappear every single time.”
I scribbled the basics on the back of an envelope. No oven. No water bath. No stress. Just a buttery crust, a silky cream cheese layer, and that gorgeous pumpkin spice filling that tastes like autumn in a pan. I made them that weekend for a small get-together, and let me tell you—people actually stopped mid-conversation to ask for the recipe. My neighbor, who usually just nods politely at my baking experiments, took a bite and said, “Okay, this is the one.” I mean, you know that feeling when a dessert just works? When it’s impressive enough for a party but so simple you could make it on a Tuesday night while watching the game? That’s these bars.
I’ve tweaked the original envelope recipe over the years—added a little more spice, swapped in a better crust, figured out how to make the layers perfectly even every time. And now, I’m sharing my version with you. Because if an accountant can accidentally change my entire fall dessert game, the least I can do is pass it along. These crowd-pleasing no-bake pumpkin cheesecake bars are about to become your new secret weapon for every gathering, potluck, and holiday table.
Why You’ll Love This Recipe
Let’s be real—there are a million pumpkin cheesecake recipes out there. But these no-bake pumpkin cheesecake bars? They’re different. I’ve tested this recipe more times than I can count, tweaking the ratios, the chilling time, the spice blend, until I got it just right. Here’s why I think you’re going to love them as much as I do:
- No Oven Required: Seriously. No baking, no water bath, no worrying about cracks. Perfect for when your oven is full of other dishes or you just don’t want to turn it on.
- Simple Ingredients: You probably already have most of these in your pantry. No fancy extracts or hard-to-find items. Just real, honest ingredients.
- Perfect for Hosting: These bars are made for a crowd. They slice beautifully, travel well, and look stunning on a dessert table. Plus, you can make them a day ahead—one less thing to worry about when guests arrive.
- Crowd-Pleaser: I’ve brought these to potlucks, Thanksgiving dinners, and casual get-togethers. They always get devoured. Even people who say they’re “not pumpkin people” go back for seconds.
- Unbelievably Creamy: The texture is what sets these apart. It’s silky, rich, and perfectly set without being heavy. That first bite? You’ll close your eyes. I promise.
What makes this version my best? It’s the balance. The crust is buttery and just salty enough to contrast the sweet filling. The cream cheese layer adds a tangy brightness. And the pumpkin layer? It’s spiced warmly with cinnamon, ginger, and a pinch of cloves—no bland, one-note pumpkin flavor here. This isn’t just another recipe. It’s the one you’ll come back to year after year.
What Ingredients You Will Need
This recipe uses simple, wholesome ingredients to create a dessert that tastes anything but basic. Most of these are pantry staples, especially if you do any fall baking. I’ve also included a few notes on what to look for and what you can swap if needed.
For the Crust
- 2 cups (200g) graham cracker crumbs (about 14-15 full sheets) — You can use store-bought crumbs, but I prefer grinding my own from whole graham crackers. They stay a little more textured, and the butter absorbs better.
- 1/2 cup (113g) unsalted butter, melted — Use real butter here. Margarine or coconut oil will change the flavor and texture. I use Land O’Lakes or Kerrygold for the best taste.
- 1/4 cup (50g) granulated sugar — Just enough to sweeten the crust without making it candy-like.
- 1/4 teaspoon salt — This balances the sweetness and makes the crust taste more like a baked good.
For the Cream Cheese Layer
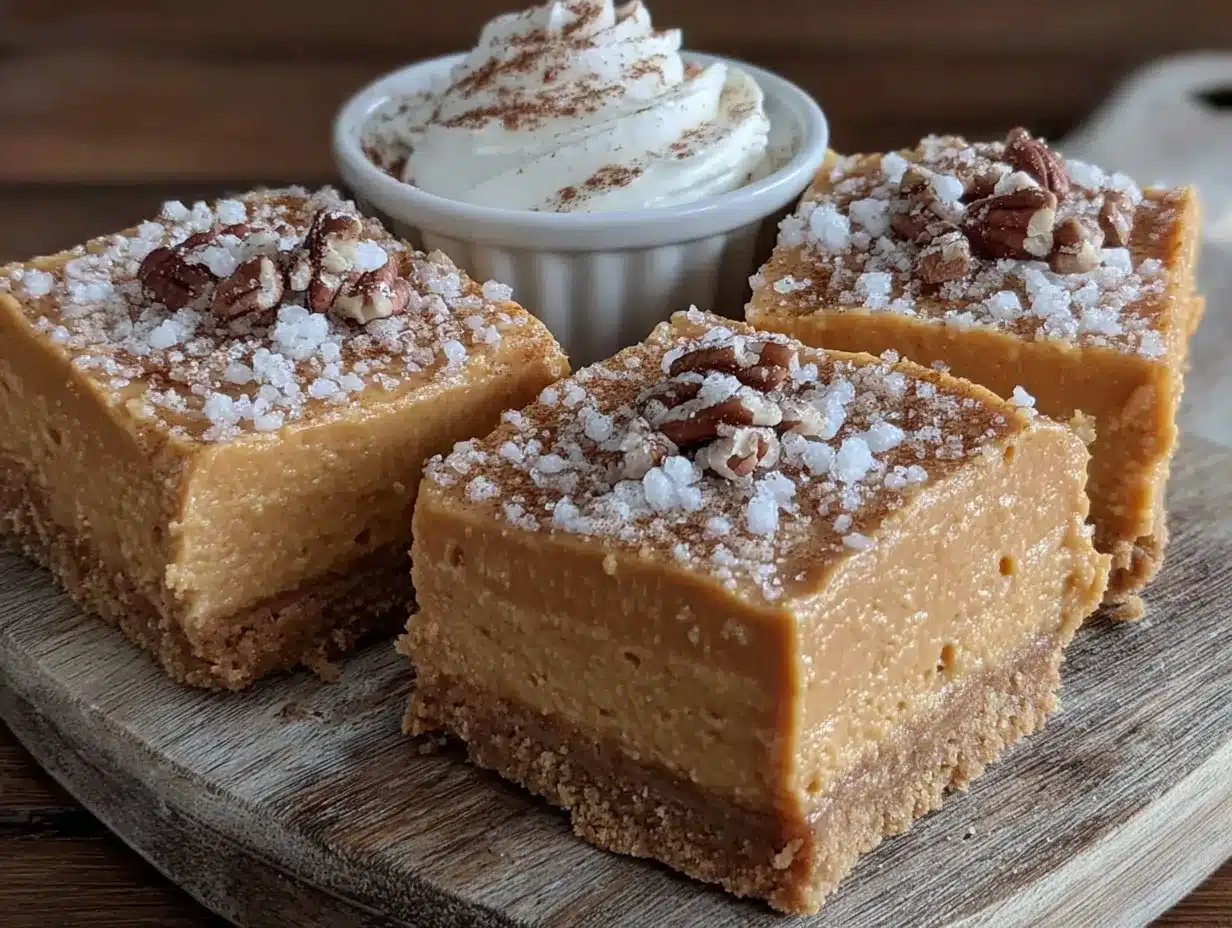
- 16 oz (450g) full-fat cream cheese, softened — Do not use low-fat or Neufchâtel. Full-fat is essential for that luscious, stable texture. Let it sit on the counter for at least an hour before starting.
- 1/2 cup (100g) granulated sugar — Regular white sugar works best here.
- 1 teaspoon vanilla extract — Pure vanilla, not imitation. It makes a difference.
- 1 cup (240ml) heavy whipping cream, cold — This gets whipped and folded in to make the filling light and airy. Keep it chilled until you’re ready to whip it.
For the Pumpkin Layer
- 1 cup (245g) pumpkin puree — Not pumpkin pie filling! Look for 100% pure pumpkin. I like Libby’s for its consistent texture and flavor.
- 1/2 cup (100g) packed light brown sugar — Brown sugar adds moisture and a deeper, molasses-like sweetness that pairs perfectly with pumpkin.
- 1 teaspoon ground cinnamon — The backbone of the spice blend.
- 1/2 teaspoon ground ginger — Adds warmth without heat.
- 1/4 teaspoon ground nutmeg — Freshly grated if you have it, but pre-ground works fine.
- 1/8 teaspoon ground cloves — Just a pinch. Cloves are potent, and a little goes a long way.
- 1/4 teaspoon salt — To enhance all the flavors.
- 1 teaspoon vanilla extract — Rounds out the spices.
- 1/2 cup (120ml) heavy whipping cream, cold — This gets whipped separately and folded into the pumpkin mixture for a light, mousse-like texture.
For Garnish (Optional but Recommended)
- Whipped cream — Homemade is best, but store-bought works in a pinch.
- Caramel sauce — A drizzle over the top looks gorgeous and adds another layer of flavor.
- Crushed pecans or gingersnap cookies — For a little crunch.
Substitution Notes: For a gluten-free crust, use gluten-free graham crackers or crushed gluten-free cookies. You can also swap the graham crackers for crushed gingersnaps for a spicier crust. If you’re dairy-free, this recipe is trickier to adapt because of the cream cheese and heavy cream, but there are good plant-based cream cheese alternatives (like Kite Hill or Tofutti) and coconut cream can replace the heavy cream—just note the texture will be slightly different.
Equipment Needed
You don’t need a lot of fancy tools to make these no-bake pumpkin cheesecake bars. Here’s what I use and what you can substitute if you don’t have the exact item.
- 9×13-inch baking dish or pan — This is the perfect size for a crowd. You can also use a 9×9-inch pan for thicker bars, but you’ll need to adjust the chilling time. I prefer a metal or glass pan; ceramic takes longer to cool down.
- Electric hand mixer or stand mixer — You’ll be whipping cream and beating cream cheese, so a mixer is a huge time-saver. A hand mixer works perfectly fine. If you’re feeling strong, you can whip the cream by hand with a whisk, but be prepared for an arm workout.
- Large mixing bowls — At least two. One for the cream cheese mixture and one for the pumpkin mixture.
- Medium bowl — For the crust mixture.
- Parchment paper — Lining the pan makes lifting the bars out so much easier. I always leave an overhang on two sides.
- Measuring cups and spoons — Accurate measurements matter here, especially for the spices and cream.
- Spatula — A rubber or silicone spatula for folding and spreading.
- Food processor or zip-top bag and rolling pin — For crushing the graham crackers. I use my food processor because it’s faster, but a bag and a rolling pin work just fine—plus, it’s a little therapeutic.
- Sharp knife — For slicing clean bars. Run it under hot water and wipe it dry between cuts for the neatest slices.
If you don’t have a 9×13-inch pan, you can use a 9×9-inch square pan. The bars will be thicker, so you’ll need to chill them for at least 6 hours or overnight to ensure they set properly. A springform pan also works, but it’s harder to get clean slices from a round pan.
Preparation Method
Now for the fun part. I’ve broken this down into clear steps so you can follow along without any confusion. Take your time, especially with the whipping and folding—those are the steps that give these bars their signature texture.
Step 1: Prepare the Crust
Line your 9×13-inch baking dish with parchment paper, leaving a 2-inch overhang on the long sides. This will be your handle to lift the bars out later. In a medium bowl, combine the graham cracker crumbs, melted butter, sugar, and salt. Stir with a fork until the mixture looks like wet sand and all the crumbs are evenly coated. Press this mixture firmly into the bottom of the prepared pan. I use the bottom of a measuring cup to really pack it down—you want a solid, even layer. Pop the pan in the fridge while you make the fillings.
Step 2: Make the Cream Cheese Layer
In a large mixing bowl, beat the softened cream cheese with an electric mixer on medium speed until it’s smooth and creamy—about 2 minutes. Scrape down the sides and the bottom of the bowl. Add the sugar and vanilla, and beat for another minute until everything is well combined and smooth. In a separate medium bowl, whip the cold heavy cream on medium-high speed until stiff peaks form. This takes about 3-4 minutes with a hand mixer. You’re looking for peaks that hold their shape when you lift the beaters. Gently fold the whipped cream into the cream cheese mixture using a spatula. Fold until no white streaks remain. Be gentle—you want to keep the air in the whipped cream. Spread this mixture evenly over the chilled crust. Pop it back in the fridge while you make the pumpkin layer.
Step 3: Make the Pumpkin Layer
In another large bowl, whisk together the pumpkin puree, brown sugar, cinnamon, ginger, nutmeg, cloves, salt, and vanilla until smooth. In a separate medium bowl, whip the cold heavy cream until stiff peaks form again. Fold the whipped cream into the pumpkin mixture in two additions, folding gently after each. You want a uniform, mousse-like texture. Carefully spread this over the cream cheese layer, smoothing the top with your spatula.
Step 4: Chill and Set
Cover the pan tightly with plastic wrap or foil. Refrigerate for at least 6 hours, but overnight is better. I know it’s hard to wait, but this is a crucial step. The bars need time to set so they slice cleanly. If you’re in a rush, 4 hours is the absolute minimum, but the texture won’t be as firm.
Step 5: Slice and Serve
Once fully chilled, lift the bars out of the pan using the parchment overhang. Place on a cutting board. Use a sharp knife to slice into squares—I usually cut 24 bars (6 rows by 4 rows). For the cleanest cuts, run the knife under hot water, dry it, and slice. Wipe the blade clean between cuts. Garnish with a dollop of whipped cream, a drizzle of caramel sauce, or a sprinkle of crushed pecans. Serve cold.
Troubleshooting Tip: If your cream cheese mixture seems lumpy, it wasn’t softened enough. Let it sit at room temperature for another 30 minutes next time. You can also try beating it for an extra minute to smooth it out. If your pumpkin layer looks curdled after folding, your cream might have been over-whipped or your pumpkin puree was too cold. Let the puree sit at room temperature for 15 minutes before mixing.
Cooking Tips & Techniques
Over the years, I’ve made a few mistakes so you don’t have to. Here are my best tips for perfect no-bake pumpkin cheesecake bars every single time.
Temperature is everything. This is the number one lesson I learned the hard way. Your cream cheese needs to be truly softened—not just out of the fridge for 10 minutes. Give it at least an hour on the counter. Cold cream cheese will leave you with lumpy filling. On the flip side, your heavy cream must be cold. If it’s even slightly warm, it won’t whip properly. Keep it in the fridge until the very last minute.
Don’t over-whip the cream. I’ve done this more times than I want to admit. You want stiff peaks, but if you keep going, you’ll end up with butter. Stop as soon as the peaks hold their shape and the cream looks billowy. If you see it starting to look grainy, you’ve gone too far. You can still use it, but the texture of your bars won’t be as silky.
Fold, don’t stir. When combining the whipped cream with the cream cheese or pumpkin, use a gentle folding motion. Cut through the center, scrape along the bottom, and turn the bowl. Repeat until just combined. Over-mixing deflates the air and makes the filling dense.
Chill time is non-negotiable. I know you want to eat them right away. I’ve been there. But these bars need time to set. If you slice too early, you’ll get a mess. Plan ahead. Make them the day before your event. They actually taste better after a full night in the fridge—the flavors meld together and the texture becomes perfectly creamy.
Slice with a hot knife. This is my favorite trick for clean, bakery-style bars. Run your knife under hot water, dry it, and make one cut. Wipe the blade clean and repeat. It takes a little extra time, but the results are worth it, especially if you’re serving guests.
Variations & Adaptations
One of the best things about this recipe is how easy it is to change up. Here are a few variations I’ve tried and loved.
Gingersnap Crust: Swap the graham crackers for crushed gingersnap cookies. The spicy, molasses flavor of the gingersnaps pairs beautifully with the pumpkin. I’ve done this for Thanksgiving and it was a huge hit. Just use the same proportions—2 cups crumbs, 1/2 cup melted butter, no extra sugar needed since gingersnaps are already sweet.
Chocolate Drizzle: Melt 1/2 cup of dark chocolate chips with 1 teaspoon of coconut oil and drizzle it over the top after chilling. The bitterness of the dark chocolate cuts through the sweetness of the cheesecake. I made this version for a Halloween party and people went crazy for it.
Pumpkin Spice Latte Twist: Add 1 tablespoon of instant espresso powder to the pumpkin mixture along with the spices. It gives the bars a subtle coffee flavor that makes them taste like your favorite fall drink in dessert form. I tried this on a whim one rainy Sunday and now it’s my go-to for adult gatherings.
Dairy-Free Option: Use a plant-based cream cheese (like Kite Hill or Violife) and substitute coconut cream for the heavy cream. Chill the can of coconut cream overnight and scoop out only the solid part. The texture will be a little different—slightly less firm—but the flavor is still fantastic. I’ve served this to dairy-free friends and they were thrilled.
Mini Cheesecake Bites: Press the crust into a mini muffin tin lined with paper liners, then spoon the fillings on top. Chill for at least 4 hours. These are perfect for parties where people want to grab and go. Just be prepared—they disappear fast.
Serving & Storage Suggestions
These no-bake pumpkin cheesecake bars are best served cold, straight from the fridge. I like to let them sit at room temperature for about 5 minutes before slicing—just enough to take the chill off without compromising the structure. If you’re serving a crowd, arrange them on a platter and garnish with a dollop of whipped cream and a light dusting of cinnamon or pumpkin pie spice. A drizzle of caramel sauce makes them look extra special and adds a lovely sweetness.
For drinks, these bars pair beautifully with hot coffee, spiced apple cider, or a warm chai latte. If you’re serving them at a dinner party, a glass of dessert wine like a late harvest Riesling or a tawny port is a wonderful match. I’ve also served them alongside a scoop of vanilla ice cream, and honestly, it’s a combination I can’t recommend enough.
Storage: Keep the bars in an airtight container in the refrigerator. They’ll stay fresh for up to 5 days. I’ve never had them last longer than that because they’re always eaten first, but they should be fine. You can also freeze them for up to 2 months. Wrap the entire slab (or individual bars) tightly in plastic wrap, then in foil. Thaw in the refrigerator overnight before serving. The texture remains remarkably creamy after freezing—I’ve done it several times when I wanted to get ahead on holiday prep.
One thing I love about this recipe is that the flavors actually improve after a day or two in the fridge. The spices meld with the cream cheese, and everything becomes more cohesive. So don’t worry if you make them ahead—they’ll be even better.
Nutritional Information & Benefits
Let’s be honest—these are a treat. But I believe in enjoying dessert without guilt, and this recipe uses real, whole ingredients. Here’s a rough estimate per bar (based on 24 servings):
- Calories: 210
- Fat: 14g
- Carbohydrates: 18g
- Protein: 3g
- Sugar: 12g
The pumpkin puree is a good source of vitamin A and fiber, and the cream cheese provides calcium and protein. The spices—cinnamon, ginger, nutmeg, cloves—are known for their anti-inflammatory properties. So while I wouldn’t call these health food, they’re certainly not empty calories. They’re a dessert made with love and real ingredients, and that counts for something.
Dietary Considerations: This recipe contains gluten (from the graham crackers), dairy (from the cream cheese and heavy cream), and eggs are not used. For gluten-free or dairy-free adaptations, see the Variations section above.
Allergen Note: This recipe contains milk and wheat. If you’re serving a crowd with allergies, I recommend labeling the dish or offering a separate allergen-free option.
Conclusion
These crowd-pleasing no-bake pumpkin cheesecake bars are everything I want in a fall dessert: easy, impressive, and absolutely delicious. They’ve saved me more times than I can count—from last-minute potluck invites to holiday dinners where I needed one less thing to worry about. The fact that they come together without turning on the oven is just the icing on the cake.
I hope you give them a try and make them your own. Maybe you’ll add a different crust, or a new topping, or serve them with something I’ve never thought of. That’s the beauty of a good recipe—it’s a starting point, not a rulebook. I’d love to hear how they turn out for you. Drop a comment below and let me know if you made any changes, or tag me in your photos on social media. I genuinely read every single one.
Happy fall, friends. Go make something delicious.
Frequently Asked Questions
Can I make these no-bake pumpkin cheesecake bars gluten-free?
Absolutely. Just use gluten-free graham crackers or crushed gluten-free cookies for the crust. The rest of the ingredients are naturally gluten-free.
How long do these bars need to chill?
At least 6 hours, but overnight is best. The longer they chill, the cleaner the slices and the better the texture.
Can I use pumpkin pie filling instead of pumpkin puree?
No, I wouldn’t recommend it. Pumpkin pie filling is already sweetened and spiced, so it will throw off the balance of the recipe. Stick with 100% pure pumpkin puree.
Can I freeze these cheesecake bars?
Yes! Wrap the slab or individual bars tightly in plastic wrap and then foil. Freeze for up to 2 months. Thaw in the refrigerator overnight before serving.
Why did my cream cheese layer turn out lumpy?
Your cream cheese was probably too cold. Make sure it’s softened at room temperature for at least an hour before you start. If it’s still lumpy, beat it for an extra minute to smooth it out.
Pin This Recipe!
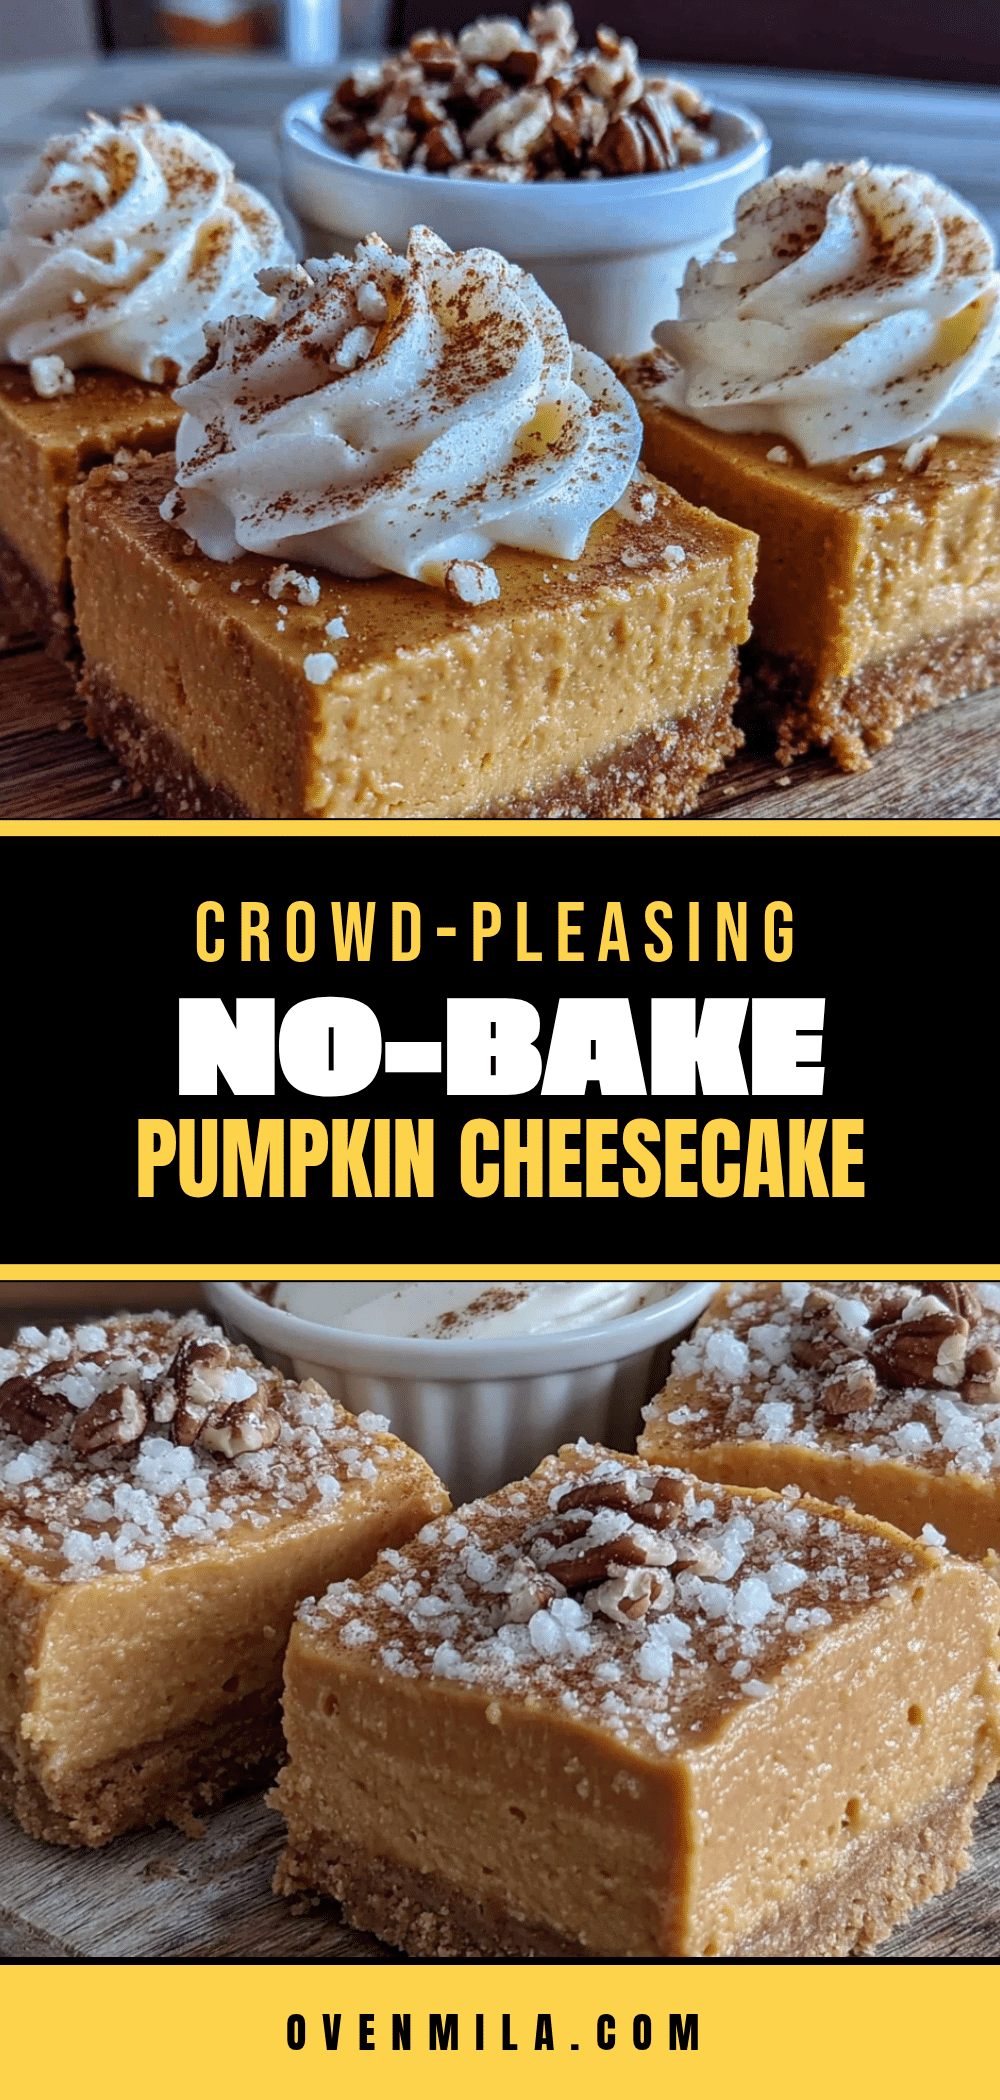
Crowd-Pleasing No-Bake Pumpkin Cheesecake Bars: Easy Fall Dessert
These no-bake pumpkin cheesecake bars are the ultimate easy fall dessert. With a buttery graham cracker crust, a silky cream cheese layer, and a spiced pumpkin filling, they’re perfect for potlucks, Thanksgiving, or any gathering. No oven required!
- Prep Time: 30 minutes
- Cook Time: 0 minutes
- Total Time: 6 hours 30 minutes (includes chilling)
- Yield: 24 bars 1x
- Category: Dessert
- Cuisine: American
Ingredients
- 2 cups (200g) graham cracker crumbs (about 14–15 full sheets)
- 1/2 cup (113g) unsalted butter, melted
- 1/4 cup (50g) granulated sugar
- 1/4 teaspoon salt
- 16 oz (450g) full-fat cream cheese, softened
- 1/2 cup (100g) granulated sugar
- 1 teaspoon vanilla extract
- 1 cup (240ml) heavy whipping cream, cold
- 1 cup (245g) pumpkin puree (not pumpkin pie filling)
- 1/2 cup (100g) packed light brown sugar
- 1 teaspoon ground cinnamon
- 1/2 teaspoon ground ginger
- 1/4 teaspoon ground nutmeg
- 1/8 teaspoon ground cloves
- 1/4 teaspoon salt
- 1 teaspoon vanilla extract
- 1/2 cup (120ml) heavy whipping cream, cold
- Whipped cream (for garnish, optional)
- Caramel sauce (for garnish, optional)
- Crushed pecans or gingersnap cookies (for garnish, optional)
Instructions
- Line a 9×13-inch baking dish with parchment paper, leaving a 2-inch overhang on the long sides.
- In a medium bowl, combine graham cracker crumbs, melted butter, sugar, and salt. Stir until the mixture looks like wet sand.
- Press the crust mixture firmly into the bottom of the prepared pan. Use the bottom of a measuring cup to pack it down evenly. Refrigerate while making the fillings.
- In a large bowl, beat softened cream cheese with an electric mixer on medium speed until smooth and creamy, about 2 minutes. Scrape down the sides.
- Add 1/2 cup sugar and 1 teaspoon vanilla extract to the cream cheese. Beat for another minute until well combined and smooth.
- In a separate medium bowl, whip 1 cup cold heavy cream on medium-high speed until stiff peaks form, about 3-4 minutes.
- Gently fold the whipped cream into the cream cheese mixture using a spatula until no white streaks remain. Spread evenly over the chilled crust. Return to the fridge.
- In another large bowl, whisk together pumpkin puree, brown sugar, cinnamon, ginger, nutmeg, cloves, 1/4 teaspoon salt, and 1 teaspoon vanilla extract until smooth.
- In a separate medium bowl, whip 1/2 cup cold heavy cream until stiff peaks form.
- Fold the whipped cream into the pumpkin mixture in two additions, folding gently until uniform and mousse-like.
- Carefully spread the pumpkin layer over the cream cheese layer, smoothing the top with a spatula.
- Cover the pan tightly with plastic wrap or foil. Refrigerate for at least 6 hours, preferably overnight.
- Once fully chilled, lift the bars out of the pan using the parchment overhang. Place on a cutting board.
- Use a sharp knife to slice into squares (6 rows by 4 rows for 24 bars). For clean cuts, run the knife under hot water, dry it, and slice. Wipe the blade clean between cuts.
- Garnish with whipped cream, caramel sauce, or crushed pecans if desired. Serve cold.
Notes
For best results, chill overnight. Use full-fat cream cheese and cold heavy cream. If cream cheese is lumpy, it wasn’t softened enough. For gluten-free, use gluten-free graham crackers. For dairy-free, use plant-based cream cheese and coconut cream (chill can overnight and use only solid part).
Nutrition
- Serving Size: 1 bar
- Calories: 210
- Sugar: 12
- Sodium: 150
- Fat: 14
- Saturated Fat: 8
- Carbohydrates: 18
- Fiber: 1
- Protein: 3
Keywords: no-bake pumpkin cheesecake bars, easy fall dessert, pumpkin cheesecake, no-bake dessert, pumpkin bars, cheesecake bars, fall dessert, crowd-pleasing dessert


