I was standing in line at the hardware store last December, holding a bag of replacement cabinet handles, when the woman behind me started talking about cream cheese. Not to anyone in particular, mind you. She was just sort of muttering to herself about how the block needed to be truly room temperature, not just sort of soft. I turned around, and she looked at me with this very serious expression and said, “You can’t rush a cheesecake, honey. It knows.” Her name was Margie, and she was a retired pastry chef who now worked the returns desk. By the time I paid for my handles, she had described in detail how she layers dark chocolate ganache over a peppermint cheesecake filling on a crushed candy cane crust. I scribbled it on the back of my receipt because, honestly, you don’t forget a recipe like that. I’ve tweaked it a bit over the years, but the heart of it—that creamy, cool filling against the snap of peppermint—is all Margie.
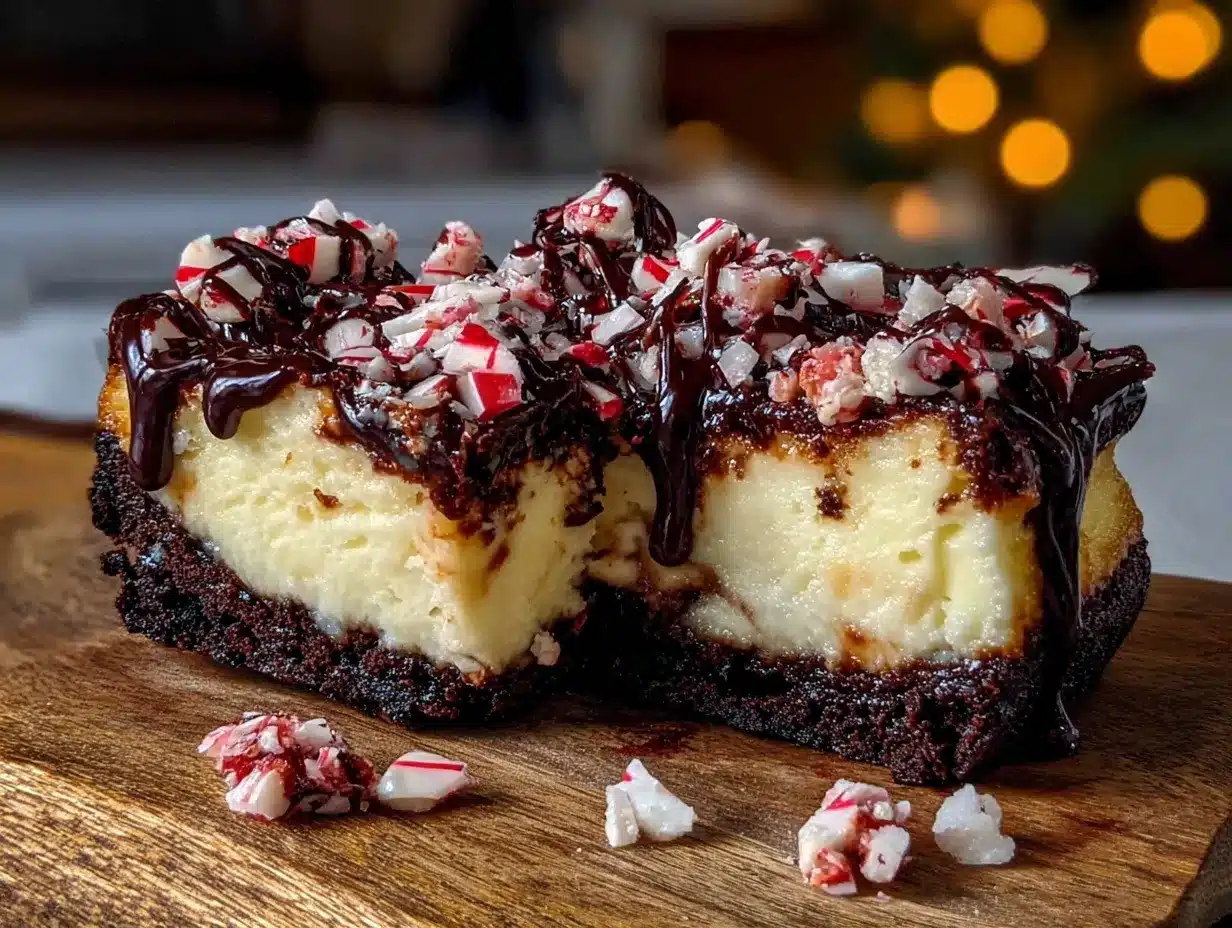
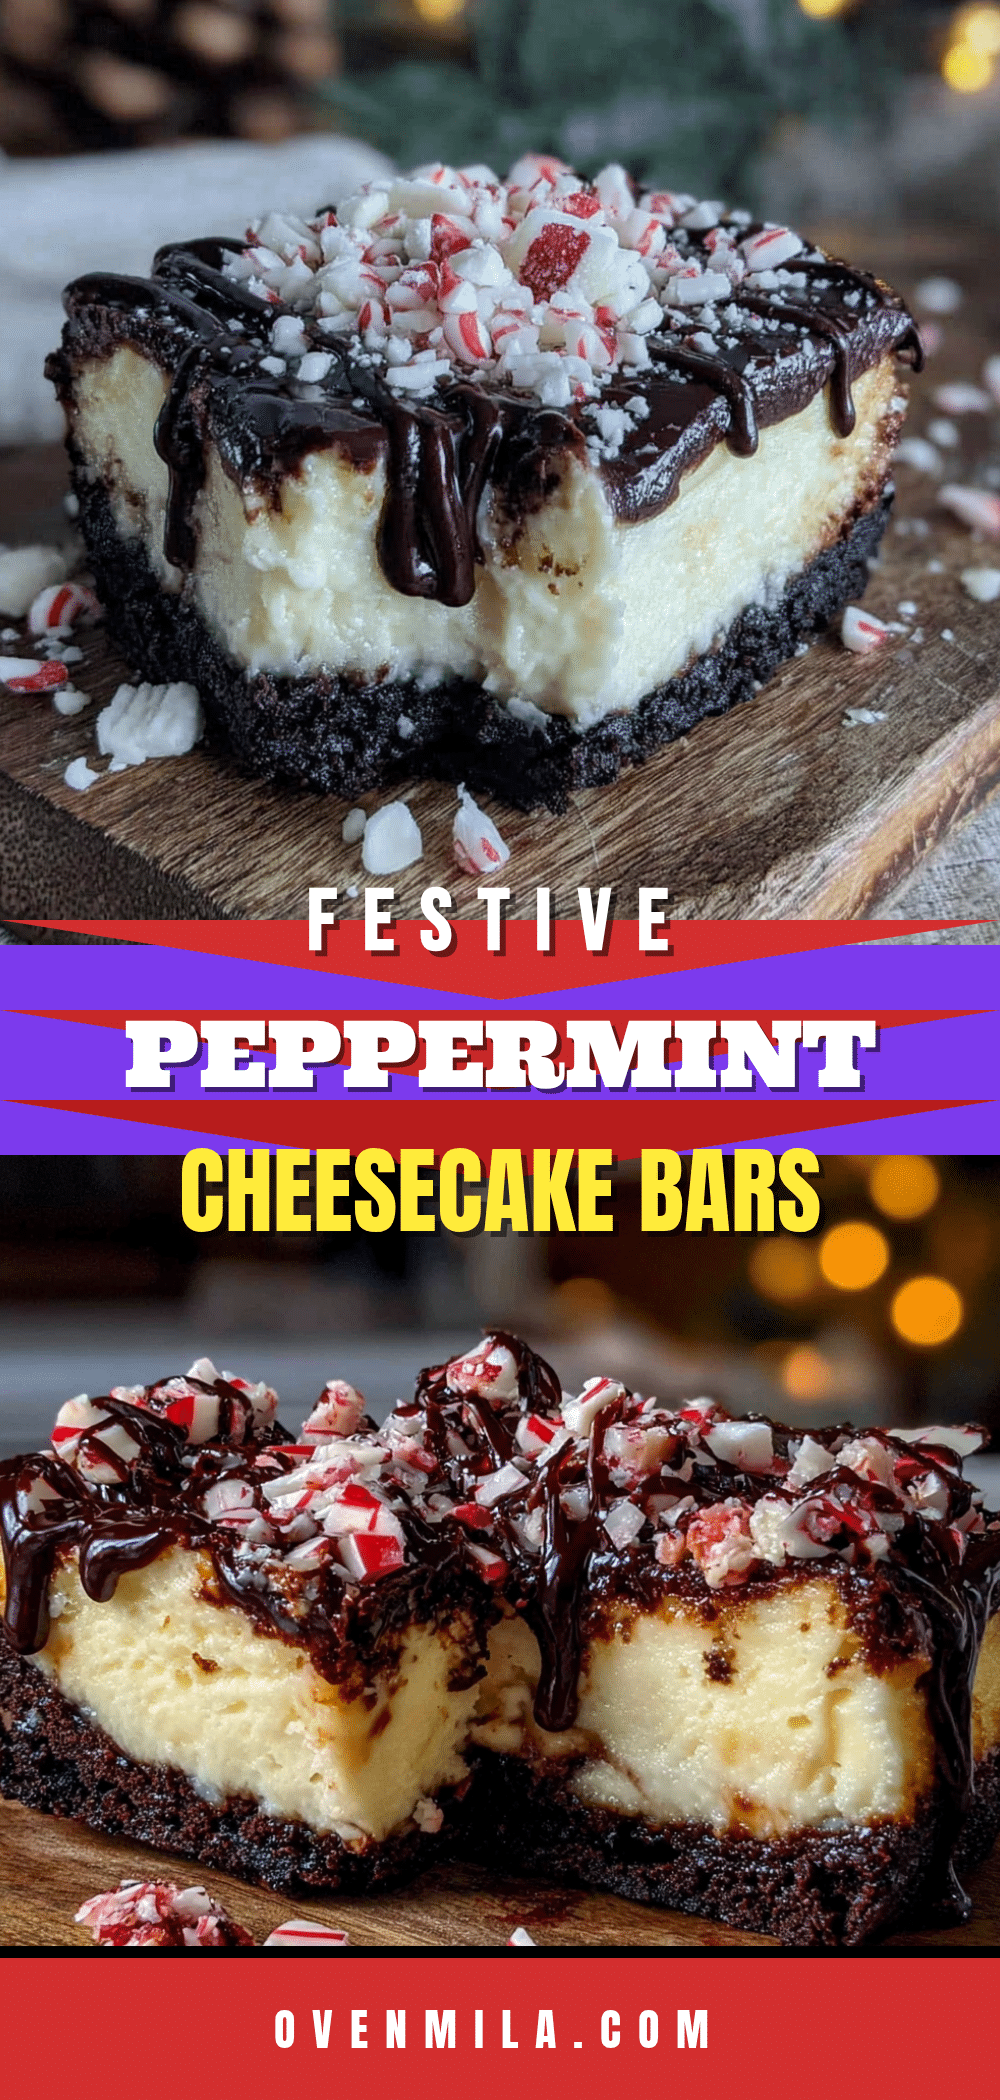
These Festive Peppermint Bark Cheesecake Bars are the dessert you bring to a holiday party and watch disappear. They have that classic cheesecake richness, but the peppermint keeps it light and bright. The chocolate crust gives it a fudgy base, and the white chocolate drizzle on top makes it look like you spent hours on it. Maybe you’ve been there, staring at a Pinterest board full of complicated holiday desserts and feeling a little overwhelmed. Let me tell you, these bars are the answer. They look impressive but come together without the fuss of a water bath or a springform pan. I have made these for three different Christmas gatherings now, and every single time, someone asks for the recipe. That’s how you know you’ve got a keeper.
Why You’ll Love This Recipe
These bars have become my go-to holiday dessert for a reason. They hit that perfect sweet spot between fancy and approachable. I have tested this recipe six times to get the ratios just right, and let me tell you, the feedback from my taste-testers (my very honest family) has been overwhelmingly positive.
- Quick & Easy: You get all the flavor of a traditional cheesecake without the water bath or the cracking worries. These bars are ready to chill in about 30 minutes of active work.
- Simple Ingredients: No fancy grocery trips needed. You likely already have cream cheese, butter, and sugar in your kitchen. The peppermint and candy canes are the only special purchases.
- Perfect for the Holidays: These are great for Christmas cookie exchanges, holiday brunches, or a cozy dessert after a winter dinner. They fit right in with the festive season.
- Crowd-Pleaser: The combination of chocolate, peppermint, and creamy cheesecake is a universal win. Kids love the crunch, and adults appreciate the sophisticated flavor.
- Unbelievably Delicious: The texture is what gets me every time. The smooth, dense cheesecake layer paired with the crunchy crust and the snap of the peppermint topping is pure magic.
What makes these bars different from other peppermint desserts is the balance. I don’t use peppermint extract in the cheesecake itself—just crushed candy canes folded in. This gives you those little pockets of minty crunch without an overpowering toothpaste flavor. The chocolate crust is also thicker than most recipes call for, which I found makes the bars sturdier and more satisfying. It is comfort food reimagined for the holidays—familiar but with a fresh twist that makes you close your eyes after the first bite.
What Ingredients You Will Need
This recipe uses simple, wholesome ingredients to deliver that bold peppermint and chocolate flavor without the fuss. Most of these are pantry staples, especially during the holiday season. Here is what you will need:
For the Chocolate Cookie Crust
- 1 ½ cups (150g) chocolate cookie crumbs (about 18 Oreos, filling removed, or use chocolate graham crackers)
- ¼ cup (50g) granulated sugar
- 6 tablespoons (85g) unsalted butter, melted
- Pinch of salt (balances the sweetness)
For the Peppermint Cheesecake Filling
- 16 ounces (450g) full-fat cream cheese, softened (I recommend Philadelphia for the smoothest texture)
- ¾ cup (150g) granulated sugar
- 2 large eggs, room temperature
- 1 teaspoon vanilla extract
- ½ cup (120ml) sour cream, room temperature (adds tanginess and creaminess)
- ½ cup (75g) crushed candy canes or peppermint candies (about 6-8 regular-sized candy canes)
For the Topping
- ½ cup (90g) semi-sweet chocolate chips
- ¼ cup (60ml) heavy cream
- ½ cup (90g) white chocolate chips
- ¼ cup (40g) crushed candy canes, for garnish
When choosing your cream cheese, make sure it is the block-style, not the spreadable kind in a tub. The spreadable kind has added air and water, which will make your cheesecake filling too loose. For the candy canes, I prefer the classic red-and-white striped ones. The flavored ones (like blue raspberry) work in a pinch, but they change the color of the filling. You can crush them by placing them in a sealed zip-top bag and whacking them with a rolling pin. It is oddly satisfying.
If you want a gluten-free option, use gluten-free chocolate sandwich cookies for the crust. For a dairy-free version, you can try dairy-free cream cheese and coconut cream in place of the sour cream, but I will be honest—the texture is not quite the same. The full-fat dairy really makes these bars shine.
Equipment Needed
You do not need a lot of fancy equipment for these bars, which is part of why I love them. Here is what you will need:
- 9×9-inch square baking pan (an 8×8 works too, but the bars will be slightly thicker)
- Parchment paper (for easy lifting and cleanup)
- Mixing bowls (one large, one medium)
- Electric hand mixer or stand mixer (a whisk and some elbow grease works, but your arm will be tired)
- Rolling pin or food processor (for crushing cookies and candy canes)
- Small saucepan (for melting the chocolate ganache)
- Spatula (for spreading the batter evenly)
If you do not have a 9×9 pan, a 9-inch round cake pan works perfectly. Just adjust the baking time by a few minutes. I have also used a disposable aluminum pan when I was bringing these to a potluck, and they turned out just fine. For crushing the cookies, I have found that a food processor gives you the most uniform crumbs, but a rolling pin and a zip-top bag is a great arm workout.
Preparation Method
Let us walk through this step by step. I have made this recipe enough times to know exactly where things can go wrong, so I will point those spots out as we go.
- Preheat and Prep: Preheat your oven to 325°F (160°C). Line your 9×9-inch baking pan with parchment paper, leaving a 2-inch overhang on two opposite sides. This creates handles for lifting the bars out later. Lightly grease the parchment with non-stick spray.
- Make the Crust: In a medium bowl, combine the chocolate cookie crumbs, sugar, and salt. Pour in the melted butter and stir with a fork until the mixture looks like wet sand and holds together when you squeeze it. Press this mixture firmly and evenly into the bottom of your prepared pan. Use the flat bottom of a measuring cup to really pack it down—this prevents the crust from crumbling when you cut the bars. Bake the crust for 10 minutes, then set it aside to cool slightly while you make the filling.
- Make the Cheesecake Filling: In a large bowl, beat the softened cream cheese with an electric mixer on medium speed until it is completely smooth and free of lumps. This should take about 2 minutes. Scrape down the sides and the bottom of the bowl with a spatula. Add the sugar and beat for another 2 minutes until light and fluffy.
- Add the Eggs: Add the eggs, one at a time, beating on low speed after each addition until just combined. Do not overmix here. Overmixing incorporates too much air, which can cause the cheesecake to puff up and crack as it cools. I learned this the hard way after my first batch looked like the surface of the moon.
- Finish the Filling: Beat in the vanilla extract and sour cream on low speed until smooth. The mixture should be silky and thick. Gently fold in the crushed candy canes with a spatula. The batter will look speckled with red and white bits—that is exactly what you want.
- Assemble and Bake: Pour the cheesecake filling over the warm crust and spread it into an even layer with your spatula. Gently tap the pan on the counter a few times to release any air bubbles. Bake at 325°F (160°C) for 35-40 minutes. The edges should be set and slightly puffed, but the center should still jiggle slightly when you gently shake the pan. Do not overbake—the residual heat will continue cooking the center as it cools.
- Cool Completely: Place the pan on a wire rack and let it cool to room temperature. This takes about 1-2 hours. Then, cover the pan with plastic wrap and refrigerate for at least 4 hours, or overnight. Chilling is non-negotiable here. The bars need this time to set properly so you get clean slices.
- Make the Toppings: Once the bars are fully chilled and set, make the chocolate ganache. Place the semi-sweet chocolate chips in a small heatproof bowl. Heat the heavy cream in a small saucepan until it just begins to simmer (do not let it boil). Pour the hot cream over the chocolate chips and let it sit for 1 minute. Then, stir gently until the chocolate is completely melted and the ganache is smooth. Pour this over the chilled cheesecake layer and spread it into an even layer.
- Add the White Chocolate Drizzle: Melt the white chocolate chips in a microwave-safe bowl in 20-second intervals, stirring between each, until smooth. Drizzle the melted white chocolate over the dark chocolate ganache. You can use a fork or a small piping bag for this. While the chocolate is still wet, sprinkle the remaining crushed candy canes over the top.
- Final Chill and Slice: Return the pan to the refrigerator for at least 30 minutes to let the chocolate set. Once firm, use the parchment paper handles to lift the entire block out of the pan. Place it on a cutting board and use a sharp, large knife to slice it into 16 bars. For the cleanest cuts, wipe the knife clean between each slice.
Cooking Tips & Techniques
Over the years, I have made a few mistakes with these bars so you do not have to. Here are the things I wish I had known from the start.
Room temperature ingredients matter. I cannot stress this enough. Cold cream cheese creates lumps that are nearly impossible to beat out completely. Cold eggs can cause the batter to curdle. Take your cream cheese, eggs, and sour cream out of the refrigerator at least 30 minutes before you start baking. Set a timer if you have to—I have forgotten and ended up with a lumpy filling that I had to strain through a sieve.
Do not skip the parchment paper. I know it seems like an extra step, but trust me on this. The first time I made these, I just greased the pan, and then I spent fifteen minutes trying to pry the first bar out without destroying it. The parchment paper handles make lifting the entire block out a breeze, and your bars will have perfectly straight edges.
Watch the baking time. Every oven runs a little differently. My old oven would bake these in exactly 35 minutes, but my new one takes closer to 40. Start checking at the 30-minute mark. The edges should look set and slightly golden, but the center should still have a gentle wobble. If the center looks completely firm and dry, you have overbaked it, and the texture will be dense and slightly rubbery.
Crush the candy canes finely. If you leave large chunks of candy cane in the filling, they can create pockets of syrup as they dissolve during baking. I aim for pieces about the size of coarse sand. A few slightly larger pieces are fine for texture, but avoid anything bigger than a pea.
Variations & Adaptations
One of the best things about this recipe is how easily you can adapt it to suit different tastes or dietary needs. Here are some variations I have tried and loved.
Dark Chocolate Peppermint Bars: Swap the semi-sweet chocolate chips in the ganache for dark chocolate (70% cocoa or higher). This gives the bars a more intense, less sweet flavor that pairs beautifully with the mint. I made this version for my brother who claims he “doesn’t like sweet desserts,” and he ate three bars.
Gluten-Free Version: Use gluten-free chocolate sandwich cookies for the crust. Most brands work well, but make sure to check the label. The filling itself is naturally gluten-free, so this is an easy swap. I have used both store-brand and name-brand gluten-free cookies, and they all worked fine.
Mint Chocolate Chip Twist: Fold ½ cup of mini chocolate chips into the cheesecake filling along with the crushed candy canes. This adds another layer of chocolate throughout the bars. It is a great option if you are a fan of mint chocolate chip ice cream.
Dairy-Free Adaptation: Use dairy-free cream cheese (like Kite Hill or Tofutti) and full-fat coconut cream in place of the sour cream. The texture will be slightly softer, so I recommend chilling the bars for at least 6 hours before slicing. The flavor is still fantastic—my dairy-intolerant friend gave them a thumbs up.
Serving & Storage Suggestions
These bars are best served cold, straight from the refrigerator. The chilled cheesecake has a dense, creamy texture that is incredibly satisfying. I like to let them sit at room temperature for about 5 minutes before serving, just to take the chill off, but that is a personal preference.
For a beautiful presentation, arrange the bars on a festive platter and garnish with a few whole candy canes or a sprig of fresh mint. They pair wonderfully with a hot cup of coffee or a glass of cold milk. If you are serving them at a party, consider placing them on a cake stand to make them the centerpiece of the dessert table.
Storage: Store leftover bars in an airtight container in the refrigerator for up to 5 days. The flavors actually deepen and meld together after a day or two, so they taste even better on day two. I have found that the crust stays crisp for about 3 days before it starts to soften slightly.
Freezing: These bars freeze beautifully. Wrap the entire block (or individual bars) tightly in plastic wrap, then in a layer of aluminum foil. Freeze for up to 3 months. When you are ready to serve, thaw them in the refrigerator overnight. Do not thaw them at room temperature, as the condensation can make the topping weep. I always keep a batch in my freezer during December for unexpected guests.
Nutritional Information & Benefits
Let us be real—these are a treat, not a health food. But knowing what is in them can help you enjoy them mindfully. Here is the approximate nutritional breakdown for one bar (based on 16 servings):
| Nutrient | Amount per Bar |
|---|---|
| Calories | 285 |
| Total Fat | 18g |
| Saturated Fat | 10g |
| Cholesterol | 65mg |
| Sodium | 180mg |
| Total Carbohydrates | 30g |
| Dietary Fiber | 1g |
| Sugars | 22g |
| Protein | 4g |
On the plus side, the cream cheese provides a good amount of calcium and protein. The dark chocolate in the ganache contains antioxidants and a small amount of iron. And the peppermint—well, it is traditionally used to aid digestion after a heavy meal. So you can tell yourself you are being healthy. Honestly, I think the biggest benefit is the joy it brings to a holiday table. Sometimes that is enough.
Frequently Asked Questions
Can I use peppermint extract instead of crushed candy canes?
You can, but I do not recommend it as a direct swap. Peppermint extract is very concentrated, and it is easy to overdo it. If you want to use extract, start with ¼ teaspoon and taste the batter before adding more. You will miss out on the crunchy texture of the candy canes, though, so consider adding some finely crushed candy canes on top for garnish anyway.
Why did my cheesecake filling crack?
Cracks usually happen for two reasons: overbaking or overmixing. If the bars are baked too long, the eggs overcook and the structure tightens, causing cracks. If you beat the filling too vigorously after adding the eggs, you incorporate too much air, which expands in the oven and then collapses. Bake just until the edges are set and the center jiggles slightly, and mix on low speed after adding the eggs.
Can I use a different type of cookie for the crust?
Absolutely. Chocolate graham crackers, chocolate wafer cookies, or even regular graham crackers work well. If you use regular graham crackers, the crust will be less chocolaty, so you might want to add a tablespoon of cocoa powder to the crumb mixture. Thin mint cookies would also be incredible here.
How do I get clean, neat slices?
The key is a sharp knife and patience. After the bars are fully set, use a large, sharp chef’s knife. Wipe the blade clean with a damp paper towel between each cut. You can also run the knife under hot water and dry it before slicing—the heat helps the knife glide through the chocolate topping without dragging it.
Can I make these bars in advance for a party?
Yes, and I actually recommend it. These bars taste even better after a day or two in the refrigerator because the flavors have time to meld. You can make them up to 3 days in advance. Just keep them covered in the refrigerator, and add the final garnish of crushed candy canes right before serving so they stay crunchy.
Conclusion
These Festive Peppermint Bark Cheesecake Bars are the kind of recipe that becomes a tradition. They are the dessert that people start asking about in November, the one that gets requested year after year. I make them every December now, and every time I pull that pan out of the refrigerator, I think of Margie at the hardware store. It is funny where good recipes come from, is not it?
I hope you give these bars a try and make them your own. Maybe you will add a little extra chocolate, or swap in dark chocolate, or double the candy cane crunch. That is the beauty of a good base recipe—it is a starting point for your own creativity. If you do make them, I would love to hear about it. Drop a comment below and tell me how they turned out, or share any twists you added. And if you are looking for more holiday inspiration, check out our classic chocolate crinkle cookies or these easy snowball cookies for your cookie platter. Happy baking, and here is to a delicious holiday season!
Pin This Recipe!
Perfect Peppermint Bark Cheesecake Bars Recipe
These Festive Peppermint Bark Cheesecake Bars are the dessert you bring to a holiday party and watch disappear. They have that classic cheesecake richness, but the peppermint keeps it light and bright.
- Prep Time: 30 minutes
- Cook Time: 35-40 minutes
- Total Time: 5 hours 10 minutes (including chilling)
- Yield: 16 bars 1x
- Category: Dessert
- Cuisine: American
Ingredients
- 1 ½ cups (150g) chocolate cookie crumbs (about 18 Oreos, filling removed, or use chocolate graham crackers)
- ¼ cup (50g) granulated sugar
- 6 tablespoons (85g) unsalted butter, melted
- Pinch of salt
- 16 ounces (450g) full-fat cream cheese, softened
- ¾ cup (150g) granulated sugar
- 2 large eggs, room temperature
- 1 teaspoon vanilla extract
- ½ cup (120ml) sour cream, room temperature
- ½ cup (75g) crushed candy canes or peppermint candies (about 6–8 regular-sized candy canes)
- ½ cup (90g) semi-sweet chocolate chips
- ¼ cup (60ml) heavy cream
- ½ cup (90g) white chocolate chips
- ¼ cup (40g) crushed candy canes, for garnish
Instructions
- Preheat your oven to 325°F (160°C). Line your 9×9-inch baking pan with parchment paper, leaving a 2-inch overhang on two opposite sides. Lightly grease the parchment with non-stick spray.
- In a medium bowl, combine the chocolate cookie crumbs, sugar, and salt. Pour in the melted butter and stir with a fork until the mixture looks like wet sand and holds together when you squeeze it. Press this mixture firmly and evenly into the bottom of your prepared pan. Use the flat bottom of a measuring cup to really pack it down. Bake the crust for 10 minutes, then set it aside to cool slightly while you make the filling.
- In a large bowl, beat the softened cream cheese with an electric mixer on medium speed until it is completely smooth and free of lumps, about 2 minutes. Scrape down the sides and the bottom of the bowl with a spatula. Add the sugar and beat for another 2 minutes until light and fluffy.
- Add the eggs, one at a time, beating on low speed after each addition until just combined. Do not overmix.
- Beat in the vanilla extract and sour cream on low speed until smooth. Gently fold in the crushed candy canes with a spatula.
- Pour the cheesecake filling over the warm crust and spread it into an even layer with your spatula. Gently tap the pan on the counter a few times to release any air bubbles. Bake at 325°F (160°C) for 35-40 minutes. The edges should be set and slightly puffed, but the center should still jiggle slightly when you gently shake the pan.
- Place the pan on a wire rack and let it cool to room temperature, about 1-2 hours. Then, cover the pan with plastic wrap and refrigerate for at least 4 hours, or overnight.
- Once the bars are fully chilled and set, make the chocolate ganache. Place the semi-sweet chocolate chips in a small heatproof bowl. Heat the heavy cream in a small saucepan until it just begins to simmer (do not let it boil). Pour the hot cream over the chocolate chips and let it sit for 1 minute. Then, stir gently until the chocolate is completely melted and the ganache is smooth. Pour this over the chilled cheesecake layer and spread it into an even layer.
- Melt the white chocolate chips in a microwave-safe bowl in 20-second intervals, stirring between each, until smooth. Drizzle the melted white chocolate over the dark chocolate ganache. While the chocolate is still wet, sprinkle the remaining crushed candy canes over the top.
- Return the pan to the refrigerator for at least 30 minutes to let the chocolate set. Once firm, use the parchment paper handles to lift the entire block out of the pan. Place it on a cutting board and use a sharp, large knife to slice it into 16 bars. For the cleanest cuts, wipe the knife clean between each slice.
Notes
Room temperature ingredients matter. Do not skip the parchment paper. Watch the baking time. Crush the candy canes finely. For clean slices, use a sharp knife and wipe it clean between cuts.
Nutrition
- Serving Size: 1 bar
- Calories: 285
- Sugar: 22
- Sodium: 180
- Fat: 18
- Saturated Fat: 10
- Carbohydrates: 30
- Fiber: 1
- Protein: 4
Keywords: peppermint bark cheesecake bars, holiday dessert, cheesecake bars, peppermint dessert, chocolate peppermint


