I was standing in line at the hardware store last October, holding a bag of lightbulbs I didn’t really need, when the woman behind me—a retired schoolteacher named Carol with silver hair and a sensible raincoat—started talking about deviled eggs.
Not just any deviled eggs, mind you. She was describing how she’d been making them for her Halloween block party for thirty years, and how her grandkids wouldn’t let her show up without “the spooky ones.” I honestly thought she was talking to someone else at first. But no, Carol saw me eyeing the Halloween decorations display and decided I needed her recipe.
“You pipe the filling so it looks like a spider body,” she said, gesturing with her free hand while balancing a bag of potting soil. “And you use black olives for the legs. It’s the easiest thing, but people lose their minds over them.”
I scribbled her instructions on the back of my receipt, half-convinced I’d never actually make them. But that weekend, with a Halloween party looming and absolutely no idea what to bring, I found myself hard-boiling a dozen eggs and digging through my pantry for olives. And let me tell you—Carol was right. These light & spooky spider deviled eggs are the kind of appetizer that disappears before anything else on the table.
Maybe you’ve had that moment where a stranger hands you something unexpectedly perfect. This is that recipe. It’s simple, it’s clever, and it’s genuinely delicious—not just a gimmick. Every time I make them, I think about Carol in her raincoat, and I smile.
Why You’ll Love This Recipe
Let’s be honest—Halloween food can be a mixed bag. You’ve got your candy overload, your creepy cupcakes that taste more like food coloring than actual cake, and those store-bought treats that nobody really wants. These spider deviled eggs are different. They’re the savory relief everyone craves between handfuls of candy corn.
- Quick & Easy: These come together in about 30 minutes, with most of that time being hands-off while the eggs boil and chill. Perfect for last-minute party prep.
- Simple Ingredients: You probably already have eggs and mayonnaise in your kitchen. The only special purchase is a can of black olives—and honestly, you might have those too.
- Perfect for Halloween Parties: Whether it’s a work potluck, a kid’s classroom celebration, or a grown-up costume party, these eggs fit right in. They’re spooky without being gross.
- Crowd-Pleaser: I’ve watched kids who swear they hate deviled eggs eat three of these. Something about the spider shape makes them irresistible.
- Unbelievably Delicious: The classic deviled egg filling is creamy, tangy, and perfectly seasoned. The olive spiders add a briny pop that complements the richness beautifully.
What makes this recipe different from all the other spider deviled eggs out there? It’s the balance. I’ve tested the filling-to-yolk ratio, the perfect amount of mustard, and the best way to pipe the filling so it actually looks like a spider body—not a sad blob. This isn’t just another Halloween recipe. It’s the one that’ll get asked for year after year.
There’s something deeply satisfying about bringing a platter of these to a party. People do a double-take. They laugh. They take pictures. And then they eat every single one. That’s the kind of recipe worth keeping.
What Ingredients You Will Need
This recipe uses simple, everyday ingredients to create something that looks far more complicated than it actually is. The magic is all in the presentation—the flavors are classic deviled egg perfection.
- 12 large eggs — Look for eggs that are at least a week old for easier peeling. Fresh eggs are harder to peel cleanly.
- 1/3 cup mayonnaise — I prefer Hellmann’s or Duke’s for their tangy flavor. Full-fat works best here for a creamy texture.
- 1 tablespoon yellow mustard — This gives the filling that classic yellow color and mild tang. Dijon works too, but the color will be paler.
- 1 teaspoon white vinegar — A tiny splash brightens everything up. Apple cider vinegar is a fine substitute.
- 1/4 teaspoon salt — Fine sea salt dissolves better than coarse kosher here.
- 1/8 teaspoon black pepper — Freshly ground is always better, but pre-ground works in a pinch.
- 1 can (6 ounces) large black olives — You need whole, pitted olives. The large ones are easier to slice into legs. I like Lindsay brand for their consistent size.
- Paprika for dusting — Smoked paprika adds a lovely depth, but regular works fine.
Ingredient Selection Tips: For the best texture, make sure your eggs are at room temperature before boiling. Cold eggs straight from the fridge can crack when they hit the hot water. And please—please—don’t use those pre-sliced olives. You need whole olives so you can control the size of your spider legs.
Substitution Guidance: If you’re avoiding dairy, most mayonnaise is dairy-free, but check the label. For a lighter version, you can use half Greek yogurt and half mayonnaise—though the texture will be slightly less rich. And if black olives aren’t your thing? Kalamata olives make wonderfully dramatic dark purple spiders.
Equipment Needed
You don’t need anything fancy for this recipe. That’s part of the beauty.
- Large saucepan or pot — Big enough to hold all 12 eggs in a single layer without crowding.
- Slotted spoon — For gently lowering eggs into the water and fishing them out.
- Mixing bowl — For mashing the yolks and mixing the filling.
- Fork or potato masher — A fork works fine, but a potato masher makes quick work of the yolks.
- Piping bag or zip-top bag — A piping bag with a star tip gives the best spider body shape, but a zip-top bag with the corner snipped off works perfectly.
- Sharp paring knife — For slicing the olives into legs. A dull knife will squish them.
- Cutting board — Preferably small, so the olive slices don’t wander off.
- Serving platter — A dark-colored platter makes the spiders pop. I use a black slate board I found at a thrift store.
Budget-Friendly Options: If you don’t have a piping bag, don’t buy one. A sturdy zip-top bag works just as well. And if you don’t have a star tip, you can simply snip the corner of the bag and pipe a round shape—it’ll still look like a spider body, I promise.
Preparation Method
- Hard-boil the eggs. Place the eggs in a single layer in your saucepan and cover with cold water by about an inch. Bring to a rolling boil over high heat. Once boiling, cover the pot, remove from heat, and let sit for exactly 12 minutes. While they sit, prepare an ice bath—a large bowl filled with ice and cold water.
- Cool the eggs. After 12 minutes, use your slotted spoon to transfer the eggs to the ice bath. Let them chill for at least 10 minutes. This stops the cooking and makes peeling infinitely easier. I’ve learned this the hard way—skipping the ice bath leads to green-ringed yolks and peeling frustration.
- Peel the eggs. Gently tap each egg on the counter to crack the shell all over, then roll it between your palms to loosen the shell. Start peeling from the wider end where the air pocket is. Rinse briefly under cool water to remove any tiny shell fragments. Pat dry with paper towels.
- Slice the eggs. Using a sharp knife, slice each egg in half lengthwise. Carefully pop out the yolks into your mixing bowl. Arrange the egg white halves on your serving platter, cut side up.
- Make the filling. Add the mayonnaise, mustard, vinegar, salt, and pepper to the bowl with the yolks. Mash everything together with a fork until completely smooth. No lumps allowed here—you want a silky, pipeable consistency. Taste and adjust seasoning. I usually add another pinch of salt at this point.
- Prepare the olives. Drain the olives and pat them dry with paper towels. For each spider, you’ll need one whole olive for the body and another olive sliced crosswise into thin rounds for the legs. Slice carefully—you want each round to be about 1/8-inch thick. You’ll need 8 slices per spider. This is the fiddliest part, but it goes faster than you’d think.
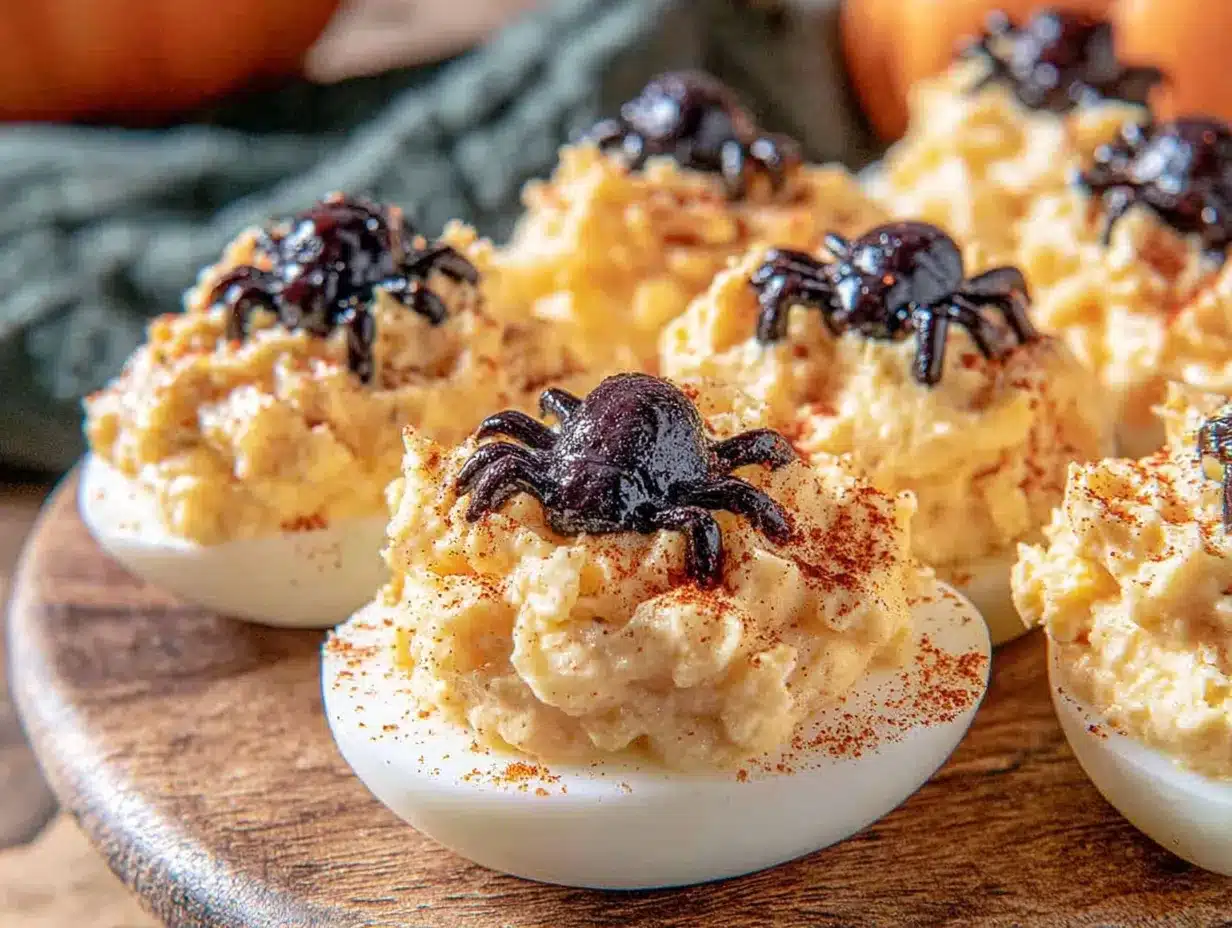
- Pipe the filling. Spoon the filling into your piping bag fitted with a star tip (or into a zip-top bag with a corner snipped). Pipe a generous mound onto each egg white half. You want it to look like a rounded spider body—not flat, not too tall, just a nice dome. The star tip creates ridges that look like fuzzy spider texture.
- Assemble the spiders. Place one whole olive on top of each piped filling mound—this is the spider’s body. Then, gently insert 8 olive slices around it as legs. I like to place 4 on each side, slightly angled so they look like the spider is creeping. Press them in just enough so they stay put.
- Dust with paprika. Lightly sprinkle paprika over the entire platter. It adds color and a tiny bit of smoky flavor. Don’t go overboard—you want the spiders to stand out.
- Chill before serving. Refrigerate the assembled eggs for at least 30 minutes before serving. This helps the filling firm up and the olive legs set in place. They’ll hold together much better this way.
Sensory Cue: When you mash the yolks with the mayonnaise, you’re looking for a texture that’s like thick frosting—smooth, spreadable, and just a little bit glossy. If it seems too stiff, add another teaspoon of mayonnaise. Too loose? A tiny bit more mashed yolk will fix it.
Personal Tip: I always boil an extra egg or two. Sometimes one cracks during boiling, or the yolk isn’t quite right, and having a backup saves the day. Plus, you can snack on the extra while you work.
Cooking Tips & Techniques
I’ve made these spider deviled eggs at least a dozen times now, and I’ve made every mistake in the book. Let me save you the trouble.
The Perfect Hard-Boiled Egg: The biggest mistake people make is overcooking. Twelve minutes off the heat is the sweet spot for fully set yolks without that dreaded green ring. If your yolks have a gray-green halo, you cooked them too long or shocked them with water that wasn’t cold enough.
Peeling Without Tears: Start peeling under running water. The water gets between the egg and the shell, helping it release more easily. And if you’re making these for a party, peel the eggs the night before and store them in the fridge—it saves so much stress on party day.
Olive Leg Strategy: Here’s the trick that took me three tries to figure out. Slice the olives while they’re still cold from the can. Cold olives slice more cleanly and don’t squish. And if an olive slice breaks? Just eat it and grab another. Nobody’s counting.
Piping Like a Pro: Don’t overfill your piping bag. You want enough filling to work with, but not so much that it’s hard to control. Fill the bag about halfway, twist the top closed, and squeeze from the top—not the middle. This gives you way more control.
Timing and Multitasking: While the eggs are boiling, slice your olives and set up your serving platter. While the eggs are chilling in the ice bath, make the filling. This recipe is all about overlapping tasks to save time. You can have everything assembled in under 20 minutes of active work.
Variations & Adaptations
One of the best things about this recipe is how easy it is to adapt. Here are some variations I’ve tried and loved.
Spicy Spider Eggs: Add 1/2 teaspoon of cayenne pepper or a splash of hot sauce to the filling. The heat pairs beautifully with the briny olives. I made these for a Halloween party where someone brought ghost pepper salsa, and they were a hit with the spice lovers.
Avocado Spider Eggs: Swap half the mayonnaise for mashed ripe avocado. The filling turns a gorgeous pale green and tastes incredibly fresh. Just be aware that the color will darken over time, so assemble these closer to serving time. I add a squeeze of lime juice to slow down the browning.
Smoky Paprika Spiders: Use smoked paprika instead of regular, and add 1/4 teaspoon of smoked salt to the filling. The smoky flavor makes these taste like they came off a grill. I serve these at fall gatherings where there’s a bonfire vibe.
Gluten-Free Note: This recipe is naturally gluten-free, which makes it perfect for guests with dietary restrictions. Just double-check your mayonnaise label—most are gluten-free, but it’s worth confirming.
Dairy-Free Adaptation: Use a vegan mayonnaise or make your own with aquafaba. The texture will be slightly different, but the flavor is still fantastic. I’ve tested this with Follow Your Heart’s Vegenaise and it worked beautifully.
Personal Favorite Variation: I once made these with a tablespoon of pickle relish mixed into the filling. The sweet-tangy crunch was unexpected and wonderful. My friend’s kid called them “pickle spiders” and ate six. High praise.
Serving & Storage Suggestions
These spider deviled eggs are best served chilled, straight from the fridge. The cold filling holds its shape better, and the olive legs stay firmly in place. I like to arrange them on a dark platter or a black slate board—the contrast makes the spiders look like they’re crawling across a midnight sky.
Complementary Dishes: These pair beautifully with other Halloween appetizers like mummy hot dogs, pumpkin-shaped cheese balls, or a bowl of bloody red pepper hummus. For drinks, a crisp cider or a dark stout complements the savory richness of the eggs.
Storage Instructions: Store any leftover spider deviled eggs in an airtight container in the refrigerator for up to 2 days. Place them in a single layer—don’t stack them, or you’ll have squished spiders. I line the container with a paper towel to absorb any excess moisture.
Reheating: Don’t. These are served cold, and reheating would ruin the texture. If they’ve been sitting out at a party for more than 2 hours, it’s safer to discard any leftovers.
How Flavors Develop: Honestly, these taste even better the next day. The flavors meld together overnight, and the filling becomes more cohesive. Just add the olive legs right before serving, as they can soften and lose their shape if stored too long on the filling.
Nutritional Information & Benefits
Per serving (2 spider deviled eggs):
- Calories: 180
- Protein: 12g
- Fat: 14g
- Carbohydrates: 2g
- Fiber: 0g
- Sugar: 1g
- Sodium: 320mg
Health Benefits: Eggs are a fantastic source of high-quality protein and contain essential nutrients like choline, which supports brain health. The olives provide healthy monounsaturated fats and antioxidants. This is one Halloween treat you can feel good about eating.
Dietary Considerations: This recipe is naturally gluten-free, low-carb, and keto-friendly. It’s also nut-free and soy-free (check your mayonnaise). For a lower-fat version, use half the mayonnaise and replace the rest with plain Greek yogurt.
Personal Wellness Perspective: I love that these spider deviled eggs let me participate in Halloween festivities without derailing my eating habits. They’re satisfying, protein-rich, and actually nourishing. It’s the perfect example of how holiday food doesn’t have to be all sugar and processed snacks.
Conclusion
These light & spooky spider deviled eggs are the Halloween appetizer you didn’t know you needed. They’re clever without being complicated, delicious without being heavy, and festive without requiring hours in the kitchen. Every time I make them, I think about Carol from the hardware store, and I’m grateful she shared her secret with a stranger.
I encourage you to make these your own. Adjust the seasoning, try different olive varieties, or experiment with the filling. That’s the beauty of a simple recipe—it’s a canvas for your creativity.
Have you made these spider deviled eggs? I’d love to hear how they turned out! Drop a comment below and tell me about your Halloween party, your favorite variation, or any tricks you discovered along the way. And if you’re looking for more spooky-but-simple recipes, check out our crispy garlic chicken for a savory main dish, or our pumpkin spice muffins for a sweet treat that’s perfect for fall mornings.
Happy Halloween, and happy cooking!
Frequently Asked Questions
Can I make spider deviled eggs a day ahead?
Absolutely! Prepare the egg whites and filling separately, then assemble the spiders on the day of your event. The olive legs can become soft if they sit on the filling too long. Store the filling in a piping bag in the fridge and the whites in an airtight container.
How do I keep the olive legs from falling off?
Press them gently but firmly into the piped filling. The filling acts like glue. If you’re really worried, you can use a tiny dab of cream cheese or extra filling to help the legs stay put. Chilling the assembled eggs for 30 minutes also helps everything set.
Can I use a different type of olive?
Yes! Kalamata olives make beautiful dark purple spiders. Green olives work too, though they look less spooky. Just make sure you’re using whole, pitted olives so you can control the slice size.
Why did my deviled egg filling turn out runny?
This usually happens when the mayonnaise-to-yolk ratio is off, or if the eggs were undercooked and the yolks were still slightly soft. Next time, make sure your yolks are fully set and start with less mayonnaise, adding more until you reach the right consistency.
Can I freeze spider deviled eggs?
I don’t recommend it. The texture of both the egg whites and the filling changes dramatically after freezing—they become watery and grainy. These are best made fresh or up to two days ahead and stored in the refrigerator.
Pin This Recipe!
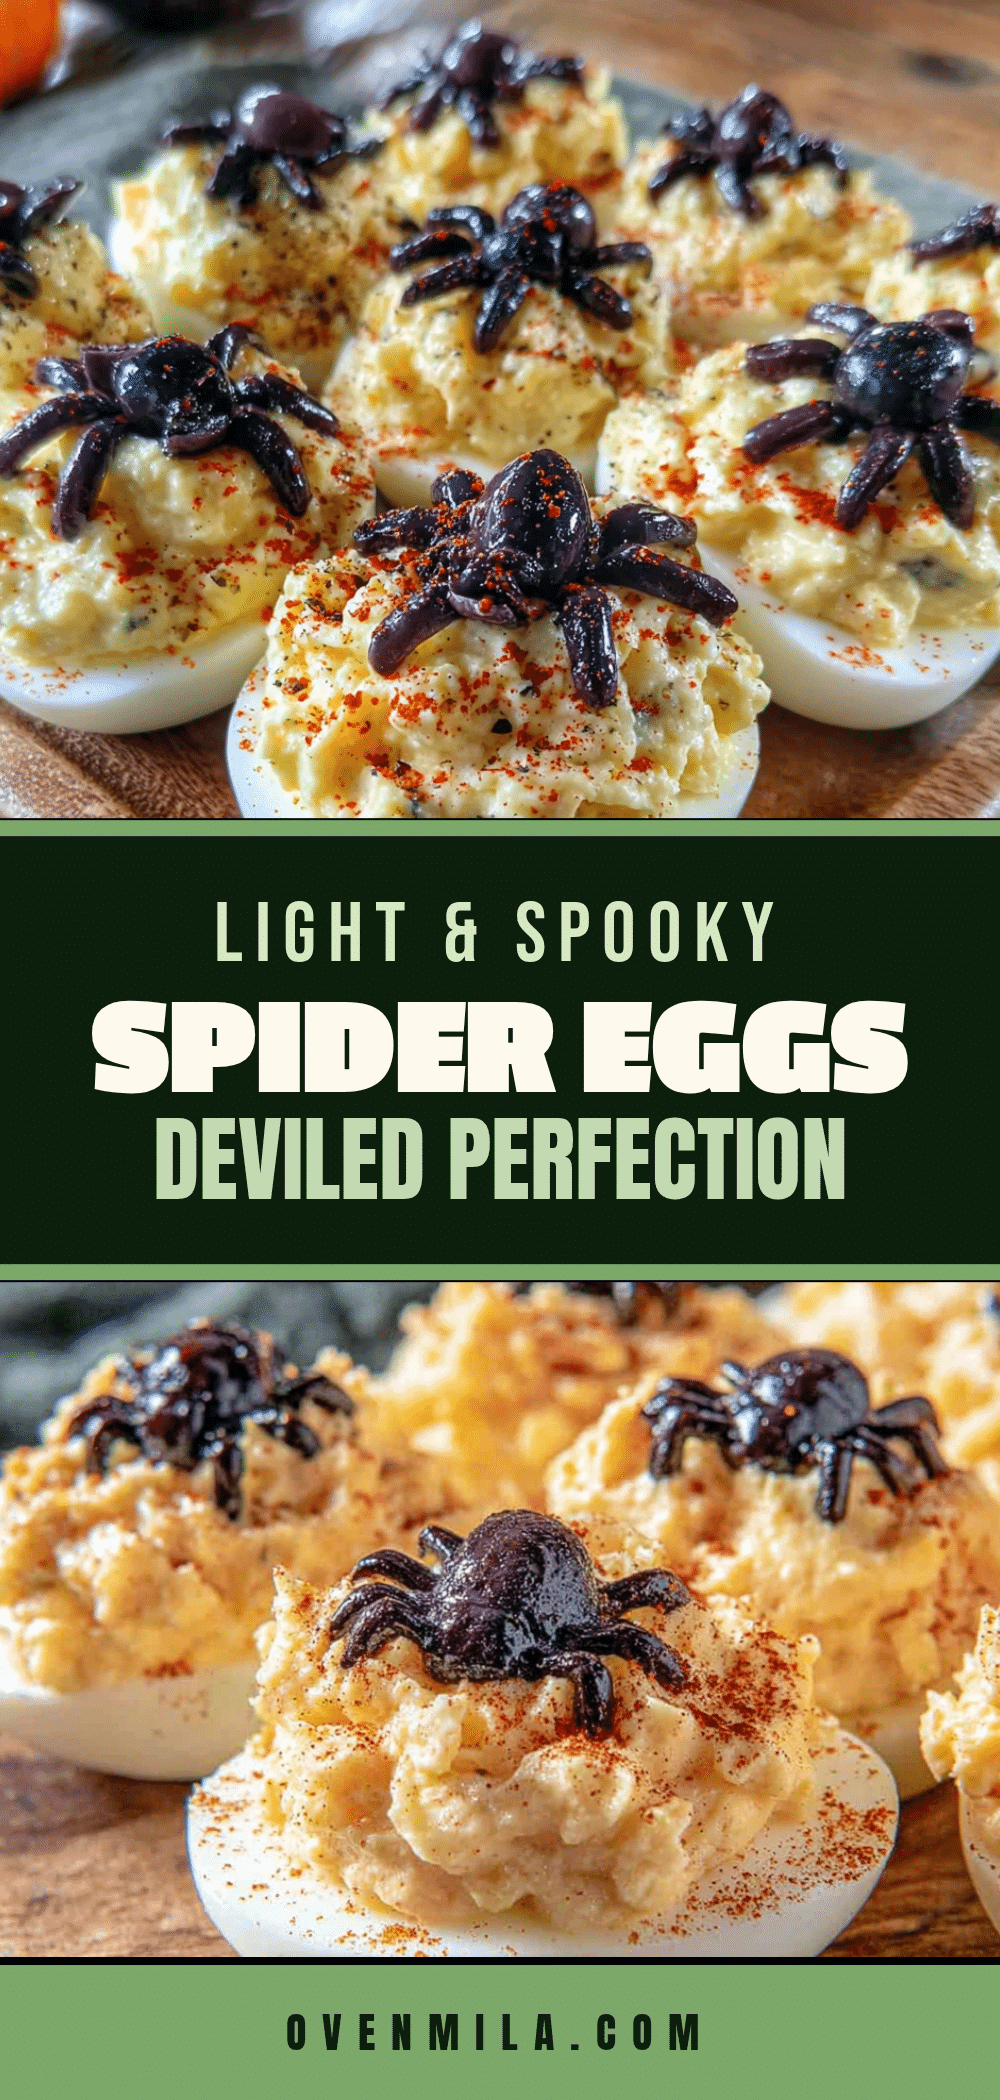
Best Easy Spider Deviled Eggs Recipe for Halloween
These light & spooky spider deviled eggs are the Halloween appetizer you didn’t know you needed. They’re clever without being complicated, delicious without being heavy, and festive without requiring hours in the kitchen.
- Prep Time: 20 minutes
- Cook Time: 12 minutes
- Total Time: 32 minutes
- Yield: 24 spider deviled eggs 1x
- Category: Appetizer
- Cuisine: American
Ingredients
- 12 large eggs
- 1/3 cup mayonnaise
- 1 tablespoon yellow mustard
- 1 teaspoon white vinegar
- 1/4 teaspoon salt
- 1/8 teaspoon black pepper
- 1 can (6 ounces) large black olives, pitted
- Paprika for dusting
Instructions
- Hard-boil the eggs: Place eggs in a single layer in a saucepan, cover with cold water by 1 inch. Bring to a rolling boil over high heat. Cover, remove from heat, and let sit for exactly 12 minutes. Prepare an ice bath.
- Cool the eggs: Transfer eggs to the ice bath with a slotted spoon. Chill for at least 10 minutes.
- Peel the eggs: Tap each egg to crack the shell, roll between palms, and peel starting from the wider end. Rinse and pat dry.
- Slice the eggs: Cut each egg in half lengthwise. Remove yolks to a mixing bowl. Arrange whites on a serving platter cut side up.
- Make the filling: Add mayonnaise, mustard, vinegar, salt, and pepper to the yolks. Mash until smooth and pipeable. Adjust seasoning.
- Prepare the olives: Drain and pat olives dry. For each spider, use one whole olive for the body and slice another crosswise into 1/8-inch rounds (8 slices per spider).
- Pipe the filling: Spoon filling into a piping bag fitted with a star tip (or a zip-top bag with a corner snipped). Pipe a generous mound onto each egg white half.
- Assemble the spiders: Place one whole olive on top of each piped filling mound. Insert 8 olive slices around it as legs (4 on each side), pressing gently.
- Dust with paprika: Lightly sprinkle paprika over the entire platter.
- Chill before serving: Refrigerate assembled eggs for at least 30 minutes before serving.
Notes
For easier peeling, use eggs that are at least a week old. Boil an extra egg or two in case one cracks. Slice olives while cold from the can for cleaner cuts. The filling can be made a day ahead and stored in a piping bag in the fridge. Add olive legs just before serving to prevent softening.
Nutrition
- Serving Size: 2 spider deviled egg
- Calories: 180
- Sugar: 1
- Sodium: 320
- Fat: 14
- Saturated Fat: 3
- Carbohydrates: 2
- Protein: 12
Keywords: spider deviled eggs, Halloween appetizer, deviled eggs, Halloween recipe, spooky eggs, olive spiders


