The neighborhood fall block party was in three hours and I’d completely forgotten. Everyone else would be bringing those elaborate, multi-day preparations—the kind of thing that makes you nod politely while secretly wondering when they found the time. I’d been so swamped with work that week that I hadn’t even thought about what to bring. Standing in my kitchen at 2 PM on a Saturday, staring into my pantry, I felt that familiar knot of panic tighten in my chest. I had a can of pumpkin puree, some basic baking staples, and absolutely zero time to spare.
I mean, let’s be real—I almost just grabbed a store-bought pie and called it a day. But something about that felt wrong. These were my people. The ones who’d seen me through moving trucks and broken appliances and that one time my car died in the grocery store parking lot. I couldn’t show up with a sad, plastic-wrapped dessert. So I did what any reasonable person in a panic would do: I started throwing things together and hoped for the best.
The pumpkin bars came out of the oven looking a little too humble for my liking—just simple, golden squares that didn’t scream “I tried.” But then I remembered the cream cheese frosting I’d made on a whim last Thanksgiving, and I figured, why not? I whipped up a batch, slathered it on while the bars were still slightly warm (honestly, I was in a hurry), and let me tell you, that was the moment everything changed. The frosting melted into the top just enough to create this magical layer that nobody could stop talking about.
At the party, I set my pan down next to a three-tiered pumpkin cake and a tray of hand-piped cookies. I almost apologized for it. But by the end of the night, my pan was empty, and people were asking for the recipe. Someone actually said, “These are the best pumpkin bars I’ve ever had.” And I believed them, because I’d had three myself. Maybe you’ve been there—that moment when something simple somehow wins the day, and you’re left wondering how it even happened. That’s how these pumpkin bars became my go-to, and that’s why I keep coming back to them, even when I have all the time in the world.
Why You’ll Love This Recipe
After testing this recipe more times than I’d like to admit (and eating way too many test batches), I can confidently say these pumpkin bars are something special. They’re not just another fall dessert—they’re the one that disappears first at every gathering.
- Quick & Easy: Comes together in under 45 minutes from start to finish. Perfect for those moments when you need something impressive but forgot to plan ahead. No stand mixer required, and you can mix everything by hand in one bowl.
- Simple Ingredients: You probably already have most of these in your pantry. Canned pumpkin, basic flour, eggs, butter, and cream cheese. No fancy extracts or hard-to-find spices—just good, honest ingredients that work together beautifully.
- Perfect for Fall Gatherings: Whether it’s a block party, Thanksgiving potluck, or casual family dinner, these bars fit right in. They’re easy to transport, slice neatly, and don’t require any last-minute fussing before serving.
- Crowd-Pleaser: I’ve served these to kids, picky eaters, and serious foodies. Every single person goes back for seconds. The combination of spiced pumpkin and tangy cream cheese frosting is just that good.
- Unbelievably Delicious: The texture is where these bars really shine. They’re soft and cake-like without being dry, with a slightly dense crumb that holds up perfectly under the frosting. The cream cheese layer adds this rich, tangy contrast that makes each bite feel complete.
What makes this recipe different from all the other pumpkin bar recipes out there? It’s the balance. So many pumpkin desserts are either too sweet or too spiced, but this one hits that sweet spot where everything feels just right. The bars themselves aren’t overly sweet, which lets the pumpkin flavor come through, and the frosting adds just enough richness without overwhelming the whole thing. Plus, the texture—I spent weeks tweaking the flour-to-pumpkin ratio to get that perfect soft-but-sturdy crumb that doesn’t fall apart when you pick it up. This isn’t just another version; it’s my best version, tested and approved by everyone who’s tried it.
Honestly, this recipe is the kind that makes you close your eyes after the first bite. It’s comfort food reimagined—faster and simpler, but with the same soul-soothing satisfaction that makes fall baking so special. Perfect for impressing guests without stress, or turning a simple Tuesday into something memorable.
What Ingredients You Will Need
This recipe uses simple, wholesome ingredients to deliver bold pumpkin flavor and that irresistible creamy topping. Most of these are pantry staples, which makes this recipe perfect for spontaneous baking sessions. Let me walk you through each one and share a few tips I’ve picked up along the way.
For the Pumpkin Bars
- All-purpose flour, 2 cups (240g) — I use Gold Medal or King Arthur for consistent results. Spoon and level your flour for the best texture; scooping directly from the bag can pack in too much.
- Granulated sugar, 1 ½ cups (300g) — Regular white sugar works perfectly here. It adds sweetness without changing the color or texture.
- Brown sugar, ½ cup (100g), packed — Light or dark both work, but dark brown sugar gives a deeper, more molasses-like flavor that complements the pumpkin nicely. Pack it firmly into your measuring cup.
- Baking powder, 2 teaspoons — Make sure it’s fresh. If you’re not sure, test it by dropping a bit into warm water—it should bubble immediately.
- Baking soda, 1 teaspoon — Same freshness rule applies. Expired baking soda won’t give you the lift you need.
- Salt, ½ teaspoon — I use fine sea salt. It balances the sweetness and enhances the spices.
- Ground cinnamon, 2 teaspoons — The backbone of pumpkin spice. Use a good-quality cinnamon like Saigon or Ceylon for warmer flavor.
- Ground nutmeg, ½ teaspoon — Freshly grated is amazing if you have it, but pre-ground works perfectly fine.
- Ground ginger, ½ teaspoon — Adds a little warmth and zing. Skip it if you’re out, but it really rounds out the spice blend.
- Ground cloves, ¼ teaspoon — A little goes a long way. Too much can make things taste medicinal.
- Pumpkin puree, 1 can (15 oz or 425g) — Not pumpkin pie filling! Make sure you grab 100% pure pumpkin. Libby’s is my go-to brand for consistent texture and flavor.
- Vegetable oil, 1 cup (240ml) — Canola or any neutral oil works. Oil keeps these bars incredibly moist. I’ve tried melted butter, but oil gives a softer crumb that lasts longer.
- Large eggs, 4, at room temperature — Room temperature eggs incorporate more evenly into the batter. If you forgot to take them out, place them in a bowl of warm water for 5 minutes.
- Vanilla extract, 2 teaspoons — Pure vanilla extract makes a difference, but imitation works in a pinch. I prefer Nielsen-Massey for its rich flavor.
For the Cream Cheese Frosting
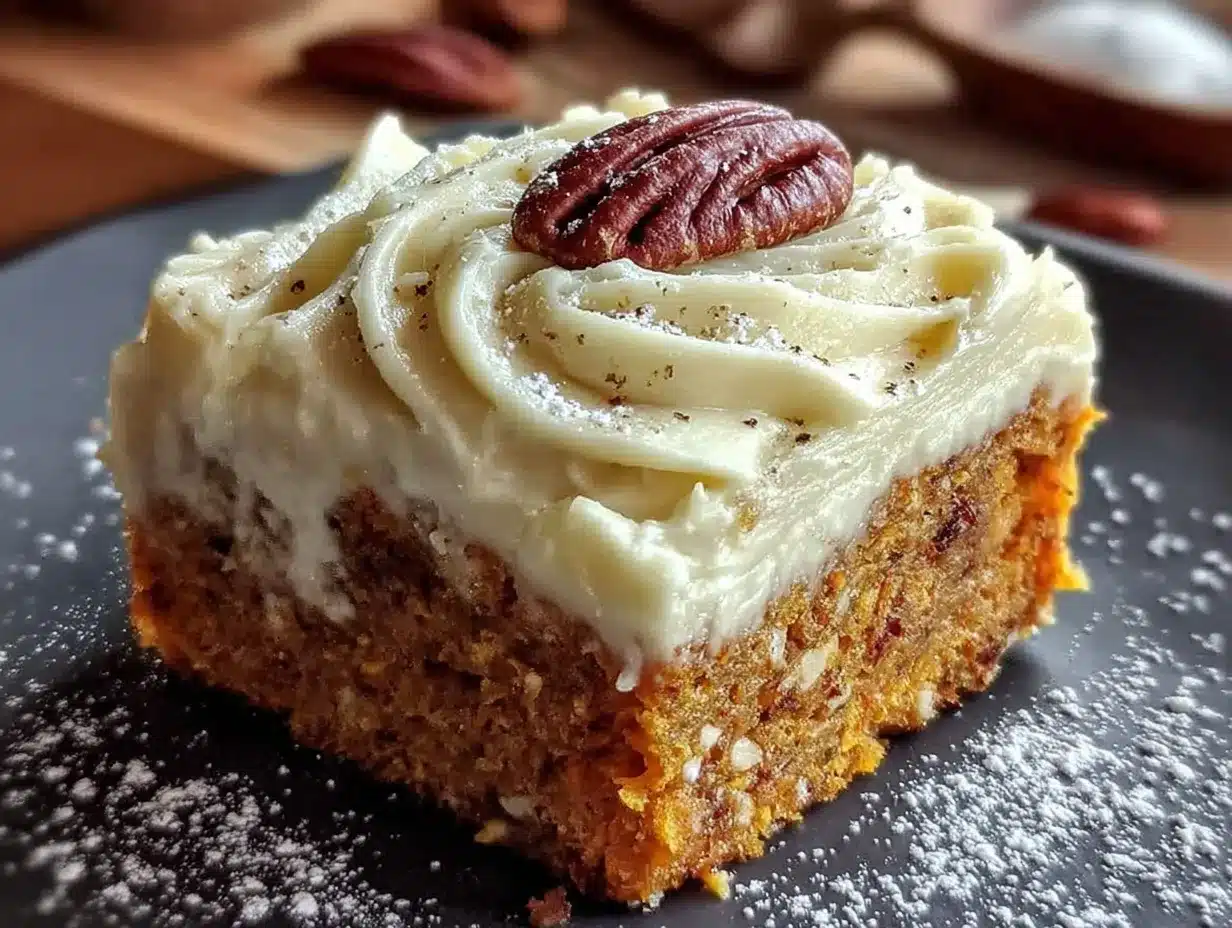
- Cream cheese, 8 oz (226g), softened — Full-fat block cream cheese is non-negotiable here. Don’t use the spreadable kind in a tub—it has too much water and won’t set properly. Philadelphia is my trusted brand.
- Unsalted butter, ½ cup (113g), softened — Let it come to room temperature naturally. Microwaving can melt it unevenly and ruin the frosting texture.
- Powdered sugar, 3 cups (360g), sifted — Sifting removes lumps and gives you a silky smooth frosting. If you’re in a hurry, whisk it vigorously with a fork.
- Vanilla extract, 1 teaspoon — Same brand as above. It adds warmth and depth to the frosting.
- Salt, a pinch — Just enough to cut through the sweetness and balance the tanginess of the cream cheese.
Ingredient Selection Tips
For the pumpkin puree, I always recommend sticking with a trusted brand like Libby’s. Some store brands can be watery or stringy, which affects the texture of your bars. If you’re using fresh pumpkin, make sure to roast and puree it until it’s thick and smooth—strain any excess liquid through cheesecloth before measuring.
For the cream cheese, full-fat is essential. Low-fat or non-fat versions contain more water and stabilizers, which can make your frosting runny. I learned this the hard way after ending up with a soupy mess that slid right off the bars. Trust me on this one.
If you need a gluten-free option, you can substitute the all-purpose flour with a 1:1 gluten-free baking blend. I’ve had good results with Bob’s Red Mill. Just note that the texture will be slightly more crumbly. For a dairy-free frosting, use vegan cream cheese and vegan butter, but be prepared for a slightly softer set.
Equipment Needed
You don’t need a fancy kitchen to make these pumpkin bars. Here’s what you’ll need, along with a few tips I’ve picked up along the way.
- 9×13-inch baking pan — A metal pan works best for even baking. Glass or ceramic pans retain heat longer, so your bars might brown more on the edges. If using glass, reduce the oven temperature by 25°F.
- Mixing bowls — You’ll need one large bowl for the dry ingredients and another for the wet ingredients. I use stainless steel bowls because they’re lightweight and easy to clean.
- Whisk — For combining dry ingredients. A fork works in a pinch, but a whisk ensures even distribution of spices and leavening agents.
- Hand mixer or stand mixer — Essential for the cream cheese frosting. You can mix the bar batter by hand with a wooden spoon, but the frosting needs that electric power to get smooth and fluffy.
- Spatula — A rubber spatula is perfect for folding the batter and scraping every last bit of frosting out of the bowl. Don’t waste a single drop!
- Parchment paper — Lining your pan with parchment paper makes lifting the bars out a breeze. Leave some overhang on the sides for easy removal.
- Cooling rack — Letting the bars cool completely before frosting is crucial. A wire rack allows air to circulate underneath, preventing a soggy bottom.
- Offset spatula — For spreading the frosting evenly. A butter knife works too, but an offset spatula gives you that bakery-smooth finish.
If you don’t have a hand mixer, you can beat the cream cheese and butter vigorously with a wooden spoon—just expect a workout and a slightly less fluffy result. I’ve done it before when my mixer broke, and while it wasn’t as smooth, it still tasted amazing.
Preparation Method
Let me walk you through this step by step. I’ve included all the little details that make the difference between good pumpkin bars and the best pumpkin bars.
Step 1: Preheat and Prepare Your Pan
Preheat your oven to 350°F (175°C). Line a 9×13-inch baking pan with parchment paper, leaving about 2 inches of overhang on the long sides. Lightly spray the parchment with non-stick cooking spray. This makes lifting the bars out so much easier—trust me, you don’t want to fight with stuck-on bars when you’re ready to cut them.
Step 2: Mix the Dry Ingredients
In a large bowl, whisk together 2 cups (240g) all-purpose flour, 1 ½ cups (300g) granulated sugar, ½ cup (100g) packed brown sugar, 2 teaspoons baking powder, 1 teaspoon baking soda, ½ teaspoon salt, 2 teaspoons ground cinnamon, ½ teaspoon ground nutmeg, ½ teaspoon ground ginger, and ¼ teaspoon ground cloves. Whisk until everything is evenly combined—about 30 seconds. You should see an even color throughout with no streaks of flour or spices.
Step 3: Combine the Wet Ingredients
In a separate medium bowl, whisk together 1 can (15 oz) pumpkin puree, 1 cup (240ml) vegetable oil, 4 large eggs, and 2 teaspoons vanilla extract. Whisk until the mixture is smooth and uniform. The eggs should be fully incorporated—no streaks of egg white floating around. The mixture will look thick and glossy, with that beautiful orange color that screams fall.
Step 4: Combine Wet and Dry Mixtures
Pour the wet ingredients into the dry ingredients. Stir gently with a rubber spatula or wooden spoon until just combined. Do not overmix! A few small lumps are perfectly fine. Overmixing develops gluten, which can make your bars tough instead of tender. The batter should be thick but scoopable, similar to a muffin batter. Scrape the bottom of the bowl to make sure no dry pockets remain.
Step 5: Bake the Bars
Pour the batter into your prepared pan and spread it evenly with a spatula. Bake at 350°F (175°C) for 25-30 minutes, or until a toothpick inserted into the center comes out clean or with just a few moist crumbs. The edges should be lightly golden and pulling away from the sides of the pan. Every oven is different, so start checking at 22 minutes if your oven runs hot. Mine usually takes exactly 27 minutes.
Step 6: Cool Completely
Let the bars cool in the pan on a wire rack for about 10 minutes. Then, using the parchment overhang, lift the bars out of the pan and transfer them to the wire rack to cool completely. This is crucial—if you frost them while they’re still warm, the frosting will melt and slide right off. I’ve made that mistake before, and it’s heartbreaking. Patience, my friend. Let them cool for at least 1 hour, or even 2 hours if you have the time.
Step 7: Make the Cream Cheese Frosting
While the bars are cooling, make the frosting. In a large bowl, beat 8 oz (226g) softened cream cheese and ½ cup (113g) softened unsalted butter together on medium speed until smooth and creamy—about 2 minutes. Scrape down the sides and bottom of the bowl. Add 1 teaspoon vanilla extract and a pinch of salt, then beat again. Gradually add 3 cups (360g) sifted powdered sugar, one cup at a time, beating on low speed until incorporated. Once all the sugar is added, increase the speed to medium-high and beat for 2-3 minutes until the frosting is light, fluffy, and spreadable. If it’s too thick, add a teaspoon of milk. If it’s too thin, add a little more powdered sugar.
Step 8: Frost and Serve
Spread the frosting evenly over the completely cooled bars. Use an offset spatula or butter knife to create swirls or a smooth surface—whatever you prefer. For clean slices, refrigerate the frosted bars for 30 minutes before cutting. Use a sharp knife and wipe it clean between cuts for neat edges. Cut into 24 squares or 12 larger rectangles, depending on your crowd.
Cooking Tips & Techniques
After making these pumpkin bars more times than I can count (and a few spectacular failures), I’ve gathered some tips that will save you from my early mistakes.
Don’t overmix the batter. This is the number one mistake I see people make. When you combine the wet and dry ingredients, stir just until the flour disappears. Overmixing develops gluten, which makes the bars tough and rubbery instead of soft and tender. A few lumps are your friend here. I promise they’ll bake out.
Room temperature ingredients matter. I know it’s tempting to use cold eggs straight from the fridge, but room temperature ingredients emulsify better, creating a smoother, more uniform batter. Same goes for the cream cheese and butter in the frosting. Cold cream cheese will leave you with lumpy frosting no matter how long you beat it. Take everything out 30-60 minutes before you start baking.
Check your baking powder and soda. If your bars turn out flat and dense, your leavening agents might be expired. I learned this the hard way when I made a batch that looked like hockey pucks. Test them by dropping a small amount into warm water—if it fizzes, it’s still active. If not, it’s time to buy new ones.
Let the bars cool completely. I cannot stress this enough. Warm bars + cold frosting = melty disaster. One time I was in a rush and frosted them after only 30 minutes of cooling. The frosting turned into a runny mess that pooled around the edges. Not cute. Give them a full hour at minimum, or pop them in the fridge for 20 minutes after they’ve cooled to room temperature.
For the best texture, use oil instead of butter. Oil keeps these bars incredibly moist for days. Butter-based pumpkin bars tend to dry out faster. If you really want to use butter, melt it and let it cool slightly before adding it to the wet ingredients. But honestly, oil gives you a more consistent result every time.
Toast your spices. This is a pro tip that takes your pumpkin bars to the next level. Before adding the spices to the flour mixture, toast them in a dry pan over medium heat for 30-60 seconds until fragrant. It wakes up the essential oils and makes the flavor deeper and more complex. Just watch closely—they burn fast.
Variations & Adaptations
One of the best things about this recipe is how adaptable it is. Here are some variations I’ve tried and loved.
Gluten-Free Version
Substitute the all-purpose flour with a 1:1 gluten-free baking blend that contains xanthan gum. I’ve tested this with Bob’s Red Mill and King Arthur’s measure-for-measure blends, and both work well. The texture will be slightly more delicate, so handle the bars gently when lifting them out of the pan. Let them cool completely before cutting for cleaner slices.
Dairy-Free Frosting
Use vegan cream cheese and vegan butter for the frosting. Miyoko’s and Violife are my favorite brands for this. The frosting won’t be quite as firm as the dairy version, so refrigerate the bars for at least an hour before serving. The bars themselves are naturally dairy-free since they use oil instead of butter—perfect for those with dairy sensitivities.
Spice It Up
Add ½ teaspoon of cardamom or allspice to the dry ingredients for a more complex spice profile. I tried this last Thanksgiving and it was a huge hit. You can also add a pinch of black pepper—sounds weird, I know, but it actually enhances the pumpkin flavor and adds a subtle warmth that’s really lovely.
Add Mix-Ins
Fold in 1 cup of chopped pecans, walnuts, or chocolate chips before baking. White chocolate chips pair especially well with pumpkin. For a crunchier texture, sprinkle some toasted pecans on top of the frosting. I once added dried cranberries and orange zest, and it was like a pumpkin pie in bar form—amazing.
Pumpkin Cheesecake Bars
For an extra-indulgent version, swirl 4 oz of softened cream cheese mixed with 2 tablespoons of sugar and 1 teaspoon of vanilla into the batter before baking. Drop spoonfuls of the cream cheese mixture on top of the batter, then swirl with a knife. It creates these beautiful marbled layers that look and taste incredible.
Serving & Storage Suggestions
These pumpkin bars are incredibly versatile when it comes to serving. Here’s how I like to present and store them.
Serving Temperature: I prefer these bars chilled or at room temperature. Straight from the fridge, the frosting is firm and the bars are dense and fudgy. At room temperature, they’re softer and the flavors are more pronounced. Both are delicious—it just depends on your mood. For a dinner party, I usually take them out of the fridge 15 minutes before serving so they soften slightly.
Presentation Tips: Cut the bars into neat squares or rectangles using a sharp knife. Wipe the blade clean between cuts for the cleanest edges. Arrange them on a platter or cake stand, and dust with a light sprinkle of cinnamon or nutmeg for a finishing touch. A few fresh mint leaves or edible flowers add a pop of color that makes them look extra special.
What to Serve Alongside: These bars pair beautifully with a hot cup of coffee, spiced chai latte, or a glass of cold milk. For a dessert spread, serve them alongside vanilla ice cream or a dollop of whipped cream. They also work great as part of a fall brunch buffet with apple cider, cinnamon rolls, and a fruit salad.
Storage Instructions: Store the frosted bars in an airtight container in the refrigerator for up to 5 days. The bars actually taste better on day two or three as the flavors meld together. If you’re storing them for a party, make them a day ahead—they’ll be even more delicious.
Freezing Instructions: These bars freeze beautifully. Freeze the unfrosted bars in an airtight container for up to 3 months. When you’re ready to serve, thaw them in the refrigerator overnight, then make the frosting fresh and spread it on. You can also freeze the frosted bars, but place them in a single layer on a baking sheet until frozen solid, then wrap each bar individually in plastic wrap and store in a freezer bag. Thaw in the refrigerator before serving.
Reheating Tips: If you prefer warm bars, microwave individual portions for 10-15 seconds. Just be careful not to overheat, or the frosting will melt. For a warm dessert, skip the frosting and serve the bars warm with a scoop of ice cream instead.
Nutritional Information & Benefits
Here’s an approximate nutritional breakdown for one bar (based on 24 servings):
- Calories: 280
- Total Fat: 15g
- Saturated Fat: 6g
- Cholesterol: 45mg
- Sodium: 180mg
- Total Carbohydrates: 35g
- Dietary Fiber: 1g
- Sugars: 24g
- Protein: 3g
These values are estimates and can vary based on ingredient brands and portion sizes.
Health Benefits of Key Ingredients: Pumpkin is packed with vitamin A (beta-carotene), which supports eye health and immune function. It’s also a good source of fiber, which aids digestion. The cinnamon and ginger in this recipe have anti-inflammatory properties, while the eggs provide high-quality protein. Cream cheese offers calcium for bone health, though it’s best enjoyed in moderation as part of a balanced diet.
Dietary Considerations: This recipe is vegetarian and can be made gluten-free and dairy-free with the substitutions mentioned above. It contains eggs, dairy, and gluten (unless modified). For a lower-sugar version, reduce the granulated sugar to 1 cup and use a sugar substitute in the frosting. I’ve tried this with monk fruit sweetener, and while the texture is slightly different, it still tastes great.
I’m not a nutritionist, but I believe in enjoying treats in a way that feels good for you. These bars are a celebration dessert—something to share with loved ones and savor without guilt. Life’s too short not to enjoy a good pumpkin bar, you know?
Frequently Asked Questions
Can I use fresh pumpkin instead of canned?
Yes, you can use fresh pumpkin puree, but make sure it’s thick and not watery. Roast a small sugar pumpkin, scoop out the flesh, and puree it until smooth. Strain it through cheesecloth or a fine-mesh strainer to remove excess moisture. If your puree is too wet, your bars will turn out dense and gummy. Canned pumpkin is more consistent, which is why I usually recommend it.
Why did my pumpkin bars turn out dry?
Dry pumpkin bars usually result from overbaking or using too much flour. Make sure you’re measuring your flour correctly—spoon it into the measuring cup and level it off with a knife, rather than scooping directly from the bag. Also, check your oven temperature with an oven thermometer; some ovens run hot and can dry out baked goods. Start checking for doneness at 22 minutes to avoid overbaking.
Can I make these bars ahead of time?
Absolutely! In fact, I prefer making them a day ahead. The flavors meld together overnight, and the bars become even more moist and flavorful. Store the frosted bars in an airtight container in the refrigerator. Let them sit at room temperature for 15 minutes before serving for the best texture.
Can I freeze the cream cheese frosting?
Yes, you can freeze the frosting separately for up to 3 months. Thaw it in the refrigerator overnight, then beat it with a hand mixer for a minute or two to restore its fluffy texture. If it seems too stiff after thawing, add a teaspoon of milk and beat again. I usually make the frosting fresh because it’s so quick, but freezing works in a pinch.
How do I get clean, neat slices?
For the cleanest cuts, refrigerate the frosted bars for at least 30 minutes before slicing. Use a sharp chef’s knife and wipe it clean with a damp paper towel between each cut. This prevents the frosting from smearing and gives you those beautiful, bakery-style edges. Cut straight down—don’t saw back and forth—for the cleanest lines.
Conclusion
These pumpkin bars with cream cheese frosting have become my go-to fall dessert for a reason. They’re simple enough for a Tuesday night baking session but impressive enough to steal the show at any gathering. The combination of tender, spiced pumpkin cake and tangy, creamy frosting is just unbeatable—especially when you consider how little effort it takes to put them together.
I hope you give these a try and make them your own. Maybe you’ll add a handful of pecans, or swirl in some extra cream cheese, or serve them warm with a scoop of vanilla ice cream. However you customize them, I promise they’ll be a hit. That’s the beauty of a recipe like this—it’s forgiving, adaptable, and always delicious.
I’d love to hear how yours turn out! Drop a comment below and let me know if you tried any variations, or share a photo of your pumpkin bars. Tag me on Pinterest or Instagram so I can see your beautiful creations. And if you have any questions along the way, don’t hesitate to ask. Happy baking, friends—here’s to making this fall the coziest one yet!
Pin This Recipe!
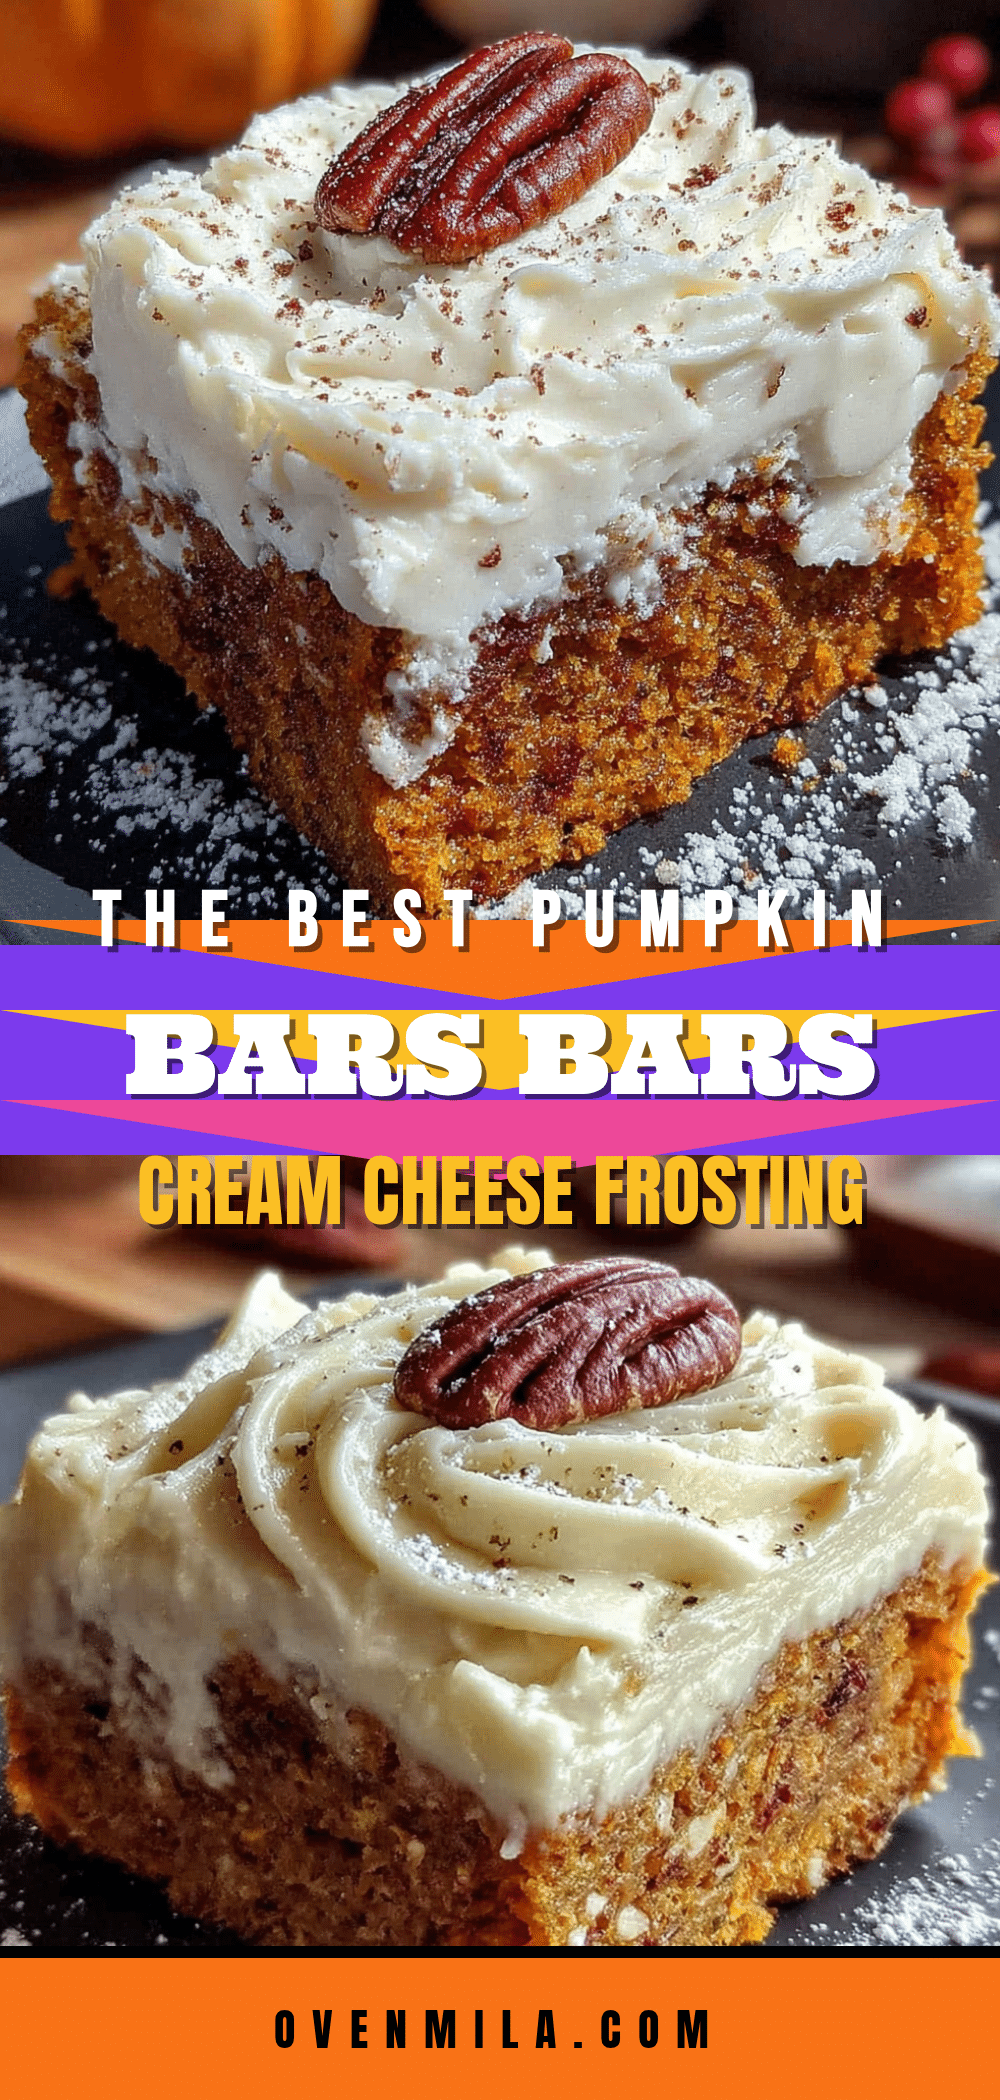
The Best Pumpkin Bars with Cream Cheese Frosting
These pumpkin bars are soft, spiced, and topped with a tangy cream cheese frosting. They come together in under 45 minutes and are perfect for fall gatherings, potlucks, or a simple weeknight treat.
- Prep Time: 15 minutes
- Cook Time: 30 minutes
- Total Time: 45 minutes
- Yield: 24 servings 1x
- Category: Dessert
- Cuisine: American
Ingredients
- 2 cups (240g) all-purpose flour
- 1 ½ cups (300g) granulated sugar
- ½ cup (100g) packed brown sugar
- 2 teaspoons baking powder
- 1 teaspoon baking soda
- ½ teaspoon salt
- 2 teaspoons ground cinnamon
- ½ teaspoon ground nutmeg
- ½ teaspoon ground ginger
- ¼ teaspoon ground cloves
- 1 can (15 oz or 425g) pumpkin puree
- 1 cup (240ml) vegetable oil
- 4 large eggs, at room temperature
- 2 teaspoons vanilla extract
- 8 oz (226g) cream cheese, softened
- ½ cup (113g) unsalted butter, softened
- 3 cups (360g) powdered sugar, sifted
- 1 teaspoon vanilla extract
- a pinch of salt
Instructions
- Preheat oven to 350°F (175°C). Line a 9×13-inch baking pan with parchment paper, leaving overhang on the long sides. Lightly spray with non-stick cooking spray.
- In a large bowl, whisk together flour, granulated sugar, brown sugar, baking powder, baking soda, salt, cinnamon, nutmeg, ginger, and cloves until evenly combined.
- In a separate medium bowl, whisk together pumpkin puree, vegetable oil, eggs, and vanilla extract until smooth and uniform.
- Pour the wet ingredients into the dry ingredients. Stir gently with a rubber spatula or wooden spoon until just combined. Do not overmix; a few lumps are fine.
- Pour the batter into the prepared pan and spread evenly. Bake for 25-30 minutes, or until a toothpick inserted into the center comes out clean or with a few moist crumbs. The edges should be lightly golden.
- Let the bars cool in the pan on a wire rack for 10 minutes. Then, using the parchment overhang, lift the bars out and transfer to the wire rack to cool completely (at least 1 hour).
- While the bars cool, make the frosting: In a large bowl, beat cream cheese and butter on medium speed until smooth and creamy, about 2 minutes. Add vanilla and salt, beat again. Gradually add powdered sugar, one cup at a time, beating on low until incorporated. Increase speed to medium-high and beat for 2-3 minutes until light and fluffy.
- Spread the frosting evenly over the completely cooled bars. Refrigerate for 30 minutes before cutting for clean slices. Cut into 24 squares or 12 rectangles.
Notes
For best results, use full-fat block cream cheese (not spreadable). Let bars cool completely before frosting to prevent melting. For gluten-free, use a 1:1 gluten-free baking blend. For dairy-free frosting, use vegan cream cheese and butter. Bars can be stored in the refrigerator for up to 5 days or frozen for up to 3 months.
Nutrition
- Serving Size: 1 bar
- Calories: 280
- Sugar: 24
- Sodium: 180
- Fat: 15
- Saturated Fat: 6
- Carbohydrates: 35
- Fiber: 1
- Protein: 3
Keywords: pumpkin bars, cream cheese frosting, fall dessert, pumpkin dessert, easy pumpkin bars, pumpkin bars with cream cheese frosting


