My neighbor, a retired firefighter named Dave who grows the most absurdly large tomatoes you have ever seen, asked why I couldn’t just shove a stick of butter under the turkey skin and call it a day. I started to explain why that wouldn’t work — something about even cooking and the butter just melting off into the pan. Then I stopped. Honestly, I had never actually tried it his way. I had all these complicated steps I’d learned over the years, all these little tricks for basting and tenting foil. But Dave, who cooks maybe three things a year but does them with absolute conviction, just shrugged and said, “Butter is butter.” So last Thanksgiving, with a little bit of a chip on my shoulder, I tried it. I softened a whole stick of herb butter, loosened the skin on a twelve-pound bird, and just… shoved it in there. It was the most ridiculous, simple thing. And you know what? It was the juiciest, most flavorful turkey I have ever made. The skin got this deep, burnished gold, and the garlic and sage just melted into the meat. I had to text Dave a photo with a very humble apology. This recipe is the result of me being proven gloriously wrong. It’s for those evenings when you want something that feels like a celebration but without the stress of a hundred different steps. Maybe you’ve been there, overcomplicating a dish when the simplest path was right in front of you. This is that path — a cozy, herb-butter roasted turkey that tastes like a hug from the inside out. I keep making it because it reminds me that sometimes the best lessons come from the most unexpected places.
Why You’ll Love This Recipe
This isn’t just another turkey recipe. This is the one that will have everyone at the table asking for your secret. It’s built on a foundation of tested techniques and pure, comforting flavor. I’ve spent years tweaking and perfecting this method, and it’s become my absolute go-to for any occasion that calls for a showstopping bird.
- Incredibly Juicy Meat: The herb butter works its magic under the skin, basting the breast from the inside out. You get moist, flavorful meat every single time, no basting required.
- Crispy, Golden Skin: The combination of butter and a hot oven creates a skin that is shatteringly crisp and deeply seasoned. It’s the best part of the bird, honestly.
- Simple, Pantry-Friendly Ingredients: You don’t need a fancy grocery run. Butter, garlic, sage, and a few pantry staples are all it takes to create something truly spectacular.
- Perfect for a Cozy Feast: Whether it’s a chilly Sunday dinner, a Friendsgiving gathering, or the main event on a holiday table, this turkey sets the tone for warmth and togetherness. It’s comfort food at its finest.
- Surprisingly Low-Stress: The hands-on time is minimal. Most of the work happens in the oven, leaving you free to relax or prep your sides. It’s a crowd-pleaser that doesn’t come with a side of anxiety.
What makes this recipe different is the sheer simplicity of the technique. There’s no brine, no complicated rub, no fussy basting schedule. It’s about letting high-quality ingredients and a smart method do the heavy lifting. The result is a turkey that is not just good, but memorable. It’s the kind of dish that makes you close your eyes after the first bite, the kind that feels like a warm blanket on a cold day. It’s comfort food reimagined—simpler, richer, and with the same soul-soothing satisfaction that turns a simple meal into a cherished memory.
What Ingredients You Will Need
This recipe relies on a handful of simple, high-quality ingredients to deliver deep, savory flavor. Most of these are likely already in your kitchen, which is part of the magic. Here’s what you’ll need to bring this cozy turkey to life.
For the Herb Butter
- 1 cup (2 sticks) unsalted butter, softened: This is the heart of the recipe. I prefer unsalted to control the salt level. Make sure it’s truly softened to room temperature so it spreads easily under the skin.
- 4 cloves garlic, minced: Fresh garlic is non-negotiable here. It provides a pungent, aromatic base that mellows beautifully as it roasts.
- 3 tablespoons fresh sage, finely chopped: Sage and turkey are a classic pairing. The earthy, slightly peppery flavor of fresh sage is miles ahead of dried. (Use 1 tablespoon dried sage if that’s all you have, but fresh is best.)
- 2 tablespoons fresh rosemary, finely chopped: Rosemary adds a woodsy, pine-like aroma that cuts through the richness of the butter.
- 2 tablespoons fresh thyme leaves: Thyme offers a subtle, earthy flavor with hints of mint and lemon. It’s a backbone herb that ties everything together.
- 1 teaspoon kosher salt: Salt is crucial for seasoning the meat from the inside out. I use Diamond Crystal kosher salt, but any fine sea salt works.
- 1/2 teaspoon black pepper, freshly ground: Freshly ground pepper is always more aromatic and flavorful than pre-ground.
For the Turkey
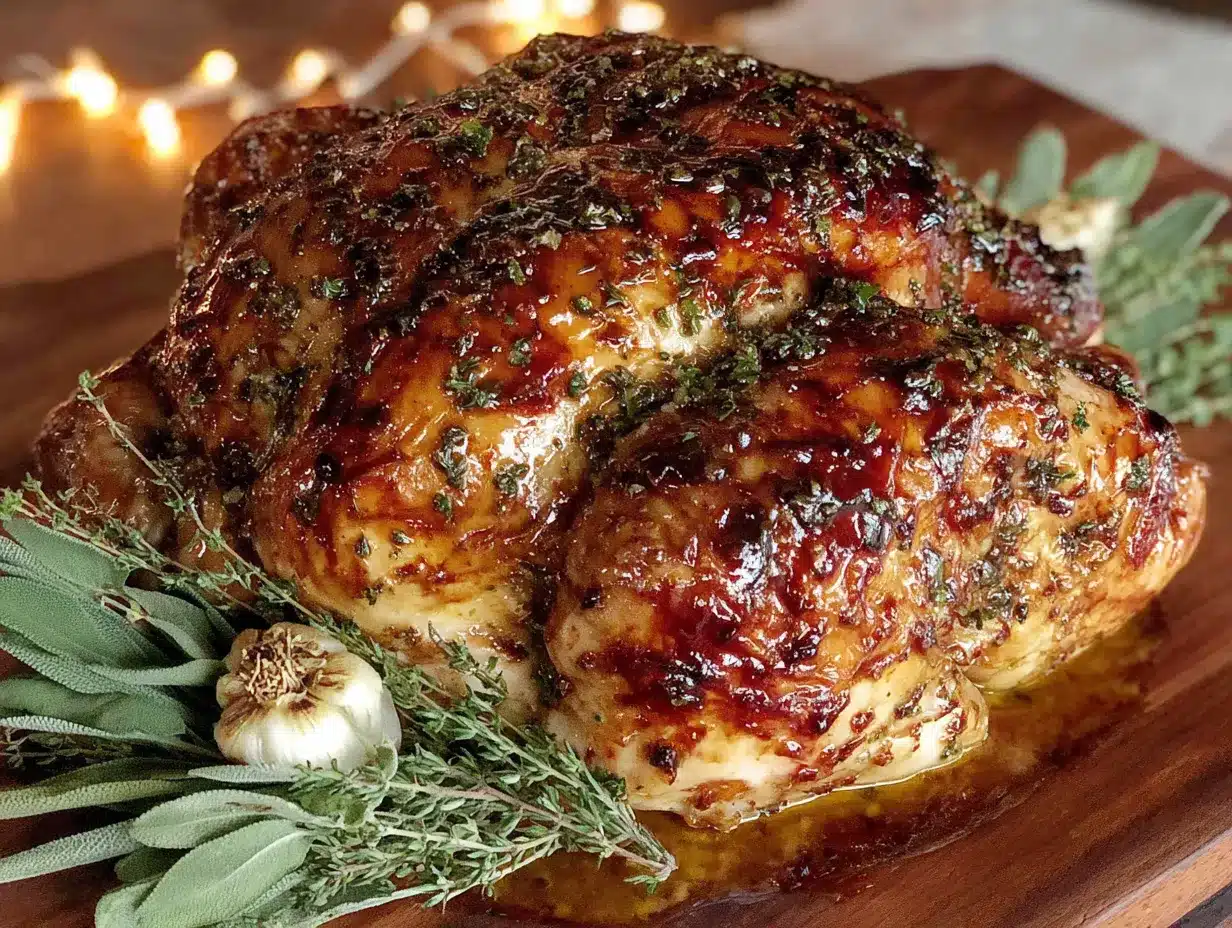
- 1 (12-14 pound) whole turkey, thawed if frozen: Look for a bird that is fresh or has been fully thawed in the refrigerator. I personally like to use a free-range or organic turkey for the best flavor and texture.
- 1 tablespoon kosher salt: For seasoning the outside of the bird and the cavity.
- 1 teaspoon black pepper, freshly ground: For the exterior seasoning.
- 1 large onion, quartered: This goes inside the cavity to add moisture and a subtle sweetness as it steams.
- 1 lemon, halved: A lemon half in the cavity adds a bright, citrusy note that balances the richness of the butter and herbs.
- 4 cloves garlic, smashed: These get tossed into the cavity along with the onion and lemon for an extra layer of aromatic flavor.
- Fresh sage, rosemary, and thyme sprigs (optional): A few extra sprigs in the cavity are a nice touch for added aroma, but not strictly necessary.
Equipment Needed
You don’t need a lot of fancy gear to make this turkey, but having the right tools makes the process a whole lot smoother. Here’s what you’ll need to get the job done.
- Roasting Pan: A sturdy metal or ceramic roasting pan is essential. It needs to be large enough to hold the turkey comfortably without crowding. I use a classic stainless steel one that I’ve had for years. A disposable aluminum pan will work in a pinch, but it’s not as stable.
- Roasting Rack (or Vegetables): A V-rack or a flat rack lifts the turkey off the bottom of the pan, allowing hot air to circulate for even cooking. If you don’t have one, you can create a makeshift rack by using thick carrot and celery chunks.
- Instant-Read Thermometer: This is the most important tool you’ll use. Don’t guess when your turkey is done. A reliable thermometer ensures a perfectly cooked bird every time and prevents dry meat. I have a Thermapen, but any instant-read thermometer is a great investment.
- Kitchen Twine: Tying the legs together isn’t strictly necessary, but it helps the turkey cook more evenly and gives it a nicer presentation.
- Chef’s Knife and Cutting Board: For prepping the herbs and garlic. A sharp knife makes the work feel effortless.
- Small Bowl: To mix the herb butter.
- Pastry Brush or Spatula: For spreading the butter, though clean hands work best for getting under the skin.
Preparation Method
Follow these steps, and you’ll have a beautiful, golden-brown turkey that’s juicy and full of flavor. Take your time, and don’t rush the process.
- Prep the Turkey: About 45 minutes before you plan to start, take the turkey out of the refrigerator and let it sit at room temperature. This helps it cook more evenly. Remove the neck and giblets from the cavity (save them for stock if you like!). Pat the turkey completely dry inside and out with paper towels. This is key for crispy skin.
- Make the Herb Butter: In a small bowl, combine the softened butter, minced garlic, chopped sage, rosemary, thyme, 1 teaspoon of salt, and 1/2 teaspoon of pepper. Mix until everything is well combined. It should look like a beautiful, speckled green paste.
- Season the Cavity: Season the inside of the turkey cavity generously with salt and pepper. Stuff it with the quartered onion, lemon halves, and smashed garlic cloves. If you have extra herb sprigs, tuck those in too.
- Apply the Herb Butter (The Dave Method): This is the most important step. Using your fingers, gently loosen the skin from the breast meat. Start at the neck cavity and work your way down, being careful not to tear the skin. You want to create a pocket. Take about two-thirds of the herb butter and push it under the skin, spreading it evenly over both breasts. Massage it from the outside to make sure it’s distributed. Rub the remaining butter all over the outside of the turkey, covering the legs, thighs, and wings. Don’t forget the back!
- Season the Exterior: Sprinkle the remaining 1 tablespoon of salt and 1 teaspoon of pepper all over the outside of the turkey. This final seasoning helps create that gorgeous, crispy crust.
- Truss (Optional but Helpful): Using kitchen twine, tie the turkey legs together. Tuck the wing tips under the body of the turkey to prevent them from burning.
- Roast: Place the turkey on a roasting rack inside your roasting pan. Pour about 1 cup of water or chicken broth into the bottom of the pan (this prevents drippings from burning). Roast in a preheated 425°F (220°C) oven for 30 minutes. Then, reduce the oven temperature to 350°F (175°C) and continue roasting.
- The Timing: A 12-14 pound turkey will take approximately 2 1/2 to 3 hours total. The key is to not rely on time, but on temperature. Start checking the internal temperature about 30 minutes before you think it will be done.
- Check for Doneness: Insert an instant-read thermometer into the thickest part of the thigh, avoiding the bone. You’re looking for 165°F (74°C). Also check the breast, which should be at 160°F (71°C). If the skin is getting too dark before the turkey is done, tent it loosely with aluminum foil.
- Rest, Rest, Rest: This step is non-negotiable. Once the turkey is out of the oven, transfer it to a cutting board or platter. Let it rest, uncovered, for at least 30 minutes before you start carving. This allows the juices to redistribute throughout the meat, resulting in a much juicier bird. Don’t skip this!
Cooking Tips & Techniques
Over the years, I’ve made every mistake in the book with roasting turkey. Here are the lessons I’ve learned, so you don’t have to make them yourself.
- Don’t Over-Stuff the Cavity: The aromatics are there for flavor and moisture, not to be a stuffing. Overcrowding the cavity can prevent the inside from cooking properly. Just a few aromatics are plenty.
- The Butter Temperature is Crucial: If the butter is too cold, it won’t spread under the skin and will just tear it. If it’s too melted, it will just run off. You want it to be the consistency of a thick paste, soft enough to smear but firm enough to stay put.
- Pat it Bone-Dry: I cannot stress this enough. Moisture is the enemy of crispy skin. Use a lot of paper towels and really get in all the nooks and crannies. Letting it sit uncovered in the fridge overnight is even better, but a good pat-down 45 minutes before roasting works wonders.
- Ignore the Pop-Up Timer: Those little plastic timers that come with the turkey are notoriously unreliable. They often pop when the bird is already overcooked. Trust your instant-read thermometer instead. It’s your best friend in the kitchen.
- Let it Rest: I once carved a turkey right out of the oven because I was impatient. The juices ran all over the cutting board, leaving the meat dry and sad. It was a tragedy. Resting allows those juices to soak back into the muscle fibers. It’s the single most important step for a moist turkey.
Variations & Adaptations
This recipe is a fantastic base, and you can easily tweak it to fit your mood or dietary needs. Here are a few of my favorite ways to change it up.
- Citrus-Herb Twist: Swap the lemon in the cavity for an orange or a grapefruit. Add the zest of one of those citrus fruits to the herb butter. The bright, sweet citrus notes pair beautifully with the savory herbs and garlic.
- Spicy Maple Glaze: About 30 minutes before the turkey is done, brush it with a mixture of 1/4 cup maple syrup, 2 tablespoons of the pan drippings, and a pinch of cayenne pepper. This creates a gorgeous, sticky, sweet-and-spicy glaze that is absolutely addictive.
- Garlic Lover’s Version: If you love garlic as much as I do, roast a whole head of garlic alongside the turkey. Squeeze the soft, caramelized cloves into the pan drippings before making gravy. It adds an incredible depth of flavor.
- Dairy-Free Adaptation: You can easily make this dairy-free by substituting the butter with a high-quality plant-based butter or a rich olive oil. The technique remains the same, and the result is still incredibly moist and flavorful. I’ve done this for friends with dairy allergies, and it was a huge hit.
- Smoked Turkey Variation: For a completely different flavor profile, try smoking the turkey instead of roasting it. Apply the herb butter as directed, then smoke the turkey at 225-250°F (107-121°C) for about 30-40 minutes per pound, or until it reaches an internal temperature of 165°F (74°C). The smoky flavor with the herbs is a match made in heaven.
Serving & Storage Suggestions
How you serve and store your turkey is just as important as how you cook it. Here’s how to make the most of your beautiful bird.
- Serving: Carve the turkey after it has rested. Arrange the slices on a warm platter. Spoon a little of the pan juices over the meat to keep it extra moist. It’s absolutely divine served with classic sides like creamy mashed potatoes, green bean casserole, and a rich, herby stuffing.
- What to Drink: A crisp, dry white wine like a Sauvignon Blanc or a light Pinot Noir is a classic pairing. For a non-alcoholic option, a sparkling apple cider or a sage-infused sparkling water is lovely and festive.
- Storing Leftovers: Store leftover turkey meat in an airtight container in the refrigerator. It will keep for 3-4 days. The flavors actually meld and deepen overnight, making leftovers almost better than the original meal.
- Reheating: The best way to reheat turkey without drying it out is in a low oven. Place slices in a baking dish, add a splash of chicken broth or turkey gravy, cover with foil, and warm at 300°F (150°C) for 15-20 minutes. You can also reheat it in a skillet with a little butter over medium-low heat.
- Freezing: Turkey freezes beautifully. Shred or slice the meat and place it in freezer-safe bags or containers. It will keep for up to 3 months. Thaw overnight in the refrigerator before reheating. The texture will be slightly different, but it’s perfect for soups, casseroles, or sandwiches.
Nutritional Information & Benefits
While this is undeniably a comforting, celebratory dish, it also offers some nutritional benefits worth noting. It’s all about balance, right?
- Estimated Nutritional Values (per 4-ounce serving of breast meat): Calories: 250, Fat: 14g, Saturated Fat: 8g, Cholesterol: 110mg, Sodium: 400mg, Protein: 30g, Carbohydrates: 1g. (Note: These are estimates and will vary based on the specific ingredients and portion sizes.)
- Lean Protein: Turkey is an excellent source of high-quality, lean protein, which is essential for muscle building and repair. A single serving provides a significant portion of your daily protein needs.
- Rich in B Vitamins: Turkey is packed with B vitamins, including B6 and B12, which are crucial for energy metabolism and brain function.
- Selenium Source: This mineral is a powerful antioxidant that supports thyroid function and the immune system. Turkey is one of the best dietary sources of selenium.
- Garlic and Herbs: Garlic is known for its immune-boosting properties, while herbs like sage and rosemary are rich in antioxidants. So you’re getting a little wellness boost with every delicious bite.
- Dietary Considerations: This recipe is naturally gluten-free and low-carb. To make it dairy-free, simply substitute the butter with a plant-based alternative. It’s a fantastic option for many different dietary needs.
Conclusion
This Cozy Herb Butter Roasted Turkey is more than just a recipe; it’s an experience. It’s the smell that fills your home on a chilly afternoon, the golden centerpiece that brings everyone to the table, and the taste of a moment well spent. It’s proof that the most comforting things in life are often the simplest. I love this recipe because it reminds me of that lesson from my neighbor Dave—that sometimes, the best approach is the most direct one. It’s forgiving, it’s foolproof, and it’s absolutely delicious. I truly hope you give it a try and make it your own. Add a little extra garlic, swap in your favorite herbs, or try that maple glaze. The kitchen is your cozy kingdom. I’d love to hear how it turns out! Leave a comment below and tell me about your turkey triumph, or share a photo of your beautiful bird. Happy roasting, and here’s to many cozy meals shared with the people you love.
Frequently Asked Questions
Do I really need to let the turkey come to room temperature before roasting?
Yes, it makes a big difference! Letting it sit out for about 45 minutes takes the chill off the meat. This helps it cook more evenly, so the breast doesn’t dry out while you’re waiting for the thigh to reach temperature. It’s a simple step that pays off in juiciness.
Can I use dried herbs instead of fresh for the butter?
You can, but fresh herbs really do make a difference in this recipe. They have a much brighter, more vibrant flavor. If you only have dried, use about one-third of the amount called for. So, for 3 tablespoons of fresh sage, use 1 tablespoon of dried. The texture won’t be as lovely, but it will still taste good.
My turkey is browning too quickly. What should I do?
No worries at all! This happens sometimes, especially in a hot oven. The easiest fix is to tent the turkey loosely with a piece of aluminum foil. This will shield the skin from direct heat while the inside continues to cook. Just remove the foil for the last 15-20 minutes if you want to crisp the skin back up.
How do I make gravy from the pan drippings?
It’s simple! After you remove the turkey, pour the pan drippings into a fat separator or a glass measuring cup. Let the fat rise to the top. Spoon off the fat, reserving about 1/4 cup. Place the roasting pan on the stovetop over medium heat. Add the reserved fat and whisk in 1/4 cup of all-purpose flour. Cook for a minute, then slowly whisk in the remaining defatted drippings and about 2 cups of chicken or turkey broth. Simmer until thickened, season with salt and pepper, and you’re done!
Can I prepare the herb butter ahead of time?
Absolutely! The herb butter can be made up to 3 days in advance. Just wrap it tightly in plastic wrap or store it in an airtight container in the refrigerator. Let it soften again at room temperature for about 30 minutes before you’re ready to use it. This is a great time-saver if you’re planning a big meal.
Pin This Recipe!
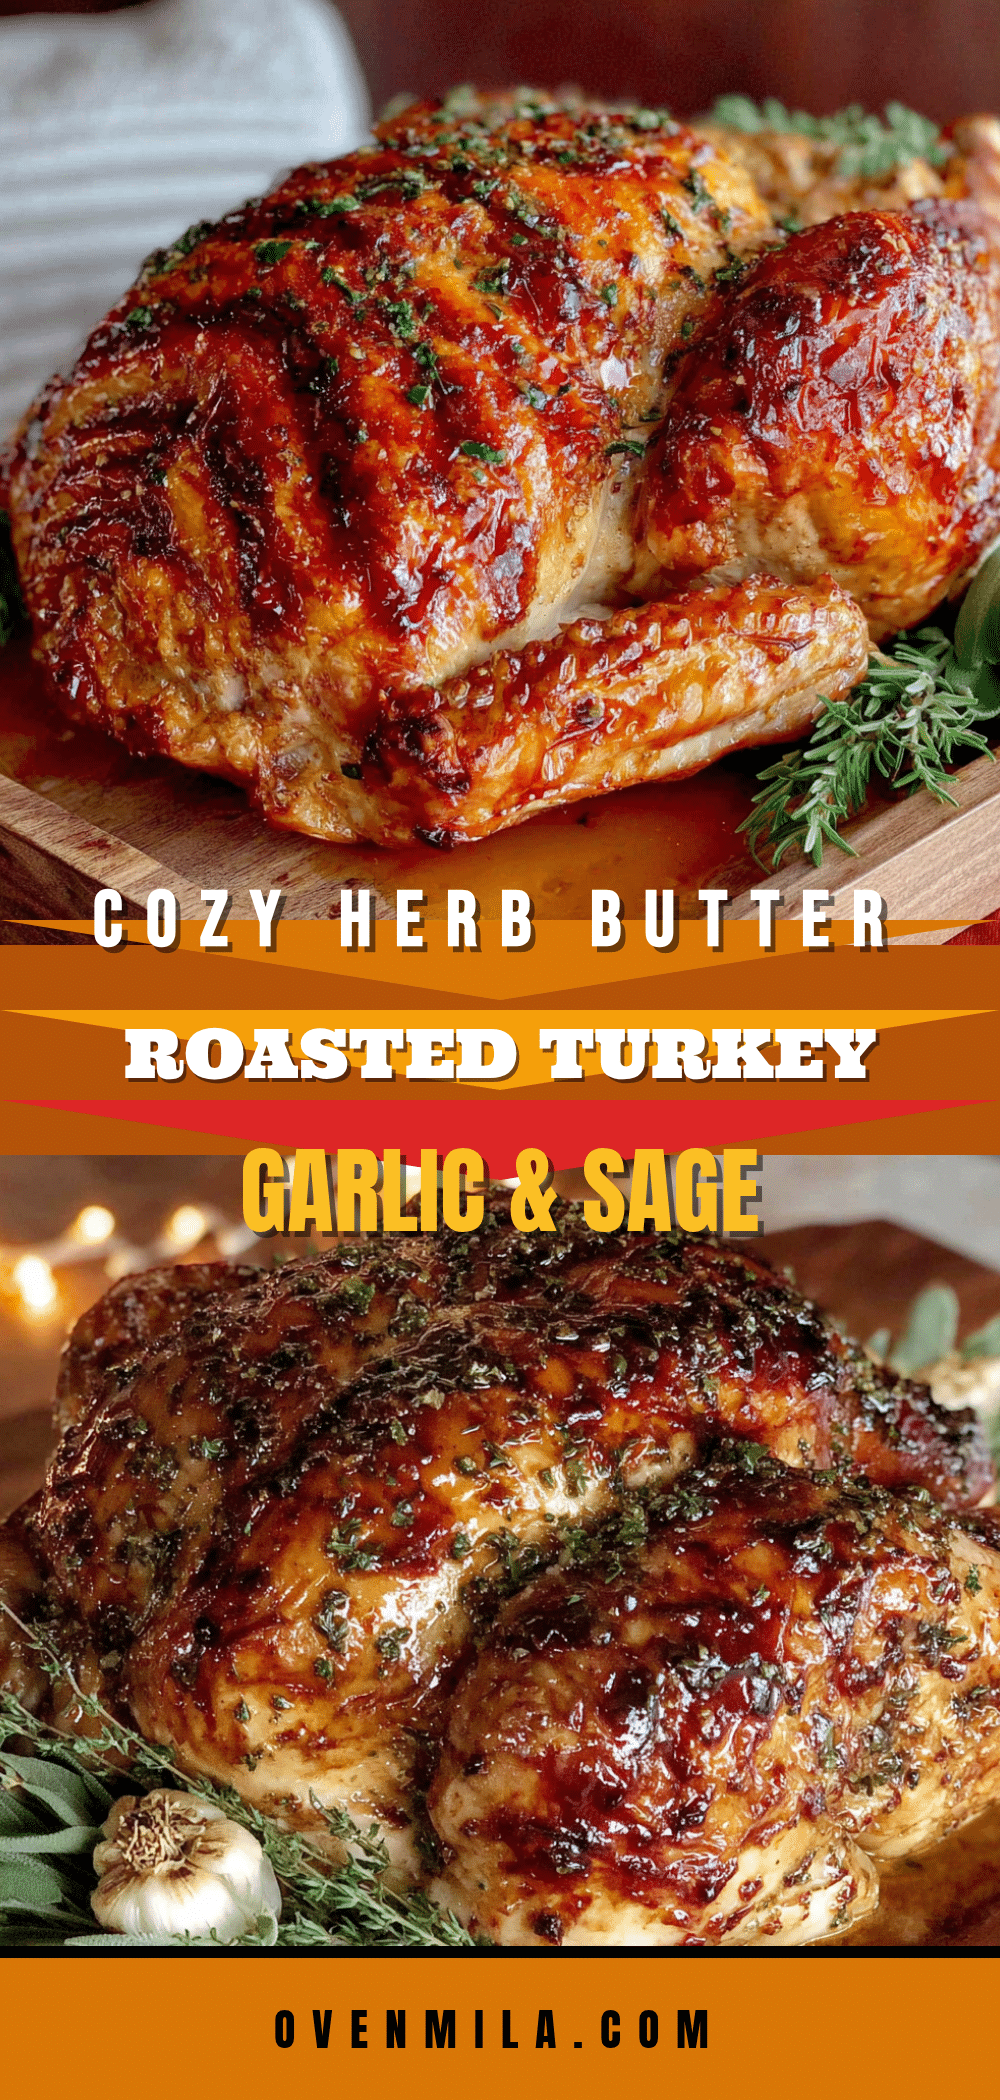
Cozy Herb Butter Roasted Turkey with Garlic & Sage
This is the juiciest, most flavorful turkey you’ll ever make. A simple herb butter technique, inspired by a neighbor’s no-fuss approach, delivers incredibly moist meat and crispy, golden skin with minimal effort.
- Prep Time: 20 minutes
- Cook Time: 2 hours 30 minutes
- Total Time: 3 hours 20 minutes
- Yield: 8-10 servings 1x
- Category: Main Course
- Cuisine: American
Ingredients
- 1 cup (2 sticks) unsalted butter, softened
- 4 cloves garlic, minced
- 3 tablespoons fresh sage, finely chopped
- 2 tablespoons fresh rosemary, finely chopped
- 2 tablespoons fresh thyme leaves
- 1 teaspoon kosher salt
- 1/2 teaspoon black pepper, freshly ground
- 1 (12-14 pound) whole turkey, thawed if frozen
- 1 tablespoon kosher salt
- 1 teaspoon black pepper, freshly ground
- 1 large onion, quartered
- 1 lemon, halved
- 4 cloves garlic, smashed
- Fresh sage, rosemary, and thyme sprigs (optional)
Instructions
- About 45 minutes before you plan to start, take the turkey out of the refrigerator and let it sit at room temperature. Remove the neck and giblets from the cavity. Pat the turkey completely dry inside and out with paper towels.
- In a small bowl, combine the softened butter, minced garlic, chopped sage, rosemary, thyme, 1 teaspoon of salt, and 1/2 teaspoon of pepper. Mix until well combined.
- Season the inside of the turkey cavity generously with salt and pepper. Stuff it with the quartered onion, lemon halves, and smashed garlic cloves. If you have extra herb sprigs, tuck those in too.
- Using your fingers, gently loosen the skin from the breast meat. Start at the neck cavity and work your way down, being careful not to tear the skin. Take about two-thirds of the herb butter and push it under the skin, spreading it evenly over both breasts. Rub the remaining butter all over the outside of the turkey, covering the legs, thighs, and wings.
- Sprinkle the remaining 1 tablespoon of salt and 1 teaspoon of pepper all over the outside of the turkey.
- Using kitchen twine, tie the turkey legs together. Tuck the wing tips under the body of the turkey.
- Place the turkey on a roasting rack inside your roasting pan. Pour about 1 cup of water or chicken broth into the bottom of the pan. Roast in a preheated 425°F (220°C) oven for 30 minutes. Then, reduce the oven temperature to 350°F (175°C) and continue roasting.
- A 12-14 pound turkey will take approximately 2 1/2 to 3 hours total. Start checking the internal temperature about 30 minutes before you think it will be done.
- Insert an instant-read thermometer into the thickest part of the thigh, avoiding the bone. You’re looking for 165°F (74°C). Also check the breast, which should be at 160°F (71°C). If the skin is getting too dark before the turkey is done, tent it loosely with aluminum foil.
- Once the turkey is out of the oven, transfer it to a cutting board or platter. Let it rest, uncovered, for at least 30 minutes before you start carving.
Notes
Let the turkey come to room temperature for 45 minutes before roasting for even cooking. Pat the turkey bone-dry for crispy skin. Use an instant-read thermometer instead of the pop-up timer. Let the turkey rest for at least 30 minutes before carving to retain juices. The herb butter can be made up to 3 days in advance.
Nutrition
- Serving Size: 4 ounces of breast m
- Calories: 250
- Sodium: 400
- Fat: 14
- Saturated Fat: 8
- Carbohydrates: 1
- Protein: 30
Keywords: roasted turkey, herb butter turkey, Thanksgiving turkey, garlic sage turkey, juicy turkey, crispy skin turkey, holiday turkey


