My neighbor Carla wasn’t trying to impress anyone. I’d stopped by to borrow a ladder—ours had mysteriously vanished after a garage sale—and the smell hit me before I even got past her screen door. It was sweet, but not in a cloying way. Earthy. Warm. Like autumn had been distilled into something you could eat with a spoon.
She was pulling a baking sheet out of the oven, and I just stood there in her kitchen doorway, probably looking like a total weirdo. “What is that?” I asked, and she shrugged—actually shrugged—and said, “Oh, just squash. I’m bringing it to book club.” Just squash. Like it was no big deal. Let me tell you, it was a very big deal.
I watched her scrape the roasted pieces into a dish, crumble some goat cheese over the top while it was still hot, and drizzle this glossy maple situation over everything. She didn’t measure anything. She didn’t consult a recipe. She just… knew. And honestly, that’s the kind of cook I’ve always wanted to be—the one who doesn’t need a binder of printouts to make something unforgettable.
So I went home, ladder-less but inspired, and spent the next two weeks trying to reverse-engineer what I’d smelled. This guest-favorite maple roasted butternut squash with goat cheese is the result of all that obsessive testing. It’s the dish I bring to every gathering now, the one people hover around asking for the recipe. And the best part? It looks like you fussed, but you really, really didn’t. Maybe you’ve been looking for that kind of recipe too—the one that makes people think you’re a kitchen wizard when really you just know a good combination when you taste it.
Why You’ll Love This Recipe
Let’s be honest—there are a million ways to roast squash. But this version? It’s the one that disappears first at every potluck, dinner party, and holiday table I’ve ever brought it to. Here’s why it works so well:
- Incredibly Simple Ingredients: You probably have maple syrup and olive oil in your pantry right now. The goat cheese is the only “special” item, and it’s worth every penny.
- Minimal Active Time: The oven does most of the work. You’re looking at about 10 minutes of prep, then you can go set the table or pour yourself a drink.
- Perfect for Entertaining: This dish is designed for hosts. You can prep it hours ahead, pop it in the oven when guests arrive, and serve it warm with zero last-minute fuss. It’s the kind of thing that makes you look like you’ve got it all together.
- Crowd-Pleasing Flavor: The sweetness of the maple-roasted squash against the tangy, creamy goat cheese is a combination that gets people every time. I’ve seen self-proclaimed “squash haters” go back for thirds.
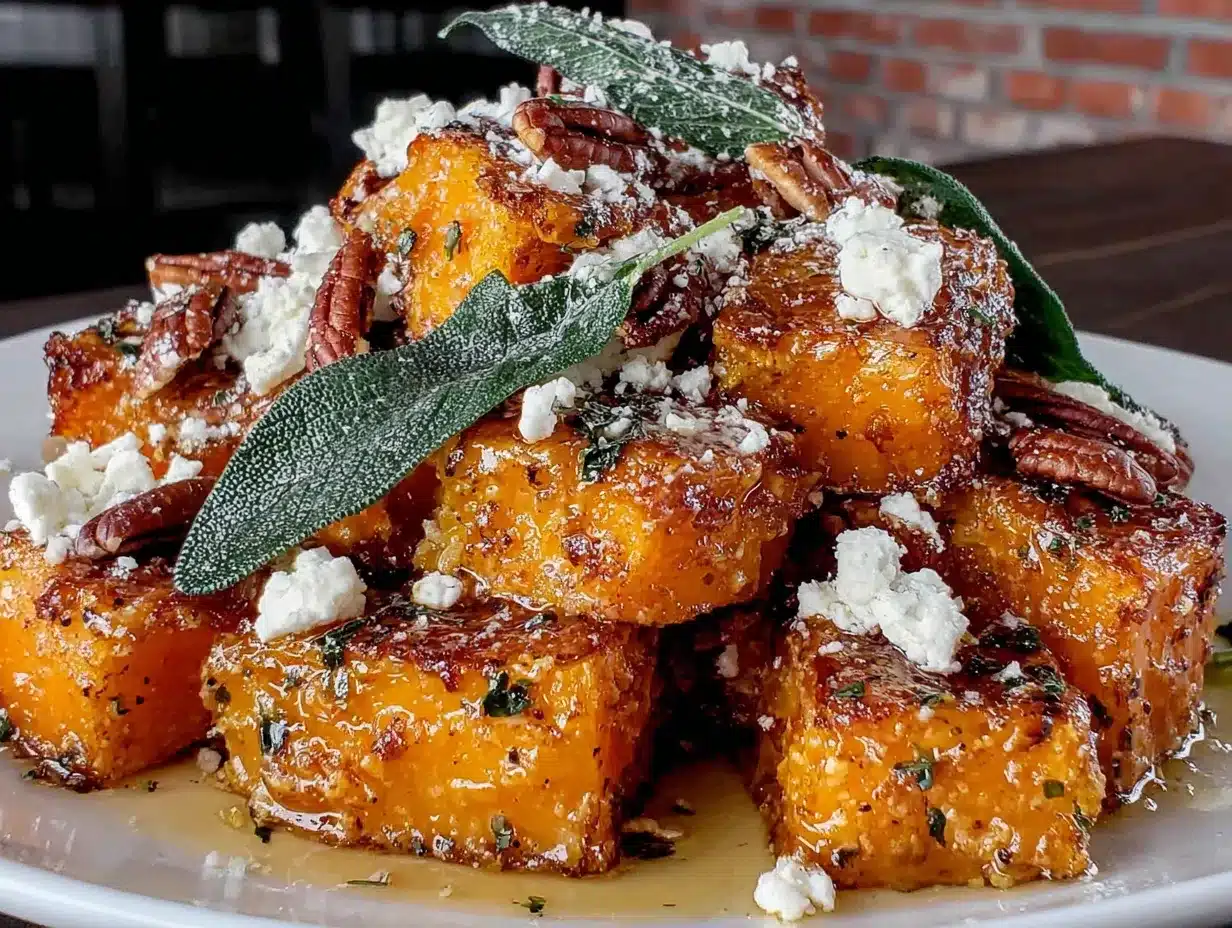
- Visually Stunning: The deep orange of the roasted squash, the white crumbles of cheese, the dark green of fresh thyme or parsley—it’s a gorgeous dish that doesn’t need any special plating skills.
What makes this recipe different from the dozens of other roasted squash recipes out there is the technique. I roast the squash at a high temperature to get those caramelized, almost-burnt edges that are pure flavor, then I hit it with the maple glaze in the last few minutes so it doesn’t burn. The goat cheese goes on while everything is still hot, so it softens and melts into the crevices. It’s not just squash with cheese on top—it’s a cohesive dish where every bite has a little bit of everything.
This is comfort food that feels special. It’s the dish you bring when you want to impress but don’t want to stress. The one that makes people close their eyes after the first bite and say, “Okay, I need this recipe.” And honestly, that never gets old.
What Ingredients You Will Need
This recipe uses simple, wholesome ingredients that come together to create something far greater than the sum of their parts. Most of these are pantry staples or easy to find at any grocery store.
For the Roasted Squash
- 1 large butternut squash (about 3 pounds) — Look for one that feels heavy for its size with a firm, unblemished skin. You’ll need to peel, seed, and cube it. If you’re short on time, pre-cut cubes from the store work fine, though they tend to be a bit drier.
- 3 tablespoons olive oil — Use a good-quality extra virgin olive oil here. It adds flavor, not just moisture. I prefer California Olive Ranch for its consistent quality.
- 1 teaspoon salt — I use fine sea salt. Kosher salt works too, but you might need a bit more since the flakes are larger.
- ½ teaspoon black pepper — Freshly ground is always better, but pre-ground works in a pinch.
- ½ teaspoon smoked paprika — This is my secret ingredient. It adds a subtle smokiness that plays beautifully with the sweet maple. Don’t skip it.
- ¼ teaspoon cayenne pepper (optional) — Just a tiny pinch for warmth, not heat. Leave it out if you’re serving a crowd with sensitive palates.
For the Maple Glaze
- ¼ cup pure maple syrup — Please, please use real maple syrup, not pancake syrup. Grade A dark amber is my go-to for its robust flavor. The fake stuff has a different consistency and won’t caramelize the same way.
- 2 tablespoons unsalted butter — Adds richness and helps the glaze cling to the squash. You can use vegan butter or coconut oil for a dairy-free version.
- 1 tablespoon apple cider vinegar — This cuts the sweetness and adds a tiny tang that makes the whole dish more interesting. Don’t leave it out.
- 1 clove garlic, minced — A small clove, finely grated. It melts into the glaze and adds savory depth.
For the Topping
- 4 ounces goat cheese, crumbled — Buy a log and crumble it yourself—it’s cheaper and the texture is better than pre-crumbled. Let it sit at room temperature for 15 minutes before crumbling for easier handling.
- ¼ cup toasted pecans or walnuts (optional) — Adds crunch. Toast them in a dry pan for 2-3 minutes until fragrant. Watch them closely—they burn fast.
- 2 tablespoons fresh thyme leaves or chopped parsley — For color and freshness. Thyme is more traditional with squash, but parsley works beautifully too.
- Flaky sea salt for finishing — A sprinkle of Maldon or similar flaky salt right before serving makes a surprising difference. It adds little bursts of saltiness that contrast with the sweet squash.
Equipment Needed
You don’t need a fancy kitchen to make this dish. Here’s what you’ll need:
- Large baking sheet — A half-sheet pan (18×13 inches) is ideal. If your baking sheet is smaller, use two pans or roast in batches. Crowding the pan leads to steamed, not roasted, squash.
- Chef’s knife and cutting board — A sharp knife makes peeling and cubing butternut squash much safer and easier. I learned this the hard way after a close call with a dull blade.
- Vegetable peeler — A sturdy Y-peeler works best for butternut squash. The skin is tough, so a flimsy peeler will just frustrate you.
- Small saucepan — For making the maple glaze. Any small pot will do.
- Mixing bowl — For tossing the squash with oil and spices.
- Spatula or wooden spoon — For stirring the glaze and flipping the squash halfway through roasting.
- Serving platter or shallow bowl — Something wide enough to spread the squash in a single layer for that beautiful presentation.
If you don’t have a baking sheet, a large cast-iron skillet works surprisingly well. The sides are higher, so you’ll need to stir a bit more, but the even heat distribution is excellent. And if you’re really in a pinch, a 9×13 baking dish will work—just expect the squash to be a bit softer since there’s less surface area for caramelization.
One tip: line your baking sheet with parchment paper for easier cleanup. The maple glaze can get sticky and charred on the pan, and scrubbing it off is no one’s idea of a good time.
Preparation Method
This recipe comes together in about 45 minutes, with most of that being hands-off oven time. Here’s how to do it:
- Preheat your oven to 425°F (220°C). A hot oven is crucial for getting those caramelized edges. While it’s heating, position a rack in the middle of the oven.
- Prep the squash. Cut off both ends of the butternut squash with your chef’s knife, then slice it in half where the narrow neck meets the wider bulb. Use a vegetable peeler to remove the tough skin from both pieces. It’s easier to peel the neck first, then cut it into rounds, and finally cube those rounds. For the bulb, cut it in half lengthwise, scoop out the seeds with a spoon, then cut the flesh into 1-inch cubes. Aim for uniform pieces so they cook evenly. This takes about 10 minutes the first few times, but you’ll get faster with practice.
- Season the squash. Place the cubed squash in a large mixing bowl. Add the olive oil, salt, pepper, smoked paprika, and cayenne if using. Toss everything together with your hands or a spatula until every piece is coated. Don’t skip this step—tossing in a bowl distributes the seasoning much better than drizzling oil over the squash on the pan.
- Spread on the baking sheet. Arrange the squash pieces in a single layer on your parchment-lined baking sheet. Make sure they’re not touching or overlapping—crowding is the enemy of caramelization. If they’re piled up, they’ll steam and get mushy instead of roasting and getting those gorgeous brown edges.
- Roast for 20 minutes. Pop the pan in the oven and set a timer. While it roasts, start making the glaze.
- Make the maple glaze. In a small saucepan over medium heat, combine the maple syrup, butter, apple cider vinegar, and minced garlic. Stir occasionally until the butter is melted and the mixture is smooth. Let it simmer gently for 2-3 minutes until it thickens slightly—it should coat the back of a spoon. Remove from heat and set aside. Don’t walk away from this; maple syrup can burn quickly if you’re not watching.
- Flip and glaze. After 20 minutes, pull the baking sheet out of the oven. Use a spatula to flip each piece of squash over. They should be starting to brown on the bottom. Drizzle the maple glaze evenly over the squash, then use the spatula to gently toss the pieces so they’re all coated. Return the pan to the oven.
- Roast for another 10-15 minutes. Keep an eye on it during this last stretch. The squash should be tender enough to pierce easily with a fork, and the glaze should be bubbling and caramelized. The edges should be dark brown in spots—that’s where the flavor lives. If your oven runs hot, check at the 10-minute mark.
- Add the goat cheese. Transfer the hot roasted squash to your serving platter. While it’s still steaming, crumble the goat cheese evenly over the top. The heat will soften the cheese, making it creamy and slightly melty. This is the moment where the dish really comes together.
- Finish and serve. Sprinkle the toasted nuts over the top if using, then scatter the fresh thyme or parsley. Finish with a pinch of flaky sea salt. Serve warm or at room temperature—both are delicious.
One thing I learned through trial and error: don’t add the goat cheese too early. If you put it on before the final roast, it’ll melt into a puddle and lose that lovely creamy texture. The residual heat from the just-roasted squash is perfect for softening it just enough.
Cooking Tips & Techniques
After making this dish more times than I can count, I’ve picked up a few tricks that make a real difference:
Cut your squash evenly. This is the number one thing that separates good roasted squash from great roasted squash. Pieces that are roughly the same size cook at the same rate. If you have tiny pieces burning while big chunks are still raw, you’re going to have a bad time. Take the extra minute to even them out.
Don’t skip the high heat. I’ve tried roasting squash at 375°F and it just doesn’t get the same caramelization. 425°F is the sweet spot—hot enough to brown the edges and concentrate the natural sugars, but not so hot that the outside burns before the inside is tender. If your oven runs hot, you can drop it to 400°F and add a few minutes to the cooking time.
Use the parchment paper trick. Line your baking sheet with parchment paper, then drizzle a tiny bit of oil on the paper and spread it around before adding the squash. This prevents sticking even better than oiling the pan directly, and cleanup is a breeze. I learned this after spending 20 minutes scrubbing a baking sheet that looked like it had been through a war.
Toast your nuts in advance. If you’re adding pecans or walnuts, toast them while the oven is preheating. Spread them on a small baking sheet and pop them in for 3-5 minutes until they smell nutty and are slightly darker. Watch them like a hawk—they go from toasted to burnt in about 30 seconds. I may or may not have set off a smoke detector learning this lesson.
Make the glaze ahead. You can make the maple glaze up to three days in advance and keep it in the fridge. Just warm it gently on the stovetop or in the microwave before using. This is a huge time-saver when you’re hosting and trying to do a million things at once.
Use room temperature goat cheese. Cold goat cheese straight from the fridge is crumbly and hard to distribute evenly. Let it sit on the counter for 15-20 minutes before you crumble it. It’ll be much easier to work with and will soften more beautifully over the hot squash.
Variations & Adaptations
This recipe is wonderfully flexible. Here are some ways to make it your own:
Dairy-Free Version: Skip the goat cheese and use a dairy-free alternative like cashew-based “cheese” or simply leave it off entirely. The maple-roasted squash is delicious on its own. You can also substitute the butter in the glaze with coconut oil or a vegan butter stick.
Add Some Heat: If you’re cooking for a crowd that likes spice, increase the cayenne to ½ teaspoon or add a finely chopped fresh chili (like a serrano or Thai bird chili) to the maple glaze. The sweet-spicy combination is addictive. I did this for a game day gathering and it was the first dish to run out.
Make It a Salad: Let the roasted squash cool completely, then toss it with arugula, dried cranberries, and a simple lemon vinaigrette. Crumble the goat cheese over the top and add the toasted nuts. It’s a stunning fall salad that holds up well at a potluck.
Swap the Squash: Butternut is classic, but this recipe works beautifully with delicata squash (no need to peel—the skin is edible!), acorn squash, or even sweet potatoes. Adjust cooking times as needed—delicata cooks faster, while sweet potatoes might need an extra 5 minutes.
Herb Variations: If you don’t have fresh thyme, try fresh rosemary (use half the amount—it’s stronger), sage, or even a sprinkle of za’atar for a Middle Eastern twist. Each herb brings a completely different personality to the dish.
Balsamic Maple Version: Replace the apple cider vinegar in the glaze with balsamic vinegar for a deeper, more complex sweetness. Add a teaspoon of Dijon mustard to the glaze for extra tang. This variation is especially good with roasted Brussels sprouts mixed in.
Serving & Storage Suggestions
This dish is incredibly versatile when it comes to serving. Here’s how to make the most of it:
Serving Temperature: This maple roasted butternut squash with goat cheese is best served warm, right after the goat cheese has had a chance to soften. But honestly, it’s also delicious at room temperature—the flavors actually continue to develop as it sits. If you’re bringing it to a potluck or dinner party, you can make it up to an hour ahead and let it rest on the counter.
What to Serve Alongside: This dish is a natural companion to roasted meats like pork tenderloin, roast chicken, or turkey. It’s also fantastic alongside a hearty grain bowl with farro or quinoa. For a vegetarian meal, serve it with a lentil salad or stuffed into acorn squash halves. At a holiday table, it fits right in alongside mashed potatoes, green bean casserole, and cranberry sauce.
Presentation Tips: Spread the squash in a single layer on a wide, shallow platter rather than piling it in a bowl. This shows off the caramelized edges and allows guests to see all the beautiful colors. Sprinkle the herbs and flaky salt right before serving for maximum visual impact. A wooden board or a white ceramic platter makes the colors pop.
Storage: Leftovers keep well in an airtight container in the refrigerator for up to 4 days. The goat cheese will firm up again, and the squash will soften slightly, but the flavor is still excellent. I actually love eating the leftovers cold, straight from the fridge—the flavors are even more concentrated.
Reheating: To reheat, spread the squash on a baking sheet and warm it in a 350°F oven for about 10 minutes. This helps restore some of the caramelized edges. You can also microwave it in 30-second bursts, but the texture won’t be as good. If you’re reheating a large batch, add a tiny splash of maple syrup or olive oil to refresh the glaze.
Freezer Instructions: You can freeze the roasted squash (without the goat cheese or toppings) for up to 3 months. Let it cool completely, then transfer to a freezer-safe bag or container. To serve, thaw in the refrigerator overnight, reheat in the oven, then add fresh goat cheese and toppings. The texture won’t be quite as firm as fresh, but it’s still delicious.
Nutritional Information & Benefits
This dish isn’t just delicious—it’s packed with good-for-you ingredients. Here’s a rough breakdown per serving (based on 6 servings):
| Nutrient | Amount Per Serving |
|---|---|
| Calories | 280 |
| Total Fat | 16g |
| Saturated Fat | 6g |
| Cholesterol | 15mg |
| Sodium | 420mg |
| Total Carbohydrates | 32g |
| Dietary Fiber | 5g |
| Sugars | 16g |
| Protein | 6g |
| Vitamin A | 350% DV |
| Vitamin C | 40% DV |
| Calcium | 8% DV |
| Iron | 10% DV |
Butternut squash is a nutritional powerhouse. It’s loaded with vitamin A (from beta-carotene), which supports eye health and immune function. It’s also a great source of fiber, which helps with digestion and keeps you feeling full. The goat cheese adds protein and calcium, while the olive oil provides heart-healthy monounsaturated fats.
This recipe is naturally gluten-free and can easily be made dairy-free or vegan with the substitutions mentioned above. It’s also relatively low in sugar compared to many holiday side dishes, with most of the sweetness coming from the maple syrup and the natural sugars in the squash.
One note: if you’re watching your sodium intake, you can reduce the salt in the recipe and rely more on the flaky sea salt finish for flavor. A little goes a long way when it’s sprinkled on top.
Conclusion
This guest-favorite maple roasted butternut squash with goat cheese has become my signature dish for a reason. It’s the kind of recipe that makes people think you spent hours in the kitchen when really, the oven did all the heavy lifting. It’s impressive enough for a holiday table but simple enough for a Tuesday night dinner.
What I love most about this recipe is how forgiving it is. Your cubes don’t have to be perfect. Your glaze might be a little thin or a little thick. The squash might be a tiny bit overdone or a tiny bit under. And you know what? It’s still going to be delicious. It’s still going to disappear. Someone is still going to ask for the recipe.
I hope you make this for your next gathering—whether it’s a big holiday dinner, a casual potluck, or just a dinner party with close friends. I hope it becomes your signature dish too. And when someone asks you for the recipe, I hope you shrug a little and say, “Oh, it’s just squash.” Because honestly, that’s the best part.
Have you tried this recipe? I’d love to hear how it turned out! Leave a comment below and let me know what variations you tried or what you served it with. And if you loved it, share it with a friend who needs a new go-to dish for their next dinner party.
Frequently Asked Questions
Can I use frozen butternut squash for this recipe?
You can, but I don’t recommend it. Frozen squash releases a lot of water as it thaws, which will prevent the caramelization that makes this dish so good. If you’re in a pinch, thaw the frozen squash completely, pat it very dry with paper towels, and spread it in a single layer on the baking sheet. You might need to add 5-10 minutes to the roasting time.
How do I peel a butternut squash without losing a finger?
This is a common fear! The easiest method is to microwave the whole squash for 2-3 minutes to soften the skin slightly. Let it cool until you can handle it, then use a sharp Y-peeler. Alternatively, you can cut the squash into large chunks and peel each piece individually—it’s actually easier than trying to peel the whole thing at once.
Can I make this recipe ahead of time for a party?
Absolutely. You can roast the squash and make the glaze up to a day ahead. Keep them separately in the fridge. About 30 minutes before serving, reheat the squash on a baking sheet at 350°F, drizzle with the warmed glaze, and add the goat cheese and toppings fresh. This is my go-to strategy for Thanksgiving—it frees up oven space and reduces stress.
What can I use instead of goat cheese?
Feta cheese is the best substitute—it has a similar tangy, salty profile. Ricotta salata (a firmer, saltier version of ricotta) also works well. For a dairy-free option, try crumbled firm tofu that’s been marinated in lemon juice and salt, or use a vegan feta-style cheese. The dish is also lovely without any cheese at all.
Is this recipe suitable for meal prep?
Yes, with a few adjustments. Roast the squash and make the glaze up to 4 days ahead, but keep the goat cheese, nuts, and fresh herbs separate. When you’re ready to eat, reheat the squash, add the glaze, and top with the fresh ingredients. This keeps everything tasting fresh and prevents the nuts from getting soggy or the cheese from melting into a puddle.
Pin This Recipe!
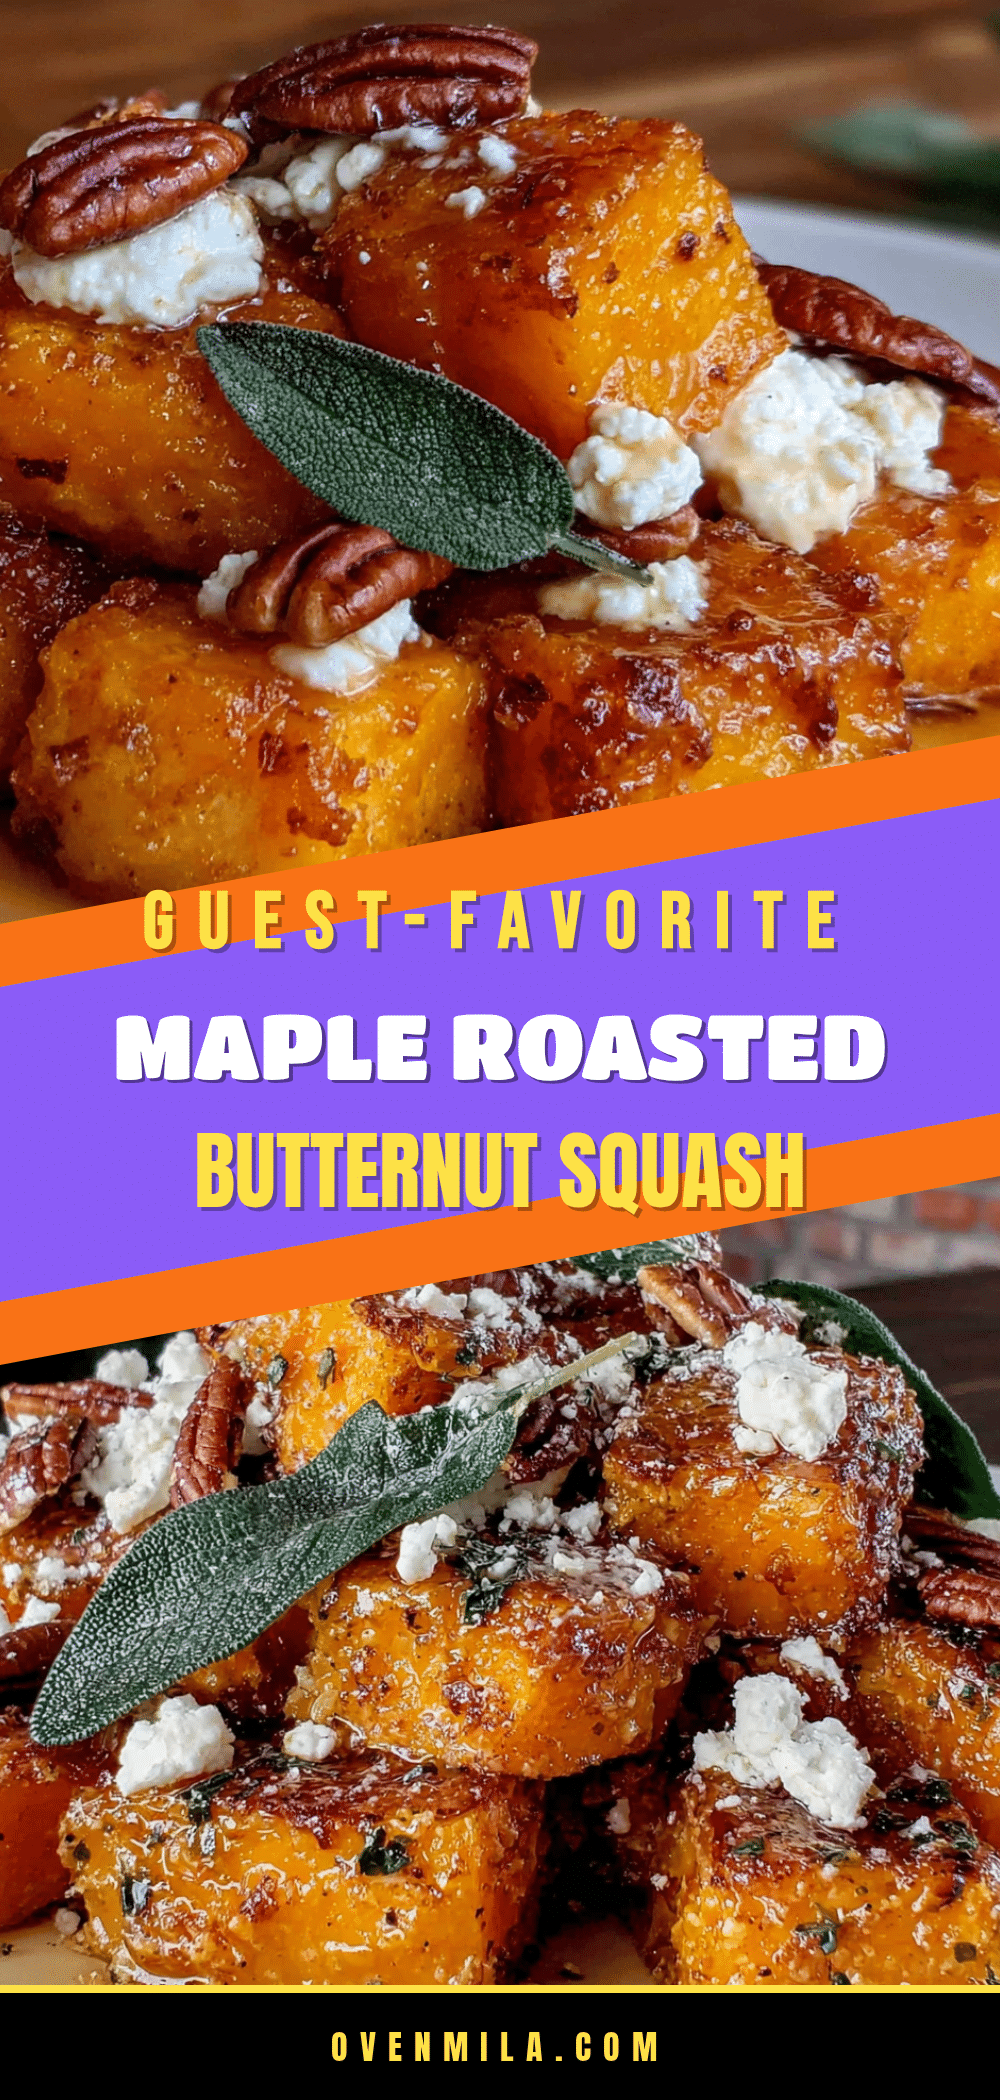
Easy Maple Roasted Butternut Squash with Goat Cheese
This guest-favorite maple roasted butternut squash with goat cheese is the dish you bring when you want to impress but don’t want to stress. It’s incredibly simple, with minimal active time, and the combination of sweet maple-roasted squash with tangy, creamy goat cheese is a crowd-pleaser.
- Prep Time: 10 minutes
- Cook Time: 30-35 minutes
- Total Time: 40-45 minutes
- Yield: 6 servings 1x
- Category: Side Dish
- Cuisine: American
Ingredients
- 1 large butternut squash (about 3 pounds), peeled, seeded, and cubed into 1-inch pieces
- 3 tablespoons olive oil
- 1 teaspoon fine sea salt
- ½ teaspoon black pepper, freshly ground
- ½ teaspoon smoked paprika
- ¼ teaspoon cayenne pepper (optional)
- ¼ cup pure maple syrup (Grade A dark amber preferred)
- 2 tablespoons unsalted butter
- 1 tablespoon apple cider vinegar
- 1 clove garlic, minced
- 4 ounces goat cheese, crumbled (room temperature)
- ¼ cup toasted pecans or walnuts (optional)
- 2 tablespoons fresh thyme leaves or chopped parsley
- Flaky sea salt for finishing
Instructions
- Preheat your oven to 425°F (220°C). Position a rack in the middle of the oven.
- Prep the squash: Cut off both ends, slice in half where the narrow neck meets the wider bulb. Use a vegetable peeler to remove the skin. For the neck, cut into rounds then cubes. For the bulb, cut in half lengthwise, scoop out seeds, then cut into 1-inch cubes.
- Place cubed squash in a large mixing bowl. Add olive oil, salt, pepper, smoked paprika, and cayenne (if using). Toss until every piece is coated.
- Spread squash in a single layer on a parchment-lined baking sheet, ensuring pieces are not touching or overlapping.
- Roast for 20 minutes.
- Meanwhile, make the maple glaze: In a small saucepan over medium heat, combine maple syrup, butter, apple cider vinegar, and minced garlic. Stir until butter is melted and mixture is smooth. Let simmer gently for 2-3 minutes until slightly thickened. Remove from heat.
- After 20 minutes, remove baking sheet from oven. Flip each piece of squash. Drizzle maple glaze evenly over squash and gently toss to coat.
- Return to oven and roast for another 10-15 minutes, until squash is tender and edges are caramelized and dark brown in spots.
- Transfer hot roasted squash to a serving platter. While still steaming, crumble goat cheese evenly over the top.
- Sprinkle with toasted nuts (if using), fresh thyme or parsley, and a pinch of flaky sea salt. Serve warm or at room temperature.
Notes
Don’t add goat cheese too early; it will melt. Use room temperature goat cheese for easier crumbling. Line baking sheet with parchment for easy cleanup. Make glaze up to 3 days ahead and refrigerate. For dairy-free, skip goat cheese and use coconut oil or vegan butter in glaze.
Nutrition
- Serving Size: 1 serving (about 1 c
- Calories: 280
- Sugar: 16
- Sodium: 420
- Fat: 16
- Saturated Fat: 6
- Carbohydrates: 32
- Fiber: 5
- Protein: 6
Keywords: maple roasted butternut squash, goat cheese, butternut squash recipe, fall side dish, holiday side dish, easy roasted squash, maple glaze


