I was standing in the parking lot of a gas station last Tuesday, of all places, when the smell hit me. It wasn’t the usual mix of gasoline and stale coffee—it was warm, nutty, and sweet, drifting from the exhaust vent of a tiny bakery tucked behind the pumps. And suddenly I was eight years old, sitting on a cracked vinyl stool at my neighbor Mrs. Kowalski’s kitchen counter, watching her stir a pot of butter on the stove until it turned the color of autumn leaves. She’d let me peek into the pan while she explained, her voice gravelly and patient, that browning butter was “the secret nobody tells you.” I didn’t understand then. I just knew those cookies she pulled out of the oven—crispy at the edges, impossibly chewy in the middle—tasted like nothing else in the world. Mrs. Kowalski moved away the summer I turned ten, and I never got her recipe. Honestly, I’ve spent years trying to get back to that exact moment, that specific chew, that rich, almost caramel flavor that no ordinary cookie could touch. Maybe you’ve been there—chasing a taste you can barely describe, something that feels like home even if you can’t quite remember the address. This is my attempt to bottle that feeling. And let me tell you, after a dozen burnt batches and a few tears, I finally cracked it.
This perfect chewy brown butter chocolate chip cookies recipe is more than just a dessert—it’s a showstopper for any gathering. When you’re hosting a dinner party or a festive get-together, you want something that looks impressive but doesn’t keep you stuck in the kitchen while your guests are having fun. These cookies are exactly that. They’re the kind of thing that makes people hover around the kitchen island, grabbing one after another, asking, “What did you do to these?” And the best part? You can prep the dough ahead of time, so when your guests arrive, all you have to do is scoop and bake. The smell alone will have them talking before they even take a bite.
Why You’ll Love This Recipe
Let me be real with you—I’ve tested this recipe more times than I care to count. I’ve used different butters, different sugars, different chilling times. I’ve burned the butter, under-chilled the dough, and over-baked the cookies until they were basically crackers. But this version? This is the one. Here’s why it works so well for hosts like us:
- Quick & Easy: The active prep time is only about 20 minutes. The dough needs a chill, but that’s hands-off time you can use to set out appetizers or pour yourself a glass of wine.
- Simple Ingredients: No weird specialty flours or obscure extracts. You probably have everything except maybe the good chocolate, and that’s worth the trip.
- Perfect for Hosting: These cookies are made for a crowd. The recipe scales beautifully, and they stay chewy for days—if they last that long.
- Crowd-Pleaser: I’ve served these at potlucks, holiday parties, and casual get-togethers. They disappear every single time. Kids love them, adults love them, even that one friend who “doesn’t really do dessert” will grab two.
- Unbelievably Delicious: The brown butter adds this deep, nutty, almost toffee-like flavor that regular cookies just can’t compete with. It’s the kind of cookie that makes you close your eyes after the first bite.
What makes this recipe different from the dozens of other chocolate chip cookie recipes out there? It’s the technique. I’m not just browning the butter for flavor—I’m also using a specific ratio of brown to white sugar that gives you that perfect chew without making the cookies greasy or cakey. And the chilling step? Non-negotiable. It lets the flavors meld and the butter solidify just enough so the cookies spread slowly in the oven, creating that ideal texture. This isn’t just another cookie recipe. It’s the one you’ll come back to again and again.
What Ingredients You Will Need
This recipe uses simple, everyday ingredients, but each one plays a crucial role in creating that perfect chewy texture and rich flavor. The star of the show is the brown butter, which transforms ordinary cookies into something extraordinary.
- 1 cup (2 sticks or 226g) unsalted butter — Don’t use salted butter here. You want to control the salt level yourself, and unsalted butter lets the nutty flavor of the browning process shine through. I prefer Kerrygold or any European-style butter for its higher fat content, which browns more evenly.
- 2 ¼ cups (280g) all-purpose flour — Spoon and level your flour. Scooping directly from the bag packs in too much flour and gives you dry, crumbly cookies. If you want to get technical, weigh it.
- 1 teaspoon baking soda — This gives the cookies their lift and helps them spread just the right amount.
- ½ teaspoon salt — I use fine sea salt. It balances the sweetness and enhances the brown butter flavor. If you only have table salt, use ¼ teaspoon.
- 1 cup (200g) packed light brown sugar — This is the secret to the chew. The molasses in brown sugar keeps the cookies soft and adds a hint of caramel flavor that pairs beautifully with the brown butter. I use light brown sugar, but dark brown sugar works too—it’ll give you an even deeper flavor.
- ½ cup (100g) granulated sugar — White sugar helps the cookies spread and gives them those crispy, lacy edges.
- 2 large eggs, room temperature — Room temperature eggs emulsify into the butter mixture much better than cold ones. If you forgot to take them out, place them in a bowl of warm water for 5 minutes.
- 2 teaspoons vanilla extract — Use pure vanilla extract if you can. It’s worth it. The vanilla rounds out the nutty notes of the brown butter.
- 2 cups (340g) semi-sweet chocolate chips or chopped chocolate — I like to use a mix: about half semi-sweet chips and half dark chocolate chunks. It gives you pockets of melty chocolate in every bite. Ghirardelli or Guittard are my go-to brands. For a fancier touch, chop up a good quality chocolate bar—the irregular pieces look beautiful and melt differently.
- Flaky sea salt, for finishing (optional but highly recommended) — A sprinkle of Maldon salt on top right after they come out of the oven takes these cookies to another level. Trust me.
Substitution notes: If you’re out of brown sugar, you can make your own by mixing 1 cup of granulated sugar with 1 tablespoon of molasses. For a dairy-free version, use vegan butter—just be aware that the browning process will be slightly different, and the flavor won’t be as rich. Gluten-free all-purpose flour blends work well, but add ¼ teaspoon of xanthan gum if your blend doesn’t already include it.
Equipment Needed
You don’t need a lot of fancy equipment for these cookies, which is part of why I love making them for parties. Here’s what you’ll need:
- Light-colored saucepan or skillet — This is important. A dark pan makes it hard to see the color of the butter as it browns, and you’ll end up burning it. I use a stainless steel saucepan. A heavy-bottomed pan distributes heat more evenly.
- Large mixing bowl — Any bowl will do, but a wide one makes mixing easier.
- Whisk — For combining the dry ingredients and for whisking the brown butter and sugars.
- Rubber spatula or wooden spoon — For folding in the chocolate chips. A spatula is gentler and helps you avoid overmixing.
- Baking sheets — I recommend heavy-duty, light-colored baking sheets. Dark sheets can cause the bottoms of the cookies to burn before the tops are done. If you only have dark sheets, reduce the baking time by 1-2 minutes.
- Parchment paper or silicone baking mats — Parchment paper is my preference because it’s easy to clean up and the cookies slide right off. Silicone mats work too, but they can make the cookies spread a bit more.
- Cookie scoop (about 1.5 tablespoons) — Not strictly necessary, but it gives you evenly sized cookies that bake uniformly. A #40 scoop is perfect.
- Cooling rack — Letting the cookies cool on the pan for a few minutes before transferring them to a rack is key for that chewy texture.
If you don’t have a cookie scoop, just use two spoons or your hands—lightly greased hands work best to prevent sticking. And if you’re baking for a crowd, you might want to invest in a second baking sheet so you can rotate pans and bake more cookies at once.
Preparation Method
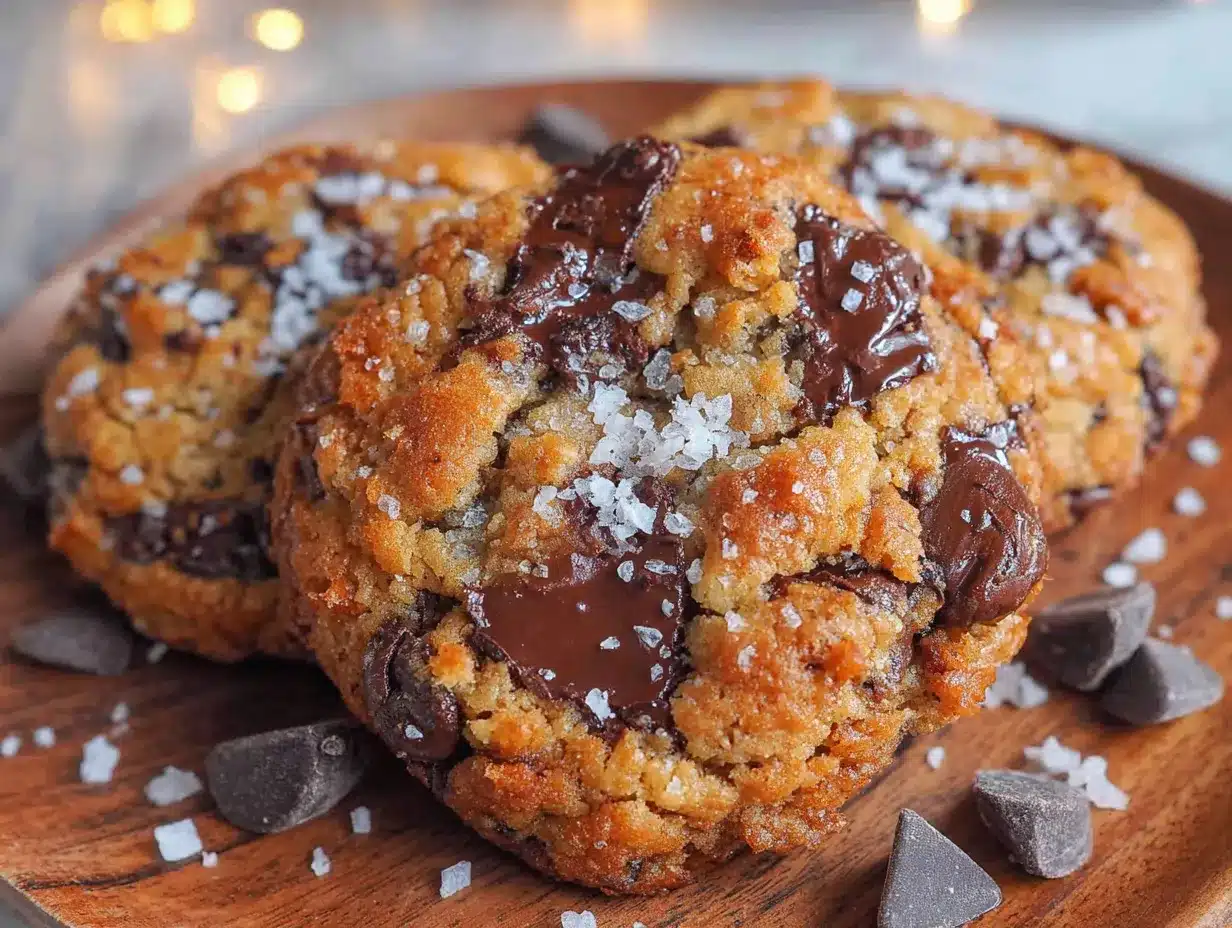
Alright, let’s get to it. This method is broken down into clear steps, and I’ve included all the little details I wish someone had told me the first time I tried browning butter.
- Brown the butter. Cut the butter into tablespoon-sized pieces and place them in your light-colored saucepan. Set the pan over medium heat and let the butter melt, stirring occasionally with a rubber spatula or whisk. Once it’s fully melted, it will start to foam and bubble. Keep stirring—don’t walk away. After about 5-7 minutes, the foam will subside, and you’ll see small brown specks forming at the bottom of the pan. The butter will smell nutty and amazing. As soon as it turns a deep amber color (think the color of a penny), remove it from the heat immediately. Pour it into a heatproof bowl to stop the cooking process. Let it cool for about 10-15 minutes. You want it warm, not hot, when you add it to the sugars.
- Mix the dry ingredients. In a medium bowl, whisk together the flour, baking soda, and salt. Set this aside. I like to use a whisk here because it aerates the flour and ensures the baking soda is evenly distributed.
- Combine the wet ingredients. In your large mixing bowl, combine the cooled brown butter with the brown sugar and granulated sugar. Whisk them together until they’re well combined—it should look like wet sand. The mixture will be a little grainy, and that’s totally fine. Add the room temperature eggs one at a time, whisking vigorously after each addition until the mixture is smooth and glossy. Stir in the vanilla extract. The mixture should look thick and almost shiny at this point.
- Add the dry ingredients. Pour the flour mixture into the wet mixture. Use a rubber spatula to fold everything together gently. Stir just until you no longer see streaks of flour—overmixing will make the cookies tough. A few small lumps are okay.
- Fold in the chocolate. Add the chocolate chips or chopped chocolate. Fold them in with a few gentle strokes. Make sure they’re evenly distributed throughout the dough.
- Chill the dough. This step is crucial. Cover the bowl with plastic wrap and refrigerate for at least 30 minutes, but ideally 1-2 hours. Chilling solidifies the butter, which means the cookies will spread less and have a thicker, chewier texture. You can even chill it overnight—the flavor actually gets better. If you’re in a hurry, you can scoop the dough into balls first and then chill them on a baking sheet for 20 minutes in the freezer.
- Preheat and prepare. When you’re ready to bake, preheat your oven to 350°F (175°C). Line two baking sheets with parchment paper. If you’re using one sheet, let it cool completely between batches—a hot sheet will make the dough spread too much.
- Scoop and bake. Use your cookie scoop or a spoon to portion out rounded tablespoons of dough (about 1.5 tablespoons each). Place them about 2 inches apart on the prepared baking sheets. For that bakery-style look, press a few extra chocolate chips onto the tops of the dough balls—it makes them look gorgeous. Bake one sheet at a time for 10-12 minutes, or until the edges are golden brown and the centers are still slightly soft and puffy. They will look underdone in the middle—that’s exactly what you want. The carryover heat will finish cooking them.
- Cool and finish. Let the cookies cool on the baking sheet for 5 minutes. This allows them to set up without becoming hard. Then transfer them to a wire rack to cool completely. While they’re still warm, sprinkle a tiny pinch of flaky sea salt on top of each cookie if you’re using it. The salt cuts through the sweetness and makes the brown butter flavor pop.
Cooking Tips & Techniques
I’ve made plenty of mistakes with these cookies, and I’m happy to share them so you don’t have to learn the hard way.
Don’t rush the browning. The first time I tried browning butter, I cranked the heat to high because I was impatient. Big mistake. The butter burned before it even had a chance to develop that nutty flavor. Medium heat is your friend. And watch closely—the transition from perfectly browned to burnt happens in about 30 seconds.
Use a light-colored pan. I cannot stress this enough. I once used a dark nonstick skillet because it was the only clean pan I had, and I ended up with black butter. You need to see the color change clearly. A stainless steel or light-colored enamel pan is ideal.
Chill the dough, seriously. I know it’s tempting to skip this step when you’re in a hurry or when guests are about to arrive. But don’t. Unchilled dough will spread into flat, thin, crispy cookies—not the thick, chewy ones we’re after. If you’re really short on time, scoop the dough into balls and pop them in the freezer for 20 minutes. That works in a pinch.
Measure your flour correctly. The number one mistake people make with cookie recipes is using too much flour. Fluff your flour with a spoon, then spoon it into your measuring cup and level it off with a knife. Or better yet, use a kitchen scale. I promise it makes a difference.
Bake one sheet at a time. I know it takes longer, but it’s worth it. When you put two sheets in the oven, the heat circulates unevenly, and you’ll end up with some cookies overdone and some underdone. If you need to bake in batches, keep the remaining dough in the fridge between batches.
Underbake them slightly. Pull the cookies out when the edges are set and golden, but the centers still look soft and slightly puffy. They will continue to bake on the hot pan for a few minutes after you take them out. If you wait until the centers look fully baked, they’ll be overdone and crunchy.
Variations & Adaptations
One of the best things about this recipe is how adaptable it is. Here are some variations I’ve tried that turned out amazing:
Dark Chocolate & Sea Salt: Swap the semi-sweet chips for dark chocolate chunks (60-70% cacao) and double up on the flaky sea salt. The bitterness of the dark chocolate balances the sweet, nutty brown butter perfectly. This is my personal favorite for a grown-up cookie platter.
Brown Butter & Toffee: Replace half the chocolate chips with chopped toffee bits (like Heath bars). The toffee gets all melty and crunchy, and it adds another layer of buttery flavor. This version disappears fastest at parties, I’ve noticed.
Gluten-Free Version: Substitute the all-purpose flour with a 1:1 gluten-free baking flour blend (I like Bob’s Red Mill). Add ¼ teaspoon of xanthan gum if your blend doesn’t include it. Chill the dough for at least an hour—gluten-free dough is stickier and needs more time to firm up. The texture will be slightly more delicate, but the flavor is still incredible.
Vegan Version: Use vegan butter (like Miyoko’s or Earth Balance) and a flax egg (1 tablespoon ground flaxseed mixed with 3 tablespoons water, left to sit for 5 minutes). The vegan butter won’t brown quite as deeply, but it still gets nutty. Chill the dough for at least 2 hours. The texture will be a bit more cakey than chewy, but honestly, it’s still delicious.
Add Some Crunch: Fold in ½ cup of toasted chopped pecans or walnuts along with the chocolate. Toast the nuts in a dry skillet over medium heat for 3-4 minutes until fragrant—this brings out their flavor and keeps them crunchy in the cookies.
Serving & Storage Suggestions
These cookies are best served warm, when the chocolate is still slightly melty and the edges are crisp. If you’re hosting, bake them just before your guests arrive or right after dinner. The smell of brown butter and chocolate wafting through the house is a guaranteed crowd-pleaser.
For presentation, arrange the cookies on a beautiful platter or a wooden board. Stack them slightly—it looks more rustic and inviting. A small bowl of flaky sea salt on the side is a nice touch if anyone wants to add an extra sprinkle. These cookies pair beautifully with a cold glass of milk, a hot cup of coffee, or even a glass of bourbon for an adult treat.
Storage: Store cooled cookies in an airtight container at room temperature for up to 5 days. Place a slice of bread in the container—it will absorb excess moisture and keep the cookies soft and chewy. Replace the bread every other day if the cookies last that long.
Freezing: You can freeze the baked cookies for up to 3 months. Layer them between sheets of parchment paper in a freezer-safe container. Thaw at room temperature for about 20 minutes. Or, freeze the unbaked dough balls on a baking sheet, then transfer them to a freezer bag. Bake from frozen—just add 2-3 minutes to the baking time.
Reheating: Pop a cookie in the microwave for 10 seconds for that fresh-from-the-oven experience. Or reheat in a 300°F oven for 5 minutes.
The flavors actually deepen after a day or two. The brown butter gets more pronounced, and the texture becomes even chewier. So don’t worry if you make them a day ahead—they might even be better.
Nutritional Information & Benefits
Let’s be honest—these are cookies, not health food. But I do think there’s something to be said for using real, whole ingredients. The brown butter adds a depth of flavor that means you can use less sugar and still feel completely satisfied. Here’s a rough estimate per cookie (based on 24 cookies):
- Calories: 220
- Fat: 12g
- Carbohydrates: 28g
- Protein: 3g
- Sugar: 18g
- Sodium: 120mg
The butter provides a small amount of vitamin A and healthy fats, while the dark chocolate (if you use it) is rich in antioxidants. The eggs add protein. But honestly, I make these cookies because they make people happy. They’re a treat, and that’s okay. If you’re looking for a slightly lighter version, you can reduce the sugar by ¼ cup and use dark chocolate chips—the brown butter is so flavorful that you won’t miss the extra sweetness.
Allergen note: This recipe contains dairy, eggs, and gluten. For allergen-friendly variations, see the section above.
Conclusion
These perfect chewy brown butter chocolate chip cookies are the kind of recipe that becomes a staple. They’re the ones you’ll make for holiday cookie exchanges, for dinner parties, for Tuesday nights when you just need something good. They’re the ones people will ask you for, again and again. And honestly, that’s the best compliment a recipe can get.
I love this recipe because it reminds me of Mrs. Kowalski and her patient, gravelly voice, but also because it’s become my own. I’ve tweaked it, tested it, burned it, and perfected it. And now it’s yours. Play with the variations, add your own twist, make it your own. That’s what cooking is all about.
I’d love to hear how these turn out for you! Drop a comment below and let me know—did you add toffee? Use dark chocolate? Burn the butter on your first try like I did? Share your photos and tag me on Pinterest. And if you loved this recipe, don’t forget to pin it for later. Happy baking, friends!
Frequently Asked Questions
Can I use salted butter instead of unsalted?
You can, but you’ll need to reduce the added salt in the recipe to ¼ teaspoon. The salted butter will also brown slightly differently because of the added salt content, but it’ll still work in a pinch.
Why did my cookies turn out flat?
Flat cookies usually mean the butter was too warm when you mixed the dough, or you skipped the chilling step. Make sure your brown butter is cooled to room temperature before mixing, and always chill the dough for at least 30 minutes.
Can I make the dough ahead of time?
Absolutely! The dough can be refrigerated for up to 3 days. In fact, the flavor improves as it sits. You can also freeze the scooped dough balls for up to 3 months and bake them straight from the freezer.
How do I know when the butter is properly browned?
You’re looking for a deep amber color, like the color of a new penny. You’ll also see small brown specks at the bottom of the pan, and the butter will smell nutty and toasty. Remove it from the heat as soon as it reaches this stage to prevent burning.
Can I use milk chocolate instead of semi-sweet?
You can, but the cookies will be much sweeter. Milk chocolate also melts more quickly, so you might end up with more spread in the cookies. If you prefer milk chocolate, I recommend using dark chocolate chunks alongside it to balance the sweetness.
Pin This Recipe!
Perfect Chewy Brown Butter Chocolate Chip Cookies

These perfect chewy brown butter chocolate chip cookies are a showstopper for any gathering. With a deep, nutty flavor from browned butter and a perfectly chewy texture, they’re the kind of cookie that makes people hover around the kitchen island.
- Prep Time: 20 minutes
- Cook Time: 12 minutes
- Total Time: 1 hour 32 minutes (including chilling)
- Yield: 24 servings 1x
- Category: Dessert
- Cuisine: American
Ingredients
- 1 cup (2 sticks or 226g) unsalted butter
- 2 ¼ cups (280g) all-purpose flour
- 1 teaspoon baking soda
- ½ teaspoon salt
- 1 cup (200g) packed light brown sugar
- ½ cup (100g) granulated sugar
- 2 large eggs, room temperature
- 2 teaspoons vanilla extract
- 2 cups (340g) semi-sweet chocolate chips or chopped chocolate
- Flaky sea salt, for finishing (optional but highly recommended)
Instructions
- Brown the butter. Cut the butter into tablespoon-sized pieces and place them in a light-colored saucepan over medium heat. Stir occasionally until melted, then continue stirring until it foams and subsides, and small brown specks form at the bottom. When it turns a deep amber color, remove from heat and pour into a heatproof bowl. Let cool for 10-15 minutes.
- Mix the dry ingredients. In a medium bowl, whisk together the flour, baking soda, and salt. Set aside.
- Combine the wet ingredients. In a large mixing bowl, combine the cooled brown butter with the brown sugar and granulated sugar. Whisk until well combined and looks like wet sand. Add the room temperature eggs one at a time, whisking vigorously after each addition until smooth and glossy. Stir in the vanilla extract.
- Add the dry ingredients. Pour the flour mixture into the wet mixture. Use a rubber spatula to fold together gently until no streaks of flour remain. Do not overmix.
- Fold in the chocolate. Add the chocolate chips or chopped chocolate and fold in with a few gentle strokes until evenly distributed.
- Chill the dough. Cover the bowl with plastic wrap and refrigerate for at least 30 minutes, ideally 1-2 hours, or overnight.
- Preheat and prepare. When ready to bake, preheat oven to 350°F (175°C). Line two baking sheets with parchment paper.
- Scoop and bake. Use a cookie scoop or spoon to portion out rounded tablespoons of dough (about 1.5 tablespoons each). Place them about 2 inches apart on the prepared baking sheets. Press a few extra chocolate chips onto the tops if desired. Bake one sheet at a time for 10-12 minutes, until edges are golden brown and centers are still soft and puffy.
- Cool and finish. Let cookies cool on the baking sheet for 5 minutes, then transfer to a wire rack to cool completely. While still warm, sprinkle a tiny pinch of flaky sea salt on top of each cookie if using.
Notes
Chilling the dough is crucial for chewy texture. Use a light-colored pan to monitor browning. Underbake slightly for best results. Store in an airtight container at room temperature for up to 5 days. Freeze baked cookies for up to 3 months or unbaked dough balls for up to 3 months.
Nutrition
- Serving Size: 1 cookie
- Calories: 220
- Sugar: 18
- Sodium: 120
- Fat: 12
- Saturated Fat: 7
- Carbohydrates: 28
- Fiber: 1
- Protein: 3
Keywords: brown butter, chocolate chip cookies, chewy cookies, dessert, baking, cookie recipe