My sister had sworn she hated peanut butter for twenty-three years. Twenty-three years of side-eyeing my PB&Js, of pushing away Thai peanut sauce noodles, of claiming the smell alone made her queasy. Then last October, I brought a batch of these brownies to her place, mostly as an excuse to use her good oven while mine was acting up. I walked into the kitchen halfway through the timer and found her standing over the pan, fork in hand, mid-bite. “Don’t say a word,” she mumbled, crumbs falling. I didn’t have to. The conversion was complete.
That’s the thing about these Wholesome Spiderweb Peanut Butter Brownies, honestly. They don’t try to convince you. They just sit there, all dark chocolate and creamy peanut butter swirls, and let the flavor do the talking. I’d been tinkering with this recipe for months, trying to find that perfect balance where the brownie stays fudgy and rich but the peanut butter doesn’t get lost or, worse, taste artificial. The web pattern on top isn’t just for Halloween, though it does look spectacular for spooky season—it’s actually the best way to distribute that peanut butter goodness in every single bite.
Maybe you’ve been there, staring at a brownie recipe that promises “wholesome” but delivers cardboard. Or maybe you’re just tired of dry, crumbly chocolate squares that leave you reaching for a glass of milk out of disappointment rather than joy. These brownies changed my mind, and my sister’s, and honestly, they might change yours too. I keep making them because they nail that rare combo: rich enough to feel like a real treat, but made with ingredients that don’t make you feel like you’ve derailed your whole week. Let me tell you, that’s harder to pull off than it sounds.
Why You’ll Love This Recipe
I’ve tested this recipe seven times to get it right—seven batches, seven slightly different ratios, and a lot of happy neighbors. Here’s what makes these brownies stand out from every other chocolate-peanut butter combo you’ve tried:
- Quick & Easy: From mixing bowl to oven in under 15 minutes. No stand mixer needed, no complicated techniques. Just a whisk, a spatula, and about ten minutes of active work.
- Simple Ingredients: You’ll find everything at a regular grocery store. No obscure flours, no specialty extracts, no ingredients that cost more than the whole batch should.
- Perfect for Halloween or Any Day: The spiderweb design makes these a showstopper for October parties, but the flavor works year-round. I’ve made them for birthday parties, book club meetings, and random Tuesday cravings.
- Crowd-Pleaser: My sister isn’t the only convert. Kids love the web pattern, adults love the grown-up chocolate intensity, and everyone loves that they don’t feel overly sugary.
- Unbelievably Delicious: The texture hits that sweet spot between fudgy and cakey, with pockets of melted peanut butter throughout. It’s the kind of brownie that makes you close your eyes after the first bite.
What makes this recipe different is the technique. Instead of just swirling peanut butter on top, I blend a portion into the batter itself for even distribution, then create the web with a thicker peanut butter mixture. This means you get peanut butter in every bite, not just the lucky ones. Plus, I swapped in whole wheat pastry flour and reduced the sugar without losing any of that rich, decadent feel. It’s comfort food reimagined—healthier, faster, but with the same soul-soothing satisfaction that made you love brownies in the first place.
What Ingredients You Will Need
This recipe uses simple, wholesome ingredients to deliver bold flavor and satisfying texture without the fuss. Most are pantry staples, and I’ve included notes for easy substitutions where they work best.
For the Brownie Batter
- 1/2 cup (113g) unsalted butter — I prefer Kerrygold for its rich flavor, but any good-quality unsalted butter works. Melted and slightly cooled.
- 3/4 cup (150g) coconut sugar — Adds a subtle caramel note and lower glycemic impact than white sugar. Regular brown sugar works too.
- 1/4 cup (50g) granulated sugar — Helps with structure and that crackly top. You can use all coconut sugar, but the top won’t be as shiny.
- 2 large eggs — Room temperature for better emulsification. If you forget, place them in warm water for 5 minutes.
- 1 teaspoon vanilla extract — Pure, not imitation. It makes a difference in depth of flavor.
- 1/2 cup (60g) unsweetened cocoa powder — I use Ghirardelli for its rich, dark chocolate flavor. Dutch-process also works beautifully.
- 1/2 cup (60g) whole wheat pastry flour — Lighter than regular whole wheat but adds fiber and nuttiness. All-purpose flour is a direct swap.
- 1/4 teaspoon baking powder — Just enough lift without making them cakey.
- 1/4 teaspoon salt — Enhances the chocolate and balances sweetness.
- 1/3 cup (80g) creamy peanut butter — Stirred well before measuring. I love Smucker’s Natural for its clean ingredient list, but any creamy peanut butter works.
For the Peanut Butter Web
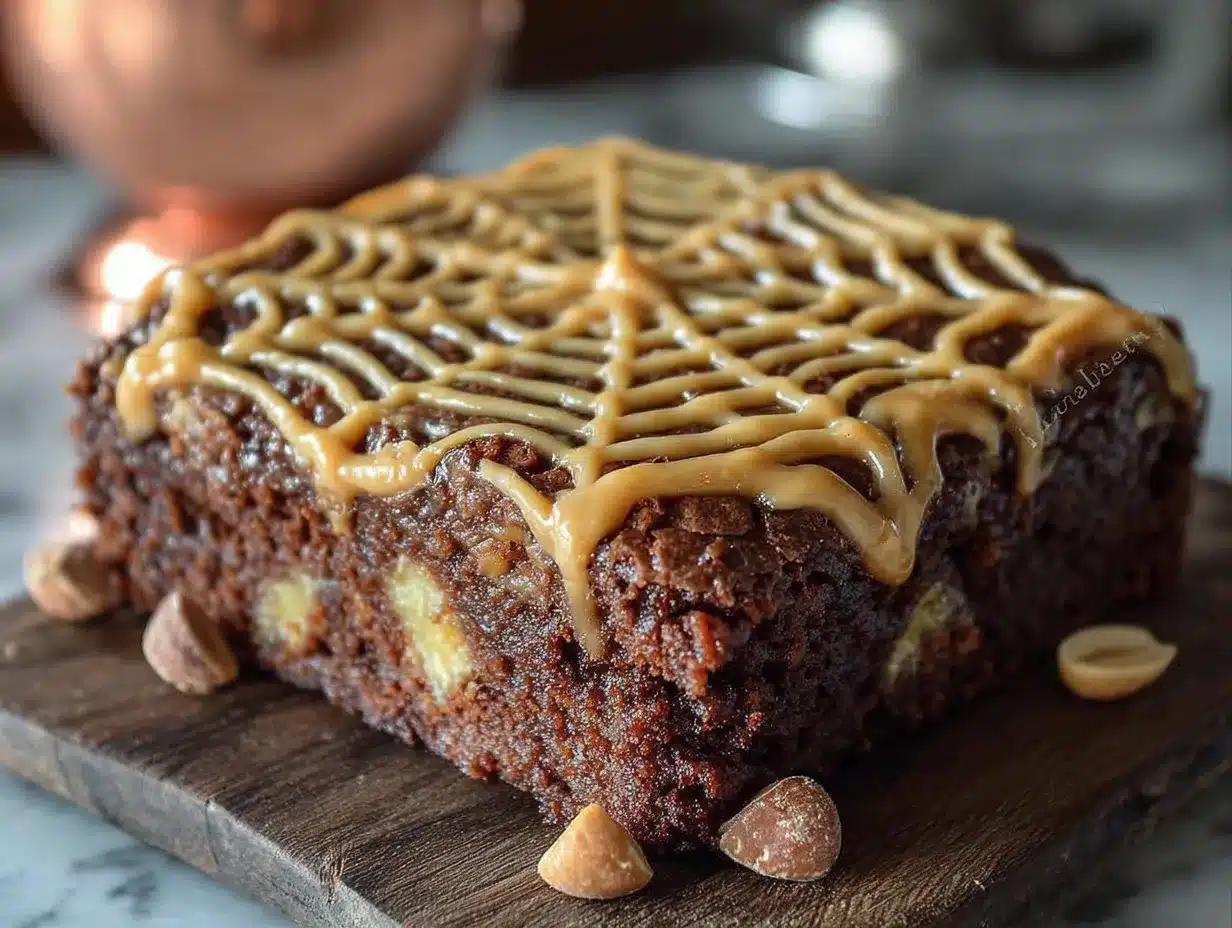
- 1/3 cup (80g) creamy peanut butter — Use the same brand for consistency. Don’t use natural “no-stir” here; the oil separation can make the web too runny.
- 2 tablespoons powdered sugar — Helps stabilize the peanut butter for piping. Maple syrup works in a pinch but makes the web softer.
- 2-3 teaspoons milk — Any kind works. Adds just enough looseness for piping without making it thin.
Ingredient Selection Tips
For the best texture, use a peanut butter that’s smooth and not overly oily. I’ve found that conventional creamy peanut butters (like Jif or Skippy) create the most defined spiderweb pattern because they’re more stable. Natural peanut butters work too, but you’ll need to stir them really well and may need to adjust the milk quantity slightly. If you’re using natural peanut butter, start with 1 teaspoon of milk and add more as needed.
For the cocoa powder, splurge on a good brand here—it’s the star of the show. Cheap cocoa can taste flat and chalky. I’ve tested this with both natural and Dutch-process cocoa, and both work, but Dutch-process gives a deeper, more sophisticated chocolate flavor that pairs beautifully with the peanut butter.
Equipment Needed
You don’t need a professional bakery setup for these, which is honestly my favorite thing about the recipe. Here’s what you’ll need:
- 8×8-inch baking pan — Glass, metal, or ceramic all work. I prefer metal for more even browning on the edges.
- Parchment paper — Non-negotiable for easy removal. Let some hang over the sides for handles.
- Large mixing bowl — For the batter. Any bowl works, but a wider one makes mixing easier.
- Medium bowl — For the peanut butter web mixture.
- Whisk — For combining wet ingredients without overmixing.
- Rubber spatula — For folding and scraping every last bit of batter.
- Piping bag or small zip-top bag — For creating the web. A zip-top bag with a tiny corner snipped off works perfectly and costs nothing.
- Toothpick or skewer — For dragging the web pattern. A wooden skewer gives the cleanest lines.
- Cooling rack — Ensures even cooling and prevents soggy bottoms.
If you don’t have an 8×8 pan, a 9×9 works too—just reduce baking time by 3-5 minutes and expect slightly thinner brownies. I’ve also made these in a 9-inch cast iron skillet, which gives amazing crispy edges. Just watch the baking time closely since cast iron holds heat differently.
Preparation Method
Let’s make some brownies. This process is straightforward, but I’ll walk you through every step with the little tricks I’ve learned from seven batches of trial and error.
- Preheat and prep. Preheat your oven to 350°F (175°C). Line your 8×8 pan with parchment paper, leaving about 2 inches overhanging on two opposite sides. These will be your handles later. Lightly spray the parchment with nonstick spray—trust me on this, even parchment can stick when peanut butter is involved.
- Melt the butter. Place the 1/2 cup butter in a microwave-safe bowl and heat in 30-second intervals until just melted. You want it melted but not hot—if it’s too hot, it’ll cook the eggs when you add them. Let it sit for 2-3 minutes to cool slightly. I’ve definitely scrambled eggs this way before, and it’s not a fun clean-up.
- Mix the sugars and butter. Add the coconut sugar and granulated sugar to the melted butter. Whisk vigorously for about 30 seconds until the mixture looks glossy and the sugar has partially dissolved. This step helps create that crackly top everyone loves.
- Add the eggs and vanilla. Crack both eggs into the mixture, add the vanilla, and whisk until everything is fully combined and slightly thickened—about 45 seconds. The batter should look smooth and glossy, not separated. If it looks greasy, you whisked too fast or the butter was too hot. Don’t panic; just add the dry ingredients immediately and it’ll come together.
- Combine dry ingredients. In a small bowl, whisk together the cocoa powder, whole wheat pastry flour, baking powder, and salt. This ensures even distribution of the leavening agent and prevents bitter cocoa pockets.
- Fold in the dry ingredients. Add the dry mixture to the wet ingredients. Use a rubber spatula to fold gently—about 15-20 strokes. Stop when you can’t see any more white flour streaks. Overmixing at this stage develops gluten and makes brownies tough. A few small lumps are totally fine.
- Add the first peanut butter. Drop the 1/3 cup peanut butter in small spoonfuls over the batter. Use the spatula to fold it in with 5-6 broad strokes. You want ribbons of peanut butter throughout, not fully incorporated. This creates those lovely pockets of peanut butter in the baked brownie.
- Pour and spread. Transfer the batter to your prepared pan. Use the spatula to spread it evenly into all corners. The batter will be thick and somewhat sticky—that’s perfect. Wet the spatula slightly if it’s sticking too much.
- Make the peanut butter web mixture. In a small bowl, combine the remaining 1/3 cup peanut butter with the powdered sugar and 2 teaspoons of milk. Stir until smooth. It should be thick but pipeable—like a slightly runny peanut butter. If it’s too thick, add the remaining teaspoon of milk. If it’s too thin, add a pinch more powdered sugar.
- Pipe the web. Transfer the peanut butter mixture to a piping bag or a small zip-top bag. Snip off a tiny corner (about 1/8 inch). Pipe three concentric circles on top of the brownie batter, starting from the center and working outward. Don’t worry about perfection—the web pattern hides imperfections beautifully.
- Create the spiderweb. This is the fun part. Take a toothpick or skewer and start from the center. Drag it outward through all three circles to the edge of the pan. Repeat every 1-2 inches around the entire pan, like drawing spokes on a wheel. You should end up with 8-12 spokes. The peanut butter circles will pull into a beautiful web pattern. Wipe the toothpick between drags for cleaner lines.
- Bake. Place the pan in the preheated oven and bake for 22-26 minutes. Start checking at 22 minutes—the edges should look set and slightly pulling away from the pan, but the center should still look slightly underdone. A toothpick inserted in the center should come out with a few moist crumbs, not wet batter. The brownies will continue cooking from residual heat as they cool.
- Cool completely. This is the hardest part, I know. Let the brownies cool in the pan on a wire rack for at least 30 minutes. Then use the parchment handles to lift them out and cool completely on the rack—another 30-45 minutes. Cutting them while warm will give you a gooey mess. If you can wait overnight, the flavors deepen and the texture becomes even more fudgy.
- Slice and serve. Use a sharp knife to cut into 16 squares. Wipe the knife clean between cuts for those beautiful Instagram-worthy edges. I like to cut them while they’re still slightly warm from the oven for the fudgiest texture, but fully cooled gives cleaner cuts.
Cooking Tips & Techniques
After making these brownies more times than I care to admit, here are the things I wish I’d known from the start:
Don’t overmix the batter. I learned this the hard way. My first batch came out tough and cakey because I kept mixing until it was “perfectly smooth.” Brownie batter should be stirred just until the flour disappears. A few streaks are fine—they’ll bake out. Overmixing develops gluten, and gluten is the enemy of fudgy brownies.
Watch the baking time like a hawk. Every oven runs differently. My friend’s oven bakes these in exactly 22 minutes; mine takes 25. The difference between perfect brownies and dry brownies is about 90 seconds. Start checking at 20 minutes if you have a convection oven or a particularly hot oven. The brownies are done when the edges are set and the center jiggles just slightly when you shake the pan.
Room temperature eggs matter. I know, I know, who plans ahead? But cold eggs can seize the melted butter and give you a lumpy batter. If you forgot to take them out, place the eggs in a bowl of warm water for 5 minutes. It works every time and saves you from a grainy texture.
Let them cool fully before cutting. This is the advice I ignore most often because I have zero patience. But seriously, warm brownies are a crumbly mess. If you absolutely must have a warm brownie (and I get it), cut the whole pan after it’s fully cooled, then microwave individual pieces for 10 seconds. You get the warm experience without the structural collapse.
Use a wet knife for cleaner cuts. Run your knife under hot water, wipe it dry, then slice. The heat helps the knife glide through without dragging the peanut butter web. Clean the knife between each cut for the prettiest squares.
Variations & Adaptations
One of the best things about this recipe is how adaptable it is. Here are some variations I’ve tried and loved:
Gluten-Free Version: Swap the whole wheat pastry flour for an equal amount of gluten-free all-purpose flour blend (I like Bob’s Red Mill 1-to-1). Add 1/4 teaspoon xanthan gum if your blend doesn’t include it. The texture will be slightly more tender but still wonderfully fudgy. My gluten-sensitive friend couldn’t tell the difference.
Vegan Adaptation: Replace the butter with melted coconut oil or vegan butter (Miyoko’s works great). Use two flax eggs (2 tablespoons ground flaxseed + 6 tablespoons water, let sit for 5 minutes) instead of regular eggs. The texture is slightly denser but still rich and satisfying. Use dairy-free chocolate chips if you want to add them.
Dark Chocolate Peanut Butter Swirl: For an even more intense chocolate experience, add 1/2 cup dark chocolate chips (60-70% cacao) to the batter after mixing. Fold them in gently with the peanut butter. The chocolate chips create little pools of melted chocolate that complement the peanut butter web beautifully.
Spicy Spiderweb: Add 1/4 teaspoon cayenne pepper and 1/2 teaspoon cinnamon to the dry ingredients. The heat sneaks up on you and pairs surprisingly well with the peanut butter. It’s become my secret Halloween party trick—everyone asks what makes them “different.”
Nut-Free Option: Use sunflower seed butter or WowButter instead of peanut butter. The flavor changes, obviously, but the texture and web pattern work exactly the same. Just make sure your sunflower seed butter doesn’t have added sugar, or adjust the powdered sugar in the web mixture accordingly.
Serving & Storage Suggestions
These brownies are incredibly versatile when it comes to serving. Here’s how I like to enjoy them:
Serve at room temperature for the fudgiest texture. If you’ve refrigerated them, let them sit out for 15-20 minutes before serving. Cold brownies are denser and less flavorful—the butter and peanut butter need a little warmth to fully express themselves.
Warm them up for an extra-special treat. Microwave individual brownies for 8-10 seconds. Top with a scoop of vanilla ice cream, a drizzle of warm chocolate sauce, or a sprinkle of flaky sea salt. The contrast between warm brownie and cold ice cream is absolutely unbeatable.
Pair with beverages: A cold glass of milk is the classic choice, but these brownies also pair beautifully with coffee (hot or iced), a rich hot chocolate, or even a dark stout beer for the adults. The bitterness of coffee cuts through the sweetness perfectly.
Storage: Store brownies in an airtight container at room temperature for up to 4 days. Layer them with parchment paper between stacks to prevent sticking. They actually get more fudgy on day two as the moisture redistributes—if you can wait that long.
Freezing: These freeze beautifully. Wrap individual brownies tightly in plastic wrap, then place in a freezer-safe bag or container. They’ll keep for up to 3 months. Thaw at room temperature for about 30 minutes, or microwave frozen brownies for 15-20 seconds for an instant treat. I always keep a stash in the freezer for unexpected guests or late-night cravings.
Flavor development: Honestly, these brownies taste better on day two. The flavors meld together, the peanut butter infuses the chocolate more deeply, and the texture becomes even more fudgy. If you can bake them a day ahead, you’ll be rewarded with the best possible brownie experience.
Nutritional Information & Benefits
These brownies are wholesome enough to feel good about eating, but indulgent enough to satisfy that chocolate craving. Here’s the breakdown per brownie (based on 16 servings):
- Calories: Approximately 195
- Fat: 12g (6g saturated)
- Carbohydrates: 21g (3g fiber, 14g sugar)
- Protein: 5g
- Sodium: 125mg
Health benefits: Using whole wheat pastry flour adds fiber and nutrients compared to all-purpose flour. Coconut sugar has a lower glycemic index than white sugar, meaning it won’t spike your blood sugar as dramatically. Peanut butter provides healthy fats and protein, which helps keep you full and satisfied. Cocoa powder is rich in antioxidants called flavonoids, which support heart health. These aren’t health food, but they’re a smarter choice than traditional brownies—and they taste better, too.
Dietary considerations: This recipe is naturally vegetarian. For gluten-free, vegan, or nut-free options, check the variations section above. These brownies contain peanuts, dairy, eggs, and gluten in their standard form.
Conclusion
These Wholesome Spiderweb Peanut Butter Brownies have become my go-to recipe for so many reasons. They’re impressive enough for Halloween parties, simple enough for a Tuesday night, and wholesome enough that I don’t feel guilty reaching for a second one. The spiderweb pattern is genuinely fun to create—there’s something magical about watching those peanut butter circles transform into a web with just a few drags of a toothpick.
I’d love to hear how yours turn out. Did you try any of the variations? Did your family love them as much as mine did? Drop a comment below and let me know—I read every single one and I’m always looking for new ideas to test in my kitchen. And if you’re feeling generous, share a photo of your spiderweb creation on Pinterest or Instagram. Tag me so I can see your beautiful brownies!
Go ahead, preheat that oven. Your new favorite brownie recipe is waiting.
Frequently Asked Questions
Can I use natural peanut butter for the spiderweb pattern?
You can, but conventional creamy peanut butter (like Jif or Skippy) creates a more defined web because it’s more stable and less oily. If you use natural peanut butter, stir it really well and you may need to add a little extra powdered sugar to thicken it for piping.
How do I keep the brownies from sticking to the parchment paper?
Lightly spray the parchment paper with nonstick cooking spray before adding the batter. Even high-quality parchment can stick when peanut butter is involved, and there’s nothing sadder than losing half your brownie to the paper.
Can I make these brownies ahead of time for a party?
Absolutely! In fact, they taste even better on day two when the flavors have had time to meld. Bake them a day ahead, cool completely, and store in an airtight container at room temperature. They’ll be perfectly fudgy and ready to serve.
Why did my spiderweb pattern disappear during baking?
This usually happens if the peanut butter web mixture was too thin. Make sure you’re using enough powdered sugar to stabilize it—it should be thick but pipeable, like slightly runny peanut butter. Also, don’t press too hard when dragging the toothpick; gentle, even pressure gives the cleanest web.
Can I double this recipe for a 9×13 pan?
Yes! Double all ingredients and bake in a 9×13 pan. The baking time will increase to about 28-32 minutes. Start checking at 28 minutes—the center should still look slightly underdone. You’ll get about 24 brownies from the larger pan.
Pin This Recipe!
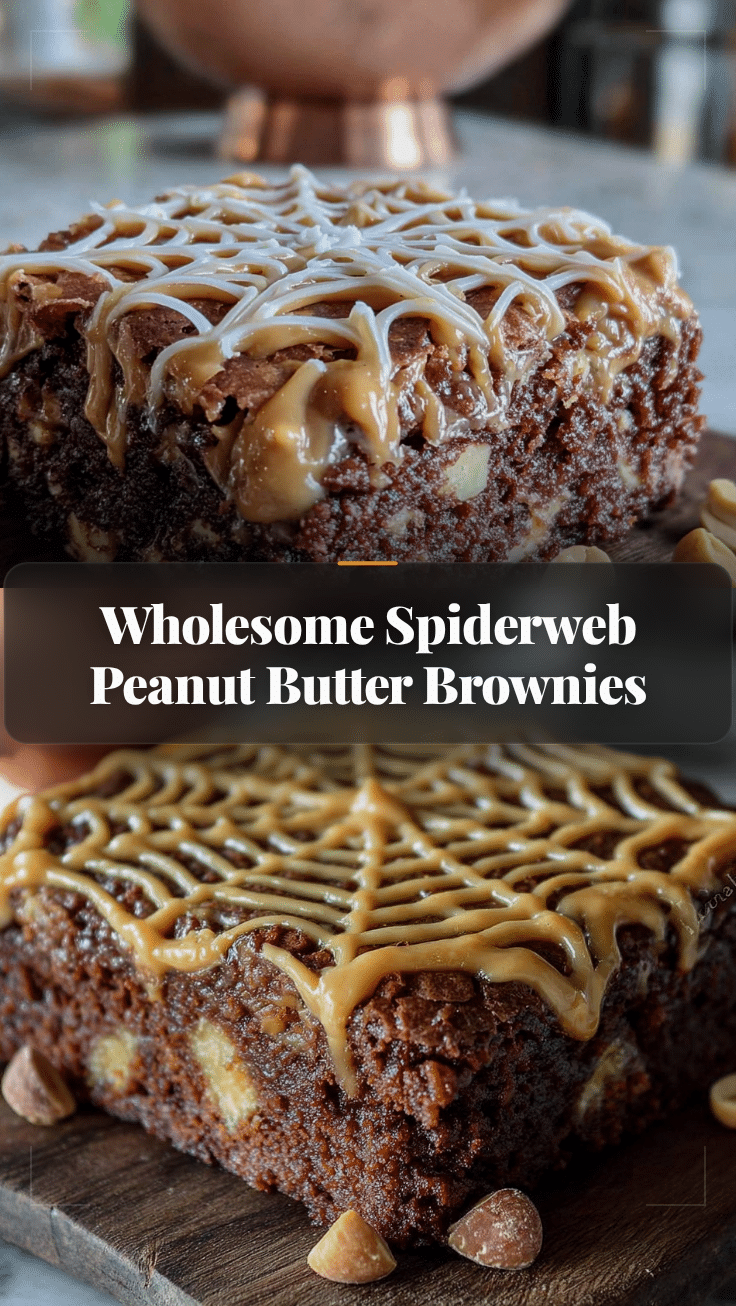
Wholesome Spiderweb Peanut Butter Brownies
Fudgy dark chocolate brownies with creamy peanut butter swirls in a spiderweb pattern. A wholesome twist on a classic treat that’s quick to make and perfect for Halloween or any day.
- Prep Time: 15 minutes
- Cook Time: 25 minutes
- Total Time: 40 minutes
- Yield: 16 servings 1x
- Category: Dessert
- Cuisine: American
Ingredients
- 1/2 cup (113g) unsalted butter
- 3/4 cup (150g) coconut sugar
- 1/4 cup (50g) granulated sugar
- 2 large eggs, room temperature
- 1 teaspoon vanilla extract
- 1/2 cup (60g) unsweetened cocoa powder
- 1/2 cup (60g) whole wheat pastry flour
- 1/4 teaspoon baking powder
- 1/4 teaspoon salt
- 1/3 cup (80g) creamy peanut butter (for batter)
- 1/3 cup (80g) creamy peanut butter (for web)
- 2 tablespoons powdered sugar
- 2–3 teaspoons milk
Instructions
- Preheat oven to 350°F (175°C). Line an 8×8-inch baking pan with parchment paper, leaving overhang on two sides. Lightly spray parchment with nonstick spray.
- Melt butter in a microwave-safe bowl in 30-second intervals until just melted. Let cool for 2-3 minutes.
- Add coconut sugar and granulated sugar to melted butter. Whisk vigorously for about 30 seconds until glossy and sugar partially dissolves.
- Add eggs and vanilla. Whisk until fully combined and slightly thickened, about 45 seconds.
- In a small bowl, whisk together cocoa powder, whole wheat pastry flour, baking powder, and salt.
- Add dry ingredients to wet ingredients. Fold gently with a rubber spatula until just combined (15-20 strokes). Do not overmix.
- Drop 1/3 cup peanut butter in small spoonfuls over batter. Fold with 5-6 broad strokes to create ribbons.
- Transfer batter to prepared pan and spread evenly.
- In a small bowl, combine remaining 1/3 cup peanut butter, powdered sugar, and 2 teaspoons milk. Stir until smooth. Add remaining milk if needed for pipeable consistency.
- Transfer peanut butter mixture to a piping bag or zip-top bag. Snip a tiny corner. Pipe three concentric circles on top of batter, starting from center.
- Using a toothpick or skewer, drag from center outward through all circles to edge of pan. Repeat every 1-2 inches around pan to create spiderweb pattern. Wipe toothpick between drags.
- Bake for 22-26 minutes. Edges should be set and center slightly underdone. A toothpick inserted in center should come out with moist crumbs.
- Cool in pan on wire rack for 30 minutes. Use parchment handles to lift out and cool completely on rack (another 30-45 minutes).
- Slice into 16 squares with a sharp knife, wiping clean between cuts.
Notes
For best results, use conventional creamy peanut butter (like Jif or Skippy) for the spiderweb pattern as it’s more stable. Room temperature eggs are important to prevent butter from seizing. Brownies taste even better on day two. For cleaner cuts, use a wet knife and wipe between cuts. Store in an airtight container at room temperature for up to 4 days or freeze for up to 3 months.
Nutrition
- Serving Size: 1 brownie
- Calories: 195
- Sugar: 14
- Sodium: 125
- Fat: 12
- Saturated Fat: 6
- Carbohydrates: 21
- Fiber: 3
- Protein: 5
Keywords: peanut butter brownies, spiderweb brownies, Halloween brownies, fudgy brownies, wholesome brownies, chocolate peanut butter


