I was standing in the middle of a crowded grocery store aisle on a Thursday afternoon, staring at a display of pudding cups and feeling completely uninspired. My phone buzzed with a text from my sister-in-law asking what I was bringing to the family potluck that weekend. I had nothing. No plan, no ideas, and honestly, no energy to make something complicated. That’s when I spotted the gummy worms hanging on an endcap display, and a memory hit me—my neighbor Mrs. Chen, who lived two doors down when I first moved into my apartment, used to make these little cups of crushed cookies and pudding for her grandkids. She watched me fumbling with a box of brownie mix one afternoon and didn’t say anything at first. Then she just appeared at my door with two plastic cups filled with something that looked like dirt but tasted like pure joy. “For when you need dessert fast,” she said with a shrug. I didn’t ask for the recipe that day—I was too busy eating it. But I never forgot the way those simple layers of chocolate and cream made everyone at her tiny kitchen table smile.
These Oreo Dirt Cups with Gummy Worms are that exact recipe, adapted and tweaked over the years until they became my go-to for every gathering. I mean, let’s be real—there are desserts that require precision, patience, and a pastry bag, and then there are desserts that let you walk into a party feeling like a hero with ten minutes of effort. These dirt cups fall squarely into the second category. Maybe you’ve been there too, standing in your kitchen with guests arriving in an hour and no idea what to serve. That’s where this recipe comes in. It’s the kind of thing that makes people think you tried way harder than you actually did, and honestly, I’m not mad about it.
What started as a quick fix for a potluck turned into the dessert I’m asked to bring to every barbecue, birthday party, and casual dinner. There’s something about digging into a cup of crushed Oreos and creamy pudding and finding a gummy worm hiding underneath that makes adults act like kids again. I’ve watched my brother-in-law, who claims he doesn’t have a sweet tooth, polish off three of these in one sitting. The recipe stayed with me because it’s not just about the taste—it’s about the moment you hand someone a cup and watch their face light up. That’s the kind of dessert worth keeping in your back pocket.
Why You’ll Love This Recipe
Let me tell you why these Oreo Dirt Cups have earned a permanent spot in my recipe rotation. I’ve tested this version at least a dozen times, tweaking the ratios and trying different pudding brands until I got it exactly right. Here’s what makes it stand out:
- Ready in 10 Minutes: No baking, no waiting, no complicated steps. From start to finish, you’re looking at about ten minutes of active work. The hardest part is crushing the Oreos, and honestly, that’s kind of fun.
- Simple Ingredients: You probably have most of these in your kitchen right now. Instant pudding mix, milk, Cool Whip, Oreos, and gummy worms. That’s it. No fancy grocery runs required.
- Perfect for Parties: These are made for gatherings. They’re individual servings, so no slicing or plating needed. Guests can grab one and go, which is perfect for potlucks, barbecues, or any event where people are mingling.
- Crowd-Pleaser: I’ve served these to kids, grandparents, picky eaters, and dessert snobs. Every single person has loved them. There’s something universally appealing about chocolate, cream, and a playful surprise.
- Make-Ahead Friendly: You can assemble these the night before and they actually get better as they sit. The cookies soften slightly, the pudding sets perfectly, and the flavors meld together beautifully.
What makes this recipe different from other dirt cup versions I’ve tried is the texture balance. Some recipes use too much pudding, making it soupy. Others skimp on the Oreos, leaving you with a sad layer of crumbs. I’ve found the sweet spot—enough creamy filling to feel indulgent, but enough crunch to keep every bite interesting. Plus, using frozen whipped topping instead of homemade whipped cream means the texture stays light and stable, even after sitting in the fridge overnight. This isn’t just another version of dirt cups; it’s the one that disappears fastest at every party I bring it to.
What Ingredients You Will Need
This recipe uses simple, everyday ingredients to create something that feels way more special than it should. Here’s everything you need and a few notes on why each one matters:
- 1 package (3.9 ounces) instant chocolate pudding mix – I recommend Jell-O brand for the smoothest texture and richest flavor. The instant version is key here—cook-and-serve pudding won’t set properly for this recipe.
- 2 cups cold whole milk – Whole milk gives the pudding a creamier, more luxurious texture. You can use 2% in a pinch, but avoid skim milk—it makes the pudding thinner and less satisfying. For a dairy-free version, unsweetened oat milk works surprisingly well.
- 1 container (8 ounces) frozen whipped topping, thawed – Cool Whip is my go-to here because it holds its shape and keeps the filling light. If you want to use homemade whipped cream, you’ll need about 1 ½ cups of heavy cream whipped to stiff peaks, but it won’t hold up as well overnight.
- 1 package (14.3 ounces) regular Oreo cookies – You need about 24 cookies total. Don’t use double-stuf for this—the extra filling throws off the dirt texture and makes the crumbs clump together. Regular Oreos crush perfectly into that sandy, soil-like consistency we’re going for.
- 1 bag (4.5 ounces) gummy worms – Any brand works, but I prefer the sour gummy worms for a little tangy contrast against the sweet chocolate. Trolli and Black Forest are both excellent choices. You’ll need about 2-3 worms per cup.
- Optional: 2 tablespoons unsalted butter, melted – This is for making the Oreo crumbs more stable if you want a firmer “dirt” layer that doesn’t get completely soggy. I add this when I’m making the cups a day ahead.
A few sourcing notes: If you can find the Oreo Thins, those crush up even finer and give a more realistic dirt texture. For the pudding, I’ve tested this with store-brand instant pudding and it works fine, but the texture is slightly grainier. Stick with name-brand for the smoothest result. And here’s a trick I learned the hard way—make sure your milk is really cold before mixing the pudding. Warm milk won’t let the pudding set properly, and you’ll end up with soup instead of a creamy filling. Trust me on this one.
Equipment Needed
You don’t need anything fancy for this recipe, which is part of the beauty. Here’s what I use:
- Large mixing bowl – Any bowl works, but a wider one makes whisking the pudding easier. I use my grandmother’s old Pyrex mixing bowl because it’s the perfect size.
- Whisk – A good whisk helps prevent lumps in the pudding. If you’re in a hurry, you can use an electric mixer on low speed, but whisking by hand only takes about two minutes.
- Food processor or zip-top bag – For crushing the Oreos. A food processor gives you the most consistent texture, but I’ve also used a rolling pin on a bag of cookies when I didn’t want to wash extra dishes. Both work perfectly.
- 6 to 8 small cups or glasses – Clear plastic cups are traditional and let everyone see the layers, which is half the fun. I use 7-ounce clear plastic cups for parties, but small mason jars or even juice glasses work beautifully.
- Small spatula or spoon – For layering the pudding and crumbs. A small offset spatula makes neat layers, but a regular spoon does the job just fine.
- Measuring cups and spoons – Standard set for measuring the milk and any optional additions.
If you don’t have a food processor, don’t stress. I’ve crushed Oreos in a zip-top bag with a rolling pin more times than I can count. It’s a little messier, but it works. Just make sure the bag is sealed tight before you start pounding—I learned that lesson the hard way, and let me tell you, cleaning chocolate crumbs off the ceiling is not fun.
Preparation Method
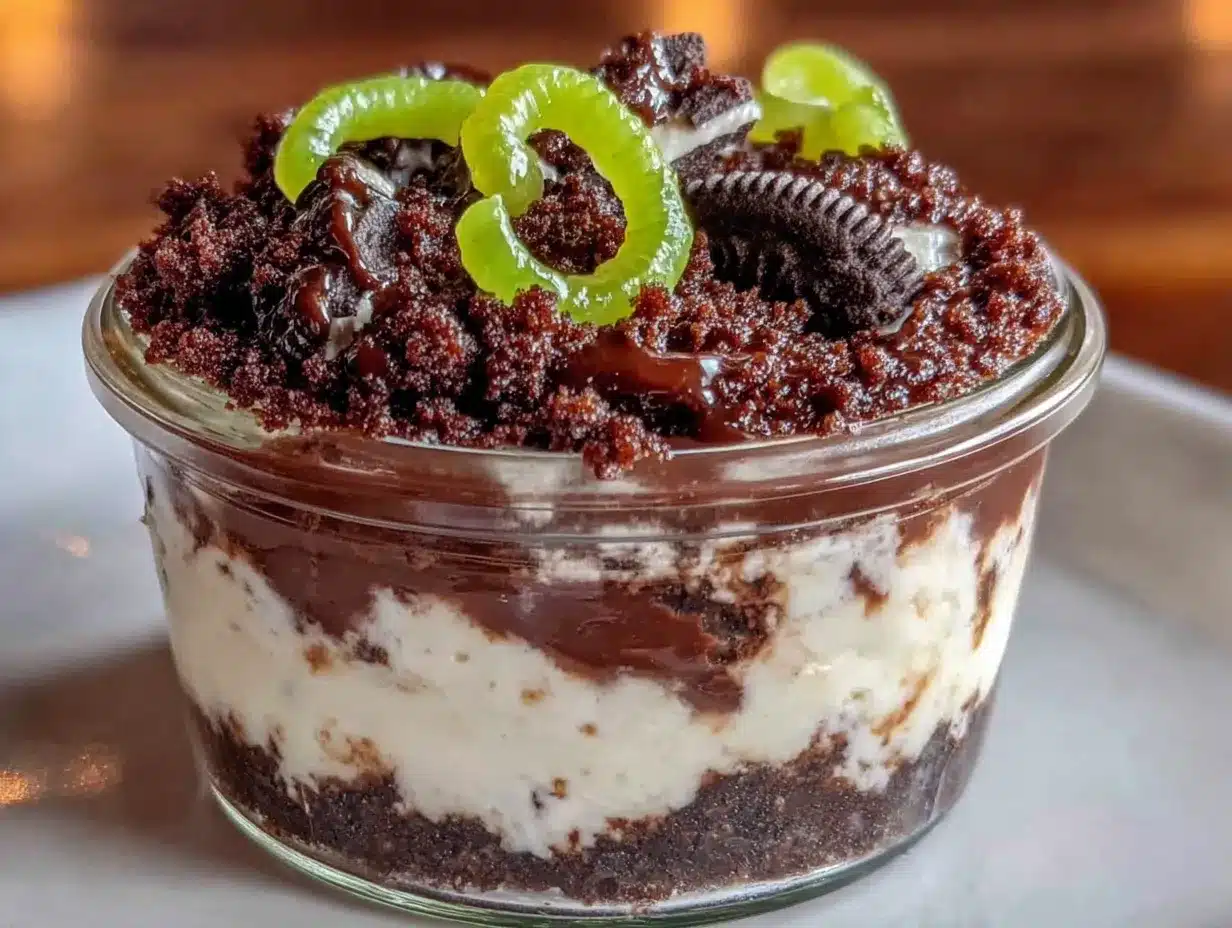
Follow these steps, and you’ll have beautiful dirt cups in no time. I’ve included all the little details that make the difference between good and great.
- Crush the Oreos – Place all 24 Oreo cookies in a food processor and pulse until they form fine crumbs. You want them to look like dark, sandy soil—no big chunks remaining. If you’re using the bag method, put the cookies in a gallon-size zip-top bag, seal it, and crush them with a rolling pin until evenly ground. This takes about 3-4 minutes of steady work. Set the crumbs aside in a bowl.
- Make the pudding – In a large mixing bowl, whisk together the instant chocolate pudding mix and 2 cups of cold whole milk. Whisk vigorously for about 2 minutes until the mixture thickens. It should look glossy and start to hold soft peaks when you lift the whisk. Don’t overmix, or the pudding can become grainy.
- Fold in the whipped topping – Add the thawed frozen whipped topping to the pudding mixture. Use a rubber spatula to gently fold it in, turning the bowl as you go. You want to incorporate it completely without deflating the airiness. The final mixture should be light, fluffy, and a shade lighter than the pudding alone. This step takes about 1 minute of gentle folding.
- Layer the cups – Spoon about 2 tablespoons of the crushed Oreos into the bottom of each cup. Press them down lightly with the back of the spoon to create a stable base. Then add a layer of the pudding mixture, filling the cup about halfway. Add another 2 tablespoons of Oreo crumbs, then another layer of pudding, leaving about ½ inch of space at the top.
- Top with the final dirt layer – Sprinkle the remaining Oreo crumbs over the top of each cup, covering the pudding completely. This is the “dirt” that everyone sees, so make it generous. You want a thick enough layer that no pudding peeks through.
- Add the gummy worms – Gently push 2-3 gummy worms into the top of each cup, leaving part of them sticking out so they look like worms crawling out of the dirt. Arrange them at different angles for a more natural, playful look. I usually push one in deep, one halfway, and leave one mostly on top.
- Chill before serving – Refrigerate the cups for at least 1 hour before serving. This allows the pudding to fully set and the Oreo crumbs to soften slightly, creating that perfect dirt-like texture. For best results, let them chill for 2-3 hours. The cups will keep in the refrigerator for up to 2 days, though the gummy worms will soften over time.
A few timing notes: The pudding sets in about 5 minutes after whisking, so work quickly once it’s ready. If you’re making these for a party, I recommend assembling them the morning of or the night before. The flavors meld together beautifully, and it’s one less thing to worry about when guests arrive. One warning—don’t skip the chilling step. Serving them right away means runny pudding and dry crumbs, which is not the experience we’re going for.
Cooking Tips & Techniques
After making these dirt cups more times than I can count, I’ve picked up a few tricks that make the process smoother and the results better. Here’s what I’ve learned, including some mistakes I’ve made so you don’t have to.
Crush the Oreos evenly – The biggest mistake I see is leaving chunks of cookie in the crumbs. Big pieces don’t look like dirt, and they create uneven textures. Pulse your food processor in short bursts and shake the bowl between pulses. If you’re using the bag method, crush in sections rather than trying to do it all at once. I once left a quarter of a cookie in the mix, and it looked like a rock in the middle of my dirt cup. Not cute.
Don’t overmix the pudding – Whisk just until the pudding thickens and starts to set. Overmixing can break down the starches and make the pudding thin and watery. I’ve done this before when I got distracted by a phone call, and the pudding never set properly. Set a timer for 2 minutes and stop when it goes off.
Layer strategically – The bottom layer of crumbs should be pressed down firmly to create a stable base. If you skip this step, the layers will shift when you transport the cups. I learned this after arriving at a potluck with cups that looked more like mudslides than dirt cups. A gentle press with the back of a spoon makes all the difference.
Keep the gummy worms visible – Push them in at the very end, just before serving or chilling. If you add them too early, they sink into the pudding and disappear. You want them peeking out like they’re crawling up from underground. I usually arrange them right before I set the cups on the dessert table.
Make extra crumbs – I always crush one or two extra Oreos to have on hand for touching up the tops before serving. Sometimes the crumbs settle or get disturbed during chilling, and a fresh sprinkle makes them look perfect again. It’s a small step that makes a big visual difference.
Variations & Adaptations
One of the best things about this recipe is how easy it is to customize. Here are some variations I’ve tried and loved:
- Peanut Butter Dirt Cups – Add ¼ cup of creamy peanut butter to the pudding mixture before folding in the whipped topping. Whisk it in thoroughly until smooth. The peanut butter adds a rich, salty contrast that pairs beautifully with the chocolate. I made these for a game night, and they disappeared in ten minutes.
- Mint Chocolate Version – Use mint-flavored Oreos instead of regular ones, and add ½ teaspoon of peppermint extract to the pudding mixture. Top with a few chocolate shavings for an extra touch. These feel especially festive around the holidays.
- Gluten-Free Adaptation – Use gluten-free chocolate sandwich cookies (like Glutino or Kinnikinnick brands) and ensure your pudding mix is certified gluten-free. Most instant pudding mixes are gluten-free, but always check the label. The texture is slightly different, but the taste is just as good.
- Dairy-Free Version – Substitute the whole milk with unsweetened oat milk or almond milk, and use a dairy-free whipped topping like CocoWhip. I’ve tested this with oat milk, and the pudding sets beautifully. The texture is slightly less creamy but still delicious.
- Birthday Cake Dirt Cups – Use golden Oreos instead of chocolate, vanilla pudding instead of chocolate, and add rainbow sprinkles to the crumb mixture. Use rainbow-colored gummy worms for a festive, colorful twist. These are perfect for kids’ birthday parties.
My personal favorite variation is the peanut butter version. I stumbled on it when I was out of regular Oreos and only had the peanut butter ones. I figured I’d try adding a little extra peanut butter to the filling, and honestly, it might be better than the original. The saltiness cuts through the sweetness in a way that keeps you coming back for another bite.
Serving & Storage Suggestions
These dirt cups are best served chilled, straight from the refrigerator. The cold temperature keeps the pudding firm and the texture just right. If you’re serving them at a party, I like to arrange them on a tray with a small sign that says “Dig In!” to keep the playful theme going. You can also add a few extra gummy worms on the tray for decoration.
For presentation, clear plastic cups really let the layers shine. If you want to get fancy, you can use small mason jars or stemless wine glasses. I’ve even made these in shot glasses for a party appetizer-style dessert, and they were a huge hit. Just reduce the layers to about half the usual amount.
These pair beautifully with other no-bake desserts. I often serve them alongside a batch of no-bake chocolate peanut butter bars for a dessert spread that requires zero oven time. For drinks, cold milk or a tall glass of iced coffee is the perfect companion.
Storage is straightforward. Keep the cups covered in the refrigerator for up to 3 days. I recommend covering each cup with plastic wrap or using cups with lids. The gummy worms will soften over time, so if you’re making them more than a day ahead, add the worms just before serving. The Oreo crumbs will continue to soften as they sit, which actually makes the texture more like real dirt—in a good way. I actually prefer the cups on day two, when everything has melded together perfectly.
To re-crisp the tops if they’ve softened too much, you can sprinkle a thin layer of fresh Oreo crumbs on top just before serving. This gives you that satisfying crunch back. Don’t try to freeze these—the pudding separates when thawed and the texture becomes watery and unappealing.
Nutritional Information & Benefits
Let’s be honest—these dirt cups are a treat, not a health food. But here’s the estimated nutritional breakdown for one serving (based on 8 servings per recipe):
| Nutrient | Amount Per Serving |
|---|---|
| Calories | 320 |
| Total Fat | 14g |
| Saturated Fat | 8g |
| Cholesterol | 15mg |
| Sodium | 380mg |
| Total Carbohydrates | 47g |
| Dietary Fiber | 2g |
| Sugars | 32g |
| Protein | 5g |
On the plus side, the milk provides a good dose of calcium and vitamin D, and the Oreos contain a small amount of iron. The gummy worms add a bit of gelatin, which some people find beneficial for joint health. But mostly, this is a dessert designed for joy, not nutrition. If you’re looking to lighten it up, you can use sugar-free pudding mix and reduced-fat whipped topping to cut the sugar and fat by about half. I’ve made that version for a friend who was watching her sugar intake, and she said it still hit the spot.
This recipe contains dairy (milk, whipped topping), gluten (Oreos), and soy (often in Oreos and pudding mixes). For allergen-friendly versions, check the variations section above.
Conclusion
These Easy Oreo Dirt Cups with Gummy Worms are the dessert that keeps on giving. They’re quick enough for a last-minute craving, impressive enough for a party, and fun enough to make with kids. I’ve made them for backyard barbecues, holiday gatherings, and lazy Sunday afternoons, and every single time, they’re the first thing to disappear from the dessert table.
What I love most about this recipe is how it brings people together. There’s something about handing someone a cup of “dirt” with a worm sticking out that makes everyone smile. It breaks the ice, sparks conversation, and reminds us not to take ourselves too seriously. That’s the kind of energy I want at my table, and I think you’ll want it at yours too.
I’d love to hear how these turn out for you. Did you try any variations? Did the kids go wild for them? Drop a comment below and let me know. And if you’re looking for more crowd-pleasing desserts, check out my easy no-bake cheesecake bites or my three-ingredient peanut butter cookies. Happy cooking, and don’t forget to hide a few for yourself before your guests get to them!
Frequently Asked Questions
Can I make these Oreo dirt cups ahead of time?
Absolutely! These are actually better when made a few hours or even a day ahead. The pudding sets completely, and the Oreo crumbs soften to a more realistic dirt texture. Just add the gummy worms right before serving to keep them from getting too soft.
Can I use homemade whipped cream instead of Cool Whip?
Yes, you can substitute 1 ½ cups of heavy cream whipped to stiff peaks. However, homemade whipped cream is less stable and may deflate or separate after a day in the fridge. If you’re serving these within a few hours, it works beautifully. For longer storage, stick with frozen whipped topping.
How do I crush Oreos without a food processor?
Place the Oreos in a gallon-size zip-top bag, seal it tightly, and use a rolling pin or even a heavy skillet to crush them. Work in batches if needed, and make sure no big chunks remain. I’ve done this many times when I didn’t feel like pulling out the food processor.
Can I use sugar-free pudding and Cool Whip?
Yes! Sugar-free instant pudding and sugar-free whipped topping work perfectly in this recipe. The texture and flavor are very similar to the original. Just note that the pudding may set slightly faster, so work quickly when layering.
Why did my pudding turn out runny?
Runny pudding usually happens for one of three reasons: your milk wasn’t cold enough, you didn’t whisk long enough, or you used cook-and-serve pudding instead of instant. Make sure your milk is straight from the refrigerator, whisk for a full 2 minutes, and double-check that your box says “instant” on the label.
Pin This Recipe!
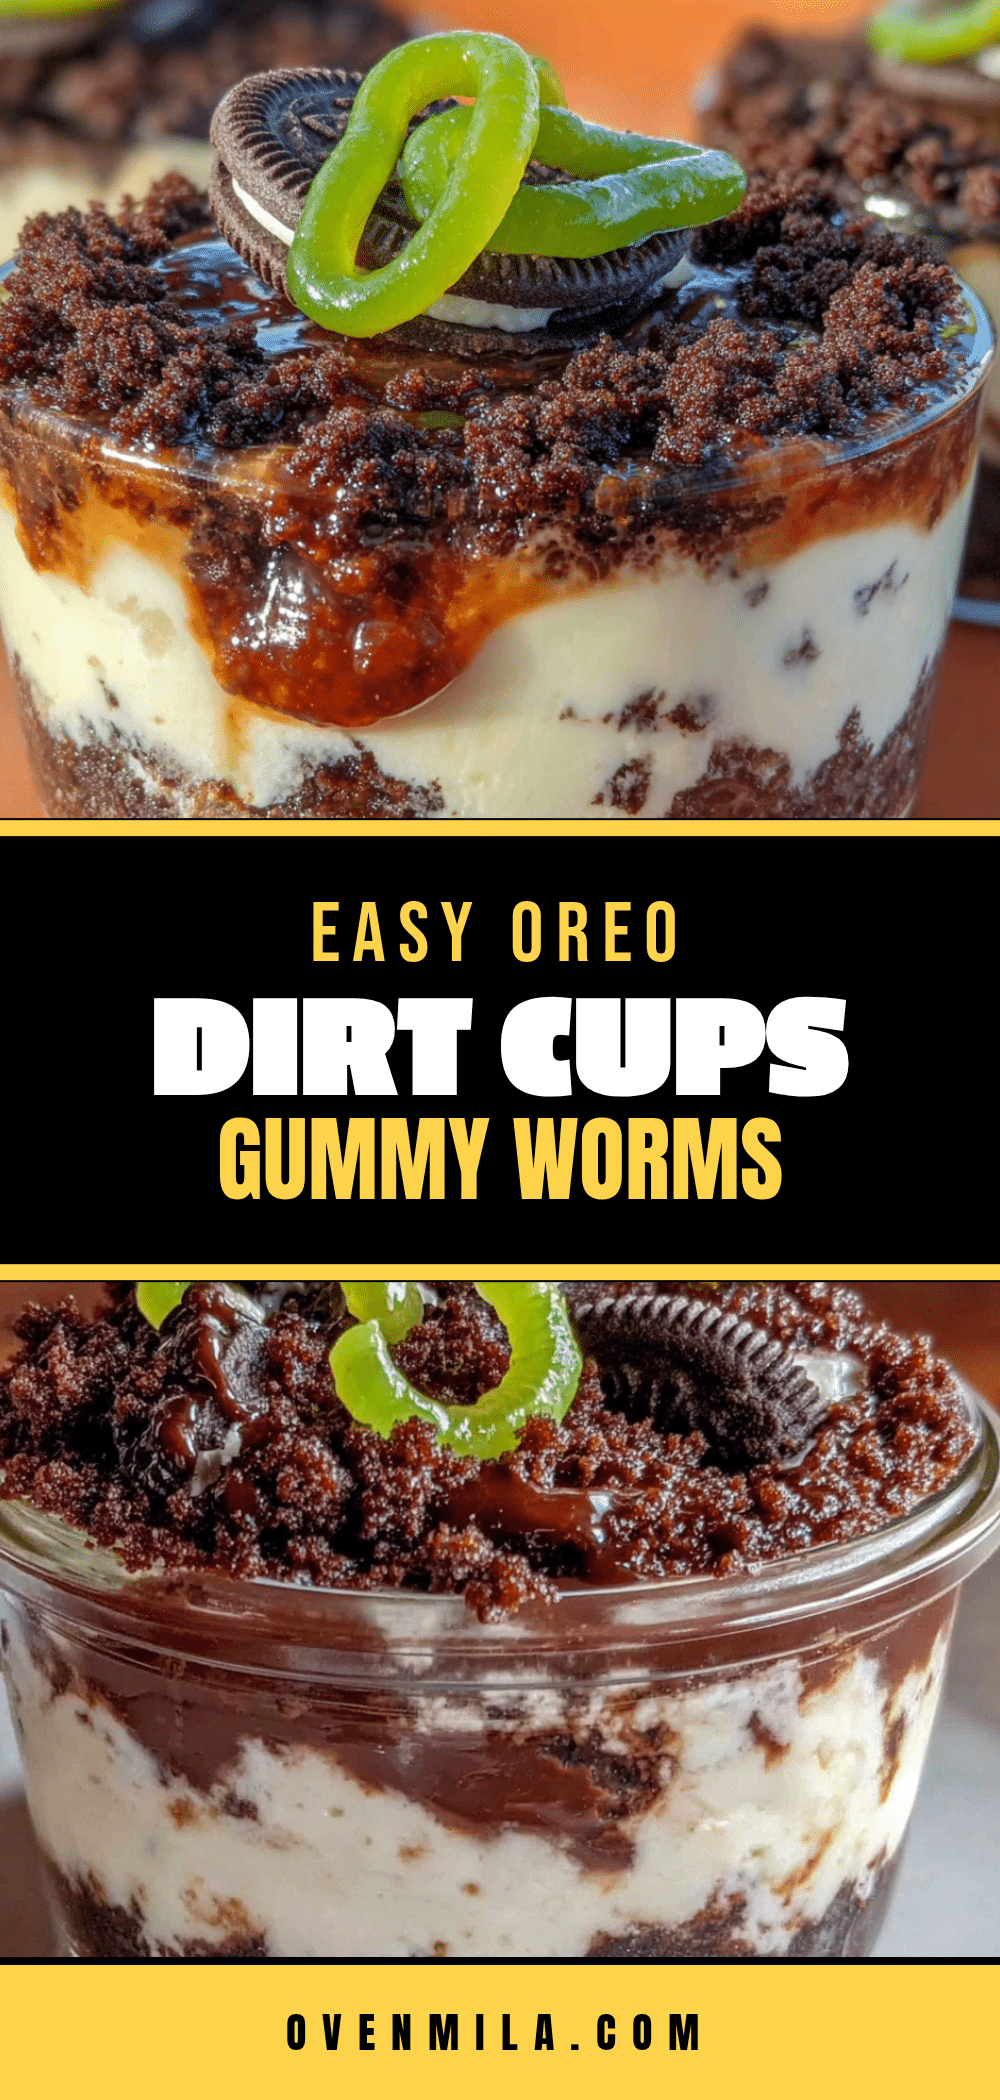
Easy Oreo Dirt Cups with Gummy Worms: Best 10-Minute Dessert
These no-bake Oreo Dirt Cups with Gummy Worms are the ultimate 10-minute dessert, perfect for parties and potlucks. Layers of creamy chocolate pudding, crushed Oreos, and playful gummy worms create a fun, crowd-pleasing treat that looks like dirt but tastes like pure joy.
- Prep Time: 10 minutes
- Cook Time: 0 minutes
- Total Time: 10 minutes (plus 1 hour chilling)
- Yield: 8 servings 1x
- Category: Dessert
- Cuisine: American
Ingredients
- 1 package (3.9 ounces) instant chocolate pudding mix
- 2 cups cold whole milk
- 1 container (8 ounces) frozen whipped topping, thawed
- 1 package (14.3 ounces) regular Oreo cookies (about 24 cookies)
- 1 bag (4.5 ounces) gummy worms
- Optional: 2 tablespoons unsalted butter, melted
Instructions
- Crush the Oreos: Place all 24 Oreo cookies in a food processor and pulse until they form fine crumbs. Alternatively, place cookies in a gallon-size zip-top bag and crush with a rolling pin. Set crumbs aside.
- Make the pudding: In a large mixing bowl, whisk together the instant chocolate pudding mix and 2 cups of cold whole milk. Whisk vigorously for about 2 minutes until the mixture thickens and starts to hold soft peaks.
- Fold in the whipped topping: Add the thawed frozen whipped topping to the pudding mixture. Gently fold with a rubber spatula until fully incorporated and the mixture is light and fluffy.
- Layer the cups: Spoon about 2 tablespoons of crushed Oreos into the bottom of each cup. Press down lightly. Add a layer of pudding mixture, filling the cup about halfway. Add another 2 tablespoons of Oreo crumbs, then another layer of pudding, leaving about ½ inch of space at the top.
- Top with the final dirt layer: Sprinkle remaining Oreo crumbs over the top of each cup, covering the pudding completely.
- Add the gummy worms: Gently push 2-3 gummy worms into the top of each cup, leaving part of them sticking out.
- Chill before serving: Refrigerate the cups for at least 1 hour before serving. For best results, chill for 2-3 hours. The cups will keep in the refrigerator for up to 2 days.
Notes
For best results, use cold milk straight from the refrigerator. Don’t overmix the pudding. If making ahead, add gummy worms just before serving to prevent them from softening. For a firmer ‘dirt’ layer, mix crushed Oreos with 2 tablespoons melted butter. The cups are best on day two when flavors have melded.
Nutrition
- Serving Size: 1 cup
- Calories: 320
- Sugar: 32
- Sodium: 380
- Fat: 14
- Saturated Fat: 8
- Carbohydrates: 47
- Fiber: 2
- Protein: 5
Keywords: Oreo dirt cups, gummy worms, no-bake dessert, 10-minute dessert, easy dessert, potluck dessert, kids dessert, chocolate pudding cups


