This was supposed to be a batch of perfectly round, chocolate-dipped cake balls for a neighbor’s Halloween party. I had the ganache chilling, the candy melts warming, and a vision of elegant, sophisticated treats that would make Martha Stewart proud. Then my three-year-old walked into the kitchen, grabbed the wrong bag from the pantry, and dumped an entire container of candy eyeballs into the bowl of white chocolate before I could even blink. I stood there, staring at the disaster, with melted chocolate dripping down the front of my apron and a toddler grinning up at me like she’d just solved world hunger. Honestly, I almost cried. The party was in two hours, and I had no time to start over.
But here’s the thing about kitchen disasters—sometimes they’re the best thing that ever happens to a recipe. Instead of fishing out the eyeballs (which were already sinking into the warm chocolate like tiny, creepy submarines), I just went with it. I stirred them in, dipped my cake balls anyway, and added a few more eyeballs on top for good measure. What came out was nothing like the plan—and better. They were ridiculous. They were messy. They were the goofiest, most kid-friendly things I’d ever made. And you know what? At the party, those eyeball cake pops disappeared before the fancy cookies even got touched. I mean, kids were literally fighting over the last one with the crooked googly eye.
Maybe you’ve been there—that moment when a recipe goes sideways and you just have to roll with it. That’s the magic of these no-bake Halloween eyeball cake pops. They’re forgiving, they’re fun, and they turn a kitchen mistake into a family tradition. I’ve been making them every October since, and let me tell you, they never get old. There’s something about biting into a creepy little eyeball that makes even the grumpiest kid crack a smile.
Why You’ll Love This Recipe
Let’s face it—Halloween treats can be a real pain. Between the complicated decorating, the expensive ingredients, and the hours of cleanup, it’s easy to just buy a bag of candy and call it a day. But these eyeball cake pops are different. They’re the kind of recipe that makes you look like a hero without actually breaking a sweat.
- No-Bake & Stress-Free : No oven required! You can whip these up in about 30 minutes of active time, then let the fridge do the rest of the work. Perfect for those chaotic October afternoons when you’re already juggling costumes and pumpkin carving.
- Simple, Budget-Friendly Ingredients : A box of cake mix, a can of frosting, and some candy eyeballs. That’s it. No fancy grocery store runs, no specialty baking supplies. You probably have most of this stuff in your pantry right now.
- Kid-Approved & Picky-Eater Tested : My own kids can be suspicious of anything that looks “weird,” but these eyeball pops are a guaranteed hit. The googly eyes make them fun, not scary, and the familiar cake-and-frosting flavor is comfort food at its finest.
- Perfect for Parties & Classrooms : Whether it’s a Halloween class party, a trunk-or-treat event, or just a fun weekend activity, these cake pops travel well and don’t require any last-minute fussing.
- Unbelievably Customizable : Want green eyeballs? Use green candy melts. Want zombie brains? Add some shredded coconut dyed green. The base recipe is so simple that the possibilities are endless.
What makes this recipe different from all those other complicated Halloween treats? It’s the texture, honestly. The cake-and-frosting mixture creates this perfectly soft, fudge-like center that stays moist for days. And the candy coating gives it that satisfying snap when you bite in. It’s comfort food disguised as a creepy Halloween snack—and honestly, that’s exactly what October calls for.
These aren’t just cake pops. They’re the kind of treat that makes kids close their eyes after the first bite. They’re the recipe your kids will beg you to make every single Halloween. And best of all? They cost pennies per pop compared to the bakery versions.
What Ingredients You Will Need
This recipe uses simple, everyday ingredients to deliver maximum Halloween fun without the fuss. Most of these are pantry staples, and the few special items (candy eyeballs, candy melts) are easy to find at any grocery store or craft store during October.
For the Cake Pop Base
- 1 box (15.25 oz) vanilla cake mix (I prefer Betty Crocker or Duncan Hines for consistent texture—the cheap store brands can be a bit crumbly)
- 1/2 cup (120 ml) vegetable oil (canola or any neutral oil works fine)
- 3 large eggs (room temperature if you remember, but honestly, cold works too)
- 1 cup (240 ml) water
- 1/2 cup (120 g) cream cheese frosting (store-bought is fine, but I like Pillsbury for its thickness—adds richness)
For the Coating & Decoration
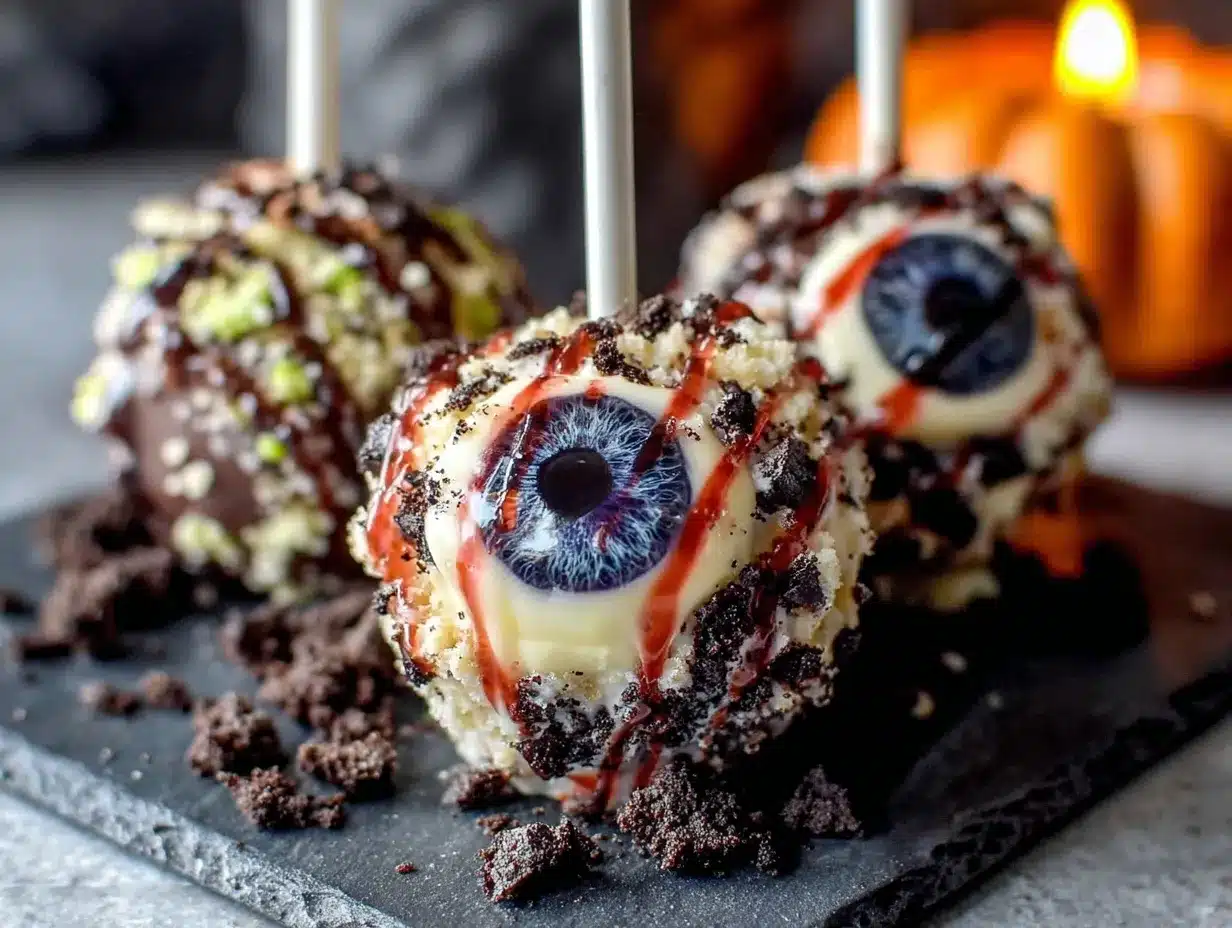
- 12 oz (340 g) white candy melts (I recommend Wilton or Ghirardelli—they melt smoother and don’t seize up as easily)
- 1 tablespoon (15 ml) coconut oil or shortening (optional, but helps thin the coating for easier dipping)
- 1/2 cup (about 50-60 pieces) candy eyeballs (the edible kind with the little black pupils—look for them in the baking aisle or online)
- Red gel food coloring (for the “bloodshot” veins—just a drop or two is plenty)
For Assembly
- 20-24 lollipop sticks (6-inch sticks work best for cake pops)
- 1 block of styrofoam (to hold the pops upright while they set—a cardboard box with holes poked in it works in a pinch)
Ingredient Selection Tips : When choosing candy melts, avoid the “chocolate chips” from the baking aisle—they don’t harden the same way and will leave your pops sticky. Candy melts are specifically formulated to set firm at room temperature. For the cake mix, any flavor works, but vanilla gives you that neutral base that lets the Halloween decorations shine. Chocolate cake mix makes them look like muddy eyeballs, which is actually kind of fun too.
Substitution Guidance : If you’re gluten-free, use a gluten-free cake mix—just check the package instructions because the liquid ratios might be slightly different. For a dairy-free version, swap the cream cheese frosting for a dairy-free vanilla frosting and use dairy-free candy melts. The coconut oil in the coating is naturally dairy-free, so that’s already covered. If you can’t find candy eyeballs, draw pupils on mini marshmallows with black gel icing—it’s more work, but it’s a great backup plan.
Equipment Needed
You don’t need a fancy kitchen to pull these off. Here’s what you’ll actually use:
- Large mixing bowl (for the cake batter and later for crumbling the cake)
- 9×13-inch baking pan (or two 8-inch rounds—whatever you’ve got)
- Electric hand mixer or stand mixer (a whisk and some elbow grease works too, but the mixer saves time)
- Medium microwave-safe bowl (for melting the candy coating)
- Small cookie scoop or tablespoon (for portioning the cake balls evenly—makes a huge difference in consistency)
- Baking sheet lined with parchment paper (for chilling the cake balls before dipping)
- Lollipop sticks (available at craft stores or online—don’t use regular skewers, they’re too thin)
- Styrofoam block or cardboard box (for drying the finished pops upright)
- Piping bag or small zip-top bag (for drizzling the red “bloodshot” details—a toothpick works too)
Budget-Friendly Alternatives : Don’t have a cookie scoop? Use a regular spoon and estimate. No lollipop sticks? Short pretzel sticks work surprisingly well—they add a salty crunch that kids love. And if you don’t have a styrofoam block, poke holes in a cardboard box or even use a colander turned upside down. I once used a clean egg carton with holes cut in the bottom—it was janky, but it worked.
Preparation Method
Let me walk you through this step by step. I’ve made these dozens of times, and I’ve learned a few tricks that make the process way smoother.
Step 1: Bake the Cake
Preheat your oven to 350°F (175°C). Grease your 9×13-inch baking pan with butter or nonstick spray. In a large bowl, combine the cake mix, oil, eggs, and water. Beat with an electric mixer on medium speed for about 2 minutes until smooth and lump-free. Pour the batter into the prepared pan and bake for 25-30 minutes, or until a toothpick inserted in the center comes out clean. Let the cake cool completely in the pan—this is crucial. Warm cake turns into mushy cake balls that won’t hold their shape.
Personal Tip : I once tried to speed this up by putting the warm cake in the fridge. Big mistake. The condensation made the cake soggy, and my cake balls turned into sad little puddles. Let it cool naturally on the counter for at least an hour. Trust me on this.
Step 2: Crumble the Cake
Once the cake is completely cool, break it into large chunks and transfer them to a large mixing bowl. Use your hands to crumble the cake into fine, even crumbs. There shouldn’t be any big chunks—think sand-like texture. This takes about 3-4 minutes of rubbing the cake between your palms. It’s messy, but it’s oddly satisfying.
Sensory Cue : The crumbs should feel dry and powdery, not sticky or damp. If they clump together when you squeeze them, you’re in good shape.
Step 3: Add the Frosting
Add 1/2 cup of cream cheese frosting to the crumbled cake. Use a fork or your hands to mix it in until the mixture holds together when pressed. You’re looking for a Play-Doh-like consistency—moist but not greasy. If it’s too dry, add another tablespoon of frosting. If it’s too wet, add a few more cake crumbs. This is where experience comes in—every cake mix behaves a little differently.
Troubleshooting : If your mixture feels greasy or sticky, you added too much frosting. Don’t panic—just crumble in a little more cake or even some vanilla wafers. I’ve saved many a batch this way.
Step 4: Form the Cake Balls
Scoop out about 1.5 tablespoons of the mixture and roll it between your palms into a smooth ball. Place each ball on the parchment-lined baking sheet. You should get about 20-24 balls, depending on how generous you are with your scoops. Pop the baking sheet into the fridge for at least 30 minutes, or until the balls are firm to the touch.
Personal Tip : If your hands get sticky, lightly dampen them with water. It helps the mixture roll smoothly without sticking to your skin.
Step 5: Melt the Candy Coating
Place the white candy melts in a microwave-safe bowl. Microwave in 30-second intervals, stirring thoroughly after each interval, until completely smooth. Stir in the coconut oil or shortening if you’re using it—this helps thin the coating and gives it a beautiful shine. Let it cool for 2-3 minutes before dipping. Hot coating will melt your cake balls.
Warning : Never microwave candy melts on full power for more than 30 seconds at a time. They burn easily and turn into a grainy, unusable mess. Low and slow is the way to go.
Step 6: Assemble the Cake Pops
Remove the chilled cake balls from the fridge. Dip the tip of a lollipop stick into the melted coating, then insert it about halfway into a cake ball. This acts like glue and keeps the pop from sliding off. Dip the entire cake ball into the melted coating, gently tapping the stick against the side of the bowl to let excess coating drip off. Don’t swirl or spin—that creates air bubbles that crack later.
Place the dipped pop into your styrofoam block to set. While the coating is still wet, press two candy eyeballs onto the front of each pop. Use a toothpick to add tiny red “bloodshot” veins with the gel food coloring. Let the pops set completely, about 15-20 minutes at room temperature or 10 minutes in the fridge.
Personal Tip : If the coating starts to thicken while you’re working, pop it back in the microwave for 10 seconds. Don’t let it get too thick, or your pops will look lumpy.
Step 7: Final Touch
Once the coating is fully set, you can add a second layer if you want a thicker shell. Just repeat the dipping process. Store the finished pops upright in the styrofoam block until ready to serve.
Cooking Tips & Techniques
I’ve made a LOT of cake pops over the years, and I’ve learned some things the hard way. Here’s what I wish someone had told me before my first batch fell apart.
The Number One Mistake : Not chilling the cake balls long enough. I know you’re in a hurry—I’ve been there. But if the balls are even slightly warm, they’ll fall off the stick and land in the coating like a sad little blob. Give them a full 30 minutes in the fridge, minimum. An hour is even better.
The “Cracking” Problem : If your coating cracks after it sets, it means the cake ball was too cold when you dipped it. The sudden temperature change makes the coating expand and crack. Solution: Let the chilled balls sit at room temperature for 5 minutes before dipping. Or, if you’re in a rush, use a slightly thicker coating (skip the coconut oil) so it sets more slowly.
Multitasking Like a Pro : While the cake balls are chilling, melt your coating and set up your decorating station. Line up your candy eyeballs, prepare your red gel coloring, and have your styrofoam block ready. Once you start dipping, you won’t want to stop to search for supplies.
Consistency is Key : For perfectly round cake balls, use a cookie scoop. It’s not just about speed—it ensures every pop is the same size, which means they’ll all set at the same rate. I learned this after making one giant pop that took forever to set while the tiny ones were already hard.
The “Sweating” Issue : If your pops look wet or sticky after setting, you might have used too much oil in the coating. Next time, skip the coconut oil and see if that helps. Also, don’t store them in an airtight container while they’re still warm—condensation will ruin that perfect shine.
Variations & Adaptations
One of the best things about this recipe is how easy it is to change up. Here are some of my favorite twists:
Monster Mash Pops
Instead of eyeballs, use green candy melts and press on candy corn teeth for a monster face. My kids went absolutely bonkers for these last year—they looked like little Frankensteins. Just use a toothpick to draw on a mouth before the coating sets.
Spider Web Pops
Dip the pops in white coating, then drizzle melted dark chocolate in a spiral pattern. Use a toothpick to drag lines from the center outward to create a web effect. These look incredibly fancy but take about 30 seconds per pop. Perfect for impressing the grown-ups at the party.
Pumpkin Patch Pops
Use orange candy melts instead of white. Before the coating sets, press a small piece of green licorice into the top for a stem. These are adorable for Halloween or even Thanksgiving. I made these for a school harvest festival, and they were gone in 10 minutes.
Gluten-Free Version
Swap the regular cake mix for a gluten-free vanilla cake mix. Everything else stays the same—just follow the cake mix instructions for the liquid ratios. I’ve tested this with King Arthur’s gluten-free mix, and it works perfectly. The texture is slightly denser, but the kids don’t notice.
Vegan Adaptation
Use a vegan cake mix (most are accidentally vegan), replace the eggs with flax eggs (1 tablespoon ground flax + 3 tablespoons water per egg), and use vegan frosting. The candy melts need to be checked for dairy—Enjoy Life brand makes a great vegan white chocolate. The coconut oil in the coating is already vegan-friendly.
Personal Variation : Last year, I tried making these with red velvet cake mix and cream cheese frosting. The red cake crumbs looked like brains peeking through the white coating. It was a little gruesome, honestly, but the teenagers at the party thought it was hilarious. Just be warned—red velvet stains everything, including your hands and your countertops.
Serving & Storage Suggestions
These eyeball cake pops are best served at room temperature. The coating should be firm but not hard, and the center should be soft and fudge-like. If you’ve stored them in the fridge, let them sit out for about 10 minutes before serving.
Presentation Ideas : Arrange the pops upright in a small pumpkin or a hollowed-out watermelon for a spooky centerpiece. Or stick them into a frosted cupcake for a “zombie cupcake” effect. For a party, I like to place them in a vase filled with black beans or coffee grounds—it looks like they’re growing out of dirt.
Complementary Treats : These pair beautifully with warm apple cider or a mug of hot chocolate. For a Halloween party spread, serve them alongside popcorn balls, caramel apples, and pumpkin-shaped cookies. The sweetness of the cake pops balances nicely with salty snacks.
Storage Instructions : Store the finished pops upright in the styrofoam block, covered loosely with plastic wrap, in the refrigerator for up to 5 days. Do not stack them—they’ll stick together and the coating will crack. You can also freeze them for up to 2 months. Just wrap each pop individually in plastic wrap, then place them in a freezer bag. Thaw in the refrigerator overnight before serving.
Reheating Tips : These are meant to be eaten cold or at room temperature, so no reheating needed. If the coating looks dull after storage, a quick 10-second blast with a hair dryer on low heat will bring back the shine. Yes, I’m serious—it works.
Flavor Development : Honestly, these taste even better the next day. The flavors meld together overnight, and the center becomes even more fudge-like. I always make mine a day ahead of time for that reason.
Nutritional Information & Benefits
Let’s be real—these are a treat, not a health food. But here’s the breakdown if you’re curious:
Per serving (1 cake pop) : Approximately 180 calories, 9g fat, 24g carbohydrates, 2g protein, 14g sugar. These numbers will vary based on your specific ingredients and the size of your pops.
Health Benefits of Key Ingredients : Believe it or not, there are a few silver linings. The cake mix provides iron and B vitamins from enriched flour. The eggs add protein and healthy fats. And the candy eyeballs? Well, they’re mostly sugar, but they make kids happy, and that counts for something.
Dietary Considerations : This recipe can be made gluten-free, dairy-free, or vegan with simple substitutions. It’s naturally nut-free if you use a nut-free cake mix and frosting. Always check labels if you’re serving to someone with allergies—some candy melts are processed in facilities that handle nuts.
Potential Allergens : Wheat, dairy, eggs, soy (in the candy melts). The candy eyeballs typically contain wheat and soy, so check the package if allergies are a concern.
Personal Wellness Perspective : I’m all about balance. These cake pops are a once-a-year treat in my house, and that makes them special. I don’t worry about the sugar content on Halloween—I worry about the memories we’re making. And honestly, watching my kids’ faces light up when they see these goofy eyeball pops is worth every single calorie.
Conclusion
These no-bake Halloween eyeball cake pops are the kind of recipe that proves the best things in life come from happy accidents. They’re easy enough for a busy weeknight, fun enough for a classroom party, and budget-friendly enough for a family on a sensible grocery budget. You don’t need fancy equipment or professional decorating skills—just a box of cake mix, a can of frosting, and a sense of humor.
I love that this recipe lets kids get involved. My little ones fight over who gets to press on the eyeballs, and my teenager loves experimenting with different color combinations. It’s become our Halloween tradition, and I bet it’ll become yours too.
So go ahead—embrace the mess. Let your kids help. Make a batch that’s lopsided and ridiculous and absolutely perfect. And when someone asks for the recipe, just smile and say it was a happy accident.
I’d love to see your creations! Tag me in your Halloween cake pop photos, or leave a comment below with your favorite variation. Did you try the spider web design? The monster mash? Tell me all about it—I read every single comment, and your ideas inspire me to try new things in my own kitchen.
Happy Halloween, and happy baking!
Frequently Asked Questions
Can I use a different flavor of cake mix?
Absolutely! Chocolate, red velvet, lemon, or even funfetti all work beautifully. Just keep in mind that darker cake colors will show through the white coating more, so you might want to use a thicker coating or add a second layer. Chocolate cake pops with white coating actually look like little eyeballs with dark irises—it’s a fun effect.
My cake pops keep falling off the sticks. What am I doing wrong?
This is the most common problem, and it’s almost always because the cake balls weren’t chilled enough. Make sure they’re in the fridge for at least 30 minutes, and dip the tip of the stick in melted coating before inserting it into the ball. That little bit of “glue” makes a huge difference. Also, don’t overfill the balls—1.5 tablespoons is plenty.
How far in advance can I make these?
You can make them up to 5 days ahead and store them in the refrigerator. I actually prefer making them a day or two ahead because the flavors meld together and the texture gets even better. Just keep them upright in the styrofoam block and cover loosely with plastic wrap. Don’t freeze them with the coating on if you can avoid it—the coating can get condensation when thawing.
Can I use homemade frosting instead of store-bought?
Yes, but be careful. Homemade buttercream frosting is softer than store-bought, so you might need to use less of it. Start with 1/4 cup and add more if needed. The key is to get that Play-Doh-like consistency—if it’s too soft, the balls won’t hold their shape. I’ve had great results with a simple buttercream made with 1/2 cup butter, 2 cups powdered sugar, and 1 teaspoon vanilla.
My candy melts are lumpy and thick. How do I fix them?
Don’t panic—this happens to everyone. Add 1 teaspoon of coconut oil or shortening and microwave for another 10 seconds, then stir vigorously. The fat helps smooth everything out. If they’re still lumpy, you might have overheated them. In that case, start over with fresh melts and go slower next time. And never, ever add water to candy melts—it makes them seize up into a grainy mess.
Pin This Recipe!
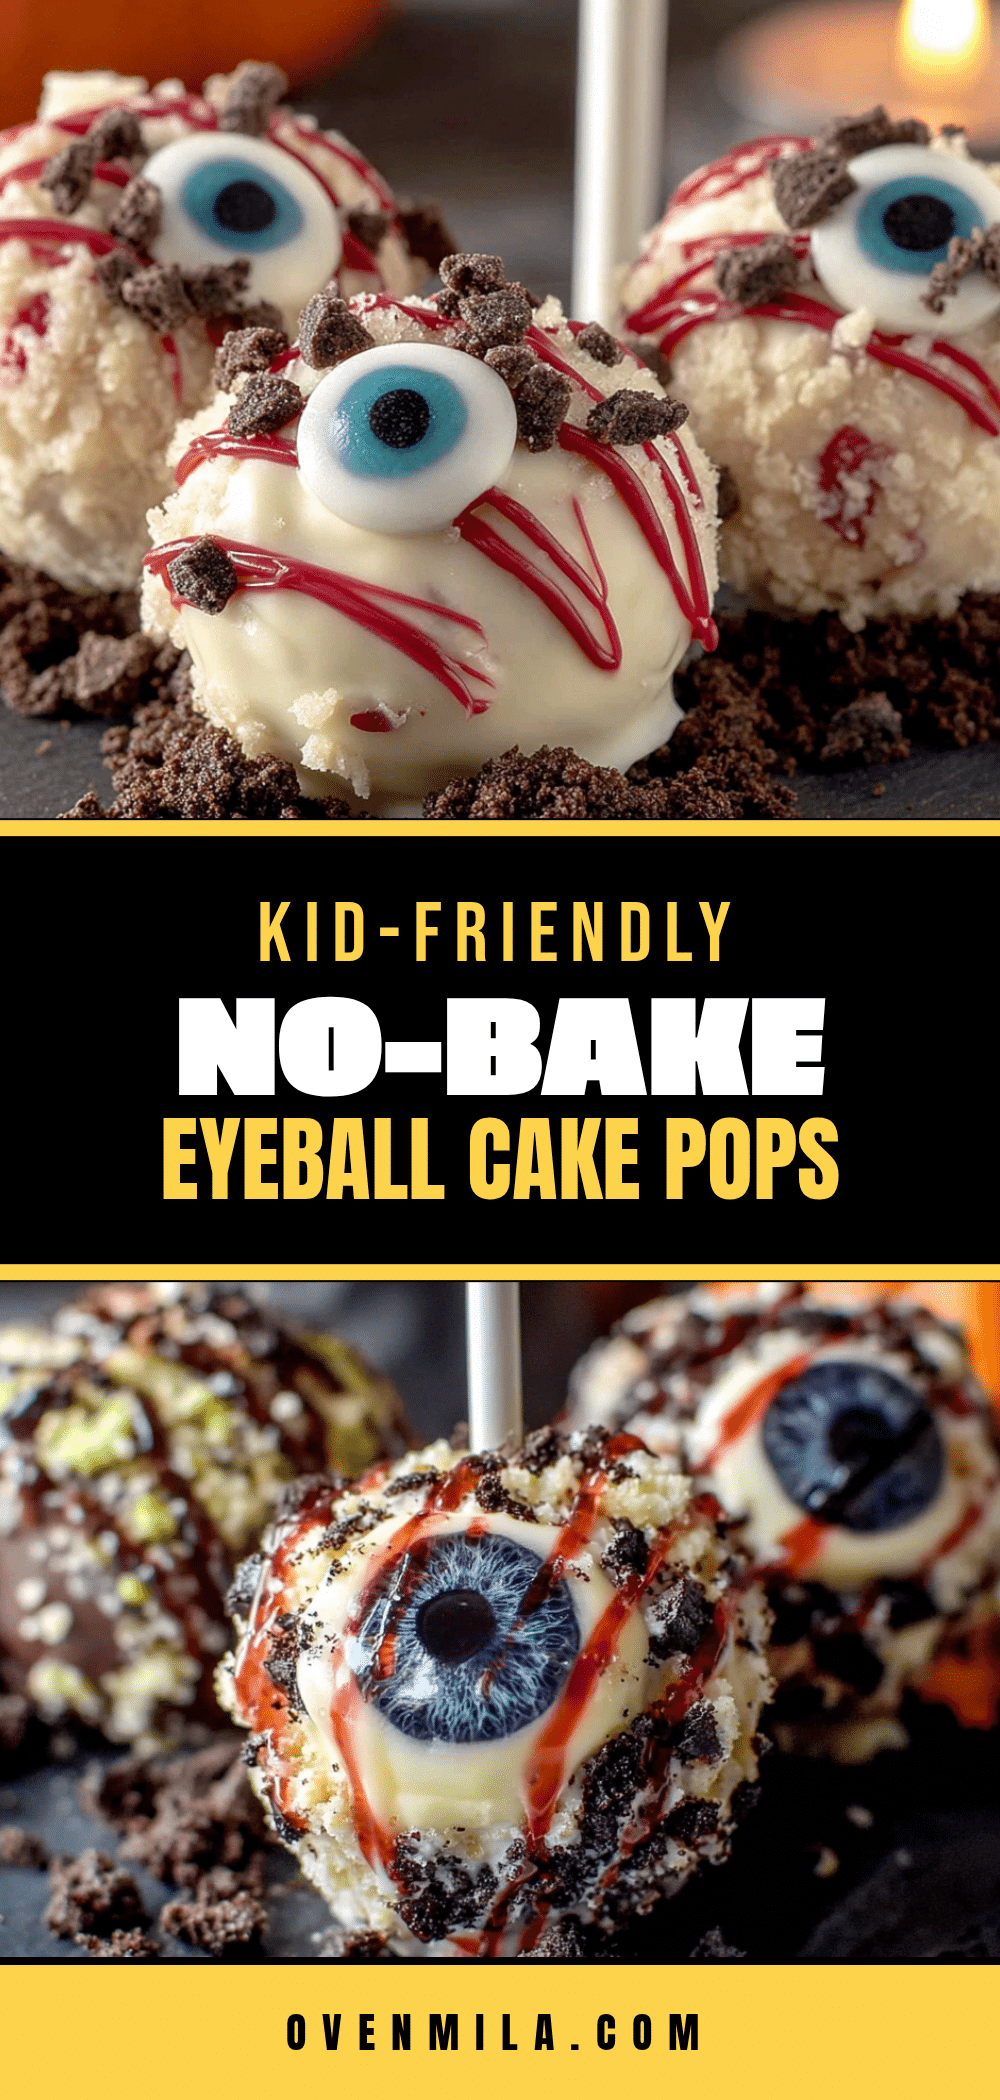
Easy Halloween Eyeball Cake Pops: No-Bake Kid Treat
These no-bake Halloween eyeball cake pops are a fun, kid-friendly treat made with simple ingredients. They’re perfect for parties and turn a kitchen mistake into a family tradition.
- Prep Time: 30 minutes
- Cook Time: 30 minutes
- Total Time: 1 hour 30 minutes
- Yield: 20-24 servings 1x
- Category: Dessert
- Cuisine: American
Ingredients
- 1 box (15.25 oz) vanilla cake mix
- 1/2 cup (120 ml) vegetable oil
- 3 large eggs
- 1 cup (240 ml) water
- 1/2 cup (120 g) cream cheese frosting
- 12 oz (340 g) white candy melts
- 1 tablespoon (15 ml) coconut oil or shortening (optional)
- 1/2 cup (about 50–60 pieces) candy eyeballs
- Red gel food coloring
- 20–24 lollipop sticks
- 1 block of styrofoam
Instructions
- Preheat oven to 350°F (175°C). Grease a 9×13-inch baking pan.
- In a large bowl, combine cake mix, oil, eggs, and water. Beat with an electric mixer on medium speed for 2 minutes until smooth.
- Pour batter into prepared pan and bake for 25-30 minutes, or until a toothpick inserted in the center comes out clean. Let cool completely.
- Crumble the cooled cake into fine crumbs in a large bowl.
- Add cream cheese frosting and mix until the mixture holds together like Play-Doh.
- Scoop about 1.5 tablespoons of mixture and roll into smooth balls. Place on a parchment-lined baking sheet. Refrigerate for at least 30 minutes.
- Melt white candy melts in a microwave-safe bowl in 30-second intervals, stirring after each, until smooth. Stir in coconut oil if using.
- Dip the tip of a lollipop stick into melted coating, then insert halfway into a cake ball. Dip the entire ball into coating, tapping off excess.
- Place dipped pop in styrofoam block. While coating is wet, press two candy eyeballs onto the front. Use a toothpick to add red ‘bloodshot’ veins with gel food coloring.
- Let set for 15-20 minutes at room temperature or 10 minutes in the fridge. Optionally, add a second coating layer.
Notes
Chill cake balls thoroughly to prevent them from falling off sticks. If coating cracks, let chilled balls sit at room temperature for 5 minutes before dipping. Store upright in refrigerator for up to 5 days.
Nutrition
- Serving Size: 1 cake pop
- Calories: 180
- Sugar: 14
- Sodium: 150
- Fat: 9
- Saturated Fat: 3
- Carbohydrates: 24
- Protein: 2
Keywords: Halloween, cake pops, no-bake, kid-friendly, eyeball, easy, party treat


