I was standing in the middle of a party supply store last October, staring at a display of plastic witch fingers, when the smell hit me—that unmistakable, salty-sweet aroma of a soft pretzel from a mall kiosk. And suddenly I was seven years old at my Aunt Rita’s kitchen table, her flour-dusted hands rolling out dough while I sat on a stack of phone books so I could reach. She’d let me shape the pretzels into whatever I wanted, and I always made the same thing: long, knobby fingers with almond fingernails. Aunt Rita passed away five years ago, and I hadn’t thought about those afternoons in forever. But standing there with a plastic witch finger in my hand, I knew I had to figure out how to make them again—only this time, for a grown-up Halloween party where they’d actually impress people.
So I bought a bag of pretzel rods on a whim, grabbed some sliced almonds and food coloring, and went home to experiment. Honestly, the first batch looked more like zombie toes than witch fingers—I may have used too much red gel coloring, and let’s just say the result was disturbing in a way I didn’t intend. But by the third try, I had it. These Witch Finger Pretzel Rods are the perfect mix of spooky and snackable, and they save you the trouble of making dough from scratch. I mean, Aunt Rita would probably roll her eyes at my shortcut, but she’d also be the first one to grab three of them at a party.
Maybe you’ve been there—you want to bring something to a Halloween gathering that looks impressive but doesn’t require you to spend all day in the kitchen. Or maybe you just want to see the look on your friends’ faces when they realize the witch finger they’re about to bite into is actually a salty pretzel. Either way, this recipe is for you.
Why You’ll Love This Recipe
Let me tell you—I’ve tested this recipe about six times now, and each batch taught me something new. The first time, the almond “nails” fell off because I didn’t press them in firmly enough. The second time, the pretzels got soggy because I dipped them while they were still warm. But now? I’ve got it down to a science, and I’m sharing every trick I’ve learned so you don’t have to make the same mistakes.
- Quick & Easy: These come together in under 30 minutes, which means you can make them the day of your party without stressing. No yeast, no rising time, no complicated steps.
- Simple Ingredients: You only need five ingredients, and you probably already have three of them in your pantry right now. No fancy grocery store runs required.
- Perfect for Halloween Parties: These are the kind of appetizer that gets people talking. They’re creepy enough to fit the theme but delicious enough that everyone actually eats them.
- Crowd-Pleaser: I brought these to a potluck last weekend, and they were gone in fifteen minutes. Kids love them, adults love them—even people who claim they don’t like sweets can’t resist a salty-sweet pretzel.
- Unbelievably Delicious: The combination of salty pretzel, sweet candy coating, and crunchy almond is next-level. It’s like a Halloween version of a chocolate-covered pretzel, but way more fun.
What makes these different from other witch finger recipes you might find online? For one thing, I use pretzel rods instead of making dough from scratch. That means you get that perfect crunchy texture every time, and you don’t have to worry about your fingers breaking or getting stale. Plus, I’ve perfected the candy coating ratio so it sets up firm but doesn’t crack when you bite into it. And the green food coloring? I’ve figured out exactly how much to use so they look authentically witchy without looking radioactive.
This recipe isn’t just good—it’s the kind that makes you close your eyes after the first bite. It’s Halloween fun reimagined: spooky on the outside, delicious on the inside, and easy enough that you can actually enjoy your own party instead of stressing in the kitchen.
What Ingredients You Will Need
This recipe uses simple, everyday ingredients to create something that looks way more complicated than it actually is. Here’s what you’ll need to gather before you start:
For the Witch Fingers
- 24 pretzel rods (I recommend the Rold Gold brand for their sturdy texture—they hold up better than thinner brands)
- 2 cups white candy melts or white chocolate chips (look for Ghirardelli white chocolate chips for the smoothest melt, or use Wilton candy melts for easier handling)
- 1 tablespoon coconut oil or vegetable shortening (this helps thin the coating so it’s easier to dip)
- Green gel food coloring (use gel, not liquid—liquid will seize your chocolate. Americolor brand works great)
- 24 sliced almonds (for the fingernails—look for whole sliced almonds, not slivered, so you get that nice wide nail shape)
For Decorating (Optional but Recommended)

- Red jam or red gel icing (for bloody cuticles—trust me, it takes them from cute to creepy)
- Black sanding sugar or black sprinkles (for dirt effect on the “knuckles”)
- Wax paper or parchment paper (for setting the finished fingers)
One thing I’ve learned from making these multiple times: the quality of your candy melts really matters. The cheap store brand ones tend to get clumpy and weird, and nobody wants lumpy witch fingers. I’ve had the best luck with the Ghirardelli white chocolate chips—they melt smooth and taste amazing. If you’re dairy-free, look for Enjoy Life white chocolate chips, which are vegan and melt just as well.
For the pretzel rods, try to find ones that are relatively straight and uniform in size. I’ve made the mistake of buying the extra-thick ones before, and they looked more like giant monster fingers than delicate witch fingers. The standard size works perfectly. And if you can only find the extra-long pretzel rods, just snap them in half before you start.
Equipment Needed
You don’t need much fancy equipment for this recipe, which is part of why I love it. Here’s what you’ll need:
- Microwave-safe bowl or double boiler (I use a glass Pyrex measuring cup—the spout makes dipping easier)
- Baking sheet lined with wax paper or parchment paper (for setting the finished fingers)
- Small knife or offset spatula (for spreading the coating if needed)
- Toothpick or small skewer (for creating knuckle lines and wrinkles)
- Tweezers (this sounds weird, but trust me—tweezers make placing those almond nails so much easier than using your fingers)
If you don’t have a microwave, you can melt the candy coating in a double boiler on the stovetop. Just make sure the water isn’t boiling too hard, and don’t let any steam get into the chocolate or it will seize up. I learned that one the hard way—my first batch turned into a grainy, unworkable mess because I got distracted and let the water boil too vigorously.
For the baking sheet, any standard half-sheet pan will work. I like to put a cooling rack on top of the wax paper so the pretzels don’t sit in any pooling coating, but that’s optional. And honestly, if you don’t have tweezers, you can definitely use your fingers—just make sure your hands are clean and dry, because any moisture will mess with the candy coating.
Preparation Method
Alright, let’s get into the actual making of these spooky treats. I’ve broken this down step by step so you can follow along without any confusion. Take your time with the first few—once you get the hang of it, you’ll be able to whip these out in no time.
- Prep your workspace. Line a baking sheet with wax paper or parchment paper. Arrange your pretzel rods nearby, and have your sliced almonds ready in a small bowl. This is one of those recipes where having everything ready to go makes a huge difference—you don’t want to be scrambling for almonds while your coating is cooling.
- Melt the candy coating. Place the white candy melts or white chocolate chips in a microwave-safe bowl. Add the coconut oil or shortening. Microwave in 30-second intervals, stirring well after each interval, until completely smooth. This usually takes about 1-2 minutes total, depending on your microwave. Don’t rush this step—if you overheat the chocolate, it will seize up and become unusable.
- Add the green color. Once your coating is smooth and fully melted, add a small amount of green gel food coloring. Start with just a tiny dab—you can always add more, but you can’t take it away. Stir thoroughly until the color is evenly distributed. You’re going for a pale, witchy green—think the Wicked Witch of the West, not Shrek. I usually end up using about 1/8 teaspoon of gel color for the perfect shade.
- Dip the pretzels. Holding one pretzel rod by the end, dip it into the green coating, leaving about an inch undipped at the top (this will be the “wrist” area). Gently twist and lift the pretzel, letting the excess coating drip back into the bowl. You want a thin, even layer—not too thick, or it will look lumpy. Place the dipped pretzel on your prepared baking sheet.
- Add the fingernail. While the coating is still wet, press a sliced almond onto the tip of the pretzel, pointed end facing outward. Press firmly enough that the almond is partially embedded in the coating, but don’t push it all the way through. The almond should look like a fingernail growing out of the finger. Use your tweezers for this if you have them—they give you much better control.
- Create the knuckles. While the coating is still soft, use a toothpick or small skewer to gently press lines into the coating to create knuckle wrinkles. Make 2-3 lines about halfway down the pretzel, and a couple more near the top. Don’t press too hard—you just want to create indentations, not cut through the coating. Think of it like drawing wrinkles on a finger.
- Add extra details. If you want to get really fancy, you can add a tiny dab of red jam or red gel icing at the base of the almond nail to look like a bloody cuticle. You can also sprinkle a little black sanding sugar on the knuckle areas to look like dirt or warts. These details are totally optional, but they really take the creep factor up a notch.
- Let them set. Allow the coated pretzels to sit at room temperature until the coating is completely firm. This usually takes about 15-20 minutes, depending on the temperature of your kitchen. Don’t put them in the refrigerator to speed things up—the condensation can make the coating look dull and streaky.
- Repeat with remaining pretzels. Continue dipping and decorating the rest of your pretzels. If your coating starts to thicken as it cools, just pop it back in the microwave for 10-15 seconds and stir until smooth again.
- Serve or store. Once all your witch fingers are set, they’re ready to serve. Arrange them on a platter with the “fingernails” pointing outward for maximum creepy effect. You can also stand them up in a jar or mug for a fun presentation.
Cooking Tips & Techniques
After making these about a dozen times (not exaggerating), I’ve picked up a few tricks that make the process smoother and the results more impressive. Here’s what I wish someone had told me before I started:
Temperature matters more than you think. If your kitchen is too warm, the coating will take forever to set and might slide off the pretzels. If it’s too cold, the coating will thicken too quickly and you’ll get lumpy fingers. Aim for a room temperature around 68-72°F. I made the mistake of trying these on a humid summer day once, and the coating never fully hardened—they were sticky and messy.
Don’t skip the coconut oil. I know it seems like an extra step, but adding that tablespoon of coconut oil or shortening makes the coating much easier to work with. It thins the chocolate just enough that it coats evenly without being too thick, and it helps prevent cracking once the coating sets. I tried a batch without it, and the coating was so thick it looked like the pretzels were wearing mittens.
Work in small batches. Don’t try to dip all 24 pretzels at once, especially if you’re new to this. Dip 4-5 at a time, add their almond nails and knuckle lines, then move on to the next batch. If you try to do too many at once, the coating will start to set before you get to the decorations, and you’ll end up with almond nails that won’t stick.
Keep your hands clean and dry. Any moisture on your hands or on the pretzels will cause the coating to seize up and get grainy. Before you start, wash your hands thoroughly and dry them completely. And don’t touch the pretzels with damp hands while you’re working—I learned this one the hard way when I grabbed a pretzel with slightly wet fingers and ended up with a weird, lumpy spot.
Practice your knuckle lines. The first few times I did this, my knuckle lines looked more like random scratches than actual finger wrinkles. The trick is to use the side of the toothpick rather than the point, and to press gently in a curved motion rather than a straight line. Think about how your own knuckles look—they’re not perfectly straight lines, they’re slightly curved and uneven.
Variations & Adaptations
One of the best things about this recipe is how easy it is to customize. Here are some variations I’ve tried and loved:
Zombie Fingers: Instead of green, use gray or beige candy coating. Add red gel icing around the almond nail for a bloody look, and skip the knuckle lines—zombie fingers are supposed to look decayed, not wrinkled. I made these for a zombie-themed party last year, and they were a huge hit.
Mummy Fingers: After dipping the pretzels in white coating, drizzle a little more white coating back and forth across the finger to create a mummy-wrap effect. Add two tiny dots of black icing for eyes at the top. These are actually easier than the witch fingers because you don’t have to worry about perfect knuckle lines.
Vampire Fingers: Use red candy coating instead of green, and add a white almond nail. The red looks like blood, and the white nail against the red finger is seriously creepy. I like to add a tiny drop of dark red gel icing at the tip to look like the finger is still bleeding.
Gluten-Free Option: Most pretzel rods contain wheat flour, but you can find gluten-free pretzel rods at specialty stores or online. The rest of the ingredients are naturally gluten-free, so this is an easy swap. Just make sure to check the labels on your candy melts—some brands use wheat-based additives.
Vegan Version: Use vegan white chocolate chips (like Enjoy Life brand) and make sure your food coloring is vegan-friendly. Most gel food colors are, but it’s worth double-checking. The coconut oil keeps it vegan-friendly, so you’re good there.
Extra Spooky Details: For a more dramatic look, you can add a drop of red food coloring to the green coating before dipping to create a veiny, marbled effect. Or dip the tips of the finished fingers in red icing to look like they’ve been chopped off. I tried this once and it was almost too realistic—my roommate actually screamed when she saw them.
Serving & Storage Suggestions
These witch fingers are best served at room temperature, which makes them perfect for parties—you don’t have to worry about keeping them hot or cold. Arrange them on a black platter or a dark-colored plate for maximum contrast. I like to fan them out in a circle with the fingernails pointing outward, like a hand reaching up from the grave.
If you’re serving these at a party, consider pairing them with other Halloween treats. They go great with a bowl of pumpkin dip or a plate of ghost-shaped cookies. For drinks, try serving them with a dark red punch that looks like blood—the combination is seriously Instagram-worthy.
For storage, keep the witch fingers in an airtight container at room temperature. They’ll stay fresh for up to a week, though they’re best within the first 2-3 days. Don’t refrigerate them—the coating can develop condensation and get sticky. If you need to make them ahead of time, you can prepare them up to 3 days in advance and store them in a cool, dry place.
One thing I love about these is that the flavors actually get better after a day or two. The coating sets up firmer, and the saltiness of the pretzel balances perfectly with the sweetness of the coating. I’ve made batches on a Wednesday for a Saturday party, and they were still perfect.
If you’re bringing these to a party, transport them in a single layer in a shallow container. Don’t stack them on top of each other, or the almond nails might get knocked off. I learned this the hard way when I showed up to a party with a container full of fingernail-less pretzels—they still tasted good, but they looked more like green sticks than witch fingers.
Nutritional Information & Benefits
Let’s be real—these are a treat, not a health food. But here’s the nutritional breakdown for one witch finger pretzel rod, based on using white chocolate chips and coconut oil:
- Calories: Approximately 180-200 per pretzel rod
- Fat: 8-10 grams (mostly from the white chocolate and coconut oil)
- Carbohydrates: 24-28 grams
- Protein: 3-4 grams
- Sugar: 14-16 grams
- Sodium: 300-350 mg (from the pretzel)
On the plus side, almonds are a great source of vitamin E, magnesium, and healthy fats. And pretzels are lower in fat than many other snack options. But honestly, this is a Halloween treat—it’s meant to be enjoyed in moderation as part of the fun. I always tell people to make a batch, enjoy a couple, and share the rest with friends. That way everyone gets to experience the spooky fun without overdoing it.
If you’re watching your sugar intake, you can use sugar-free white chocolate chips or a sugar-free candy coating. The texture might be slightly different, but the overall effect is still wonderfully creepy. And if you’re concerned about food dyes, look for natural green food coloring made from spirulina or matcha powder—though the color won’t be quite as vibrant.
Conclusion
I’ve made these Witch Finger Pretzel Rods for three Halloweens in a row now, and they’ve become my signature party contribution. Every time I bring them, someone asks for the recipe. Every time, they disappear within minutes. And every time I make them, I think about Aunt Rita and those afternoons in her kitchen, her hands guiding mine as we shaped dough into something magical.
This recipe is proof that you don’t need to be a professional baker to create something that wows people. With just a few simple ingredients and a little bit of patience, you can make Halloween treats that look like they came from a bakery. And the best part? You get to watch your friends’ faces when they realize what they’re about to eat.
I’d love to hear how yours turn out. Did you try the zombie version? The mummy version? Did your kids help with the decorating? Drop a comment below and let me know. And if you’re feeling brave, tag me in your photos—I’m always looking for new Halloween inspiration. Now go make some magic (and maybe scare a few people while you’re at it).
Frequently Asked Questions
Can I use chocolate instead of white chocolate?
Absolutely! Dark chocolate or milk chocolate works great for witch fingers—just use brown food coloring instead of green, or leave the chocolate as is for a more natural look. The process is exactly the same.
How far in advance can I make these?
You can make them up to 3 days ahead of time. Store them in an airtight container at room temperature, and they’ll stay fresh and crunchy. Just don’t refrigerate them, or the coating might get sticky.
My coating is too thick—what do I do?
Add a little more coconut oil or shortening, about 1/2 teaspoon at a time, and stir until smooth. You can also microwave it for 10 seconds to thin it out. Just be careful not to overheat it.
Can I freeze these?
I don’t recommend freezing them—the coating can crack and the pretzels can get stale. They’re best made fresh or within a few days of serving. If you need to make them way ahead, freeze the undipped pretzels and dip them the day before your party.
My almond nails keep falling off—what am I doing wrong?
This usually happens when the coating has started to set before you add the almond. Make sure you’re working in small batches and adding the almond immediately after dipping. Press firmly and hold for a few seconds to make sure it sticks.
Pin This Recipe!
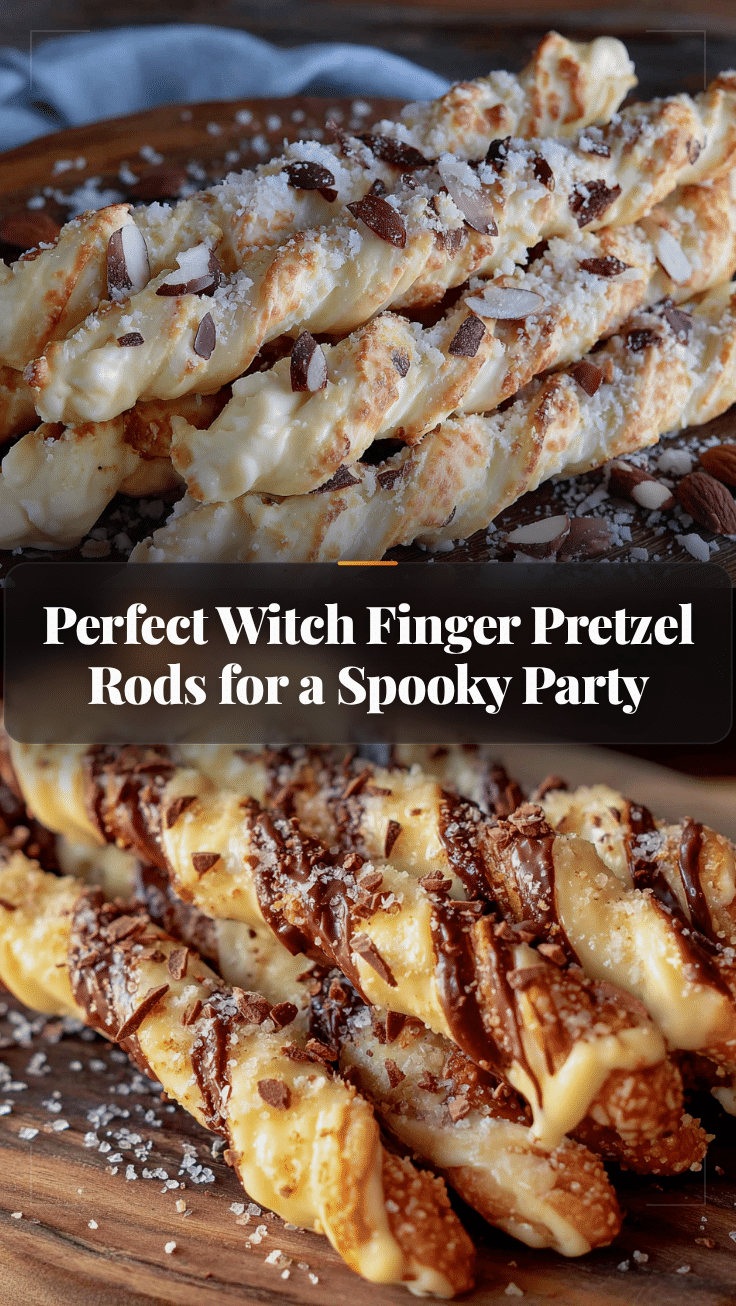
Best Witch Finger Pretzel Rods for a Spooky Party

These Witch Finger Pretzel Rods are the perfect mix of spooky and snackable, made with pretzel rods, white candy coating, and almond fingernails. Quick and easy to make in under 30 minutes, they’re a crowd-pleasing Halloween treat that looks impressively creepy.
- Prep Time: 15 minutes
- Cook Time: 5 minutes
- Total Time: 20 minutes
- Yield: 24 servings 1x
- Category: Appetizer
- Cuisine: American
Ingredients
- 24 pretzel rods (Rold Gold brand recommended)
- 2 cups white candy melts or white chocolate chips (Ghirardelli or Wilton recommended)
- 1 tablespoon coconut oil or vegetable shortening
- Green gel food coloring (Americolor brand recommended)
- 24 sliced almonds (whole sliced, not slivered)
- Red jam or red gel icing (optional, for bloody cuticles)
- Black sanding sugar or black sprinkles (optional, for dirt effect)
- Wax paper or parchment paper (for setting)
Instructions
- Prep your workspace: Line a baking sheet with wax paper or parchment paper. Arrange pretzel rods nearby and have sliced almonds ready in a small bowl.
- Melt the candy coating: Place white candy melts or white chocolate chips in a microwave-safe bowl. Add coconut oil or shortening. Microwave in 30-second intervals, stirring well after each, until completely smooth (about 1-2 minutes total).
- Add the green color: Stir in a small amount of green gel food coloring (start with a tiny dab, about 1/8 teaspoon) until evenly distributed. Aim for a pale, witchy green.
- Dip the pretzels: Holding one pretzel rod by the end, dip it into the green coating, leaving about an inch undipped at the top (the ‘wrist’ area). Gently twist and lift, letting excess drip back into the bowl. Place on prepared baking sheet.
- Add the fingernail: While coating is still wet, press a sliced almond onto the tip of the pretzel, pointed end outward. Press firmly so the almond is partially embedded. Use tweezers for better control if available.
- Create the knuckles: While coating is still soft, use a toothpick or small skewer to gently press 2-3 lines into the coating about halfway down the pretzel, and a couple more near the top, to create knuckle wrinkles. Press gently in a curved motion.
- Add extra details (optional): Add a tiny dab of red jam or red gel icing at the base of the almond nail for a bloody cuticle. Sprinkle black sanding sugar on knuckle areas for dirt or warts.
- Let them set: Allow coated pretzels to sit at room temperature until coating is completely firm, about 15-20 minutes. Do not refrigerate.
- Repeat with remaining pretzels: Continue dipping and decorating. If coating thickens, microwave for 10-15 seconds and stir until smooth.
- Serve or store: Once set, arrange on a platter with fingernails pointing outward. Store in an airtight container at room temperature for up to a week (best within 2-3 days).
Notes
Work in small batches (4-5 at a time) to prevent coating from setting before decorations are added. Keep hands clean and dry to avoid moisture seizing the coating. If coating thickens, add more coconut oil or microwave briefly. For best results, make up to 3 days ahead and store at room temperature.
Nutrition
- Serving Size: 1 pretzel rod
- Calories: 190
- Sugar: 15
- Sodium: 325
- Fat: 9
- Saturated Fat: 5
- Carbohydrates: 26
- Fiber: 1
- Protein: 3
Keywords: witch fingers, pretzel rods, Halloween treats, spooky snacks, easy Halloween recipe, candy coated pretzels, party appetizer


