I was standing in the checkout line at Aldi last Tuesday, mentally calculating if I had enough cash to cover the week’s groceries, when the woman behind me sighed and said, “My kid’s birthday party is Saturday, and I still don’t know what to make.” I turned around, and she was holding a box of Biscoff cookies, looking at it like it held the answer to some deep question. And honestly? It kind of does.
That moment took me straight back to my aunt’s cramped kitchen, circa 2007. She wasn’t really my aunt—she was my mom’s best friend from high school, but we called her Tia Rosa anyway. She had this way of stretching a dollar into a celebration without ever making you feel like you were eating on a budget. I remember standing on a wobbly stool next to her counter, watching her crush cookies with the bottom of a measuring cup because she couldn’t find her rolling pin. The kitchen smelled like butter and cinnamon, and she kept telling me to stop eating the crumbs. I didn’t stop. I never did.
Tia Rosa passed away three years ago, and I still haven’t found a dessert that captures that exact feeling—until now. These Biscoff cheesecake bars are the closest I’ve gotten. They’ve got that same warm, spiced cookie flavor, that creamy filling that feels fancy but costs pennies to make, and that moment when you bite into one and suddenly you’re eight years old again, sneaking crumbs off the counter while nobody’s looking. Maybe you’ve been there too—chasing a taste from your past, hoping it’ll bring back a feeling you can’t quite name.
That’s why I keep making these. Not because they’re impressive (though they are), but because they remind me that the best recipes don’t need expensive ingredients or complicated techniques. They just need a little patience, a lot of love, and someone willing to share the first bite.
Why You’ll Love This Recipe
Let me tell you why these Biscoff cheesecake bars have become the most-requested dessert in my house. I’ve tested this recipe seven times—yes, seven—to get it just right, and every single batch disappeared before I could even take a photo for this post. My kids literally fought over the last piece last week, and that’s when I knew I had to share it with you.
- Budget-Friendly: This whole recipe costs under $10 to make, and you probably already have most of the ingredients in your pantry. No expensive specialty items, no hunting down obscure imports. Just simple, honest ingredients that work together beautifully.
- Kid-Approved: I’m not kidding when I say my kids devour these. Even my picky eater—the one who inspects every meal like a food critic—asked for seconds. The Biscoff flavor is familiar enough for little palates but special enough to feel like a treat.
- Quick & Easy: You need about 20 minutes of active prep time. The rest is hands-off baking and chilling. Perfect for those evenings when you promised a dessert and then realized you have nothing planned.
- Simple Ingredients: Cream cheese, butter, sugar, eggs, vanilla, and Biscoff cookies. That’s it. No weird stabilizers, no obscure extracts, no trips to three different stores.
- Crowd-Pleaser: I brought these to a potluck last month, and three different people asked for the recipe before the coffee was done brewing. They’re fancy enough for guests but easy enough for a Tuesday night.
What makes these different from every other cheesecake bar recipe out there? It’s the texture. Most recipes end up either too dense or too crumbly, but these bars hit that sweet spot—creamy but firm, with a crust that actually stays together when you cut it. The secret is in how you handle the cream cheese (room temperature, always) and the Biscoff spread (warmed just enough to drizzle). It’s a small detail, but it makes all the difference.
Honestly, this recipe isn’t just good—it’s the kind that makes you close your eyes after the first bite. It’s comfort food reimagined: faster, cheaper, but with the same soul-soothing satisfaction. Perfect for impressing guests without stress, or turning a simple family dinner into something memorable.
What Ingredients You Will Need
This recipe uses simple, wholesome ingredients to deliver that rich, spiced flavor and creamy texture without any fuss. Most of these are pantry staples, so you might already have everything you need.
For the Crust
- 2 cups (about 200g) Biscoff cookie crumbs — (about 30 cookies, crushed finely)
- 5 tablespoons (70g) unsalted butter, melted — (adds richness and helps the crust hold together)
- 2 tablespoons (25g) granulated sugar — (just a touch to balance the spice)
For the Cheesecake Filling
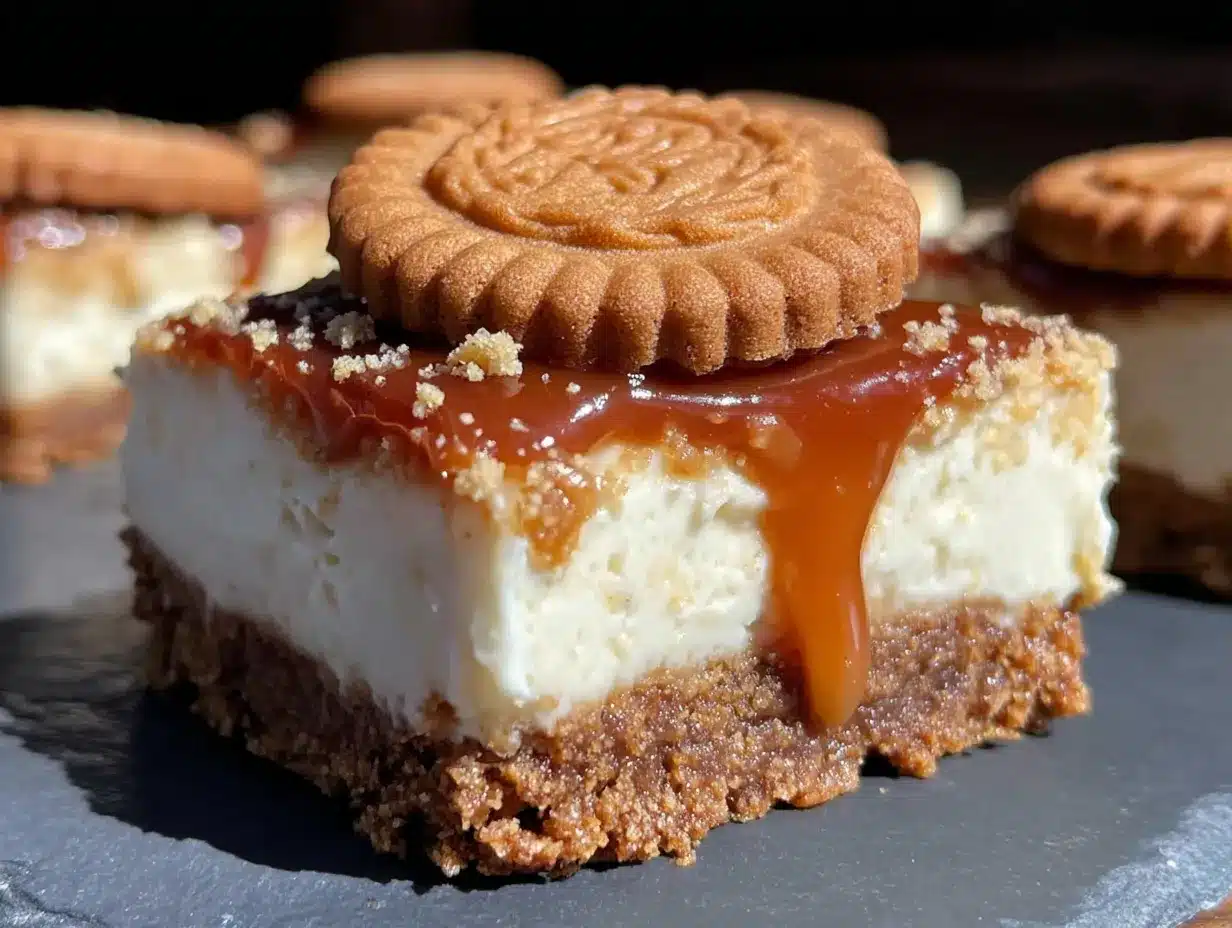
- 16 ounces (450g) full-fat cream cheese, softened — (I recommend Philadelphia for the smoothest texture; let it sit out for at least 30 minutes)
- ½ cup (100g) granulated sugar
- 2 large eggs, room temperature — (cold eggs can make the filling lumpy)
- 1 teaspoon vanilla extract — (pure, not imitation, if you can swing it)
- ⅓ cup (80ml) heavy cream — (adds that silky, luxurious texture)
- ¼ cup (60g) creamy Biscoff spread — (the stuff in the jar, not the cookies)
For the Topping
- ¼ cup (60g) creamy Biscoff spread, warmed — (microwave for 15 seconds, then stir)
- Optional: 2 tablespoons crushed Biscoff cookies for garnish
Ingredient Tips: Look for the Biscoff cookie spread in the peanut butter aisle or near the international foods section. If you can’t find it, you can use Speculoos cookie butter instead—it’s the same thing under a different name. For the cookies themselves, the classic Biscoff cookies (the ones they serve on airplanes) work perfectly. Don’t bother with the gluten-free version unless you need it; the texture isn’t quite the same.
Substitution Guidance: If you’re dairy-sensitive, use dairy-free cream cheese and coconut cream instead of heavy cream. The texture will be slightly less firm, but the flavor is still fantastic. For a lower-sugar version, reduce the sugar in the filling to ⅓ cup and skip the drizzle on top. My sister tried it this way and said it was still plenty sweet.
Equipment Needed
You don’t need a fancy kitchen to make these bars. Here’s what you’ll actually use:
- 9×9-inch baking pan — (an 8×8 works too, but your bars will be thicker and may need an extra 5 minutes of baking time)
- Electric hand mixer or stand mixer — (you can whisk by hand, but your arm will get tired, and the texture won’t be as smooth)
- Food processor or zip-top bag + rolling pin — (for crushing the cookies; I’ve used both methods, and honestly, the bag-and-rolling-pin approach is oddly satisfying)
- Mixing bowls — (one medium, one large)
- Parchment paper — (this is non-negotiable if you want to lift the bars out cleanly)
- Rubber spatula — (for scraping every last bit of that delicious filling)
- Measuring cups and spoons
Budget-Friendly Alternative: If you don’t have a food processor, don’t sweat it. Place the cookies in a sturdy zip-top bag, seal it, and go to town with a rolling pin or even a heavy skillet. My kids actually love doing this part—it’s a great way to get out some energy before dinner.
Maintenance Tip: If you use an electric mixer, make sure the beaters are completely dry before you start. Any water in the cream cheese mixture can cause the filling to separate during baking. Learned that one the hard way, let me tell you.
Preparation Method
Alright, let’s get to the good part. Follow these steps carefully, and you’ll have the best Biscoff cheesecake bars of your life.
- Preheat and Prep: Preheat your oven to 325°F (160°C). Line your 9×9-inch baking pan with parchment paper, leaving a 2-inch overhang on two opposite sides. This creates “handles” that make lifting the bars out super easy later. Lightly spray the parchment with non-stick spray.
- Make the Crust: In a food processor, pulse the Biscoff cookies until they become fine crumbs. You should have about 2 cups. Transfer to a medium bowl, add the melted butter and 2 tablespoons sugar, and stir with a fork until the mixture looks like wet sand. Press this mixture firmly into the bottom of your prepared pan. I use the bottom of a measuring cup to really pack it down—this prevents a crumbly crust later. Bake for 10 minutes, then set aside to cool slightly while you make the filling.
- Beat the Cream Cheese: In a large bowl, beat the softened cream cheese with an electric mixer on medium speed until smooth and fluffy—about 2 minutes. Scrape down the sides and bottom of the bowl with a rubber spatula. This is important: if you don’t scrape, you’ll end up with lumps of unincorporated cream cheese in your filling.
- Add Sugar and Flavor: Add the ½ cup sugar and beat until combined, about 1 minute. Then add the vanilla extract and the ¼ cup Biscoff spread. Beat on low speed until just incorporated. Don’t overmix here—you don’t want to incorporate too much air, which can cause cracks during baking.
- Add Eggs One at a Time: Crack one egg into a small bowl first (this prevents shell pieces from ending up in your batter). Add it to the cream cheese mixture and beat on low speed until just combined. Repeat with the second egg. Then add the heavy cream and mix on low until smooth. The batter should be thick, creamy, and slightly glossy.
- Assemble and Bake: Pour the cheesecake filling over the pre-baked crust. Use your spatula to spread it evenly to the edges. Give the pan a gentle tap on the counter to release any air bubbles. Bake at 325°F (160°C) for 35-40 minutes, or until the edges are set and the center jiggles slightly when you shake the pan. Don’t overbake! The center should still have a slight wobble—it will continue to set as it cools.
- Cool and Chill: Place the pan on a wire rack and let it cool completely at room temperature, about 1 hour. Then cover with plastic wrap and refrigerate for at least 4 hours, preferably overnight. This step is crucial—the bars need time to firm up so you can cut clean slices.
- Add the Topping: Once the bars are fully chilled and set, warm the remaining ¼ cup Biscoff spread in the microwave for 15-20 seconds. Stir until smooth, then drizzle over the top of the cheesecake. Use a spoon to create a decorative pattern if you’re feeling fancy. Sprinkle with crushed Biscoff cookies if desired.
- Slice and Serve: Use the parchment paper handles to lift the entire block of cheesecake out of the pan. Place it on a cutting board and use a sharp knife to slice into 16 squares. For clean cuts, wipe the knife clean between each slice.
Troubleshooting Tip: If your cheesecake filling looks curdled or separated after adding the eggs, don’t panic. This usually means your cream cheese was too cold or you overmixed. Try adding a tablespoon of heavy cream and mixing on low speed—it often brings everything back together.
Cooking Tips & Techniques
After seven batches of these bars, I’ve picked up a few tricks that make a real difference. Here’s what I wish I’d known from the start:
Room temperature ingredients are non-negotiable. I know, I know—every recipe says this, but it really matters here. Cold cream cheese creates lumps that no amount of mixing can fully fix. Set your cream cheese, eggs, and heavy cream out on the counter at least 30 minutes before you start. If you forgot (I do this all the time), cut the cream cheese into small cubes and microwave it for 10 seconds at 50% power. It’s not perfect, but it works in a pinch.
Don’t overmix the filling. I learned this lesson the hard way when my first batch came out of the oven looking like the surface of the moon. Overmixing incorporates too much air, which expands during baking and then collapses, causing cracks. Mix on low speed and stop as soon as everything is combined. A few tiny lumps are better than a cracked top.
The water bath debate. Most cheesecake recipes call for a water bath to prevent cracking, but honestly? For these bars, I skip it. The shallow pan and shorter baking time mean they’re less prone to cracking anyway. Plus, a water bath is a hassle—wrapping the pan in foil, worrying about leaks, steaming up your kitchen. I’ve tested both methods, and the texture difference is minimal. Save yourself the trouble.
Patience with chilling. I know it’s hard to wait, but these bars really need that full 4 hours (or overnight) in the fridge. I once tried to rush the process and cut them after 2 hours—total disaster. The filling was still soft, the knife dragged through everything, and I ended up with a pan of ugly but delicious mush. They tasted great, but presentation-wise? Not my finest moment.
Timing strategy: Make these the day before you need them. The flavor actually develops overnight—the Biscoff spice melds with the cream cheese, and the crust softens just slightly to the perfect texture. Plus, you’ll thank yourself when party day arrives and dessert is already done.
Variations & Adaptations
One of the best things about this recipe is how adaptable it is. Here are some variations I’ve tried and loved:
Chocolate Biscoff Bars
Melt ¼ cup of semi-sweet chocolate chips and swirl it into the cheesecake filling before baking. I did this for a friend’s birthday, and it was gone in 10 minutes. The chocolate adds a richness that pairs beautifully with the spiced cookie flavor.
Gluten-Free Version
Use gluten-free Biscoff cookies (they do exist!) and confirm your Biscoff spread is certified gluten-free. Everything else in the recipe is naturally gluten-free. My neighbor has celiac disease, and she said these were the best gluten-free bars she’s had in years.
Mini Bites for Lunchboxes
Instead of a 9×9 pan, use a mini muffin tin lined with paper liners. Press about a tablespoon of crust into each cup, then fill with cheesecake batter. Bake for 15-18 minutes. These are perfect for lunchboxes or after-school snacks—my kids love finding one in their lunch bag.
Vegan Adaptation
Use vegan cream cheese (I like Violife or Kite Hill), coconut cream instead of heavy cream, and flax eggs (1 tablespoon ground flaxseed + 3 tablespoons water per egg, let sit for 5 minutes). The texture is slightly less firm, but the flavor is still amazing. My vegan sister-in-law devoured half a pan at Thanksgiving last year.
Serving & Storage Suggestions
These bars are best served cold, straight from the fridge. The texture is perfect—creamy, firm, and sliceable. If you let them sit at room temperature too long, they’ll start to soften and lose their structure.
Presentation Ideas: For a pretty presentation, drizzle the warmed Biscoff spread in a zigzag pattern across the top, then use a toothpick to drag through it, creating a marbled effect. Sprinkle with crushed cookies and a tiny pinch of flaky sea salt. The salt sounds weird, I know, but it balances the sweetness beautifully.
What to Serve With Them: A cup of strong black coffee or a cold glass of milk is the perfect companion. For dessert, try serving with a dollop of whipped cream and fresh berries—the tartness cuts through the richness. I’ve also crumbled one over vanilla ice cream for a truly decadent sundae.
Storage Instructions: Store leftover bars in an airtight container in the refrigerator for up to 5 days. Layer them between sheets of parchment paper to prevent sticking. I don’t recommend freezing these—the texture of the cream cheese filling changes when thawed, becoming slightly grainy. If you must freeze them, wrap individual bars tightly in plastic wrap and then foil, and thaw in the refrigerator overnight.
Flavor Development: Here’s a secret: these bars actually taste better on day two. The Biscoff flavor deepens and melds with the cream cheese overnight. So if you can resist eating them all immediately, you’re in for a real treat the next day.
Nutritional Information & Benefits
Let’s be real—these are a treat, not a health food. But that doesn’t mean they can’t fit into a balanced diet. Here’s the estimated nutritional breakdown per bar (based on 16 servings):
- Calories: 285
- Total Fat: 18g
- Saturated Fat: 10g
- Cholesterol: 65mg
- Sodium: 210mg
- Total Carbohydrates: 28g
- Dietary Fiber: 0g
- Sugars: 18g
- Protein: 4g
- Calcium: 40mg
Health Highlights: Cream cheese provides a small amount of calcium and protein, and the eggs add high-quality protein and essential vitamins like B12 and D. The Biscoff cookies contain a bit of iron from the wheat flour. Is it a superfood? No. But it’s a dessert made with real ingredients, and that counts for something in my book.
Dietary Considerations: This recipe contains dairy, eggs, gluten, and wheat. For a dairy-free version, see the variations section above. For a gluten-free version, use certified gluten-free Biscoff cookies. The bars are nut-free as written, making them a good option for school bake sales where nut allergies are a concern.
My Personal Take: I believe in enjoying treats in moderation. These bars aren’t an everyday food, but they’re perfect for birthdays, holidays, or those days when you just need something special. One bar satisfies my sweet tooth completely—I never feel the need to go back for seconds.
Conclusion
These Biscoff cheesecake bars are everything I love about baking: simple ingredients, straightforward technique, and a result that feels way more impressive than the effort it took. They’ve become my go-to for school events, family gatherings, and those evenings when I just need a little something sweet.
The best part? You can make them your own. Add chocolate, go gluten-free, make mini versions for lunchboxes—the possibilities are endless. Don’t be afraid to experiment and find your perfect version. That’s what cooking is all about, right?
I’d love to hear how these turn out for you. Drop a comment below and let me know if your kids loved them as much as mine do. Did you add a twist? Did you double the recipe because one pan wasn’t enough? Share your stories—I read every single comment, and honestly, they make my day.
Until next time, happy baking! And remember: the best recipes are the ones you share with the people you love.
Frequently Asked Questions
Can I use reduced-fat cream cheese?
You can, but I don’t recommend it. Reduced-fat cream cheese has a higher water content, which can make the filling less creamy and more prone to cracking. If you’re watching calories, try using Neufchâtel cheese instead—it has about a third less fat than regular cream cheese but behaves much better in baking.
Why did my cheesecake bars crack on top?
Cracks usually happen for one of three reasons: overmixing the batter (too much air), overbaking (the center should still jiggle), or a sudden temperature change (don’t open the oven door while baking). If cracks do appear, don’t worry—the Biscoff drizzle on top will hide them beautifully.
Can I make these bars without an electric mixer?
Yes, but you’ll need some elbow grease. Make sure your cream cheese is very soft (leave it out for an hour), then beat it vigorously with a wooden spoon until smooth. A whisk works too, but it takes longer. The key is to get the cream cheese completely smooth before adding the other ingredients.
How do I get clean, neat slices?
Use a sharp knife and wipe it clean with a damp paper towel between each cut. For the absolute cleanest slices, chill the bars for at least 6 hours (overnight is best). You can even pop them in the freezer for 20 minutes before slicing—just don’t forget them in there!
Can I double this recipe for a larger crowd?
Absolutely! Double all ingredients and use a 9×13-inch baking pan. The baking time will increase slightly—start checking at 40 minutes. You’ll get about 24 bars from a 9×13 pan. I’ve done this for several potlucks, and it works perfectly every time.
Pin This Recipe!
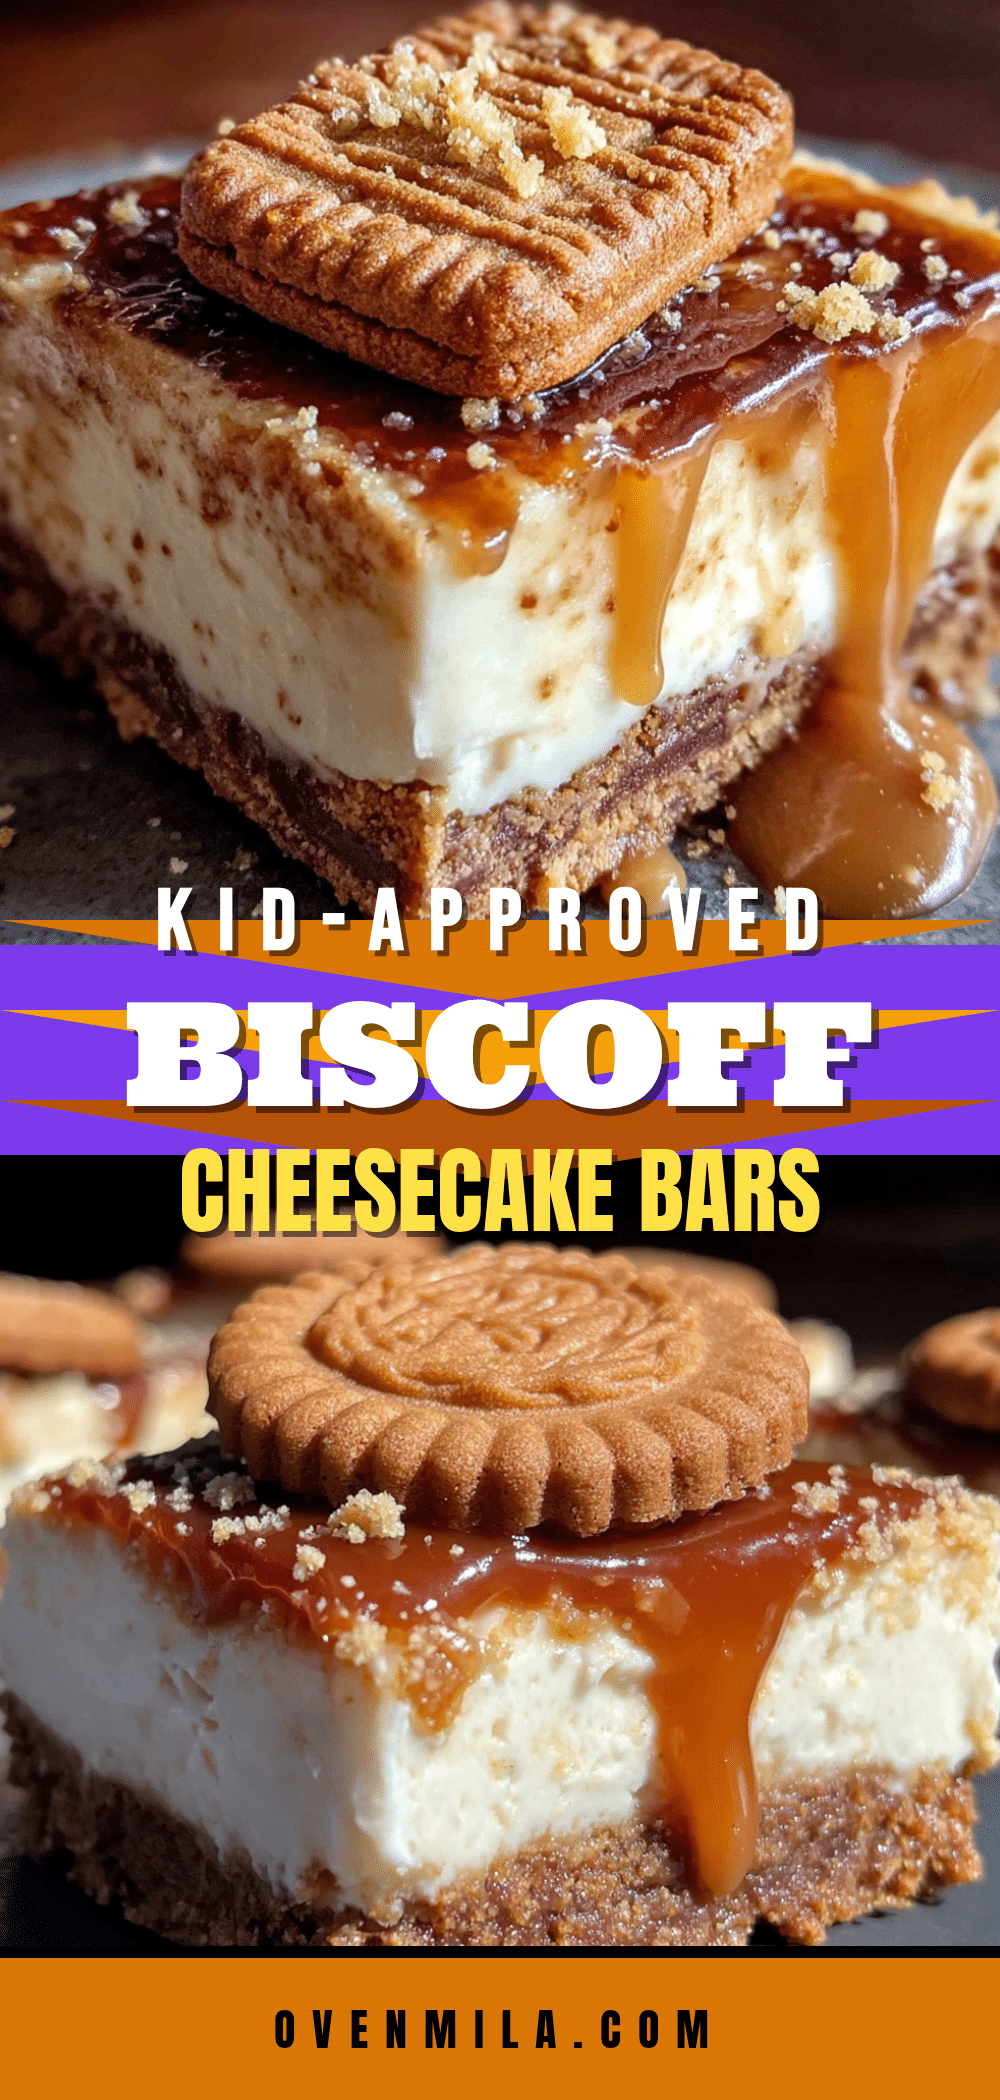
Easy Biscoff Cheesecake Bars Your Kids Will Love
These Biscoff cheesecake bars are a budget-friendly, kid-approved dessert with a creamy filling and a spiced cookie crust. They’re quick to make and perfect for any occasion.
- Prep Time: 20 minutes
- Cook Time: 35-40 minutes
- Total Time: 4 hours 55 minutes (including chilling)
- Yield: 16 servings 1x
- Category: Dessert
- Cuisine: American
Ingredients
- 2 cups (about 200g) Biscoff cookie crumbs (about 30 cookies, crushed finely)
- 5 tablespoons (70g) unsalted butter, melted
- 2 tablespoons (25g) granulated sugar
- 16 ounces (450g) full-fat cream cheese, softened
- ½ cup (100g) granulated sugar
- 2 large eggs, room temperature
- 1 teaspoon vanilla extract
- ⅓ cup (80ml) heavy cream
- ¼ cup (60g) creamy Biscoff spread
- ¼ cup (60g) creamy Biscoff spread, warmed (for topping)
- 2 tablespoons crushed Biscoff cookies (optional, for garnish)
Instructions
- Preheat your oven to 325°F (160°C). Line a 9×9-inch baking pan with parchment paper, leaving a 2-inch overhang on two opposite sides. Lightly spray the parchment with non-stick spray.
- In a food processor, pulse the Biscoff cookies until they become fine crumbs (about 2 cups). Transfer to a medium bowl, add the melted butter and 2 tablespoons sugar, and stir with a fork until the mixture looks like wet sand. Press this mixture firmly into the bottom of the prepared pan using the bottom of a measuring cup. Bake for 10 minutes, then set aside to cool slightly.
- In a large bowl, beat the softened cream cheese with an electric mixer on medium speed until smooth and fluffy—about 2 minutes. Scrape down the sides and bottom of the bowl with a rubber spatula.
- Add the ½ cup sugar and beat until combined, about 1 minute. Then add the vanilla extract and the ¼ cup Biscoff spread. Beat on low speed until just incorporated.
- Crack one egg into a small bowl, then add it to the cream cheese mixture and beat on low speed until just combined. Repeat with the second egg. Then add the heavy cream and mix on low until smooth.
- Pour the cheesecake filling over the pre-baked crust. Use a spatula to spread it evenly to the edges. Give the pan a gentle tap on the counter to release any air bubbles. Bake at 325°F (160°C) for 35-40 minutes, or until the edges are set and the center jiggles slightly when you shake the pan.
- Place the pan on a wire rack and let it cool completely at room temperature, about 1 hour. Then cover with plastic wrap and refrigerate for at least 4 hours, preferably overnight.
- Once the bars are fully chilled and set, warm the remaining ¼ cup Biscoff spread in the microwave for 15-20 seconds. Stir until smooth, then drizzle over the top of the cheesecake. Sprinkle with crushed Biscoff cookies if desired.
- Use the parchment paper handles to lift the entire block of cheesecake out of the pan. Place it on a cutting board and use a sharp knife to slice into 16 squares. Wipe the knife clean between each slice for clean cuts.
Notes
Room temperature ingredients are crucial for a smooth filling. Don’t overmix the batter to avoid cracks. Chilling for at least 4 hours (preferably overnight) is essential for clean slices. The bars taste even better on day two as the flavors meld.
Nutrition
- Serving Size: 1 bar
- Calories: 285
- Sugar: 18
- Sodium: 210
- Fat: 18
- Saturated Fat: 10
- Carbohydrates: 28
- Protein: 4
Keywords: Biscoff cheesecake bars, easy cheesecake bars, kid-friendly dessert, budget-friendly dessert, Biscoff recipe


