My neighbor, Mrs. Gable, wasn’t trying to impress anyone. I’d stopped by to borrow a cup of sugar—how cliché, I know—and a smell hit me before I even made it past her screen door. It was warm, spicy, and deeply autumnal. It smelled like everything good about fall, concentrated into one invisible cloud. She was in her tiny kitchen, flour dusted on her favorite faded apron, pulling a pie crust out of the oven. Not a fancy one, mind you. It was a little lopsided, with crimped edges that looked like they’d been done by a five-year-old (her grandson, she later confessed).
“Oh, that’s just my pumpkin pie,” she said, waving her hand like it was no big deal. “I make it every year for the church potluck.” She said it the way someone might mention buying a loaf of bread from the store. But I had tasted that pie before, at last year’s block party. I had gone back for a second slice, and maybe a third. It was the kind of pie that made you close your eyes after the first bite. The filling was impossibly smooth, not too sweet, with a depth of flavor that tasted like it had been simmering all day. The crust was flaky and buttery, the kind that shatters when you press it with a fork.
I stood there, holding my borrowed cup of sugar, and I just asked her. “Mrs. Gable, you have to tell me your secret.” She laughed, wiped her hands on her apron, and said, “There’s no secret, honey. It’s just good ingredients and a little bit of patience.” Honestly, I think she was holding out on me. But over the next few weeks, I watched her, asked questions, and eventually, I got the whole story. This recipe—this homemade pumpkin pie from scratch—is the result of that persistence. It’s the pie I’ve been making every Thanksgiving since, and it’s the one that finally got my uncle, a devout pecan pie loyalist, to switch teams. Maybe you’ve been there, looking for that one recipe that feels like home. Let me tell you, this is it.
Why You’ll Love This Recipe
Look, I’ve tested a lot of pumpkin pie recipes. Some are too watery. Some are so spiced they taste like a candle. And don’t even get me started on the ones that call for a can of evaporated milk and a pre-made crust that tastes like cardboard. This wholesome homemade pumpkin pie from scratch is different. It’s the one I turn to year after year because it just works. Here’s why you’re going to love it too:
- Made from Real, Whole Ingredients: No cans of pumpkin pie filling here. We’re using a real sugar pumpkin (or a good quality canned pumpkin puree if you’re short on time) and a blend of warm spices you can pronounce. It’s food that feels good to eat.
- That Perfect, Silky Texture: We’re not using any weird shortcuts. The key is a slow, gentle bake and a water bath for the filling. The result is a pie that’s creamy, set, and slices like a dream—no cracks, no weeping.
- A Foolproof, Flaky Crust: I’ll walk you through my favorite all-butter pie crust. It’s forgiving, it’s delicious, and it won’t shrink up on you. You don’t need to be a pastry chef to nail it.
- Perfectly Balanced Flavor: This pie isn’t cloyingly sweet. The natural sweetness of the pumpkin shines through, backed by a warm hug of cinnamon, ginger, nutmeg, and a tiny pinch of cloves. It’s the kind of flavor that feels nostalgic but tastes incredibly fresh.
- Healthier, Without Sacrifice: I’ve cut back on the sugar compared to most traditional recipes, and I use a touch of maple syrup for a more complex sweetness. It’s a dessert you can feel good about serving to your family—and yourself.
This isn’t just another recipe. It’s the result of years of tweaking, a few burnt crusts, and one very honest conversation with a neighbor. It’s the pie that makes people say, “Wow, you made this from scratch?” and then go back for seconds. It’s comfort food, reimagined for a modern kitchen.
What Ingredients You Will Need
This recipe relies on simple, wholesome ingredients to build that deep, comforting flavor. Most of these are pantry staples, especially if you’re a fall baking enthusiast. The quality of your ingredients really does matter here, so let’s talk about what to look for.
For the All-Butter Pie Crust
- 1 ¼ cups (160g) all-purpose flour: Spoon it into your measuring cup and level it off. Don’t scoop it, or you’ll pack it down and end up with a tough crust. I usually use King Arthur Flour for its consistent protein content.
- ½ teaspoon salt: Just fine sea salt or table salt. It balances the butter and brings out the flavor of the flour.
- 1 tablespoon granulated sugar: A tiny bit of sugar helps with browning and adds a whisper of sweetness. You can leave it out if you prefer a savory crust.
- ½ cup (113g) cold unsalted butter, cut into small cubes: This is non-negotiable. The butter must be ice-cold. I pop my cubed butter in the freezer for 10 minutes before I start. It creates those beautiful, flaky layers.
- 3-4 tablespoons (45-60ml) ice water: You might need a little more or less depending on your flour and the humidity. Start with 3 tablespoons and add more, one teaspoon at a time, until the dough just comes together.
For the Wholesome Pumpkin Filling
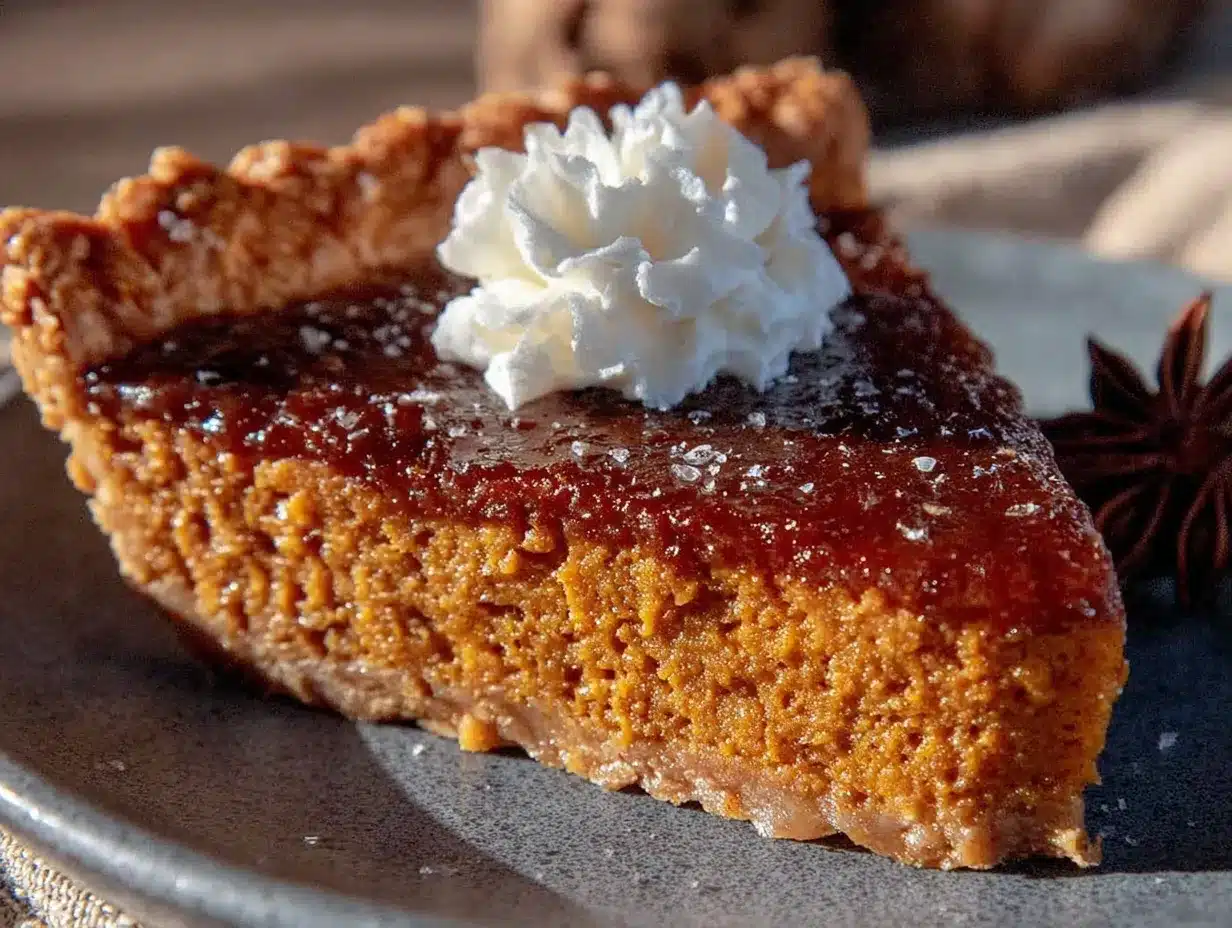
- 2 cups (450g) pumpkin puree: If you’re using a fresh sugar pumpkin, you’ll need about one medium pumpkin. Roast it until tender, scoop out the flesh, and puree it until smooth. For a shortcut, I highly recommend Libby’s 100% Pure Pumpkin. It’s consistent and has a great color. Do not use pumpkin pie filling—it’s already sweetened and spiced.
- ¾ cup (150g) packed light brown sugar: I like brown sugar for its molasses notes, which complement the pumpkin beautifully. You can use coconut sugar for a less refined option.
- ¼ cup (60ml) pure maple syrup: This adds a lovely, woodsy sweetness. Grade A dark amber is my favorite for baking. Don’t use pancake syrup—it’s not the same thing.
- 2 large eggs, plus 1 large egg yolk: The extra yolk adds richness and a velvety texture. Make sure your eggs are at room temperature so they emulsify smoothly into the filling.
- 1 ½ cups (355ml) heavy cream: This is what makes the filling so luxuriously creamy. You can substitute half-and-half for a slightly lighter pie, but it won’t be quite as rich.
- 2 teaspoons ground cinnamon: The backbone of the spice blend. I like to use Ceylon cinnamon for a milder, more floral flavor, but Cassia works perfectly fine.
- 1 teaspoon ground ginger: For a little warmth and zing.
- ½ teaspoon ground nutmeg: Freshly grated is a game-changer if you have a whole nutmeg in your spice drawer.
- ¼ teaspoon ground cloves: A little goes a long way. It adds that classic “pumpkin pie” depth.
- ½ teaspoon salt: To tie all the flavors together.
- 1 teaspoon vanilla extract: It rounds out the spices and adds a subtle warmth.
Ingredient Swap Note: For a dairy-free version, you can use full-fat canned coconut milk in place of the heavy cream. The texture will be slightly different—a bit less firm—but it’s still delicious. Just make sure to shake the can well before measuring.
Equipment Needed
You don’t need a professional pastry kitchen to make this pie. Here’s what you’ll need to have on hand:
- 9-inch pie plate: I prefer a glass or ceramic dish for even heat distribution. A metal pan works too, but keep an eye on the crust—it can brown faster.
- Rolling pin: A standard wooden one is perfect. If you don’t have one, a clean wine bottle works in a pinch! I’ve done it. It’s not elegant, but it gets the job done.
- Large mixing bowls (2): One for the crust, one for the filling.
- Parchment paper or aluminum foil: For blind baking the crust.
- Pie weights or dried beans: To keep the crust from puffing up during blind baking. I keep a bag of old dried chickpeas in my pantry just for this purpose.
- Whisk: For the filling. No electric mixer needed here—a good whisk is all you need to get it smooth.
- Food processor (optional): For making the crust. You can absolutely do it by hand with a pastry cutter or two forks, but a food processor makes it incredibly fast and easy.
- Measuring cups and spoons: For accuracy.
- Kitchen scale (optional but recommended): Baking by weight is more precise and leads to better results, especially with the crust.
- Cooling rack: So the pie can cool evenly after it comes out of the oven.
My best tip? Make sure your pie plate is at room temperature before you put the dough in it. A cold plate can cause the butter to seize up and make the dough difficult to work with.
Preparation Method
Alright, let’s get to it. This recipe looks long, but I promise you, it’s mostly hands-off time. We’re going to break it down into three parts: the crust, the filling, and the bake. Take a deep breath, and let’s make some pie.
Part 1: Make the All-Butter Crust (Hands-on: 15 mins | Chill time: 1 hour)
- Combine dry ingredients: In a large bowl (or the bowl of your food processor), whisk together the flour, salt, and sugar. If using a food processor, pulse a few times to combine.
- Cut in the butter: Add the cold, cubed butter to the flour mixture. If doing it by hand, use a pastry cutter or your fingertips to work the butter into the flour until the mixture looks like coarse meal with some pea-sized butter pieces remaining. You want to see those little flecks of butter—they’re what create the flaky layers. In a food processor, pulse in short bursts until you achieve the same texture. Don’t over-process!
- Add the water: Drizzle 3 tablespoons of ice water over the mixture. Toss it gently with a fork (or pulse 2-3 times in the processor) until the dough starts to clump together. If it seems too dry, add the remaining tablespoon of water, one teaspoon at a time. The dough should hold together when you squeeze a piece in your hand.
- Form the disc: Turn the dough out onto a lightly floured surface. Gather it into a ball, then flatten it into a disc about 1-inch thick. Wrap it tightly in plastic wrap and refrigerate for at least 1 hour, or up to 3 days. This rest is crucial—it relaxes the gluten and solidifies the butter, which prevents shrinkage and ensures a tender crust.
- Roll it out: On a lightly floured surface, roll the chilled dough into a 12-inch circle, about ⅛-inch thick. Rotate the dough a quarter turn after every few rolls to keep it even. Gently transfer it to your 9-inch pie plate. Don’t stretch the dough—just lift and settle it into the plate.
- Crimp the edges: Trim the overhang to about ½-inch, then tuck it under itself to create a thick edge. Crimp the edge using your fingers or a fork. Place the crust back in the refrigerator for at least 30 minutes while you preheat the oven. This second chill is key for a crisp crust.
Part 2: Blind Bake the Crust (Hands-on: 5 mins | Bake time: 20 mins)
- Preheat your oven to 375°F (190°C).
- Line and fill: Remove the chilled crust from the fridge. Line it with a piece of parchment paper, making sure it goes all the way up the sides. Fill it completely with pie weights or dried beans.
- Bake: Bake for 15 minutes. The edges should look set and just barely starting to turn golden.
- Remove weights: Carefully lift the parchment paper with the weights out of the crust. Prick the bottom of the crust all over with a fork (this is called docking, and it prevents bubbles). Return the crust to the oven and bake for another 5-7 minutes, until the bottom looks dry and is just starting to color.
- Cool: Set the crust aside on a wire rack to cool slightly while you make the filling. Keep the oven on.
Part 3: Make the Filling & Bake (Hands-on: 10 mins | Bake time: 50-60 mins)
- Whisk the wet ingredients: In a large bowl, whisk together the pumpkin puree, brown sugar, and maple syrup until smooth. Add the eggs and the extra yolk, one at a time, whisking well after each addition.
- Add the cream and spices: Pour in the heavy cream, vanilla extract, cinnamon, ginger, nutmeg, cloves, and salt. Whisk until the filling is completely smooth and homogeneous. It will be a beautiful, deep orange color.
- Pour the filling: Place the warm, pre-baked crust on a baking sheet (this makes it easier to get in and out of the oven and catches any spills). Carefully pour the pumpkin filling into the crust.
- Bake: Carefully transfer the baking sheet to the oven. Bake at 375°F (190°C) for 15 minutes. Then, without opening the oven, reduce the temperature to 350°F (175°C) and continue baking for 35-45 minutes more.
- Check for doneness: The pie is done when the edges are set and puffed slightly, but the center still jiggles just a little bit—like a firm Jell-O. If you insert a knife near the center, it should come out mostly clean. A perfectly baked pumpkin pie will have a dull, matte surface.
- Cool completely: Remove the pie from the oven and let it cool on a wire rack to room temperature. This takes about 2 hours. The residual heat will finish setting the center. Do not put it in the fridge while it’s still warm, or it will crack.
Sensory Cue: When it’s done, your kitchen will smell like a fall festival. The top of the pie should be a deep, burnished copper color, and the edges of the crust will be a lovely golden brown.
Cooking Tips & Techniques
I’ve made this pie at least a dozen times, and I’ve learned a few things the hard way. Here are my best tips to make sure your pie turns out perfectly every single time.
- Don’t skip the blind bake: I know it’s an extra step, but it’s non-negotiable for a bottom crust that isn’t soggy. A wet filling like pumpkin needs a head start on cooking. Trust me on this one—I skipped it once, and I ended up with a pie that fell apart on the plate.
- Use a water bath for the filling (optional but magical): If you want a truly silky, crack-free top, place your pie plate inside a larger baking dish and pour hot water into the outer dish until it comes about halfway up the sides of the pie plate. This gentle, even heat prevents the eggs from scrambling and the top from cracking. I do it for special occasions.
- Watch the crust edges: If the edges of your crust are browning too quickly before the filling is set, loosely cover them with a pie shield or a strip of aluminum foil. I usually do this about 20 minutes into the bake.
- Let it rest: This is the hardest part! You have to let the pie cool completely to room temperature before you slice into it. If you cut it while it’s warm, the filling will be runny and the slices will be a mess. Patience is a virtue, especially when it comes to pie.
- My biggest failure: I once forgot to add the sugar to the filling. I was chatting on the phone and just… missed it. The pie looked beautiful, but it tasted like sadness. Always double-check your ingredients! I now do a quick taste test of the filling before I pour it into the crust. It should taste slightly too sweet—the sweetness will mellow as it bakes.
Variations & Adaptations
This wholesome homemade pumpkin pie from scratch is a great base for your own creativity. Here are a few ways I’ve tweaked it over the years:
- Spiced Maple Pecan Topping: Before baking, sprinkle the top of the filling with a mixture of ½ cup chopped pecans, 2 tablespoons of maple syrup, and a pinch of cinnamon. It adds a wonderful crunch and a nutty flavor that pairs perfectly with the creamy filling.
- Ginger Snap Crust: Instead of a traditional pastry crust, use a crust made from crushed ginger snaps and melted butter. It’s a fantastic shortcut that adds a spicy kick. Use about 1 ½ cups of crumbs and 5 tablespoons of melted butter.
- Dairy-Free & Vegan Adaptation: Use full-fat coconut milk instead of heavy cream, and replace the eggs with 3 tablespoons of cornstarch mixed with ¼ cup of water. The texture won’t be quite as rich, but it’s a solid option for those with dietary restrictions. I’ve served it to dairy-free friends and they loved it.
- Pumpkin Pie Dip: Don’t want to mess with a crust? Make the filling as directed, but bake it in a greased 8×8-inch dish at 350°F (175°C) for 30-35 minutes. Serve it warm with graham crackers, apple slices, or ginger snaps for dipping. It’s a huge hit at parties.
Serving & Storage Suggestions
This pie is a star on its own, but a few thoughtful accompaniments can make it truly shine.
- Serving Temperature: I prefer this pie at room temperature. The flavors are more pronounced, and the texture is perfect. You can serve it slightly warm, but make sure it’s fully set first.
- Topping Ideas: A generous dollop of lightly sweetened whipped cream is a classic for a reason. For a slightly tangier option, try a spoonful of crème fraîche or a drizzle of maple syrup. A sprinkle of flaky sea salt on top just before serving is a fantastic way to balance the sweetness.
- Pairing Suggestions: This pie is the perfect ending to a Thanksgiving feast, but it’s also wonderful with a hot cup of coffee or chai tea on a crisp fall afternoon. For a boozy pairing, a glass of bourbon or a dark rum old-fashioned is divine.
- Storage: Once the pie has cooled completely, cover it loosely with plastic wrap or aluminum foil and store it in the refrigerator. It will keep for up to 5 days. The flavors actually get better after a day or two as they meld together.
- Freezing: You can freeze the baked, cooled pie for up to 3 months. Wrap it tightly in a layer of plastic wrap, then a layer of foil. To serve, thaw it overnight in the refrigerator and bring it to room temperature before slicing.
- Reheating: I usually don’t reheat this pie, but if you want a warm slice, pop it in a 300°F (150°C) oven for 10-15 minutes. Avoid the microwave—it will make the crust soggy.
Nutritional Information & Benefits
Let’s be real: this is still a dessert. But it’s made with ingredients that actually do your body some good, which makes it a treat you can enjoy without a side of guilt.
Estimated per serving (based on 8 servings):
- Calories: ~380
- Fat: 22g
- Carbohydrates: 42g
- Fiber: 3g
- Sugar: 28g
- Protein: 6g
- Vitamin A: 250% DV
The Good Stuff: Pumpkin is packed with vitamin A (beta-carotene), which is fantastic for your eyes and immune system. It’s also a good source of fiber. We’ve used less refined sugar than most traditional recipes, swapping some for maple syrup, which contains antioxidants and minerals like zinc and manganese. The eggs and butter provide healthy fats and fat-soluble vitamins that help you absorb all that vitamin A. It’s a dessert that’s actually working for you, at least a little bit.
Dietary Note: This recipe contains gluten (from the flour), dairy (butter and cream), and eggs. For a gluten-free version, use a 1:1 gluten-free baking flour blend in the crust. For dairy-free, use the coconut milk and butter substitute mentioned in the variations section.
Conclusion
So there you have it—my neighbor’s not-so-secret recipe for the most incredible wholesome homemade pumpkin pie from scratch. It’s more than just a dessert. It’s a little piece of fall, baked into a flaky crust with a silky, spiced heart. It’s the smell that pulls you into a warm kitchen. It’s the taste that makes everyone at the table go quiet for a moment. It’s the recipe I’m most proud to share.
I really hope you give this one a try. Don’t be intimidated by the crust or the long list of steps—you’ve got this. And honestly, even if it’s a little lopsided, it will taste incredible. That’s the beauty of homemade. Make it your own. Add a little extra cinnamon. Skip the cloves if you’re not a fan. Serve it with a mountain of whipped cream. Do whatever makes you happy.
I’d love to hear how it turns out for you! Drop a comment below and tell me about your pie-making adventure. Did you use a fresh pumpkin? Did your family fight over the last slice? Share your photos and tag me on Pinterest—I can’t wait to see your beautiful creations. Happy baking, friends!
Frequently Asked Questions
Can I use canned pumpkin puree instead of fresh?
Absolutely! In fact, I often use canned pumpkin puree (like Libby’s) for its consistent texture and flavor. Just make sure you buy 100% pure pumpkin, not pumpkin pie filling, which has added sugar and spices.
Why did my pie crust shrink?
Crust shrinkage usually happens for two reasons: the dough was overworked (developing too much gluten) or it wasn’t chilled enough before baking. Make sure to handle the dough gently and give it that full hour of chill time in the fridge.
How do I know when the pumpkin pie is done?
The edges should be set and slightly puffed, but the center should still jiggle slightly when you gently shake the pan—like a firm Jell-O. A knife inserted about 1 inch from the center should come out clean. The pie will continue to set as it cools.
Can I make this pie ahead of time?
Yes! This pie actually tastes better the next day as the flavors meld together. You can bake it a day ahead, let it cool completely, and store it covered in the refrigerator. Bring it to room temperature before serving.
My pumpkin pie cracked on top. What did I do wrong?
Cracks usually happen from overbaking or from a sudden change in temperature. To prevent this, bake the pie just until the center is set but still jiggly, and let it cool gradually on a wire rack away from drafts. Using a water bath (as mentioned in the tips) is also very helpful for preventing cracks.
Pin This Recipe!
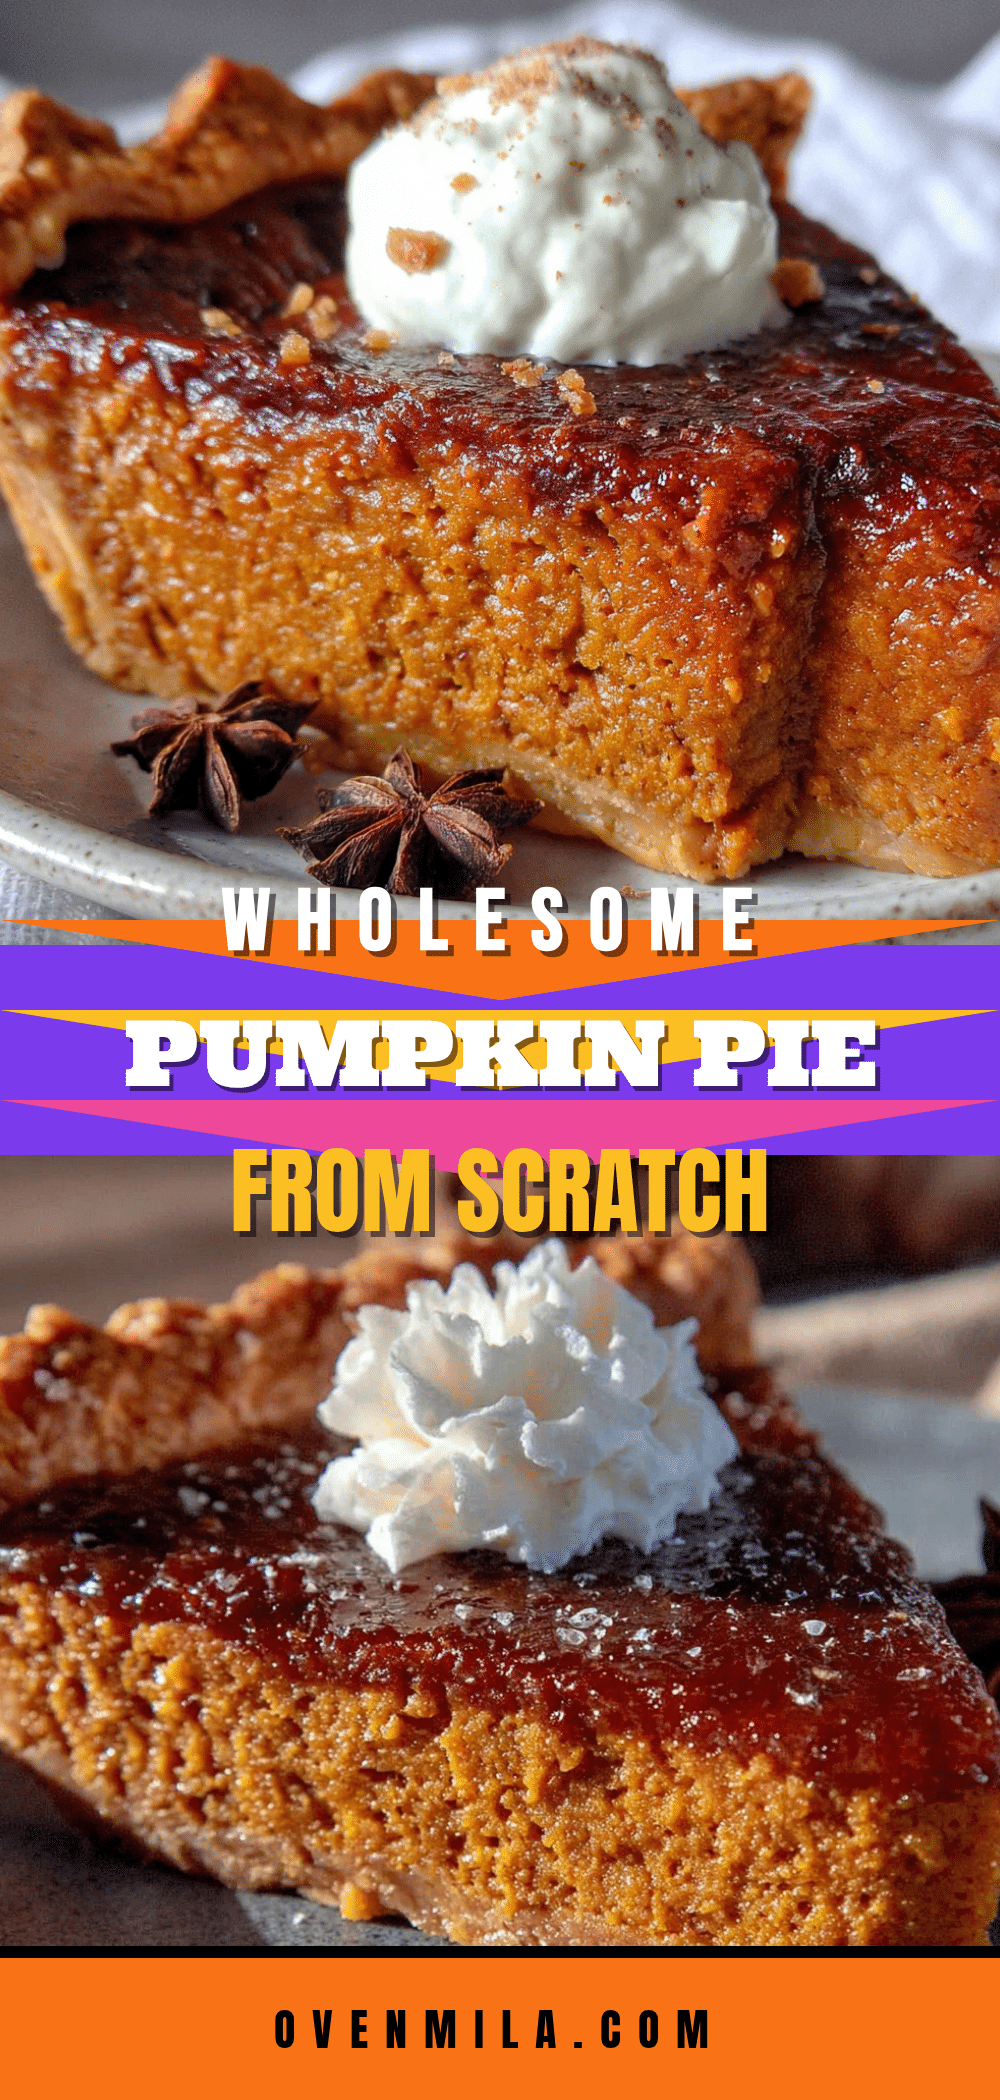
Homemade Pumpkin Pie from Scratch (Easiest Recipe)
This wholesome homemade pumpkin pie from scratch features a silky, perfectly spiced filling and a flaky all-butter crust. It’s the ultimate fall dessert that tastes like home, made with real ingredients and a foolproof method.
- Prep Time: 1 hour 30 minutes
- Cook Time: 55 minutes
- Total Time: 2 hours 25 minutes
- Yield: 8 servings 1x
- Category: Dessert
- Cuisine: American
Ingredients
- 1 ¼ cups (160g) all-purpose flour
- ½ teaspoon salt
- 1 tablespoon granulated sugar
- ½ cup (113g) cold unsalted butter, cut into small cubes
- 3–4 tablespoons (45-60ml) ice water
- 2 cups (450g) pumpkin puree
- ¾ cup (150g) packed light brown sugar
- ¼ cup (60ml) pure maple syrup
- 2 large eggs, plus 1 large egg yolk
- 1 ½ cups (355ml) heavy cream
- 2 teaspoons ground cinnamon
- 1 teaspoon ground ginger
- ½ teaspoon ground nutmeg
- ¼ teaspoon ground cloves
- ½ teaspoon salt
- 1 teaspoon vanilla extract
Instructions
- Make the crust: In a large bowl, whisk together flour, salt, and sugar. Cut in cold butter until mixture resembles coarse meal with pea-sized butter pieces. Drizzle 3 tablespoons ice water over mixture and toss until dough clumps together. Form into a disc, wrap in plastic, and refrigerate for at least 1 hour.
- Roll out the chilled dough on a floured surface into a 12-inch circle. Transfer to a 9-inch pie plate, crimp edges, and refrigerate for 30 minutes.
- Preheat oven to 375°F (190°C). Line crust with parchment paper and fill with pie weights. Bake for 15 minutes. Remove weights, prick bottom with fork, and bake 5-7 minutes more until bottom is dry. Set aside to cool slightly.
- Make the filling: In a large bowl, whisk together pumpkin puree, brown sugar, and maple syrup until smooth. Add eggs and yolk one at a time, whisking well. Add heavy cream, vanilla, cinnamon, ginger, nutmeg, cloves, and salt. Whisk until smooth.
- Place pre-baked crust on a baking sheet. Pour filling into crust. Bake at 375°F (190°C) for 15 minutes, then reduce temperature to 350°F (175°C) and bake 35-45 minutes more until edges are set but center jiggles slightly.
- Cool completely on a wire rack for about 2 hours before serving.
Notes
For a dairy-free version, use full-fat canned coconut milk instead of heavy cream. The pie tastes even better the next day. To prevent cracks, use a water bath or cool gradually. If crust edges brown too quickly, cover with foil.
Nutrition
- Serving Size: 1 slice
- Calories: 380
- Sugar: 28
- Sodium: 320
- Fat: 22
- Saturated Fat: 13
- Carbohydrates: 42
- Fiber: 3
- Protein: 6
Keywords: pumpkin pie, homemade pumpkin pie, from scratch, Thanksgiving dessert, fall baking, pumpkin dessert, easy pumpkin pie


