I was picking up a last-minute plumbing part at the hardware store—honestly, I can’t even remember what I was fixing—when the guy behind the counter started talking about Thanksgiving. Not his turkey brine or his mother’s stuffing recipe. He was describing a charcuterie board. “You just need one big round board,” he said, wiping his hands on a rag, “and you arrange everything in a circle. It looks like a wreath. People lose their minds over it.” I stood there holding a copper pipe fitting, completely captivated. He told me his wife made it every year for their pre-Thanksgiving get-together, and it was always the first thing to disappear. That conversation lasted maybe four minutes, but I scribbled his tips on the back of a receipt before I left the store. That’s how this Quick Friendsgiving Charcuterie Wreath Board was born—from a plumber who clearly knew his way around a spread just as well as a pipe wrench.
Let me tell you, that first board I made was a beautiful mess. I didn’t have the right size board, so I used a pizza pan. The salami slices were too thick, and the rosemary sprigs kept sliding off. But you know what? Everyone stood around it, grabbing, dipping, laughing. It was the centerpiece of the whole night. Now, years later, I’ve refined the process so it comes together in under twenty minutes. This isn’t about spending hours fanning out prosciutto rosettes. This is about making something that looks like you fussed—without actually fussing. And honestly, for a Friendsgiving where you’re already cooking a dozen other things, that’s exactly what you need.
Why You’ll Love This Recipe
Look, I’ve tested this board more times than I can count. I’ve made it for my family’s chaotic Thanksgiving, for a Friendsgiving with eight roommates who couldn’t agree on anything, and for a quiet dinner party where I needed something that looked impressive but didn’t require me to be in the kitchen all night. This board works every single time. Here’s why it’s become my go-to:
- Quick & Easy: This comes together in about 15–20 minutes. No cooking, no baking, just arranging. For a busy weeknight or a last-minute gathering, this is your lifesaver.
- Simple Ingredients: You can find everything at your regular grocery store. No fancy cheese shops or specialty meat counters required. I’ve even made this with items from a gas station deli in a pinch—don’t judge, it worked.
- Perfect for Friendsgiving: This is the ultimate crowd-pleaser for a casual pre-holiday hang. It’s shareable, snackable, and doubles as a stunning centerpiece.
- Crowd-Pleaser: I’ve watched people who claim they don’t like goat cheese go back for thirds. The combination of savory, sweet, and tangy hits every note.
- Unbelievably Delicious: The trick is the balance. You get salty cured meats, creamy cheese, tart cranberries, and crunchy nuts. It’s a flavor party on a cracker.
What makes this board different from the rest is the method. I’m not asking you to make elaborate rose shapes out of prosciutto. Instead, I use a simple folding technique that looks polished but takes seconds. Plus, I’ve figured out the perfect ratio of meat to cheese to crackers so you don’t run out of anything. This isn’t just another charcuterie board—it’s the one that disappears first, every single time.
What Ingredients You Will Need
This recipe uses simple, grocery-store-friendly ingredients to create a board that looks like it came from a catering company. The key is variety—different textures, flavors, and colors. Here’s what you’ll need:
For the Meats
- Prosciutto (8–10 slices): Look for thinly sliced prosciutto. I prefer the one from the deli counter rather than pre-packaged—it’s usually more tender. (Pro tip: ask for it sliced fresh, it makes a difference in texture.)
- Salami (6–8 ounces): I use a mix of Genoa salami and peppered salami. The peppered one adds a nice little kick. You can also use soppressata if you want something bolder.
- Capicola or Coppa (6 slices): This is optional, but I love the slightly spicy, fatty flavor. If you can’t find it, just add more prosciutto.
For the Cheeses
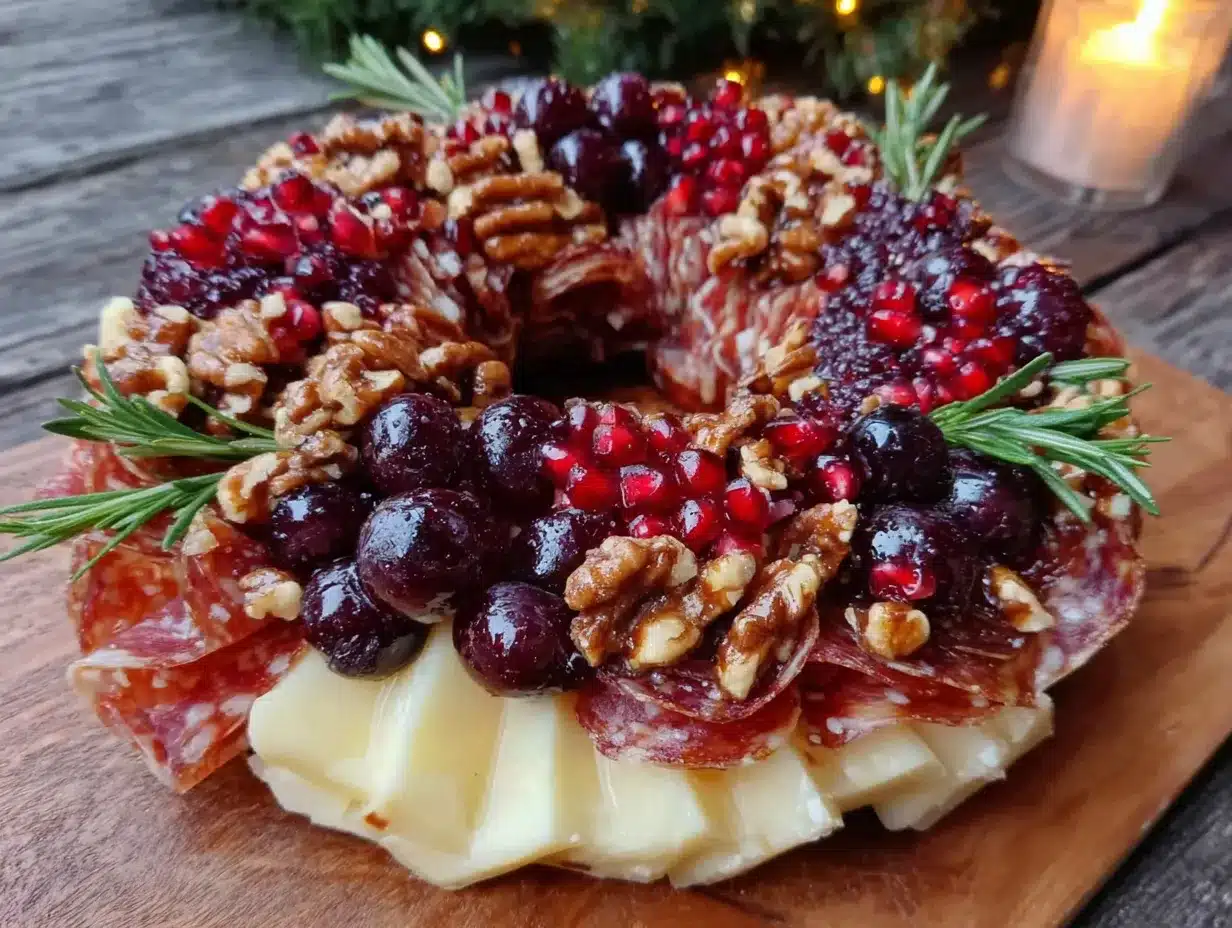
- Aged Cheddar (4–6 ounces): A sharp, crumbly cheddar adds a nice contrast to the creamy cheeses. I like the one from Cabot or a good English cheddar.
- Brie (one small wheel): Keep the rind on. It softens at room temperature and becomes perfectly spreadable. Look for a double or triple cream brie for extra richness.
- Goat Cheese Log (4 ounces): The tanginess cuts through the salty meats. I recommend the plain, soft goat cheese—not the flavored ones, which can clash.
- Manchego (4 ounces): This is my secret weapon. It’s nutty, firm, and slices beautifully. Plus, it holds up well on the board for hours.
For the Accompaniments
- Crackers (about 20–25): Use a mix of textures. I do a box of water crackers, a box of buttery rounds, and a handful of rosemary or sea salt crackers. The variety keeps things interesting.
- Fresh Cranberries (½ cup): These are mostly for color, but they also add a tart pop if you bite into one. They make the board look instantly festive.
- Dried Apricots (½ cup): The sweetness balances the salty meats. I slice them in half so they’re easier to grab.
- Honey (for drizzling): A small ramekin of honey next to the brie is a game-changer. Trust me on this.
- Mixed Nuts (½ cup): I use a mix of almonds and pecans. Toasting them lightly in a dry pan brings out their flavor, but raw works fine too.
- Fresh Rosemary Sprigs (a few): These are for decoration, but the aroma is lovely. Plus, they make the board look like a wreath.
Optional Add-Ins
- Fig Jam or Quince Paste: If you have it, add a small bowl. It pairs beautifully with the manchego.
- Dark Chocolate: A few squares of dark chocolate (70% or higher) scattered around the board add a touch of indulgence.
- Olives: A handful of Castelvetrano or kalamata olives add brininess.
Equipment Needed
You don’t need much for this board, and I’ve made it work with what I had on hand more than once. Here’s the short list:
- Large Round Board or Platter: The key is something round. I use a 16-inch wooden board, but a large ceramic platter, a pizza pan, or even a flat serving tray works. If you don’t have a round board, arrange everything in a circle on a rectangular cutting board—it still looks great.
- Small Ramekins or Bowls: You’ll need 2–3 small bowls for the honey, jam, or olives. I use little ceramic ramekins I picked up at a thrift store. They don’t have to match—mismatched bowls add charm.
- Cheese Knives: At least one small knife for the brie and one for the cheddar. If you don’t have cheese knives, a butter knife and a paring knife work fine.
- Tongs or Small Spoons: For the nuts and dried fruit. I usually just use my hands (washed, of course), but tongs look nicer for serving.
- Parchment Paper: Optional, but I sometimes line the board with a piece of parchment paper for easy cleanup. It also adds a rustic look.
Preparation Method
Alright, let’s get to the fun part. This whole process takes about 15–20 minutes, and I promise you can do it while chatting with guests or drinking a glass of wine. Here’s the step-by-step:
- Start with the board. Place your board or platter on the counter. If you’re using parchment paper, lay it down now. Take a deep breath—this is supposed to be fun, not stressful.
- Place the small bowls first. Set your ramekins of honey, fig jam, or olives in a circle around the board. I like to space them evenly, about 4 inches apart. These will act as anchors for your wreath shape.
- Add the brie. Place the wheel of brie in the center of the board. This is your focal point. Don’t worry if it’s not perfectly centered—just get it close. The board will look more organic if everything isn’t perfectly symmetrical.
- Fold the prosciutto. Take a slice of prosciutto and fold it lengthwise into a loose ribbon. Then fold it in half again. Place it on the board in a small cluster. Repeat with the remaining slices, spacing them around the circle. (I usually do two clusters of prosciutto on opposite sides of the board.)
- Fold the salami. For Genoa salami, I fold each slice in half, then in half again, and stand it on its edge. For peppered salami, I just fold it into quarters. Arrange these in small piles around the board, interspersed with the prosciutto.
- Slice the cheddar and manchego. Cut the cheddar into thin triangles or small cubes. Slice the manchego into thin wedges. Arrange these in small piles or fan them out in a line. I usually put the cheddar near the honey and the manchego near the dried apricots—they pair well together.
- Add the goat cheese. Take the goat cheese log and slice it into ½-inch rounds. Arrange them in a small cluster. I like to put them near the cranberries for a color contrast.
- Fill in with crackers. Place crackers in small clusters around the board. Don’t line them all up in a row—scatter them in groups of 3–4. This makes the board look abundant and encourages people to grab a variety.
- Scatter the dried fruit and nuts. Sprinkle the dried apricots, cranberries, and nuts into the gaps. Don’t overthink it—just let them fall naturally. If a few cranberries roll off the board, that’s fine. It adds to the rustic feel.
- Add the rosemary sprigs. Tuck small sprigs of rosemary around the board, especially near the cheese. The green adds a beautiful contrast to the reds and browns. Plus, it makes the board smell amazing.
- Drizzle the honey. Take the ramekin of honey and drizzle a small amount over the brie and goat cheese. Don’t go overboard—just a light drizzle. You want the honey to complement, not overwhelm.
- Step back and adjust. Look at your board from above. Are there any big empty spots? Fill them with a few extra crackers or a handful of nuts. Is everything evenly distributed? Move things around until it looks balanced. This is your masterpiece.
Pro tip from my early failures: I used to put everything on the board in neat little rows. It looked like a grocery store display. The trick is to make it look effortless—clusters, piles, and a little chaos. That’s what makes it inviting. Also, don’t forget to take the cheeses out of the fridge 30 minutes before you start assembling. They taste so much better at room temperature.
Cooking Tips & Techniques
I’ve made this board at least two dozen times, and I’ve learned a few things the hard way. Here are my best tips:
Don’t overthink the folding. I used to watch videos of people making elaborate prosciutto roses, and I felt like a failure. Then I realized—nobody cares if your prosciutto looks like a flower. They care if it tastes good. Just fold it loosely and move on. The board will look beautiful regardless.
Watch the moisture. Wet ingredients like olives or pickled vegetables can make crackers soggy if they sit too long. I always put wet items in separate ramekins, not directly on the board. If you’re making this ahead, add the crackers and nuts just before serving.
Balance the flavors. I once made a board with all sharp, strong cheeses—big mistake. It was overwhelming. Now I always include at least one mild cheese (brie) and one tangy cheese (goat cheese) to balance the sharp cheddar and nutty manchego. Think of it like a flavor seesaw.
Temperature matters. Cold cheese is sad cheese. I’ve learned to take everything out of the fridge 30–45 minutes before serving. The brie becomes spreadable, the cheddar gets creamier, and the meats release more flavor. It makes a huge difference.
Multitask wisely. While the cheeses are coming to room temperature, I prep the accompaniments—slice the apricots, measure the nuts, wash the cranberries. By the time the cheese is ready, everything else is done. It takes the pressure off.
Variations & Adaptations
One of the best things about this board is how flexible it is. I’ve adapted it for different occasions, dietary needs, and what I have in the fridge. Here are a few variations I’ve tried:
Vegetarian Version: Skip the meats entirely and double up on the cheeses. Add more nuts, dried fruit, and maybe some roasted red peppers or artichoke hearts. I’ve made this for a vegetarian Friendsgiving, and nobody missed the meat.
Gluten-Free Version: Use gluten-free crackers (there are some great ones out now) or swap the crackers for cucumber rounds, bell pepper slices, or rice cakes. I’ve also used gluten-free pretzels, which add a nice salty crunch.
Seasonal Twist: In the fall, I add sliced apples and pears. In the summer, I add fresh figs and grapes. In the winter, I swap the cranberries for pomegranate seeds. The base stays the same, but the fruit changes with the season.
Spicy Kick: I once added a small bowl of hot honey and a few slices of jalapeño to the board. It was a hit with my spice-loving friends. The heat pairs surprisingly well with the creamy brie.
Budget-Friendly Version: Use all cheddar and a cheaper salami instead of the variety of meats and cheeses. I’ve done this when I was short on cash, and it still looked and tasted great. The key is to keep the colors and textures varied—even with budget ingredients.
Serving & Storage Suggestions
This board is best served at room temperature, so pull it out of the fridge about 20 minutes before your guests arrive. Arrange it on the table as the centerpiece—it’s beautiful enough to stand alone. I like to put it in the middle of the table with small plates and napkins nearby.
For drinks, this board pairs beautifully with a crisp white wine like Sauvignon Blanc or a light red like Pinot Noir. If you’re serving beer, go with a wheat beer or a pale ale. For non-alcoholic options, sparkling water with a slice of lemon or a cranberry spritzer works perfectly.
If you have leftovers (which is rare in my house), store the meats, cheeses, and accompaniments separately in airtight containers. The meats and cheeses will keep in the fridge for 3–4 days. The crackers and nuts can be stored at room temperature. Don’t try to store the assembled board—the crackers will get stale, and the cheese will dry out. Just break it down and enjoy the leftovers as snacks for the next few days.
One thing I’ve noticed: the flavors actually get better after a day in the fridge. The cheese absorbs the aromas of the herbs, and the dried fruit softens slightly. It’s like a little bonus round of deliciousness.
Nutritional Information & Benefits
Let’s be honest—this is an indulgent board. But there are some surprising health benefits hidden in all that deliciousness. Here’s a rough estimate per serving (about ¼ of the board):
- Calories: Approximately 350–450 per serving, depending on how much cheese and meat you eat.
- Protein: 15–20 grams from the meats and cheeses, which helps keep you full.
- Healthy Fats: The nuts and cheeses provide monounsaturated and polyunsaturated fats, which are good for heart health.
- Fiber: The dried fruit and nuts add a few grams of fiber.
The prosciutto and salami are high in protein and B vitamins, while the cheese provides calcium and vitamin A. The nuts are packed with vitamin E and magnesium. Even the cranberries offer a dose of antioxidants. So while this isn’t a health food, it’s not empty calories either. It’s a balanced snack that satisfies both your taste buds and your body.
If you’re watching your sodium, go easy on the cured meats. And if you’re dairy-sensitive, swap the cheeses for vegan alternatives—there are some really good ones now. I’ve made a fully vegan version using cashew cheese and plant-based meats, and it was surprisingly good.
Conclusion
This Quick Friendsgiving Charcuterie Wreath Board is more than just a snack—it’s a conversation starter, a centerpiece, and a way to bring people together without spending hours in the kitchen. I love that it makes me look like I put in way more effort than I actually did. And honestly, in the chaos of Friendsgiving, that’s a gift.
I encourage you to make this board your own. Swap in your favorite cheeses, use whatever meats you have on hand, and don’t stress about perfection. The beauty of charcuterie is that it’s forgiving. Every board is unique, and that’s what makes it special. So grab a board, some cheese, and a few friends—and make something beautiful together.
If you try this recipe, I’d love to hear about it. Leave a comment below and tell me what variations you tried. Did you add something unexpected? Did your guests fight over the last piece of brie? Share your story—I read every comment. And if you love this board as much as I do, share it with a friend who needs a little holiday inspiration. Happy Friendsgiving!
Frequently Asked Questions
Can I make this board ahead of time?
Yes, but with a few caveats. You can prep all the ingredients a day ahead—slice the cheese, fold the meats, measure the nuts. Store everything separately in the fridge. Assemble the board about 30 minutes before serving to let the cheese come to room temperature. Add the crackers and nuts just before serving to keep them crunchy.
How do I keep the crackers from getting soggy?
Place any wet ingredients (olives, pickles, jams) in separate small ramekins. Don’t put them directly on the board where they can soak into the crackers. Also, add the crackers right before serving, not hours ahead. If you’re serving the board over a long period, refill the crackers as needed.
What if I don’t have a round board?
No problem! You can use a large rectangular cutting board, a baking sheet, or even a clean pizza pan. Just arrange the ingredients in a circular shape in the center of the board. It will still look like a wreath. I’ve also used a large ceramic platter in a pinch—it worked beautifully.
Can I make this vegan or dairy-free?
Absolutely. Use vegan cheeses (cashew-based or almond-based work well), plant-based meats (like seitan or mushroom-based prosciutto), and dairy-free crackers. The rest of the ingredients—nuts, dried fruit, honey (or agave for vegan)—are already plant-based. I’ve made a fully vegan version, and it was a hit with my plant-based friends.
How many people does this board serve?
This board serves about 6–8 people as an appetizer or snack. If you’re serving it as the main event (like for a light lunch), it serves 4. I usually double the recipe for a larger crowd—just use a bigger board or make two separate boards.
Pin This Recipe!
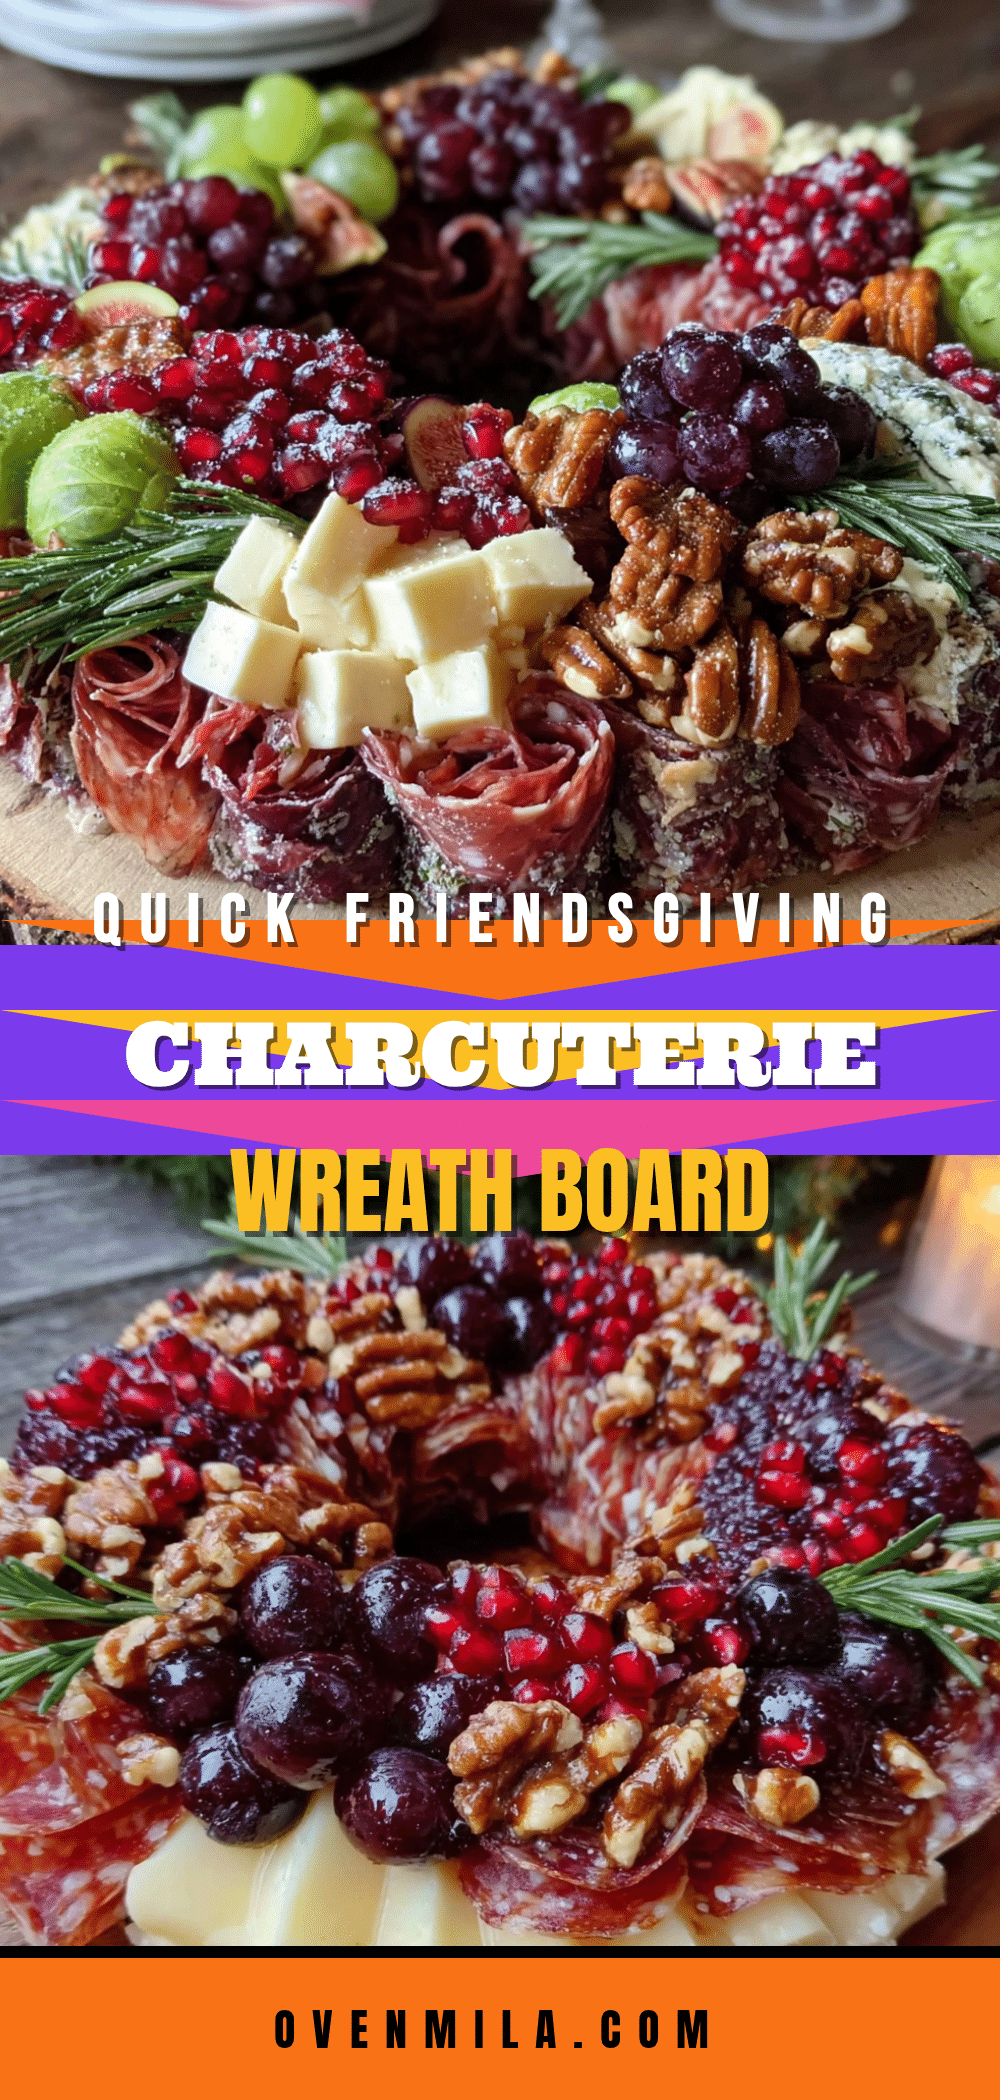
Quick Friendsgiving Charcuterie Wreath: Easy Holiday Board
A stunning charcuterie board arranged in a wreath shape, perfect for Friendsgiving or holiday gatherings. This easy, no-cook recipe comes together in under 20 minutes with simple grocery store ingredients, featuring a balance of savory meats, creamy cheeses, sweet dried fruit, and crunchy nuts.
- Prep Time: 15 minutes
- Cook Time: 0 minutes
- Total Time: 15 minutes
- Yield: 6–8 servings 1x
- Category: Appetizer
- Cuisine: American
Ingredients
- 8–10 slices prosciutto
- 6–8 ounces salami (mix of Genoa and peppered)
- 6 slices capicola or coppa (optional)
- 4–6 ounces aged cheddar
- 1 small wheel brie (double or triple cream)
- 4 ounces goat cheese log (plain, soft)
- 4 ounces manchego
- 20–25 crackers (mix of water crackers, buttery rounds, rosemary or sea salt crackers)
- ½ cup fresh cranberries
- ½ cup dried apricots (sliced in half)
- Honey (for drizzling)
- ½ cup mixed nuts (almonds and pecans)
- Fresh rosemary sprigs (for decoration)
- Fig jam or quince paste (optional)
- Dark chocolate (70% or higher, optional)
- Olives (Castelvetrano or kalamata, optional)
Instructions
- Place your board or platter on the counter. If using parchment paper, lay it down now.
- Set small ramekins of honey, fig jam, or olives in a circle around the board, spaced about 4 inches apart.
- Place the wheel of brie in the center of the board as the focal point.
- Fold prosciutto slices lengthwise into loose ribbons, then fold in half again. Place in small clusters around the board, spacing them evenly.
- Fold salami slices in half, then in half again, and stand on edge. Arrange in small piles interspersed with prosciutto.
- Slice cheddar into thin triangles or small cubes. Slice manchego into thin wedges. Arrange in small piles or fan out near complementary ingredients.
- Slice goat cheese log into ½-inch rounds and arrange in a small cluster, preferably near the cranberries.
- Place crackers in small clusters of 3–4 around the board, scattering them for an abundant look.
- Scatter dried apricots, cranberries, and nuts into the gaps naturally.
- Tuck small rosemary sprigs around the board, especially near the cheese.
- Drizzle a small amount of honey over the brie and goat cheese.
- Step back and adjust: fill empty spots with extra crackers or nuts, and ensure even distribution.
Notes
Take cheeses out of the fridge 30–45 minutes before serving for best flavor. For a vegetarian version, skip meats and double up on cheeses. For gluten-free, use gluten-free crackers or cucumber rounds. Store leftovers separately: meats and cheeses in airtight containers in the fridge for 3–4 days, crackers and nuts at room temperature.
Nutrition
- Serving Size: ¼ of the board
- Calories: 350450
- Sugar: 1012
- Sodium: 8001000
- Fat: 2025
- Saturated Fat: 1012
- Carbohydrates: 2025
- Fiber: 34
- Protein: 1520
Keywords: charcuterie board, holiday appetizer, Friendsgiving, easy appetizer, no-cook recipe, wreath board, party food


