This was supposed to be Swedish meatballs. I had the whole thing planned out—a creamy gravy, lingonberry jam on the side, the works. But somewhere between chopping the onion and reaching for the breadcrumbs, I grabbed the wrong package of ground meat. Instead of the ground pork I’d carefully set aside, I pulled out a family-sized pack of ground chuck. And honestly? I was already running late. The timer on the oven was beeping for the roasted potatoes I’d prepped, my phone was buzzing with a text from my sister asking what time dinner was, and I’d just realized I was out of allspice. The whole Swedish meatball dream was crumbling.
So I did what any reasonable cook does when things fall apart. I panicked for about thirty seconds, then just started throwing things together. Ketchup? Sure. Worcestershire sauce? Why not. A handful of crackers I crushed with the bottom of a measuring cup because the food processor was dirty. I shaped it all into a loaf, slathered some brown sugar and mustard on top because that felt right, and shoved it in the oven next to the potatoes. I figured at worst, we’d order pizza.
What came out of that oven was nothing like the plan—and better. The glaze had caramelized into this sticky, sweet-savory crust. The inside was tender and juicy, not dry and crumbly like meatloaf can sometimes be. My sister asked for the recipe before she finished her first slice. I had to admit I didn’t really have one—it was just a happy accident born from a distracted moment and a missing spice. But I’ve made it so many times since then that I’ve got it down to a science. Maybe you’ve been there, standing in your kitchen with a half-baked plan and a timer running out. This meatloaf is proof that sometimes the best recipes come from the disasters.
Why You’ll Love This Recipe
This isn’t just another meatloaf recipe. I mean, let’s be real—there are a million of them out there. But this one? It’s the one I bring to potlucks and the one my family requests for birthdays. Here’s why it stands out:
- Incredibly Juicy: The combination of ground beef, breadcrumbs soaked in milk, and a touch of grated onion keeps every slice moist. No dry, crumbly meatloaf here.
- That Brown Sugar Glaze: The sweet and tangy topping caramelizes into a sticky, almost candied crust. It’s the kind of thing that makes people ask, “What’s on top of this?” before they’ve even taken a bite.
- Simple Pantry Ingredients: You probably have everything you need already. Ketchup, brown sugar, Worcestershire sauce, eggs, breadcrumbs—all staples.
- Perfect for a Crowd: This recipe scales beautifully. I’ve made it for Sunday dinners with six people and for holiday buffets with twenty. It holds up and stays delicious.
- Make-Ahead Friendly: You can prep the whole thing the night before. Just shape the loaf, cover it, and pop it in the fridge. When guests arrive, all you have to do is glaze and bake.
- Leftovers Are Legendary: Cold meatloaf sandwiches the next day? Yes, please. The flavors actually get better overnight.
This meatloaf is the kind of dish that makes you look like you spent hours in the kitchen when really, it comes together in about 15 minutes of active work. It’s comfort food that impresses without the stress—exactly what you want when you’re hosting.
What Ingredients You Will Need
This recipe uses simple, wholesome ingredients to deliver that classic meatloaf flavor and texture. Most of these are pantry staples, which makes this dish perfect for last-minute hosting or a cozy family dinner.
For the Meatloaf
- 2 pounds ground beef (80/20 blend): The 80/20 ratio gives you enough fat for moisture without making the loaf greasy. I prefer ground chuck for its rich flavor. If you use leaner meat like 93/7, your meatloaf might turn out dry.
- 1 cup plain breadcrumbs: These help bind the meatloaf and absorb moisture. I like using unseasoned ones so I can control the salt level. Panko works in a pinch, but traditional breadcrumbs give a softer texture.
- 1/2 cup whole milk: Pouring milk over the breadcrumbs before mixing keeps the meatloaf tender. It’s a trick I learned from my grandmother—don’t skip it. You can use 2% or even oat milk in a pinch.
- 2 large eggs, lightly beaten: Eggs are the glue that holds everything together. Make sure they’re at room temperature so they mix in evenly.
- 1 medium yellow onion, grated: Grating the onion instead of chopping it releases more moisture and flavor. It melts into the meatloaf so you get the taste without chunky bits of onion. I use a box grater for this.
- 3 cloves garlic, minced: Fresh garlic is non-negotiable here. The jarred stuff has a different flavor that just doesn’t work as well.
- 2 tablespoons Worcestershire sauce: This adds that deep, savory umami flavor. Lea & Perrins is my go-to brand.
- 1 tablespoon Dijon mustard: A little tang to cut through the richness. You can use yellow mustard if that’s what you have.
- 1 teaspoon salt: I use kosher salt. If you’re using table salt, reduce to 3/4 teaspoon.
- 1/2 teaspoon black pepper: Freshly ground is best.
- 1/2 teaspoon dried thyme: A subtle earthy note that pairs beautifully with beef. You can use 1 teaspoon fresh thyme if you have it.
- 1/4 teaspoon smoked paprika: This is my secret ingredient. It adds a whisper of smokiness that makes people wonder what’s in it.
For the Brown Sugar Glaze
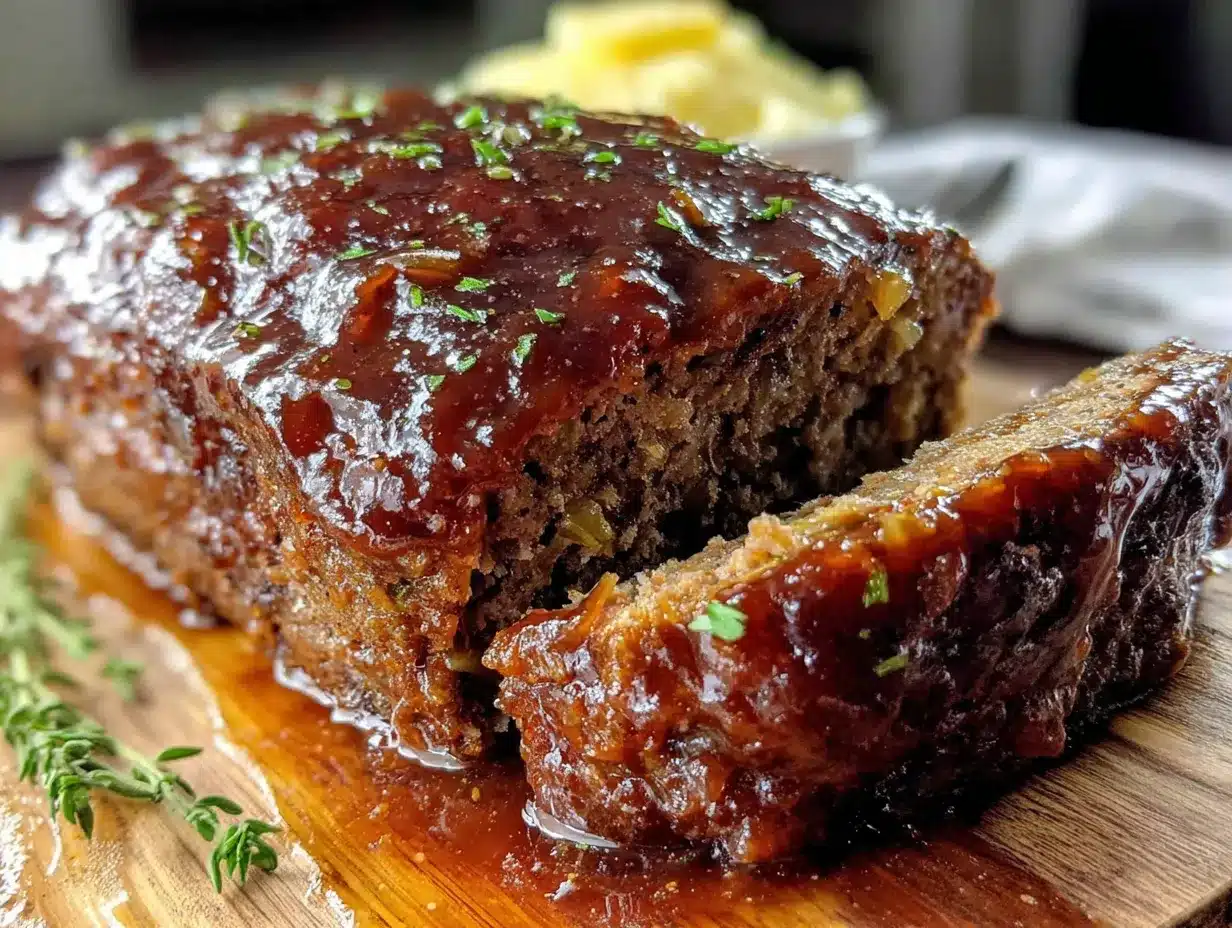
- 1/2 cup ketchup: The base of the glaze. Heinz is my favorite for its balanced sweetness and tang.
- 1/3 cup packed brown sugar: Light or dark both work. Dark brown sugar gives a deeper molasses flavor.
- 1 tablespoon apple cider vinegar: This cuts the sweetness and adds a little tang. White vinegar works too.
- 1 teaspoon Worcestershire sauce: For extra depth.
- 1/2 teaspoon garlic powder: Not the same as fresh garlic, but it blends perfectly into the glaze.
Equipment Needed
You don’t need fancy equipment for this recipe, which is part of its charm. Here’s what you’ll need:
- Large mixing bowl: Big enough to get your hands in there. I use a stainless steel bowl because it doesn’t absorb odors.
- Box grater: For grating the onion. A food processor with a grating disc works too, but the box grater is easier to clean.
- Measuring cups and spoons: For accuracy. I keep a set just for wet ingredients to avoid cross-contamination.
- Small bowl: For mixing the glaze.
- Baking sheet or roasting pan: Line it with foil or parchment paper for easy cleanup. I prefer a rimmed baking sheet to catch any drips.
- Wire rack: Placing the meatloaf on a rack set inside the baking sheet lets fat drip away and helps the glaze caramelize evenly. If you don’t have one, just form the loaf directly on the foil-lined sheet.
- Instant-read thermometer: This is your best friend. Meatloaf is done at 160°F (71°C). No more guessing and overcooking.
- Pastry brush: For applying the glaze. A silicone one is easiest to clean.
If you don’t have a wire rack, you can roll up a few pieces of foil into snake shapes and place the meatloaf on top of those. It’s not perfect, but it works in a pinch.
Preparation Method
Let’s walk through this step by step. I’ve made this meatloaf more times than I can count, so I’ve learned a few tricks along the way.
- Preheat your oven to 350°F (175°C). Position the rack in the center of the oven. While it’s heating, line a rimmed baking sheet with foil and place a wire rack on top if you’re using one.
- Soak the breadcrumbs in milk. In your large mixing bowl, combine the breadcrumbs and milk. Stir them together and let them sit for 5 minutes. This is called a panade, and it’s the secret to a tender meatloaf. The breadcrumbs absorb the milk and release starch, which keeps the meat from getting tough. I’ve skipped this step before when I was in a hurry, and the meatloaf was noticeably drier.
- Grate the onion. While the breadcrumbs are soaking, grate your onion using the large holes of a box grater. Grate it right over the bowl so you catch all the juice. That onion juice adds so much moisture and flavor. If your eyes start watering, that’s a good sign—it means the onion is fresh.
- Add the remaining meatloaf ingredients. To the bowl with the soaked breadcrumbs and grated onion, add the beaten eggs, garlic, Worcestershire sauce, Dijon mustard, salt, pepper, thyme, and smoked paprika. Stir everything together with a fork until it’s well combined. Don’t overmix at this stage—you just want everything evenly distributed.
- Add the ground beef. Crumble the ground beef over the mixture. Now comes the important part: use your hands to gently mix everything together. I know it’s messy, but your hands are the best tool for this job. A spoon or spatula will overwork the meat. Just squeeze and fold until the breadcrumb mixture is evenly incorporated into the meat. Stop as soon as it looks combined—overmixing makes meatloaf dense.
- Shape the loaf. Transfer the meat mixture to your prepared baking sheet or wire rack. Shape it into a loaf about 9 inches long and 5 inches wide. Try to make it evenly shaped so it cooks consistently. I like to make the edges slightly higher than the center—this helps the loaf cook evenly and prevents the middle from bulging up.
- Make the glaze. In a small bowl, whisk together the ketchup, brown sugar, apple cider vinegar, Worcestershire sauce, and garlic powder until the sugar is mostly dissolved. It should be smooth and glossy.
- Apply the first layer of glaze. Using your pastry brush, spread about half of the glaze over the top and sides of the meatloaf. Reserve the rest for later. This first layer will bake into the meat while the second layer creates that sticky crust.
- Bake for 45 minutes. Place the meatloaf in the preheated oven and bake for 45 minutes. At this point, the meatloaf should be starting to brown and the glaze will have set.
- Apply the second layer of glaze. Remove the meatloaf from the oven and brush on the remaining glaze. Return it to the oven and bake for another 15 to 20 minutes.
- Check the internal temperature. Insert your instant-read thermometer into the center of the meatloaf. You’re looking for 160°F (71°C). If it’s not there yet, give it another 5 to 10 minutes. Don’t rely on time alone—every oven runs differently.
- Rest before slicing. Once the meatloaf reaches temperature, remove it from the oven and let it rest on the baking sheet for 10 to 15 minutes. This is crucial. The juices need time to redistribute throughout the loaf. If you cut into it right away, all those delicious juices will run out onto the cutting board, leaving you with dry meatloaf. I learned this the hard way when I was impatient for dinner one night.
- Slice and serve. Transfer the meatloaf to a cutting board. Use a sharp knife to slice it into 1-inch thick pieces. The glaze should be sticky and caramelized, and the inside should be moist and tender.
Cooking Tips & Techniques
After making this meatloaf probably thirty or forty times, I’ve picked up some tricks that make a real difference.
Don’t skip the milk-soaked breadcrumbs. I know it seems like an extra step, but this is what keeps your meatloaf from turning into a brick. The starch from the breadcrumbs traps moisture, and the milk adds fat. I once tried using dry breadcrumbs without soaking them first, and the meatloaf was noticeably less tender. Just don’t do it.
Use a light touch when mixing. This is probably the most common mistake people make. You want to mix until everything is just combined—no more. Overmixing develops the proteins in the meat, which makes the loaf tough and dense. I think of it like making biscuits: gentle hands, quick work.
Grate, don’t chop, the onion. This was a game-changer for me. When you grate the onion, it releases all its juice, which adds moisture and flavor throughout the meatloaf. Chopped onion leaves little chunks that can make the texture uneven. Plus, grated onion practically disappears into the meat, so even picky eaters won’t notice it.
Let it rest. I cannot stress this enough. That 10 to 15 minute rest after baking is not optional. The meatloaf continues to cook slightly from residual heat, and the juices settle back into the meat. If you slice it too soon, you’ll have a pool of liquid on your cutting board and a dry meatloaf on your plate. I learned this the hard way when I was hosting a dinner party and got impatient. The meatloaf was good, but it could have been great.
Use a thermometer. Meatloaf is done at 160°F (71°C). Guessing based on time alone is risky because ovens vary. I’ve had meatloaf that looked done on the outside but was still raw in the middle. A good instant-read thermometer takes the guesswork out. It’s a small investment that pays off every time.
Make it ahead for better flavor. Here’s a pro tip: shape the meatloaf the night before, cover it, and refrigerate it. The flavors meld together overnight, and the texture actually improves. Just add an extra 10 to 15 minutes to the baking time since you’re starting from cold.
Variations & Adaptations
One of the best things about this meatloaf is how adaptable it is. I’ve tried several variations over the years, and here are my favorites:
Turkey Meatloaf: Swap the ground beef for ground turkey (93/7 blend works best). Turkey is leaner, so add 2 tablespoons of olive oil to the mixture to keep it moist. You might also want to add an extra 1/4 cup of breadcrumbs to help with binding. The glaze works beautifully with turkey, and honestly, my sister prefers this version.
Gluten-Free Version: Replace the breadcrumbs with gluten-free oats or crushed gluten-free crackers. I’ve used both, and the oats give a slightly heartier texture that I actually prefer sometimes. Make sure your Worcestershire sauce is gluten-free—Lea & Perrins is, but some brands add malt vinegar.
Cheesy Stuffed Meatloaf: This is a crowd-pleaser. Flatten the meat mixture into a rectangle on a piece of parchment paper. Spread a layer of shredded mozzarella or cheddar cheese down the center, then use the parchment to roll it up into a loaf. Seal the seams and bake as directed. The cheese melts into the center, creating a gooey surprise when you slice into it.
Spicy Kick: Add 1 tablespoon of sriracha or 1 teaspoon of red pepper flakes to the meat mixture. For the glaze, stir in 1 teaspoon of chipotle powder or a dash of hot sauce. This version is great for game day or when you want something with a little heat.
BBQ Glaze Variation: Replace the ketchup in the glaze with your favorite barbecue sauce. Use 1/2 cup BBQ sauce, 2 tablespoons brown sugar, and 1 tablespoon apple cider vinegar. This gives the meatloaf a smoky, tangy flavor that’s perfect for summer cookouts.
Mini Meatloaves: For faster cooking and built-in portion control, divide the mixture into a 12-cup muffin tin. Press the mixture into each cup and brush with glaze. Bake for 20 to 25 minutes, or until they reach 160°F. These are great for meal prep or for feeding a crowd with different dietary needs—just label which ones have cheese or spice.
Serving & Storage Suggestions
This meatloaf is a star on its own, but here’s how to make it shine when you’re hosting.
Serving Temperature: Serve the meatloaf warm, right after its rest. The glaze should be sticky and caramelized. If you’re making it for a buffet, you can keep it warm in a 200°F oven for up to 30 minutes, but cover it loosely with foil so the glaze doesn’t dry out.
Presentation Tips: Transfer the whole loaf to a wooden cutting board or a platter. Slice it at the table for a dramatic reveal—the steam rising, the glaze glistening. Garnish with a sprinkle of fresh parsley or thyme for color. I like to put a small bowl of extra glaze on the side for anyone who wants more.
What to Serve Alongside: Mashed potatoes are the classic pairing, and for good reason—they soak up the juices and any extra glaze. Roasted green beans or a simple side salad add freshness. For a heartier meal, serve with roasted carrots or a creamy coleslaw. If you’re hosting a dinner party, a red wine like a Merlot or Zinfandel pairs beautifully with the sweet glaze.
Storage: Leftover meatloaf keeps well in the refrigerator for up to 4 days. Wrap it tightly in foil or plastic wrap, or store slices in an airtight container. The flavors actually deepen overnight, so leftovers are often better than the first meal.
Freezing: You can freeze the whole cooked meatloaf or individual slices. Wrap it tightly in plastic wrap, then foil, and freeze for up to 3 months. To thaw, transfer it to the refrigerator overnight. Reheat in a 350°F oven until warmed through, about 20 minutes for slices or 40 minutes for a whole loaf.
Reheating: The best way to reheat meatloaf is in the oven. Place slices on a baking sheet, cover with foil to prevent drying, and warm at 350°F for 10 to 15 minutes. You can also microwave individual slices, but the texture won’t be as good. If you’re in a rush, a hot skillet with a splash of water works surprisingly well—just cover it to steam the meatloaf back to tenderness.
Cold Meatloaf Sandwiches: This is my favorite way to eat leftovers. Slice the cold meatloaf thick, layer it on white bread with a smear of the extra glaze or some mayo, and add a few leaves of lettuce. It’s simple, messy, and absolutely perfect.
Nutritional Information & Benefits
Here’s the nutritional breakdown for one serving (based on 8 servings):
- Calories: 385
- Protein: 28g
- Fat: 22g
- Carbohydrates: 18g
- Fiber: 1g
- Sugar: 12g
- Sodium: 680mg
This meatloaf is a good source of protein and iron from the beef. The onions and garlic provide antioxidants and anti-inflammatory compounds. The eggs add B vitamins and choline, which supports brain health.
Dietary Considerations: This recipe contains gluten (breadcrumbs) and dairy (milk). For a gluten-free version, use gluten-free breadcrumbs or oats. For a dairy-free version, use oat milk or almond milk. The recipe is naturally nut-free and can be made egg-free by using a flax egg (1 tablespoon ground flaxseed mixed with 3 tablespoons water, let sit for 5 minutes).
I’m not a nutritionist, but I’ve learned that balance is key. This meatloaf is hearty and satisfying—it’s comfort food that fills you up and makes you feel good. Pair it with a big green salad or roasted vegetables, and you’ve got a meal that’s both nourishing and indulgent.
Conclusion
This meatloaf started as a kitchen disaster, but it’s become one of my most-requested recipes. There’s something about that sweet, sticky glaze paired with the savory, tender meat that just works. It’s the kind of dish that makes people close their eyes after the first bite—and then ask for the recipe before they’ve finished chewing.
What I love most about this recipe is how forgiving it is. You can swap ingredients, adjust the seasoning, or double the batch, and it still comes out delicious. It’s perfect for hosting because it looks impressive but doesn’t require constant attention. You can prep it ahead, pop it in the oven, and focus on your guests while it bakes.
I’d love to hear how yours turns out. Did you try a variation? Did your family love it? Drop a comment below and let me know—I read every single one. And if you’re looking for more crowd-pleasing dinner ideas, be sure to check out our creamy mashed potatoes and garlic roasted green beans—they’re the perfect sidekicks for this meatloaf.
Happy cooking, friends. And remember: sometimes the best recipes come from the moments when everything goes wrong.
Frequently Asked Questions
Can I make this meatloaf ahead of time?
Absolutely! You can shape the meatloaf up to 24 hours in advance, cover it, and refrigerate it. When you’re ready to bake, add about 10 to 15 minutes to the cooking time since you’re starting from cold. The flavors actually meld together beautifully overnight.
Why is my meatloaf falling apart?
This usually happens for one of two reasons: not enough binder or not letting it rest. Make sure you’re using enough breadcrumbs and eggs to hold the mixture together. Also, let the meatloaf rest for at least 10 minutes after baking—this helps it set so it holds its shape when you slice it.
Can I use ground turkey instead of beef?
Yes, you can. Use ground turkey with at least 93% lean to keep it moist. Add 2 tablespoons of olive oil to the mixture to compensate for the lower fat content. The cooking time might be slightly shorter, so start checking the temperature at 50 minutes.
How do I know when the meatloaf is done?
The most reliable way is to use an instant-read thermometer. Insert it into the center of the meatloaf—it should read 160°F (71°C). If you don’t have a thermometer, you can cut into the center to check, but you’ll lose some juices. The meatloaf should also be pulling away from the sides of the pan slightly.
Can I freeze this meatloaf?
Yes, and it freezes beautifully. You can freeze the whole cooked meatloaf or individual slices. Wrap it tightly in plastic wrap, then foil, and freeze for up to 3 months. To serve, thaw in the refrigerator overnight and reheat in a 350°F oven until warmed through.
Pin This Recipe!
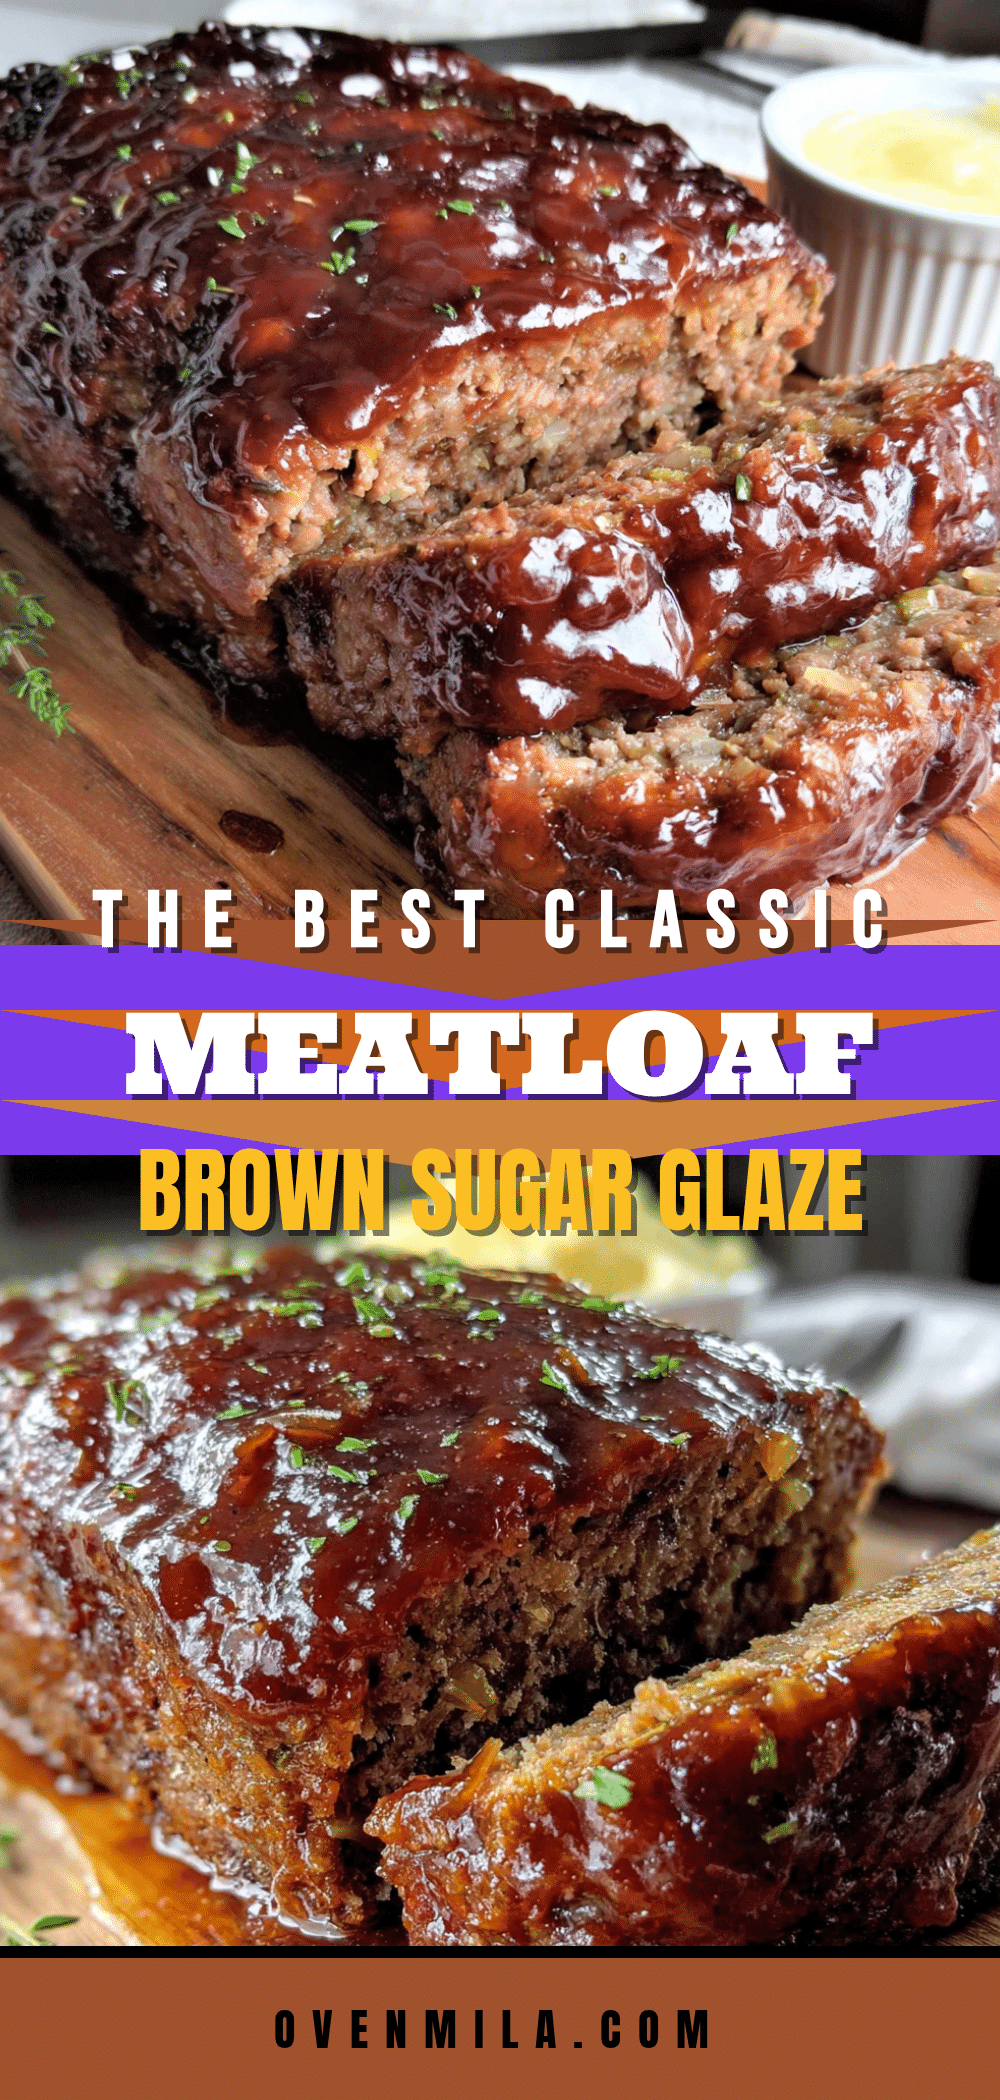
The Best Classic Meatloaf with Brown Sugar Glaze (Easy Recipe)
This classic meatloaf features a sweet and tangy brown sugar glaze that caramelizes into a sticky, savory crust. It’s incredibly juicy, made with simple pantry ingredients, and perfect for a crowd.
- Prep Time: 15 minutes
- Cook Time: 60 minutes
- Total Time: 1 hour 15 minutes
- Yield: 8 servings 1x
- Category: Main Course
- Cuisine: American
Ingredients
- 2 pounds ground beef (80/20 blend)
- 1 cup plain breadcrumbs
- 1/2 cup whole milk
- 2 large eggs, lightly beaten
- 1 medium yellow onion, grated
- 3 cloves garlic, minced
- 2 tablespoons Worcestershire sauce
- 1 tablespoon Dijon mustard
- 1 teaspoon salt
- 1/2 teaspoon black pepper
- 1/2 teaspoon dried thyme
- 1/4 teaspoon smoked paprika
- 1/2 cup ketchup
- 1/3 cup packed brown sugar
- 1 tablespoon apple cider vinegar
- 1 teaspoon Worcestershire sauce
- 1/2 teaspoon garlic powder
Instructions
- Preheat your oven to 350°F (175°C). Position the rack in the center of the oven. Line a rimmed baking sheet with foil and place a wire rack on top if using.
- In a large mixing bowl, combine the breadcrumbs and milk. Stir and let sit for 5 minutes to create a panade.
- Grate the onion using the large holes of a box grater directly over the bowl to catch the juice.
- Add the beaten eggs, garlic, 2 tablespoons Worcestershire sauce, Dijon mustard, salt, pepper, thyme, and smoked paprika to the bowl. Stir with a fork until well combined.
- Crumble the ground beef over the mixture. Use your hands to gently mix until the breadcrumb mixture is evenly incorporated. Do not overmix.
- Transfer the meat mixture to the prepared baking sheet or wire rack. Shape into a loaf about 9 inches long and 5 inches wide, making the edges slightly higher than the center.
- In a small bowl, whisk together the ketchup, brown sugar, apple cider vinegar, 1 teaspoon Worcestershire sauce, and garlic powder until smooth.
- Brush about half of the glaze over the top and sides of the meatloaf. Reserve the rest.
- Bake for 45 minutes. The meatloaf should be starting to brown and the glaze set.
- Remove from the oven and brush on the remaining glaze. Return to the oven and bake for another 15 to 20 minutes.
- Check the internal temperature with an instant-read thermometer; it should read 160°F (71°C) in the center.
- Let the meatloaf rest on the baking sheet for 10 to 15 minutes before slicing.
- Transfer to a cutting board and slice into 1-inch thick pieces. Serve warm.
Notes
For a gluten-free version, use gluten-free breadcrumbs or oats. For a dairy-free version, use oat milk or almond milk. The meatloaf can be shaped up to 24 hours in advance and refrigerated; add 10-15 minutes to baking time if starting from cold. Leftovers keep in the refrigerator for up to 4 days or can be frozen for up to 3 months.
Nutrition
- Serving Size: 1 slice (1/8 of loaf
- Calories: 385
- Sugar: 12
- Sodium: 680
- Fat: 22
- Saturated Fat: 8
- Carbohydrates: 18
- Fiber: 1
- Protein: 28
Keywords: meatloaf, brown sugar glaze, classic meatloaf, easy meatloaf, comfort food, ground beef


