I was supposed to be making a fancy chocolate mousse cake for my niece’s Halloween party. Like, the kind with layers and a mirror glaze and all the things that look impressive on social media. I had the recipe bookmarked, the ingredients laid out, and a whole afternoon blocked off. Then my toddler decided to “help” by dumping the entire bag of Oreos onto the floor while I was melting the chocolate. I mean, crumbs everywhere. The good chocolate seized up while I was cleaning the mess, and I was already running late. So I stood there, staring at a bowl of crushed Oreos and a pan of ruined chocolate, and just… gave up on the fancy plan. What came out of that moment was nothing like the cake I had planned—and honestly, it was so much better. These spooky easy Halloween dirt cups with gummy worms are the definition of a happy little kitchen accident. They’re the dessert you make when life throws you a handful of crushed cookies and you decide to just roll with it. Let me tell you, sometimes the best recipes come from the biggest messes.
I grabbed some pudding cups I had stashed in the pantry for emergencies, layered them in clear plastic cups with the crushed Oreos, and stuck a few gummy worms on top. The kids lost their minds. The adults asked for seconds. And I sat there thinking, “Why have I been stressing over complicated desserts for years?” These dirt cups are ridiculously simple, but they look like you put in actual effort. The dark, crumbly “dirt” against the creamy chocolate pudding, with those bright green gummy worms wriggling out—it’s creepy in the best way. Maybe you’ve been there, staring at a Pinterest fail wondering what went wrong. Honestly, this is the recipe that saves you. It’s the one that makes you look like a Halloween hero with zero stress. And that’s why I keep coming back to it every October.
Why You’ll Love This Recipe
These spooky easy Halloween dirt cups with gummy worms are the kind of dessert that makes you feel like a kitchen genius without actually having to do much work. I’ve tested this recipe more times than I care to admit, and every single time, people are shocked at how simple it is. Here’s why you’ll absolutely love it:
- Quick & Easy : Comes together in under 15 minutes. No baking, no fancy techniques, no waiting around. Perfect for those last-minute Halloween parties or when you realize the school bake sale is tomorrow morning.
- Simple Ingredients : You probably already have most of this stuff in your kitchen. Oreos, instant pudding mix, milk, and gummy worms. That’s it. No weird specialty items you’ll never use again.
- Perfect for Halloween : These dirt cups are basically the unofficial dessert of spooky season. They’re great for classroom parties, trunk-or-treat events, or just a fun family movie night with Hocus Pocus playing in the background.
- Crowd-Pleaser : Kids go absolutely bonkers for these. Adults too, honestly. There’s something about eating “dirt” with gummy worms that brings out the kid in everyone. I’ve never seen leftovers.
- Unbelievably Delicious : The combination of creamy chocolate pudding and crunchy Oreo crumbs is comfort food at its finest. It’s rich without being heavy, and the gummy worms add that chewy, fruity pop that cuts through the chocolate.
What makes this recipe different from all the other dirt cup recipes out there? It’s the little things I’ve learned from making these dozens of times. Like using cold milk for the pudding so it sets up perfectly every time. Or crushing the Oreos in a zip-top bag with a rolling pin so you get that perfect mix of fine crumbs and little chunks. I also insist on using the full-fat pudding mix—the sugar-free stuff just doesn’t give you that same silky texture. This isn’t just another version; it’s the version I’ve perfected through trial and error so you don’t have to learn the hard way.
These dirt cups are the kind of dessert that makes you close your eyes after the first bite. It’s comfort food reimagined—simpler, faster, but with the same soul-soothing satisfaction. Perfect for impressing a crowd of little goblins without breaking a sweat, or turning a simple October evening into something memorable.
What Ingredients You Will Need
This recipe uses simple, everyday ingredients to deliver that spooky, delicious look without any fuss. Everything is easy to find at any grocery store, and most of it is probably already in your pantry.
- For the Pudding Layer:
- 1 (3.9-ounce) box instant chocolate pudding mix (I prefer Jell-O brand for the smoothest texture, but any brand works fine)
- 2 cups cold whole milk (cold milk is key—it helps the pudding set up faster and creamier. You can use 2% or even oat milk, but whole milk gives the richest result)
- For the “Dirt” Layer:
- 1 (14.3-ounce) package Oreo cookies (about 24 cookies. You don’t need to remove the cream filling—crush them whole. The cream helps the crumbs stick together a bit, which mimics real dirt texture)
- For the Spooky Decorations:
- 1 (5-ounce) bag gummy worms (I like the sour ones for extra zing, but regular gummy worms work great too. Trolli and Black Forest are my go-to brands)
- Optional: Halloween sprinkles, candy eyeballs, or small plastic spiders for extra creep factor
- For Serving:
- 6 to 8 small clear plastic cups (8-ounce cups are perfect. Clear cups are essential so you can see the layers—that’s half the fun!)
Ingredient Selection Tips: When you’re buying Oreos, grab the regular ones, not the double-stuf. The double-stuf has too much cream filling, which makes the crumbs clump up instead of giving you that nice, crumbly “dirt” texture. If you’re feeling adventurous, you can use the Golden Oreos for a lighter “sand” version, but the dark chocolate crumbs really sell the dirt look.
Substitution Guidance: Need a dairy-free option? Use a dairy-free instant pudding mix and swap the milk for unsweetened almond or oat milk. Just know that the pudding might be slightly less thick—let it set for an extra 5 minutes. For a gluten-free version, use gluten-free chocolate sandwich cookies (like Glutino or Kinnikinnick). The texture is a bit different, but the spooky factor is still there. You can also swap the gummy worms for gummy spiders or gummy bats if you want to mix it up.
Equipment Needed
You don’t need any fancy equipment for these spooky easy Halloween dirt cups with gummy worms. That’s part of the beauty.
- Mixing bowls: One medium bowl for the pudding, one small bowl if you’re crushing Oreos separately. I use my grandma’s old Pyrex bowls, but any bowl works.
- Whisk: A standard wire whisk for the pudding. You can use a hand mixer if you’re feeling fancy, but a whisk works just fine.
- Rolling pin or food processor: For crushing the Oreos. I prefer the rolling pin method because it gives you more control over the texture—plus it’s a great way to release some frustration. Just put the cookies in a zip-top bag and go to town. If you have a food processor, pulse them in short bursts so you don’t end up with dust.
- Clear plastic cups: 8-ounce cups are the perfect size. I buy the disposable ones from the dollar store—they’re cheap and make cleanup a breeze. You can also use small mason jars if you want to be fancy.
- Spatula or spoon: For layering. A small spatula helps you spread the pudding evenly without disturbing the Oreo layer.
- Measuring cups and spoons: Standard set for the milk and pudding mix.
Budget-friendly tip: If you don’t have a rolling pin, use a heavy can of beans or a wine bottle. I’ve done it many times. And if you don’t have clear cups, any small bowl or cup works—you just won’t see the layers as well. The taste is still the same.
Preparation Method
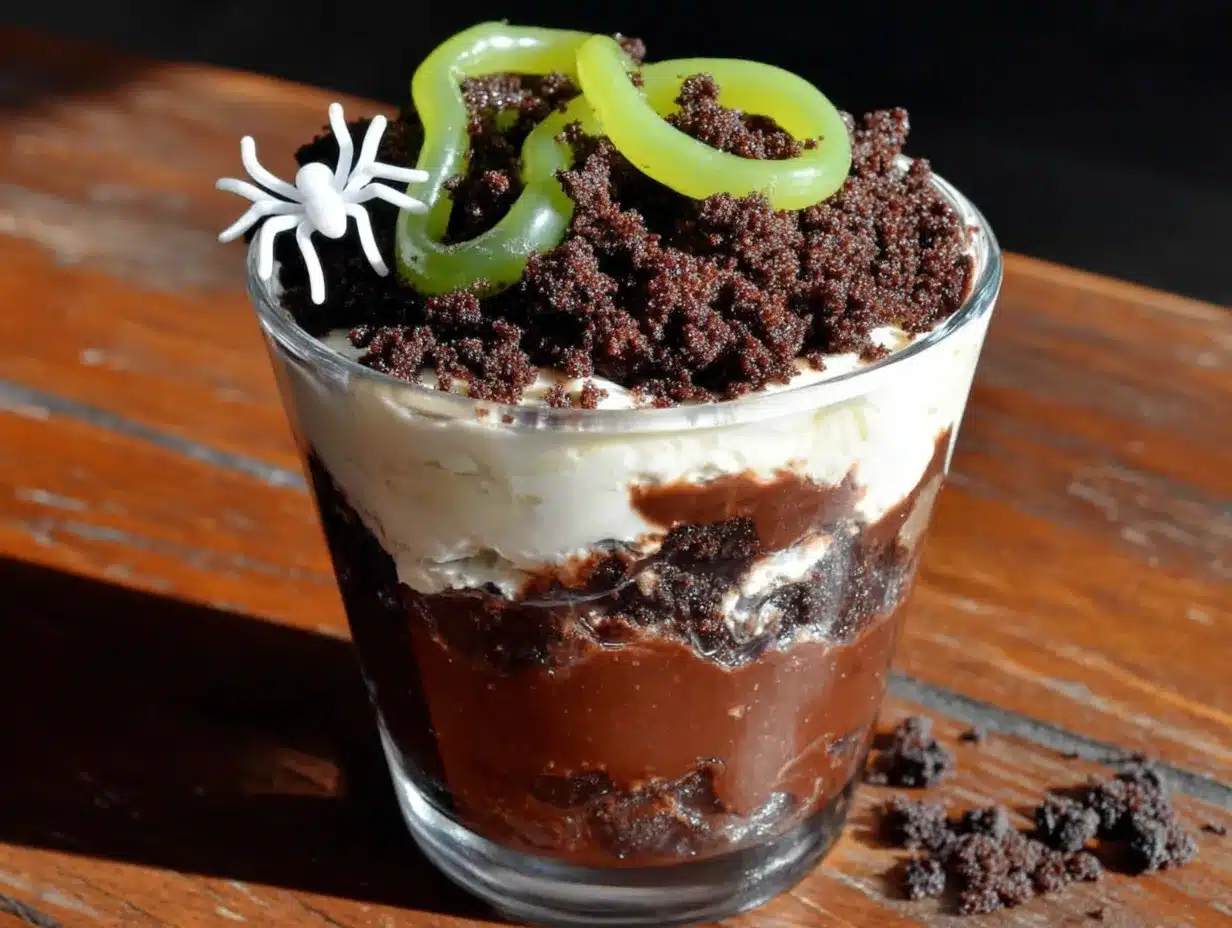
Making these spooky easy Halloween dirt cups with gummy worms is almost too simple. Here’s exactly how to do it, step by step.
- Crush the Oreos. Place the entire package of Oreos (cream filling and all) into a large zip-top bag. Seal it up, making sure to push out as much air as possible. Now, take your rolling pin and gently crush the cookies. I say “gently” because you don’t want to pulverize them into dust. You’re aiming for a mix of fine crumbs and small pea-sized chunks. That’s what gives the dirt texture. If you go too fine, it looks more like potting soil than actual dirt. Set the crushed Oreos aside. (Pro tip: Do this step first so the crumbs are ready to go when the pudding is done.)
- Make the chocolate pudding. In your medium mixing bowl, pour the 2 cups of cold milk. Add the entire box of instant chocolate pudding mix. Whisk vigorously for about 2 minutes. You’ll feel it start to thicken almost immediately. The mixture should be smooth and glossy with no lumps. If you see any dry bits of powder, keep whisking. Let the pudding sit for 5 minutes to set up completely. It should be thick enough to hold its shape when you lift the whisk. (Important note: Don’t use hot milk. The pudding needs cold milk to set properly. I learned this the hard way when I was rushing and used warm milk—it turned into chocolate soup.)
- Layer the cups. Take your clear plastic cups and start building. First, add a generous tablespoon of crushed Oreos to the bottom of each cup. Press it down lightly with the back of a spoon to create a solid base layer. This keeps the pudding from seeping through and mixing with the dirt. Next, spoon or pipe the chocolate pudding on top of the Oreo layer. Fill each cup about halfway with pudding. You want an even layer—use the back of your spoon to spread it out gently. Then add another layer of crushed Oreos on top of the pudding. This is your “surface dirt.” Leave a little room at the top for the gummy worms to poke out.
- Add the gummy worms. Here’s where it gets fun. Take your gummy worms and push them into the top layer of Oreo crumbs. Angle them so they look like they’re crawling out of the dirt. Some can be fully buried with just a head poking out, others can be halfway out. Get creative with it. I usually use 2 to 3 worms per cup. If you have extra, scatter a few on the surface like they’re wriggling around on top of the dirt.
- Chill and serve. Place the finished cups in the refrigerator for at least 30 minutes before serving. This helps the layers set and makes the whole thing look more cohesive. If you’re making them for a party, you can assemble them up to 24 hours in advance—just wait to add the gummy worms until right before serving so they stay bright and chewy. When you’re ready to serve, pull them out and watch the kids’ faces light up.
Sensory cues: When you’re crushing the Oreos, you should hear that satisfying crackle as the cookies break apart. The pudding should look dark, smooth, and glossy—like liquid velvet. When you push the gummy worms in, you’ll feel the crumbs give way and the pudding resist slightly. That’s how you know the layers are perfect.
Cooking Tips & Techniques
I’ve made these spooky easy Halloween dirt cups with gummy worms more times than I can count, and I’ve definitely learned a few things the hard way. Here are my best tips to make sure yours turn out perfect every time.
Use cold milk, seriously. I cannot stress this enough. The first time I made these, I was in a hurry and used room-temperature milk. The pudding never set up properly. It was runny and sad, and the Oreo crumbs just turned into a muddy mess. Cold milk activates the thickening agents in the pudding mix faster and more evenly. Leave the milk in the fridge until the last possible second.
Don’t overmix the pudding. Whisk it just until it thickens and the lumps are gone. If you keep beating it, you’ll incorporate too much air, and the pudding will end up foamy instead of silky smooth. You want it dense and creamy, not fluffy.
Crush the Oreos in stages. I’ve found that crushing the cookies in two batches gives you better texture. For the bottom layer, crush them a bit finer so they pack down nicely. For the top layer, leave them chunkier so it looks more like actual dirt with little rocks in it. It’s a small detail, but it makes a difference visually.
Let the pudding set before layering. I know you’re excited, but if you dump the Oreo crumbs on top of runny pudding, they’ll sink and disappear. Wait the full 5 minutes. The pudding should be thick enough that when you spoon it, it holds its shape in the bowl. Then layer away.
Make extra. I always make one or two extra cups because someone will inevitably want seconds, or a kid will drop theirs, or you’ll want to taste-test one yourself. Trust me on this.
My biggest failure: One year, I tried to make these in mason jars and forgot to leave room at the top. When I shoved the gummy worms in, the whole thing overflowed. Pudding and Oreo crumbs everywhere. So learn from my mess—leave at least a half-inch of space at the top of each cup.
Variations & Adaptations
These spooky easy Halloween dirt cups with gummy worms are endlessly adaptable. Here are some of my favorite twists.
- Peanut Butter Dirt Cups: Swap the chocolate pudding for chocolate-peanut butter pudding. Just add 2 tablespoons of creamy peanut butter to the pudding mix before whisking. It gives you that Reese’s cup vibe that’s absolutely addictive. My husband begs for this version every year.
- Vegan Version: Use a dairy-free instant pudding mix (check the label—many are accidentally vegan) and unsweetened almond milk. For the Oreos, regular Oreos are actually vegan! Just make sure you get the original kind, not the ones with special fillings. The texture is a tiny bit less creamy, but the spooky factor is still 100% there.
- Berry Dirt Cups: For a less chocolate-heavy option, use vanilla or cheesecake-flavored instant pudding instead. Layer in some fresh raspberries or sliced strawberries between the pudding and the Oreo crumbs. The tartness of the berries cuts through the sweetness beautifully. This is my go-to for springtime “mud” cups.
- Spider Web Dirt Cups: Before adding the gummy worms, drizzle some melted white chocolate over the top Oreo layer in a spiral pattern. Use a toothpick to drag lines from the center outward, creating a spider web effect. Then stick a plastic spider on top. It’s extra work, but it looks incredible for parties.
- Individual Trifle Jars: If you’re feeling fancy, layer the ingredients in small mason jars instead of plastic cups. Add a layer of whipped cream between the pudding and the Oreo crumbs for a trifle-style dessert. It’s a bit more decadent, but it’s perfect for adult Halloween parties.
Serving & Storage Suggestions
These spooky easy Halloween dirt cups with gummy worms are best served cold, straight from the fridge. The contrast between the chilled pudding and the crunchy Oreo crumbs is part of the magic. I like to serve them on a tray lined with fake spiderwebs or orange napkins to really lean into the Halloween theme.
What to serve with them: These dirt cups are rich enough to stand alone, but they pair wonderfully with a cup of hot apple cider or a warm pumpkin spice latte. For a full Halloween spread, serve them alongside spooky Halloween popcorn mix or creamy pumpkin dip with ginger snaps. The sweet and salty combo is unbeatable.
Storage: Assemble the cups but leave the gummy worms off. Cover each cup with plastic wrap or a lid and store them in the refrigerator for up to 3 days. The pudding will stay creamy, and the Oreo crumbs will soften slightly, which actually makes them taste even more like real dirt. Add the gummy worms just before serving so they stay chewy and bright.
Freezer option: You can freeze these! Make the cups without the gummy worms, cover tightly, and freeze for up to 1 month. Thaw in the refrigerator overnight before serving. The texture of the pudding will be slightly different—a bit more like ice cream—but it’s still delicious. Add the gummy worms after thawing.
Reheating: You don’t need to reheat these. They’re meant to be served cold. If you’ve frozen them, just let them thaw in the fridge. Don’t microwave them—the pudding will turn into soup.
Flavor development: Honestly, these taste even better the next day. The Oreo crumbs absorb a little moisture from the pudding, creating a texture that’s almost like actual moist dirt. It sounds weird, but it’s so good. The flavors meld together beautifully overnight.
Nutritional Information & Benefits
Let’s be real—these spooky easy Halloween dirt cups with gummy worms are a treat, not a health food. But here’s the estimated nutritional breakdown per serving (based on 8 servings, using whole milk and regular Oreos):
| Nutrient | Amount Per Serving |
|---|---|
| Calories | 310 |
| Total Fat | 12g |
| Saturated Fat | 5g |
| Cholesterol | 10mg |
| Sodium | 380mg |
| Total Carbohydrates | 48g |
| Dietary Fiber | 2g |
| Sugars | 32g |
| Protein | 5g |
Health benefits: Okay, I’m stretching here, but the milk provides calcium and vitamin D for strong bones. The cocoa in the pudding has antioxidants. And the gummy worms… well, they’re made of sugar and happiness. Honestly, these are about fun and nostalgia, not nutrition. But if you want to feel slightly better about it, use low-fat milk and light Oreos. You’ll save about 50 calories per serving.
Dietary considerations: This recipe contains dairy (milk), wheat (Oreos), and soy (Oreos). It’s not gluten-free unless you use gluten-free cookies. For nut-free, check your pudding mix label—most are safe, but some may be processed in facilities that handle nuts. Always read labels if you’re serving someone with allergies.
Conclusion
These spooky easy Halloween dirt cups with gummy worms are proof that you don’t need to be a pastry chef to make something that looks amazing. They’re fun, they’re fast, and they taste like childhood in the best possible way. Whether you’re making them for a classroom party, a family movie night, or just because it’s October and you feel like being a little spooky, they never disappoint.
I love this recipe because it reminds me that sometimes the best things in life come from letting go of perfection. That afternoon when my chocolate seized up and my Oreos ended up on the floor could have been a disaster. Instead, it gave me one of my most-requested recipes. So go ahead—customize these however you want. Add extra worms. Use different cookies. Make them your own. And when you do, come back and tell me about it in the comments. I’d love to hear how your dirt cups turned out, what variations you tried, and whether the kids in your life went as nuts as mine did.
Happy Halloween, friends. Go make some delicious dirt.
Frequently Asked Questions
Can I make these Halloween dirt cups ahead of time?
Absolutely! You can assemble them up to 24 hours in advance. Just leave the gummy worms off until right before serving so they stay chewy and bright. Cover the cups with plastic wrap and keep them in the fridge.
How do I get the perfect “dirt” texture?
Crush the Oreos in a zip-top bag with a rolling pin. Aim for a mix of fine crumbs and small chunks. Don’t pulverize them into dust—you want some texture. If you use a food processor, pulse in short bursts.
Can I use sugar-free pudding mix?
You can, but the texture will be slightly less creamy. Sugar-free pudding tends to be a bit thinner and can have a slight artificial aftertaste. If you’re watching your sugar intake, it’s a fine option, but I recommend using whole milk to help with the texture.
My pudding didn’t set up. What went wrong?
Most likely, your milk wasn’t cold enough. The pudding mix needs cold milk to activate the thickening agents. Also, make sure you’re using instant pudding, not cook-and-serve. And whisk it for the full 2 minutes—don’t stop as soon as it starts to thicken.
Can I use different types of cookies?
Yes! Golden Oreos make a great “sand” version. You can also use chocolate wafer cookies, graham crackers (for a lighter dirt), or even crushed pretzels for a salty-sweet twist. Just make sure whatever you use is crunchy enough to mimic dirt texture.
Pin This Recipe!
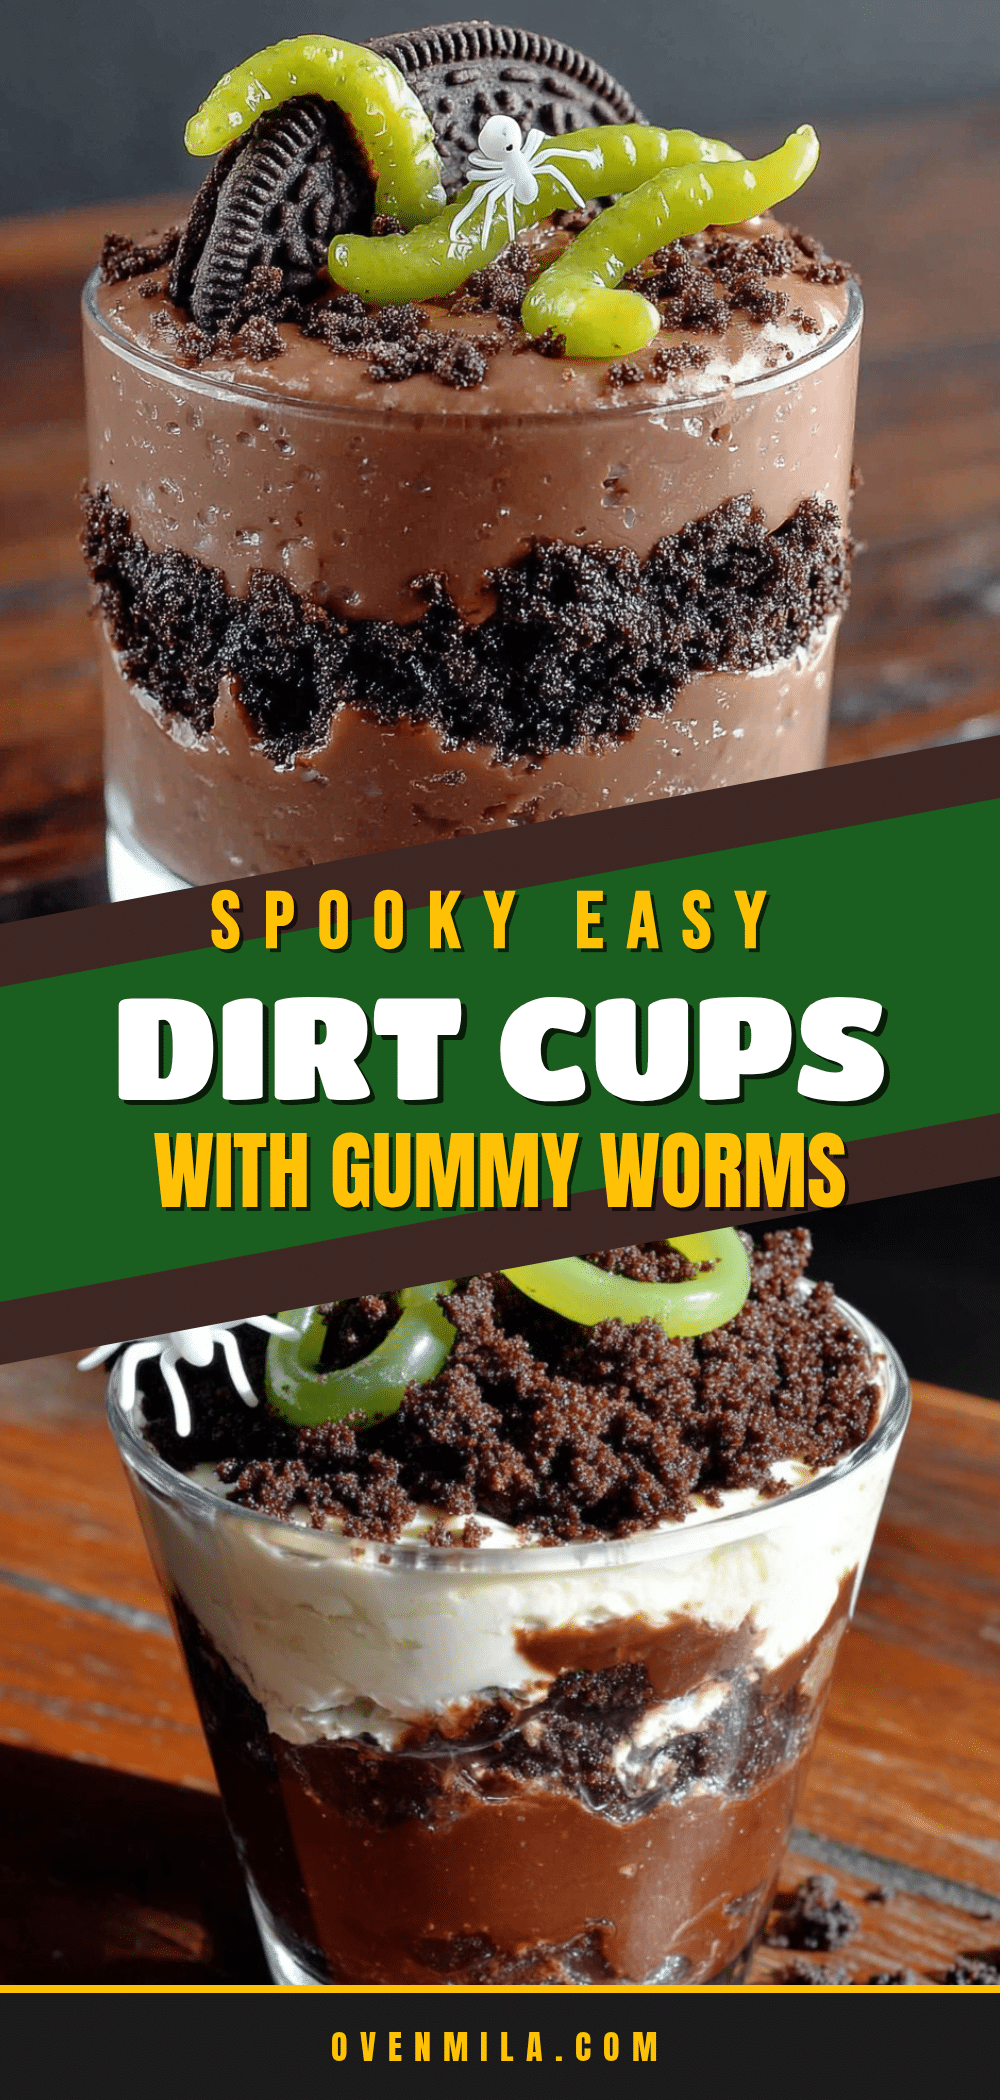
Spooky Easy Halloween Dirt Cups with Gummy Worms
These spooky easy Halloween dirt cups with gummy worms are the perfect no-bake dessert for Halloween parties. Layers of creamy chocolate pudding and crushed Oreo ‘dirt’ topped with gummy worms create a fun, kid-friendly treat that comes together in under 15 minutes.
- Prep Time: 15 minutes
- Cook Time: 0 minutes
- Total Time: 45 minutes (includes chilling time)
- Yield: 8 servings 1x
- Category: Dessert
- Cuisine: American
Ingredients
- 1 (3.9-ounce) box instant chocolate pudding mix (preferably Jell-O brand)
- 2 cups cold whole milk (or 2% or oat milk)
- 1 (14.3-ounce) package Oreo cookies (about 24 cookies, regular not double-stuf)
- 1 (5-ounce) bag gummy worms (sour or regular, such as Trolli or Black Forest)
- Optional: Halloween sprinkles, candy eyeballs, or small plastic spiders for decoration
Instructions
- Crush the Oreos: Place the entire package of Oreos (cream filling and all) into a large zip-top bag. Seal, pushing out as much air as possible. Use a rolling pin to gently crush the cookies into a mix of fine crumbs and small pea-sized chunks. Set aside.
- Make the chocolate pudding: In a medium mixing bowl, pour 2 cups of cold milk. Add the entire box of instant chocolate pudding mix. Whisk vigorously for about 2 minutes until smooth and glossy. Let the pudding sit for 5 minutes to set up completely.
- Layer the cups: Add a generous tablespoon of crushed Oreos to the bottom of each clear plastic cup (8-ounce cups). Press down lightly with the back of a spoon. Spoon or pipe chocolate pudding on top, filling each cup about halfway. Add another layer of crushed Oreos on top of the pudding, leaving about half an inch of space at the top.
- Add the gummy worms: Push 2 to 3 gummy worms into the top Oreo layer, angling them so they look like they are crawling out of the dirt. Scatter extra worms on the surface if desired.
- Chill and serve: Refrigerate the cups for at least 30 minutes before serving. For best results, assemble up to 24 hours in advance, but add gummy worms just before serving.
Notes
Use cold milk for the pudding to set properly. Crush Oreos in a zip-top bag with a rolling pin for best texture. For dairy-free, use dairy-free pudding mix and unsweetened almond or oat milk. For gluten-free, use gluten-free chocolate sandwich cookies. Add gummy worms just before serving to keep them chewy.
Nutrition
- Serving Size: 1 cup
- Calories: 310
- Sugar: 32
- Sodium: 380
- Fat: 12
- Saturated Fat: 5
- Carbohydrates: 48
- Fiber: 2
- Protein: 5
Keywords: Halloween dirt cups, gummy worms, no-bake dessert, Oreo pudding cups, spooky treats, easy Halloween dessert


