My husband claimed he hated squash. For years. Every fall, when the farmers’ market bins overflowed with knobby gourds and speckled pumpkins, he’d make a point of announcing his position. “It’s fine,” he’d say, backing away from the counter. “You make it. I’ll have the chicken.” And I did, for three autumns in a row, making roasted butternut and stuffed delicata and spicy kabocha curries that I ate alone while he made himself a sandwich. Then last October, I came home from the store with a single acorn squash. Honestly, I wasn’t even trying to convert him. I just wanted something easy for lunch the next day. I halved it, scooped out the seeds, drizzled it with a little maple syrup and butter, and slid it into the oven. An hour later, I pulled it out, the edges caramelized and the flesh spoon-tender, and set it on the counter to cool. That’s where I found him. Standing over the baking sheet, fork in hand, mid-bite. “This is good,” he said, mouth full. “What is it?”
That moment caught me completely off guard. I mean, I’d spent years trying everything—roasting with cumin, stuffing with quinoa, blending into soup—and nothing had cracked the code. But this simple, almost lazy version? The one I threw together without any expectations? That was the one that did it. The maple brown butter glaze, it turns out, is the real star here. It’s not complicated. You brown the butter until it smells nutty and toast-colored, whisk in some maple syrup and a pinch of cinnamon, and let it soak into the roasted squash as it finishes in the oven. The result is this glossy, almost candied coating that makes the squash taste like something you’d order at a fancy restaurant, not something you threw together on a random Tuesday.
Maybe you’ve been there, with a food you just couldn’t get anyone in your house to eat. Or maybe you’re the one who needs convincing. Either way, this recipe is for you. It’s the kind of dish that changes minds without even trying. It’s cozy, it’s seasonal, and it tastes exactly like fall tastes when you close your eyes and take that first bite. The squash gets tender and sweet, the glaze gets sticky and rich, and suddenly everyone’s a fan. Even the people who swore they hated it.
Why You’ll Love This Recipe
Let me tell you why this roasted acorn squash with maple brown butter glaze has become my most-requested fall side dish. It’s not just because it’s beautiful on the table—though it is, with those dark green edges and golden centers. It’s because it delivers on every level without demanding much from you.
- Simple Ingredients: You probably already have butter, maple syrup, and cinnamon in your kitchen right now. The acorn squash is the only thing you might need to pick up, and it’s available at nearly every grocery store from September through December.
- Quick & Easy: The active prep time is about 10 minutes. Seriously. You cut the squash, scoop the seeds, whisk the glaze, and the oven does the rest. It’s perfect for those busy weeknights when you want something impressive without the stress.
- Perfect for Fall Gatherings: Whether it’s Thanksgiving, a cozy Friendsgiving, or just a Sunday dinner when the leaves are changing, this dish fits right in. It pairs beautifully with roasted chicken, pork chops, or even a hearty grain bowl.
- Crowd-Pleaser: I’ve served this to kids, picky eaters, and squash skeptics (including my husband). Every single time, the baking sheet comes back empty. The sweetness of the maple and the nuttiness of the brown butter are universally appealing.
- Unbelievably Delicious: The texture is what gets me every time. The edges get slightly crispy and caramelized, while the centers turn soft and almost custard-like. The glaze seeps into every crevice, making each bite a perfect balance of sweet, savory, and rich.
What makes this recipe different from all the other roasted squash recipes out there? It’s the technique. Most recipes just toss the squash with oil and roast it, but that leaves you with something that’s fine—just fine. This version uses a two-step method: you roast the squash first to soften it, then brush on the maple brown butter glaze and let it caramelize in the final minutes. The result is a deeply flavored, glossy finish that clings to every curve of the squash. It’s not just another side dish. It’s the one people ask for by name.
What Ingredients You Will Need
This recipe uses simple, wholesome ingredients that come together to create something truly special. The magic is in the quality of each component and how they work together. Here’s what you’ll need:
- 2 medium acorn squash (about 1.5 pounds each, or 680g each) – Look for squash that feels heavy for its size and has a deep green color with some orange patches. That orange color means it’s fully ripe and will be sweeter. I prefer organic squash when I can find it, but conventional works just fine.
- 1/4 cup (56g) unsalted butter – Use unsalted so you can control the salt level. I recommend Kerrygold or Plugrà for the richest flavor, but any good-quality butter will work. The butter is what we’ll brown, so skip the margarine or plant-based spreads here—they won’t brown the same way.
- 1/4 cup (60ml) pure maple syrup – This is not the time for pancake syrup. Use real maple syrup, preferably Grade A Dark Amber for a more robust maple flavor. The darker the syrup, the more it will complement the nutty brown butter. I’ve tried this with honey in a pinch, and it works, but the maple flavor is really what makes this dish shine.
- 1/2 teaspoon ground cinnamon – Fresh cinnamon makes a difference here. If your cinnamon has been sitting in the back of the spice cabinet for years, it’s time to replace it. I like Saigon cinnamon for its warm, slightly spicy notes.
- 1/4 teaspoon salt – I use fine sea salt. The salt balances the sweetness and helps bring out the natural flavor of the squash. Don’t skip it.
- 1/8 teaspoon black pepper – Just a tiny pinch. You won’t taste it as pepper, but it adds a subtle warmth that rounds out the flavor. Freshly ground is best.
- Optional: Fresh sage leaves (6-8 leaves) – If you want to take this dish over the top, add a few sage leaves to the baking sheet during the last 10 minutes. They’ll crisp up beautifully and add an earthy, herbal note that pairs perfectly with the squash and brown butter.
- Optional: Flaky sea salt for finishing – A sprinkle of Maldon or another flaky sea salt right before serving adds a lovely crunch and a pop of saltiness that contrasts with the sweet glaze.
Ingredient Selection Tips: When choosing acorn squash, look for one that’s firm with no soft spots or cracks. The stem should be intact and dry. If you’re buying ahead of time, acorn squash stores well at room temperature for up to a month, so stock up when you see good ones. For the maple syrup, I’ve found that the less expensive “maple-flavored” syrups just don’t work here—they’re too thin and lack the depth of flavor that real maple syrup provides. Trust me on this one.
Substitution Guidance: If you’re dairy-free, you can use a high-quality vegan butter or coconut oil instead of regular butter. Just know that coconut oil won’t brown the same way, so the flavor will be different—still good, just different. For a sugar-free version, you can try using a sugar-free maple syrup substitute, but I haven’t tested that myself. If you don’t have acorn squash, butternut squash or delicata squash work well too, though cooking times may vary slightly.
Equipment Needed
You don’t need a lot of fancy equipment for this recipe, which is part of its charm. Here’s what you’ll need:
- Large baking sheet – A rimmed baking sheet is best. The rim catches any glaze that might drip off the squash. I use a half-sheet pan (18×13 inches), which fits two acorn squash halves perfectly. If you don’t have one large enough, use two smaller sheets.
- Sharp chef’s knife – Acorn squash has a tough skin, so a sharp knife is essential. I’ve made the mistake of using a dull knife before, and it’s dangerous and frustrating. A 8-inch chef’s knife works great.
- Large spoon or ice cream scoop – For scooping out the seeds and stringy bits. An ice cream scoop with a sharp edge makes this job much easier.
- Small saucepan – For browning the butter. A light-colored saucepan is ideal so you can see the butter change color as it browns. Stainless steel or enameled cast iron works well.
- Whisk – For combining the glaze ingredients. A small whisk works perfectly.
- Pastry brush – For brushing the glaze onto the squash. Silicone brushes are easy to clean and work well. If you don’t have one, you can use a spoon to drizzle the glaze over the squash.
- Parchment paper – Optional but recommended. It makes cleanup much easier and prevents the glaze from sticking to the pan. I always line my baking sheet with parchment paper.
Budget-Friendly Tips: If you don’t have a pastry brush, a clean, unused paintbrush from the hardware store works in a pinch. Or just use a spoon to drizzle the glaze. For the baking sheet, any oven-safe dish will work—even a cast-iron skillet can be used to roast the squash halves if you cut them to fit. I’ve done this many times when traveling and it works beautifully.
Preparation Method
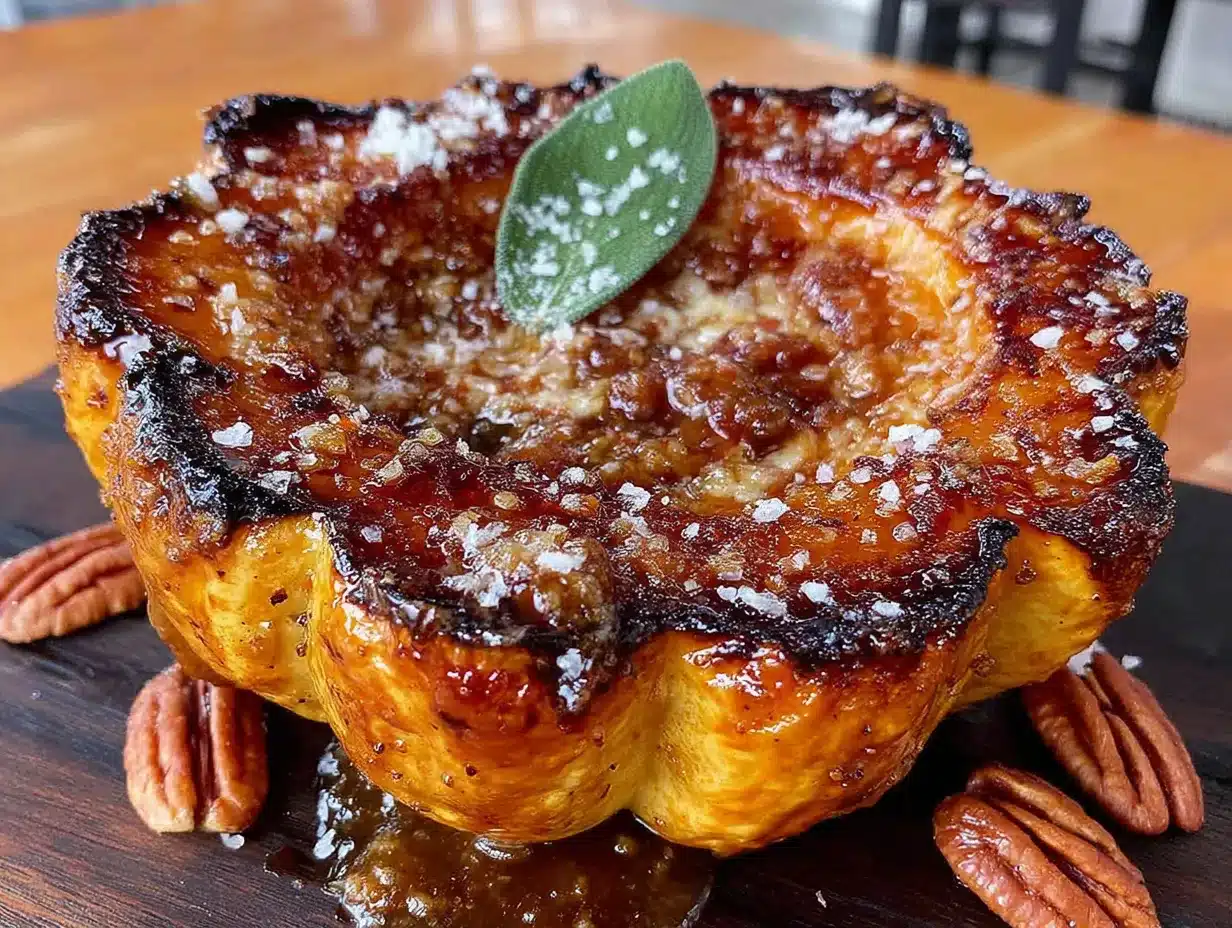
Let me walk you through this step by step. I’ve made this recipe dozens of times, so I’ll share all the little tricks I’ve learned along the way.
- Preheat your oven to 400°F (200°C). Position the rack in the middle of the oven. While the oven heats up, line your baking sheet with parchment paper for easy cleanup.
- Prepare the acorn squash. Using a sharp chef’s knife, carefully cut each acorn squash in half from stem to tip. Be very careful here—acorn squash can be tough to cut. If you’re struggling, try microwaving the whole squash for 2 minutes to soften it slightly. Once halved, use a large spoon to scoop out the seeds and stringy fibers. Don’t rinse the squash with water; just scrape out the insides. The seeds can be saved, cleaned, and roasted separately for a snack.
- Slice the squash into wedges (optional but recommended). For more even cooking and more surface area for the glaze, cut each half into 2-3 wedges, depending on the size of your squash. Each wedge should be about 1-2 inches thick at the widest part. This creates more caramelized edges, which is where all the flavor lives. If you prefer, you can leave the halves whole—just increase the roasting time by about 10 minutes.
- Start the initial roast. Place the squash wedges or halves cut-side up on the prepared baking sheet. Drizzle with a tiny bit of olive oil (about 1 tablespoon) and rub it over the cut surfaces. Sprinkle with a pinch of salt and pepper. Roast for 25 minutes. This initial roast softens the squash and begins the caramelization process.
- Make the maple brown butter glaze. While the squash roasts, make the glaze. Place the 1/4 cup (56g) unsalted butter in a small saucepan over medium heat. Let it melt completely, then continue cooking, swirling the pan occasionally. The butter will foam up, then the foam will subside, and you’ll see brown specks forming at the bottom of the pan. This happens quickly, so watch carefully. When the butter smells nutty and is a golden-brown color (about 3-4 minutes), remove it from heat immediately. Whisk in the 1/4 cup (60ml) maple syrup, 1/2 teaspoon cinnamon, 1/4 teaspoon salt, and 1/8 teaspoon black pepper. The mixture will bubble up a bit—that’s normal. Set aside.
- Glaze the squash. After the initial 25-minute roast, remove the baking sheet from the oven. Using a pastry brush, generously brush the maple brown butter glaze over all the cut surfaces of the squash. Don’t be shy here—you want every nook and cranny coated. If you’re using sage leaves, tuck them between the squash wedges at this point.
- Finish roasting. Return the baking sheet to the oven and roast for another 15-20 minutes, until the squash is fork-tender and the glaze is bubbling and caramelized. The edges should be deep golden brown and slightly crispy. If you want extra caramelization, you can switch the oven to broil for the last 2 minutes—but watch it carefully, as the sugar in the glaze can burn quickly.
- Rest and serve. Remove the squash from the oven and let it rest on the baking sheet for 5 minutes. This allows the glaze to set slightly. Transfer to a serving platter, spoon any remaining glaze from the pan over the top, and finish with a sprinkle of flaky sea salt if desired. Serve warm.
Pro Tip: The squash is done when a fork slides into the thickest part with little resistance. If the glaze starts to look too dark before the squash is tender, loosely tent the pan with foil for the remaining cooking time. This happened to me the first time I made this recipe, and the foil trick saved it completely.
Cooking Tips & Techniques
Over the years, I’ve learned a few things about making this recipe perfect every time. Here are my best tips:
- Don’t skip the initial roast. I know it’s tempting to just brush the glaze on and roast everything together, but roasting the squash first without the glaze allows it to soften and develop natural sweetness. If you add the glaze too early, the sugar can burn before the squash is fully cooked. Trust the two-step process.
- Watch the brown butter like a hawk. Brown butter goes from perfect to burnt in about 30 seconds. As soon as you see those brown specks and smell that nutty aroma, pull it off the heat. I’ve ruined many batches by walking away for “just a second.” Don’t make my mistake. Stand there and watch it.
- Cut the squash into uniform pieces. This is one of those tips that sounds obvious but makes a huge difference. If your wedges are different sizes, some will be mushy while others are undercooked. Take an extra minute to make sure they’re all about the same thickness.
- Use a light-colored pan for browning butter. Dark pans make it hard to see the color change. If all you have is dark nonstick, you can still make it work—just pay extra attention to the smell. The nutty aroma is your best clue.
- Double the glaze if you’re feeding a crowd. The recipe as written makes just enough for two squash. If you’re making more, double everything in the glaze. Leftover glaze is amazing drizzled over oatmeal, pancakes, or vanilla ice cream.
- Don’t overcrowd the pan. The squash wedges need space around them to caramelize properly. If they’re touching, they’ll steam instead of roast. Use two baking sheets if needed, and rotate them halfway through cooking.
Common Mistake to Avoid: The first time I made this, I used salted butter and added the extra salt called for in the recipe. The result was way too salty. If salted butter is all you have, reduce the added salt to just a pinch. You can always add more at the end, but you can’t take it out.
Variations & Adaptations
This recipe is wonderfully adaptable. Here are some ways to make it your own:
- Savory Herb Version: Skip the cinnamon and add 1 teaspoon of fresh thyme leaves and 1/2 teaspoon of fresh rosemary, finely chopped, to the brown butter glaze. The herbs pair beautifully with the nutty brown butter and make this version perfect alongside roasted chicken or pork.
- Spicy Maple Version: Add 1/4 teaspoon of cayenne pepper or red pepper flakes to the glaze along with the cinnamon. The heat cuts through the sweetness and adds a wonderful warmth. I made this version for a Friendsgiving last year and it was the first dish to disappear.
- Vegan Version: Substitute the butter with 1/4 cup (60ml) of coconut oil or a high-quality vegan butter. For the best flavor, use refined coconut oil (which has no coconut taste) and add 1/2 teaspoon of nutritional yeast for a slightly nutty, savory note. The texture will be slightly different, but it’s still delicious.
- Stuffed Acorn Squash: After the initial 25-minute roast, fill the squash halves with a mixture of cooked quinoa, dried cranberries, toasted pecans, and crumbled feta or goat cheese. Drizzle the glaze over everything and finish roasting. This turns a side dish into a main course—perfect for a light fall dinner.
- Air Fryer Method: Cut the squash into smaller wedges (about 1-inch thick). Toss with a little oil and air fry at 375°F (190°C) for 10 minutes. Brush with the glaze and air fry for another 5-7 minutes until tender and caramelized. This method is faster and gives you extra-crispy edges.
Personal Variation: My favorite way to make this is with the addition of toasted pecans. After glazing the squash, I sprinkle about 1/2 cup of roughly chopped pecans over the top before the final roast. The pecans get toasty and glazed right along with the squash, adding a wonderful crunch. I stumbled onto this combination when I had leftover pecans from a pie project, and now I can’t imagine making it any other way.
Serving & Storage Suggestions
This roasted acorn squash is best served warm, right out of the oven, when the glaze is still glossy and the edges are perfectly caramelized. Here’s how to make the most of it:
Serving Temperature and Presentation: Transfer the squash wedges to a warm serving platter and spoon any remaining glaze from the pan over the top. A sprinkle of flaky sea salt and a few fresh sage leaves (if you have them) make for a beautiful presentation. I like to serve it family-style, letting everyone grab their own pieces. For a more formal dinner, arrange the wedges in a fan pattern on individual plates.
Complementary Dishes: This squash pairs beautifully with roasted chicken, turkey, pork chops, or a hearty grain bowl with farro and roasted vegetables. It’s also wonderful alongside a simple green salad with a tangy vinaigrette—the acidity cuts through the richness of the glaze. For a vegetarian main course, serve it with creamy polenta and sautéed kale.
Storage Instructions: Leftover roasted squash can be stored in an airtight container in the refrigerator for up to 4 days. The glaze will soften the edges a bit, but the flavor is still fantastic. I often make extra on purpose so I can have leftovers.
Reheating Methods: For best results, reheat the squash in a 350°F (175°C) oven for about 10 minutes. This helps restore some of the caramelization. You can also reheat it in an air fryer at 350°F for 5 minutes. The microwave works in a pinch, but the texture will be softer and less appealing. If the squash seems dry when reheating, drizzle a tiny bit of maple syrup over it before warming.
How Flavors Develop: Honestly, this dish is even better the next day. The flavors meld together overnight, and the squash absorbs more of the glaze. I’ve been known to eat the leftovers cold, straight from the fridge, standing at the counter. Don’t judge me until you’ve tried it.
Nutritional Information & Benefits
Here’s the approximate nutritional breakdown for one serving (about 1/2 of a medium acorn squash with glaze):
- Calories: 245
- Total Fat: 12g
- Saturated Fat: 7g
- Carbohydrates: 36g
- Fiber: 4g
- Sugar: 18g
- Protein: 2g
- Vitamin A: 30% of the Daily Value
- Vitamin C: 25% of the Daily Value
- Potassium: 12% of the Daily Value
Health Benefits: Acorn squash is packed with nutrients. It’s an excellent source of vitamin A (in the form of beta-carotene), which supports eye health and immune function. It’s also rich in vitamin C, an antioxidant that helps protect your cells from damage. The fiber content (4 grams per serving) supports digestive health and helps keep you feeling full. Plus, the maple syrup provides a more natural source of sweetness than refined sugar, though it’s still sugar, so enjoy in moderation.
Dietary Considerations: This recipe is naturally gluten-free and can easily be made vegan (see variations). It’s also vegetarian and contains no nuts (unless you add the pecan variation). The main allergen to note is dairy from the butter. If you’re watching your sugar intake, you can reduce the maple syrup to 2 tablespoons, though the glaze will be less glossy and sweet.
Personal Wellness Perspective: I love that this recipe feels indulgent but is actually quite wholesome. It’s the kind of dish that satisfies that craving for something sweet and rich without being overly processed. When I serve this, I feel good knowing I’m getting a serving of vegetables in a way that actually makes people excited to eat them.
Conclusion
This roasted acorn squash with maple brown butter glaze is more than just a side dish—it’s a fall tradition waiting to happen. It’s the recipe that converted my squash-hating husband, the one that gets requested at every holiday gathering, and the one I turn to when I want something that feels special without hours of work. The combination of tender, caramelized squash and nutty, sweet glaze is simply irresistible.
I encourage you to make this recipe your own. Add the pecans, throw in some fresh herbs, or double the glaze and use it on everything from roasted carrots to sweet potatoes. The beauty of this dish is that it’s forgiving and adaptable. You really can’t mess it up. And if you do? Well, you’ll still have something delicious on the table.
I’d love to hear how it turns out for you. Did you try a variation? Did you convert a squash skeptic in your life? Drop a comment below and let me know. And if you share a photo on Pinterest, tag me—I love seeing your creations. Happy fall cooking, friends. This one’s a keeper.
Frequently Asked Questions
Can I use frozen acorn squash for this recipe?
I don’t recommend it. Frozen squash releases a lot of water as it thaws, which will make the glaze watery and prevent proper caramelization. Fresh acorn squash is widely available in the fall and stores well, so stick with fresh for the best results.
Can I make this recipe ahead of time?
You can prepare the squash and make the glaze up to a day in advance. Simply cut the squash, store the pieces in an airtight container in the refrigerator, and keep the glaze in a separate container. When you’re ready to serve, proceed with the roasting instructions. The squash may need an extra 5-10 minutes of roasting time since it’s starting from cold.
Why is my brown butter not browning?
Several things could be going wrong. First, make sure you’re using real butter, not margarine or a spread. Second, your heat might be too low—medium heat is ideal. Third, make sure you’re using a light-colored pan so you can see the color change. If you’ve been cooking for 5 minutes and nothing’s happening, turn up the heat slightly and be patient. It will happen.
Can I use this glaze on other vegetables?
Absolutely! This maple brown butter glaze is amazing on roasted carrots, sweet potatoes, parsnips, and even Brussels sprouts. I’ve also used it on butternut squash and delicata squash with great results. The cooking time will vary depending on the vegetable, so adjust accordingly.
How do I know when the acorn squash is fully cooked?
The squash is done when a fork or knife slides into the thickest part with little to no resistance. The edges should be caramelized and golden brown, and the flesh should be tender all the way through. If the glaze starts to get too dark before the squash is tender, tent the pan loosely with foil and continue cooking.
Pin This Recipe!
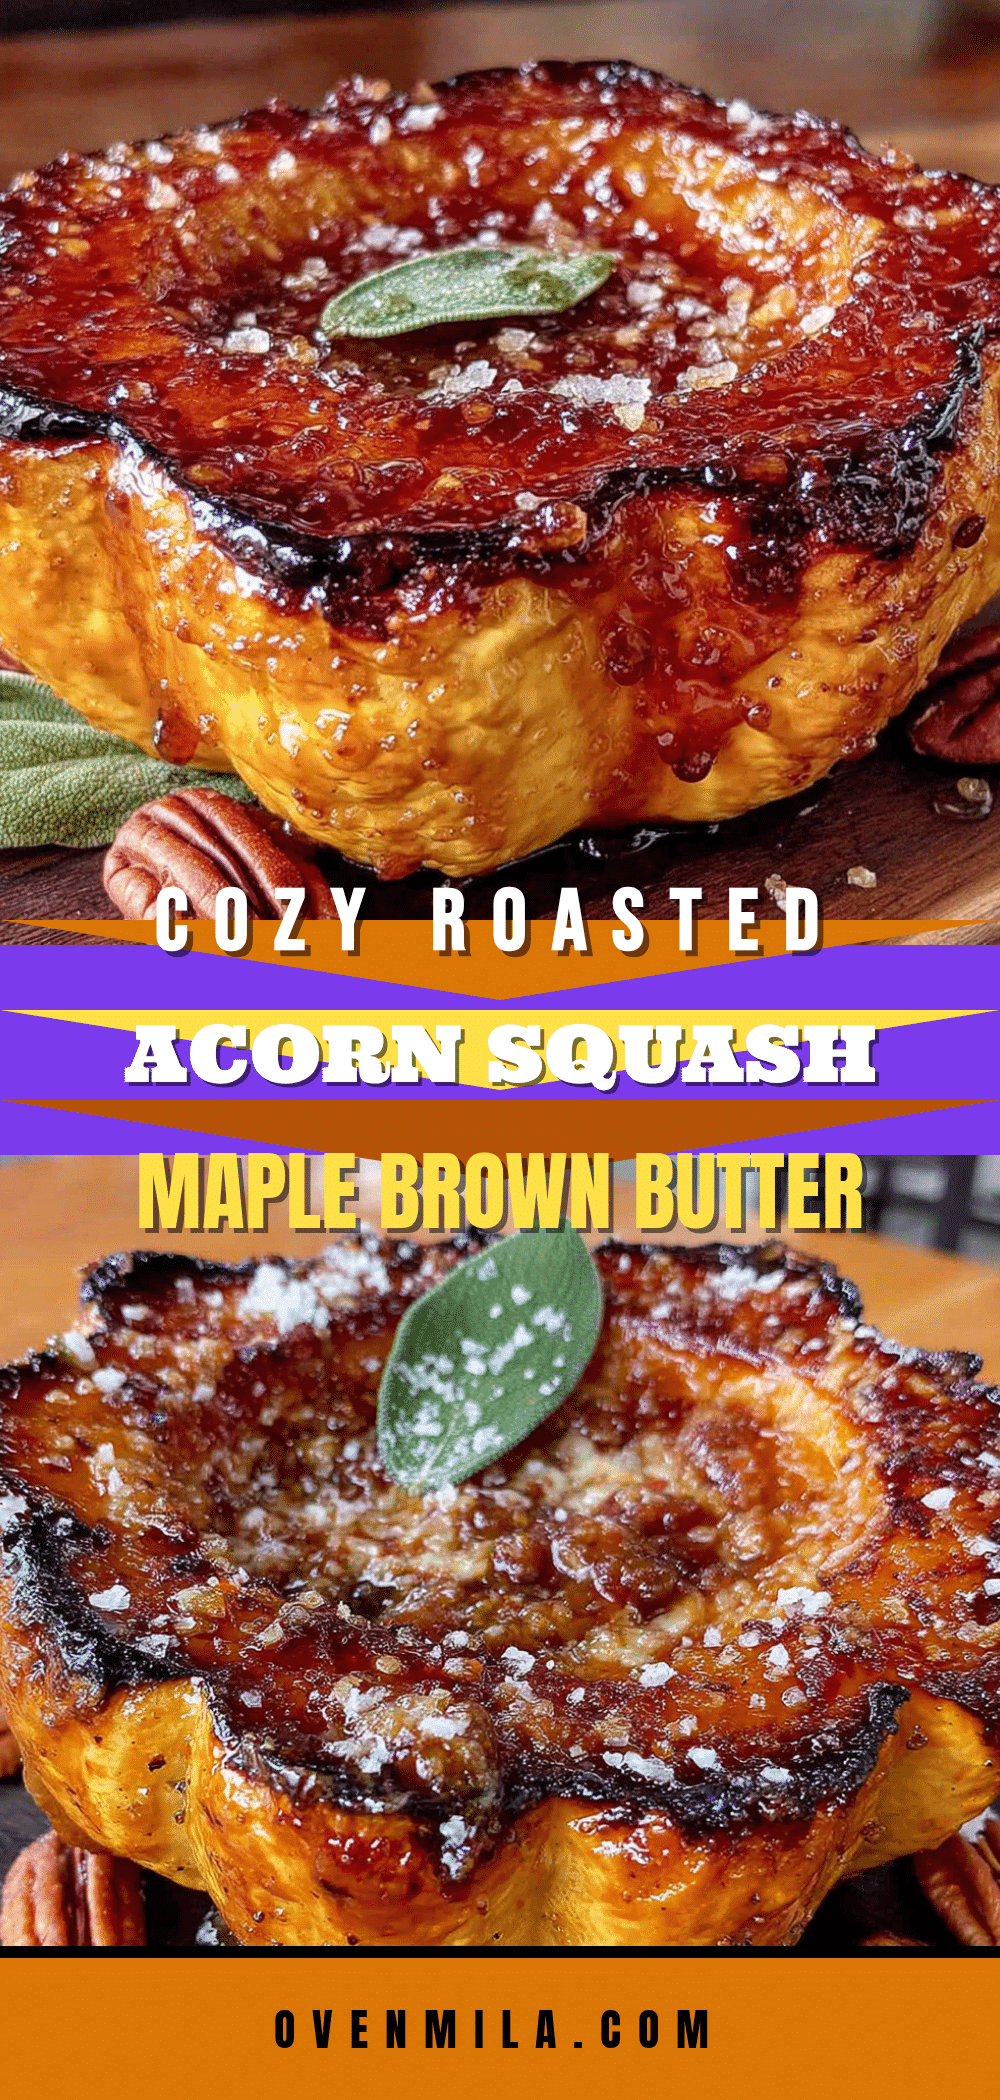
Cozy Roasted Acorn Squash with Maple Brown Butter Glaze
This roasted acorn squash with maple brown butter glaze is a simple yet impressive fall side dish. The squash gets tender and sweet, while the nutty, sweet glaze caramelizes to perfection, making it a crowd-pleaser that even squash skeptics will love.
- Prep Time: 10 minutes
- Cook Time: 40-45 minutes
- Total Time: 50-55 minutes
- Yield: 4 servings 1x
- Category: Side Dish
- Cuisine: American
Ingredients
- 2 medium acorn squash (about 1.5 pounds each, or 680g each)
- 1/4 cup (56g) unsalted butter
- 1/4 cup (60ml) pure maple syrup
- 1/2 teaspoon ground cinnamon
- 1/4 teaspoon fine sea salt
- 1/8 teaspoon black pepper
- Optional: 6-8 fresh sage leaves
- Optional: Flaky sea salt for finishing
- 1 tablespoon olive oil (for initial roast)
Instructions
- Preheat your oven to 400°F (200°C). Position the rack in the middle of the oven. Line a large baking sheet with parchment paper.
- Using a sharp chef’s knife, carefully cut each acorn squash in half from stem to tip. Scoop out the seeds and stringy fibers with a large spoon.
- Cut each half into 2-3 wedges (about 1-2 inches thick at the widest part) for more even cooking and caramelization. Alternatively, leave halves whole and increase roasting time by 10 minutes.
- Place the squash wedges cut-side up on the prepared baking sheet. Drizzle with olive oil and rub over cut surfaces. Sprinkle with a pinch of salt and pepper. Roast for 25 minutes.
- While the squash roasts, make the glaze: In a small saucepan over medium heat, melt the butter. Continue cooking, swirling occasionally, until the butter foams, then subsides, and brown specks form at the bottom (about 3-4 minutes). Remove from heat immediately when it smells nutty and is golden-brown.
- Whisk in the maple syrup, cinnamon, salt, and black pepper. The mixture will bubble up. Set aside.
- After the initial 25-minute roast, remove the baking sheet from the oven. Generously brush the maple brown butter glaze over all cut surfaces of the squash. If using sage leaves, tuck them between the wedges.
- Return to the oven and roast for another 15-20 minutes, until the squash is fork-tender and the glaze is bubbling and caramelized. For extra caramelization, broil for the last 2 minutes, watching carefully.
- Remove from the oven and let rest on the baking sheet for 5 minutes. Transfer to a serving platter, spoon any remaining glaze from the pan over the top, and finish with flaky sea salt if desired. Serve warm.
Notes
Don’t skip the initial roast before adding the glaze to prevent burning. Watch the brown butter carefully as it can burn quickly. For uniform cooking, cut squash wedges to similar sizes. If using salted butter, reduce added salt to a pinch. Leftover glaze is great on oatmeal, pancakes, or ice cream.
Nutrition
- Serving Size: 1/2 of a medium acor
- Calories: 245
- Sugar: 18
- Sodium: 150
- Fat: 12
- Saturated Fat: 7
- Carbohydrates: 36
- Fiber: 4
- Protein: 2
Keywords: roasted acorn squash, maple brown butter, fall side dish, Thanksgiving, vegetarian, gluten-free, easy side dish


