The neighborhood cookie swap was in three days and I’d completely forgotten. I mean, completely. I’d RSVP’d yes, promised to bring “something spectacular” (my own words, unfortunately), and then let the chaos of December sweep the whole thing right out of my brain. Everyone else would be bringing elaborate, multi-day projects—layered bars, perfectly piped linzer cookies, those delicate little meringues that take an entire afternoon. And I had a half-used bag of sugar cookie mix, a bag of red and green M&Ms I’d bought for a movie night, and about forty-five minutes before I needed to leave for my kid’s school concert.
Honestly, I stood in my kitchen and laughed. Not a happy laugh, mind you—the kind of laugh that’s one step away from crying. I almost grabbed my phone to text my neighbor Sarah and tell her I was coming down with something. But then I spotted the bag of white chocolate chips in the pantry, and something clicked. What if I didn’t make individual cookies at all? What if I made one giant one and broke it into pieces?
That’s how this Festive Christmas Sugar Cookie Bark was born—out of pure panic and a refusal to show up empty-handed. I pressed the dough into a sheet pan, baked it, slathered it with melted white chocolate, and went absolutely wild with sprinkles. I brought it to the swap in a zip-top bag (classy, I know), fully expecting to be the potluck failure of the year. Instead, people lost their minds. Three people asked for the recipe before I even made it to the punch bowl. Someone called it “the best thing at the table.” Let me tell you, that felt pretty good for a recipe I threw together while wearing my kid’s winter coat because I couldn’t find mine.
So if you’ve ever shown up to a holiday party with store-bought cookies and a sheepish grin, this one’s for you. It looks like you spent hours. It tastes like you spent hours. But you and I will know the truth—and honestly, that’s half the fun.
Why You’ll Love This Recipe
I’ve tested this Festive Christmas Sugar Cookie Bark about a dozen times now, tweaking the bake time, the chocolate-to-cookie ratio, and the sprinkle distribution. This version is the one I keep coming back to, and here’s why it works so well for hosting:
- Incredibly Easy : You only need about 20 minutes of active prep time. The oven does the heavy lifting, and the hardest part is waiting for the chocolate to set.
- Pantry-Friendly Ingredients : Butter, sugar, flour, vanilla, white chocolate chips, and sprinkles. That’s it. No weird extracts, no specialty flours, no hunting through three grocery stores.
- Perfect for Holiday Gatherings : This bark was literally designed for cookie swaps, potlucks, and dinner parties. It breaks into serving pieces, so guests can grab a chunk and keep mingling.
- Guaranteed Crowd-Pleaser : I’ve brought this to five different holiday events now, and it disappears faster than anything else on the table. Kids love the sprinkles. Adults love the buttery, crunchy texture. Everyone wins.
- Looks Impressive with Zero Effort : The white chocolate drizzle and rainbow of sprinkles make it look like you’re a professional baker. Nobody needs to know you pressed it into a pan with your fingers.
What makes this version different from other bark recipes? Most bark recipes use graham crackers or saltines as a base. That’s fine, but it’s not a cookie. This one actually uses a proper sugar cookie base—soft, buttery, and sturdy enough to hold up under the chocolate without getting soggy. It’s the best of both worlds: the ease of bark with the soul-satisfying flavor of a Christmas sugar cookie.
And here’s the emotional part—the part that keeps me making this year after year. This recipe isn’t just good. It’s the kind of treat that makes people close their eyes after the first bite. It’s comfort food reimagined for the holiday chaos—faster, easier, but with the same warm, nostalgic satisfaction. Perfect for impressing guests without stress, or turning a simple dessert table into something memorable.
What Ingredients You Will Need
This recipe uses simple, wholesome ingredients to deliver that classic sugar cookie flavor with a festive twist. Most of these are pantry staples, especially if you do any holiday baking at all.
For the Sugar Cookie Base
- Unsalted butter, softened (1 cup / 226g) – I prefer using unsalted so I can control the salt level. Leave it on the counter for about an hour before starting.
- Granulated sugar (1 cup / 200g) – Standard white sugar gives that classic sugar cookie sweetness and helps create a slightly crisp edge.
- Large egg (1, room temperature) – Room temperature eggs incorporate more evenly into the creamed butter and sugar. If you forget to take it out early, just place it in a bowl of warm water for 5 minutes.
- Vanilla extract (1 ½ teaspoons) – Pure vanilla extract makes a noticeable difference here. I recommend Nielsen-Massey or Simply Organic for the best flavor.
- All-purpose flour (2 cups / 250g) – Spoon and level your flour. Scooping directly from the bag packs it down and gives you too much flour, which makes the bark dry and crumbly.
- Baking powder (½ teaspoon) – Just enough to give the bark a little lift without making it puffy.
- Salt (¼ teaspoon) – Balances the sweetness. Don’t skip it.
For the Topping
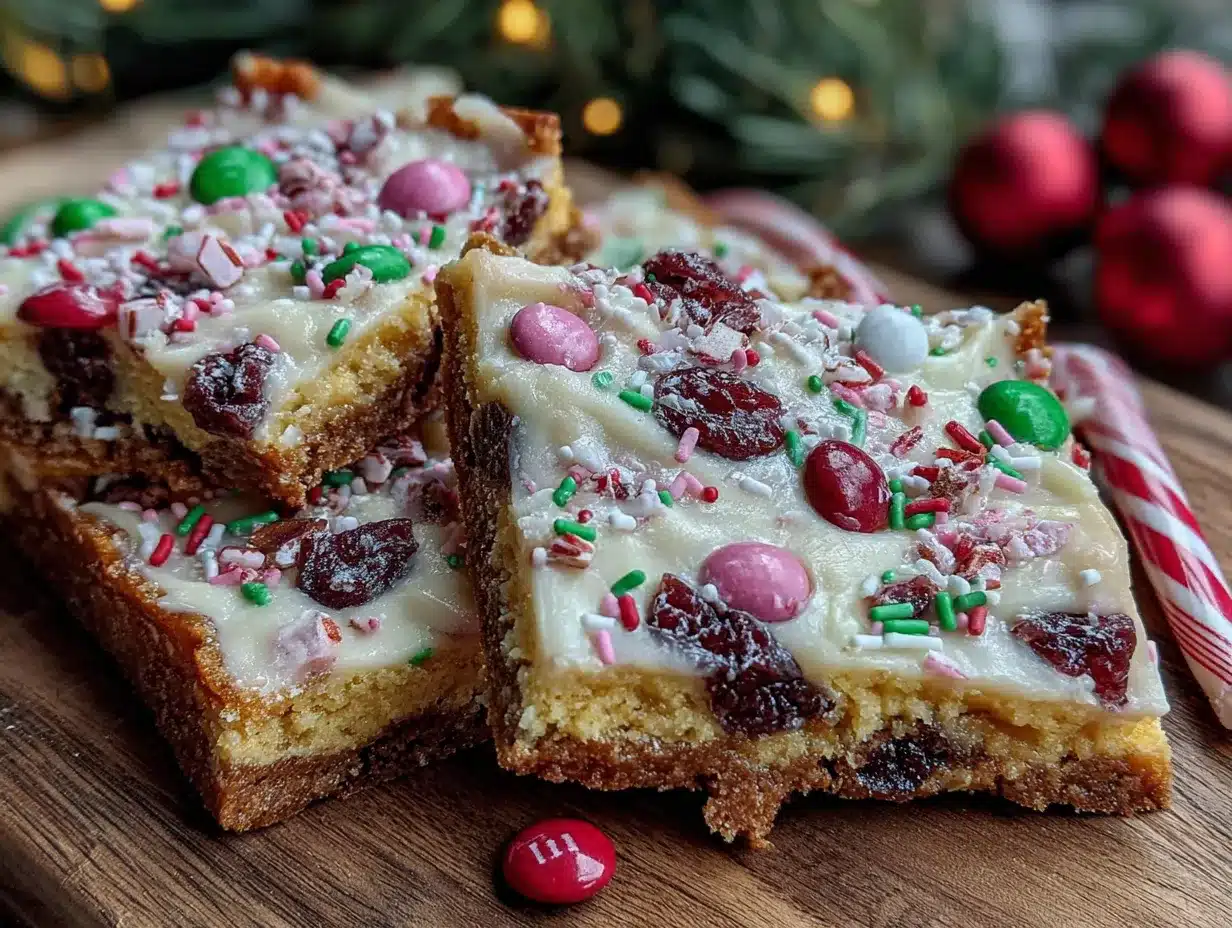
- White chocolate chips or melting wafers (1 ½ cups / 255g) – I’ve tested this with both Ghirardelli white chocolate chips and Wilton candy melts. The Ghirardelli version tastes better but takes longer to set. The Wilton version sets faster and is more stable at room temperature. Both work great.
- Coconut oil or shortening (1 teaspoon, optional) – Adding a tiny bit helps the white chocolate melt smoothly and gives it a nice shine. Only use this if your white chocolate seems thick or clumpy.
- Christmas sprinkles (¼ cup / 40g) – Use a mix of red and green jimmies, nonpareils, and snowflake-shaped sprinkles if you can find them. Avoid the giant sprinkle balls—they look pretty but are hard to bite through on the bark.
- Crushed candy canes (optional, 2 tablespoons) – Adds a peppermint crunch that pairs beautifully with the white chocolate. I add these about half the time, depending on my mood.
Substitution Guidance
If you’re dairy-free, use a plant-based butter stick (like Miyoko’s) and dairy-free white chocolate chips. For a gluten-free version, swap the all-purpose flour with a 1:1 gluten-free baking flour blend—I’ve had good results with Bob’s Red Mill. And if white chocolate isn’t your thing, semi-sweet or milk chocolate chips work beautifully too. Just keep in mind that dark chocolate will make the bark less sweet overall.
Equipment Needed
- Half-sheet baking pan (18×13 inches) – This is the standard size. If you only have a 9×13 pan, the bark will be thicker and need about 5 extra minutes in the oven. I’ve done it both ways, and honestly, the thicker version is also delicious—just slightly less crunchy.
- Parchment paper – Non-negotiable. The bark will stick to the pan without it. I always buy the pre-cut sheets because I’m lazy and they fit perfectly.
- Stand mixer or hand mixer – You can cream the butter and sugar by hand if you’re feeling ambitious, but a mixer makes it much easier. I use my KitchenAid for this.
- Rubber spatula – For scraping down the bowl and spreading the dough into the pan.
- Offset spatula (optional but helpful) – Makes spreading the melted white chocolate much easier and more even. A regular butter knife works in a pinch, but it’s messier.
- Microwave-safe bowl – For melting the white chocolate. I use a glass Pyrex measuring cup because the pour spout makes drizzling easier.
- Cooling rack – Helps the bark cool evenly and prevents the bottom from getting soggy.
One tip I learned the hard way: don’t use a nonstick pan without parchment paper. I tried it once thinking it would be fine, and I spent twenty minutes chipping hardened white chocolate off the pan. Not my finest moment.
Preparation Method
- Preheat your oven to 350°F (175°C). Line your half-sheet pan with parchment paper, leaving a little overhang on two sides. This gives you handles to lift the bark out later.
- Cream the butter and sugar. In a large mixing bowl, beat the softened butter and granulated sugar together on medium speed until light and fluffy—about 3 minutes. You’re looking for a pale yellow color and a texture that looks almost like frosting. Stop and scrape down the sides of the bowl once halfway through.
- Add the egg and vanilla. Crack the egg into the bowl, add the vanilla extract, and beat on medium speed until fully combined. It might look a little curdled at this point—that’s normal. Don’t panic.
- Mix the dry ingredients separately. In a medium bowl, whisk together the flour, baking powder, and salt. This step isn’t optional—if you dump the baking powder directly into the wet mixture, it can clump and leave bitter pockets in your bark. Trust me on this one.
- Combine wet and dry ingredients. Add the flour mixture to the butter mixture in two additions, mixing on low speed after each. Stop as soon as the flour disappears. Overmixing develops gluten and makes the bark tough. You want it tender and crumbly.
- Press the dough into the pan. Transfer the dough to your prepared baking sheet. It will be thick and a little sticky. Use your fingers or a rubber spatula to press it into an even layer, reaching all the way to the edges. If the dough sticks to your fingers, lightly wet your hands with cold water. Aim for about ¼-inch thickness. Don’t stress about perfection—rustic edges add charm.
- Bake for 12-15 minutes. The edges should be lightly golden brown, and the center should look set but still pale. It will firm up as it cools. If you overbake it, the bark will be too hard to break nicely. I pulled my first batch at 16 minutes and ended up with crumbly shards instead of neat pieces.
- Cool completely on the pan. Place the pan on a wire rack and let the cookie base cool for at least 30 minutes. Do not add the chocolate while it’s still warm, or you’ll end up with a melty, streaky mess. I speak from experience.
- Melt the white chocolate. Place the white chocolate chips in a microwave-safe bowl. Microwave in 30-second intervals at 50% power, stirring thoroughly after each interval. White chocolate burns easily, so don’t walk away. It usually takes about 2-3 intervals total. When it’s mostly melted with a few small lumps, stir until smooth. If it’s too thick, stir in the coconut oil or shortening.
- Spread the chocolate over the cooled cookie base. Pour the melted white chocolate onto the center of the cookie base. Use an offset spatula or the back of a spoon to spread it evenly, working quickly before the chocolate starts to set. Leave a small border around the edges for a rustic look.
- Add the sprinkles. While the chocolate is still wet, generously sprinkle your Christmas sprinkles and crushed candy canes (if using) over the entire surface. Don’t be shy—the sprinkles are what make it festive. Press them in very gently with your fingers so they stick.
- Let the chocolate set. Place the pan in the refrigerator for about 20 minutes, or leave it at room temperature for 1-2 hours. The chocolate should be firm and no longer sticky to the touch.
- Break into pieces. Once set, lift the bark out of the pan using the parchment paper overhang. Place it on a cutting board. Use your hands to break it into irregular pieces—about 2-3 inches each. The rustic, jagged edges are part of the charm. If you prefer cleaner lines, use a sharp knife, but you’ll get more crumbs.
Cooking Tips & Techniques
Here’s the thing about this Festive Christmas Sugar Cookie Bark—it’s forgiving, but a few small tweaks make the difference between “pretty good” and “people are asking for the recipe.”
Don’t overwork the dough. I’ve made this mistake more times than I care to admit. When you press the dough into the pan, be gentle. If you pack it down too firmly, the bark will be dense and tough instead of tender and crisp. Think light pressure, not body weight.
Watch the bake time like a hawk. The difference between perfect bark and overly hard bark is about 90 seconds. I recommend setting a timer for 12 minutes and checking it. The edges should be just barely golden, and the center should look dry but not brown. Remember, it continues to bake from residual heat after you pull it out.
White chocolate is temperamental. It seizes up if it gets even a drop of water in it. Make sure your bowl and spatula are completely dry. And don’t melt it on high power—I ruined an entire batch of Ghirardelli white chocolate by getting distracted and nuking it for a full minute. It turned into a grainy, lumpy disaster.
Work in batches if you’re making this for a crowd. This recipe fits one half-sheet pan, which yields about 20-24 good-sized pieces. For a large party, double the recipe and bake two pans. Just don’t try to cram double the dough into one pan—it will be too thick and won’t bake evenly.
Prep ahead for hosting. You can bake the cookie base up to two days in advance and store it at room temperature, tightly wrapped. Then add the white chocolate and sprinkles the day of your event. This is my favorite hosting hack—it makes the process feel completely stress-free.
Variations & Adaptations
This recipe is a great starting point, but don’t be afraid to make it your own. Here are some variations I’ve tried and loved:
Peppermint White Chocolate Bark – Add ½ teaspoon of peppermint extract to the melted white chocolate before spreading. Top with crushed candy canes instead of mixed sprinkles. The combination of buttery cookie and cool peppermint is absolutely addictive. I made this version for a Christmas brunch and it was gone in fifteen minutes.
Dark Chocolate & Sea Salt – Swap the white chocolate for high-quality dark chocolate (60-70% cacao). After spreading the chocolate, sprinkle with flaky sea salt and skip the colorful sprinkles. This version is more sophisticated and works beautifully for adult-only gatherings. My brother-in-law, who claims to “not have a sweet tooth,” ate half a batch of this.
Gluten-Free Version – As I mentioned earlier, a 1:1 gluten-free flour blend works perfectly here. I’ve tested this with King Arthur Measure for Measure flour, and honestly, I couldn’t tell the difference. The texture is slightly more delicate, so handle the bark gently when breaking it into pieces.
Vegan Adaptation – Use plant-based butter, a flax egg (1 tablespoon ground flaxseed mixed with 3 tablespoons water), and dairy-free white chocolate. The texture will be slightly less rich, but the flavor is still fantastic. I brought this version to a friend’s holiday party where half the guests were vegan, and it was one of the first things to disappear.
Cookie Butter Swirl – Before adding the sprinkles, drop small spoonfuls of cookie butter (like Biscoff spread) onto the white chocolate and swirl it with a toothpick. It adds a lovely spiced flavor that’s perfect for winter.
Serving & Storage Suggestions
This bark is best served at room temperature, which makes it perfect for holiday gatherings. Arrange the pieces on a festive platter or in a decorative tin. I like to layer them with parchment paper if I’m stacking them, so the sprinkles don’t rub off.
What to serve alongside: This bark pairs beautifully with hot cocoa, spiced apple cider, or a strong cup of coffee. For a dessert table, I’d set it out next to something lighter, like fresh fruit or a simple angel food cake, since the bark is rich and sweet. It also works great as a gift—just pile the pieces into a clear cellophane bag, tie it with a red ribbon, and attach a recipe card.
Storage: Store the bark in an airtight container at room temperature for up to one week. Do not refrigerate it long-term—the cookie base can absorb moisture and become soft. If you live in a humid climate, I recommend adding a food-safe silica gel packet to the container to keep the bark crisp.
Freezer instructions: This bark freezes beautifully. Place the pieces in a single layer on a baking sheet and freeze for 1 hour, then transfer to a freezer-safe bag or container. It will keep for up to 3 months. Thaw at room temperature for about 15 minutes before serving. I always keep a batch in the freezer for unexpected guests during the holiday season.
Flavor development note: The bark tastes best within the first 3 days, when the cookie base is still crisp and the white chocolate is snappy. After that, the texture softens slightly, but the flavor actually deepens. It’s still delicious—just different.
Nutritional Information & Benefits
Let’s be honest—this is a treat, not a health food. But here’s the estimated nutritional breakdown per piece (based on 24 pieces):
Calories: 185 | Fat: 9g | Carbohydrates: 24g | Sugar: 16g | Protein: 2g
Health highlights: The butter in this recipe provides a small amount of vitamin A and healthy fats. White chocolate contains calcium from the milk solids, though it’s minimal. The real benefit here is portion control—because the bark breaks into small pieces, it’s easier to enjoy a little without overindulging. At least, that’s what I tell myself.
Dietary considerations: This recipe contains gluten, dairy, and eggs. It is not suitable for vegans without the substitutions mentioned above. For nut-free households, double-check your white chocolate chips—some brands are processed in facilities that also handle tree nuts.
Personal perspective: I’m a firm believer that holiday treats should be enjoyed without guilt. This bark is part of the celebration, and one piece (or two) isn’t going to derail anyone’s healthy habits. Balance is key—eat your veggies, enjoy your bark, and don’t overthink it.
Conclusion
This Festive Christmas Sugar Cookie Bark has saved me more times than I can count. It’s the recipe I turn to when I’m short on time, low on energy, but still want to show up with something that feels special. It’s proof that you don’t need hours in the kitchen or a dozen specialty ingredients to create a dessert that people will rave about.
I hope you’ll make this bark your own. Play with the sprinkles, swap the chocolate, add crushed candy canes or leave them off. The beauty of this recipe is that it’s forgiving and flexible—exactly what we need during the holiday chaos.
If you try this recipe, I’d love to hear about it. Drop a comment below and tell me what variations you tried, or tag me in your photos on social media. Nothing makes me happier than seeing this bark show up at holiday tables around the world. Happy baking, friends—and remember, even the panicked recipes can turn into something wonderful.
Frequently Asked Questions
Can I use pre-made sugar cookie dough for this bark?
Yes, absolutely. If you’re really short on time, a 16.5-ounce tube of refrigerated sugar cookie dough works perfectly. Just press it into the pan and bake according to the package directions, then add the white chocolate and sprinkles. The flavor won’t be quite as buttery as homemade, but it’s a solid shortcut.
Why did my white chocolate seize up and become grainy?
White chocolate is sensitive to moisture and heat. If even a tiny drop of water gets into the bowl, it can seize. Also, overheating is a common culprit—always melt at 50% power in short intervals. If your chocolate does seize, try stirring in a teaspoon of vegetable oil or shortening to smooth it out. It won’t be perfect, but it’s salvageable.
How far in advance can I make this bark?
You can make the full bark up to 5 days in advance and store it in an airtight container at room temperature. For the best texture, I recommend making it no more than 3 days ahead. The cookie base stays crisper that way. If you’re making it for a specific event, aim for 1-2 days before.
Can I use milk chocolate or dark chocolate instead of white chocolate?
Definitely. Milk chocolate will make the bark sweeter and richer, while dark chocolate balances the sweetness with a bit of bitterness. Both work well. Just keep in mind that dark chocolate sets more firmly at room temperature, so the bark might be slightly harder to break into pieces.
My bark turned out too soft and crumbly. What went wrong?
This usually happens for one of two reasons: either the dough was underbaked, or it was overmixed. Underbaked dough doesn’t set properly and stays soft. Overmixed dough develops too much gluten, which can make the bark fragile instead of crisp. Next time, bake until the edges are golden and let it cool completely before adding the chocolate.
Pin This Recipe!
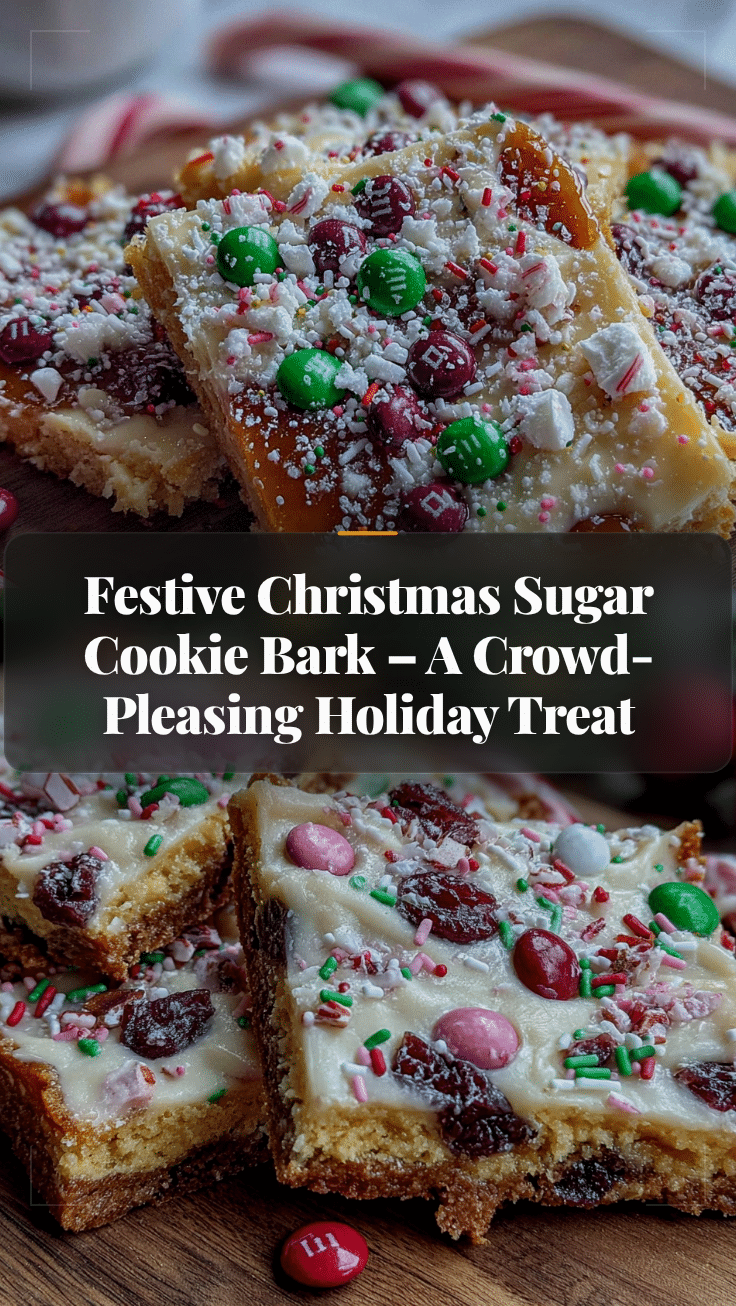
Festive Christmas Sugar Cookie Bark: Easy Holiday Treat
A quick and easy holiday dessert made from a buttery sugar cookie base topped with melted white chocolate and festive sprinkles. Perfect for cookie swaps, potlucks, and holiday gatherings.
- Prep Time: 20 minutes
- Cook Time: 15 minutes
- Total Time: 35 minutes (plus cooling and setting time)
- Yield: 24 pieces 1x
- Category: Dessert
- Cuisine: American
Ingredients
- 1 cup (226g) unsalted butter, softened
- 1 cup (200g) granulated sugar
- 1 large egg, room temperature
- 1 ½ teaspoons vanilla extract
- 2 cups (250g) all-purpose flour
- ½ teaspoon baking powder
- ¼ teaspoon salt
- 1 ½ cups (255g) white chocolate chips or melting wafers
- 1 teaspoon coconut oil or shortening (optional)
- ¼ cup (40g) Christmas sprinkles
- 2 tablespoons crushed candy canes (optional)
Instructions
- Preheat your oven to 350°F (175°C). Line a half-sheet pan (18×13 inches) with parchment paper, leaving overhang on two sides.
- In a large mixing bowl, beat the softened butter and granulated sugar together on medium speed until light and fluffy, about 3 minutes. Scrape down the sides halfway through.
- Add the egg and vanilla extract, and beat on medium speed until fully combined.
- In a medium bowl, whisk together the flour, baking powder, and salt.
- Add the flour mixture to the butter mixture in two additions, mixing on low speed after each. Stop as soon as the flour disappears.
- Transfer the dough to the prepared baking sheet. Press it into an even layer about ¼-inch thick, reaching all the way to the edges. Lightly wet your hands if the dough sticks.
- Bake for 12-15 minutes, until the edges are lightly golden and the center is set but still pale. Cool completely on the pan on a wire rack for at least 30 minutes.
- Place the white chocolate chips in a microwave-safe bowl. Microwave in 30-second intervals at 50% power, stirring after each, until mostly melted. Stir until smooth. If too thick, stir in the coconut oil or shortening.
- Pour the melted white chocolate onto the cooled cookie base. Use an offset spatula or spoon to spread it evenly, leaving a small border around the edges.
- While the chocolate is still wet, generously sprinkle the Christmas sprinkles and crushed candy canes (if using) over the surface. Press them in gently.
- Place the pan in the refrigerator for about 20 minutes, or leave at room temperature for 1-2 hours, until the chocolate is firm.
- Lift the bark out of the pan using the parchment paper overhang. Place on a cutting board and break into irregular pieces, about 2-3 inches each.
Notes
For best results, do not overmix the dough. Watch the bake time closely to avoid overbaking. White chocolate is sensitive to moisture and heat; melt at 50% power in short intervals. The bark can be stored in an airtight container at room temperature for up to one week, or frozen for up to 3 months.
Nutrition
- Serving Size: 1 piece
- Calories: 185
- Sugar: 16
- Sodium: 60
- Fat: 9
- Saturated Fat: 5
- Carbohydrates: 24
- Protein: 2
Keywords: Christmas sugar cookie bark, holiday bark, easy cookie bark, white chocolate bark, festive dessert, cookie swap recipe


