The lady at the holiday market stall watched me eyeing her tray of perfect little chocolate truffles. I was trying to figure out how she got them so round, honestly, without any cracks. She didn’t say anything for a minute, just kept wrapping up a box for another customer. Then she slid a napkin toward me with one of her truffles on it. “It’s just crushed cookies,” she said with a wink. “No baking, no fuss. You’ll make them better than me by your second batch.” That moment stuck with me. Here was someone sharing a simple family trick, not a guarded secret. That’s how these Cozy No-Bake Christmas Oreo Balls with White Chocolate came into my life. They weren’t fancy or complicated, and that was exactly the point. You know that feeling when a recipe just clicks, and you realize you’ve been overthinking things for years? That was this one for me. I’ve tweaked her method just slightly, adding a pinch of salt and a specific brand of cream cheese, but the heart of it remains that kind lady’s generosity.
Maybe you’ve been there, staring down a holiday baking list that feels a mile long and wondering if you’ll ever see the couch again. These little bites of joy are my answer to that panic. They take about fifteen minutes of hands-on work and then just some chill time in the fridge. No oven, no stand mixer, no stress. They are the perfect project for a cozy night in, maybe with some Christmas music playing and a cup of tea nearby. I keep making them because they remind me that the best holiday treats don’t need a culinary degree. They just need a little patience, some good ingredients, and a story worth telling.
Why You’ll Love This Recipe
I’ve tested this recipe more times than I care to count, trying different ratios of Oreo to cream cheese, different melting methods for the white chocolate, and even different chill times. What I’m sharing here is the version that works every single time. It’s the one that got the thumbs up from my neighbor who claims she “can’t cook anything,” and the one my pastry-chef cousin asked for the recipe to. That’s when I knew it was a keeper.
- Quick & Easy: You can have these ready to chill in under 20 minutes. Perfect for those last-minute holiday parties or when you need a homemade gift in a pinch.
- Simple Ingredients: Just five main ingredients, most of which you probably already have in your pantry. No weird extracts or hard-to-find specialty items.
- Perfect for the Holidays: These little snowball-looking treats are the star of any cookie exchange, dessert table, or cozy movie night. They just scream Christmas.
- Crowd-Pleaser: I have yet to meet a person who doesn’t love these. Kids devour them, adults sneak extras, and everyone asks for the recipe.
- Unbelievably Delicious: The combo of crunchy Oreo crumbs with smooth, tangy cream cheese, all wrapped in a sweet white chocolate shell? It’s pure comfort in a bite-sized package.
What makes this recipe different from all the others out there is the texture. I’ve figured out the exact way to crush the Oreos so you get a mix of fine crumbs and tiny little chunks of cookie. That gives the inside a bit of texture instead of being a pasty mess. Plus, I use a little trick with the cream cheese to make sure the mixture isn’t too sticky to handle. It’s a small thing, but it makes the whole process so much smoother. This is comfort food reimagined—simpler, faster, but with the same soul-soothing satisfaction that makes you close your eyes after the first bite.
What Ingredients You Will Need
This recipe uses simple, wholesome ingredients to deliver that classic cookies-and-cream flavor with a creamy, decadent finish. Most of these are pantry staples, especially if you’ve done any holiday baking before.
For the Oreo Balls
- Oreo cookies: One standard 14.3-ounce package. You’ll use the whole cookie, cream filling and all. I recommend the classic Oreo for the best flavor, but the Double Stuf version works too if that’s what you have on hand.
- Cream cheese: 8 ounces, softened to room temperature. This is crucial. Cold cream cheese will leave you with lumpy, difficult-to-mix dough. Let it sit out for at least 30 minutes. I prefer Philadelphia brand for its consistent texture.
- Vanilla extract: 1 teaspoon. It adds a lovely warmth that complements the chocolate and white chocolate. Use pure vanilla extract if you have it, but imitation works fine here.
- Pinch of salt: Just a small pinch. Don’t skip this! It balances the sweetness and makes the chocolate flavor pop.
For the Coating

- White chocolate melting wafers: 12 ounces. I’ve tested this with regular white chocolate chips, and honestly, melting wafers are easier. They melt smoother and don’t seize up as easily. Ghirardelli or Wilton brands are my go-to choices.
- Coconut oil or shortening: 1 teaspoon (optional). Adding a tiny bit of coconut oil to the white chocolate helps thin it out for a smoother, thinner coating. It’s not strictly necessary, but it makes the dipping process much easier.
For Decoration (Optional but Fun)
- Crushed candy canes: For a festive peppermint crunch.
- Christmas sprinkles: Red, green, and white sprinkles add that holiday cheer.
- Drizzled dark chocolate: A little contrast in color and flavor is always nice.
Equipment Needed
You don’t need a fancy kitchen to make these. In fact, you probably already own everything on this list. That’s the beauty of a no-bake recipe.
- Food processor or ziplock bag + rolling pin: For crushing the Oreos into fine crumbs. A food processor is faster and gives you a more consistent texture, but a bag and a rolling pin work perfectly fine. It’s a little arm workout, but worth it.
- Large mixing bowl: For combining the Oreo crumbs and cream cheese.
- Electric hand mixer or sturdy spatula: An electric mixer makes combining the cream cheese and crumbs effortless. A spatula works too, but you’ll need a bit more elbow grease.
- Baking sheet: Lined with parchment paper or a silicone baking mat to hold the formed balls while they chill.
- Small cookie scoop or tablespoon: For portioning out uniform balls. A #60 scoop (about 1 tablespoon) is perfect for this size.
- Microwave-safe bowl or double boiler: For melting the white chocolate. I use the microwave because it’s faster, but a double boiler gives you more control and is less likely to burn the chocolate.
- Fork or dipping tool: For dipping the chilled balls into the melted chocolate. A regular dinner fork works great. Some people use a toothpick, but I find a fork gives more control.
Preparation Method
Alright, let’s get to the fun part. Follow these steps, and you’ll be snacking on these little bites of heaven in no time. I’ve included all the little details I wish someone had told me the first time I made them.
- Crush the Oreos: Place the entire package of Oreos (cream filling and all) into your food processor. Pulse until you have fine crumbs. If you don’t have a food processor, put the cookies in a large ziplock bag, seal it, and go to town with a rolling pin. You want a mix of fine crumbs and some slightly larger pieces for texture. Don’t turn it into powder—a few little chunks are a good thing.
- Soften the cream cheese: Make sure your cream cheese is at room temperature. This is not a step to rush. Cold cream cheese will not blend smoothly, and you’ll end up with white lumps in your dark Oreo mixture. If you forgot to take it out of the fridge, you can microwave it in 5-second bursts until it’s soft but not melted.
- Mix the base: In a large mixing bowl, combine the Oreo crumbs, softened cream cheese, vanilla extract, and a pinch of salt. Use an electric hand mixer on low speed to combine everything. Start slow, or you’ll have a cloud of Oreo dust in your face. Mix until the dough comes together and looks like a uniform, dark, fudgy mass. It should hold together when you squeeze it.
- Chill the dough: This is a step I sometimes skip when I’m impatient, and I always regret it. Cover the bowl and pop it in the refrigerator for at least 30 minutes. Chilling the dough makes it much easier to roll into balls without it sticking to your hands. The cream cheese firms up, and the Oreo crumbs absorb some moisture.
- Roll the balls: Line a baking sheet with parchment paper. Using your cookie scoop or a tablespoon, scoop out portions of the chilled dough. Roll each portion between your palms to form a smooth ball. Place them on the prepared baking sheet. They should be about 1 inch in diameter. If the dough starts to get too sticky, just wash your hands and keep going, or pop the dough back in the fridge for a few minutes.
- Second chill: This is the most important step for a smooth coating. Place the baking sheet with the rolled Oreo balls back in the refrigerator for at least 1 hour. They need to be very firm before you dip them in the warm white chocolate. If they’re even slightly soft, they’ll fall apart in the chocolate.
- Melt the white chocolate: About 15 minutes before your balls are done chilling, prepare your white chocolate. Place the melting wafers in a microwave-safe bowl. Microwave in 30-second intervals, stirring well after each interval, until the chocolate is smooth and fully melted. Be careful not to overheat it. White chocolate burns easily and becomes grainy. If you’re using the coconut oil, stir it in after the chocolate is melted.
- Dip the balls: Remove the chilled Oreo balls from the fridge. Working with one ball at a time, drop it into the melted white chocolate. Use a fork to gently roll it around until it’s fully coated. Lift the ball out with the fork, tapping the fork gently on the edge of the bowl to let the excess chocolate drip off. Then, carefully slide the ball off the fork onto the parchment-lined baking sheet.
- Add decorations: While the white chocolate is still wet, sprinkle on your crushed candy canes, festive sprinkles, or a tiny drizzle of melted dark chocolate. If you wait too long, the coating will set, and the decorations won’t stick.
- Final set: Place the baking sheet back in the refrigerator for another 20-30 minutes to allow the white chocolate coating to fully harden. Once set, they’re ready to serve!
Cooking Tips & Techniques
I’ve made my fair share of mistakes with these little guys, so let me save you the trouble. Here are the things I wish I knew from the beginning.
The biggest mistake is not chilling the cream cheese mixture long enough. I know you’re excited, but trust me on this one. If the balls are even a little warm or soft when you drop them into the warm white chocolate, they will start to fall apart. You’ll end up with chocolate soup with Oreo chunks floating in it. It’s still delicious, but it’s not pretty. Give them a full hour in the fridge after rolling.
Another common issue is seizing the white chocolate. White chocolate is more sensitive than dark or milk chocolate. If even a single drop of water gets into the melting bowl, the chocolate will seize up and turn into a grainy, clumpy mess. Make sure your bowl and utensils are completely dry. Also, don’t melt it on too high a heat. Low and slow is the way to go.
My personal failure that taught me a lesson: The first time I made these, I used regular white chocolate chips instead of melting wafers. They melted fine, but the coating was thick and kind of lumpy. It didn’t look smooth and professional. Melting wafers are formulated to melt into a thin, even coating that hardens with a nice snap. It’s a small upgrade that makes a huge visual difference.
For multitasking, I like to crush the Oreos and mix the dough while my cream cheese is coming to room temperature. Then, while the rolled balls are in their first chill, I clean up my workspace and get the chocolate ready. This way, the process feels seamless, and you’re not standing around waiting.
For consistency, use a cookie scoop for the balls. It ensures they’re all the same size, which means they’ll chill and dip evenly. Nobody wants a giant ball next to a tiny one on the serving plate.
Variations & Adaptations
One of the best things about this recipe is how easy it is to change up. I’ve played around with it quite a bit, and here are some of my favorite variations.
Mint Chocolate Chip: This is a personal favorite. Swap the vanilla extract for 1/2 teaspoon of peppermint extract. Then, fold in 1/4 cup of mini chocolate chips into the Oreo mixture before rolling. The chocolate chips add a nice little crunch and extra chocolate flavor. Top with crushed candy canes for a double mint punch.
Peanut Butter Cup: For all you peanut butter lovers out there. Reduce the cream cheese to 6 ounces and add 1/4 cup of creamy peanut butter to the mixture. Mix it all together. The peanut butter adds a savory richness that pairs beautifully with the sweet white chocolate. You could also use dark chocolate for the coating for a classic peanut butter cup vibe.
Gluten-Free Adaptation: This is an easy one. Simply use gluten-free Oreos. They taste almost identical to the original and work perfectly in this recipe. The texture is a tiny bit different, but honestly, no one will notice once they’re coated in white chocolate.
Vegan Version: This takes a little more work, but it’s doable. Use vegan cream cheese (like Kite Hill or Tofutti) and vegan Oreos (which are actually vegan!). For the coating, use a vegan white chocolate, which is a bit harder to find but available at specialty grocery stores or online. The texture will be slightly softer, so make sure to chill them well.
Spiced Chai: This is a cozy winter twist I tried last year. Add 1 teaspoon of chai spice blend (cinnamon, ginger, cardamom, cloves) to the Oreo and cream cheese mixture. The warm spices are incredible with the chocolate and cream cheese. Top with a little dusting of cinnamon before the chocolate sets.
Serving & Storage Suggestions
These little treats are best served cold, straight from the fridge. The white chocolate coating has a satisfying snap, and the inside is creamy and firm. I like to arrange them on a festive platter or in a pretty tin for gifting.
Serving Temperature: They are perfect right out of the fridge. If you leave them out at room temperature for more than 30 minutes, the white chocolate will start to soften and might get a little tacky to the touch. For a party, I recommend keeping the platter on ice or bringing out a fresh batch from the fridge every hour.
Complementary Dishes: These Oreo balls are rich, so they pair beautifully with something light and tart. A cup of hot coffee or a glass of cold milk is the classic choice. For a holiday party, serve them alongside a plate of fresh fruit or a tangy cranberry dessert to cut through the sweetness.
Storage: Store the Oreo balls in an airtight container in the refrigerator. They will stay fresh for up to 2 weeks… if they last that long. I layer them between sheets of parchment paper to prevent them from sticking together.
Freezer Instructions: These freeze like a dream. Place the finished, fully set Oreo balls in a single layer on a baking sheet and freeze for 1 hour. Then, transfer them to a freezer-safe bag or container. They will keep for up to 3 months. To thaw, just move them to the refrigerator overnight. You can also eat them straight from the freezer—they’re like little frozen truffles.
Reheating: You don’t need to reheat these. They are meant to be eaten cold. If you want to soften them slightly, let them sit at room temperature for 5-10 minutes before serving.
Flavor Development: Honestly, these taste even better the next day. The flavors meld together overnight, and the texture becomes perfectly uniform. If you can, make them a day ahead of when you need them.
Nutritional Information & Benefits
Let’s be real—these are a treat, not a health food. But I believe in enjoying the holidays without guilt. Here’s a rough estimate of what you’re looking at per ball (makes about 30 balls).
- Calories: Approximately 150-180 calories per ball.
- Fat: 9-11 grams (mostly from the cream cheese and white chocolate).
- Carbohydrates: 18-20 grams.
- Protein: 2 grams.
- Sugar: 14-16 grams.
While they aren’t packed with nutrients, there are a few small benefits. The cream cheese provides a little bit of calcium and protein. The Oreos, well, they provide happiness, and that counts for something in my book. If you’re looking for a lower-sugar option, you could try using a sugar-free white chocolate, but I haven’t tested that myself, so I can’t vouch for the taste or texture.
Dietary Considerations: This recipe is not gluten-free unless you use gluten-free Oreos. It contains dairy from the cream cheese and white chocolate. It is not vegan unless you use the substitutions listed above. It contains soy (from the Oreos) and may contain traces of nuts depending on the brand of white chocolate you use.
Conclusion
These Cozy No-Bake Christmas Oreo Balls with White Chocolate are more than just a recipe. They are a little moment of peace in the middle of a hectic holiday season. They are the thing you can whip up when you need a win in the kitchen, or when you want to show someone you care without spending all day slaving over a hot stove.
I love this recipe because it’s forgiving. It lets you be creative. Maybe you want to roll them in crushed pretzels for a salty-sweet kick, or dip half in dark chocolate for a two-tone look. Go for it. Make them your own. That’s what cooking is all about.
I would absolutely love to hear how yours turn out. Did you try a fun variation? Did your kids help you roll the balls? Did you give them as gifts? Drop a comment below and share your story. And if you snap a picture, tag me on social media—I live for seeing your creations. Now go make some magic in your kitchen. You’ve got this.
Frequently Asked Questions
Can I use Double Stuf Oreos for this recipe?
Yes, you can! The texture will be slightly softer and sweeter because there is more cream filling. You may need to add a tiny bit more crushed Oreo to balance it out if the dough feels too sticky.
Why did my white chocolate coating crack?
This usually happens if the Oreo balls are too cold when you dip them. If the temperature difference between the frozen ball and the warm chocolate is too extreme, the chocolate can crack as it sets. Let the balls sit at room temperature for 5 minutes before dipping.
How do I get a smooth white chocolate coating?
The key is to use melting wafers instead of regular chocolate chips. Also, adding a teaspoon of coconut oil or shortening helps thin the chocolate out. Tap the fork gently on the side of the bowl to let excess chocolate drip off for a thinner, more even coat.
Can I make these ahead of time for a party?
Absolutely. In fact, I recommend it. They taste even better the next day. You can make them up to 2 weeks in advance and store them in an airtight container in the fridge.
My dough is too sticky to roll. What should I do?
Don’t panic. Just pop the bowl back in the refrigerator for another 15-20 minutes. The cream cheese needs to firm up more. Also, make sure your hands are clean and dry. Sometimes a little moisture on your hands can make the dough sticky.
Pin This Recipe!
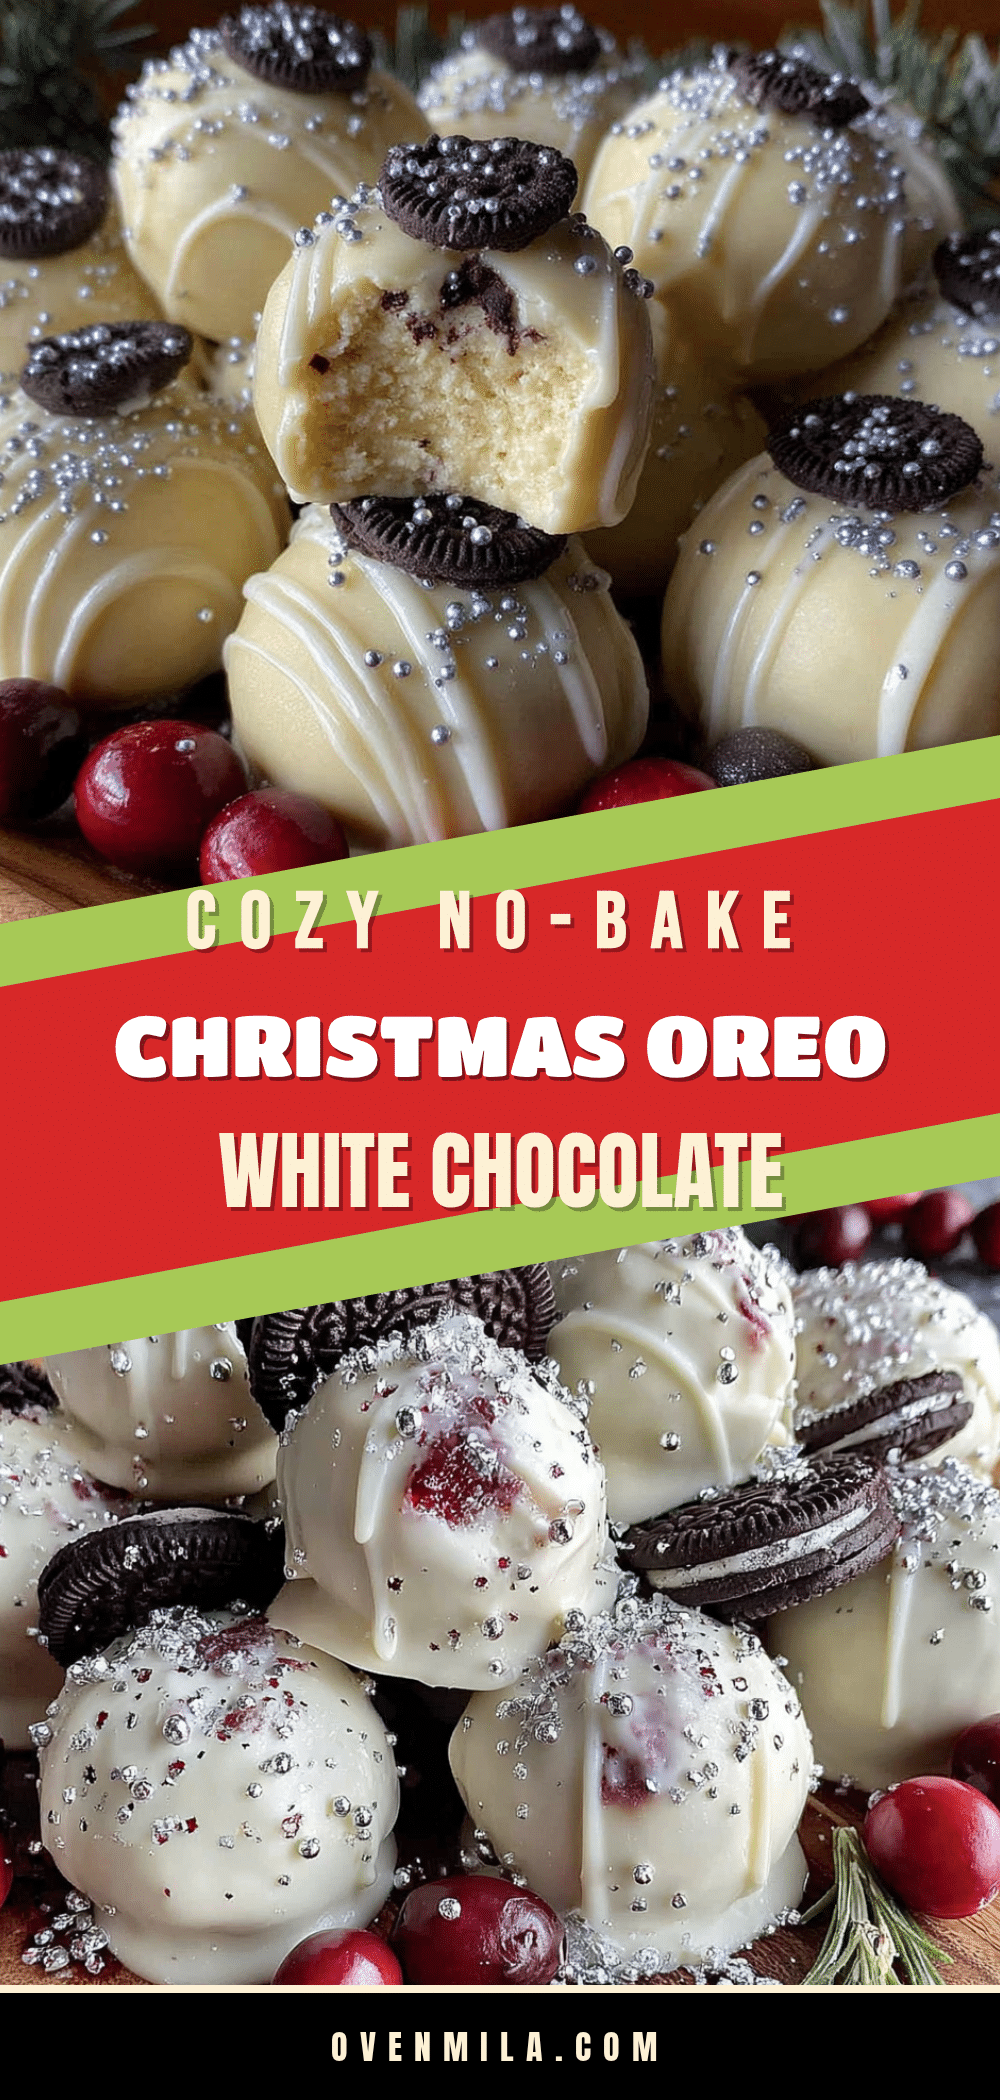
Cozy No-Bake Christmas Oreo Balls with White Chocolate

These no-bake Oreo balls are a simple, crowd-pleasing holiday treat made with crushed Oreos, cream cheese, and a smooth white chocolate coating. Perfect for last-minute parties or homemade gifts, they come together in under 20 minutes of hands-on work.
- Prep Time: 15 minutes
- Cook Time: 0 minutes
- Total Time: 2 hours 15 minutes (includes chilling)
- Yield: 30 servings 1x
- Category: Dessert
- Cuisine: American
Ingredients
- 1 (14.3-ounce) package Oreo cookies (classic or Double Stuf)
- 8 ounces cream cheese, softened to room temperature
- 1 teaspoon vanilla extract
- Pinch of salt
- 12 ounces white chocolate melting wafers (e.g., Ghirardelli or Wilton)
- 1 teaspoon coconut oil or shortening (optional, for smoother coating)
- Crushed candy canes (optional, for decoration)
- Christmas sprinkles (optional, for decoration)
- Drizzled dark chocolate (optional, for decoration)
Instructions
- Crush the Oreos: Place the entire package of Oreos (cream filling and all) into a food processor. Pulse until you have fine crumbs with some slightly larger pieces for texture. Alternatively, place cookies in a large ziplock bag and crush with a rolling pin.
- Soften the cream cheese: Ensure cream cheese is at room temperature. If forgotten, microwave in 5-second bursts until soft but not melted.
- Mix the base: In a large mixing bowl, combine Oreo crumbs, softened cream cheese, vanilla extract, and a pinch of salt. Use an electric hand mixer on low speed to combine until the dough is uniform and fudgy.
- Chill the dough: Cover the bowl and refrigerate for at least 30 minutes.
- Roll the balls: Line a baking sheet with parchment paper. Using a small cookie scoop or tablespoon, scoop portions of chilled dough and roll into smooth 1-inch balls. Place on prepared baking sheet.
- Second chill: Refrigerate the rolled balls for at least 1 hour until very firm.
- Melt the white chocolate: About 15 minutes before balls are done chilling, place melting wafers in a microwave-safe bowl. Microwave in 30-second intervals, stirring well after each, until smooth. If using, stir in coconut oil or shortening.
- Dip the balls: Working with one ball at a time, drop into melted white chocolate. Use a fork to roll until fully coated. Lift out, tap fork on bowl edge to remove excess chocolate, and slide onto parchment-lined baking sheet.
- Add decorations: While white chocolate is still wet, sprinkle with crushed candy canes, sprinkles, or drizzle with dark chocolate.
- Final set: Refrigerate for 20-30 minutes until white chocolate is fully hardened. Serve cold.
Notes
Chill the rolled balls for at least 1 hour before dipping to prevent them from falling apart in the warm chocolate. Use white chocolate melting wafers for a smooth, thin coating. If the dough is too sticky, refrigerate it longer. These taste even better the next day.
Nutrition
- Serving Size: 1 ball
- Calories: 165
- Sugar: 15
- Sodium: 95
- Fat: 10
- Saturated Fat: 6
- Carbohydrates: 19
- Protein: 2
Keywords: no-bake Christmas Oreo balls, white chocolate Oreo truffles, easy holiday dessert, Oreo cookie balls, no-bake truffles


