It was 11:47 PM on a random Tuesday, and I had a very specific craving for something crispy, cheesy, and garlicky. I didn’t have the energy for a full breading station with eggs and flour, but I had a couple of chicken breasts thawing in the fridge and a block of Parmesan that was getting lonely. Honestly, I almost just ordered pizza. But then I remembered a trick I’d seen in a restaurant kitchen years ago — using a simple mayo and cheese mixture as a crust. It sounded weird, but at that hour, weird was exactly what I needed.
I’m not supposed to play favorites with weeknight dinners, but this one broke the system. The first time I made it, I stood at the counter eating a piece right out of the pan, still too hot to handle properly, and I knew I’d stumbled onto something dangerous. It was fast, it was simple, and it tasted like I’d spent way more effort than I actually did. Maybe you’ve been there — standing in your kitchen at a ridiculous hour, hungry and tired, just wanting something good without the production.
The magic of this quick 15-minute garlic Parmesan chicken breast is that it doesn’t ask anything from you that you don’t have. No pounding the chicken thin, no standing over a hot skillet for twenty minutes, no complicated sauce. Just a handful of ingredients, one skillet, and about the time it takes to listen to three songs. I’ve made this on nights when I had zero energy and even less patience, and it’s never let me down. That late-night experiment turned into my most-requested dinner, and I think you’re about to see why.
Why You’ll Love This Recipe
Let me tell you why this one is different. I’ve tested this recipe at least a dozen times, tweaking the ratios and the timing until it was bulletproof. It’s the kind of dish that makes you look like a hero without the stress.
- Blazing Fast: From fridge to plate in 15 minutes flat. No marinating, no resting, no waiting around. This is weeknight dinner at its finest.
- Pantry-Friendly Ingredients: You probably have everything already. Mayonnaise, Parmesan cheese, garlic powder, salt, pepper. That’s it. No special trips to the store required.
- One-Skillet Cleanup: One pan, minimal dishes, maximum flavor. The kind of meal that doesn’t leave you with a mountain of dirty cookware at the end of a long day.
- Crowd-Pleasing Results: My picky nephew devours this. My neighbor who “doesn’t really like chicken” asked for the recipe. It’s got that universal appeal thing going on.
- Restaurant-Quality Crust: The mayo and Parmesan create this incredible golden, crispy coating that locks in all the moisture. The chicken stays juicy while the outside gets perfectly crunchy.
What sets this apart from other quick chicken recipes is the technique. Instead of a dry breading that can fall off or a complicated sauce that takes forever, this uses a simple paste that adheres perfectly and creates its own crust. It’s not just another version of garlic chicken — it’s the version that actually works when you’re exhausted and hungry.
This is the kind of recipe that makes you close your eyes after the first bite. It’s comfort food that comes together in the time it takes to preheat the oven for anything else. Perfect for those nights when you need dinner on the table fast but you still want something that feels special.
What Ingredients You Will Need
This recipe uses simple, everyday ingredients to deliver big flavor without any fuss. Everything is designed to work together quickly, so there’s no complicated prep or hard-to-find items.
- Boneless, skinless chicken breasts (2 medium, about 6-8 ounces each) — Look for breasts that are relatively even in thickness so they cook uniformly. If they’re really thick, you can slice them in half horizontally, but honestly, I usually just buy thin-cut breasts to save time.
- Mayonnaise (3 tablespoons) — This is the secret weapon. I know it sounds weird, but the mayo creates the most incredible crust and keeps the chicken incredibly moist. Use full-fat for best results. I personally prefer Hellmann’s or Duke’s for their tangy flavor.
- Freshly grated Parmesan cheese (1/3 cup, packed) — Please, please don’t use the green can stuff. It won’t melt properly and the texture will be off. Get a block of real Parmesan and grate it yourself. It takes two minutes and makes a massive difference.
- Garlic powder (1 teaspoon) — Not garlic salt. We’re controlling the salt separately, so stick with pure garlic powder for the best flavor.
- Salt (1/2 teaspoon) — I use fine sea salt, but kosher salt works too. If you’re using kosher, you might want to add a pinch more.
- Black pepper (1/4 teaspoon, freshly ground) — Freshly ground makes a difference here. It adds little pops of warmth throughout the crust.
- Olive oil (1 tablespoon) — For cooking the chicken. You can use avocado oil or even butter if that’s what you have.
- Fresh parsley (optional, for garnish) — Adds a pop of color and freshness. Totally optional, but it makes the dish look pretty.
Ingredient Tips: The quality of your Parmesan matters more than you think. I’ve tried this with pre-shredded cheese from the bag, and it just doesn’t melt the same way. The anti-caking agents in pre-shredded cheese prevent it from forming that beautiful golden crust. Take the extra thirty seconds to grate your own — your taste buds will thank you.
For the mayonnaise, don’t use the low-fat or miracle whip versions. The fat content is what creates the crispy texture, and the sugar in miracle whip will throw off the savory balance. Trust me on this one.
Equipment Needed
You don’t need a fancy kitchen for this one. Here’s what you’ll need:
- A large skillet (10 or 12-inch) — Cast iron is my favorite because it holds heat so well, but a good non-stick or stainless steel pan works perfectly. Just make sure it’s large enough to fit both chicken breasts without crowding.
- A small bowl — For mixing the mayo and Parmesan together. Nothing fancy, just something to stir in.
- Tongs — For flipping the chicken. A spatula works too, but tongs give you better control.
- A chef’s knife and cutting board — For mincing the parsley if you’re using it, and for slicing the chicken before serving.
- A meat thermometer — This is optional but highly recommended if you’re new to cooking chicken. It takes the guesswork out and ensures perfectly cooked chicken every time.
Budget-Friendly Tip: If you don’t have a meat thermometer, you can check doneness by cutting into the thickest part of the chicken. The juices should run clear, and there should be no pink remaining. But honestly, a good instant-read thermometer costs about the same as a fast-food meal and will save you from dry chicken forever.
Preparation Method
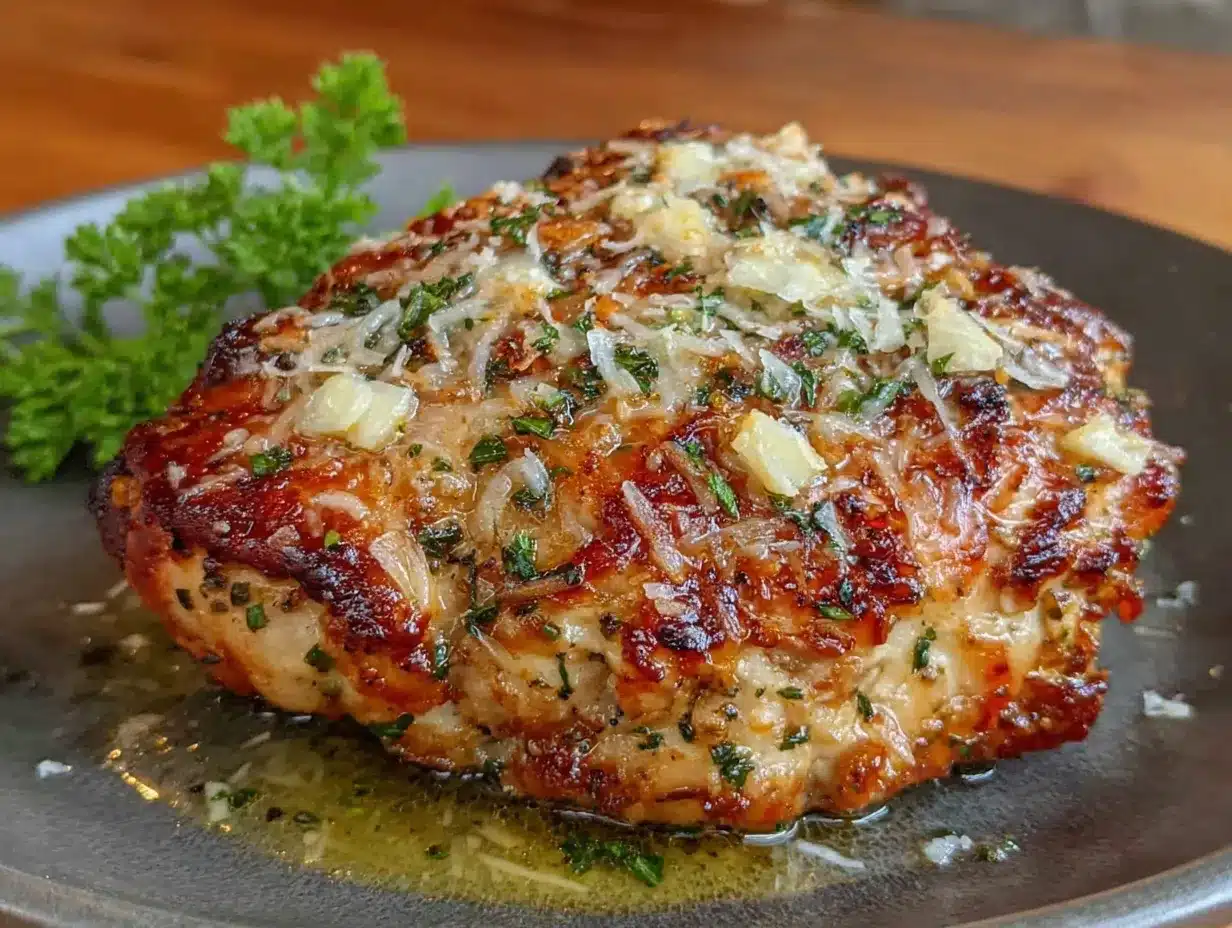
Alright, let’s get cooking. This comes together fast, so have everything ready before you start. Trust me, you don’t want to be grating cheese while your pan is smoking.
- Prep the chicken (2 minutes): Pat your chicken breasts dry with paper towels. This is important — moisture is the enemy of a good crust. If your chicken is uneven in thickness, place it between two pieces of plastic wrap and gently pound it to an even thickness with a rolling pin or heavy pan. But honestly, if you bought thin-cut breasts, you can skip this step entirely.
- Make the coating (1 minute): In a small bowl, combine the mayonnaise, grated Parmesan cheese, garlic powder, salt, and pepper. Stir until it forms a thick, paste-like mixture. It should be spreadable but not runny. If it seems too thin, add a little more Parmesan. If it’s too thick, a tiny splash of olive oil will loosen it up.
- Heat the pan (1 minute): Place your skillet over medium-high heat and add the olive oil. Let it heat up until the oil shimmers and moves easily around the pan. You want it hot but not smoking — if it starts smoking, turn the heat down a notch.
- Coat the chicken (1 minute): Spread the mayo-Parmesan mixture evenly over the top of each chicken breast. Don’t be shy — really press it on there. You want a nice, even layer covering the entire top surface. Don’t coat the bottom of the chicken; the crust will form on the top as it cooks.
- Sear the chicken (5-6 minutes): Place the chicken breasts coated-side down in the hot skillet. Yes, coated-side down. I know it seems counterintuitive, but this is the key to getting that beautiful golden crust. Let them cook undisturbed for 3 minutes. I mean it — don’t touch them, don’t peek, don’t wiggle them. Let that crust form.
- Flip and finish (4-5 minutes): Using your tongs, carefully flip the chicken over. The cooked side should be beautifully golden and crispy. Cook for another 3-4 minutes on the second side, until the chicken is cooked through. The internal temperature should reach 165°F (74°C) at the thickest part.
- Rest and serve (1 minute): Remove the chicken from the pan and let it rest on a cutting board for just a minute. This lets the juices redistribute so they don’t all run out when you cut into it. Slice against the grain, garnish with fresh parsley if you’re using it, and serve immediately.
Sensory Cues: When you flip the chicken, you should hear a satisfying sizzle. The cooked side should be a deep golden brown with little darker spots from the Parmesan. It should smell incredibly savory and garlicky. When you cut into it, the juices should be clear, and the meat should be white all the way through with no pink spots.
My Personal Tip: If your crust isn’t as golden as you’d like after flipping, you can carefully flip the chicken back over for the last minute of cooking. But honestly, I’ve found that if you let it cook undisturbed for the full 3 minutes on the first side, the crust is always perfect.
Cooking Tips & Techniques
I’ve made this recipe more times than I can count, and I’ve definitely learned some things the hard way. Here’s what I wish someone had told me.
The Mayo Magic: I know putting mayonnaise on chicken sounds weird. I had the same reaction the first time I heard about it. But here’s the thing — mayonnaise is just oil and eggs, which is basically what you’d use for a traditional breading anyway. The high fat content creates an incredible crust while keeping the chicken impossibly moist. It’s not weird; it’s science.
Don’t Overcrowd the Pan: If you’re cooking for more than two people, use two skillets or cook in batches. When the pan is too crowded, the temperature drops and the chicken steams instead of searing. You want that direct contact with the hot pan for the perfect crust.
The Biggest Mistake: Moving the chicken too soon. I cannot stress this enough. When you first put the chicken in the pan, it will stick. That’s normal. Let it cook for the full 3 minutes without touching it, and it will release naturally when the crust has formed. If you try to flip it too early, the coating will stick to the pan and you’ll lose all that beautiful crust.
Timing Strategy: While the chicken is cooking, use that time to prep any sides you’re serving. Chop some veggies, make a quick salad, or steam some rice. The chicken only takes 8-10 minutes total, so you want everything else ready to go.
Consistency Tips: For the most even cooking, let your chicken sit at room temperature for about 10 minutes before cooking. Cold chicken straight from the fridge will cook unevenly and take longer. Also, pat it really dry — excess moisture will steam the coating instead of crisping it.
Variations & Adaptations
One of the best things about this recipe is how easily it adapts to different tastes and dietary needs. Here are some variations I’ve tried and loved.
Spicy Cajun Version: Add 1/2 teaspoon of Cajun seasoning and a pinch of cayenne pepper to the mayo mixture. It gives the chicken a wonderful kick without overwhelming the Parmesan flavor. I made this version for a Super Bowl party and it disappeared in minutes.
Herb and Lemon: Add 1 teaspoon of dried Italian herbs (or 1 tablespoon of fresh chopped herbs like thyme and rosemary) and the zest of half a lemon to the coating mixture. The lemon brightens everything up and makes it feel lighter. This is my go-to spring version.
Gluten-Free Adaptation: This recipe is naturally gluten-free since we’re not using any flour or breadcrumbs. Just make sure your garlic powder and any additional seasonings are certified gluten-free if that’s a concern. It’s one of the reasons I love this recipe for guests with dietary restrictions.
Dairy-Free Option: Use a high-quality dairy-free Parmesan alternative or nutritional yeast in place of the regular Parmesan. The texture will be slightly different, but the flavor is still fantastic. I’ve also used vegan mayo with good results.
Extra Cheesy: For the cheese lovers out there, add 2 tablespoons of shredded mozzarella or provolone to the coating mixture. It creates an even more decadent, almost crust-like exterior. Just be careful not to add too much or it might not crisp up properly.
Serving & Storage Suggestions
This chicken is incredibly versatile when it comes to serving. Here’s how I like to enjoy it.
Serving Temperature: Serve immediately while the crust is still crispy. This is one of those dishes that’s best fresh from the pan. If you let it sit too long, the crust can soften from the steam.
Perfect Pairings: I love serving this with a simple side salad dressed with lemon vinaigrette and some crusty bread to soak up any juices. It’s also fantastic with roasted vegetables, garlic butter noodles, or a light risotto. For a low-carb option, serve it over a bed of sautéed spinach or zucchini noodles.
Storage Instructions: Leftover chicken can be stored in an airtight container in the refrigerator for up to 3 days. The crust will soften, but the flavor will still be amazing. I actually love slicing this cold over salads for lunch the next day.
Reheating Tips: To revive the crust, reheat in a skillet over medium heat for 2-3 minutes per side, or pop it in an air fryer at 375°F for 3-4 minutes. Avoid the microwave — it will make the crust soggy and the chicken rubbery.
Freezer Notes: You can freeze the cooked chicken for up to 2 months. Wrap each piece individually in plastic wrap and then place in a freezer bag. Thaw overnight in the refrigerator and reheat using the skillet method above.
Nutritional Information & Benefits
This recipe fits beautifully into a balanced diet. Here’s a rough breakdown per serving (one chicken breast):
- Calories: Approximately 380
- Protein: 42 grams
- Fat: 22 grams
- Carbohydrates: 2 grams
- Fiber: 0 grams
- Sugar: 1 gram
Health Benefits: Chicken breast is an excellent source of lean protein, which is essential for muscle repair and keeping you full and satisfied. Parmesan cheese adds calcium and protein, while the garlic powder provides a small amount of antioxidants. This is a naturally low-carb and keto-friendly meal that doesn’t sacrifice flavor.
Dietary Considerations: This recipe is naturally gluten-free and low-carb. It can be made dairy-free with a simple substitution. It’s not suitable for a vegan diet, obviously, but it works for most other eating plans. The fat content is moderate, coming mostly from the mayonnaise and cheese, which are both whole food ingredients.
My Personal Take: I love that this recipe feels indulgent but isn’t actually that heavy. It’s the kind of meal that satisfies a craving for something crispy and savory without leaving you feeling sluggish. Perfect for those nights when you want comfort food but don’t want to undo all your hard work.
Conclusion
This quick 15-minute garlic Parmesan chicken breast has become my weeknight dinner hero, and I have a feeling it’s about to become yours too. It’s proof that you don’t need complicated techniques or a fridge full of fancy ingredients to make something truly delicious. Sometimes the best recipes come from those late-night moments when you’re just trying to make something work with what you have.
I love this recipe because it respects your time and your energy. It doesn’t ask you to spend an hour in the kitchen after a long day. It doesn’t require a trip to three different stores. It just asks for a few simple ingredients and ten minutes of your attention, and in return, it gives you a dinner that tastes like you fussed. That’s a pretty good deal if you ask me.
I’d love to hear how this turns out for you. Did you try one of the variations? Did you come up with your own twist? Drop a comment below and let me know. And if you’re looking for another quick weeknight winner, you might also enjoy this creamy garlic herb chicken that uses a similar one-pan approach. Happy cooking!
Frequently Asked Questions
Can I use chicken thighs instead of breasts?
Absolutely! Boneless, skinless chicken thighs work beautifully with this recipe. They’ll need about 2-3 extra minutes of cooking time since they have a higher fat content, but they come out incredibly juicy and flavorful. Just make sure they reach 165°F internally.
Why is my coating falling off in the pan?
This usually happens for one of two reasons: either the pan wasn’t hot enough when you added the chicken, or you tried to flip it too early. Make sure your oil is shimmering before you add the chicken, and let it cook undisturbed for a full 3 minutes before attempting to flip. The coating needs that time to set and form a crust.
Can I bake this instead of pan-frying?
Yes, you can! Place the coated chicken on a parchment-lined baking sheet and bake at 400°F for 15-18 minutes, or until the internal temperature reaches 165°F. The crust won’t be quite as crispy as the pan-fried version, but it’s still delicious and requires even less hands-on time.
Is this recipe keto-friendly?
Yes, this recipe is naturally keto-friendly with only about 2 grams of carbs per serving. The high fat content from the mayo and cheese makes it perfect for a ketogenic diet. Just be mindful of what you serve it with — stick to low-carb sides like roasted vegetables or a green salad.
Can I make this ahead of time for meal prep?
You can cook the chicken ahead of time and store it in the refrigerator for up to 3 days. However, the crust will soften over time. For best results, reheat it in a skillet or air fryer to crisp it back up. I often make a double batch on Sunday and use the leftovers for salads and wraps throughout the week.
Pin This Recipe!
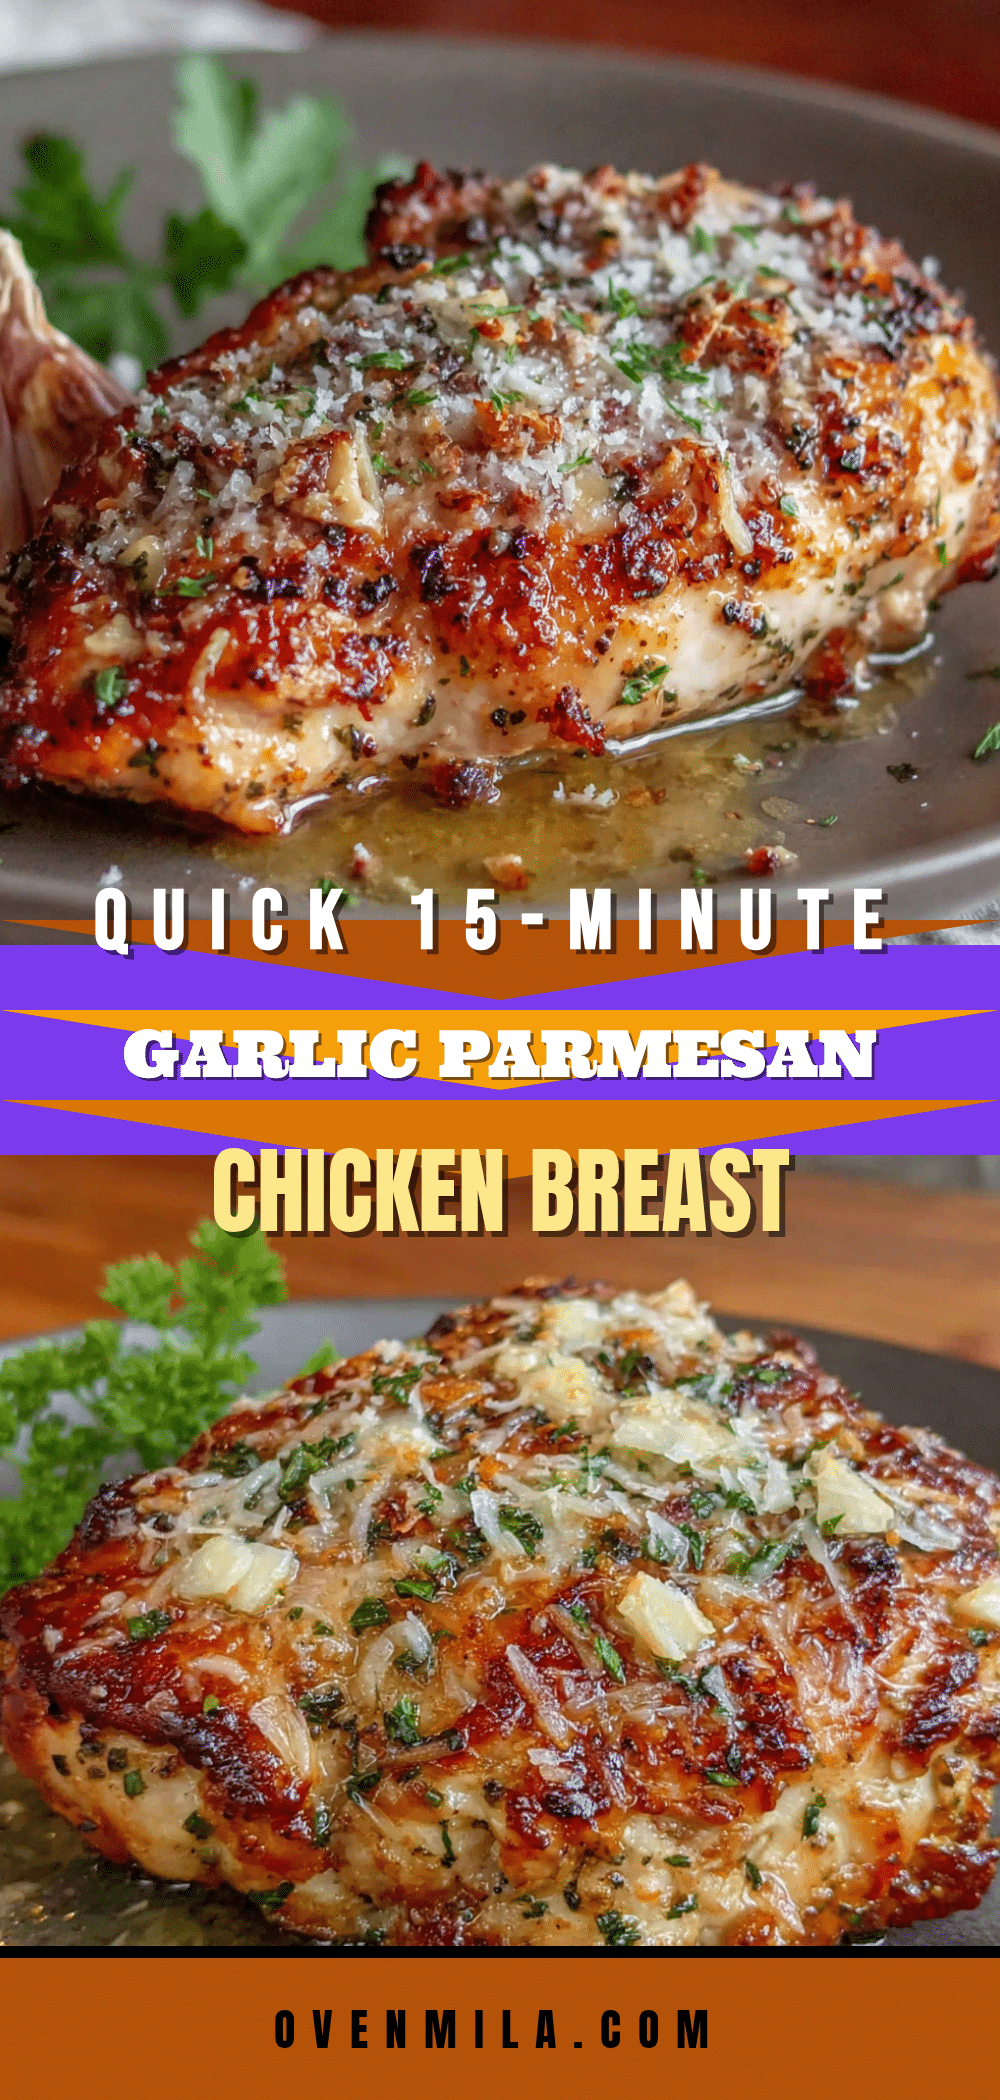
Quick 15-Minute Garlic Parmesan Chicken Breast
A quick and easy weeknight dinner featuring juicy chicken breasts with a crispy, golden Parmesan and mayo crust, ready in just 15 minutes.
- Prep Time: 5 minutes
- Cook Time: 10 minutes
- Total Time: 15 minutes
- Yield: 2 servings 1x
- Category: Main Course
- Cuisine: American
Ingredients
- 2 boneless, skinless chicken breasts (6–8 ounces each)
- 3 tablespoons mayonnaise
- 1/3 cup freshly grated Parmesan cheese, packed
- 1 teaspoon garlic powder
- 1/2 teaspoon salt
- 1/4 teaspoon black pepper, freshly ground
- 1 tablespoon olive oil
- Fresh parsley for garnish (optional)
Instructions
- Pat chicken breasts dry with paper towels. If uneven in thickness, pound to even thickness.
- In a small bowl, combine mayonnaise, Parmesan, garlic powder, salt, and pepper. Stir into a thick paste.
- Heat olive oil in a large skillet over medium-high heat until shimmering.
- Spread the mayo-Parmesan mixture evenly over the top of each chicken breast.
- Place chicken coated-side down in the hot skillet. Cook undisturbed for 3 minutes.
- Flip chicken and cook for another 3-4 minutes, until internal temperature reaches 165°F (74°C).
- Remove from pan, let rest for 1 minute, then slice against the grain. Garnish with parsley if desired.
Notes
Use full-fat mayonnaise for best crust. Freshly grate Parmesan for proper melting. Do not overcrowd the pan. Let chicken rest before slicing.
Nutrition
- Serving Size: 1 chicken breast
- Calories: 380
- Sugar: 1
- Sodium: 780
- Fat: 22
- Saturated Fat: 6
- Carbohydrates: 2
- Protein: 42
Keywords: garlic parmesan chicken, quick chicken recipe, 15 minute dinner, one skillet chicken, crispy chicken breast


