My roommate asked why I couldn’t just melt the butter instead of waiting for it to soften. It was a Tuesday night in late October, and the first real chill of autumn had settled into our drafty apartment. I started to explain why that wouldn’t work—something about creaming and air incorporation and the science of cookies. Then I stopped. Honestly, I had no good reason. I was just repeating what I’d always been told. So I melted it. And you know what? Those were the best chocolate chip cookies I’d ever made. The edges were perfectly chewy, the centers were soft, and the whole kitchen smelled like a bakery in about twenty minutes flat. No mixer. No softened butter. No fuss. That night, I learned that sometimes the best recipes come from breaking your own rules. Maybe you’ve been there—staring at a block of cold butter at 9 PM, wanting cookies but not wanting to wait. Let me tell you, this cozy small-batch chocolate chip cookie recipe was born from that exact moment of stubborn hunger and a willingness to be wrong.
Why You’ll Love This Recipe
These are not just any chocolate chip cookies. These are the cookies you make when you need comfort, fast. They are the cookies that prove you don’t need a stand mixer, a perfectly preheated oven, or a full stick of room-temperature butter to get that bakery-quality result. Here is why this recipe has become my go-to for cozy nights in:
- No Mixer Required: Everything comes together in one bowl with a spatula. Less cleanup, less stress, more cookies.
- Small Batch Perfection: This recipe makes exactly six generous cookies. No more, no less. Perfect for a quiet evening or a small craving.
- Ready in Under 30 Minutes: From the moment you decide you want cookies to the moment you take the first bite, you are looking at about 25 minutes. That is faster than delivery.
- Pantry Staples Only: You probably have everything you need right now. Butter, sugar, flour, eggs, chocolate chips. No specialty ingredients required.
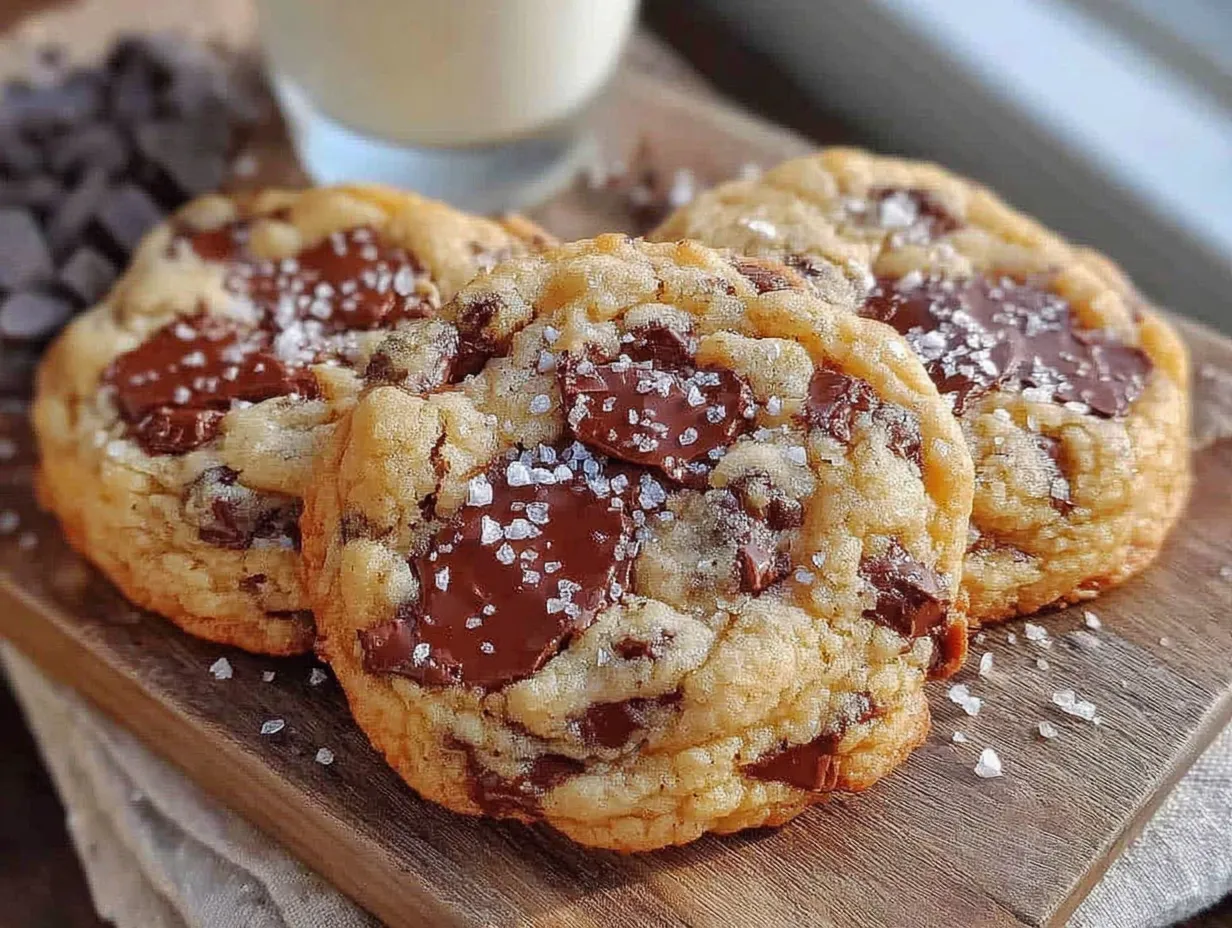
- That Perfect Texture: Thanks to the melted butter and a brief chill, these cookies have crispy edges, soft centers, and that irresistible slightly-gooey middle that makes you close your eyes after the first bite.
I have tested this recipe at least a dozen times, tweaking the flour ratio, the chill time, and the chocolate-to-dough ratio until it was just right. This is not just another cookie recipe—it is the one I reach for when I need something warm and familiar, fast. It is comfort food reimagined for real life, when you don’t have the energy for a production but still want something that feels special.
What Ingredients You Will Need
This recipe uses simple, everyday ingredients to create something truly special. The magic is in the method, not the grocery list. Here is what you will need:
- Unsalted butter, 4 tablespoons (57g), melted and slightly cooled. Melting the butter is the key here—it adds richness and creates that chewy texture without needing a mixer.
- Granulated sugar, ¼ cup (50g). Adds sweetness and helps create those crispy edges.
- Light brown sugar, ¼ cup packed (50g). This is where the moisture and that deep, caramel-like flavor come from. Make sure it is packed firmly.
- Large egg yolk, 1 (about 18g), at room temperature. Using just the yolk gives you a richer, chewier cookie without making the dough too wet. Save the white for scrambled eggs tomorrow.
- Vanilla extract, ½ teaspoon. Pure vanilla makes a difference here—skip the imitation stuff if you can.
- All-purpose flour, ¾ cup (96g). Spoon and level it—do not scoop directly from the bag or you will end up with dry cookies.
- Baking soda, ¼ teaspoon. Helps the cookies spread just enough.
- Salt, ¼ teaspoon. I prefer fine sea salt for the dough and a sprinkle of flaky salt on top before baking.
- Semi-sweet chocolate chips, ½ cup (85g). I love Ghirardelli for their consistent quality, but any good brand works. You can also chop up a chocolate bar for those melty pools of chocolate.
A quick note on substitutions: if you only have salted butter, reduce the added salt to just a pinch. For a dairy-free version, use a good-quality vegan butter stick—just make sure to melt it the same way. And if you are out of brown sugar, you can substitute ¼ cup white sugar mixed with 1 teaspoon of molasses, though the texture will be slightly different.
Equipment Needed
One of the best things about this recipe is how little equipment it requires. You do not need a mixer, a food processor, or any fancy gadgets. Here is what you will actually use:
- Mixing bowl, medium-sized. A glass or ceramic bowl works great.
- Spatula or wooden spoon, for mixing the dough.
- Measuring cups and spoons, for accuracy. I cannot stress this enough—baking is chemistry, and measuring matters.
- Baking sheet, a standard half-sheet pan works perfectly.
- Parchment paper or silicone baking mat, for easy cleanup and even baking.
- Cooling rack, optional but helpful for getting those perfectly crisp edges.
- Small cookie scoop or tablespoon, for evenly sized cookies.
If you do not have a cookie scoop, two spoons work just fine. And if you do not have parchment paper, you can lightly grease the baking sheet—just watch the bottoms so they do not burn. I have made these in a tiny apartment kitchen with a single bowl and a fork, and they came out beautifully. Trust me, you do not need much.
Preparation Method
- Melt the butter. Place the 4 tablespoons of butter in a microwave-safe bowl and heat in 15-second bursts until just melted. You want it liquid but not hot—let it sit for a minute or two. If it is too hot, it will cook the egg yolk later.
- Combine the sugars and butter. In your mixing bowl, add the melted butter, ¼ cup granulated sugar, and ¼ cup packed brown sugar. Stir with your spatula until smooth and well combined. It will look a little grainy—that is normal.
- Add the egg yolk and vanilla. Drop in the egg yolk and ½ teaspoon vanilla extract. Stir vigorously for about 30 seconds until the mixture looks glossy and slightly thickened. This is where the magic starts to happen—the sugar dissolves into the butter and egg, creating that shiny, cohesive base.
- Mix the dry ingredients. In a small separate bowl, whisk together ¾ cup flour, ¼ teaspoon baking soda, and ¼ teaspoon salt. If you are feeling lazy, you can add them directly to the wet mixture—just whisk them first to break up any clumps.
- Combine wet and dry. Add the flour mixture to the butter mixture. Fold gently with your spatula until just a few streaks of flour remain. Do not overmix—overmixing develops gluten and makes cookies tough. You want to stop when the dough is shaggy and barely holding together.
- Fold in the chocolate chips. Add ½ cup chocolate chips and fold them in with a few gentle strokes. The dough will be soft and a little sticky—that is perfect.
- Chill the dough (this is crucial!). Cover the bowl with plastic wrap or a plate and pop it in the fridge for exactly 15 minutes. Set a timer. This step allows the melted butter to firm up slightly, which prevents the cookies from spreading into flat, greasy puddles. Do not skip it.
- Preheat the oven. While the dough chills, preheat your oven to 350°F (175°C). Line your baking sheet with parchment paper.
- Scoop and shape. After 15 minutes, remove the dough from the fridge. Use a cookie scoop or a tablespoon to portion the dough into 6 equal balls, about 2 tablespoons each. Place them on the prepared baking sheet, spacing them about 3 inches apart. For those bakery-style cookies, gently press a few extra chocolate chips onto the tops of each dough ball.
- Bake. Bake for 10-12 minutes, rotating the pan halfway through. The cookies are done when the edges are golden brown and the centers look puffy and slightly underdone. They will continue to set as they cool.
- Cool and enjoy. Let the cookies cool on the baking sheet for 5 minutes—this is important for them to set properly. Then transfer to a cooling rack, or just eat them warm off the sheet. No judgment here.
Cooking Tips & Techniques
I have made this recipe probably twenty times now, and I have learned a few things the hard way. Here are my best tips:
Do not over-chill the dough. Fifteen minutes is the sweet spot. If you chill it for an hour, the melted butter solidifies too much and the cookies will not spread properly. If you skip the chill entirely, they will spread into thin, crispy discs. Set that timer.
Use a light hand when mixing. The first time I made these, I was so excited that I mixed the dough like I was kneading bread. The cookies came out tough and dense. Fold gently, stop when the flour disappears, and trust the process.
Rotate your baking sheet. Ovens have hot spots. I learned this when the back row of my cookies came out dark while the front row was pale. Rotating halfway through gives you even baking across the board.
Let them rest. I know it is tempting to grab a cookie the second it comes out of the oven. But those five minutes on the baking sheet are not optional—they are when the cookies finish setting up. If you move them too soon, they will fall apart. Trust me, I have a crumbly cookie disaster in my past to prove it.
For extra chewy cookies, use bread flour instead of all-purpose. The higher protein content gives more structure and chew. I tried this on a whim and it worked beautifully.
Variations & Adaptations
One of the best things about this small-batch recipe is how easy it is to customize. Here are a few variations I have tried and loved:
Double Chocolate Chip Cookies: Replace 2 tablespoons of the flour with 2 tablespoons of unsweetened cocoa powder. Use white chocolate chips instead of semi-sweet for a beautiful contrast. These are dangerously good.
Sea Salt and Dark Chocolate: Use dark chocolate chunks (70% cacao or higher) and sprinkle each cookie with a pinch of flaky sea salt right before baking. The salt cuts through the richness and makes the chocolate taste even deeper.
Gluten-Free Adaptation: Swap the all-purpose flour for a 1:1 gluten-free baking flour blend that contains xanthan gum. I have tested this with Bob’s Red Mill 1:1 and it works perfectly—just make sure to spoon and level the flour carefully.
Add-In Options: Fold in ¼ cup of chopped toasted walnuts or pecans along with the chocolate chips. Or swap half the chocolate chips for butterscotch chips for a different flavor profile. I once added a handful of crushed pretzels for a salty-sweet crunch, and it was incredible.
Vegan Version: Use a flax egg (1 tablespoon ground flaxseed mixed with 3 tablespoons water, let sit for 5 minutes) and vegan butter. The texture will be slightly different—a bit more cakey—but still delicious.
Serving & Storage Suggestions
These cookies are best served warm, straight from the oven, with a tall glass of cold milk. But they are also fantastic at room temperature, especially the next day when the flavors have had time to meld.
For serving, I like to arrange them on a small plate with a few extra chocolate chips scattered around for visual appeal. They are perfect for a cozy night in, a small gathering, or even as a thoughtful homemade gift for a neighbor or friend.
Storage: Store any leftover cookies in an airtight container at room temperature for up to 3 days. To keep them soft, add a slice of bread to the container—the cookies will absorb the moisture and stay chewy. Change the bread every day if you are storing them longer.
Freezing: You can freeze the baked cookies for up to 3 months. Wrap each cookie individually in plastic wrap, then place them in a freezer-safe bag. To reheat, pop a frozen cookie in a 300°F oven for 5-7 minutes, or microwave for 15 seconds for that fresh-from-the-oven feel.
Freezing the dough: This is my favorite trick. Scoop the dough into balls, place them on a parchment-lined baking sheet, and freeze until solid. Transfer the frozen dough balls to a freezer bag. When a cookie craving hits, bake them straight from frozen—just add 2-3 minutes to the baking time. Instant cozy, anytime.
Nutritional Information & Benefits
Per cookie (based on 6 cookies per batch): Approximately 290 calories, 16g fat, 35g carbohydrates, 4g protein, 1g fiber, 20g sugar. These are estimates and will vary based on your specific ingredients.
While these are definitely a treat, they do offer a few small benefits. The dark chocolate contains antioxidants and can help satisfy a sweet craving with a smaller portion than a store-bought cookie. Using butter instead of margarine means no artificial trans fats. And because this is a small batch, you are less likely to overindulge—six cookies is a manageable amount for a household of one or two.
For those watching their sugar intake, you can reduce the granulated sugar to 3 tablespoons and the brown sugar to 3 tablespoons. The cookies will be slightly less sweet but still delicious. And if you are gluten-sensitive, the gluten-free adaptation above works beautifully.
Conclusion
These cozy small-batch chocolate chip cookies have become my go-to for so many reasons. They are fast, they are forgiving, and they deliver that warm, nostalgic feeling of homemade cookies without the production. Whether you are baking for one on a quiet Tuesday or whipping up a quick treat for a friend, this recipe delivers every time.
I love that this recipe taught me to question my own assumptions in the kitchen. Melting the butter was a happy accident that turned into a staple technique. So go ahead—make these cookies. Customize them. Mess them up and try again. And when you do, I would love to hear about it. Drop a comment below and tell me how they turned out, or share your own little kitchen rebellion. Happy baking!
Frequently Asked Questions
Can I use salted butter instead of unsalted?
Absolutely. Just reduce the added salt in the recipe to just a tiny pinch, or omit it entirely. The cookies will still be perfectly balanced.
Why do I need to chill the dough for only 15 minutes?
Because the butter is melted, the dough is very soft. A 15-minute chill firms it up just enough to prevent excessive spreading while keeping the dough easy to scoop. Longer chilling will solidify the butter too much and change the texture.
Can I double this recipe?
Yes! Simply double all the ingredients. The method stays the same, and you will get 12 cookies instead of 6. You may need to bake in two batches to avoid overcrowding the baking sheet.
My cookies spread too much. What went wrong?
This usually happens if the dough was not chilled long enough, or if the butter was too warm when you mixed it. Next time, make sure your melted butter has cooled to room temperature before adding the other ingredients, and do not skip that 15-minute chill.
Can I make these cookies without an egg yolk?
You can substitute the egg yolk with 1 tablespoon of milk or water, but the texture will be different—less rich and slightly more cakey. For the best results, stick with the egg yolk.
Pin This Recipe!
Cozy Small-Batch Chocolate Chip Cookies – No Mixer Needed!

These are the cookies you make when you need comfort, fast. No mixer, no softened butter, and ready in under 30 minutes, they deliver perfectly chewy edges and soft centers every time.
- Prep Time: 15 minutes
- Cook Time: 12 minutes
- Total Time: 27 minutes
- Yield: 6 cookies 1x
- Category: Dessert
- Cuisine: American
Ingredients
- 4 tablespoons (57g) unsalted butter, melted and slightly cooled
- ¼ cup (50g) granulated sugar
- ¼ cup packed (50g) light brown sugar
- 1 large egg yolk (about 18g), at room temperature
- ½ teaspoon vanilla extract
- ¾ cup (96g) all-purpose flour, spooned and leveled
- ¼ teaspoon baking soda
- ¼ teaspoon fine sea salt
- ½ cup (85g) semi-sweet chocolate chips
Instructions
- Melt the butter in a microwave-safe bowl in 15-second bursts until just melted. Let it sit for a minute or two to cool slightly.
- In a mixing bowl, combine the melted butter, granulated sugar, and packed brown sugar. Stir with a spatula until smooth and well combined (it will look grainy).
- Add the egg yolk and vanilla extract. Stir vigorously for about 30 seconds until the mixture looks glossy and slightly thickened.
- In a small separate bowl, whisk together the flour, baking soda, and salt. (Alternatively, whisk them directly in the wet mixture to break up clumps.)
- Add the flour mixture to the butter mixture. Fold gently with a spatula until just a few streaks of flour remain. Do not overmix.
- Fold in the chocolate chips with a few gentle strokes. The dough will be soft and slightly sticky.
- Cover the bowl with plastic wrap or a plate and chill in the refrigerator for exactly 15 minutes. Set a timer.
- While the dough chills, preheat the oven to 350°F (175°C). Line a baking sheet with parchment paper.
- After 15 minutes, remove the dough from the fridge. Scoop into 6 equal balls (about 2 tablespoons each) and place them on the prepared baking sheet, spacing about 3 inches apart. Optionally, press a few extra chocolate chips onto the tops.
- Bake for 10-12 minutes, rotating the pan halfway through. The cookies are done when the edges are golden brown and the centers look puffy and slightly underdone.
- Let the cookies cool on the baking sheet for 5 minutes, then transfer to a cooling rack or enjoy warm.
Notes
Do not over-chill the dough; 15 minutes is the sweet spot. Use a light hand when mixing to avoid tough cookies. Rotate the baking sheet halfway through for even baking. Let cookies rest on the sheet for 5 minutes after baking to set properly. For extra chewy cookies, use bread flour instead of all-purpose.
Nutrition
- Serving Size: 1 cookie
- Calories: 290
- Sugar: 20
- Sodium: 180
- Fat: 16
- Saturated Fat: 10
- Carbohydrates: 35
- Fiber: 1
- Protein: 4
Keywords: small batch chocolate chip cookies, no mixer cookies, easy chocolate chip cookies, chewy chocolate chip cookies, quick cookies


