I was elbow-deep in a box of vintage Christmas ornaments at my favorite antique shop last October when the owner, a gruff man named Earl who I’d only ever seen grunt about the price of depression glass, started talking about dessert. I wasn’t expecting cooking advice from a man who looked like he hadn’t smiled since 1982, but there I was, holding a glittery plastic reindeer, listening to him describe exactly how to make what he called “graveyard pudding.” He said his grandkids wouldn’t eat anything else on Halloween, and he made them every year with a bag of Oreos, a box of instant pudding, and a handful of those neon gummy worms. Honestly, I was so surprised I almost dropped the reindeer. It was the last place I’d expect a recipe tip, but there it was. And let me tell you, these Spooky Easy Halloween Dirt Cups with Gummy Worms are now a non-negotiable part of my own family’s October 31st tradition.
I remember making my first batch later that week. I had to call my mom because I couldn’t find the pudding mix at the store (it was on the top shelf, obviously), and then I accidentally crushed the Oreos so fine they looked like potting soil. It was a mess, but a delicious one. You know that feeling when you take a bite of something and it just tastes like a specific memory? That’s what these dirt cups are for me now. They’re not fancy, they’re not complicated, but they are absolutely perfect. Maybe you’ve been there, scrambling for a last-minute treat that actually makes the kids (and let’s be real, the adults) squeal with joy. These are that recipe. They’re the kind of thing you make on a Tuesday night in October when the air gets crisp and you just want to do something fun. The best part? They come together in about fifteen minutes of active work. I mean, honestly, what could be better?
Why You’ll Love This Recipe
As a food blogger who has tested more Halloween recipes than I can count (some were total flops, let me tell you), I can say with confidence that these dirt cups are the real deal. They have earned a permanent spot in my Halloween rotation because they deliver every single time. Here is why you are going to absolutely love them:
- Quick & Easy : This recipe comes together in under 20 minutes of active prep time. No baking, no complicated steps, and absolutely no stress. It is the perfect last-minute treat for a Halloween party or a fun weeknight activity.
- Simple Ingredients : You likely already have everything you need in your kitchen. Oreos, instant chocolate pudding, milk, and some gummy worms. No fancy grocery trips or specialty stores required.
- Perfect for Halloween : These little cups of “dirt” are the ultimate Halloween party food. They are spooky, fun, and completely kid-approved. They also make a fantastic classroom treat or a creepy addition to a Halloween dessert table.
- Crowd-Pleaser : I have yet to meet a person who doesn’t love these. Kids go wild for the gummy worms, and adults appreciate the nostalgic, no-fuss dessert. They disappear faster than candy at a parade.
- Unbelievably Delicious : This isn’t just a gimmick. The creamy chocolate pudding paired with the crunchy, crumbly Oreo “dirt” is a texture and flavor combo that is pure comfort food. It is simple, but it is incredibly satisfying.
What makes this recipe different from the rest is the technique. I have a specific way of crushing the Oreos that gives you the perfect “dirt” texture—think fine topsoil, not chunky gravel. Plus, I use a little trick with the pudding to make it extra creamy and rich. This isn’t just another version of a classic Halloween treat; it is the best version. It is the kind of dessert that makes you close your eyes after the first bite, even if you are standing in a kitchen covered in chocolate crumbs. It is comfort food reimagined for the spookiest night of the year, and it is perfect for impressing guests without any stress.
What Ingredients You Will Need
This recipe uses simple, everyday ingredients to create a dessert that is both fun and delicious. The magic is in how they come together. Here is everything you need to make these Spooky Easy Halloween Dirt Cups with Gummy Worms.
- 1 (14.3 ounce) package Oreo cookies : This is the classic, original Oreo. You will be using the whole cookie, cream filling and all. I recommend using the standard size, not the double-stuf or the mega-stuf, as the ratio of cookie to cream is perfect for creating a crumbly “dirt” texture. (Trust me on this one, I tested it!)
- 1 (3.9 ounce) package instant chocolate pudding mix : Make sure you get the instant variety, not the cook-and-serve kind. The instant mix sets up quickly in the fridge, which is key for this no-bake recipe. Jell-O brand is my go-to, but any store brand works great too.
- 2 cups cold milk : Whole milk will give you the richest, creamiest pudding. However, you can easily use 2% or even a non-dairy milk like oat milk or almond milk. Just be aware that the pudding might be slightly less thick if you use a thinner milk. (I have used oat milk before and it worked perfectly fine!)
- 1 (8 ounce) container frozen whipped topping, thawed : This is the secret to making the pudding extra light and mousse-like. Cool Whip is the classic choice, but you can also use a generic brand. If you want to be extra fancy, you can whip your own heavy cream, but the frozen stuff is so much easier for a quick recipe like this.
- 1 (4.5 ounce) bag gummy worms : The star of the show! You can use any color or flavor of gummy worms you like. I personally love the sour ones for a little extra kick, but the classic sweet ones are always a hit. Look for the bright, neon colors to really pop against the dark “dirt.”
- Optional for decoration : A few extra crushed Oreos for topping, and some small plastic spiders or Halloween-themed cupcake toppers. These are totally optional, but they add a fun, festive touch.
When it comes to the Oreos, I have tested a few different brands over the years. I always go back to the original Nabisco Oreo. They have the perfect crunch and crumble. For the gummy worms, I am a big fan of the Albanese brand because they are super soft and flavorful, but any brand will do the job. If you are making these for a party, look for the big bags of gummy worms at the bulk food store—you can never have too many worms!
Equipment Needed
You don’t need any fancy gadgets to make these dirt cups. Here is the simple equipment you will need:
- Mixing bowls : You will need one medium bowl for the pudding and one large bowl for crushing the Oreos.
- Whisk : For whisking together the pudding mix and milk.
- Rolling pin or food processor : To crush the Oreos into fine crumbs. A rolling pin and a zip-top bag work perfectly and are great for getting out some aggression. A food processor makes it even faster and gives you a very consistent crumb. (I use my food processor because I am impatient!)
- 6 to 8 small cups or glasses : Clear plastic cups are perfect for Halloween because you can see the layers of dirt and worms. You can also use small mason jars, juice glasses, or even disposable party cups.
- Spatula : For folding the whipped topping into the pudding and for spooning the mixture into the cups.
- Measuring cups and spoons : To measure the milk accurately.
If you don’t have a food processor, a zip-top bag and a rolling pin are your best friends. Just put the Oreos in the bag, seal it, and go to town with the rolling pin. It is a great way to let out any pre-Halloween stress! For the cups, I highly recommend using clear plastic cups. They are inexpensive, you can find them at any grocery store, and they really show off the spooky layers.
Preparation Method
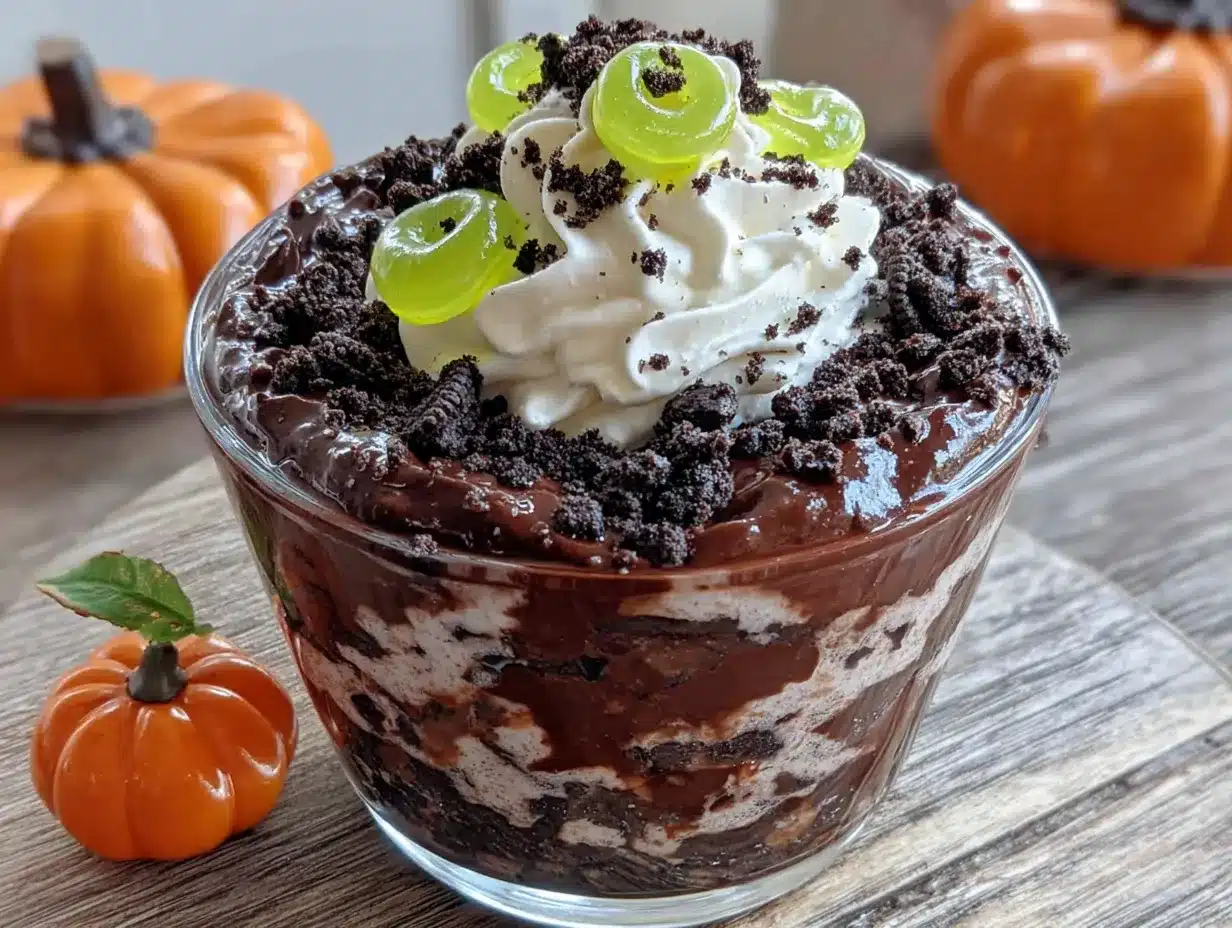
Making these Spooky Easy Halloween Dirt Cups with Gummy Worms is as simple as 1, 2, 3. Follow these steps, and you will have a creepy, delicious treat in no time.
- Crush the Oreos : Place the entire package of Oreo cookies (cream and all) into a large zip-top bag or the bowl of a food processor. If using a bag, seal it tightly, pushing out as much air as possible. Use a rolling pin to crush the cookies into fine crumbs. You want them to look like dark, rich soil. If using a food processor, pulse until you have a fine, even crumb. Be careful not to over-process, or you might end up with Oreo butter. Set the crumbs aside. (Pro-tip: Reserve about 1/4 cup of the crumbs to sprinkle on top of the finished cups for extra “dirt” effect.)
- Make the pudding : In a medium mixing bowl, whisk together the instant chocolate pudding mix and the 2 cups of cold milk. Whisk for about 2 minutes, until the mixture is smooth and starts to thicken. It will be quite thin at first, but don’t worry, it will set up in the fridge. Let it sit for about 5 minutes to partially set. (I always set a timer for this—it is easy to forget!)
- Fold in the whipped topping : Using a spatula, gently fold the thawed whipped topping into the pudding mixture. Fold until just combined, with no white streaks remaining. This step is what makes the pudding light, airy, and mousse-like. Be gentle, you don’t want to deflate all that air you just folded in.
- Assemble the dirt cups : Now for the fun part! Take your small cups or glasses. Start by adding a generous spoonful of the Oreo “dirt” to the bottom of each cup. This forms the base layer. Next, spoon the creamy pudding mixture on top of the Oreo layer, filling each cup about 3/4 full. You can use a piping bag for a cleaner look, but a spoon works perfectly fine. (I usually just use a spoon because it is one less thing to wash!)
- Add the worms : Press a few gummy worms into the pudding mixture, letting some of them poke out over the edges of the cup. This is what makes them look like creepy, crawly creatures emerging from the dirt. Don’t be shy with the worms—the more, the spookier!
- Top with more dirt : Sprinkle the remaining Oreo crumbs over the top of each cup, covering the pudding and the base of the gummy worms. This creates the final “dirt” layer. If you reserved some crumbs, use them now for a nice, even topping.
- Chill and serve : Place the assembled dirt cups in the refrigerator for at least 1 hour to allow the pudding to fully set. This step is crucial for the perfect texture. The cups will keep in the fridge for up to 2 days, but they are best enjoyed within 24 hours. Serve cold and watch them disappear!
A quick note on timing: the actual active prep time is only about 15-20 minutes. The hardest part is waiting for them to chill! I usually make these in the morning before a Halloween party so they are perfectly set by the time guests arrive. The pudding should be thick and creamy, and the Oreo crumbs should stay slightly crunchy, creating a wonderful texture contrast.
Cooking Tips & Techniques
Over the years, I have made these dirt cups more times than I can count, and I have learned a few tricks along the way. Here are my best tips for making the perfect Spooky Easy Halloween Dirt Cups with Gummy Worms.
- The perfect Oreo crumb : The key to realistic-looking “dirt” is the texture of the Oreo crumbs. You want them to be fine and uniform, like potting soil. If you use a food processor, pulse, don’t run it continuously. If you use a rolling pin, take your time and crush them thoroughly. I once made the mistake of using a knife to chop them, and the chunks were way too big. It looked more like gravel than dirt!
- Don’t overmix the pudding : When you whisk the pudding mix with the milk, whisk just until it is smooth and starting to thicken. Over-whisking can make the pudding grainy. The same goes for folding in the whipped topping—fold gently until just combined. Overmixing will deflate the mixture and make it dense instead of light and creamy.
- Layer strategically : For the best visual effect, make sure your bottom layer of Oreo crumbs is thick enough to be seen through the side of the cup. A thin layer will just look like a dark smear. I use about 1 1/2 to 2 tablespoons of crumbs for the bottom layer of a standard 8-ounce cup.
- Make it ahead of time : These dirt cups are perfect for making a day in advance. In fact, they are even better the next day because the flavors have had time to meld together. Just be aware that the Oreo crumbs on top will soften over time, so if you want a crunchy topping, add a fresh sprinkle of crumbs right before serving.
- Keep the worms happy : Gummy worms can sometimes get a little sticky or hard if they are exposed to air for too long. When you press them into the pudding, make sure the bottom half is buried in the creamy mixture, which will keep them soft. The parts sticking out will stay a bit chewier, which is a nice textural contrast.
One of my biggest failures with this recipe was the time I used cook-and-serve pudding by mistake. I was rushing and grabbed the wrong box. It never set up properly, and I ended up with a soupy mess. Learn from my mistake! Always, always use instant pudding mix. It is the only way this recipe works.
Variations & Adaptations
One of the best things about this recipe is how easy it is to customize. Here are a few of my favorite variations for these Spooky Easy Halloween Dirt Cups with Gummy Worms.
- Peanut Butter Cup Dirt Cups : For a rich, decadent twist, add a layer of peanut butter. After you add the bottom Oreo layer, spoon a tablespoon of creamy peanut butter into each cup. Then, top with the pudding mixture. The peanut butter and chocolate combination is absolutely divine. You can also use peanut butter Oreos for an even more intense flavor.
- Vegan & Dairy-Free Version : This is incredibly easy to adapt. Use a dairy-free instant chocolate pudding mix (like Jell-O brand, which is naturally vegan) and your favorite non-dairy milk, such as oat milk or soy milk. For the whipped topping, use a vegan whipped topping like CocoWhip. The Oreos themselves are also vegan-friendly! This version tastes just as good as the original.
- Pumpkin Spice Dirt Cups : For a fall twist that bridges Halloween and Thanksgiving, swap the chocolate pudding for a vanilla or butterscotch pudding mix. Then, stir in 1/2 cup of pumpkin puree and 1 teaspoon of pumpkin pie spice into the pudding mixture before folding in the whipped topping. Top with crushed gingersnap cookies instead of Oreos for a “dirt” that tastes like autumn.
- Spider Web Dirt Cups : For a more decorative look, after you add the top layer of Oreo crumbs, drizzle a little bit of melted white chocolate over the top in a spiral pattern. Then, use a toothpick to drag lines from the center outwards, creating a spider web effect. Place a plastic spider on top for the ultimate Halloween presentation.
- Individual Trifles : If you are serving a crowd, you can make this recipe in a large trifle bowl instead of individual cups. Simply layer the Oreo crumbs, pudding mixture, and gummy worms in the bowl, repeating the layers until you reach the top. This is a stunning centerpiece for a Halloween party.
I have personally tried the peanut butter cup version, and it is my absolute favorite. I use crunchy peanut butter for an extra bit of texture. It is dangerously good. Feel free to experiment and find your own perfect combination!
Serving & Storage Suggestions
These Spooky Easy Halloween Dirt Cups with Gummy Worms are best served cold, straight from the refrigerator. The contrast between the cool, creamy pudding and the slightly crunchy Oreo “dirt” is part of what makes them so satisfying. Here are my best tips for serving and storing them.
How to Serve: I like to serve these in clear plastic cups so everyone can see the spooky layers. You can place them on a platter or a baking sheet for easy transport. For a Halloween party, I like to add a few extra gummy worms on top of each cup and maybe a plastic spider or a Halloween-themed cupcake topper. It makes them look even more festive and fun. They are perfect as a dessert buffet item or as a take-home treat for party guests.
What to Serve With Them: These dirt cups are pretty rich on their own, so they pair well with a lighter beverage. A glass of cold milk is the classic choice. For an adult version, they would be fantastic with a cup of hot coffee or a glass of cold brew. If you are serving a full Halloween meal, they are a great follow-up to something savory like chili or pizza.
Storage Instructions: Store any leftover dirt cups in the refrigerator, covered tightly with plastic wrap or with a lid. They will keep well for up to 2 days. However, I find they are best within the first 24 hours, as the Oreo crumbs will continue to soften over time. The gummy worms will also become slightly softer the longer they sit in the pudding.
How to Reheat: You don’t need to reheat these! They are meant to be served cold. If you have stored them in the fridge for a while, just take them out about 10 minutes before serving to take the chill off slightly. This will make the pudding even creamier.
Make-Ahead Note: These are an excellent make-ahead dessert. You can assemble them up to 24 hours in advance. Just wait to add the final sprinkle of Oreo crumbs and the decorative gummy worms until right before serving to keep them looking their freshest. The flavors actually meld together beautifully overnight, making them even more delicious the next day.
Nutritional Information & Benefits
Let’s be honest—these Spooky Easy Halloween Dirt Cups with Gummy Worms are a treat, and they are meant to be enjoyed as part of a fun, festive occasion. They are not a health food, and that is perfectly okay! However, here is a brief look at the nutritional information and a few things to keep in mind.
Estimated Nutritional Values (per serving, based on 8 servings):
- Calories: Approximately 380-420 calories
- Fat: 16-20g
- Carbohydrates: 55-65g
- Protein: 5-7g
- Sugar: 40-50g
Please note that these are estimates and can vary based on the specific brands you use and the size of your servings. The main sources of calories and sugar are the Oreos, the pudding mix, and the gummy worms.
Dietary Considerations:
- This recipe is not gluten-free (due to the Oreos), but you can use gluten-free chocolate sandwich cookies as a substitute.
- It can be made dairy-free and vegan by using a non-dairy milk and a vegan whipped topping.
- It contains no nuts in the base recipe, but always check the labels of your ingredients to be sure.
- It is not low-carb or keto-friendly due to the high sugar content.
From a wellness perspective, I think the most important thing is balance. This is a dessert for a special occasion. It is meant to be fun, delicious, and a little bit silly. I believe in enjoying treats like this without guilt and focusing on the joy they bring. A single dirt cup is a wonderful way to celebrate Halloween and make a happy memory with family and friends.
Conclusion
So there you have it—the story of how a grumpy antique shop owner named Earl accidentally gave me one of my favorite Halloween recipes. These Spooky Easy Halloween Dirt Cups with Gummy Worms are everything a Halloween dessert should be: fun, spooky, ridiculously easy to make, and absolutely delicious. They have saved me more times than I can count, from last-minute classroom parties to impromptu movie nights.
I really hope you give this recipe a try. It is one of those rare recipes that is as much fun to make as it is to eat, especially if you have kids helping you in the kitchen. Don’t be afraid to customize it and make it your own. Add more worms, try a different flavor of pudding, or pile on the creepy decorations. The possibilities are endless.
I would love to hear how your dirt cups turn out! Leave a comment below and let me know if you tried any fun variations. Did you use sour worms or sweet ones? Did you add a spider on top? Share your spooky creations with me, and don’t forget to pin this recipe for later. Happy Halloween, and happy eating!
Frequently Asked Questions
Can I make these dirt cups the night before a party?
Absolutely! In fact, they are even better when made a day in advance. The flavors have time to meld together, and the pudding sets up perfectly. Just wait to add the final sprinkle of Oreo crumbs and any decorative elements until right before serving to keep them looking fresh.
Can I use homemade whipped cream instead of Cool Whip?
Yes, you can! Whip 1 cup of heavy cream with 2 tablespoons of powdered sugar until stiff peaks form. Gently fold it into the pudding mixture just like you would with the frozen whipped topping. It will be a little less stable, but it tastes amazing.
What if I can’t find gummy worms? Can I use something else?
Of course! You can use any gummy candy you like. Gummy spiders, gummy bats, or even gummy skeletons would be perfect. You can also use candy corn or candy pumpkins for a different Halloween vibe.
How do I get the Oreo crumbs to look like real dirt?
The key is to crush them very finely. A food processor works best for this, giving you a uniform, sandy texture. If you are using a rolling pin and a bag, take your time and crush them thoroughly until no large chunks remain. You want them to look like dark, rich topsoil.
Can I use sugar-free pudding mix to make this recipe lighter?
Yes, you can! Sugar-free instant chocolate pudding mix works perfectly in this recipe. It will have a slightly different taste and texture, but it is a great option if you are looking to reduce the sugar content. Just follow the same instructions on the box for mixing.
PrintSpooky Easy Halloween Dirt Cups with Gummy Worms
These no-bake dirt cups are a fun and spooky Halloween treat made with layers of creamy chocolate pudding and crushed Oreo ‘dirt,’ topped with gummy worms. They come together in just 15 minutes of active prep and are a guaranteed crowd-pleaser for kids and adults alike.
- Prep Time: 15 minutes
- Cook Time: 0 minutes
- Total Time: 1 hour 15 minutes
- Yield: 8 servings 1x
- Category: Dessert
- Cuisine: American
Ingredients
- 1 (14.3 ounce) package Oreo cookies
- 1 (3.9 ounce) package instant chocolate pudding mix
- 2 cups cold milk
- 1 (8 ounce) container frozen whipped topping, thawed
- 1 (4.5 ounce) bag gummy worms
- Optional: extra crushed Oreos for topping, small plastic spiders or Halloween-themed cupcake toppers
Instructions
- Crush the Oreos: Place the entire package of Oreo cookies (cream and all) into a large zip-top bag or the bowl of a food processor. If using a bag, seal it tightly, pushing out as much air as possible. Use a rolling pin to crush the cookies into fine crumbs. If using a food processor, pulse until you have a fine, even crumb. Set the crumbs aside. (Pro-tip: Reserve about 1/4 cup of the crumbs to sprinkle on top of the finished cups for extra ‘dirt’ effect.)
- Make the pudding: In a medium mixing bowl, whisk together the instant chocolate pudding mix and the 2 cups of cold milk. Whisk for about 2 minutes, until the mixture is smooth and starts to thicken. Let it sit for about 5 minutes to partially set.
- Fold in the whipped topping: Using a spatula, gently fold the thawed whipped topping into the pudding mixture. Fold until just combined, with no white streaks remaining.
- Assemble the dirt cups: Take your small cups or glasses. Start by adding a generous spoonful of the Oreo ‘dirt’ to the bottom of each cup. Next, spoon the creamy pudding mixture on top of the Oreo layer, filling each cup about 3/4 full.
- Add the worms: Press a few gummy worms into the pudding mixture, letting some of them poke out over the edges of the cup.
- Top with more dirt: Sprinkle the remaining Oreo crumbs over the top of each cup, covering the pudding and the base of the gummy worms.
- Chill and serve: Place the assembled dirt cups in the refrigerator for at least 1 hour to allow the pudding to fully set. Serve cold.
Notes
For best results, use instant pudding mix (not cook-and-serve). The Oreo crumbs can be made finer by using a food processor. These cups can be made up to 24 hours in advance; add fresh Oreo crumbs and decorative gummy worms just before serving for the best presentation.
Nutrition
- Serving Size: 1 cup
- Calories: 400
- Sugar: 45
- Sodium: 380
- Fat: 18
- Saturated Fat: 8
- Carbohydrates: 60
- Fiber: 2
- Protein: 6
Keywords: Halloween dirt cups, gummy worms, Oreo dirt, no-bake dessert, easy Halloween treat, chocolate pudding cups


