The holiday cookie exchange was in six hours and I’d completely forgotten. Everyone else would be bringing those elaborate, multi-day affairs—you know the ones. Layered, filled, dipped, drizzled, decorated with royal icing that probably required a pastry degree. I had a half-empty bag of semi-sweet chocolate chips, a candy cane that was mostly dust at the bottom of the pantry, and maybe forty-five minutes before I had to leave. Honestly, I almost just grabbed a bottle of wine from the corner store and called it a day.
But then I remembered this ridiculously simple peppermint bark recipe my college roommate used to throw together between finals. She’d melt chocolate in a borrowed microwave, crush candy canes with a hammer (a literal hammer, on the dorm room floor), and somehow end up with something that looked like it came from a fancy confectionery shop. I had all three ingredients—chocolate, white chocolate, and peppermint. That was it. No candy thermometer, no double boiler, no stressing over tempering. I figured even a half-hearted attempt would be better than showing up empty-handed.
So I melted, I spread, I crushed, I sprinkled. I shoved the pan in the freezer and prayed. When I pulled it out and snapped that first piece—that satisfying, clean crack—I actually laughed. It looked perfect. The dark chocolate base was glossy, the white chocolate layer was swirled just enough to look intentional, and the crushed peppermint sparkled like crushed rubies. I broke it into uneven, rustic shards, piled them on a plate, and walked into that party feeling like I was bringing a secret weapon.
You know that moment when someone takes a bite and their eyes go wide? That happened about twelve times that night. People asked for the recipe, and I told them the truth: three ingredients, ten minutes of actual work, and a freezer. The best part? I wasn’t even trying to impress anyone. That’s the thing about this peppermint bark—it doesn’t need effort to be extraordinary. It just needs the right ratio of chocolate to crunch, and maybe a little bit of last-minute panic to give it that extra magic.
Why You’ll Love This Recipe
Let me tell you why this particular peppermint bark has become my go-to for every single holiday event, last-minute gift, and random Tuesday craving. I’ve tested this method more times than I can count, and I can promise you it works every single time without fail.
- Quick & Easy: We’re talking about 10 minutes of active prep time. The freezer does the rest of the work. You can literally make this while your coffee brews in the morning and have it ready by lunchtime. For busy weeknights during the holiday season, that’s a game-changer.
- Simple Ingredients: Chocolate chips, white chocolate chips, and candy canes. That’s the whole grocery list. No heavy cream you’ll forget to use, no corn syrup you’ll have to hunt for at the back of the store. These are things you might already have in your pantry right now.
- Perfect for Gifting: This peppermint bark looks way more expensive than it is. Package it in a simple cellophane bag with a ribbon, and people will think you spent hours on it. I’ve given this as hostess gifts, teacher gifts, and neighbor gifts for years.
- Crowd-Pleaser: I have never, not once, met someone who didn’t like this bark. Kids love the crunch and sweetness. Adults appreciate that it’s not cloying. Even people who claim they “don’t like mint desserts” have been converted by this specific ratio.
- Unbelievably Delicious: The combination of semi-sweet chocolate and creamy white chocolate creates this perfect balance. The peppermint adds freshness and texture. It’s not just good for a three-ingredient recipe—it’s genuinely excellent, full stop.
What makes this version different from all the other peppermint bark recipes out there? It’s the technique. Most recipes tell you to just melt and layer, but they don’t tell you about the temperature tricks that prevent the layers from blending into a muddy mess. They don’t mention that the way you crush the candy canes actually affects the texture. I’ve figured all that out through trial and error (and a few sad, melted batches), so you don’t have to.
This is the kind of recipe that makes you feel like a kitchen genius with almost no effort. It’s the dessert equivalent of showing up to a party in a little black dress when everyone else is in costume—effortless, classic, and somehow always the right choice.
Ingredients Needed
This recipe uses three simple, pantry-friendly ingredients to deliver bold flavor and satisfying crunch without any fuss. Each component plays a specific role, so choosing the right ones makes a real difference.
- 12 ounces semi-sweet chocolate chips (I recommend Ghirardelli or Guittard for the smoothest melt and best flavor. The quality of your chocolate matters more here than in a complex recipe with lots of mix-ins. Save the generic store brand for chocolate chip cookies.)
- 12 ounces white chocolate chips (Look for white chocolate that contains cocoa butter—check the ingredients list. Brands like Ghirardelli or Baker’s work well. Avoid “white melting wafers” or candy coating, which have a waxy texture and artificial taste. Trust me on this one.)
- 6 to 8 large candy canes (About 3/4 cup crushed. Get the classic red-and-white striped ones, not the mini ones or the flavored varieties. The peppermint flavor is stronger and more authentic. Starlight mints work in a pinch, but candy canes give you those beautiful red streaks.)
- Optional: 1 teaspoon coconut oil or vegetable shortening (This is my secret for an extra-smooth, shiny finish on the white chocolate layer. It helps the chocolate melt more evenly and gives it that gorgeous gloss. Totally optional, but I use it every time now.)
- Optional: Flaky sea salt (A tiny sprinkle on top before the chocolate sets balances the sweetness and makes the peppermint flavor pop. Maldon is my go-to. This is a game-changer if you like that sweet-salty combo.)
Ingredient Selection Tips: For the semi-sweet chocolate, I prefer chips over chopped bars because they melt more evenly and are less likely to seize. If you’re using a bar, chop it into small, uniform pieces. For the candy canes, check the expiration date—stale candy canes are harder to crush and don’t have that fresh, sharp peppermint kick. Also, avoid “natural” candy canes that use stevia or other sweeteners—they don’t crush the same way and can leave a weird aftertaste.
Substitution Guidance: You can use dark chocolate chips if you prefer a less sweet bark—just know the bitterness will be more pronounced. For a dairy-free version, use dairy-free semi-sweet chocolate chips and dairy-free white chocolate chips (brands like Enjoy Life make good options). If you can’t find candy canes, peppermint candies or starlight mints work, but crush them finer since they’re harder. And if you’re really in a pinch, you can buy pre-crushed peppermint in the baking aisle—it just won’t have those pretty red streaks.
Equipment Needed
You don’t need a fancy kitchen setup for this peppermint bark. Here’s what you’ll actually use:
- Baking sheet (A standard 13×18-inch sheet works perfectly. Line it with parchment paper or aluminum foil for easy removal. I prefer parchment because the bark slides right off.)
- Medium microwave-safe bowls (You’ll need two—one for each type of chocolate. Glass or ceramic works best. Avoid plastic bowls, which can retain odors and affect the chocolate’s flavor.)
- Rubber spatula (For spreading the chocolate into thin, even layers. A silicone spatula is ideal because it doesn’t scratch your bowls and scrapes every last bit of chocolate.)
- Ziploc bag and rolling pin (For crushing the candy canes. The bag contains the mess, and the rolling pin gives you control over the size of the pieces. A hammer works too, but it’s loud and you’ll be finding candy cane dust for days.)
- Offset spatula (Optional but helpful for getting those layers perfectly even. A butter knife works in a pinch, but an offset spatula makes it look professional.)
- Refrigerator or freezer space (You need a flat surface in your fridge or freezer where the baking sheet can sit undisturbed for at least 30 minutes. Make sure nothing is going to drip on your chocolate.)
Budget-Friendly Tip: Don’t run out and buy a special chocolate melting set. A microwave and a bowl are all you need. I’ve been making this peppermint bark for years with just the basics, and it turns out perfectly every time. If you don’t have a rolling pin, a heavy skillet or even a wine bottle works for crushing the candy canes.
Preparation Method
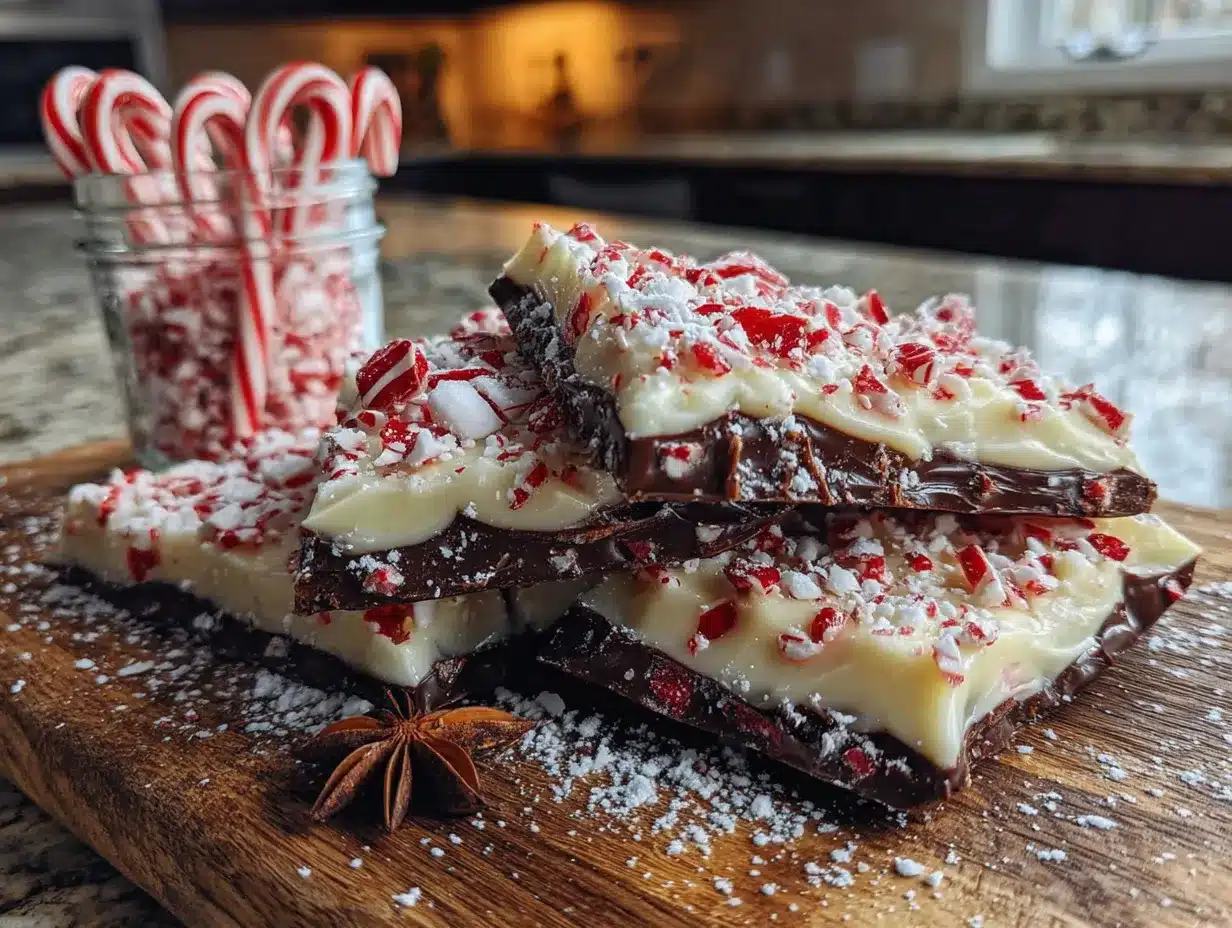
Let me walk you through this step by step. I’ve made this peppermint bark dozens of times, so I’ll share all the little tricks I’ve picked up along the way.
- Prep your workspace. Line your baking sheet with parchment paper or aluminum foil. Make sure the paper extends up the sides a little—this gives you handles to lift the bark out later. Clear a flat spot in your freezer or fridge where the sheet can sit level. Trust me, you don’t want to be shuffling things around with melted chocolate in your hands.
- Crush the candy canes. Unwrap all the candy canes and place them in a sturdy Ziploc bag. Seal it, then press out as much air as possible. Using your rolling pin (or heavy skillet, or wine bottle), gently tap the candy canes to break them into pieces, then roll over them until you have a mix of fine crumbs and small chunks. You want pieces that are about 1/4 inch—small enough to stick to the chocolate but big enough to see and crunch. Set the bag aside. Pro tip: Crush them coarser than you think you need. They’ll break down more when you sprinkle them, and you want those satisfying crunchy bits.
- Melt the semi-sweet chocolate. Place the semi-sweet chocolate chips in a medium microwave-safe bowl. Microwave in 30-second intervals at 50% power, stirring thoroughly between each interval. This gentle approach prevents the chocolate from burning or seizing. After about 1.5 to 2 minutes, the chocolate should be mostly melted with just a few lumps. Stir until completely smooth—the residual heat will melt the remaining pieces. If you need more time, go in 15-second bursts. The chocolate should be glossy and fluid, not thick or grainy.
- Spread the first layer. Pour the melted semi-sweet chocolate onto your prepared baking sheet. Using your rubber spatula or offset spatula, spread it into an even rectangle about 1/4 inch thick. Don’t worry about making it perfect—rustic edges are part of the charm. Try to keep the thickness consistent so it sets evenly. Work quickly here, because the chocolate will start to cool and thicken as you spread it.
- Set the first layer. Place the baking sheet in the refrigerator or freezer for 15 to 20 minutes, or until the chocolate is firm to the touch. It should look matte and feel solid, not tacky. If you press it gently with your finger, it shouldn’t leave an indent. This step is crucial—if the first layer isn’t fully set, the white chocolate will mix into it and you’ll lose that beautiful contrast.
- Melt the white chocolate. While the first layer sets, melt the white chocolate chips in a separate microwave-safe bowl using the same method: 30-second intervals at 50% power, stirring between each. White chocolate is more delicate than dark chocolate, so be extra careful not to overheat it. If it seizes (turns grainy and thick), you’ve overheated it—unfortunately, there’s no saving it. If you’re using the optional coconut oil, stir it in after the white chocolate is fully melted. It helps keep the white chocolate fluid and gives it a beautiful shine.
- Spread the second layer. Once the semi-sweet layer is fully set, remove the sheet from the fridge. Pour the melted white chocolate over the dark layer and spread it gently and evenly. Be careful not to press too hard, or you’ll disturb the dark chocolate underneath. Try to cover the entire dark layer—any gaps will look messy. Work quickly but gently, and don’t overwork it. A few swirls and imperfections look intentional and handmade.
- Add the peppermint topping. Immediately after spreading the white chocolate, sprinkle the crushed candy canes evenly over the top. Don’t dump them all in one spot—sprinkle with a pinching motion to distribute them evenly. Press down very lightly with your fingers or the back of a spoon to help the pieces adhere. If you’re using flaky sea salt, sprinkle a tiny pinch over the top now. Work fast, because the white chocolate will start to set as soon as it hits the cold dark layer.
- Set the final layer. Return the baking sheet to the refrigerator or freezer for at least 30 minutes, or until the bark is completely firm. In the fridge, this takes about 45 minutes to 1 hour. In the freezer, about 30 minutes. The bark should be solid and snap cleanly when you break it. If it bends instead of snapping, it needs more time.
- Break into pieces. Once fully set, lift the bark out of the pan using the parchment paper handles. Place it on a cutting board. Using your hands, break the bark into irregular shards—this looks more natural and rustic than cutting it with a knife. Aim for pieces that are about 2 to 3 inches across. If you prefer cleaner edges, use a sharp chef’s knife to cut it into squares, but honestly, the irregular pieces look more artisanal and homemade.
Sensory Cues: When the semi-sweet chocolate is ready to spread, it should look like thick, glossy fudge sauce. When the white chocolate is properly melted, it will be smooth and pale ivory, not yellow or grainy. The finished bark should have a clean, sharp snap when you break it—that’s how you know the layers set properly. The peppermint should smell fresh and cool, not artificial or medicinal.
Personal Efficiency Tip: I always crush the candy canes before I even take the chocolate out of the pantry. That way, everything is ready to go and I’m not scrambling with sticky hands while chocolate is setting. I also set a timer for each chilling step so I don’t forget about it—I’ve definitely left the first layer in the freezer too long and had to wait for it to warm up slightly before the white chocolate would stick.
Cooking Tips & Techniques
After making this peppermint bark more times than I can count, I’ve learned a few things the hard way. Here are the tips that will save you from my mistakes.
The temperature trick: This is the single most important tip I can give you. When you spread the white chocolate over the set dark layer, the cold dark chocolate will start to firm up the white chocolate almost immediately. That’s actually good—it prevents the layers from mixing. But if your white chocolate is too hot when you pour it, it will melt the dark layer and create a muddy swirl. Let the white chocolate cool for about 2 minutes after melting before you pour it. It should still be fluid but not hot to the touch.
Don’t skip the parchment: I know it’s tempting to just spray the pan and hope for the best. Don’t. The parchment paper makes removal effortless and keeps your bark intact. Foil works too, but it can leave creases in the chocolate. Parchment is worth the extra 30 seconds.
My biggest failure: The first time I made this, I tried to use white chocolate chips that had been sitting in my pantry for about a year. They were old and had absorbed some weird smells. The bark tasted faintly like the garlic and onion I store nearby. Now I always use fresh chocolate, and I store my baking chocolate in a sealed container away from strong-smelling ingredients. Learn from my mistake—fresh chocolate matters.
The multitasking strategy: While the first layer is setting in the fridge, clean your bowls and spatula. You’ll need them clean and dry for the white chocolate. Wet or soapy bowls can cause chocolate to seize. I also use this time to set out the candy canes and get my rolling pin ready. Every minute of active time is precious, and having everything prepped makes the process feel effortless.
Consistency is key: For the most professional-looking bark, try to keep both chocolate layers the same thickness. Too thin and the bark will be fragile and break into tiny pieces. Too thick and it becomes more like a chocolate bar than a delicate bark. Aim for about 1/4 inch per layer. If you’re unsure, err on the side of slightly thinner—it’s easier to handle and looks more elegant.
Humidity is the enemy: Chocolate doesn’t like humidity. If you’re making this on a rainy or humid day, work quickly and get the bark into the fridge as fast as possible. The moisture in the air can cause the chocolate to bloom (develop white streaks) or seize. I once made this during a summer thunderstorm and ended up with a streaky, sad-looking bark. It still tasted fine, but it wasn’t pretty.
Variations & Adaptations
One of the best things about this peppermint bark is how easy it is to customize. Here are some variations I’ve tried and loved.
Dark Chocolate Peppermint Bark: Use all dark chocolate (60-70% cacao) for the base instead of semi-sweet. The bitterness of the dark chocolate balances the sweetness of the white chocolate and peppermint beautifully. This is my personal favorite for gifts because it feels more sophisticated. Just be careful not to overheat dark chocolate—it’s more prone to seizing than semi-sweet.
Milk Chocolate Version: If you prefer a sweeter, creamier bark, swap the semi-sweet for milk chocolate chips. This version is especially popular with kids. The milk chocolate is softer than semi-sweet, so the bark won’t snap as cleanly, but it will still be delicious. I’d recommend chilling it in the freezer rather than the fridge for a firmer texture.
Cookie Crumble Bark: For extra texture, sprinkle crushed Oreos or chocolate wafer cookies over the white chocolate layer along with the peppermint. The chocolate cookies add a lovely crunch and a visual contrast. I tried this for a holiday party and it disappeared faster than the original version. Just crush the cookies into small pieces, not dust.
Vegan Peppermint Bark: Use dairy-free semi-sweet chocolate chips and dairy-free white chocolate chips. Enjoy Life makes excellent options that melt well and taste great. Check that your candy canes are vegan—most are, but some use confectioner’s glaze. This version sets up just as well as the original, and honestly, most people won’t notice the difference.
Spiced Peppermint Bark: Add a pinch of cinnamon or cayenne pepper to the melted semi-sweet chocolate before spreading. The warmth of the spice plays beautifully with the cool peppermint. I discovered this combination by accident when I was making hot chocolate and thought, “Why not?” Start with 1/4 teaspoon of cinnamon or a tiny pinch of cayenne—you want a hint, not a punch.
Toffee Crunch Variation: Sprinkle crushed toffee bits (like Skor or Heath bar pieces) over the white chocolate along with the peppermint. The buttery, caramel flavor complements the mint and chocolate perfectly. This is a great option if you’re making bark for a crowd that includes people who aren’t huge peppermint fans.
Serving & Storage Suggestions
This peppermint bark is incredibly versatile when it comes to serving and storing. Here’s everything you need to know.
Serving Temperature: Peppermint bark is best served cold or at cool room temperature. If it’s too warm, the chocolate can get soft and the bark will lose its satisfying snap. I like to keep it in the fridge until about 10 minutes before serving. That gives it just enough time to lose the chill without getting soft.
Presentation Ideas: Arrange the shards on a white platter or cake stand for maximum visual impact. The contrast between the dark chocolate, white chocolate, and red peppermint pieces is stunning against a neutral background. For gifts, layer the bark in a clear cellophane bag tied with a red or green ribbon. You can also stack pieces in a decorative tin lined with parchment paper.
Complementary Dishes: This bark pairs beautifully with hot coffee, espresso, or a rich hot chocolate. It’s also lovely alongside a cheese board—the sweetness contrasts with sharp cheddar or creamy brie. For a dessert spread, serve it with fresh berries and a glass of cold milk. I’ve also crumbled it over vanilla ice cream for an instant sundae upgrade.
Storage Instructions: Store the bark in an airtight container in the refrigerator for up to 3 weeks. Layer the pieces between sheets of parchment or wax paper to prevent them from sticking together. You can also store it in the freezer for up to 3 months—just make sure it’s in a freezer-safe container or bag. The bark thaws quickly, so you can eat it straight from the freezer or let it sit at room temperature for a few minutes.
Reheating: You don’t need to reheat this bark at all. It’s meant to be eaten cold or at room temperature. If it’s been in the fridge and you want to soften it slightly, let it sit out for 5 to 10 minutes before serving. Avoid microwaving it, which will melt the chocolate and ruin the texture.
How Flavors Develop: The peppermint flavor actually intensifies over the first 24 hours after making the bark. The oils from the candy canes slowly infuse into the white chocolate, creating a more cohesive flavor. This is one reason why this bark makes such a great gift—it actually tastes better the next day. If you can resist eating it immediately, let it rest in the fridge overnight for the best flavor.
Nutritional Information & Benefits
While this peppermint bark is definitely a treat, it does have some redeeming qualities. Here’s a rough nutritional breakdown per serving (about 2 ounces, or 1/8 of the recipe):
| Nutrient | Amount per Serving |
|---|---|
| Calories | 280 |
| Total Fat | 18g |
| Saturated Fat | 11g |
| Carbohydrates | 32g |
| Sugar | 28g |
| Protein | 3g |
| Fiber | 2g |
| Sodium | 40mg |
Health Benefits of Key Ingredients: Dark chocolate (when you use semi-sweet or dark varieties) contains antioxidants called flavonoids, which can support heart health and improve blood flow. The cocoa in chocolate also contains magnesium and iron. Peppermint has been used for centuries to aid digestion and freshen breath—it’s actually a natural antispasmodic that can soothe an upset stomach. Of course, these benefits come in small amounts, but it’s nice to know there’s something good in there besides sugar!
Dietary Considerations: This recipe is naturally vegetarian. For a gluten-free version, check that your candy canes are certified gluten-free (most are, but some brands process them in facilities that also handle wheat). For a vegan version, use dairy-free chocolate chips. The recipe is egg-free and nut-free as written, making it a safe option for many common allergies. However, always check labels if you’re serving someone with severe allergies—some chocolate brands are processed in facilities that handle nuts.
Potential Allergens: Dairy (in the white chocolate and semi-sweet chocolate), soy (often added to chocolate chips as an emulsifier). If you’re serving a crowd, I recommend making a note of the ingredients so guests can make informed choices.
My Personal Perspective: I believe in enjoying treats in moderation, and this peppermint bark is one of those recipes that feels worth every bite. It’s not an everyday food, but for holiday celebrations, gift-giving, and special occasions, it’s absolutely perfect. I’d rather have a small piece of really good, homemade bark than a whole box of mass-produced candy. Quality over quantity, always.
Conclusion
This peppermint bark has become my holiday secret weapon, and I’m honestly a little surprised it took me this long to share it with you. Three ingredients, ten minutes of work, and you have something that looks and tastes like it came from a fancy chocolate shop. It’s the kind of recipe that makes you look like you put in way more effort than you actually did—and honestly, that’s my favorite kind of recipe.
I love that this bark is forgiving. If your layers aren’t perfectly even, it’s rustic charm. If you crush the candy canes too fine, it’s delicate and elegant. If you leave them chunky, it’s bold and crunchy. There’s no wrong way to make it, and that’s what makes it so approachable. You don’t need to be a pastry chef or even a confident baker to nail this recipe on your first try.
So go ahead and make a batch. Make it for your holiday party, your neighbor, your kid’s teacher, or just for yourself on a cozy December evening. Break off a piece, pour yourself a cup of coffee, and enjoy the fact that you made something beautiful with almost no effort. That’s the magic of this recipe, and I hope it brings you as much joy as it’s brought me.
I’d love to hear how your peppermint bark turns out! Drop a comment below and let me know if you tried any variations, or tag me in your photos if you share them online. Happy holidays, and happy snacking!
Frequently Asked Questions
Can I use chocolate bars instead of chocolate chips?
Absolutely! Just chop them into small, uniform pieces so they melt evenly. Bars actually melt more smoothly than chips because they don’t contain the stabilizers that chips have. Use the same amount by weight—12 ounces of chopped chocolate equals about 2 cups of chips.
Why did my white chocolate seize and turn grainy?
White chocolate is the most delicate type of chocolate to melt. It seized because it got too hot or came into contact with even a drop of water. Always melt it at 50% power in short bursts, and make sure your bowl and spatula are completely dry. If it seizes, unfortunately there’s no saving it—you’ll need to start over with fresh chocolate.
How long does this peppermint bark last?
Stored properly in an airtight container in the refrigerator, it will stay fresh for up to 3 weeks. In the freezer, it lasts up to 3 months. The texture is best within the first week, but it’s still delicious after that. Just make sure to layer it with parchment paper so the pieces don’t stick together.
Can I make this without a microwave?
Yes! Use a double boiler instead. Fill a small saucepan with about an inch of water and bring it to a simmer. Place your chocolate in a heatproof bowl that sits on top of the pan without touching the water. Stir until melted, then proceed with the recipe. This method takes a little longer but gives you more control and reduces the risk of burning.
My layers mixed together and look muddy. What went wrong?
This happens when the first layer isn’t fully set before you add the second layer, or when the white chocolate is too hot. Make sure the dark chocolate layer is completely firm to the touch before you spread the white chocolate. Also, let the melted white chocolate cool for about 2 minutes before pouring it. The cold dark layer will help set the white chocolate quickly, preventing them from blending.
Pin This Recipe!
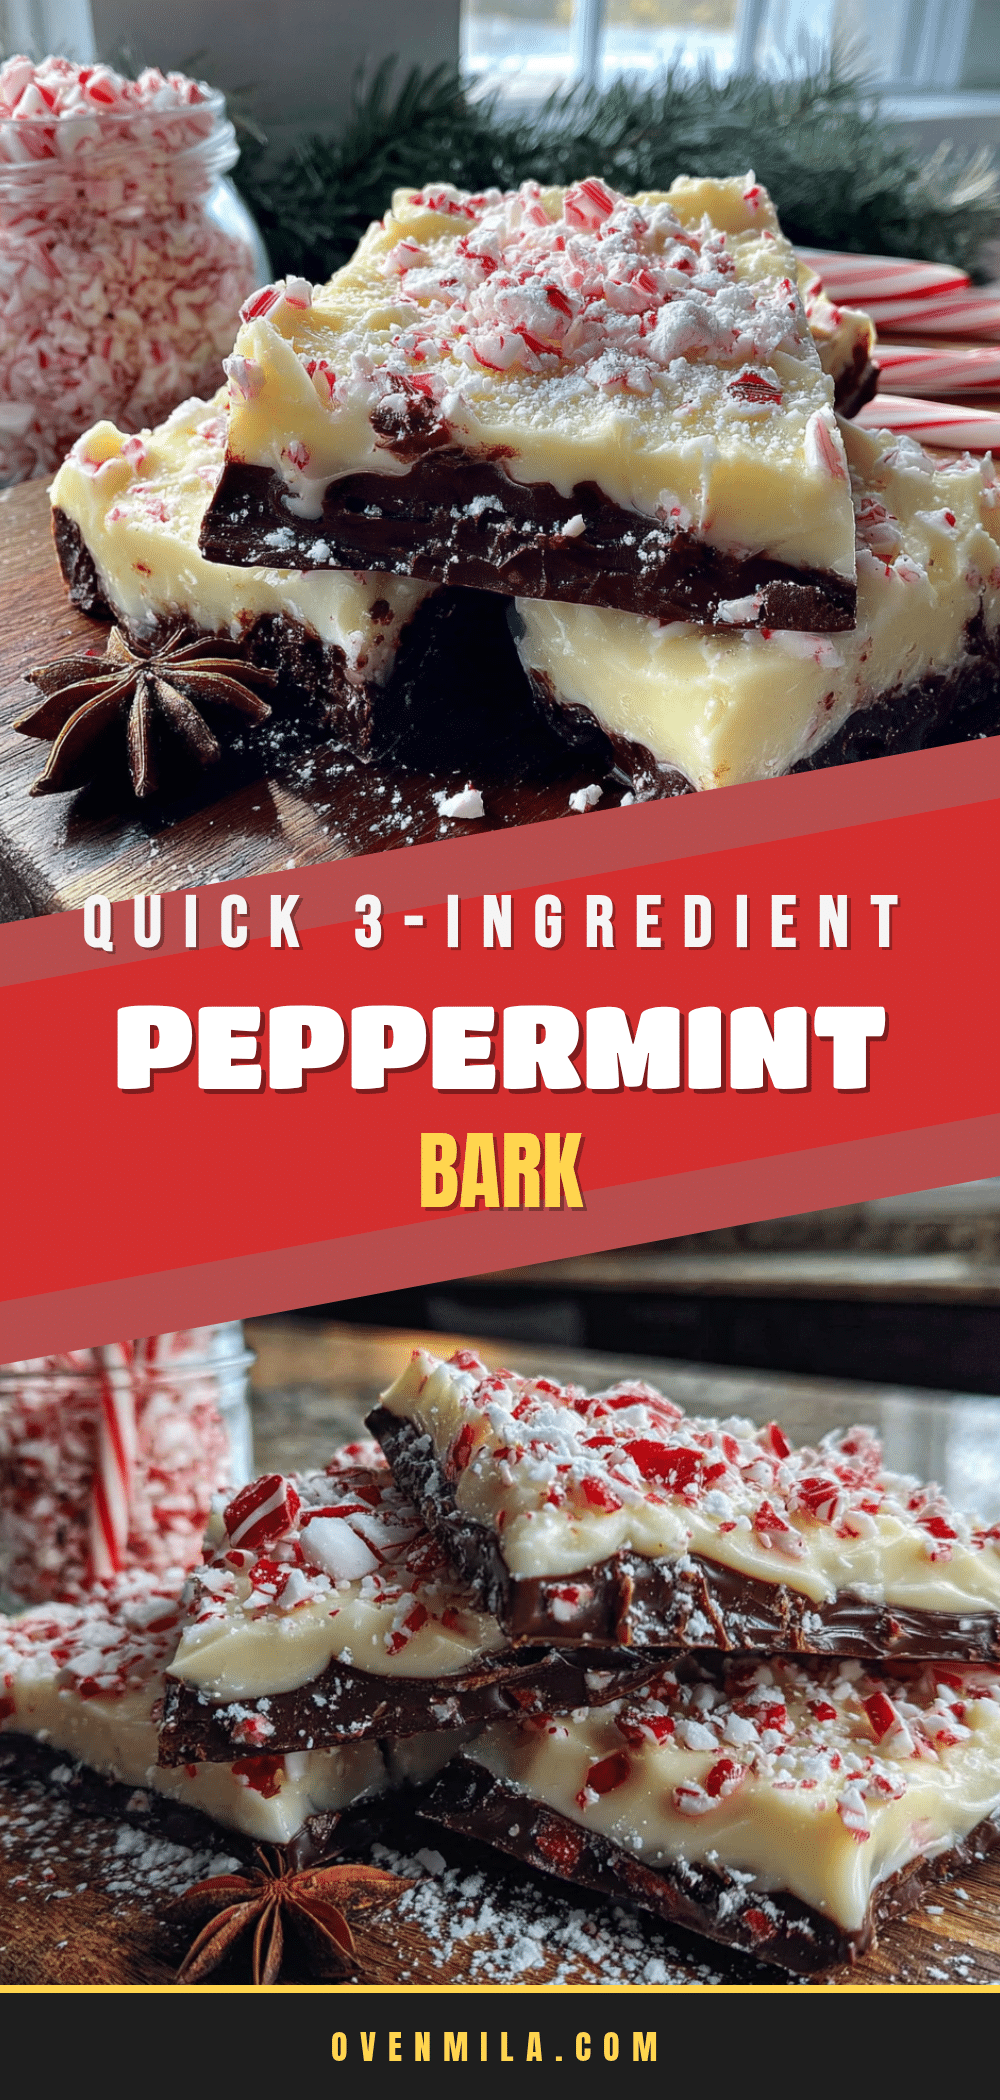
3-Ingredient Peppermint Bark: Best Easy Homemade Recipe

This incredibly simple peppermint bark uses just three ingredients and ten minutes of active prep time to create a stunning, crowd-pleasing holiday treat. The combination of semi-sweet chocolate, creamy white chocolate, and crunchy peppermint candy canes looks and tastes like it came from a fancy confectionery shop.
- Prep Time: 10 minutes
- Cook Time: 0 minutes
- Total Time: 1 hour 10 minutes (including chilling)
- Yield: 8 servings 1x
- Category: Dessert
- Cuisine: American
Ingredients
- 12 ounces semi-sweet chocolate chips (recommended: Ghirardelli or Guittard)
- 12 ounces white chocolate chips (look for ones containing cocoa butter, like Ghirardelli or Baker’s)
- 6 to 8 large candy canes (about 3/4 cup crushed, classic red-and-white striped)
- 1 teaspoon coconut oil or vegetable shortening (optional, for extra smooth white chocolate)
- Flaky sea salt (optional, like Maldon, for sweet-salty finish)
Instructions
- Prep your workspace: Line a baking sheet with parchment paper or aluminum foil, extending up the sides slightly. Clear a flat spot in your freezer or fridge.
- Crush the candy canes: Unwrap and place in a sturdy Ziploc bag, seal, and press out air. Use a rolling pin (or heavy skillet/wine bottle) to gently tap and roll until you have a mix of fine crumbs and small chunks (about 1/4 inch). Set aside.
- Melt the semi-sweet chocolate: Place chips in a medium microwave-safe bowl. Microwave in 30-second intervals at 50% power, stirring between each, until mostly melted (about 1.5-2 minutes). Stir until completely smooth and glossy.
- Spread the first layer: Pour melted semi-sweet chocolate onto prepared baking sheet. Use a rubber spatula or offset spatula to spread into an even rectangle about 1/4 inch thick. Work quickly.
- Set the first layer: Place baking sheet in refrigerator or freezer for 15-20 minutes, until chocolate is firm to the touch and matte (no indent when pressed).
- Melt the white chocolate: While first layer sets, melt white chocolate chips in a separate microwave-safe bowl using the same method (30-second intervals at 50% power). Stir in optional coconut oil after melting. Be careful not to overheat.
- Spread the second layer: Once semi-sweet layer is fully set, remove from fridge. Pour melted white chocolate over dark layer and spread gently and evenly, being careful not to disturb the dark layer.
- Add the peppermint topping: Immediately sprinkle crushed candy canes evenly over the white chocolate. Press down very lightly with fingers or back of a spoon to help them adhere. Add optional flaky sea salt.
- Set the final layer: Return baking sheet to refrigerator for 45 minutes to 1 hour, or freezer for 30 minutes, until bark is completely firm and snaps cleanly when broken.
- Break into pieces: Lift bark out using parchment handles. Place on cutting board and break into irregular shards (about 2-3 inches across) with your hands, or cut into squares with a sharp knife.
Notes
Let the melted white chocolate cool for about 2 minutes before pouring over the dark layer to prevent the layers from mixing. Crush candy canes coarser than you think you need. The peppermint flavor intensifies over the first 24 hours. Store in an airtight container in the refrigerator for up to 3 weeks or freezer for up to 3 months. For best texture, serve cold or at cool room temperature.
Nutrition
- Serving Size: 2 ounces (about 1/8
- Calories: 280
- Sugar: 28
- Sodium: 40
- Fat: 18
- Saturated Fat: 11
- Carbohydrates: 32
- Fiber: 2
- Protein: 3
Keywords: peppermint bark, 3-ingredient, easy holiday dessert, chocolate peppermint, homemade candy, Christmas treat, no-bake dessert


