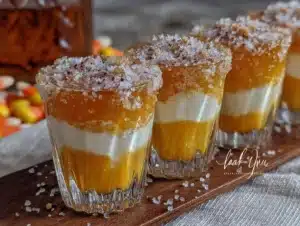
My friend Jenna had sworn off Jello shots for a solid decade. “College,” she’d say with a shudder, waving her hand like she was shooing away a bad memory. She claimed the syrupy sweetness and that artificial, hangover-in-a-cup aftertaste had ruined them for life. Then Halloween rolled around last year, and I was testing out this “lighter” version of the classic candy corn shot in my tiny kitchen. I was just going for a fun, slightly healthier option for the adults at my neighbor’s costume party. I had the layers setting in those little plastic cups—orange, yellow, and white—feeling pretty pleased with myself for using real fruit juice and a touch of good vodka instead of the usual neon-colored rocket fuel. I turned around to grab a snack from the fridge, and when I turned back, Jenna was standing there, holding one of the cups. She had already taken a bite out of the top layer. “I was just testing it for you,” she mumbled through a mouthful of set gelatin, her eyes wide with surprise. “This is… actually good.” That was the moment I knew I had something special. Honestly, if I can get a Jello-shot hater to eat one and then ask for the recipe, you know it’s a winner. This isn’t your dorm-room disaster; it’s a refined, grown-up treat that feels festive without the sugar crash. Maybe you’ve had a similar experience with a party food you thought you’d outgrown. Let me tell you, this one is worth a second chance.
Why You’ll Love This Recipe
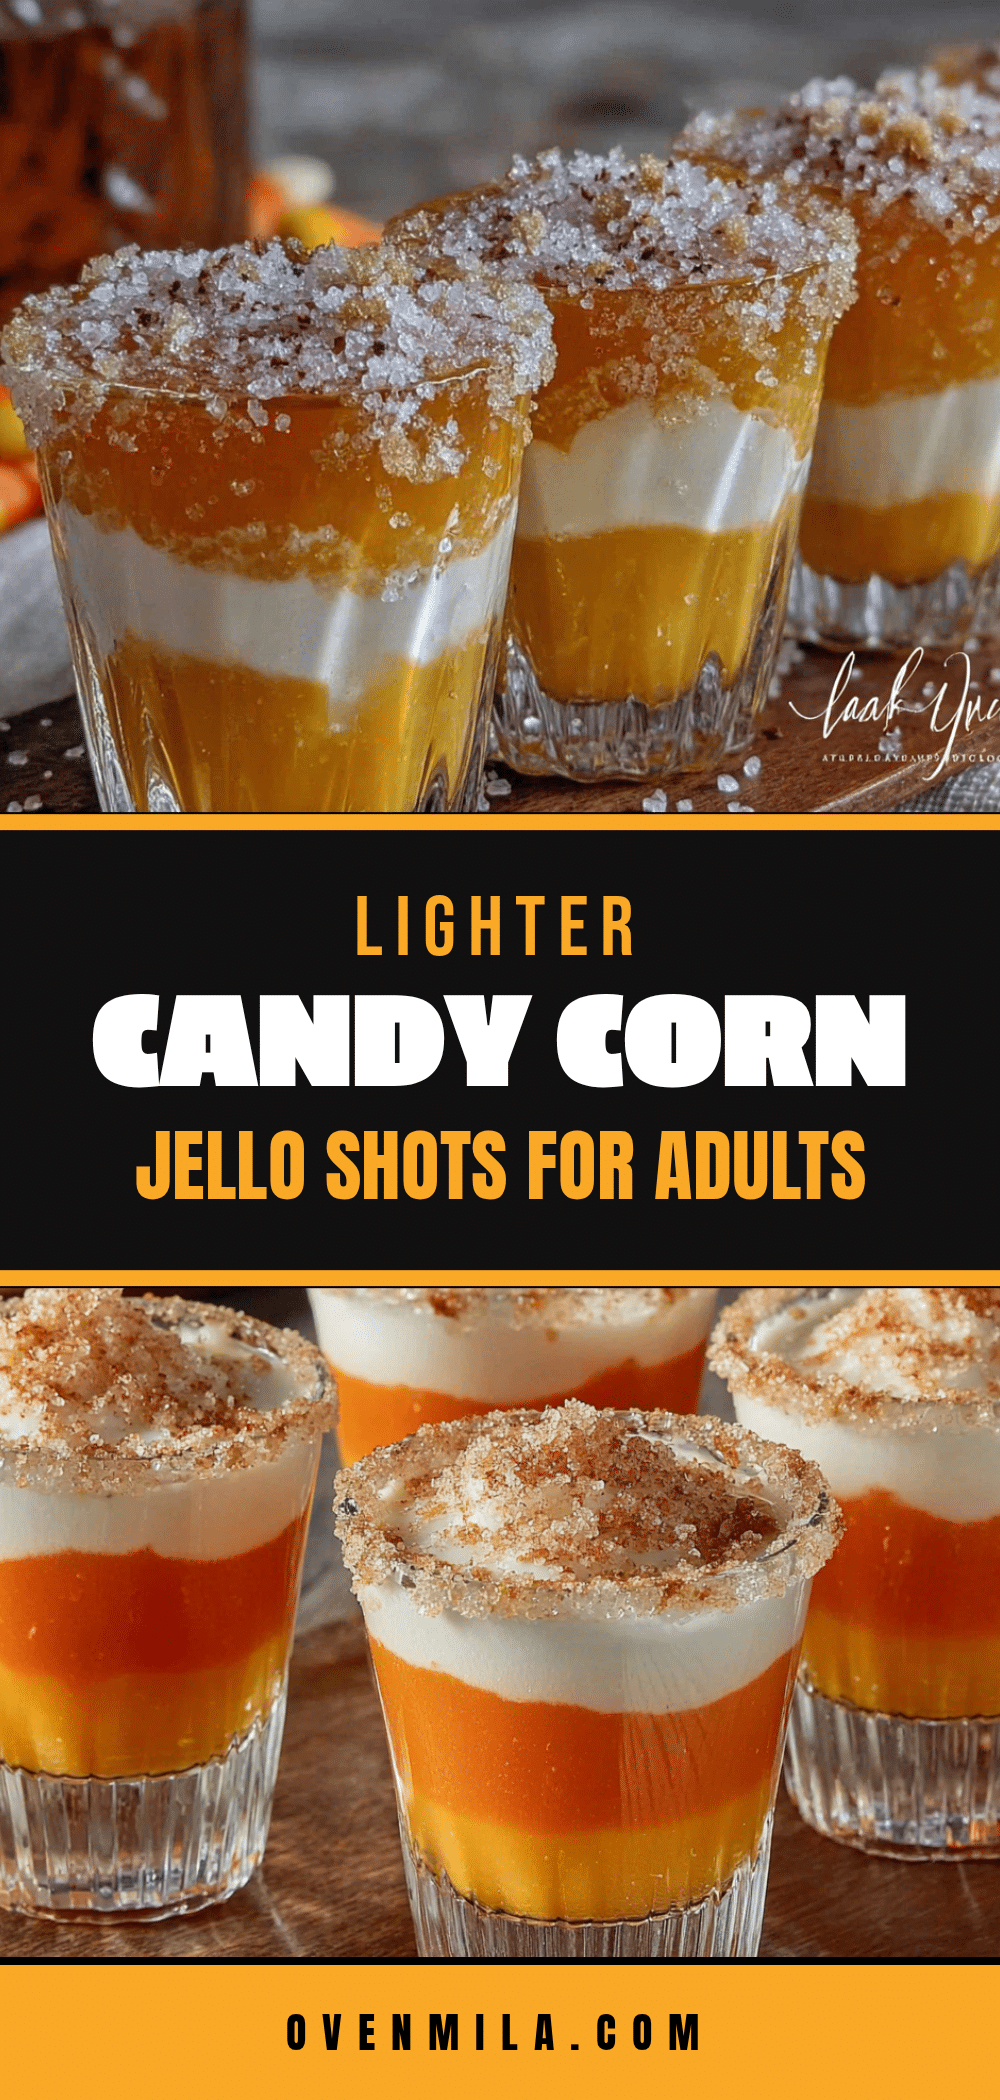
These lighter candy corn Jello shots are a game-changer for anyone who wants to join the Halloween fun without the regret. I’ve tested this recipe multiple times to nail the texture and flavor balance, and it’s become my go-to for adult gatherings. Here is why you’ll find yourself making them for every fall party:
- Quick & Easy: While they do require some chilling time for the layers, the actual hands-on work is only about 15 minutes. You can easily prep them the day before your party.
- Simple Ingredients: No need for a specialty grocery run. You’ll use real fruit juices like orange juice and pineapple juice, unflavored gelatin, and your choice of vodka or even a clear spirit like white rum.
- Perfect for Halloween Parties: These are the star of any adult Halloween gathering, tailgate, or even a spooky movie night. They look impressive but are deceptively simple to pull off.
- Crowd-Pleaser: Even people who claim to dislike Jello shots love these. The natural fruit flavors are bright and refreshing, not cloyingly sweet. I’ve watched skeptics become converts right at the table.
- Unbelievably Delicious: The combination of tangy orange, sweet pineapple, and creamy coconut milk creates a flavor profile that is miles above the store-bought mixes. It tastes like a real dessert, not a science experiment.
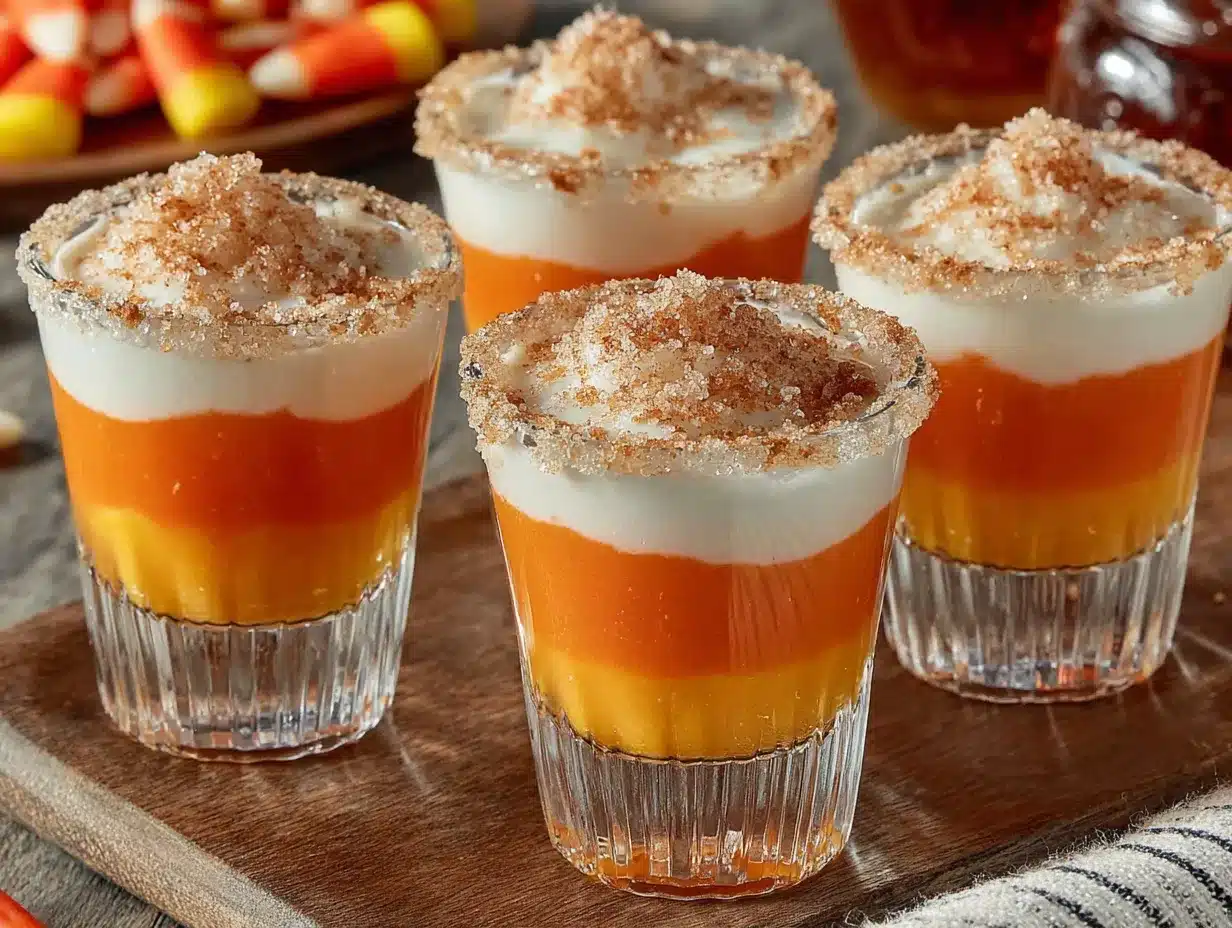
What makes this version different from the rest is the technique. Instead of using pre-packaged Jello mixes loaded with high-fructose corn syrup and artificial dyes, you are building the layers with real juice and controlling the sugar. The secret is using a touch of sweetened condensed milk for the white layer, which gives it a rich, creamy texture that perfectly mimics the candy corn top. This isn’t just another recipe—it’s the best version because it prioritizes flavor and feel-good ingredients. It’s the kind of treat that makes you close your eyes after the first bite, surprised by how good something so fun can actually taste. Perfect for impressing your friends without spending hours in the kitchen.
What Ingredients You Will Need
This recipe uses simple, wholesome ingredients to deliver those iconic candy corn colors and a bright, clean flavor. Most of these are pantry staples or easy to find at any grocery store. The key is using quality juice for the best taste.
For the Orange Layer (Bottom)
- 1 cup orange juice (freshly squeezed or a good quality, not-from-concentrate brand like Simply Orange works best for a clean flavor)
- 1 packet (2 teaspoons) unflavored gelatin (like Knox brand)
- 1 tablespoon honey or agave nectar (optional, if you want it a touch sweeter; the juice is usually sweet enough)
- 1/3 cup vodka (or your favorite clear spirit; you can adjust this to taste)
For the Yellow Layer (Middle)
- 1 cup pineapple juice (unsweetened is best to keep the sugar down; do not use canned syrup)
- 1 packet (2 teaspoons) unflavored gelatin
- 1/3 cup vodka
For the White Layer (Top)
- 1/2 cup boiling water
- 1 packet (2 teaspoons) unflavored gelatin
- 1/2 cup sweetened condensed milk (this is the secret to the creamy, opaque top layer; use a high-quality brand like Eagle Brand)
- 1/4 cup vodka
- 1/2 teaspoon vanilla extract (adds a lovely warmth to the top layer)
Ingredient Selection Tips: For the clearest layers, use a good quality vodka. You can also use white rum or even a citrus-flavored vodka for an extra flavor boost. If you want to make these completely dairy-free, you can substitute the sweetened condensed milk with a can of full-fat coconut cream mixed with 2 tablespoons of sugar, but the texture will be slightly different—less creamy, more firm. I personally love the richness the condensed milk brings. Also, look for small-curd, if you are using any other dairy, but here the milk is smooth.
Equipment Needed
You don’t need any fancy tools for this recipe, which is part of its charm. Here is what you’ll need to have on hand:
- 2-cup liquid measuring cup (with a spout makes pouring the layers much easier and less messy)
- Small bowls or ramekins (for dissolving the gelatin in each layer)
- Whisk (a small one is perfect for ensuring the gelatin dissolves completely)
- 2-ounce plastic shot cups with lids (you can find these at any party supply store or online; the clear ones show off the layers beautifully)
- Baking sheet or tray (to hold the cups while they set in the refrigerator)
- Small saucepan (for boiling water and gently heating the juice)
I learned the hard way that trying to pour the liquid from a regular bowl leads to drips and a mess. A measuring cup with a spout is a total game-changer for this. Also, a baking sheet is essential because it makes moving the tray of 20-30 cups in and out of the fridge a breeze without spilling them all over the place.
Preparation Method
Making these layered shots requires a little patience, but the process is straightforward. The key is letting each layer set completely before adding the next. I usually make them over the course of an afternoon.
Step 1: Prepare the Orange Layer (Bottom)
Pour 1/2 cup of the orange juice into a small saucepan. Sprinkle the packet of unflavored gelatin over the top and let it sit for 2-3 minutes to “bloom.” This step is crucial—it prevents lumps. Then, warm the mixture over low heat, stirring constantly, until the gelatin is fully dissolved and the liquid is clear. Do not let it boil. Remove from heat and stir in the remaining 1/2 cup of orange juice and the honey (if using) until dissolved. Let it cool for about 5 minutes, then stir in the vodka. Pour this mixture evenly into your shot cups, filling them about 1/3 of the way. Place the tray in the refrigerator for at least 1 hour, or until the layer is firm to the touch. I usually give it a full 90 minutes to be safe.
Step 2: Prepare the Yellow Layer (Middle)
Repeat the same process with the pineapple juice. In the saucepan, combine 1/2 cup of the pineapple juice with the gelatin. Let it bloom for 2-3 minutes. Warm over low heat until dissolved. Remove from heat, stir in the remaining 1/2 cup of pineapple juice, and let it cool. Stir in the vodka. Make sure the orange layer is completely set—it should feel solid, not jiggly. Gently pour the yellow mixture on top of the orange layer, filling the cups another 1/3 of the way. Return to the fridge for another 1-1.5 hours, until firm.
Step 3: Prepare the White Layer (Top)
In a small bowl, pour the 1/2 cup of boiling water over the packet of unflavored gelatin. Whisk vigorously for 2 minutes until the gelatin is completely dissolved. The water needs to be truly boiling for this to work. Let it cool for 3-4 minutes. Then, whisk in the sweetened condensed milk and vanilla extract until smooth. Finally, stir in the vodka. Allow this mixture to cool to room temperature—it should feel warm to the touch but not hot, or it will melt the yellow layer. Gently pour this over the set yellow layer, filling the cups to the top. Refrigerate for at least 4 hours, or overnight, until fully set. The shots are ready when they are completely firm and wiggle as one solid piece.
Pro-Tip from a messy kitchen: The first time I made these, I was too impatient and poured the white layer while it was still warm. It sank right into the yellow layer and created a weird, cloudy mess. Let that white mixture cool down completely! Your patience will be rewarded with those sharp, beautiful lines.
Cooking Tips & Techniques
Getting those perfect, Instagram-worthy layers is all about technique. Here are some lessons I’ve learned the hard way so you don’t have to.
The Bloom is Your Friend: Never skip blooming the gelatin in cold liquid first. If you dump the powder into hot liquid, you will get clumps that never dissolve. It takes two minutes and saves you from a lumpy disaster.
Temperature Control is Everything: This is the most important tip. Each layer you pour must be cool to the touch—almost room temperature—but the layer underneath must be fully set and cold from the fridge. If the new layer is too warm, it will melt the one below it. If the bottom layer isn’t set, the colors will bleed together. I set a timer for every single step.
The “Drip Test”: Before I pour a new layer over the entire batch, I take one test cup and pour a tiny amount of the new liquid on top. If it sits on top of the set layer without sinking in or turning cloudy, I’m good to go with the rest. This simple test has saved me many times.
Don’t Over-Boil: When dissolving the gelatin in the juice, use low heat. Boiling the mixture can break down the gelatin’s setting power, resulting in a weaker, more watery shot. A gentle simmer is all you need.
Use a Squeeze Bottle for Precision: If you really want those layers to be perfect, pour your cooled liquid into a plastic squeeze bottle. It gives you total control and prevents accidental over-pouring or splashing into the wrong cup.
Variations & Adaptations
Once you master the basic technique, the possibilities are endless. This recipe is a fantastic base for all sorts of creative Halloween treats.
- Spooky Color Twist: Instead of candy corn colors, make a “Witch’s Brew” shot. Use a green layer (melon liqueur or green food coloring with apple juice), a purple layer (grape juice), and a black layer (use the white cream layer but add black food coloring). It looks fantastic for a Halloween party.
- Non-Alcoholic Version: This is perfect for designated drivers or a party with mixed ages. Simply replace the vodka in each layer with an equal amount of cold water or a complementary flavored seltzer. The gelatin will set just the same, and you’ll have a delicious, fun gelatin dessert.
- Skinny & Low-Sugar: To make these even lighter, use unsweetened juices and replace the sweetened condensed milk with a can of full-fat coconut cream blended with a sugar substitute like monk fruit or stevia. The texture will be a bit less creamy, but the flavor is still fantastic and much lower in sugar.
- Spiced Fall Variation: For a more autumnal flavor, add 1/4 teaspoon of cinnamon and a pinch of nutmeg to the orange juice layer. You can also use a cinnamon-infused simple syrup instead of honey. It gives the shots a chai-like warmth that is perfect for a cozy night in.
I once tried a “Bloody Orange” variation by using blood orange juice for the bottom layer and adding a tiny drop of red food coloring to the white layer to make it look pink. It was a hit at a Halloween brunch!
Serving & Storage Suggestions
These shots are best served cold, right out of the fridge. The firm, cool texture is part of the experience.
Serving: Arrange the cups on a platter or a baking sheet for easy grabbing. You can garnish them with a tiny candy corn stuck into the top of the white layer for a classic look, or a small mint leaf for a pop of green. They are perfect as a self-serve option at a party. I like to place them on a tray with a little sign that just says “Boo-ze Shots.”
Storage: These shots will keep beautifully in the refrigerator for up to 5 days. Keep them covered with their lids or a piece of plastic wrap to prevent them from absorbing other odors from the fridge. Do not freeze them—the texture will become watery and grainy upon thawing.
Flavor Development: Honestly, these taste even better the day after you make them. The flavors meld together beautifully overnight. The alcohol taste also mellows out, leaving a smoother, more balanced shot. So, making them a day ahead is actually the best strategy for a party.
Nutritional Information & Benefits
While these are still a treat, this lighter version is a much better choice than the traditional neon-colored shots. Because we are using real fruit juice, you get a small dose of Vitamin C from the orange and pineapple juice. The unflavored gelatin provides a bit of protein, which can help with a more stable blood sugar response compared to pure sugar shots.
Estimated Nutritional Info (per 2 oz shot):
- Calories: ~90-100
- Carbohydrates: 12-15g (mostly from natural sugars in juice and condensed milk)
- Protein: 2g
- Fat: 1g (from the condensed milk)
Dietary Considerations: This recipe is naturally gluten-free. It contains dairy from the sweetened condensed milk. For a dairy-free option, use the coconut cream substitution mentioned in the variations. It is also relatively low in fat. I feel good serving these because I know exactly what is in them—no artificial colors or high-fructose corn syrup—and that makes the indulgence feel a little more balanced.
Conclusion
These lighter candy corn Jello shots are more than just a party trick; they are a genuinely delicious adult treat that proves you don’t need a ton of sugar and artificial ingredients to have fun. They are surprisingly easy to make, look incredibly impressive on a Halloween table, and taste like a real dessert. I love making them because they always spark a conversation and bring a smile to people’s faces—especially when they take that first skeptical bite and their eyes light up with surprise. I encourage you to play around with the flavors and make them your own. Try the spiced version or a different color combo for a birthday party. I would absolutely love to hear how yours turn out! Share your creations in the comments below, or tag me in your photos. Happy (and slightly healthier) Halloween!
Frequently Asked Questions
Can I use flavored Jello mix instead of unflavored gelatin?
You can, but it will completely change the flavor profile and add a lot of artificial sugar and colors. The whole point of this “lighter” recipe is to use real fruit juice. If you use flavored Jello, you won’t get that clean, bright taste, and you’ll lose the “lighter” aspect.
My layers are bleeding together. What did I do wrong?
This usually happens for two reasons. Either the bottom layer wasn’t fully set (it needs to be completely firm, not just jiggly) or the new layer you poured was too warm. Make sure each layer is cool to the touch and the layer below is cold and solid.
How far in advance can I make these?
You can make them up to 5 days in advance. In fact, they taste better after a day or two as the flavors meld. Just keep them covered in the refrigerator. They are the perfect make-ahead party food.
Can I use a different type of alcohol?
Absolutely! Clear spirits work best to keep the colors bright. Vodka, white rum, silver tequila, or even a citrus-flavored gin are all great options. Avoid dark liquors like whiskey or dark rum as they will muddy the colors of the yellow and orange layers.
How do I get the shots out of the cups to eat them?
You don’t need to! These are designed to be eaten straight from the plastic cup. You just squeeze the bottom of the cup gently, and the shot will pop right out into your mouth. That’s part of the fun. If you want to plate them, you can briefly dip the cups in warm water to loosen the gelatin.
Pin This Recipe!
Lighter Candy Corn Jello Shots
These lighter candy corn Jello shots are a game-changer for anyone who wants to join the Halloween fun without the regret. Made with real fruit juice and a touch of good vodka, they are a refined, grown-up treat that feels festive without the sugar crash.
- Prep Time: 15 minutes
- Cook Time: 0 minutes
- Total Time: 6 hours 15 minutes (includes chilling time)
- Yield: 20-30 servings (2 oz shots) 1x
- Category: Dessert
- Cuisine: American
Ingredients
- 1 cup orange juice (freshly squeezed or not-from-concentrate)
- 3 packets (2 teaspoons each) unflavored gelatin (like Knox brand)
- 1 tablespoon honey or agave nectar (optional)
- 1 cup pineapple juice (unsweetened)
- 1/2 cup boiling water
- 1/2 cup sweetened condensed milk
- 1/2 teaspoon vanilla extract
- 1 cup vodka (or clear spirit like white rum, divided: 1/3 cup + 1/3 cup + 1/4 cup)
Instructions
- Prepare the Orange Layer (Bottom): Pour 1/2 cup of the orange juice into a small saucepan. Sprinkle 1 packet of unflavored gelatin over the top and let it sit for 2-3 minutes to bloom. Warm the mixture over low heat, stirring constantly, until the gelatin is fully dissolved and the liquid is clear. Do not let it boil. Remove from heat and stir in the remaining 1/2 cup of orange juice and the honey (if using) until dissolved. Let it cool for about 5 minutes, then stir in 1/3 cup vodka. Pour this …
- Prepare the Yellow Layer (Middle): Repeat the same process with the pineapple juice. In the saucepan, combine 1/2 cup of the pineapple juice with 1 packet of gelatin. Let it bloom for 2-3 minutes. Warm over low heat until dissolved. Remove from heat, stir in the remaining 1/2 cup of pineapple juice, and let it cool. Stir in 1/3 cup vodka. Make sure the orange layer is completely set. Gently pour the yellow mixture on top of the orange layer, filling the cups another 1/3 of the way. Return to the…
- Prepare the White Layer (Top): In a small bowl, pour the 1/2 cup of boiling water over the remaining packet of unflavored gelatin. Whisk vigorously for 2 minutes until the gelatin is completely dissolved. Let it cool for 3-4 minutes. Then, whisk in the sweetened condensed milk and vanilla extract until smooth. Finally, stir in the remaining 1/4 cup vodka. Allow this mixture to cool to room temperature. Gently pour this over the set yellow layer, filling the cups to the top. Refrigerate for at le…
Notes
The key to perfect layers is temperature control: each new layer must be cool to the touch, and the layer underneath must be fully set. Let the white mixture cool completely before pouring to avoid melting the yellow layer. These taste even better the day after making them.
Nutrition
- Serving Size: 1 shot (2 oz)
- Calories: 90100
- Sugar: 1012
- Sodium: 20
- Fat: 1
- Saturated Fat: 0.5
- Carbohydrates: 1215
- Protein: 2
Keywords: candy corn, jello shots, Halloween, adult treats, party food, lighter, vodka, gelatin, layered shots