My sister claimed she hated green beans for twenty-three years. Twenty-three years of pushing them to the side of her plate, of making that little face when they showed up at Thanksgiving, of declaring them “soggy grass” at every family dinner. Then last Christmas, I made a batch of these bacon wrapped green beans with brown sugar glaze for a potluck, and I caught her standing by the serving tray. Not just standing—hoarding. She had seven of them on a napkin, and she was sneaking bites while pretending to check her phone. I didn’t say anything. I just watched her eat every single one and then go back for more. She never admitted I was right, but honestly, she didn’t have to. The empty tray did all the talking for me.
That’s the thing about this recipe, you know? It doesn’t argue with you. It just sits there looking all caramelized and glossy, wrapped in bacon, and dares you to keep your old grudges. I mean, I get it—plain steamed green beans can be a sad affair. But wrap them in crispy bacon, hit them with a buttery brown sugar glaze that turns into this sticky-sweet caramel in the oven, and suddenly you’ve got a side dish that steals the show from the main course every single time. Maybe you’ve been there, watching someone pick around a vegetable for years, wondering what it would take to change their mind.
These green beans are what it takes. They’re the dish that makes skeptics into converts, the one that disappears before the turkey even gets carved, the recipe that people text you about the next day asking for the details. And the best part? They’re embarrassingly easy to throw together. I’ve been making them for every holiday gathering, every backyard barbecue, every random Tuesday when I need a little comfort, and they never let me down. Let me tell you how it happened.
Why You’ll Love This Recipe
Look, I’ve tested a lot of green bean recipes over the years. Some were too soggy, some were too dry, and some just didn’t have that oomph that makes you reach for seconds. This one? It’s the real deal. Here’s why you’ll keep coming back to it:
- Quick & Easy: With just 10 minutes of prep time, these come together fast. You don’t need any fancy techniques—just wrap, glaze, and bake. Perfect for busy weeknights or holiday mornings when you’re juggling a dozen dishes.
- Simple Ingredients: Bacon, green beans, brown sugar, butter, garlic. That’s it. No trips to specialty stores, no hunting down obscure spices. You probably have most of this in your kitchen right now.
- Perfect for Gatherings: Whether it’s Thanksgiving, Christmas, Easter, or a casual summer cookout, these green beans fit right in. They’re elegant enough for a holiday table but casual enough for a weeknight dinner.
- Crowd-Pleaser: I’ve served these to kids, picky eaters, vegetarians who “just want one,” and bacon lovers who can’t get enough. Every single person goes back for more. Even my sister, and she held a grudge for twenty-three years.
- Unbelievably Delicious: The combination of salty bacon, sweet brown sugar, and tender-crisp green beans is pure magic. The glaze caramelizes in the oven, creating this sticky, buttery coating that makes every bite irresistible.
What makes this recipe different from all the others? It’s the balance. Some recipes make the green beans too sweet, turning them into candy. Others forget to season the beans themselves, so you end up with bland vegetables wrapped in salty bacon. This version gets it right—the brown sugar glaze is measured carefully so it complements the bacon without overwhelming it, and the green beans are seasoned before they even hit the oven. Plus, I’ve figured out the perfect cooking time so the beans stay tender-crisp instead of turning into mushy messes. This isn’t just another version of bacon wrapped green beans. It’s the best version, and I’ll stand by that.
Honestly, this recipe is comfort food at its finest. It’s the kind of dish that makes you close your eyes after the first bite, the kind that reminds you why home cooking is worth the effort. It’s warm, it’s nostalgic, and it’s exactly what you need on a cold evening or a rough day that needs fixing. Trust me on this one.
What Ingredients You Will Need
This recipe uses simple, wholesome ingredients to deliver bold flavor and satisfying texture without the fuss. Most of these are pantry staples, and the ones that aren’t are easy to find at any grocery store. Let me walk you through each one.
For the Green Beans
- Fresh green beans, 1 pound (trimmed, ends removed) — Fresh is non-negotiable here. Frozen green beans release too much water and will make your bacon soggy. Look for bright green, firm beans with no wilting or brown spots. I prefer thinner beans because they cook faster and have a better texture, but any fresh green beans will work. If you’re feeling fancy, you can use haricots verts—they’re thinner and more tender.
- Bacon, 12 slices (regular cut, not thick cut) — Regular cut bacon is the sweet spot for this recipe. Thick cut bacon takes too long to crisp up, and thin cut bacon might break when you wrap it. I recommend Wright Brand or Oscar Mayer for consistent results. You want bacon that’s going to get crispy in the same time it takes the green beans to cook through. If you can find it, applewood smoked bacon adds a lovely subtle flavor that pairs beautifully with the brown sugar.
- Olive oil, 1 tablespoon — Just a little to toss the green beans before seasoning. It helps the salt and pepper stick and gives the beans a nice sheen. You can use avocado oil if that’s what you have, but I prefer the mild flavor of olive oil here.
- Salt, ½ teaspoon — I use fine sea salt for even distribution. Don’t skip this! The green beans need their own seasoning, or they’ll taste bland compared to the bacon and glaze.
- Black pepper, ¼ teaspoon (freshly ground) — Fresh ground makes a difference here. It adds a subtle warmth that balances the sweetness of the glaze.
For the Brown Sugar Glaze
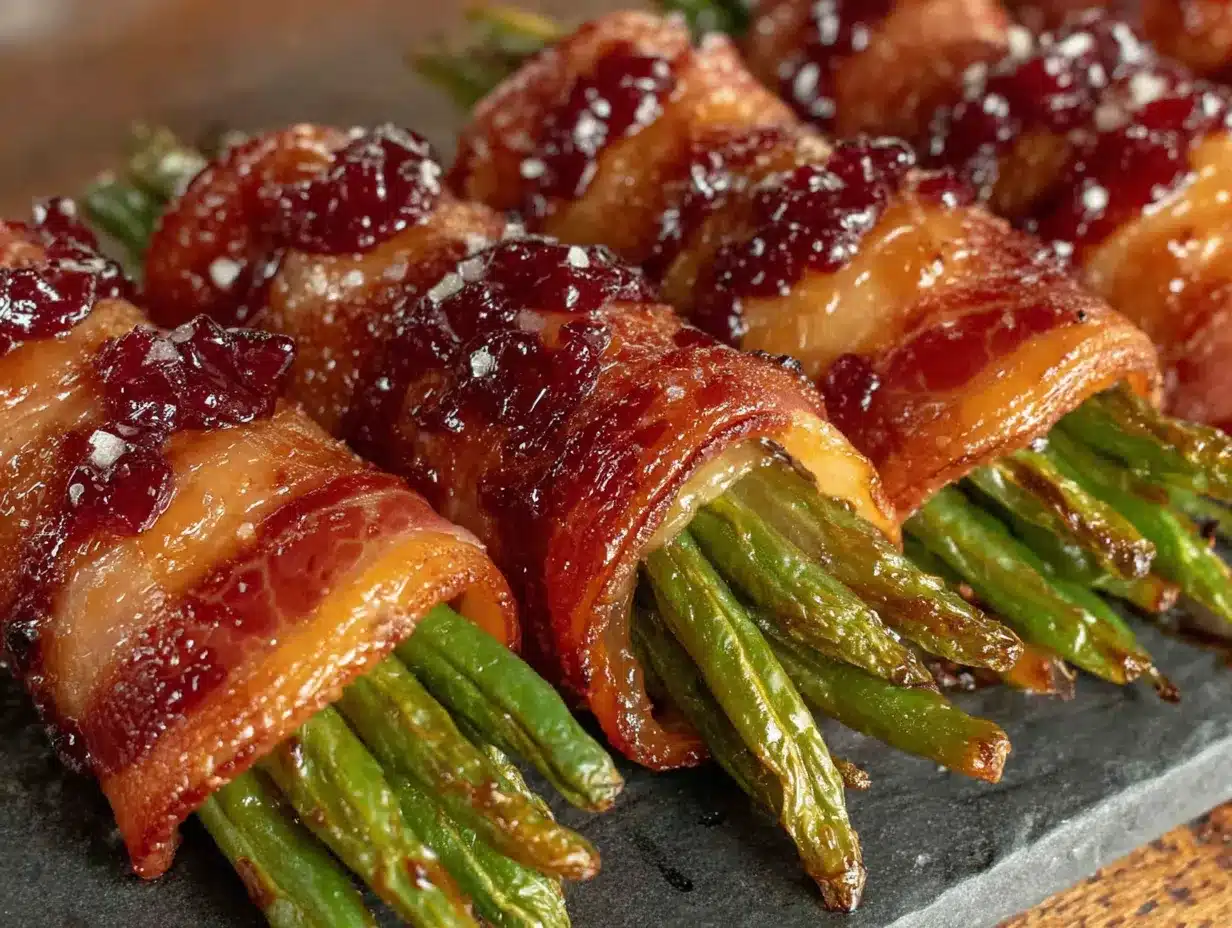
- Brown sugar, ⅓ cup (packed, light or dark) — Light brown sugar gives a milder, more buttery caramel flavor. Dark brown sugar adds deeper molasses notes. I’ve used both, and honestly, they’re both fantastic. Pack it firmly into the measuring cup—don’t just scoop it loosely. This ensures you have enough sugar to create that sticky, glossy glaze.
- Unsalted butter, 3 tablespoons (melted) — Unsalted butter lets you control the salt level. If all you have is salted butter, reduce the added salt in the recipe by half. I use Kerrygold when I’m feeling fancy, but any good-quality unsalted butter works.
- Garlic, 2 cloves (minced) — Fresh garlic only. Please don’t use the jarred stuff here. Fresh garlic adds a pungent, aromatic quality that the glaze needs to cut through the sweetness. If you’re a garlic lover, feel free to add an extra clove.
- Soy sauce, 1 teaspoon — This is my secret ingredient. Just a tiny splash adds umami and depth, balancing the sweetness of the brown sugar. You won’t taste it directly, but you’ll notice something is missing if you leave it out. Use low-sodium soy sauce if you’re watching your salt intake.
- Red pepper flakes, ¼ teaspoon (optional) — This is for those of us who like a little heat with our sweet. It’s completely optional, but I love the tiny kick it adds. If you’re serving this to kids or spice-averse guests, you can leave it out or serve it on the side.
For Garnish (Optional but Recommended)
- Fresh parsley, 2 tablespoons (chopped) — A sprinkle of fresh parsley right before serving adds a pop of color and freshness that cuts through the richness. It makes the dish look more polished, too.
- Flaky sea salt, a pinch — Maldon or any flaky sea salt adds a lovely crunch and bursts of saltiness that contrast with the sweet glaze. It’s a small touch that makes a big difference.
Equipment Needed
You don’t need a lot of fancy equipment for this recipe, which is part of why I love it. Here’s what you’ll need:
- Baking sheet, 9×13 inch (or similar size) — A rimmed baking sheet is best because it catches any glaze that drips off during cooking. If you don’t have one, a 9×13 inch casserole dish works too, though the bacon might not get as crispy since the sides are higher.
- Wire rack (fits inside the baking sheet) — This is optional but highly recommended. Placing the green beans on a wire rack allows hot air to circulate all around them, making the bacon crispier on all sides. If you don’t have one, you can place them directly on the baking sheet, just flip them halfway through cooking.
- Parchment paper or aluminum foil — Line your baking sheet with either one for easy cleanup. Trust me, the caramelized sugar glaze can be a nightmare to scrub off. Parchment paper is my preference because nothing sticks to it.
- Small bowl — For mixing the glaze. Any small bowl will do.
- Whisk or fork — For mixing the glaze ingredients together until smooth.
- Knife and cutting board — For trimming the green beans and mincing the garlic.
- Tongs — For flipping the green beans halfway through cooking. A spatula works too, but tongs give you more control.
- Pastry brush (optional) — For brushing the glaze onto the green beans. You can also drizzle it with a spoon, but a brush gives you more even coverage.
I’ve made these with just a baking sheet and a fork before, and they turned out great. The wire rack is nice to have, but don’t let the lack of one stop you from making this recipe. Also, if you’re using a dark-colored baking sheet, keep an eye on your green beans toward the end of cooking—dark pans absorb more heat and can cause the glaze to burn faster.
Preparation Method
Alright, let’s get cooking. This recipe is straightforward, but I’ve included all the little details that make the difference between good and great. Follow these steps, and you’ll have a dish that disappears in minutes.
- Preheat your oven to 400°F (200°C). Position the rack in the center of the oven. Getting the temperature right is crucial—too low and the bacon won’t crisp up; too high and the sugar will burn before the bacon is done. 400°F is the sweet spot.
- Prepare your baking sheet. Line it with parchment paper or aluminum foil for easy cleanup. If you’re using a wire rack, place it on top of the lined baking sheet. This allows air to circulate around the green beans, making the bacon crispier on all sides.
- Trim the green beans. Rinse them under cold water and pat them dry with a clean kitchen towel. Working with a small handful at a time, line up the beans and trim off the stem ends. You can leave the curly tails on for a rustic look, or trim those off too—it’s up to you. Try to keep the beans roughly the same length so they cook evenly. You should have about 36 to 40 beans total.
- Season the green beans. Place the trimmed beans in a large bowl and drizzle with 1 tablespoon of olive oil. Sprinkle with ½ teaspoon of salt and ¼ teaspoon of black pepper. Toss everything together with your hands until the beans are evenly coated. Don’t skip this step—the beans need their own seasoning, or they’ll taste bland compared to the bacon and glaze.
- Wrap the green beans in bacon. Cut each bacon slice in half crosswise, giving you 24 pieces. Take a bundle of 3 to 4 green beans (depending on their thickness) and wrap one piece of bacon around the middle, slightly overlapping the ends. Place the bundle seam-side down on your prepared baking sheet or wire rack. Repeat with the remaining beans and bacon. Don’t wrap them too tightly—leave a little room for the bacon to shrink as it cooks. You should end up with about 12 bundles.
- Make the brown sugar glaze. In a small bowl, combine ⅓ cup packed brown sugar, 3 tablespoons melted unsalted butter, 2 minced garlic cloves, 1 teaspoon soy sauce, and ¼ teaspoon red pepper flakes (if using). Whisk everything together until the sugar is mostly dissolved and the mixture is smooth. It should look like a thick, glossy sauce. Taste it—you should get sweet, buttery, garlicky notes with a tiny hint of heat at the end.
- Brush the glaze onto the bundles. Using a pastry brush or a spoon, generously coat each bacon-wrapped bundle with the brown sugar glaze. Don’t be shy—you want every surface covered. The glaze will caramelize in the oven, creating that sticky, sweet coating that makes these so addictive. Reserve any leftover glaze for basting later.
- Bake for 20 minutes. Place the baking sheet in the preheated oven and bake for 20 minutes. At this point, the bacon should be starting to crisp up, and the glaze should be bubbling and caramelizing. If you’re not using a wire rack, carefully flip each bundle with tongs halfway through (at the 10-minute mark) to ensure even cooking.
- Baste with remaining glaze (optional but recommended). After 20 minutes, remove the baking sheet from the oven. If you have any leftover glaze, brush it over the bundles now. This adds another layer of flavor and helps the glaze get extra sticky. If you didn’t reserve any, don’t worry—they’ll still be delicious.
- Bake for another 5 to 10 minutes. Return the baking sheet to the oven and bake for an additional 5 to 10 minutes, or until the bacon is crispy and the glaze is dark and caramelized. Keep a close eye on them during this last stretch—sugar can burn quickly. You’re looking for a deep amber color, not black. The bacon should be sizzling and the edges should be crispy.
- Let them rest. Remove the baking sheet from the oven and let the green beans rest on the pan for 5 minutes. This allows the glaze to set slightly and makes them easier to handle. The beans will continue to cook from residual heat, so don’t skip this step.
- Garnish and serve. Transfer the bundles to a serving platter. Sprinkle with chopped fresh parsley and a pinch of flaky sea salt, if desired. The parsley adds a fresh, green contrast to the rich, caramelized glaze, and the flaky salt provides little bursts of saltiness that balance the sweetness. Serve warm or at room temperature.
A few notes from my kitchen to yours: If you’re making these for a crowd, you can prep the bundles a few hours ahead and keep them in the fridge, then brush with glaze and bake just before serving. Also, don’t overcrowd the baking sheet—give each bundle a little space so the bacon crisps up properly. And whatever you do, don’t skip the resting time. I learned that the hard way when I tried to move them straight from the oven to a platter and ended up with a sticky, burned mess on my fingers. Patience, my friend.
Cooking Tips & Techniques
After making these bacon wrapped green beans more times than I can count (and messing them up plenty along the way), I’ve picked up a few tricks that make a real difference. Here’s what I’ve learned:
Choose the right bacon. Regular cut bacon is your best friend here. Thick cut takes too long to crisp up, and thin cut breaks apart when you wrap it. If you can only find thick cut, par-cook it for 5 minutes in a 350°F oven before wrapping—this gives it a head start on crisping up.
Don’t skip the wire rack. I know it’s an extra thing to wash, but it makes a huge difference. The wire rack lifts the bundles off the baking sheet, allowing hot air to circulate all around them. This means the bacon gets crispy on the bottom instead of sitting in a pool of rendered fat and glaze. If you don’t have a wire rack, flip the bundles halfway through cooking and drain off any excess fat before returning them to the oven.
Watch the sugar. Brown sugar burns fast. I learned this the hard way when I walked away to answer the phone and came back to a smoking kitchen. Set a timer for the last 5 minutes and check on them every couple of minutes. You’re looking for a deep amber color—once it starts to darken, it can go from perfect to burnt in seconds.
Pat the green beans dry. After washing the green beans, make sure they’re completely dry before wrapping them in bacon. Any excess moisture will steam the bacon instead of crisping it, and nobody wants soggy bacon. I like to lay them out on a clean kitchen towel and pat them dry with another towel.
Season in layers. Don’t rely on the bacon and glaze to do all the work. Season the green beans themselves with salt and pepper before wrapping them. This might seem like a small step, but it makes a big difference in the final flavor. The beans should taste good on their own, even before they get wrapped in bacon.
Multitask like a pro. While the green beans are in the oven, you can prep the rest of your meal. These take about 30 minutes total, so I like to make them alongside a main dish that requires similar oven time, like roasted chicken or baked salmon. Just make sure nothing else needs the same temperature—these need a steady 400°F to crisp up properly.
Variations & Adaptations
One of the things I love about this recipe is how versatile it is. You can tweak it a dozen different ways and end up with something delicious every time. Here are some of my favorite variations:
Spicy Maple Version: Swap the brown sugar for maple syrup and add an extra pinch of red pepper flakes. The maple syrup creates a slightly thinner, more lacquer-like glaze that’s less sweet and more complex. I made this for a friend who’s not a fan of brown sugar, and she ended up taking the leftovers home. Just be aware that maple syrup burns faster than brown sugar, so keep a close eye on the oven.
Garlic Herb Version: Add 1 teaspoon of dried thyme or rosemary to the glaze, and sprinkle the finished bundles with fresh chives instead of parsley. The earthy herbs complement the bacon beautifully and make this feel more like a holiday dish. This is my go-to for Thanksgiving—it feels special without being fussy.
Balsamic Version: Replace the soy sauce with 1 tablespoon of balsamic vinegar and reduce the brown sugar to ¼ cup. The balsamic adds a tangy, slightly fruity note that cuts through the richness of the bacon. This version is fantastic with grilled meats or as part of an antipasto spread.
Low-Carb/Keto Version: Skip the brown sugar altogether and use a sugar-free brown sugar substitute like Swerve. The texture will be slightly different (the substitute doesn’t caramelize quite the same way), but the flavor is still fantastic. You can also use sugar-free maple syrup if you prefer. I’ve tested this with both, and honestly, they’re both winners.
Air Fryer Version: If you don’t want to heat up your whole kitchen, these work beautifully in an air fryer. Preheat the air fryer to 375°F (190°C). Arrange the bundles in a single layer in the basket (you might need to work in batches). Cook for 8 to 10 minutes, flipping halfway through, until the bacon is crispy and the glaze is caramelized. The air fryer version is actually my favorite for weeknights because it’s faster and the bacon gets incredibly crispy.
Vegetarian Version: For a meatless option, wrap the green beans in thinly sliced eggplant or zucchini instead of bacon. Brush with olive oil and season with smoked paprika and garlic powder before adding the glaze. It’s not the same, of course, but it’s a delicious alternative that even bacon lovers will enjoy.
Serving & Storage Suggestions
These bacon wrapped green beans are best served warm, right after they come out of the oven. The glaze is at its stickiest and most caramelized, and the bacon is at its crispiest. But they’re also delicious at room temperature, which makes them perfect for potlucks and buffets where timing can be tricky.
Serving Suggestions: Arrange the bundles on a platter in a single layer, slightly overlapping if needed. Sprinkle with fresh parsley and flaky sea salt for a pop of color and flavor. They pair beautifully with roasted meats like turkey, chicken, pork chops, or steak. I also love serving them alongside mashed potatoes or a creamy risotto—the richness of the potatoes balances the sweet-savory flavor of the green beans. For a complete meal, add a simple green salad with a tangy vinaigrette to cut through all that richness.
Storage: If you have leftovers (which is rare in my house), store them in an airtight container in the refrigerator for up to 3 days. The bacon will lose some of its crispness, but the flavor will still be fantastic. I’ve even eaten them cold straight from the fridge, and they’re surprisingly good—like a sweet-salty snack.
Reheating: The best way to reheat these is in the oven or air fryer. Preheat your oven to 350°F (175°C) and spread the bundles on a baking sheet. Heat for 5 to 7 minutes, or until warmed through and the bacon crisps up again. In the air fryer, reheat at 350°F for 3 to 4 minutes. Avoid the microwave—it will make the bacon soggy and the glaze runny. Trust me on this one.
Make-Ahead Tips: You can assemble the bundles up to 24 hours in advance. Wrap the green beans in bacon, place them on the prepared baking sheet, and cover tightly with plastic wrap. Keep them in the refrigerator until you’re ready to bake. When you’re ready, brush with the glaze and bake as directed. You might need to add a few extra minutes to the cooking time since the bundles will be cold from the fridge.
Flavor Development: Interestingly, these green beans taste even better the next day. The flavors meld together overnight, and the glaze soaks into the green beans slightly, making them even more flavorful. If you can resist eating them all, save a few for the next day—they make an amazing addition to a leftover sandwich or chopped up and tossed into a salad.
Nutritional Information & Benefits
Let’s be real—these bacon wrapped green beans aren’t exactly health food. But they’re made with real, whole ingredients, and that counts for something. Here’s a rough breakdown per serving (about 2 bundles, assuming 6 servings):
| Nutrient | Amount per Serving |
|---|---|
| Calories | 210 |
| Total Fat | 14g |
| Saturated Fat | 6g |
| Cholesterol | 30mg |
| Sodium | 480mg |
| Total Carbohydrates | 16g |
| Dietary Fiber | 2g |
| Sugars | 12g |
| Protein | 6g |
Now, let’s talk about the good stuff. Green beans are packed with vitamins A, C, and K, plus fiber and folate. They’re also a good source of antioxidants, which help fight inflammation. The bacon adds protein and fat, which makes this dish more satisfying than plain vegetables. And the garlic? It’s been shown to support immune health and reduce blood pressure. So while this isn’t a low-calorie dish, it’s made with ingredients that offer real nutritional benefits.
If you’re watching your sodium, you can use low-sodium bacon and reduce the added salt. For a lower-sugar option, try the balsamic variation I mentioned above—the vinegar adds sweetness without the sugar. And if you’re gluten-free, just make sure your soy sauce is certified gluten-free (tamari works great).
Honestly, I believe in balance. These green beans are a treat, something you make for special occasions or when you need a little comfort. They’re not an everyday food, and that’s okay. Sometimes the best thing you can do for your soul is eat something that makes you happy, and these definitely do that.
Conclusion
So there you have it—bacon wrapped green beans with brown sugar glaze that turned a twenty-three-year grudge into an empty serving tray. If that’s not a testament to the power of good food, I don’t know what is. These green beans are proof that sometimes the simplest combinations are the most magical: salty bacon, sweet glaze, tender-crisp vegetables. It’s comfort food that feels special enough for a holiday table but easy enough for a Tuesday night.
What I love most about this recipe is how it brings people together. I’ve seen it happen at potlucks, family dinners, and casual get-togethers—someone takes one bite, their eyes go wide, and suddenly they’re asking for the recipe. It’s the kind of dish that makes memories, the kind that people request year after year. And honestly? That’s why I keep making it.
Now I want to hear from you. Have you tried these bacon wrapped green beans? Did you add your own twist? Maybe you swapped in maple syrup or added a sprinkle of cayenne? Drop a comment below and tell me how they turned out. And if you loved them as much as I do, share this recipe with someone who needs a little comfort food in their life. Trust me—they’ll thank you for it.
Until next time, happy cooking. And remember: sometimes the best way to change someone’s mind is to let the food do the talking.
Frequently Asked Questions
Can I use frozen green beans for this recipe?
I don’t recommend it. Frozen green beans release a lot of water as they thaw and cook, which will make your bacon soggy instead of crispy. Fresh green beans are the way to go here—they hold their texture better and don’t add extra moisture to the baking sheet. If you absolutely have to use frozen, thaw them completely and pat them very dry before wrapping.
How do I prevent the bacon from getting soggy?
Three things: pat your green beans dry before wrapping, use a wire rack on your baking sheet, and don’t overcrowd the pan. The wire rack allows hot air to circulate around the bundles, crisping the bacon on all sides. If you don’t have a wire rack, flip the bundles halfway through cooking and drain off any excess fat before returning them to the oven.
Can I make these ahead of time for a party?
Absolutely! You can assemble the bundles up to 24 hours in advance and keep them covered in the fridge. When you’re ready to bake, just brush on the glaze and pop them in the oven. You might need to add a few extra minutes to the cooking time since the bundles will be cold. I’ve also made these completely ahead and reheated them in a 350°F oven for 5-7 minutes—they’re almost as good as fresh.
What if my glaze burns in the oven?
It happens to the best of us. The brown sugar can go from perfectly caramelized to burnt in a matter of seconds. To prevent this, keep a close eye on them during the last 5 minutes of cooking. If you notice the glaze starting to darken too quickly, you can tent the baking sheet loosely with foil to slow down the browning. If they do burn, don’t panic—just scrape off the worst of the burnt parts and serve the rest. They’ll still taste good, I promise.
Can I use turkey bacon or a plant-based bacon alternative?
You can, but the results will be different. Turkey bacon is leaner and won’t crisp up as well, so you’ll need to cook it a bit longer. Plant-based bacon alternatives vary widely—some crisp up nicely, while others just get soft. If you’re using either option, keep a close eye on the oven and adjust cooking times as needed. The flavor won’t be exactly the same, but it can still be delicious in its own way.
Pin This Recipe!
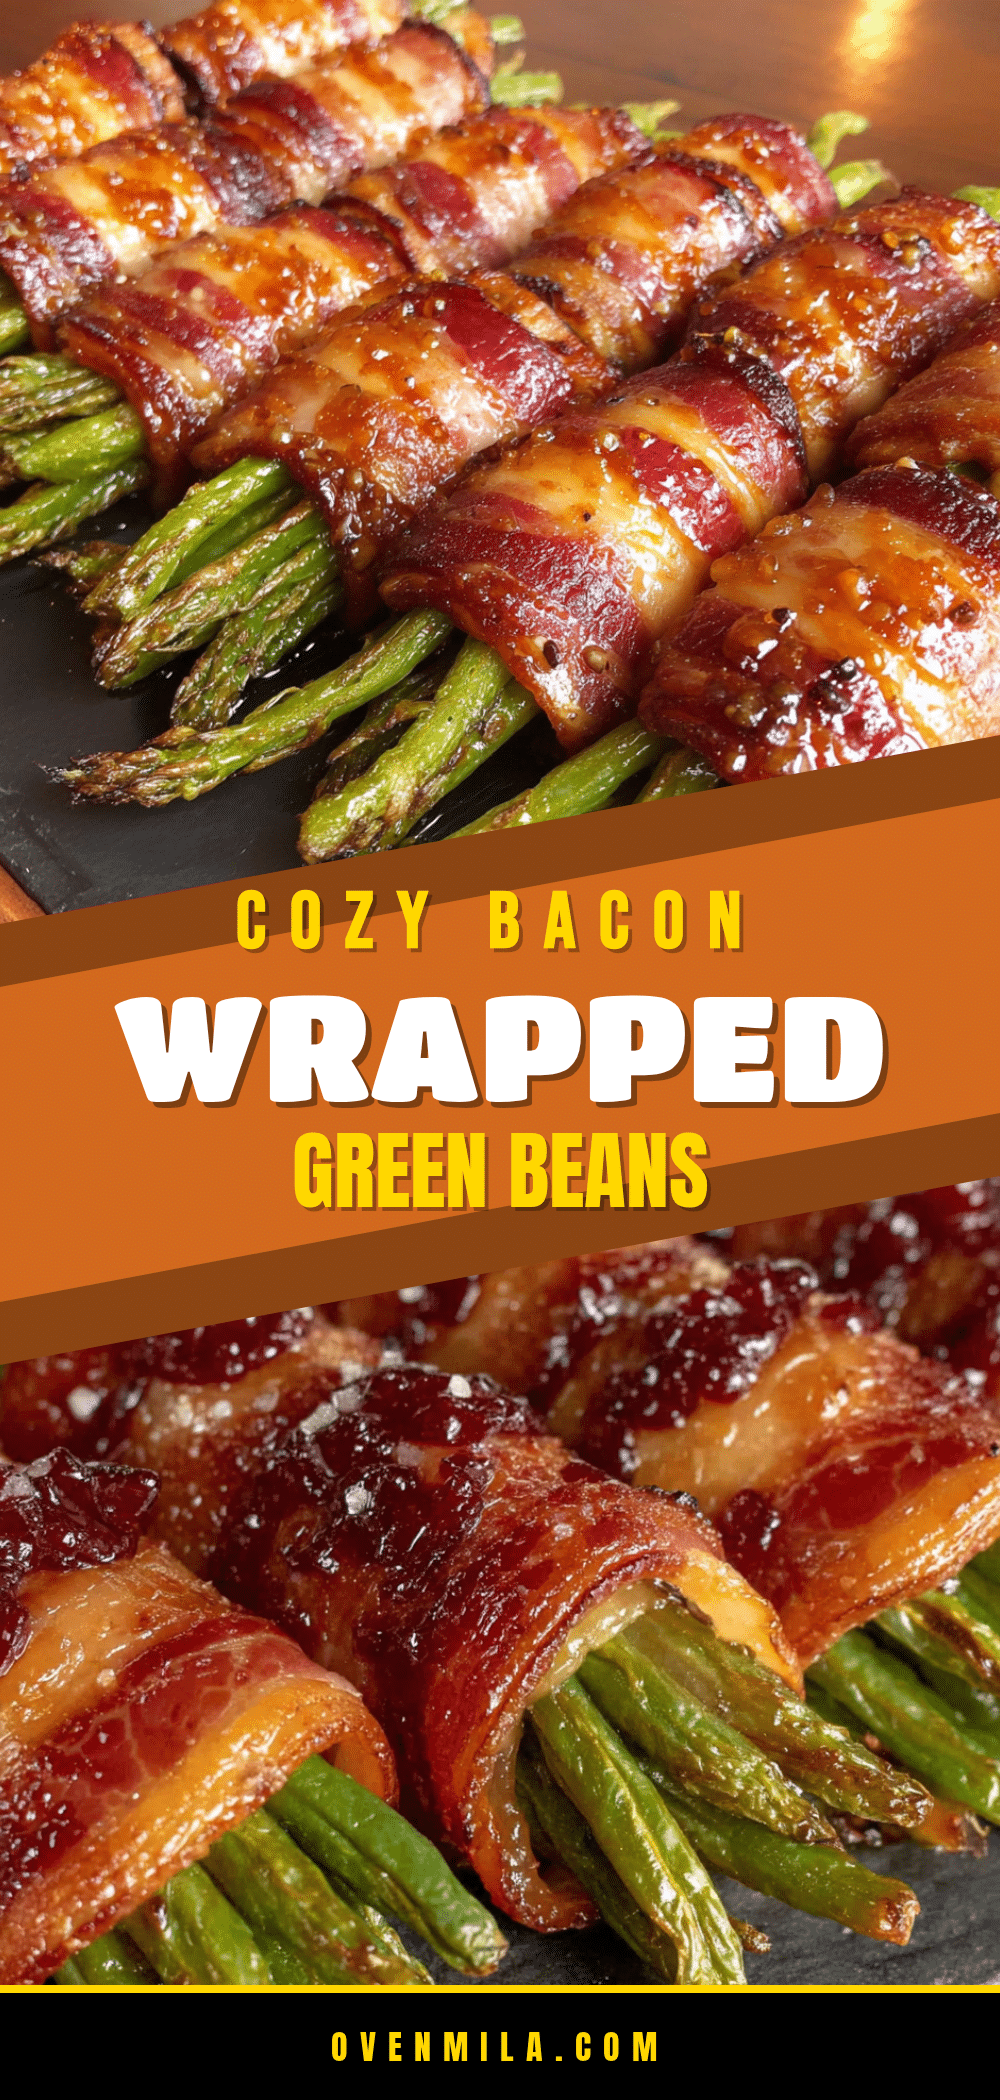
Easy Bacon Wrapped Green Beans with Brown Sugar Glaze
Tender-crisp green beans wrapped in crispy bacon and coated with a buttery brown sugar glaze that caramelizes in the oven. This irresistible side dish turns even the most stubborn green bean skeptics into converts, perfect for holidays, potlucks, or any gathering.
- Prep Time: 10 minutes
- Cook Time: 30 minutes
- Total Time: 40 minutes
- Yield: 6 servings 1x
- Category: Side Dish
- Cuisine: American
Ingredients
- 1 pound fresh green beans, trimmed
- 12 slices regular cut bacon
- 1 tablespoon olive oil
- ½ teaspoon fine sea salt
- ¼ teaspoon freshly ground black pepper
- ⅓ cup packed brown sugar (light or dark)
- 3 tablespoons unsalted butter, melted
- 2 cloves garlic, minced
- 1 teaspoon soy sauce
- ¼ teaspoon red pepper flakes (optional)
- 2 tablespoons fresh parsley, chopped (for garnish)
- Pinch of flaky sea salt (for garnish)
Instructions
- Preheat oven to 400°F (200°C). Position rack in center of oven.
- Line a rimmed baking sheet with parchment paper or aluminum foil. Place a wire rack on top if using.
- Rinse green beans and pat dry. Trim stem ends, keeping beans roughly the same length.
- In a large bowl, toss green beans with olive oil, salt, and pepper until evenly coated.
- Cut each bacon slice in half crosswise. Bundle 3-4 green beans together and wrap with one piece of bacon, slightly overlapping ends. Place seam-side down on prepared baking sheet or wire rack. Repeat to make about 12 bundles.
- In a small bowl, whisk together brown sugar, melted butter, minced garlic, soy sauce, and red pepper flakes (if using) until smooth.
- Brush or spoon glaze generously over each bacon-wrapped bundle, covering all surfaces. Reserve any leftover glaze.
- Bake for 20 minutes. If not using a wire rack, flip bundles halfway through (at 10 minutes).
- After 20 minutes, brush bundles with reserved glaze (if any).
- Return to oven and bake for 5-10 more minutes, until bacon is crispy and glaze is deep amber and caramelized. Watch closely to prevent burning.
- Remove from oven and let rest on pan for 5 minutes.
- Transfer to serving platter. Garnish with chopped parsley and flaky sea salt. Serve warm or at room temperature.
Notes
For best results, use fresh green beans (not frozen) and regular cut bacon. A wire rack helps bacon crisp on all sides. Watch the glaze closely in the last 5 minutes to prevent burning. Bundles can be assembled up to 24 hours ahead and refrigerated; add a few extra minutes to baking time if starting cold. Leftovers keep in the fridge for up to 3 days; reheat in oven or air fryer for best texture.
Nutrition
- Serving Size: 2 bundles
- Calories: 210
- Sugar: 12
- Sodium: 480
- Fat: 14
- Saturated Fat: 6
- Carbohydrates: 16
- Fiber: 2
- Protein: 6
Keywords: bacon wrapped green beans, brown sugar glaze, holiday side dish, easy appetizer, green bean recipe, bacon appetizer, caramelized green beans


