I was standing in the frozen food aisle last Tuesday when the cold air from the open freezer door hit my face—and suddenly I was nine years old at my aunt Lena’s tiny apartment, watching her pull two mismatched ramekins from her oven. The smell was what did it. That rich, dark chocolate scent mixing with something almost like coffee, wrapping around me in that cramped kitchen with its peeling linoleum. She’d let me lick the spatula, and I remember thinking there was no way anything this good could come from such a simple bowl of batter. I mean, I was just a kid, but even then I knew this was special. The way the center gave way when she pressed her spoon in, the dark river of chocolate spilling out onto the plate—it felt like magic. Honest to goodness magic.
I bought the chocolate anyway. Dark chocolate, the good stuff, not the baking chips I usually grab without thinking. Because here’s the thing: I’ve been chasing that moment for years now. That specific feeling of warmth spreading through you on a cold night, the kind of quiet comfort that only comes from something made just for you and maybe one other person. And let me tell you, I’ve had my share of failures. Lava cakes that were fully cooked through (just chocolate cake, really), cakes that collapsed into chocolate soup, one particularly sad attempt where I forgot the eggs entirely. But slowly, through trial and error and more than a few late-night baking sessions, I figured it out.
This recipe for cozy molten chocolate lava cakes for two is the one I keep coming back to. It’s not complicated—honestly, it’s almost embarrassingly simple—but it delivers that exact feeling every single time. The kind of dessert that makes you close your eyes after the first bite. Maybe you’ve been there, standing in your own kitchen on a quiet evening, wanting something that feels like a hug in food form. This is that recipe.
Why You’ll Love This Recipe
I’ve tested this recipe more times than I care to admit, and let me tell you—it’s finally right. Not just good, but the kind of good that makes you text your friend a photo immediately after you pull them from the oven. Here’s why this one works:
- Quick & Easy: From start to finish, you’re looking at about 20 minutes. Twenty minutes to go from “I want something chocolatey” to sitting down with a warm, gooey lava cake. That’s faster than ordering delivery.
- Simple Ingredients: You probably have most of these in your kitchen right now. Butter, eggs, sugar, flour, chocolate. No weird specialty items, no trips to three different stores. Just real, basic ingredients that come together beautifully.
- Perfect for a Cozy Night In: This recipe makes exactly two servings. It’s designed for sharing—or not sharing, I won’t judge. Perfect for date night, a quiet evening with a friend, or treating yourself after a long week.
- Crowd-Pleaser: I’ve served these to chocolate snobs, picky eaters, and people who swear they don’t have a sweet tooth. Every single person has gone quiet after the first bite. That’s the kind of reaction you want.
- Unbelievably Delicious: The outside is perfectly set, almost like a delicate chocolate cake, but the inside—oh, the inside. It’s warm, molten, and intensely chocolatey. The texture contrast is what makes these so satisfying.
What sets this version apart is the technique. I’ve learned that the secret isn’t in some fancy ingredient or complicated step—it’s in the timing and the temperature. Getting that perfect molten center that flows rather than just oozes. It’s comfort food at its finest, and honestly, it’s the kind of dessert that makes you feel like you’ve done something impressive even though it was almost too easy.
What Ingredients You Will Need
This recipe uses simple, everyday ingredients to create something that feels incredibly special. You don’t need a fully stocked bakery kitchen—just a few staples and some good quality chocolate. Here’s what you’ll need:
For the Lava Cakes
- 4 ounces (113g) dark chocolate, roughly chopped (I prefer 60-70% cacao for the best balance of richness and sweetness. Ghirardelli or Lindt work beautifully here. Don’t use chocolate chips—they have stabilizers that affect the melt.)
- ½ cup (113g or 1 stick) unsalted butter, cut into small cubes (plus extra for greasing the ramekins)
- 2 large eggs, at room temperature (this matters—cold eggs can seize the chocolate mixture)
- 2 large egg yolks, at room temperature
- ¼ cup (50g) granulated sugar
- 2 tablespoons (15g) all-purpose flour (spooned and leveled, not scooped)
- ¼ teaspoon salt (a tiny bit of flaky sea salt on top before serving is also lovely)
- ½ teaspoon vanilla extract (optional, but adds a nice depth)
- Cocoa powder, for dusting the ramekins (instead of flour—it prevents sticking without leaving white marks)
For Serving (Optional but Recommended)
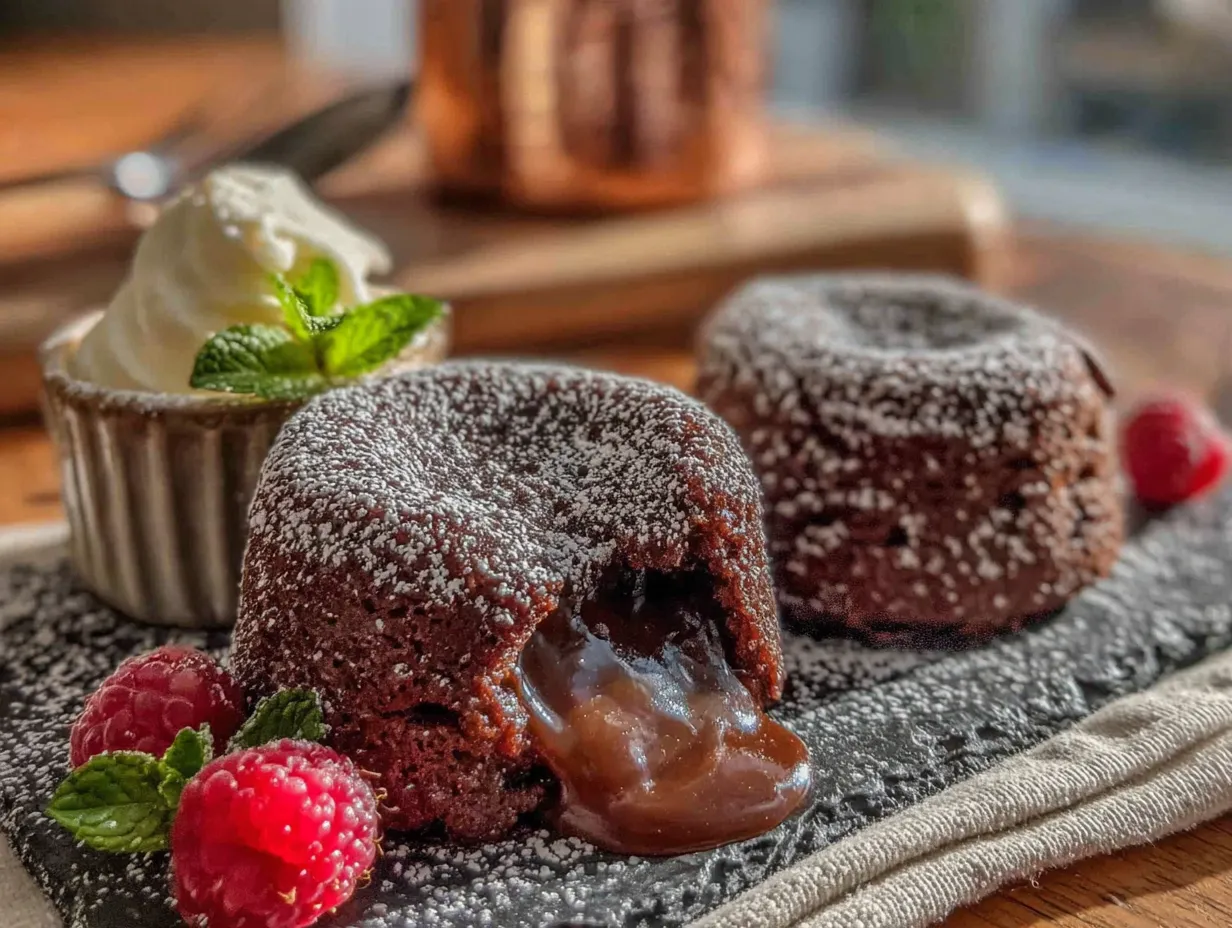
- Powdered sugar, for dusting
- Fresh raspberries or strawberries (the tartness cuts through the richness perfectly)
- Vanilla ice cream or lightly whipped cream (a must, honestly. The cold creaminess with warm chocolate is unbeatable)
- Mint sprigs, for garnish if you’re feeling fancy
One thing I’ve learned—use the best chocolate you can afford. It’s the star of the show here, and cheaper chocolate often has added oils that don’t melt as smoothly. I usually grab a couple of good quality chocolate bars from the baking aisle, and I’ve never regretted it. Also, make sure your eggs are truly at room temperature. I set mine out about 30 minutes before I start baking, or if I’m impatient (which is often), I place them in a bowl of warm water for 5 minutes.
Equipment Needed
You don’t need much for this recipe, which is part of why I love it. Here’s what you’ll want to have on hand:
- Two 6-ounce (180ml) ramekins – This is the classic size for lava cakes. You can find them at most kitchen stores or online for pretty cheap. I’ve had my set for years, and they’re one of my most-used baking tools.
- Medium mixing bowl – For melting the chocolate and butter together.
- Large mixing bowl – For whisking the eggs and sugar.
- Whisk – A good whisk makes a difference when you’re aerating the eggs and sugar.
- Spatula – For folding the chocolate mixture into the eggs gently.
- Baking sheet – Place the ramekins on a baking sheet for easy handling and to catch any potential drips.
- Small saucepan – For creating a double boiler to melt the chocolate, or you can use a microwave-safe bowl if you prefer.
- Fine-mesh sieve – For dusting powdered sugar over the finished cakes (optional, but it looks so pretty).
If you don’t have ramekins, don’t worry. You can use a muffin tin—just butter and cocoa the cups well. The cooking time might be slightly shorter, so keep an eye on them. I’ve also used small oven-safe bowls in a pinch, and they worked just fine. The key is that whatever you use is oven-safe and can hold about ¾ cup of batter.
Preparation Method
Alright, let’s make these cozy molten chocolate lava cakes for two. I’ll walk you through each step like we’re in the kitchen together.
- Preheat your oven to 425°F (220°C). Place a baking sheet on the middle rack to heat up. This helps the cakes cook evenly from the bottom.
- Prepare your ramekins. Butter the insides generously—really get into every nook and cranny. Then dust with cocoa powder, tapping out the excess. This is one of those small steps that makes a big difference. The cocoa powder prevents sticking without leaving white flour marks on your beautiful dark cakes.
- Melt the chocolate and butter together. You can do this two ways. My preferred method: fill a small saucepan with about an inch of water, bring it to a simmer, then place a heatproof bowl on top (make sure the bottom doesn’t touch the water). Add the chopped chocolate and butter cubes, and stir occasionally until smooth. Alternatively, you can microwave in 20-second bursts, stirring between each. Be careful not to overheat—chocolate seizes easily. Once melted and smooth, set aside to cool slightly while you work on the eggs.
- Whisk the eggs and sugar. In a large bowl, combine the 2 whole eggs, 2 egg yolks, and the granulated sugar. Whisk vigorously for about 2-3 minutes until the mixture is thick, pale, and falls in ribbons when you lift the whisk. This is important—you’re incorporating air here, which helps create that delicate cake structure around the molten center. The mixture should look almost like a light-colored mousse.
- Add the vanilla and salt. Whisk in the vanilla extract and salt until combined.
- Fold in the chocolate mixture. Pour the slightly cooled chocolate-butter mixture into the egg mixture. Use a spatula to fold gently—cut down through the center, scrape along the bottom, and bring up the side. Rotate the bowl as you go. You want to combine them fully but without deflating all that air you just whipped in. Stop when you no longer see streaks of chocolate.
- Sift in the flour. Place the flour in a fine-mesh sieve and sift it over the batter. Fold again gently, just until the flour disappears. Overmixing at this stage can make the cakes tough, so be gentle.
- Divide the batter. Pour the batter evenly into the two prepared ramekins. They should be about ¾ full. Place the ramekins on the hot baking sheet in the oven.
- Bake for exactly 12-14 minutes. This is the most critical part. The cakes are done when the edges are set and pulling away slightly from the sides, but the center still jiggles when you gently shake the ramekin. At 12 minutes, I start checking. The surface should look set but feel soft underneath. If you see the center starting to puff up and crack, you’ve gone too far—you’ll still have a delicious chocolate cake, but the lava effect will be gone.
- Let them rest for 1 minute. This is crucial. Remove the ramekins from the oven and let them sit on a wire rack for exactly 60 seconds. This allows the outside to firm up just enough to hold its shape when you unmold it.
- Unmold and serve immediately. Run a thin knife around the edge of each ramekin to loosen the cake. Place a small plate upside down over the ramekin, then carefully flip it over. Give it a gentle tap, and the cake should release onto the plate. If it doesn’t come out easily, give it another 10 seconds of resting time. Dust with powdered sugar, add a scoop of vanilla ice cream, and serve right away. The lava waits for no one!
Cooking Tips & Techniques
I’ve made these cozy molten chocolate lava cakes for two more times than I can count, and I’ve learned a few things along the way. Here are the tips that make the biggest difference:
Don’t skip the room temperature eggs. I know, I know—it’s annoying to wait. But cold eggs can cause the melted chocolate to seize up, creating a grainy texture instead of that silky smooth batter. Set them out ahead of time, or place them in warm water for 5 minutes if you’re in a hurry.
The jiggle test is your best friend. I can’t stress this enough. When you gently shake the ramekin, the center should wobble like jelly. If it’s completely firm, you’ve overbaked them. If it’s liquidy and sloshes, give it another minute or two. Every oven runs differently, so trust your senses over the timer.
Chill the batter for a more reliable lava. Here’s a trick I discovered after a few too many overcooked cakes: if you’re nervous about timing, you can prepare the batter, fill the ramekins, and refrigerate them for up to 2 hours before baking. The cold batter needs an extra 1-2 minutes in the oven, but it gives you a wider window for that perfect molten center. I do this when I’m making them for someone special and want to reduce the stress.
Quality chocolate matters more than you think. I once tried making these with generic baking chocolate, and the texture was off—grainy and less flavorful. Spend the extra dollar or two on a good brand. It makes a real difference.
Don’t overmix after adding the flour. This is a common mistake. Once you add the flour, just fold until it disappears. Overworking the gluten will give you a denser, less tender cake. We want delicate, not tough.
Use a baking sheet. Always place the ramekins on a baking sheet before putting them in the oven. It makes transferring them in and out so much easier, and it catches any potential drips. Plus, the preheated sheet helps the bottoms cook evenly.
And honestly, the biggest tip I can give you is this: don’t stress. If the lava doesn’t flow perfectly the first time, you still have a warm, chocolatey dessert. That’s a win in my book. Every failure taught me something, and now I can make these with my eyes closed—well, almost.
Variations & Adaptations
One of the best things about this recipe is how adaptable it is. Over the years, I’ve tried several variations, and here are some of my favorites:
Gluten-Free Version: Simply swap the all-purpose flour for an equal amount of almond flour or a good gluten-free all-purpose blend. I’ve used Bob’s Red Mill 1-to-1 Baking Flour with great results. The texture is slightly different—a bit more tender—but the lava effect works perfectly.
Dairy-Free Version: Use a high-quality vegan butter (I like Miyoko’s) and dairy-free dark chocolate that’s at least 70% cacao. The taste is still incredibly rich, and honestly, most people won’t notice the difference. Just make sure your chocolate doesn’t contain milk solids.
Flavor Twists: Add ½ teaspoon of instant espresso powder to the chocolate mixture for a deeper, more complex chocolate flavor. Or try a pinch of cinnamon and cayenne for a Mexican hot chocolate vibe. I once added a tablespoon of orange zest and a splash of Grand Marnier—absolutely divine for a grown-up treat.
Nutella Lava Cakes: Spoon a teaspoon of Nutella into the center of each ramekin after adding half the batter, then top with the remaining batter. You get a double lava effect—chocolate and hazelnut. It’s dangerous, honestly.
White Chocolate Raspberry: Swap the dark chocolate for good quality white chocolate, and add a few fresh raspberries to the center of each cake. The tartness of the berries cuts through the sweetness beautifully.
Single Serving: Halve the recipe for just one cake. Use one egg and one yolk, and reduce the other ingredients proportionally. Bake for about 10-11 minutes. Perfect for those nights when you don’t want to share.
I’ve also tried baking these in a silicone muffin pan instead of ramekins, and it worked surprisingly well. The cakes were a bit wider and shallower, so they baked in about 9 minutes. Just something to keep in mind if you’re experimenting.
Serving & Storage Suggestions
These cozy molten chocolate lava cakes for two are best served immediately—like, within seconds of unmolding. That warm, flowing center is the whole point, and it waits for no one. Here’s how to make the experience even better:
Serving Temperature: Serve the cakes warm, straight from the oven. The contrast between the warm cake and cold ice cream is pure magic. If you’re serving them without ice cream, they’re still wonderful at room temperature for about 10 minutes after baking.
Presentation: Dust with powdered sugar just before serving. Add a few fresh raspberries or strawberries on the side—their tartness balances the richness. A small sprig of mint adds a pop of color and a fresh aroma. And please, don’t forget the vanilla ice cream. It’s not optional in my book.
Complementary Dishes: These lava cakes are rich, so keep the rest of the meal light. A simple green salad with a tangy vinaigrette works well beforehand. For drinks, a strong cup of coffee or a glass of cold milk is perfect. If you’re feeling fancy, a dessert wine like a late-harvest Riesling or a small glass of port pairs beautifully.
Storage: Honestly, these are best eaten fresh. But if you have leftovers (unlikely, but possible), here’s what to do: let the cakes cool completely in the ramekins, then cover with plastic wrap and refrigerate for up to 2 days. To reheat, microwave each cake in its ramekin for about 20-30 seconds, or until warm. The lava won’t be as runny, but it’ll still be delicious.
Freezing: You can freeze the unbaked batter in the ramekins. Wrap each tightly in plastic wrap and then foil, and freeze for up to 1 month. To bake from frozen, add about 3-4 minutes to the baking time. I’ve done this for last-minute guests, and it works like a charm.
Flavor Development: Here’s something interesting—the flavors actually deepen and meld together if you let the batter rest in the fridge for an hour or two before baking. The chocolate becomes more pronounced, and the texture is even more velvety. So if you have the time, it’s worth the wait.
Nutritional Information & Benefits
Let’s be real—these are a treat, not a health food. But knowing what’s in them can help you enjoy them mindfully. Here’s the estimated nutritional breakdown for one lava cake (without ice cream or toppings):
- Calories: Approximately 420-450
- Fat: 32g (mostly from butter and chocolate)
- Carbohydrates: 32g
- Protein: 8g
- Fiber: 3g
- Sugar: 24g
Health Benefits of Key Ingredients: Dark chocolate is actually a surprising source of antioxidants, particularly flavonoids, which can support heart health. It also contains iron, magnesium, and zinc. Eggs provide high-quality protein and essential vitamins like B12 and D. Butter, while rich in saturated fat, contains butyrate, a fatty acid that supports gut health in small amounts.
Dietary Considerations: This recipe is vegetarian and can easily be made gluten-free and dairy-free with the substitutions mentioned above. It is not suitable for vegans in its current form, though I’ve seen some creative vegan versions using avocado and coconut cream. The recipe contains gluten (unless substituted), dairy, and eggs—common allergens to be aware of.
My Take: I believe in balance. These lava cakes are a special occasion dessert, not an everyday thing. And when you do indulge, using high-quality ingredients means you’re getting more nutrients and fewer additives. So enjoy that warm, chocolatey goodness—just maybe not every night.
Conclusion
So there you have it—my tried-and-true recipe for cozy molten chocolate lava cakes for two. It’s the kind of dessert that turns an ordinary evening into something special, that makes you feel like you’ve pulled off something magical even though it only took twenty minutes. I love this recipe because it’s proof that you don’t need complicated techniques or fancy equipment to create something truly memorable. Just good chocolate, a little patience, and the willingness to trust that jiggle test.
I hope you give these a try, and I hope they bring you the same quiet joy they’ve brought me. Maybe you’ll make them for someone you love, or maybe you’ll make them just for yourself on a rainy Tuesday night. Either way, I’d love to hear how they turn out. Did you try a variation? Did the lava flow perfectly on your first try, or did you learn something along the way? Drop a comment below and let me know—I read every single one. And if you share a photo on Pinterest or Instagram, tag me so I can see your beautiful creation. Happy baking, friend. You’ve got this.
Frequently Asked Questions
Can I make these lava cakes ahead of time?
Yes! You can prepare the batter, fill the ramekins, and refrigerate them for up to 2 hours before baking. When you’re ready, just add an extra 1-2 minutes to the baking time. You can also freeze the unbaked ramekins for up to a month—bake from frozen, adding 3-4 minutes.
Why did my lava cakes not have a molten center?
The most common reason is overbaking. The cakes are done when the edges are set but the center still jiggles. Every oven is different, so start checking at 12 minutes. Also, make sure your ramekins are the right size—6 ounces is standard. Too large, and the batter spreads too thin and bakes through.
Can I use milk chocolate instead of dark chocolate?
You can, but I don’t recommend it. Milk chocolate has more sugar and less cocoa butter, which changes the texture and makes the cakes much sweeter. The lava might also be thinner. If you prefer a milder chocolate flavor, try a 50-55% dark chocolate instead.
What can I use instead of ramekins?
If you don’t have ramekins, you can use a standard muffin tin (well-buttered and dusted with cocoa). The cakes will be smaller and bake faster—check them at 9-10 minutes. You can also use small oven-safe bowls or even large silicone muffin cups.
Can I double this recipe?
Absolutely. The recipe scales beautifully—just double all the ingredients. You may need to bake them in batches depending on your oven space. If baking more than two at once, rotate the baking sheet halfway through for even cooking.
Pin This Recipe!
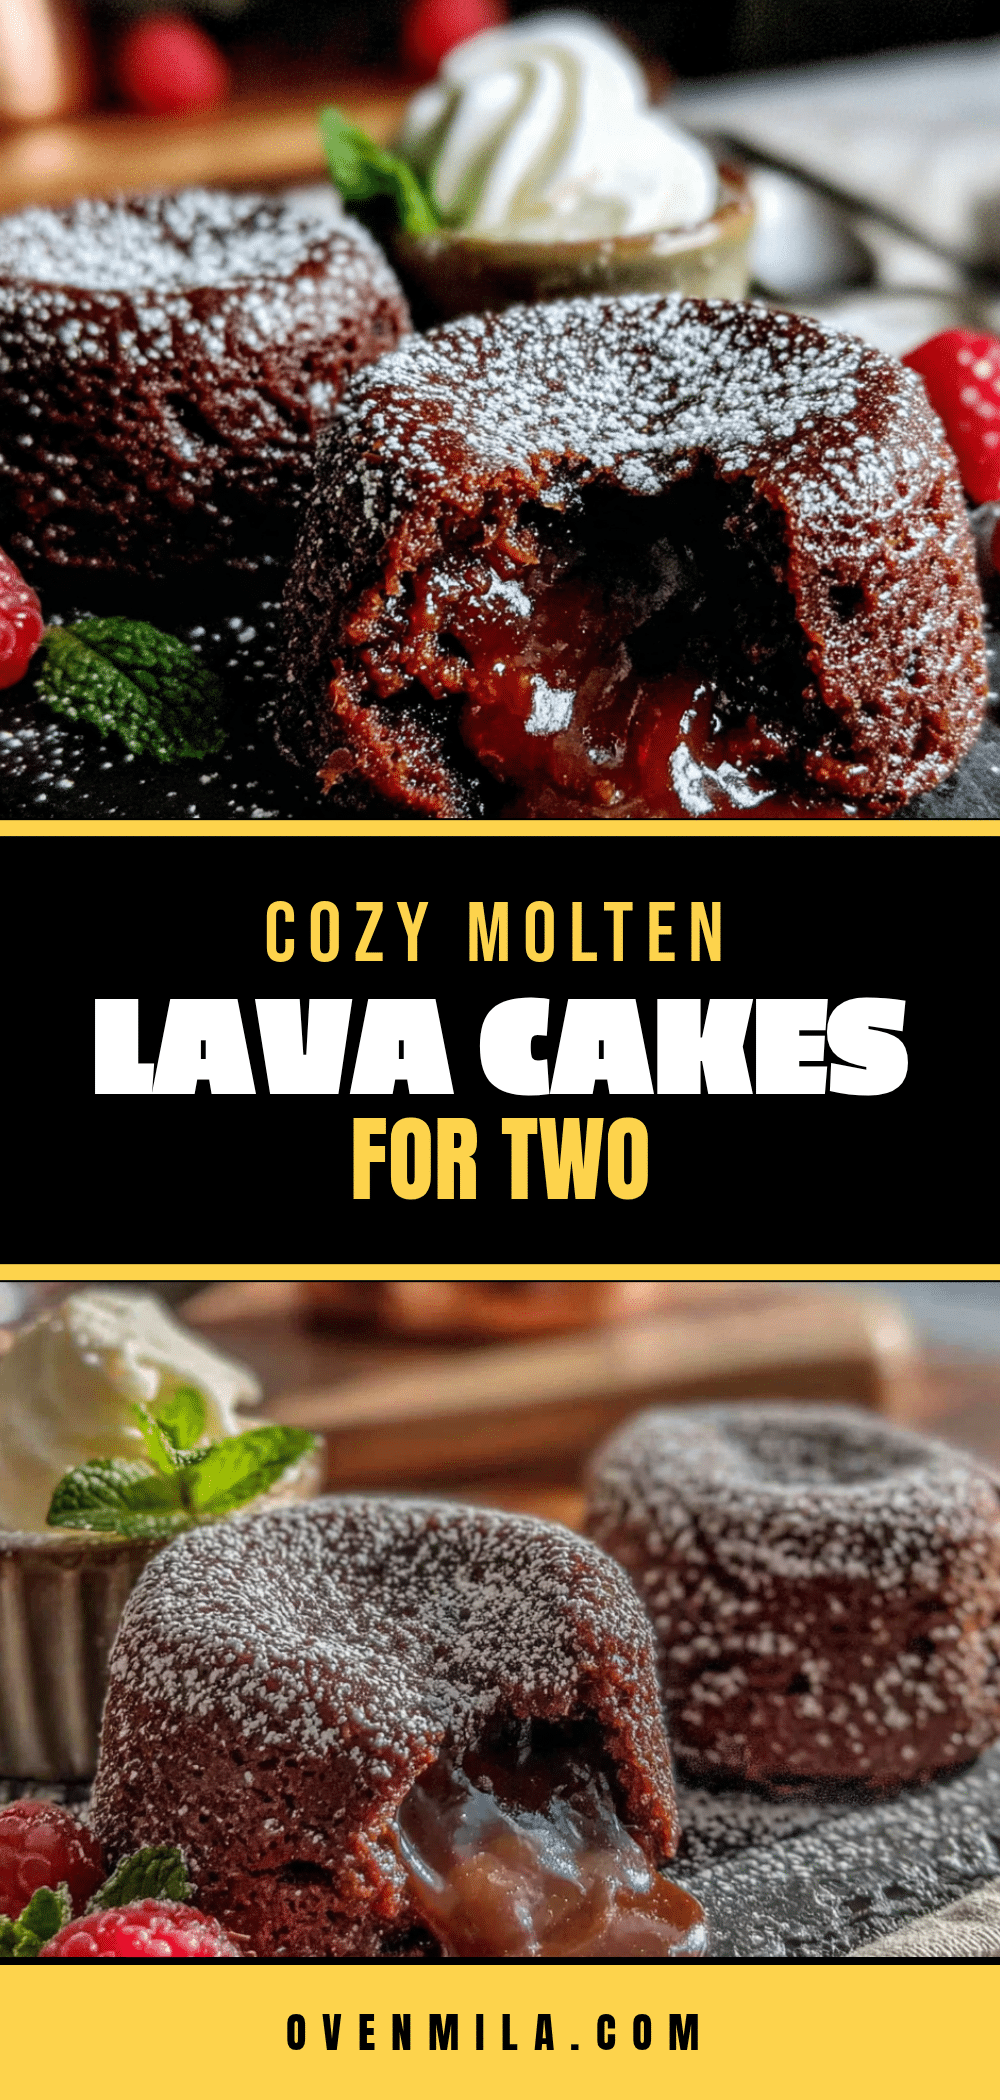
Cozy Molten Chocolate Lava Cakes for Two
Rich, dark chocolate lava cakes with a perfectly molten center, ready in just 20 minutes. This easy recipe for two is the ultimate cozy dessert for date night or a quiet evening in.
- Prep Time: 10 minutes
- Cook Time: 12-14 minutes
- Total Time: 22-24 minutes
- Yield: 2 servings 1x
- Category: Dessert
- Cuisine: American
Ingredients
- 4 ounces (113g) dark chocolate, roughly chopped (60-70% cacao recommended)
- ½ cup (113g or 1 stick) unsalted butter, cut into small cubes, plus extra for greasing ramekins
- 2 large eggs, at room temperature
- 2 large egg yolks, at room temperature
- ¼ cup (50g) granulated sugar
- 2 tablespoons (15g) all-purpose flour, spooned and leveled
- ¼ teaspoon salt
- ½ teaspoon vanilla extract (optional)
- Cocoa powder, for dusting ramekins
- For serving (optional): powdered sugar, fresh raspberries or strawberries, vanilla ice cream or whipped cream, mint sprigs
Instructions
- Preheat oven to 425°F (220°C). Place a baking sheet on the middle rack to heat up.
- Butter the insides of two 6-ounce (180ml) ramekins generously, then dust with cocoa powder, tapping out excess.
- Melt chocolate and butter together using a double boiler or microwave in 20-second bursts, stirring until smooth. Set aside to cool slightly.
- In a large bowl, whisk together 2 whole eggs, 2 egg yolks, and granulated sugar for 2-3 minutes until thick, pale, and ribbon-like.
- Whisk in vanilla extract and salt until combined.
- Pour the slightly cooled chocolate-butter mixture into the egg mixture. Fold gently with a spatula until no streaks remain.
- Sift flour over the batter and fold gently just until incorporated. Do not overmix.
- Divide batter evenly between the two prepared ramekins (about ¾ full). Place on the hot baking sheet in the oven.
- Bake for exactly 12-14 minutes, until edges are set and pulling away from sides but center still jiggles when shaken.
- Let rest on a wire rack for exactly 1 minute.
- Run a thin knife around the edge of each ramekin, place a plate upside down over the ramekin, and flip to unmold. Serve immediately with desired toppings.
Notes
For best results, use room temperature eggs to prevent chocolate from seizing. The jiggle test is key: center should wobble like jelly when done. For a more reliable lava, chill filled ramekins for up to 2 hours before baking, adding 1-2 minutes to bake time. Quality chocolate (60-70% cacao) makes a significant difference. Do not overmix after adding flour.
Nutrition
- Serving Size: 1 lava cake
- Calories: 420450
- Sugar: 24
- Sodium: 180
- Fat: 32
- Saturated Fat: 19
- Carbohydrates: 32
- Fiber: 3
- Protein: 8
Keywords: molten chocolate lava cake, lava cake for two, easy chocolate dessert, chocolate lava cake recipe, romantic dessert, quick dessert, dark chocolate lava cake


