My husband did not believe an air fryer could make crispy chicken wings. He stood right there in the kitchen, arms crossed, watching me pat the wings dry with paper towels. “It’s going to be rubbery,” he said. “No way that little machine gets the skin right.” I had my doubts too, honestly. Every air fryer wing recipe I’d tried before came out edible but sad—the skin was either chewy or just barely crisp, nothing like the deep-fried versions we both craved. But I had a theory. I figured if I skipped the oil spray, went heavy on the baking powder, and cranked the heat, maybe—just maybe—I could crack the code.
The first batch came out of the basket and I didn’t say a word. I just set the plate down and watched him take a bite. That crunch—I swear it echoed in the kitchen. He looked at me, still chewing, and just nodded. That was it. No apology, no grand declaration. Just a man eating his words along with a drumette. And honestly? That quiet moment of victory tasted better than any sauce I could have tossed them in. These crispy 15-minute air fryer chicken wings have been a regular in our rotation ever since, and I’m not exaggerating when I say they’ve converted every skeptic who’s tried them.
What gets me is how simple the whole thing is. You’re not doing anything fancy—no brining, no double-frying, no complicated marinades. It’s just a few smart moves that add up to wings that actually taste like they came from a restaurant. Trust me on this one. I was the skeptic, and now I’m the one making them for game days, lazy Fridays, and anytime we need a little crunch in our lives.
Why You’ll Love This Recipe
I’ve tested this recipe more times than I care to count, tweaking temperatures and timing until I got it just right. So when I say these are the best air fryer wings, I mean it. Here’s why this version is different from the rest:
- Ready in 15 Minutes: From fridge to plate in the time it takes to preheat a regular oven. Perfect for those nights when hunger strikes hard and fast.
- No Oil Needed: The air fryer does all the work, giving you that deep-fried texture without the greasy mess or extra calories. Your kitchen stays clean, and your wings stay crispy.
- Pantry-Friendly Ingredients: You probably have everything already—chicken wings, baking powder, salt, and your favorite seasoning. No weird specialty items required.
- Perfect for Game Day: These wings hold up beautifully for parties and gatherings. They stay crispy longer than oven-baked versions, which is a game-changer when you’re hosting.
- Foolproof Results: I’ve made these for friends who had never touched an air fryer before, and every single batch came out perfect. The method is forgiving and reliable.
The secret here is the baking powder trick. It sounds weird, I know, but it’s the key to getting that shatteringly crisp skin without any oil. Combined with the high heat of the air fryer, you get wings that rival anything from a fryer. And the best part? They’re ready in a quarter of the time. This isn’t just another recipe—it’s the one that’ll make you toss your takeout menus.
What Ingredients You Will Need
This recipe keeps things simple. You don’t need a long list of ingredients to make incredible wings—just a few quality items and the right technique. Here’s what you’ll need and why each one matters.
- Chicken Wings (2 pounds, about 20-24 pieces): Look for party wings—these are already separated into drumettes and flats. If you buy whole wings, you’ll need to cut them yourself at the joint. I prefer fresh over frozen for the best texture, but frozen works fine if you thaw them completely and pat them very dry. (Seriously, dry wings are non-negotiable.)
- Baking Powder (1 tablespoon): This is the magic ingredient. Not baking soda—baking powder. It raises the pH of the skin and helps it brown and crisp up beautifully. Make sure it’s aluminum-free to avoid any metallic aftertaste.
- Salt (1 teaspoon): I use fine sea salt here. It dissolves better into the skin and seasons the wings evenly. You can adjust based on your preference or what you’re serving alongside.
- Garlic Powder (1 teaspoon): Adds a subtle savory depth without overpowering the chicken. It’s a background note that makes the wings taste more complex.
- Onion Powder (½ teaspoon): Works with the garlic powder to build that classic savory profile. A little goes a long way.
- Paprika (1 teaspoon): I use sweet paprika for color and a mild sweetness. Smoked paprika works too if you want a deeper, smokier flavor—just know it changes the taste noticeably.
- Black Pepper (½ teaspoon): Freshly ground is best. It adds a gentle heat that cuts through the richness of the skin.
- Optional: Cayenne Pepper (¼ teaspoon): For heat lovers. This is totally optional, but I add it when I’m in the mood for spicy wings. You can also skip it and add heat later with sauce.
- Optional: Cooking Spray: I don’t use oil on the wings themselves, but a light spritz on the air fryer basket prevents sticking. Avocado oil spray works great because it has a high smoke point.
That’s it. Eight ingredients, most of which are probably in your pantry right now. The beauty of this recipe is that the seasoning is just a starting point—you can swap in your favorite spice blends or keep it simple with just salt and pepper. For a slightly different take on crispy chicken, you might enjoy these crispy baked buffalo cauliflower bites—they use a similar technique but with a vegetable twist.
Equipment Needed
You don’t need a professional kitchen to make these wings. Here’s what I use and what you can substitute if needed.
- Air Fryer (6-quart or larger): This is obviously essential. A larger basket means you can cook more wings in a single batch without overcrowding. I use a 6-quart model and it fits about 2 pounds of wings perfectly. If yours is smaller, just cook in batches.
- Paper Towels: For drying the wings thoroughly. This step is crucial—any moisture on the skin will steam instead of crisp. I go through a lot of paper towels here.
- Large Mixing Bowl: For tossing the wings with the seasoning. A glass or stainless steel bowl works best because it doesn’t absorb odors.
- Tongs: For flipping the wings halfway through cooking. Silicone-tipped tongs won’t scratch your air fryer basket.
- Instant-Read Thermometer (optional but recommended): Chicken wings are safe to eat at 165°F, but I find they’re best around 175-180°F—the extra heat renders more fat and makes the skin even crispier. A thermometer takes the guesswork out.
If you’re new to air fryers, I recommend getting one with a removable basket—it makes cleanup so much easier. And honestly, you don’t need the most expensive model. My first air fryer was a basic one I found on sale, and it made excellent wings. The technique matters more than the machine.
Preparation Method
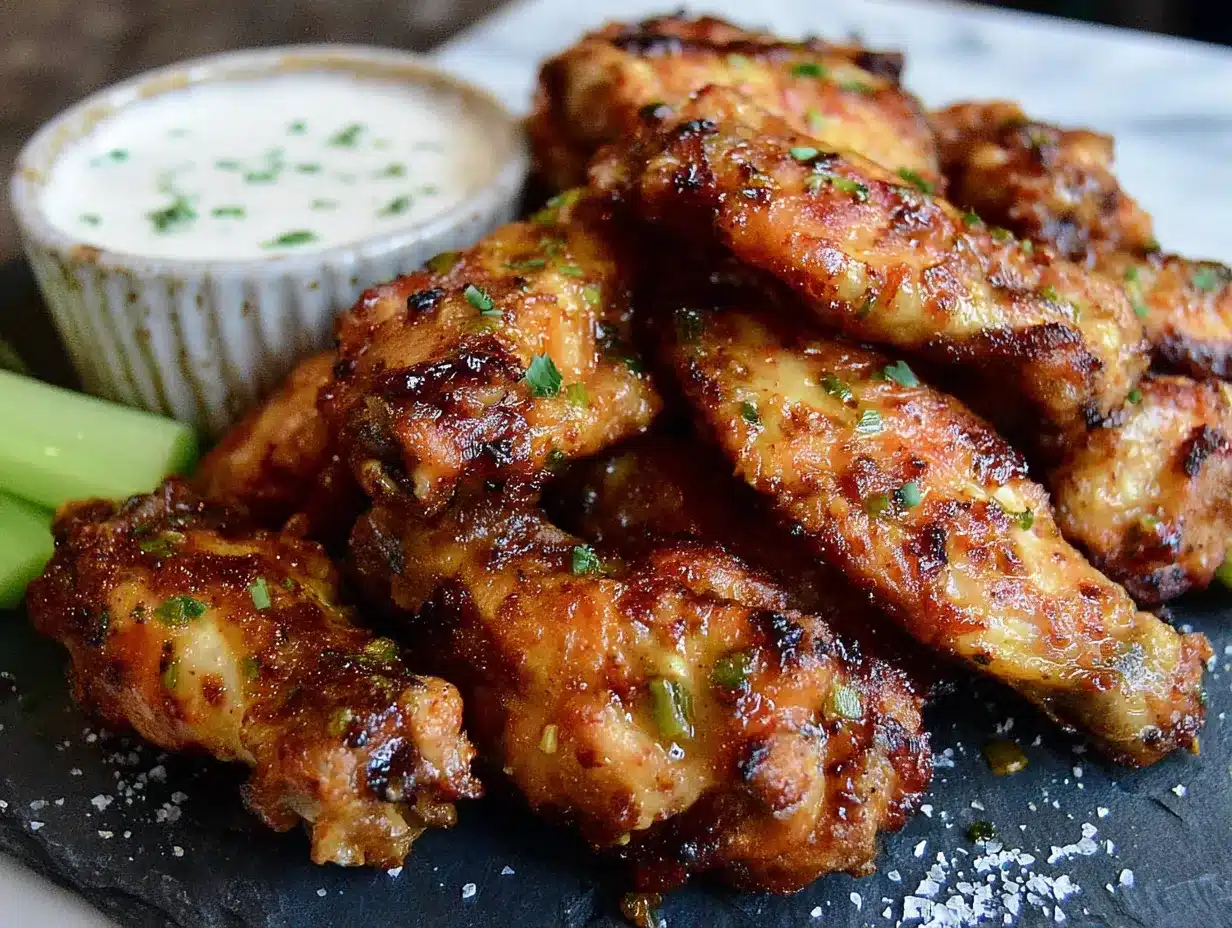
Let’s get cooking. Follow these steps closely, and you’ll have the crispiest wings of your life in just 15 minutes.
- Pat the wings completely dry. This is the most important step. Take your 2 pounds of chicken wings and lay them out on a cutting board lined with paper towels. Cover them with another layer of paper towels and press down firmly. Flip each piece and repeat. You want the skin to feel tacky, not wet. Any moisture left on the surface will create steam in the air fryer, and steam is the enemy of crispiness. Take your time here—it makes all the difference.
- Preheat your air fryer to 400°F. Most air fryers need about 3-5 minutes to preheat. Do this while you’re seasoning the wings so everything is ready to go at the same time. A hot start is key to getting that initial sear on the skin.
- Mix the dry seasoning. In a small bowl, combine 1 tablespoon baking powder, 1 teaspoon salt, 1 teaspoon garlic powder, ½ teaspoon onion powder, 1 teaspoon paprika, and ½ teaspoon black pepper. If you want heat, add ¼ teaspoon cayenne pepper. Whisk everything together so the baking powder is evenly distributed—you don’t want clumps of it sticking to one wing.
- Toss the wings with the seasoning. Place the dried wings in a large mixing bowl. Sprinkle the seasoning mixture over them and toss with your hands until every piece is evenly coated. The baking powder might look a little powdery at first, but it will disappear during cooking. Make sure you get into all the nooks and crannies, especially around the joints.
- Arrange wings in the air fryer basket. Place the seasoned wings in a single layer in the basket. They should not be touching or overlapping—if they’re crowded, they’ll steam instead of crisp. Depending on your air fryer size, you might need to cook in two batches. That’s fine. Resist the urge to cram them all in.
- Cook at 400°F for 8 minutes. Set the timer and let the air fryer do its thing. At this point, the wings will start browning and the baking powder will begin working its magic. Don’t open the basket during this time—you’ll let out all the hot air.
- Flip the wings and cook for another 7 minutes. After 8 minutes, use tongs to flip each wing over. This ensures even cooking and crispiness on all sides. Return the basket to the air fryer and cook for another 7 minutes. The total cook time is 15 minutes, but check for doneness at the 14-minute mark if your air fryer runs hot.
- Check for doneness. The wings should be golden brown and the skin should look bubbly and crisp. If you’re using a thermometer, insert it into the thickest part of a drumette—you’re looking for 175-180°F. The extra heat above the safe minimum of 165°F helps render more fat and gives you that shatteringly crisp texture.
- Rest for 2 minutes before serving. This is a short rest, but it matters. Let the wings sit in the basket (turned off) for 2 minutes. This allows the steam to escape and the skin to set. If you toss them in sauce immediately, the steam trapped inside can make the skin soggy.
That’s it. Nine steps and you’re done. The wings come out hot, crispy, and absolutely irresistible. If you’re serving a crowd, keep the first batch warm in a 200°F oven while you cook the second batch. They’ll stay crispy for up to 30 minutes this way.
Cooking Tips & Techniques
I’ve made plenty of mistakes with air fryer wings, and I’m sharing them so you don’t have to. Here’s what I’ve learned the hard way.
Don’t skip the drying step. I know it’s tedious, but it’s the single most important factor in getting crispy skin. I once rushed through this step and ended up with wings that were edible but not crispy. The moisture created steam that softened the skin. Take the extra 2 minutes to pat them dry—it’s worth it.
Use baking powder, not baking soda. This is a common mix-up, and I’ve done it myself. Baking soda has a different chemical composition and will leave a bitter, metallic taste on your wings. Baking powder is what you need. Double-check your label before you start.
Don’t overcrowd the basket. I know it’s tempting to cook all the wings at once, especially when you’re hungry. But overcrowding traps steam and prevents the hot air from circulating properly. The result is soggy, unevenly cooked wings. Cook in batches if needed—the extra 15 minutes is worth the texture.
Flip halfway through. This ensures both sides get equal exposure to the hot air. I’ve forgotten to flip before, and the bottom side was pale and soft while the top was perfectly crispy. Set a timer if you need to—it’s an easy step to overlook.
Let them rest. That 2-minute rest after cooking is crucial. If you toss hot wings in sauce immediately, the steam inside condenses and softens the skin. Let them cool slightly, then toss in sauce just before serving. For a game-day spread, these wings pair beautifully with easy loaded nacho football dip casserole—it’s another crowd-pleaser that comes together fast.
Variations & Adaptations
This base recipe is incredibly versatile. Here are some ways to change it up depending on your mood or dietary needs.
Buffalo Wings: After cooking, toss the wings in a mixture of ¼ cup hot sauce (like Frank’s RedHot) and 2 tablespoons melted butter. The butter helps the sauce cling to the wings and adds richness. Serve with ranch or blue cheese dressing and celery sticks.
Garlic Parmesan Wings: In a large bowl, combine 3 tablespoons melted butter, 2 minced garlic cloves, and ¼ cup grated Parmesan cheese. Toss the cooked wings in this mixture and finish with a sprinkle of fresh parsley. The cheese adds a salty, nutty flavor that’s hard to resist.
Honey Sriracha Wings: Mix 2 tablespoons honey, 1 tablespoon sriracha, and 1 teaspoon rice vinegar. Toss the wings in this glaze after cooking. The sweetness balances the heat perfectly, and the vinegar adds a subtle tang. This is my personal favorite when I want something sticky and sweet.
Dry Rub Variations: Swap the paprika for chili powder for a smoky-spicy kick, or use a pre-made seasoning blend like Cajun or lemon pepper. You can also add dried herbs like thyme or oregano for an herby twist. The baking powder stays the same—just adjust the other spices to your taste.
Gluten-Free Option: This recipe is naturally gluten-free as written, since we’re not using any flour or breading. Just make sure your baking powder is certified gluten-free if you’re serving someone with celiac disease. Most brands are, but it’s worth checking.
Keto-Friendly: These wings are already low-carb and keto-friendly. Skip any sugary sauces and stick with dry rubs or butter-based coatings. The baking powder adds negligible carbs, so you’re good to go.
Serving & Storage Suggestions
These wings are best served hot and fresh, but they’re still good later if you handle them right.
Serving Temperature: Serve the wings immediately after cooking for the crispiest texture. If you’re making a large batch, keep the finished wings warm in a 200°F oven on a wire rack set over a baking sheet. This allows air to circulate around the wings and prevents them from getting soggy.
What to Serve With: Classic pairings include celery and carrot sticks with ranch or blue cheese dressing. For a heartier meal, serve with fries, coleslaw, or a simple green salad. These wings also work great as an appetizer alongside other finger foods like easy cheesy football pull-apart bread for a full game-day spread.
Storage: Store leftover wings in an airtight container in the refrigerator for up to 4 days. The skin will soften as they sit, but they’ll still taste great. Don’t leave them at room temperature for more than 2 hours.
Reheating: The air fryer is your best friend here. Reheat wings at 375°F for 3-4 minutes, flipping halfway through. This restores much of the original crispiness. You can also use a 400°F oven for 5-7 minutes, but the air fryer is faster and more effective. Avoid the microwave—it will make the skin rubbery and sad.
Freezing: Cooked wings freeze well for up to 3 months. Let them cool completely, then arrange them in a single layer on a baking sheet and freeze for 1 hour. Transfer the frozen wings to a freezer-safe bag or container. To reheat, cook directly from frozen in the air fryer at 375°F for 6-8 minutes. No need to thaw first.
Nutritional Information & Benefits
Here’s the nutritional breakdown for a serving of about 5-6 wings (based on 2 pounds total, serving 4 people). Values are approximate and will vary based on specific ingredients and portion sizes.
| Nutrient | Amount Per Serving |
|---|---|
| Calories | 320 |
| Protein | 28g |
| Fat | 22g |
| Saturated Fat | 6g |
| Carbohydrates | 1g |
| Fiber | 0g |
| Sugar | 0g |
| Sodium | 680mg |
Chicken wings are a good source of protein, which supports muscle health and keeps you feeling full. The skin contains some fat, but since we’re not using any oil in this recipe, the fat content comes entirely from the chicken itself. This makes these wings a great option for low-carb and keto diets. The baking powder adds a negligible amount of sodium, so if you’re watching your salt intake, you can reduce the added salt slightly.
One thing I appreciate about this recipe is that it lets you enjoy wings without the guilt of deep frying. You get the same satisfying crunch with far less oil and fewer calories. It’s comfort food that fits into a balanced lifestyle—and honestly, that’s a win in my book.
Conclusion
These crispy 15-minute air fryer chicken wings have become a staple in my kitchen for good reason. They’re fast, they’re foolproof, and they deliver that perfect crunch every single time. Whether you’re feeding a crowd on game day or just craving something crispy on a Tuesday night, this recipe won’t let you down.
I love how adaptable these wings are—you can keep them simple with just salt and pepper, or dress them up with your favorite sauce. The technique is solid, and once you’ve made them once, you’ll have the confidence to experiment. That’s the beauty of a good base recipe.
Now I want to hear from you. Have you tried making wings in your air fryer? What’s your favorite seasoning or sauce? Drop a comment below and let me know—I’m always looking for new ideas to try. And if you make these wings, tag me in your photos. Nothing makes me happier than seeing you enjoy a recipe as much as I do. Happy cooking, friends!
Frequently Asked Questions
Can I use frozen wings directly in the air fryer?
Technically yes, but I don’t recommend it. Frozen wings release a lot of moisture as they thaw, which creates steam and prevents the skin from getting crispy. If you’re in a pinch, thaw them completely in the refrigerator overnight, then pat them very dry before seasoning. The extra effort is worth it for the texture.
Why are my air fryer wings not crispy?
There are a few common culprits. The most likely issue is moisture on the skin—make sure you pat the wings completely dry before seasoning. Another possibility is overcrowding the basket, which traps steam. Cook in a single layer with space between each piece. Finally, check that your air fryer is preheated to 400°F and that you’re using baking powder (not baking soda).
Can I make these wings ahead of time for a party?
Absolutely. Cook the wings as directed, then let them cool completely. Store them in the refrigerator in an airtight container. When you’re ready to serve, reheat them in the air fryer at 375°F for 3-4 minutes. This restores the crispiness beautifully. You can also keep them warm in a 200°F oven for up to 30 minutes after cooking.
What’s the best sauce for air fryer wings?
That depends on your preference. Classic buffalo sauce (hot sauce mixed with melted butter) is always a hit. Garlic Parmesan is another favorite in my house. For something sweet and spicy, try a honey sriracha glaze. The key is to toss the wings in sauce just before serving so the skin stays crispy.
How do I clean my air fryer after making wings?
Let the basket cool completely, then soak it in warm, soapy water for 10-15 minutes. Use a non-abrasive sponge to remove any stuck-on bits. Most air fryer baskets are dishwasher-safe, so you can also just pop them in the dishwasher. I recommend cleaning the basket soon after cooking—dried-on residue is harder to remove.
Pin This Recipe!
Crispy 15-Minute Air Fryer Chicken Wings: The Best Easy Recipe

These crispy air fryer chicken wings are ready in just 15 minutes, with no oil needed and a shatteringly crisp skin thanks to a baking powder trick. Perfect for game days or a quick, foolproof snack.
- Prep Time: 5 minutes
- Cook Time: 15 minutes
- Total Time: 20 minutes
- Yield: 4 servings 1x
- Category: Appetizer
- Cuisine: American
Ingredients
- 2 pounds chicken wings (about 20–24 pieces)
- 1 tablespoon baking powder
- 1 teaspoon fine sea salt
- 1 teaspoon garlic powder
- ½ teaspoon onion powder
- 1 teaspoon paprika
- ½ teaspoon black pepper
- ¼ teaspoon cayenne pepper (optional)
- Cooking spray (optional, for basket)
Instructions
- Pat the wings completely dry with paper towels until the skin feels tacky.
- Preheat air fryer to 400°F (about 3-5 minutes).
- In a small bowl, mix baking powder, salt, garlic powder, onion powder, paprika, black pepper, and cayenne (if using).
- Place dried wings in a large bowl, sprinkle seasoning mixture over them, and toss with hands until evenly coated.
- Arrange wings in a single layer in the air fryer basket, not touching or overlapping.
- Cook at 400°F for 8 minutes. Do not open the basket.
- Flip wings with tongs and cook for another 7 minutes (total 15 minutes).
- Check for doneness: wings should be golden brown and crispy; internal temperature should reach 175-180°F.
- Let wings rest in the basket (turned off) for 2 minutes before serving.
Notes
Pat wings very dry for best crispiness. Use baking powder, not baking soda. Do not overcrowd the basket. Let wings rest 2 minutes before saucing to keep skin crispy.
Nutrition
- Serving Size: 5-6 wings
- Calories: 320
- Sodium: 680
- Fat: 22
- Saturated Fat: 6
- Carbohydrates: 1
- Protein: 28
Keywords: air fryer chicken wings, crispy wings, 15-minute wings, game day wings, no oil wings


