I need a Halloween dessert that looks creepy but takes zero effort. Right now. The kids are already buzzing about costumes and candy, and I have exactly zero energy left for a complicated baking project. Oreos, pudding, cream cheese, and gummy worms — that’s the whole grocery list. Honestly, I’m not sure why I ever thought I needed to bake for Halloween.
These Easy No-Bake Halloween Oreo Dirt Cups with Gummy Worms came together in my kitchen on a random Tuesday afternoon last October. My nephew was coming over after school, and I had promised him something “spooky.” I stared into my pantry, saw the familiar black-and-white cookie package, and it just clicked. Dirt cups. The classic childhood treat, but made for a Halloween party crowd.
The best part? No oven required. No stand mixer drama. Just a bowl, a whisk, and about fifteen minutes of your time. The cream cheese layer is what sets these apart from the usual boxed pudding cups. It adds a richness that makes people stop and ask for the recipe. I’ve brought these to three different Halloween gatherings now, and they disappear faster than the candy bowl.
There’s something satisfying about watching someone’s face light up when they dig into a cup of crushed Oreos and find gummy worms hiding underneath. It’s simple, sure. But sometimes the simplest things are the ones that stick.
Why You’ll Love This Recipe
Let me tell you why this recipe has become my go-to for every Halloween party, classroom celebration, and spooky movie night. First off, it’s genuinely the easiest dessert you’ll make all season. No baking, no complicated techniques, no stressing over timing.
- No-Bake & Quick : This comes together in under 20 minutes. Seriously. You just need time for the pudding to set in the fridge, which means you can make these the night before your party and forget about them until showtime.
- Simple Ingredients : Oreos, instant pudding, cream cheese, milk, butter, and gummy worms. That’s it. You probably already have most of this in your kitchen right now.
- Perfect for Halloween Parties : These little cups are the ultimate crowd-pleaser. Kids adore the gummy worms, and adults secretly love the creamy, crunchy texture combo. They’re great for school parties, trunk-or-treat events, or a cozy night in watching scary movies.
- Totally Kid-Friendly : Let the little ones help crush the Oreos or layer the cups. It’s a mess, but it’s the good kind of mess that makes memories. I’ve made these with my niece and nephew, and they had a blast getting their hands dirty.
- Unbelievably Delicious : The cream cheese layer is what makes these special. It’s tangy, sweet, and perfectly balanced against the dark chocolate Oreo crumbs. You get that creamy, crunchy, and chewy texture from the gummy worms all in one bite.
This isn’t just another version of dirt cups. It’s the best version. The cream cheese adds a richness that boxed pudding alone can’t deliver. It’s the kind of dessert that makes you close your eyes after the first bite. Trust me on this one.
What Ingredients You Will Need
This recipe uses simple, everyday ingredients to create something that feels special. The magic is in how they come together. Here’s what you’ll need to gather:
For the Pudding Layer
- 1 (3.9 oz) box of instant chocolate pudding mix (I prefer Jell-O brand for consistent texture)
- 2 cups cold whole milk (or any milk you have on hand)
- 4 oz cream cheese, softened to room temperature
- 1/4 cup powdered sugar
- 1/2 teaspoon vanilla extract
For the Dirt Layer
- 1 (14.3 oz) package of Oreo cookies (regular, not Double Stuf — you want the classic ratio)
- 3 tablespoons unsalted butter, melted
For the Garnish
- 1 cup gummy worms (I use the classic Trolli brand, but any sour or regular gummy worms work)
- Optional: Halloween-themed sprinkles or candy eyeballs for extra creepiness
Pro tip: Make sure your cream cheese is truly softened. Cold cream cheese will leave lumps in your pudding layer, and nobody wants that. Let it sit on the counter for about 30 minutes before you start. Also, if you’re looking for another easy no-bake dessert to add to your Halloween spread, you should try my Easy No-Bake Oreo Icebox Cake — it uses a similar concept and is just as simple to throw together.
Equipment Needed
You don’t need a fancy kitchen to make these dirt cups. Here’s what you’ll need:
- Mixing bowls : One medium bowl for the pudding and one large bowl for crushing the Oreos.
- Whisk or electric hand mixer : A whisk works fine, but a hand mixer makes the cream cheese layer silky smooth in seconds.
- Measuring cups and spoons : For precise measurements.
- Spatula : For scraping every last bit of pudding into the cups.
- Small clear cups or ramekins : I use 6-ounce plastic cups from the party supply store. Clear cups let you see the layers, which is half the fun. You can also use small mason jars or even disposable shot glasses for a party.
- Food processor or zip-top bag and rolling pin : For crushing the Oreos into fine crumbs. A food processor is faster, but a rolling pin and some elbow grease work just as well.
- Zester or small grater : Optional, for finely grating extra Oreo crumbs on top for a clean finish.
If you don’t have a food processor, don’t sweat it. Just put the Oreos in a zip-top bag, seal it tight, and go to town with a rolling pin. It’s a great way to let out any pre-Halloween stress.
Preparation Method
Let’s get into the actual making of these adorable little spooky desserts. Follow these steps, and you’ll have perfect dirt cups every time.
- Crush the Oreos : Place the entire package of Oreos (cream filling and all) into a food processor. Pulse until you have fine, sand-like crumbs. If you’re using the bag method, place the cookies in a large zip-top bag and crush them with a rolling pin until you have a consistent crumb. You want about 2 cups of crumbs total. Set aside 1/4 cup for the final garnish.
- Mix the Oreo crumbs with butter : In a medium bowl, combine the remaining Oreo crumbs with the melted butter. Stir with a fork until the mixture looks like wet sand. This step helps the “dirt” stick together slightly and gives it a more authentic texture. Set aside.
- Make the pudding base : In a medium mixing bowl, whisk together the instant chocolate pudding mix and cold milk. Whisk for about 2 minutes until the pudding starts to thicken. It will be loose at first, but it will set up in the fridge. Set aside for now.
- Prepare the cream cheese layer : In a separate bowl, beat the softened cream cheese with an electric hand mixer until smooth and fluffy. Add the powdered sugar and vanilla extract, and beat again until fully combined. This should take about 1 minute. Scrape down the sides of the bowl with a spatula.
- Combine the layers : Gently fold the prepared pudding into the cream cheese mixture. Use a spatula and stir slowly until no white streaks remain. The mixture should be thick, creamy, and a uniform chocolate color. Don’t overmix, or it can become too thin.
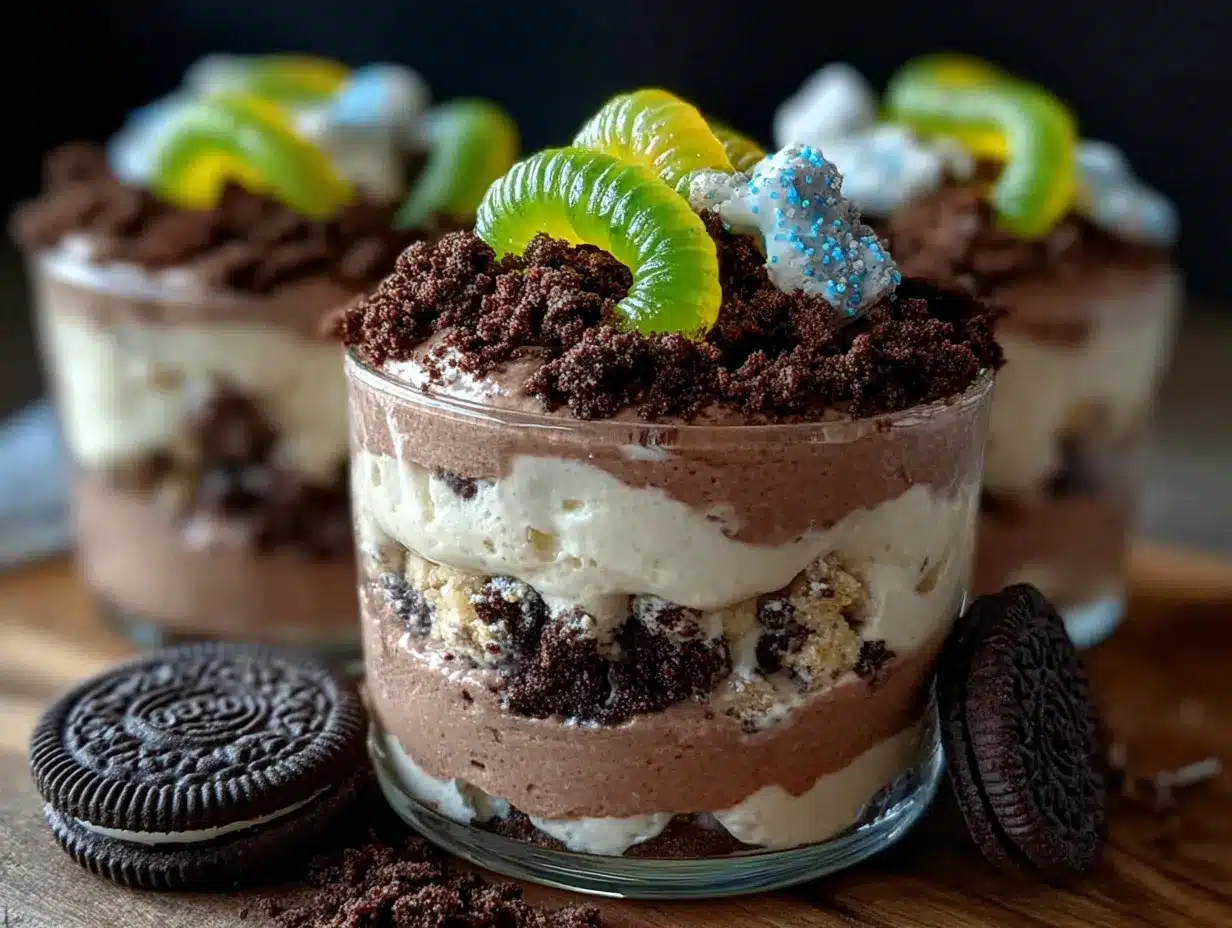
- Assemble the cups : Take your clear cups and start layering. Spoon about 2 tablespoons of the Oreo “dirt” mixture into the bottom of each cup. Press it down gently with the back of a spoon. This creates a solid base.
- Add the pudding layer : Spoon or pipe the pudding-cream cheese mixture on top of the Oreo base. Fill each cup about halfway. You can use a piping bag for clean layers, but a spoon works just fine. Tap the cups gently on the counter to settle the pudding.
- Insert the gummy worms : Here’s the fun part. Take 2-3 gummy worms and press them into the pudding layer so they’re partially submerged. Let some of the worm stick out like they’re crawling out of the dirt. This is where you can get creative with positioning.
- Top with the remaining dirt : Cover the pudding layer completely with the remaining Oreo crumbs. Make sure to cover the base of the gummy worms so it looks like they’re emerging from the dirt. Use the reserved 1/4 cup of crumbs for a final dusting on top.
- Chill and set : Place the cups in the refrigerator for at least 2 hours, or overnight. This allows the pudding to fully set and the flavors to meld together. The texture will be much better after a good chill.
- Garnish and serve : Right before serving, add a few more gummy worms on top for visual impact. You can also add Halloween sprinkles or candy eyeballs for extra flair. Serve cold and watch them disappear.
Sensory cue: The pudding should be thick enough to hold the gummy worms in place without them sinking to the bottom. If your pudding seems too thin after mixing, let it sit for 5 minutes before assembling. It will thicken as it sits.
Cooking Tips & Techniques
I’ve made these dirt cups about a dozen times now, and I’ve learned a few things the hard way. Here are my best tips for success:
Don’t skip the cream cheese step. I tried making these once with just pudding and Oreos, and it was fine. But the cream cheese layer is what makes them crave-worthy. It adds body and a tangy richness that balances the sweetness. Trust me on this one.
Use room temperature cream cheese. Cold cream cheese will leave lumps in your pudding that won’t go away no matter how much you whisk. Let it sit on the counter for 30 minutes. If you’re in a hurry, microwave it for 10-15 seconds, but watch it carefully so it doesn’t melt.
Crush the Oreos finely. Big chunks of cookie can make the texture uneven. You want the crumbs to be fine and uniform, like actual dirt. A food processor is your best friend here. If you’re using a bag, really go to town with that rolling pin.
Let the pudding set fully. I know it’s tempting to dig in right away, but the texture improves dramatically after a few hours in the fridge. The flavors meld, the pudding firms up, and the Oreo crumbs soften slightly into a cake-like consistency. Overnight is even better.
Layer strategically. Make sure the gummy worms are positioned so they look like they’re crawling out of the dirt. Press them into the pudding layer before adding the top layer of crumbs. This keeps them in place and creates that dramatic effect.
Make extra. These disappear fast. I always double the recipe for parties because people go back for seconds. And if you’re hosting a Halloween party, these pair perfectly with my Easy Loaded Nacho Football Dip Casserole for a sweet and savory spread.
Variations & Adaptations
One of the best things about this recipe is how adaptable it is. Here are some variations I’ve tried and loved:
Peanut Butter Dirt Cups
Add 1/4 cup of creamy peanut butter to the cream cheese mixture before folding in the pudding. It adds a rich, nutty flavor that pairs beautifully with the chocolate. My nephew declared this version “the best thing I’ve ever eaten.” High praise from a seven-year-old.
Pumpkin Dirt Cups
For a fall twist, swap the chocolate pudding for vanilla or butterscotch pudding. Add 1/2 cup of pumpkin puree and 1 teaspoon of pumpkin pie spice to the cream cheese mixture. Use crushed graham crackers or ginger snaps instead of Oreos. It’s like pumpkin pie in a cup. You might also enjoy my Perfect Pumpkin Cream Cheese Roll for another pumpkin-packed treat.
Gluten-Free Version
Use gluten-free chocolate sandwich cookies (like Glutino or Kinnikinnick brands) and ensure your pudding mix is certified gluten-free. The rest of the ingredients are naturally gluten-free. This version works perfectly and nobody will know the difference.
Vegan Dirt Cups
Use vegan cream cheese, plant-based milk (like oat or almond milk), and vegan chocolate sandwich cookies. Check that your pudding mix is vegan-friendly. I’ve made this for a vegan friend’s Halloween party, and it was a hit.
Extra Spooky Edition
Add a few drops of orange or green food coloring to the cream cheese layer for a creepy twist. You can also use black cookie crumbs on top and add candy spider rings or plastic skeletons for decoration. The kids will lose their minds.
Serving & Storage Suggestions
These dirt cups are best served cold, straight from the fridge. The contrast between the creamy pudding and the crunchy Oreo dirt is perfect when chilled. Here’s how to serve and store them:
Serving Temperature: Serve cold, right out of the refrigerator. The pudding should be fully set and firm to the touch. If you’re serving them at a party, keep them chilled until the last minute. They can sit out for about 30 minutes without issue.
Presentation: Arrange the cups on a platter or tray. Add a few extra gummy worms on top of each cup for dramatic effect. You can also add Halloween-themed cupcake toppers or little plastic spiders for a fun touch. For a spooky tablescape, place the cups on a black tablecloth with fake cobwebs.
Storage: Store any leftover cups in the refrigerator, covered with plastic wrap or a lid. They will keep for up to 3 days. The Oreo crumbs will soften over time, which some people actually prefer. If you want to keep the crunch, store the Oreo crumbs separately and add them right before serving.
Freezing: I don’t recommend freezing these cups. The texture of the pudding and cream cheese changes significantly after thawing. They’re best made fresh or a day ahead.
Make-Ahead Tip: These are perfect for making the day before your party. Assemble the cups, cover them, and refrigerate overnight. The flavors meld beautifully, and the texture is even better the next day. Just add the extra gummy worms and garnishes right before serving.
Nutritional Information & Benefits
Let’s be real — these are a treat, not a health food. But here’s the estimated nutritional information for one serving (based on 6 servings per recipe):
- Calories: Approximately 420-450 per cup
- Total Fat: 22g
- Saturated Fat: 12g
- Cholesterol: 45mg
- Sodium: 480mg
- Total Carbohydrates: 55g
- Dietary Fiber: 2g
- Sugars: 38g
- Protein: 6g
While these aren’t exactly a health food, there are a few redeeming qualities. The cream cheese adds a small amount of calcium and protein. The dark chocolate in Oreos contains a bit of antioxidants. And honestly, sometimes you just need a fun, indulgent treat for a special occasion. Halloween is that occasion.
If you’re looking for a healthier Halloween option, you might want to try my Easy Peanut Butter Banana Protein Balls for a balanced snack. But for the party? Go with the dirt cups.
Frequently Asked Questions
Can I use sugar-free pudding mix?
Yes, you can use sugar-free instant chocolate pudding mix. The texture will be slightly different, but it works fine. Just follow the package instructions for the milk amount.
How far in advance can I make these?
You can make these up to 2 days in advance. Store them covered in the refrigerator. The Oreo crumbs will soften over time, so if you want them crunchy, add the top layer of crumbs right before serving.
Can I use a different type of cookie?
Absolutely. You can use Golden Oreos for a vanilla version, or try crushed chocolate wafer cookies, graham crackers, or even crushed pretzels for a sweet-salty twist. Each option gives a different texture and flavor.
How many servings does this recipe make?
This recipe makes about 6 servings in standard 6-ounce cups. You can adjust the serving size by using smaller cups (like shot glasses for a party) or larger mason jars for a more generous portion.
Can I make these dairy-free?
Yes! Use dairy-free cream cheese, plant-based milk (like oat or almond milk), and ensure your pudding mix is dairy-free. Check the labels carefully. The texture will be slightly different, but they’re still delicious.
Conclusion
These Easy No-Bake Halloween Oreo Dirt Cups with Gummy Worms are the kind of recipe that makes you look like a hero with almost no effort. They’re fun, they’re creepy, and they’re absolutely delicious. The cream cheese layer is the secret weapon that takes them from a simple kids’ treat to a dessert that adults will fight over.
I love how this recipe brings people together. There’s something about digging into a cup of “dirt” and finding gummy worms that makes everyone smile, regardless of age. It’s pure, uncomplicated joy in a cup. And honestly, isn’t that what Halloween is all about?
I’d love to hear how these turn out for you! Leave a comment below and let me know if you tried any fun variations. Did you add extra gummy worms? Did you use a different cookie? Share your creations with me — I read every comment and I love seeing your photos. Happy Halloween, and happy eating!
Pin This Recipe!
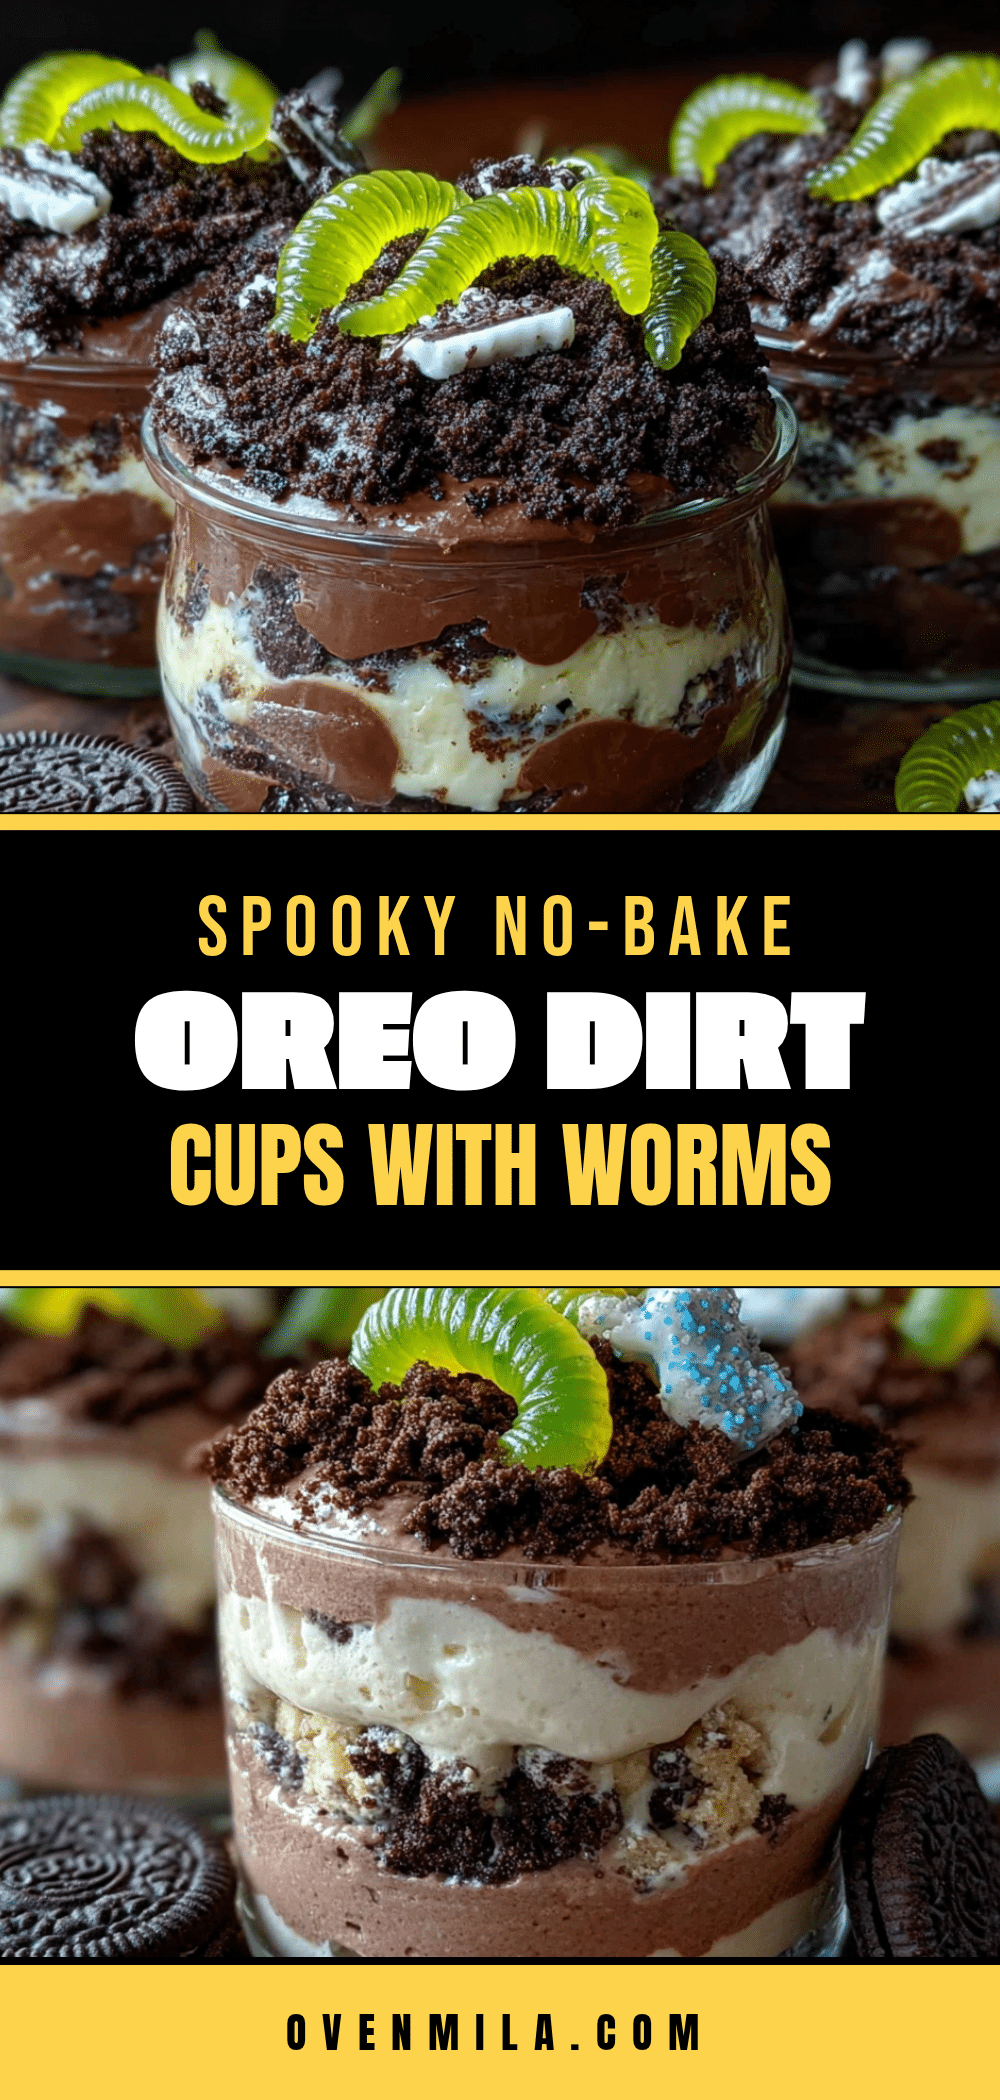
Easy No-Bake Halloween Oreo Dirt Cups with Gummy Worms
These Easy No-Bake Halloween Oreo Dirt Cups with Gummy Worms are a quick, no-bake dessert that kids and adults love. With a creamy cream cheese pudding layer, crunchy Oreo dirt, and gummy worms crawling out, they’re perfect for Halloween parties.
- Prep Time: 15 minutes
- Cook Time: 0 minutes
- Total Time: 2 hours 15 minutes (includes chilling time)
- Yield: 6 servings 1x
- Category: Dessert
- Cuisine: American
Ingredients
- 1 (3.9 oz) box instant chocolate pudding mix (Jell-O brand recommended)
- 2 cups cold whole milk
- 4 oz cream cheese, softened to room temperature
- 1/4 cup powdered sugar
- 1/2 teaspoon vanilla extract
- 1 (14.3 oz) package Oreo cookies (regular, not Double Stuf)
- 3 tablespoons unsalted butter, melted
- 1 cup gummy worms (Trolli brand recommended)
- Optional: Halloween-themed sprinkles or candy eyeballs
Instructions
- Crush the Oreos: Place the entire package of Oreos (cream filling and all) into a food processor. Pulse until you have fine, sand-like crumbs. If using the bag method, place cookies in a large zip-top bag and crush with a rolling pin. Set aside 1/4 cup for garnish.
- Mix the Oreo crumbs with butter: In a medium bowl, combine the remaining Oreo crumbs with the melted butter. Stir with a fork until the mixture looks like wet sand. Set aside.
- Make the pudding base: In a medium mixing bowl, whisk together the instant chocolate pudding mix and cold milk. Whisk for about 2 minutes until the pudding starts to thicken. Set aside.
- Prepare the cream cheese layer: In a separate bowl, beat the softened cream cheese with an electric hand mixer until smooth and fluffy. Add the powdered sugar and vanilla extract, and beat again until fully combined. Scrape down the sides.
- Combine the layers: Gently fold the prepared pudding into the cream cheese mixture using a spatula until no white streaks remain. The mixture should be thick and creamy.
- Assemble the cups: Spoon about 2 tablespoons of the Oreo ‘dirt’ mixture into the bottom of each clear cup. Press down gently with the back of a spoon.
- Add the pudding layer: Spoon or pipe the pudding-cream cheese mixture on top of the Oreo base, filling each cup about halfway. Tap cups gently on the counter to settle.
- Insert the gummy worms: Press 2-3 gummy worms into the pudding layer so they are partially submerged, with some sticking out like they are crawling out of the dirt.
- Top with the remaining dirt: Cover the pudding layer completely with the remaining Oreo crumbs, covering the base of the gummy worms. Use the reserved 1/4 cup of crumbs for a final dusting.
- Chill and set: Place cups in the refrigerator for at least 2 hours, or overnight, to allow the pudding to fully set.
- Garnish and serve: Right before serving, add a few more gummy worms on top. Add Halloween sprinkles or candy eyeballs if desired. Serve cold.
Notes
Make sure cream cheese is truly softened to avoid lumps. For best texture, let the pudding set in the fridge for at least 2 hours or overnight. The Oreo crumbs will soften over time; if you want them crunchy, add the top layer just before serving. These can be made up to 2 days in advance.
Nutrition
- Serving Size: 1 cup (6-ounce)
- Calories: 435
- Sugar: 38
- Sodium: 480
- Fat: 22
- Saturated Fat: 12
- Carbohydrates: 55
- Fiber: 2
- Protein: 6
Keywords: Halloween dessert, no-bake, Oreo dirt cups, gummy worms, easy dessert, kid-friendly, spooky treat


