I was getting my car’s oil changed—a Tuesday, I think, or maybe Wednesday, the kind of afternoon that feels like it’s wasting itself—when the mechanic, a guy named Sal with grease permanently etched into his knuckles, started talking about pumpkin seeds. Not about my alternator or the weird noise my engine was making. Pumpkin seeds. He said, “You know what I do with the guts from my kids’ jack-o’-lanterns? Toss ’em with cinnamon and sugar and roast ’em low and slow. Best thing you’ll eat all fall.” I almost laughed. Here was a man who spent his days elbow-deep in transmissions, and he was giving me a recipe that would completely change my November snack game. It was the last place I expected culinary inspiration, honestly. But there I was, nodding along, mentally rewriting my entire evening plans around a bag of raw pumpkin seeds and a cinnamon stick.
The thing is, I’d always been a salty pumpkin seed person. You know, the kind drenched in olive oil and cayenne, the ones that leave your lips tingling. I never considered the sweet route. It felt wrong, somehow. Like putting maple syrup on a baked potato. But Sal’s description—”they get all crackly and sweet, like a little autumn cookie you can eat by the handful”—stuck with me. I went home, rummaged through my spice drawer, and gave it a shot. My first batch was a disaster, honestly. I burned the sugar and the kitchen smelled like a campfire that had taken a wrong turn. But the second batch? Let me tell you, that second batch was the moment I understood what Sal was talking about. The warmth of the cinnamon, the gentle crunch, the way the sugar caramelizes just so—it’s addictive.
Maybe you’ve been there, stuck in a snack rut, eating the same salty or savory things day after day. Or maybe you just need something that feels like a hug in a bowl. These cozy cinnamon sugar pumpkin seeds are exactly that. They’re the snack you didn’t know you needed, the one that turns a regular Tuesday into a small celebration. I keep making them because they’re simple, they’re forgiving (once you learn the trick), and they make the whole house smell like a bakery that got lost in a pumpkin patch. It’s the recipe that fell into my lap from the most unexpected source, and now it’s a staple in my kitchen every single fall.
Why You’ll Love This Recipe
Let’s be real—there are a lot of pumpkin seed recipes out there. But this one is different. This one has been tested, burned, tweaked, and perfected in my own kitchen (and Sal’s, apparently). It’s the kind of snack that makes you look like a kitchen wizard with almost zero effort. Here’s why it’s going to become your new favorite:
- Quick & Easy: From start to finish, you’re looking at about 25 minutes of active time. The oven does the rest. It’s perfect for a last-minute craving or when you need a quick treat for unexpected guests.
- Simple Ingredients: You probably have everything in your pantry right now. Pumpkin seeds, butter, cinnamon, sugar, a pinch of salt. No fancy trips to specialty stores required.
- Perfect for Fall Gatherings: Whether it’s a Halloween party, a Thanksgiving appetizer, or just a cozy night in with a movie, these seeds fit right in. They’re the snack that says “autumn” without trying too hard.
- Crowd-Pleaser: I’ve served these to kids, adults, picky eaters, and even my uncle who “doesn’t do sweets.” They all disappeared. Seriously, make a double batch the first time.
- Unbelievably Delicious: The texture is what gets you. The seeds get this crackly, caramelized shell that shatters when you bite into them, while the inside stays toasty and nutty. It’s next-level comfort food in a bowl.
What makes this version different from all the others? It’s the technique. Most recipes just toss seeds with sugar and call it a day. But I’ve learned that a little melted butter—and I mean a little—helps the cinnamon and sugar cling to every crevice of the seed. Then, roasting them at a slightly lower temperature for a bit longer ensures the sugar caramelizes without burning. It’s not rocket science, but it’s the difference between “okay” and “oh, I need the recipe for this.”
Honestly, this recipe isn’t just good—it’s the kind that makes you close your eyes after the first bite. It’s comfort food reimagined: a little sweet, a little warm, with the same soul-soothing satisfaction as a slice of pie, but in a fraction of the time. Perfect for impressing guests without stress, or turning a simple snack into something memorable.
What Ingredients You Will Need
This recipe uses simple, wholesome ingredients to deliver that cozy, caramelized flavor. Most of these are pantry staples, especially if you’ve done any fall baking recently. The key is using the right form of each ingredient to get that perfect crackly coating.
- Raw Pumpkin Seeds (Pepitas): 1 cup (about 120g). You want the raw, hulled green pepitas here, not the big white ones still in their shells. The hulled ones are smaller, more tender, and they toast up beautifully. I usually buy a big bag at the start of fall from my local bulk bin section. If you’re cleaning your own pumpkin, make sure to wash and dry the seeds thoroughly before using them in this recipe—wet seeds will steam instead of roast.
- Unsalted Butter: 2 tablespoons (28g), melted. This is the glue that holds everything together. I use unsalted so I can control the salt level. If you only have salted butter, just skip the pinch of salt later. I’ve tried this with coconut oil for a dairy-free version, and while it works, the butter gives a richer, more toasty flavor that I personally prefer.
- Granulated Sugar: 3 tablespoons (36g). Regular white sugar is best here. It melts and caramelizes into that crackly shell. Brown sugar has too much moisture and can make the seeds sticky rather than crisp. Trust me on this one—I learned the hard way with a very sticky, very sad batch.
- Ground Cinnamon: 1 teaspoon. This is the star of the show, so use a good one. I’m partial to the Vietnamese cinnamon from Penzeys—it’s stronger and sweeter than the standard grocery store stuff. But any cinnamon will work. If you’re feeling fancy, you could also add a pinch of cardamom or nutmeg, but keep it simple for the first try.
- Pinch of Salt: About 1/8 teaspoon. This is non-negotiable. It balances the sweetness and makes the cinnamon pop. Without it, the seeds taste flat and one-dimensional.
- Vanilla Extract (Optional): 1/2 teaspoon. I add this about half the time. It rounds out the flavors and adds a little warmth. If you’re making a big batch for a party, skip it. If it’s just for you on a quiet Tuesday night, go ahead and add it. You deserve it.
Ingredient Selection Tips: Look for pepitas that are a vibrant, grassy green color. If they look dull or grayish, they might be old and will taste rancid. Also, give them a sniff—fresh pumpkin seeds should smell nutty and mild, not like old oil. For the cinnamon, smell it before you use it. If it doesn’t smell strong and sweet, it’s probably past its prime. A fresh jar makes a world of difference here.
Substitution Guidance: For a dairy-free version, substitute the butter with coconut oil or a vegan butter stick. For a lower-sugar option, you can use coconut sugar, but the texture will be slightly different—more crunchy than crackly, and the color will be darker. If you want a sugar-free version, try a monk fruit sweetener that measures like sugar, but be aware that it won’t caramelize the same way.
Equipment Needed
You don’t need much for this recipe, which is part of its charm. Here’s what you’ll want to have on hand:
- Baking Sheet: A standard half-sheet pan (18×13 inches) works perfectly. Line it with parchment paper for easy cleanup. I’ve made these directly on the pan before, and while they don’t stick badly, the parchment makes life so much easier.
- Mixing Bowl: Any medium bowl will do. I use a glass one so I can see if the butter and sugar are fully combined.
- Spatula or Wooden Spoon: For stirring the seeds with the coating. A silicone spatula is great because it scrapes the bowl clean.
- Measuring Cups and Spoons: Standard set. Nothing fancy.
- Small Saucepan or Microwave-Safe Bowl: For melting the butter. I usually just pop it in the microwave for 20 seconds.
- Cooling Rack (Optional): If you want the seeds to cool faster and stay extra crisp, spread them on a cooling rack after roasting. But honestly, letting them cool on the baking sheet works just fine.
Budget-Friendly Options: If you don’t have parchment paper, you can use a silicone baking mat or just grease the pan lightly with butter. And if you don’t have a cooling rack, no worries—just let them cool right on the sheet. They’ll still get crispy as they sit.
Preparation Method
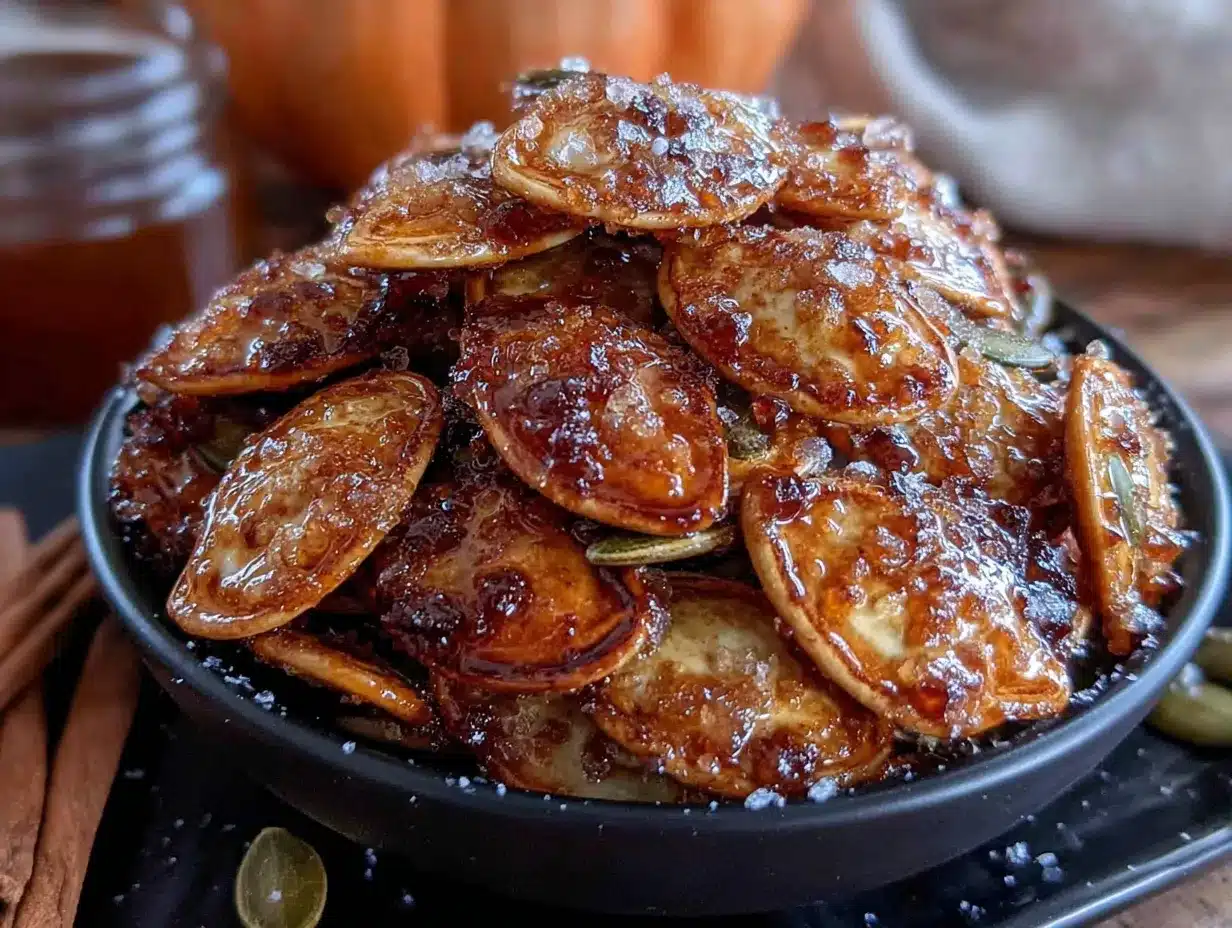
Alright, let’s get to it. This is where the magic happens. Follow these steps, and you’ll have a bowl of crackly, sweet, irresistible pumpkin seeds in no time.
- Preheat Your Oven: Set your oven to 325°F (163°C). This lower temperature is key—it gives the sugar time to melt and caramelize without burning. I’ve tried 350°F, and it’s just too hot. The sugar burns before the seeds are fully toasted.
- Prepare Your Baking Sheet: Line a half-sheet pan with parchment paper. This isn’t just for cleanup—it also prevents the caramelized sugar from sticking to the pan and creating a mess. Trust me, scrubbing burnt sugar off a baking sheet is not how you want to spend your evening.
- Melt the Butter: In a small microwave-safe bowl, melt the 2 tablespoons of unsalted butter. It takes about 20-30 seconds in my microwave. Let it cool for a minute—you don’t want it hot enough to cook the seeds when you mix them.
- Combine the Coating: In a medium mixing bowl, whisk together the melted butter, 3 tablespoons of granulated sugar, 1 teaspoon of ground cinnamon, and a pinch of salt. If you’re using the vanilla extract, add it now. The mixture will look like a thick, grainy paste. That’s perfect.
- Coat the Seeds: Add 1 cup of raw pumpkin seeds to the bowl. Use your spatula to stir everything together until every seed is coated in that buttery, cinnamon-sugar mixture. Don’t rush this step—take your time to make sure there are no dry spots. I usually spend about a minute folding and stirring.
- Spread on the Baking Sheet: Pour the coated seeds onto the prepared baking sheet. Use your spatula to spread them into a single, even layer. Try not to let them clump together too much—you want each seed to have its own space to toast. If you have a few clumps, that’s okay, they’ll break apart later.
- Roast: Place the baking sheet in the preheated oven and roast for 12-15 minutes. Here’s the important part: at the 6-minute mark, pull the sheet out and give the seeds a good stir with your spatula. This ensures even toasting and prevents the edges from burning. Then spread them back out and return to the oven.
- Check for Doneness: At 12 minutes, start checking. The seeds should be a deep golden brown and the kitchen should smell like a cinnamon-scented dream. They will still feel a little soft and sticky when they come out of the oven—that’s normal. They’ll crisp up as they cool. If they look dark brown or smell burnt, you’ve gone too far. Take them out at the first sign of that deep golden color.
- Cool Completely: This is the hardest part. Let the seeds cool on the baking sheet for at least 15-20 minutes without touching them. I know, it’s tempting to grab a handful right away, but they need this time to set and become crunchy. If you eat them warm, they’ll be soft and the sugar will stick to your teeth. Patience, my friend.
- Break Apart and Enjoy: Once completely cool, use your fingers to break apart any clumps. The seeds should be crisp, crackly, and perfectly coated. Pour them into a bowl and try not to eat the entire batch in one sitting. (Spoiler: you will.)
Sensory Cues: When you stir the seeds at the 6-minute mark, you should hear a faint sizzle—that’s the sugar melting. The seeds will look glossy and wet. When they’re done, the edges of the pan might have a thin layer of caramelized sugar that’s starting to brown. That’s a good sign. The smell is unmistakable—warm cinnamon with a hint of toasted nuttiness.
Personal Tip: If you’re making a double batch, use two baking sheets and rotate them halfway through. Don’t crowd the pan—the seeds need space to toast evenly. Overcrowding leads to steaming, and steaming leads to soggy seeds. Nobody wants that.
Cooking Tips & Techniques
I’ve made this recipe more times than I can count, and I’ve learned a few things along the way. Here are the tips that will save you from my early mistakes.
The Temperature Sweet Spot: 325°F is not a suggestion—it’s a rule. I once thought I could speed things up by roasting at 375°F. Big mistake. The sugar burned before the seeds were even warm in the center. The lower temperature gives the sugar time to melt gradually and caramelize evenly. It takes a few extra minutes, but it’s worth it.
The Stirring Secret: Don’t skip the halfway stir. I know it’s tempting to just set the timer and walk away, but that stir is what prevents the edges from burning while the center stays undercooked. It also redistributes the melting sugar so every seed gets an even coating. Set a timer on your phone if you have to.
My Biggest Failure: The first time I made these, I used brown sugar. I thought, “More flavor, right?” Wrong. Brown sugar has molasses in it, which attracts moisture. My seeds came out of the oven looking beautiful, but after they cooled, they were sticky and soft. They never got that crackly texture. Stick with granulated sugar. It’s the only way to get that shatter-in-your-mouth crunch.
The Cooling Rule: Do not, under any circumstances, try to rush the cooling process. I’ve made the mistake of putting the baking sheet in the fridge to speed things up. The condensation from the cold air made the seeds soggy. Let them cool at room temperature, undisturbed, for at least 15-20 minutes. Walk away. Read a book. Do anything but touch those seeds.
Multitasking Strategy: While the seeds are roasting, clean up your mixing bowl and measuring cups. The whole process is so quick that if you wait until after, you’ll have a sink full of sticky dishes while you’re trying to enjoy your snack. Do the dishes during the 12-minute roast, and you’ll be a happy camper.
Variations & Adaptations
Once you’ve mastered the basic recipe, it’s fun to play around. Here are some variations I’ve tried and loved.
- Spiced Chai Version: Add 1/2 teaspoon of pumpkin pie spice and a pinch of ground cardamom to the cinnamon-sugar mixture. It gives the seeds a warm, chai-like flavor that’s perfect for sipping with a cup of tea. I made this for a book club meeting, and everyone asked for the recipe.
- Maple Pecan Twist: Replace the granulated sugar with 2 tablespoons of maple sugar (or use 1 1/2 tablespoons of maple syrup, but reduce the butter to 1 tablespoon to compensate for the extra liquid). Add 1/4 cup of chopped pecans to the seeds before roasting. The maple flavor pairs beautifully with the cinnamon.
- Sweet & Spicy: Add 1/4 teaspoon of cayenne pepper to the cinnamon-sugar mixture. The heat sneaks up on you after the sweetness hits. It’s a dangerous combination—in the best way. I like to serve these with a cold beer or a spicy margarita.
- Dairy-Free & Vegan: Substitute the butter with melted coconut oil or vegan butter. Use a vegan-friendly sugar (most granulated sugar is vegan, but some brands use bone char in processing). The texture will be slightly different—coconut oil gives a lighter crunch—but it’s still delicious.
- Chocolate Drizzle: After the seeds have cooled, melt 1/4 cup of dark chocolate chips and drizzle it over the seeds. Let the chocolate set before breaking the seeds apart. It’s a dessert masquerading as a snack. I made this for a holiday party, and it was the first thing to disappear from the table.
Personal Variation: My favorite twist is adding a teaspoon of orange zest to the butter-sugar mixture. The citrus cuts through the sweetness and makes the cinnamon taste even brighter. It reminds me of those chocolate oranges you get at Christmas, but in seed form. Give it a try—you won’t regret it.
Serving & Storage Suggestions
These seeds are incredibly versatile. Here’s how to serve and store them for maximum enjoyment.
Serving Temperature: These are best served at room temperature. The texture is at its peak—crisp, crackly, and perfectly crunchy. If you’ve stored them in the fridge, let them sit out for 10 minutes before serving to take the chill off.
Presentation Ideas: Serve them in a wooden bowl for a rustic fall vibe. Or layer them in a mason jar with a ribbon for a cute homemade gift. I’ve also sprinkled them over a bowl of vanilla ice cream for an easy dessert—the contrast of cold, creamy ice cream and warm, crunchy seeds is amazing.
Complementary Dishes: These seeds pair beautifully with a warm mug of apple cider or a pumpkin spice latte. They’re also great on top of a fall salad with mixed greens, dried cranberries, and goat cheese. The sweetness balances the tangy cheese and tart cranberries perfectly.
Storage Instructions: Store the cooled seeds in an airtight container at room temperature for up to 1 week. Do not refrigerate them—the moisture in the fridge will make them soft. If you live in a humid climate, add a silica gel packet (the kind that comes in shoe boxes) to the container to absorb excess moisture.
Freezer Instructions: You can freeze these seeds for up to 3 months. Let them cool completely, then transfer to a freezer-safe bag or container. Squeeze out as much air as possible before sealing. To serve, let them thaw at room temperature for about 30 minutes. They might lose a tiny bit of crunch, but they’ll still be delicious.
Reheating Tips: If your seeds have lost their crunch (it happens), spread them on a baking sheet and pop them in a 300°F oven for 3-4 minutes. Let them cool completely before eating. This revives the caramelized coating and brings back that crackly texture.
Flavor Development: Honestly, these seeds are best within the first 2 days. That’s when the coating is at its crispiest. After that, the sugar starts to absorb a little moisture from the air, and the crunch softens slightly. They’re still good, just not as spectacular. So eat them quickly—I’m sure you won’t have a problem with that.
Nutritional Information & Benefits
I’m not a nutritionist, but I’ve done some research on the ingredients in this recipe. Here’s what I can tell you.
Estimated Nutritional Values (per 1/4 cup serving):
- Calories: 180
- Fat: 14g (mostly healthy unsaturated fats)
- Carbohydrates: 10g
- Fiber: 2g
- Sugar: 7g
- Protein: 5g
Health Benefits: Pumpkin seeds are a nutritional powerhouse. They’re packed with magnesium, which is great for muscle function and sleep quality. They also contain zinc, which supports immune health—perfect for the cold and flu season. The healthy fats and fiber help keep you full and satisfied, making these a better snack choice than processed sweets.
Dietary Considerations: This recipe is naturally gluten-free and can be made dairy-free with a simple substitution. It’s also vegetarian and can be vegan with the coconut oil swap. However, it does contain tree nuts if you add the pecan variation, and it’s not suitable for a low-sugar diet due to the granulated sugar.
Potential Allergens: Dairy (from the butter), tree nuts (from variations). Always check your ingredient labels if you’re serving to someone with allergies.
Personal Wellness Perspective: I love that this recipe lets me enjoy a sweet treat without the guilt. The protein and fiber from the seeds help balance out the sugar, so I don’t get that blood sugar crash I sometimes get from cookies or candy. Plus, making them at home means I control exactly what goes into them. No preservatives, no weird additives—just real ingredients doing delicious things.
Conclusion
So there you have it—a recipe that came from a mechanic, of all people, and became one of my most-requested fall snacks. These cozy cinnamon sugar pumpkin seeds are proof that the best recipes often come from the most unexpected places. They’re simple, they’re forgiving, and they taste like autumn in a bowl.
I hope you give these a try. Don’t be afraid to make them your own—tweak the spices, add a drizzle of chocolate, or keep them classic. The beauty of this recipe is that it’s a starting point, not a rigid set of rules. And if you burn the first batch like I did? Don’t worry. The second one will be perfect.
I’d love to hear how yours turn out! Leave a comment below and let me know if you tried any fun variations. And if you’re looking for more fall snack ideas, be sure to check out my cozy pumpkin spice latte and my easy apple cider donuts—they’re the perfect trio for a cozy autumn afternoon.
Happy snacking, friends. May your kitchen smell like cinnamon and your days feel a little warmer.
Frequently Asked Questions
Can I use the seeds from a fresh pumpkin?
Absolutely! Just make sure to clean them thoroughly. Rinse the seeds in a colander to remove all the pumpkin pulp, then pat them dry with a clean kitchen towel. Let them air dry for an hour or so before using. Wet seeds will steam instead of roast, so drying is crucial.
Why did my seeds turn out soggy?
This usually happens for one of three reasons: the oven wasn’t hot enough (or you opened the door too often), the seeds were overcrowded on the baking sheet, or you didn’t let them cool completely before storing. Make sure your oven is at a consistent 325°F, give the seeds space, and be patient during the cooling process.
Can I use a sugar substitute?
You can, but the texture will change. Monk fruit sweetener or erythritol won’t caramelize the same way, so the seeds will be crunchy rather than crackly. Coconut sugar works but gives a darker color and a slightly different flavor. For the best results, stick with granulated sugar.
How do I prevent the seeds from burning?
Watch them closely during the last 3 minutes of roasting. Every oven runs a little differently, so your timing might vary. The seeds are done when they’re a deep golden brown and the kitchen smells intensely of cinnamon. If you see any seeds turning dark brown, pull the pan out immediately.
Can I make these in an air fryer?
Yes! Preheat your air fryer to 300°F. Cook the coated seeds in a single layer for 8-10 minutes, shaking the basket halfway through. Keep a close eye on them—air fryers run hot and the sugar can burn quickly. Let them cool completely in the basket before removing.
Pin This Recipe!
Cozy Cinnamon Sugar Pumpkin Seeds: Easy Fall Snack Recipe

These crackly, sweet pumpkin seeds are coated in cinnamon sugar and roasted to perfection. A simple, addictive fall snack that tastes like autumn in a bowl.
- Prep Time: 10 minutes
- Cook Time: 15 minutes
- Total Time: 25 minutes
- Yield: 4 servings 1x
- Category: Snack
- Cuisine: American
Ingredients
- 1 cup (120g) raw pumpkin seeds (pepitas)
- 2 tablespoons (28g) unsalted butter, melted
- 3 tablespoons (36g) granulated sugar
- 1 teaspoon ground cinnamon
- 1/8 teaspoon salt
- 1/2 teaspoon vanilla extract (optional)
Instructions
- Preheat your oven to 325°F (163°C).
- Line a half-sheet pan with parchment paper.
- In a small microwave-safe bowl, melt the butter (20-30 seconds). Let cool for a minute.
- In a medium mixing bowl, whisk together the melted butter, sugar, cinnamon, salt, and vanilla (if using) until a thick paste forms.
- Add the pumpkin seeds and stir with a spatula until every seed is evenly coated.
- Spread the coated seeds in a single layer on the prepared baking sheet.
- Roast for 12-15 minutes, stirring at the 6-minute mark to ensure even toasting.
- Check for doneness at 12 minutes—seeds should be deep golden brown and smell fragrant. They will still be soft and sticky; they’ll crisp as they cool.
- Let the seeds cool completely on the baking sheet for 15-20 minutes without touching.
- Once cool, break apart any clumps and serve.
Notes
Use raw hulled pepitas for best results. Do not use brown sugar—it makes seeds sticky. Let seeds cool completely before storing to maintain crunch. Store in an airtight container at room temperature for up to 1 week. For dairy-free, substitute butter with coconut oil or vegan butter.
Nutrition
- Serving Size: 1/4 cup
- Calories: 180
- Sugar: 7
- Sodium: 75
- Fat: 14
- Saturated Fat: 4
- Carbohydrates: 10
- Fiber: 2
- Protein: 5
Keywords: pumpkin seeds, cinnamon sugar, fall snack, easy recipe, roasted pumpkin seeds, sweet snack


